In this issue:
Cutting-Edge Advancements in Same-Day Dentistry
Author

Case Presentation
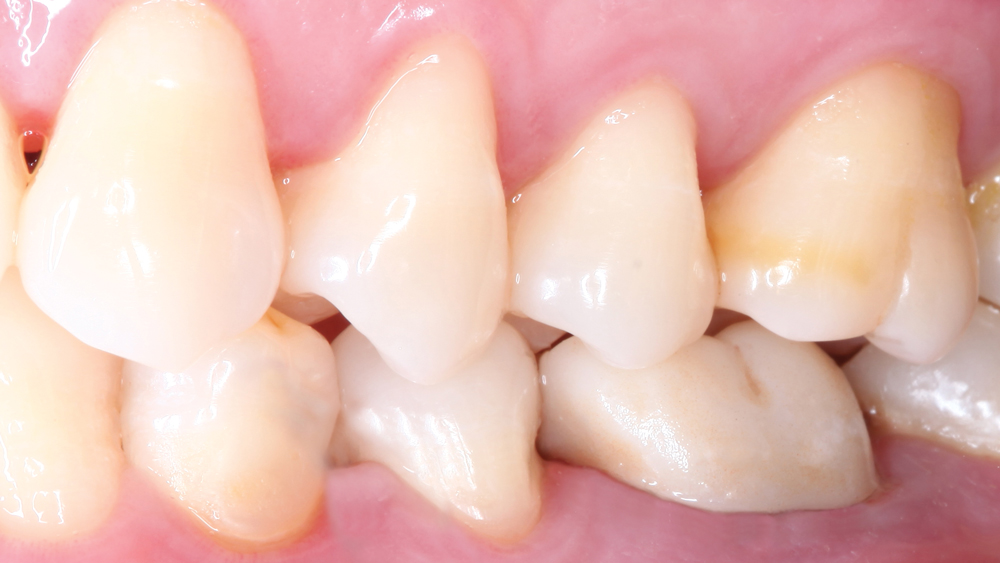
Phuong, a design quality control technician in our Zirconia/Composite department, who has been at Glidewell Laboratories for four years, was unhappy with her stainless-steel crown on tooth #19 (Figs. 1a, 1b) that was placed years earlier following root canal treatment. Upon inspection of the crown, I found poor esthetics, open margins and secondary decay (Fig. 2). With this information, it was apparent the patient required a new crown that would meet her esthetic needs as well as provide improved fit and function.
I decided to use BruxZir® NOW, which has great esthetics and is milled in-office, allowing me to deliver the restoration the same day. BruxZir NOW is a pre-shaded, fully sintered, in-office BruxZir Solid Zirconia. The new formulation features enhanced translucency and shade matching, as well as two additional shade options, totaling 16 shades that correspond to the VITA® Classical shade system (VITA Zahnfabrik; Bad Säckingen, Germany). Unchanged is the material’s flexural strength, which is greater than 800 MPa, and the single-use diamond milling bur included with each block.
I created a clear shoulder margin, made sure the axial walls were convergent and without undercuts, and established adequate occlusal clearance of 1 mm. The existing amalgam buildup was replaced with Clearfil Photo Core® (Kuraray America, Inc.; New York, N.Y.) buildup material.
After completing the prep, I proceeded with the Two-Cord Impression Technique, which provides the best combination of moisture control and gingival retraction (Fig. 3). After a five-minute wait with an anatomic Comprecap (Coltène/Whaledent Inc.; Cuyahoga Falls, Ohio) in place to provide extra tissue displacement, I removed the top cord, air-dried and applied titanium dioxide contrasting agent to the scan area.
Scan
I then started to scan with the 3M™ True Definition Scanner (3M Company; St. Paul, Minn.). First to be scanned was the occlusal of the prep, followed by the buccal and lingual. After the mandibular scans, I scanned the same aspects of the opposing arch, and finished the scanning protocol with a buccal bite scan after verifying the patient was in centric occlusion.
From the 3M True Definition interface, I sent the STL scan file to the Glidewell NOW in-office design station, which uses FastDesign™ software (Glidewell Laboratories; Newport Beach, Calif.). After importing the file into the FastDesign™ software, I filled out the on-screen order form, selecting a full-coverage BruxZir NOW crown in shade A1.
Design
I began the design process by identifying key distinguishers on the scanned preparation to aid in the crown proposal generation. First, I marked the margin (Fig. 4). Once I was satisfied with the margin, I moved to the next step and adjusted the two arrows that identify the correct path of insertion and buccal direction (Fig. 5).
The software takes the information provided and creates a restoration proposal that best matches the surrounding dentition. With the proposal generated, I can make changes, including adjusting the rotation, size, height and angulation of the crown design (Fig. 6).
Next, I brought up the opposing arch, creating an articulated virtual model, to examine the buccal and make finer adjustments to the proposal’s contours if necessary (Fig. 7).
I then opened the “Edit contacts” function and adjusted the occlusal contacts with help from the software’s visual feedback feature, which lets me know when the proposal does not meet my preferred parameters. I can also make minor esthetic changes to the anatomy (Fig. 8).
After I finished touching up the occlusal contacts, I used the same “Edit contacts” function to check and adjust the proximal contacts (Fig. 9).
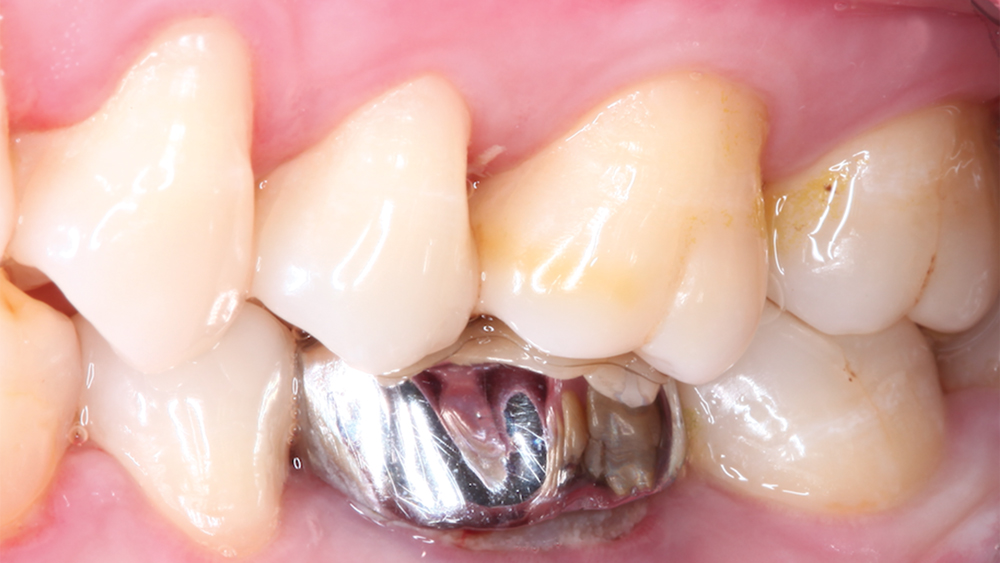
Figure 1a: Phuong’s existing stainless-steel crown on tooth #19. Note the poor marginal fit in Figure 1a.
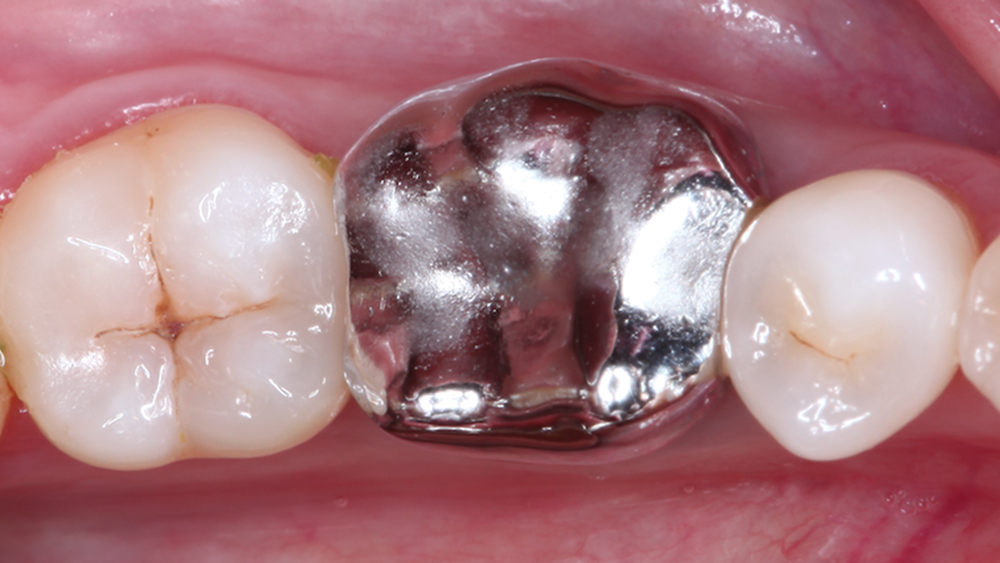
Figure 1b: Phuong’s existing stainless-steel crown on tooth #19. Note the poor marginal fit in Figure 1a.
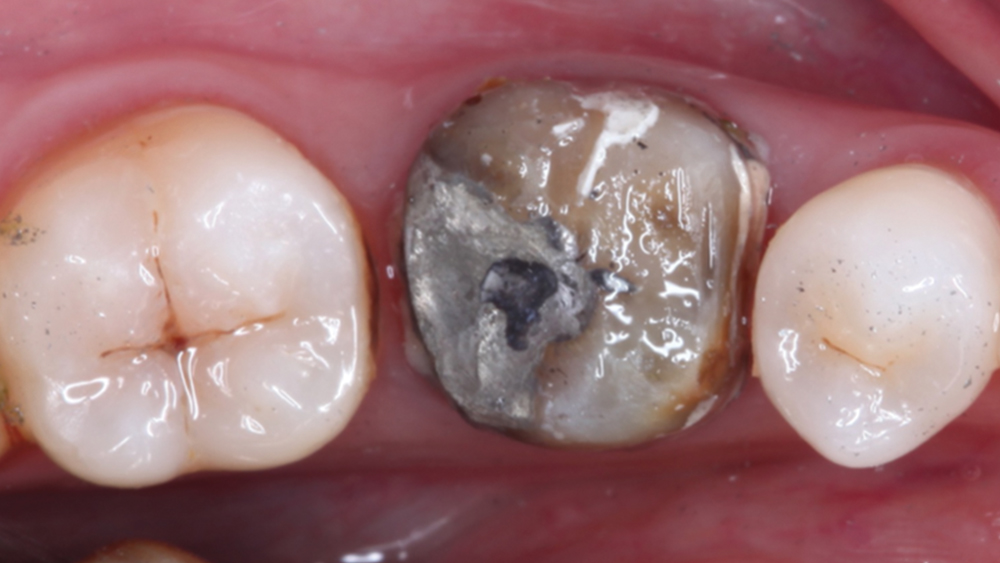
Figure 2: Upon removal of the stainless-steel crown, secondary decay was found.
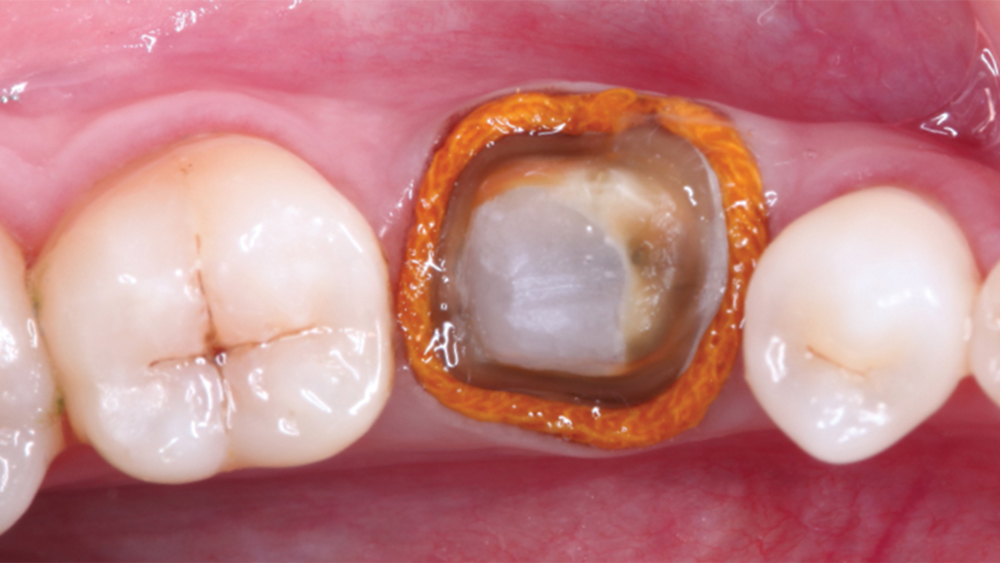
Figure 3: The Two-Cord Impression Technique was used prior to taking the digital impression.
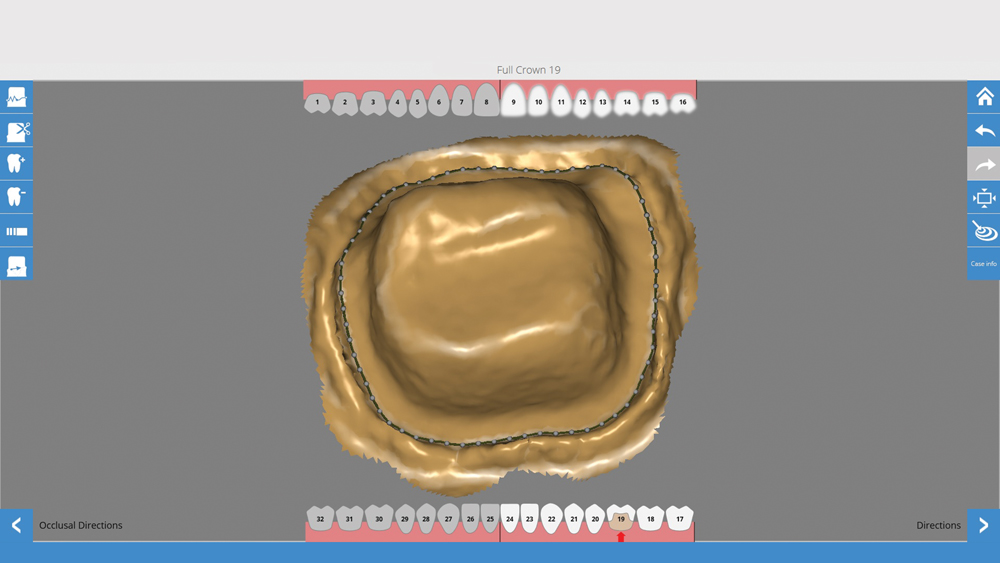
Figure 4: The FastDesign software automatically marks the margin on the scanned preparation. In this step, the user verifies that the software correctly marked the margin and adjusts if necessary.
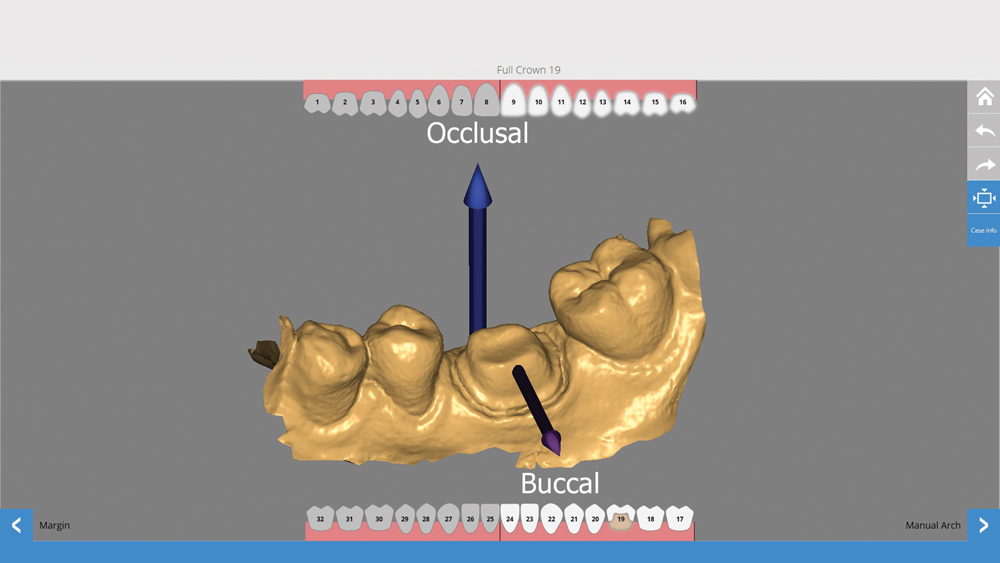
Figure 5: The software requires the identification of the path of insertion and buccal direction to aid in the design proposal generation.
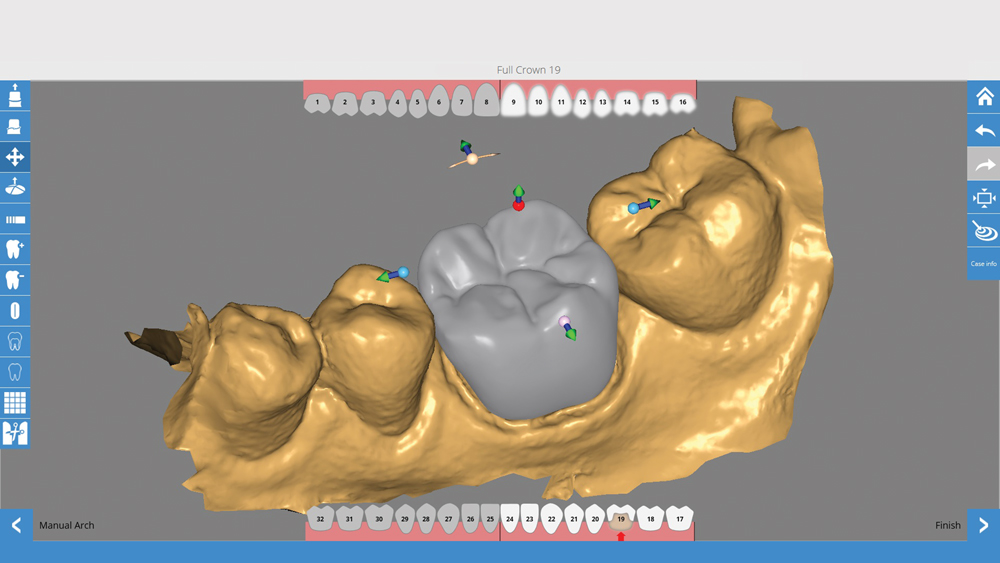
Figure 6: The Move Rotate Scale feature allows larger changes, such as adjusting the rotation, size, height and angulation of the crown design.
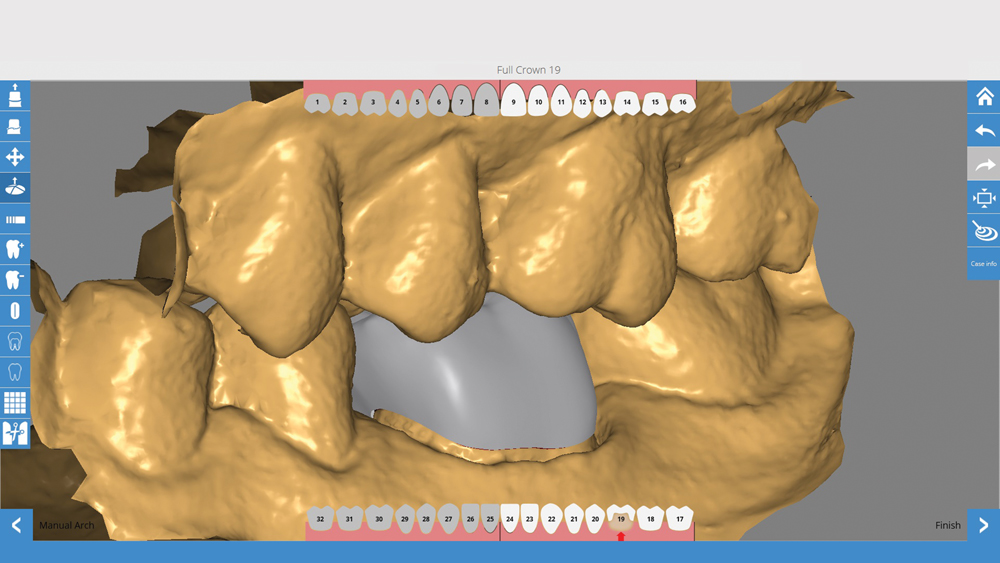
Figure 7: In this buccal view, with arches in centric occlusion, the functional areas and facial aspect of the crown can be seen and adjusted.
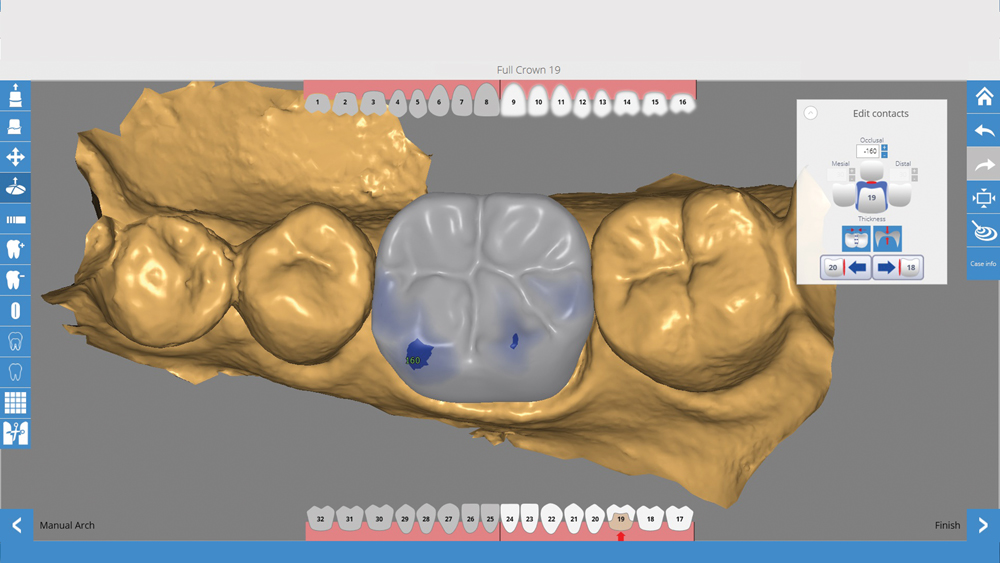
Figure 8: From the occlusal view, the user can take advantage of the software’s visual feedback feature to view and adjust occlusal contacts.
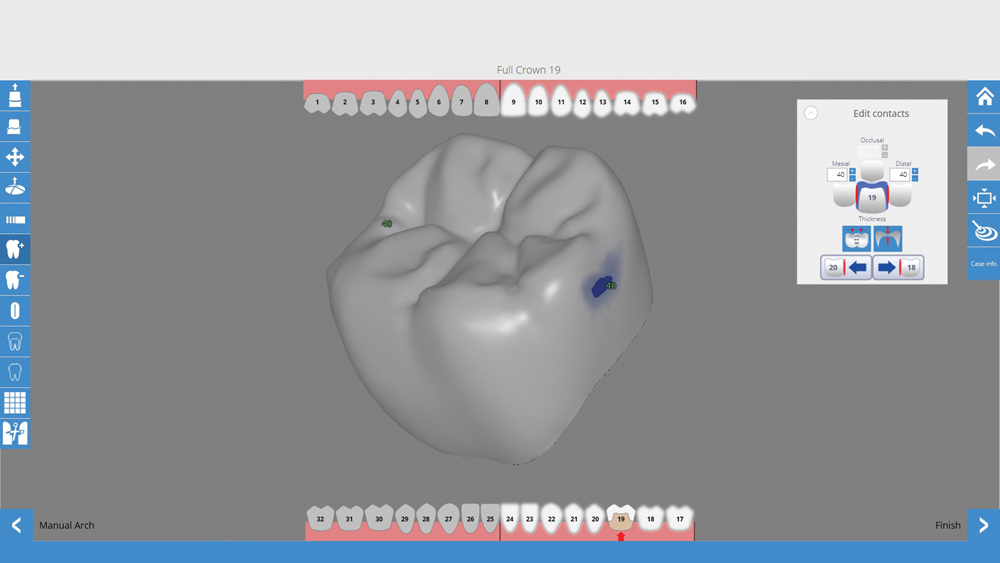
Figure 9: After setting the desired parameters for proximal contacts, the user can toggle the surrounding dentition to get a better view and adjust the contacts.

Figure 10: The FastMill in-office unit is an all-electric milling system with an easy bur-replacement feature and greater torque than air-driven mills.
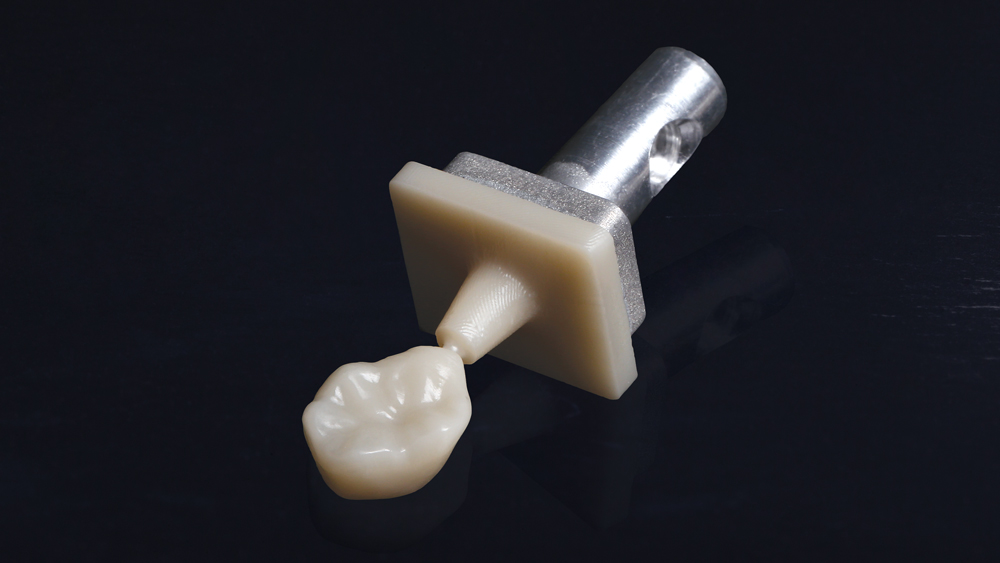
Figure 11: The BruxZir NOW crown immediately after milling.
Mill
With the crown design completed, I sent the file to the FastMill™ (Glidewell Laboratories) system, the next evolution in in-office milling (Fig. 10). Unlike air-driven mills, the FastMill unit is all-electric, which means there is no need for an air hose or air compressor. This also means it is quieter and achieves greater torque than its air-driven counterparts, and can maintain constant torque output for a more consistent milling process. Bur replacement with the mill could not be easier, too; it requires only a few mouse clicks within the desktop portal, and the old bur can be swapped for the new one, which is then pneumatically locked into place.
After I installed a new single-use diamond bur, I fastened a shade A1 milling block into the mill. Approximately 30 minutes later, a lifelike BruxZir NOW crown was removed from the mill (Fig. 11).
Deliver
I removed the sprue from the restoration with a diamond disc and finished down the sprue attachment with a high-speed diamond bur. I tried-in the crown to check the fit, and no adjustments were necessary due to the precision of the all-digital workflow (Figs. 12a, 12b). Straight out of the mill, BruxZir NOW crowns exhibit lifelike esthetics, but I decided to take a few extra minutes to match the unique characterization of the adjacent teeth. After the stain and glaze application and a 10-minute firing cycle, the crown was cemented with RelyX™ Luting Plus (3M Company), giving Phuong a much more esthetic smile (Figs. 13a, 13b).

Figures 12a, 12b: The desprued BruxZir NOW crown was tried-in.
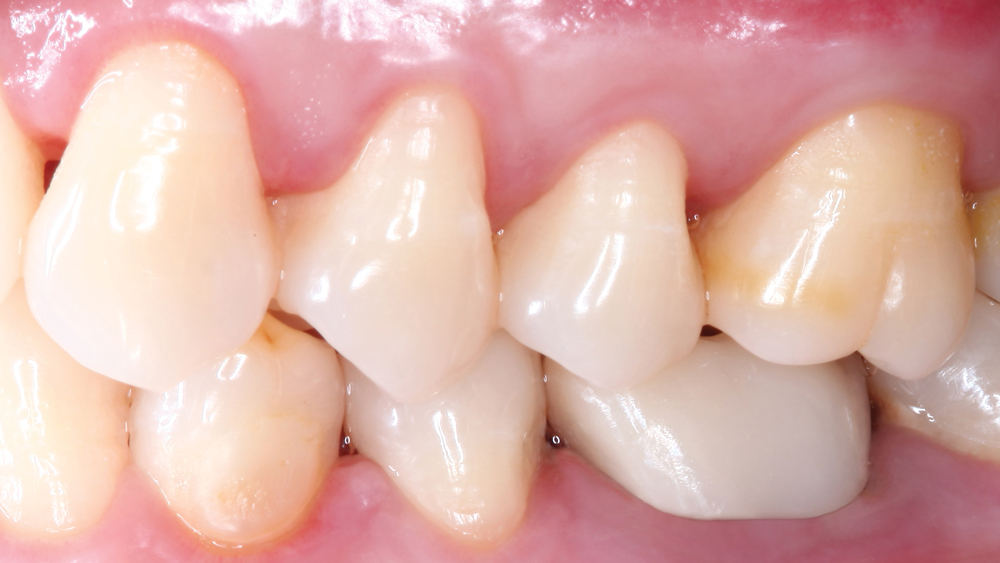
Figures 12a, 12b: The desprued BruxZir NOW crown was tried-in.
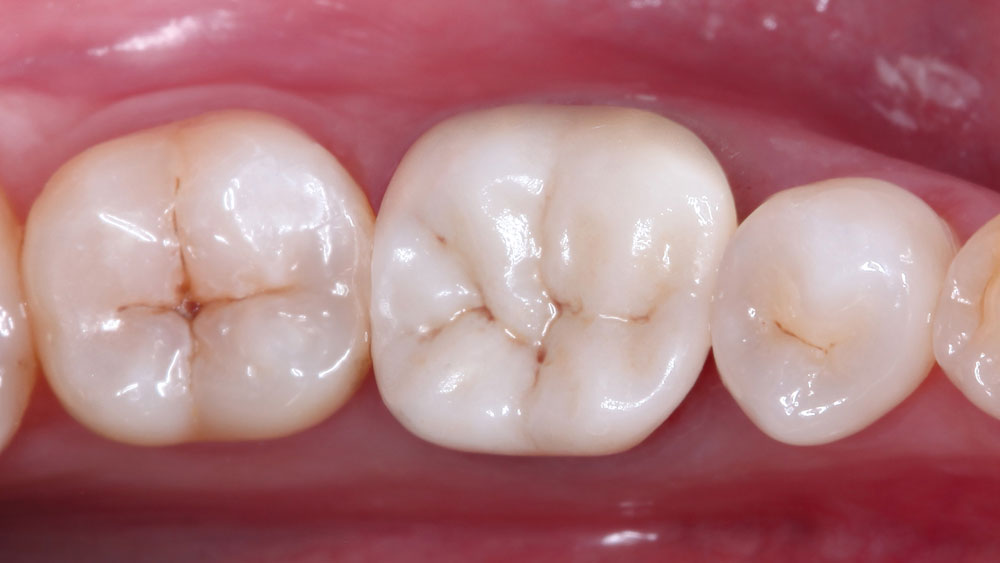
Figures 13a, 13b: After minor, optional staining and glazing to match the adjacent teeth, the crown was delivered.
Figures 13a, 13b: After minor, optional staining and glazing to match the adjacent teeth, the crown was delivered.
Conclusion
Advancements in digital technologies and materials science have made same-day dentistry and all-digital workflows the perfect complement to any existing practice. Clinicians can take advantage of the esthetics of BruxZir NOW milling blocks and the ease of use, accuracy and accessibility of the FastDesign software and the FastMill in-office unit to provide their patients with lifelike, single-unit restorations in one day, without compromising the quality of care they provide.