In this issue:
Utilizing Digital Dentistry and CAD/CAM Prosthetics to Optimize Treatment Outcomes – Part 3: Fabrication and Delivery of the Final Restoration
Author

While innovations in digital dentistry and CAD/CAM fabrication have made all aspects of implant treatment more accurate and predictable, each advancement has been made with one goal in mind: optimizing the final restoration. As demonstrated in the previous two articles in this series, virtual treatment planning allows for visualization of the ideal prosthetic outcome, which can then be executed with precision through pre-implant treatment, guided surgical implant placement and immediate loading with a prefabricated provisional restoration.
This final article will focus on the design, milling and delivery of the final prosthesis, making the planned prosthetic outcome a reality through a 100 percent digital workflow. By utilizing a multidisciplinary approach and taking full advantage of the CAD/CAM tools available to the contemporary practitioner, a stellar result was achieved in this case despite its complexity.
PRE-IMPLANT TREATMENT, GUIDED SURGERY AND IMMEDIATE PROVISIONALIZATION
Before exploring the fabrication of the final restoration, it is instructive to revisit the prosthetically driven treatment plan. In Part 1, using highly accurate digital scan data, we identified and prioritized specific dental problems for sequential treatment. The first article illustrated how precise tooth movement was accomplished with digitally fabricated Invisalign® aligners (Align Technology, Inc.; San Jose, Calif.), improving the position of the lower teeth while establishing the correct occlusion for the planned implant restoration (Figs. 1a, 1b). Composite resin was used to restore the incisal edges and return the mandibular anterior teeth to their original incisal-gingival height. Optimal excess overjet was created with tooth movement to allow proper room for the maxillary screw-retained implant bridge.
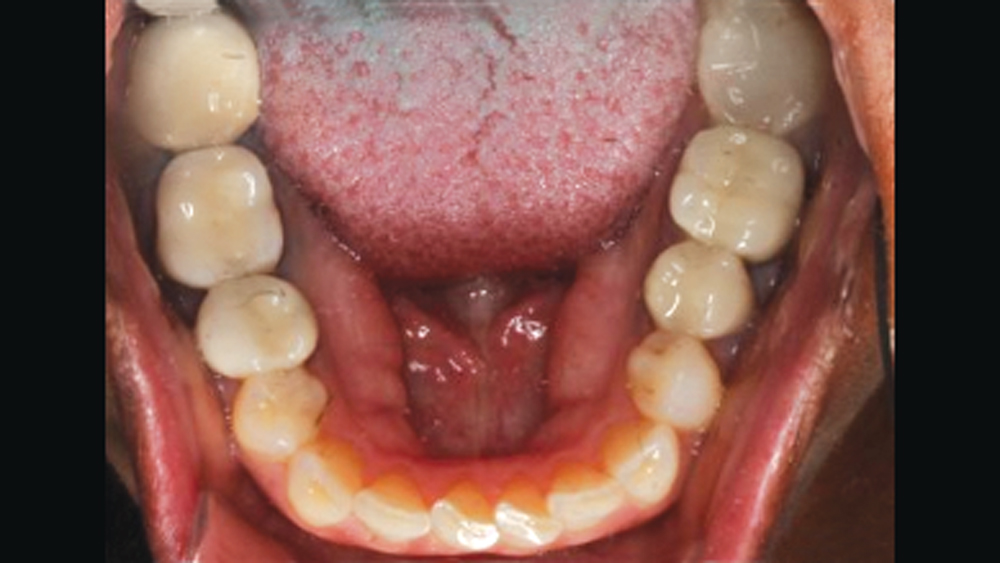
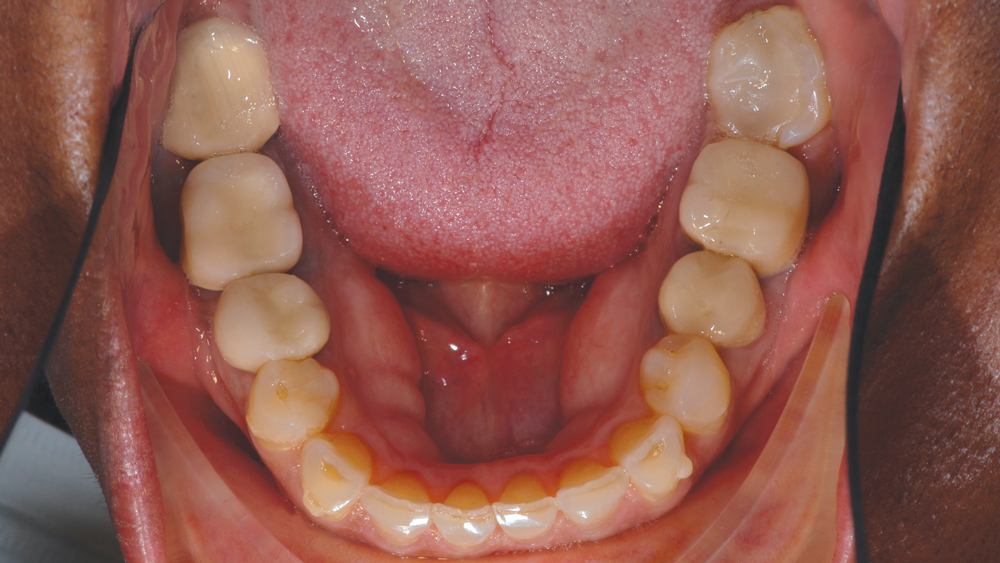
Figures 1a, 1b: Before-and-after occlusal views illustrate successful intrusion and rotation of the mandibular incisors, helping establish proper space and occlusion for the planned maxillary implant bridge.
Figures 2a–2c: Ideal implant positioning was determined using digital treatment planning software, and a surgical guide was fabricated to control the depth and angulation of the surgical drills.
Figures 3a, 3b: The 6-unit screw-retained BioTemps bridge was delivered at the time of surgery and helped confirm the restoration design and contour the soft tissue during healing.
In Part 2, we focused on the digital workflow used for CBCT and intraoral scanning, virtual determination of implant positioning, guided surgical implant placement, and the design and fabrication of the provisional implant prosthesis (Figs. 2a–2c). DICOM data files were merged with the STL digital impression files to create a virtual planning platform, facilitating design and fabrication of the surgical guide used for implant placement as well as the creation of a premade BioTemps® provisional implant prosthesis1 After placing the implants in the exact position called for by the digital treatment plan, the screw-retained PMMA provisional restoration was immediately loaded and worn by the patient to confirm the fit, esthetics and occlusion of the proposed restorative design (Figs. 3a, 3b). After completion of healing and successful integration of the Inclusive® Tapered Implants (Glidewell Direct; Irvine, Calif.), the stage was set for a smooth, predictable transition to the final restoration.
FINAL RESTORATION: MATERIAL SELECTION
Our requirements for the 6-unit screw-retained implant bridge included excellent esthetics, acceptable functional occlusion, high strength and wear resistance, retrievability, and reasonable cost. BruxZir® Full-Strength Solid Zirconia was chosen, as it best met the desired criteria. Flexural strengths of up to 1,465 MPa and the material’s superior resistance to wear and fracture were particularly beneficial in this case because of the patient’s history of bruxing, clenching and grinding. Despite its durability, BruxZir Solid Zirconia has proven to exert minimal wear on opposing dentition — an important advantage considering the worn-down mandibular incisors with which the patient presented for treatment.2 The material’s combination of high fracture resistance and lifelike appearance addressed both the functional and esthetic demands of this case.
PROVISIONAL 'TEST DRIVE'
As previously described in this article series, we used dental CAD/CAM software to design and fabricate a 6-unit screw-retained BioTemps implant bridge milled from PMMA material. The 100 percent digital workflow facilitated delivery of the premade PMMA provisional at the time of implant placement.
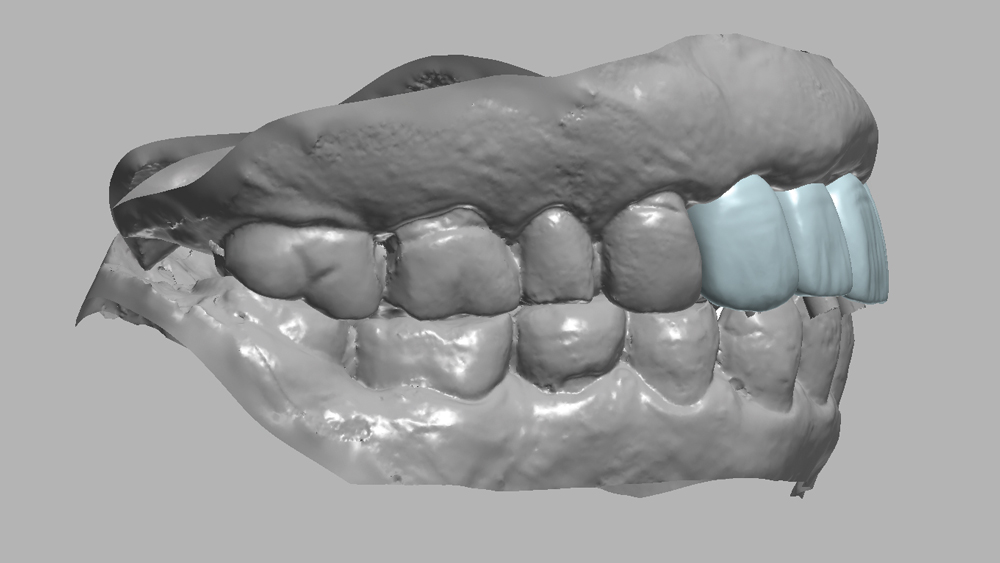
The PMMA provisional implant prosthesis allowed us to test the esthetics, fit and function, and make any necessary modifications. It was determined clinically that the maxillary canine crowns of the bridge would blend into the smile design better by “softening” the cusp tips, and this slight alteration was easily made to the PMMA material using a high-speed handpiece and white stone. The BioTemps provisional implant bridge allowed the patient to test the occlusion in full function, and we were very pleased to observe that the PMMA did not require any occlusal adjustments to the original prosthetic design (Fig. 4).
The BioTemps provisional implant bridge allowed the patient to test the occlusion in full function, and we were very pleased to observe that the PMMA did not require any occlusal adjustments to the original prosthetic design.
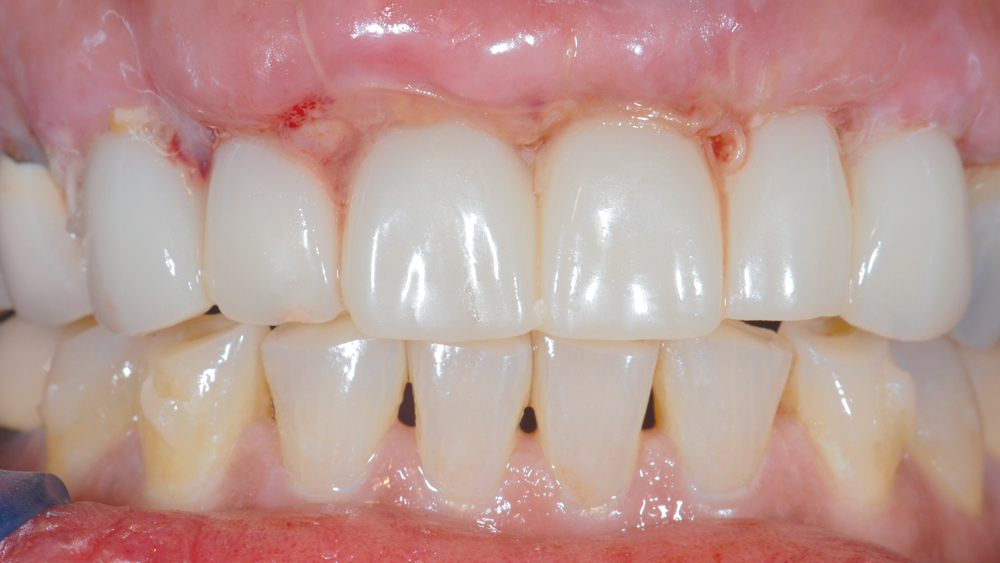
Figure 4: The occlusion established by the PMMA provisional implant bridge did not require adjustments and was thus carried through to the final restoration.
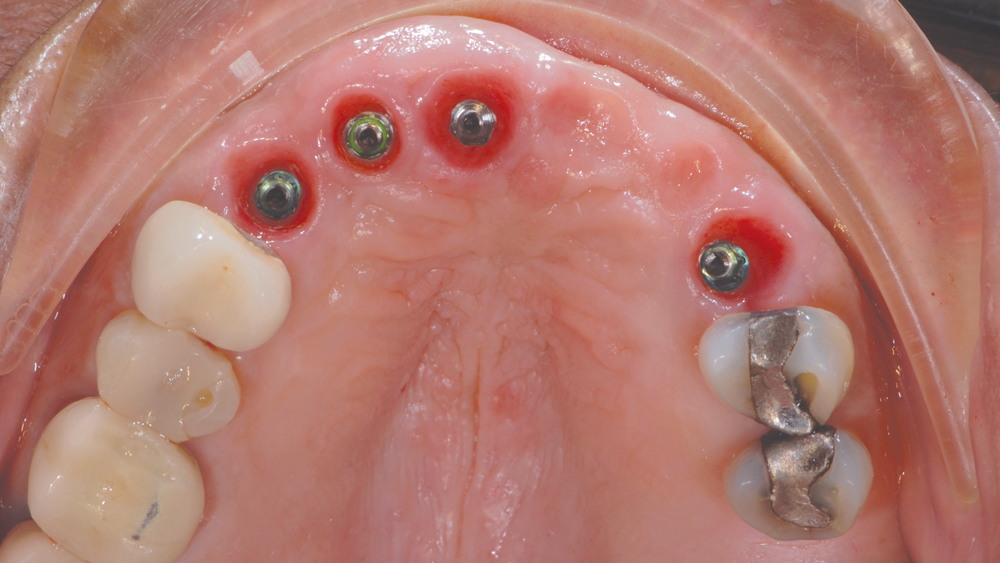
Figure 5: After completion of the healing phase, removal of the provisional implant prosthesis revealed healthy, esthetic tissue contours, which would help establish a natural emergence profile for the final BruxZir prosthesis.
The tissue surface of the provisional was contoured to help develop the soft-tissue anatomy in preparation for the final screw-retained BruxZir implant bridge. By the time the final restoration was delivered, healthy, esthetic emergence profiles were evident around the implants and in the areas of the pontics (Fig. 5). This would contribute significantly to the lifelike final restoration.
FINAL RESTORATION DESIGN AND FABRICATION
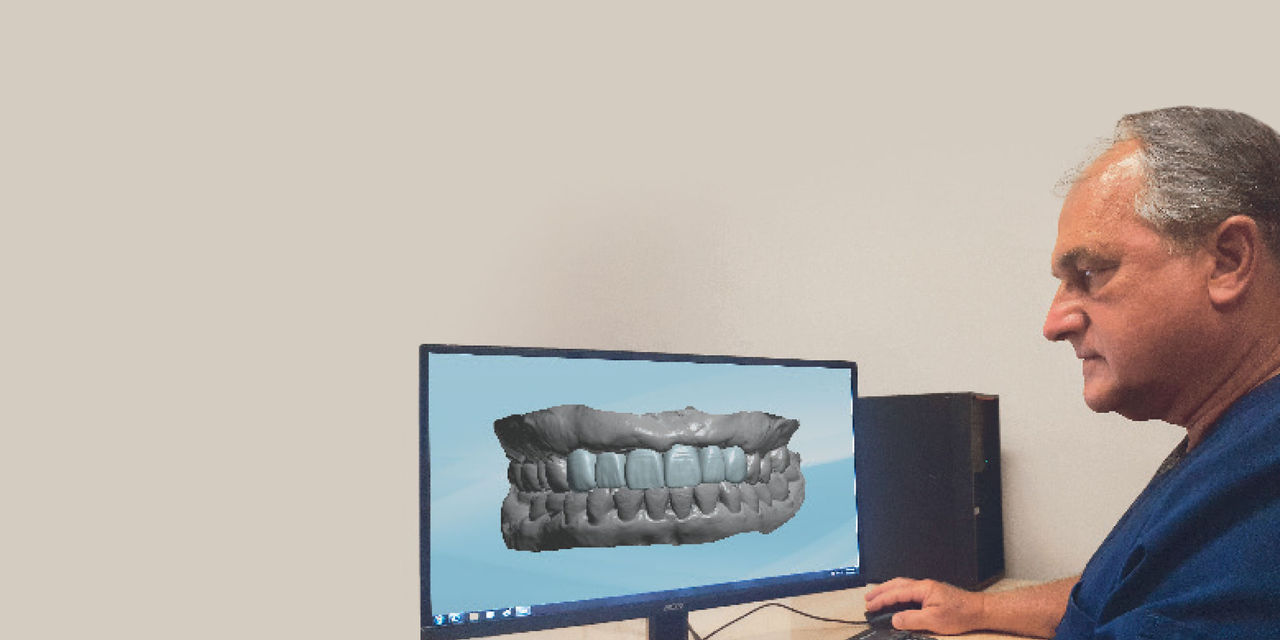
Continuing the 100 percent digital workflow, additional scans were taken to finalize the restorative design. We were so pleased with the form, function and esthetics of the original PMMA provisional that we wanted to duplicate its surface morphology, as well as the slight alterations made to the canine cusp tips, in the final restoration. The iTero® Element™ intraoral scanner (Align Technology, Inc.) was used to generate a digital impression of the BioTemps provisional implant bridge so the lab could incorporate the minor modifications into the final prosthetic design (Fig. 6).
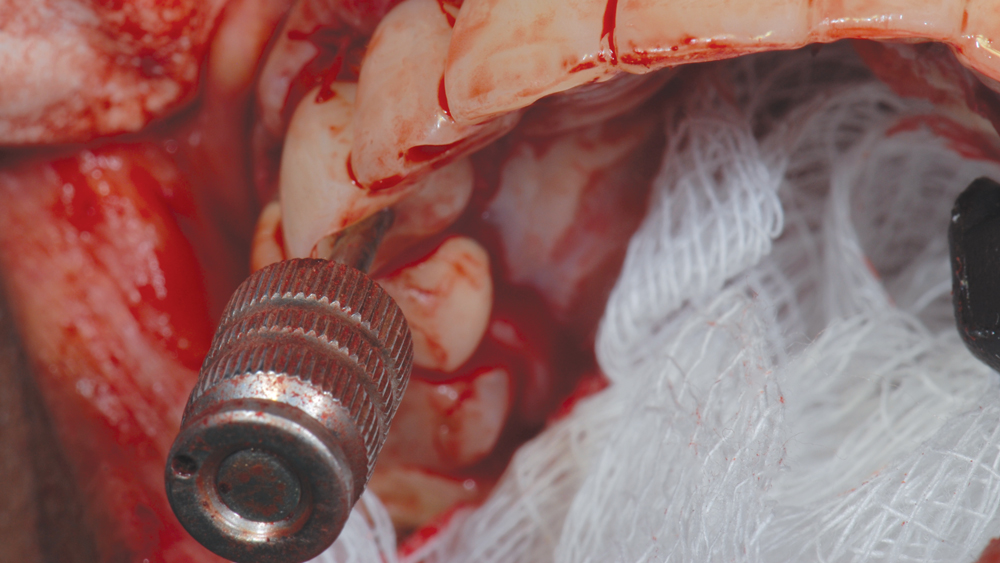
The provisional implant bridge was removed and implant stability was verified. The patient was referred for CBCT scans for radiographic documentation of implant integration (Figs. 7a, 7b).
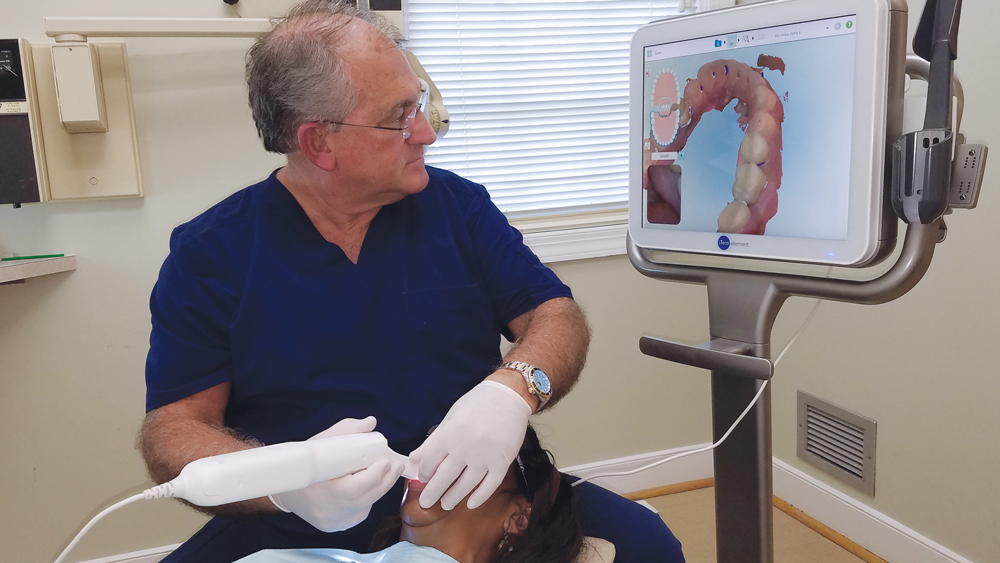
Figure 6: The iTero Element was used to take an intraoral scan of the BioTemps implant prosthesis, allowing the lab to incorporate the minor modifications made to the canine cusp tips of the 6-unit bridge.
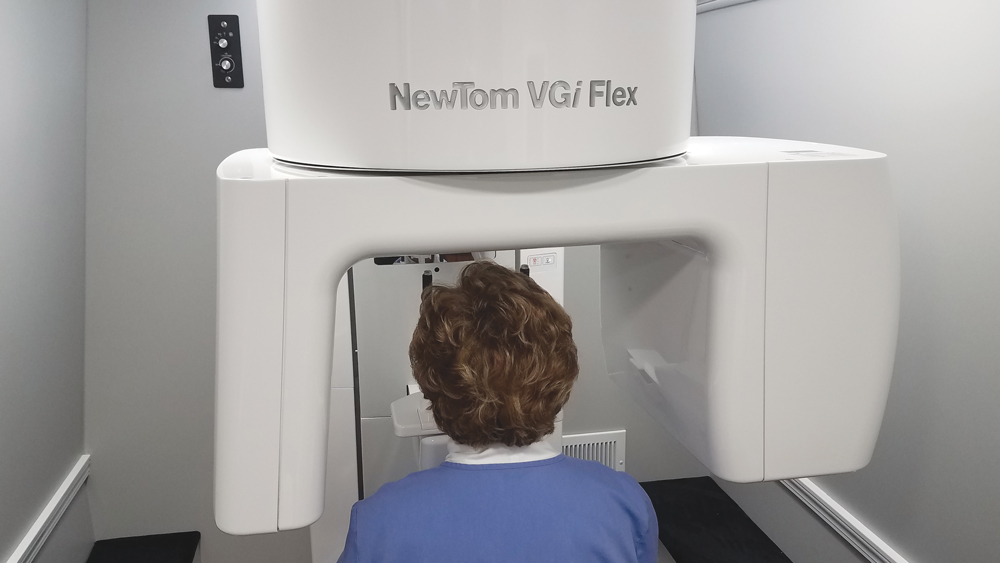
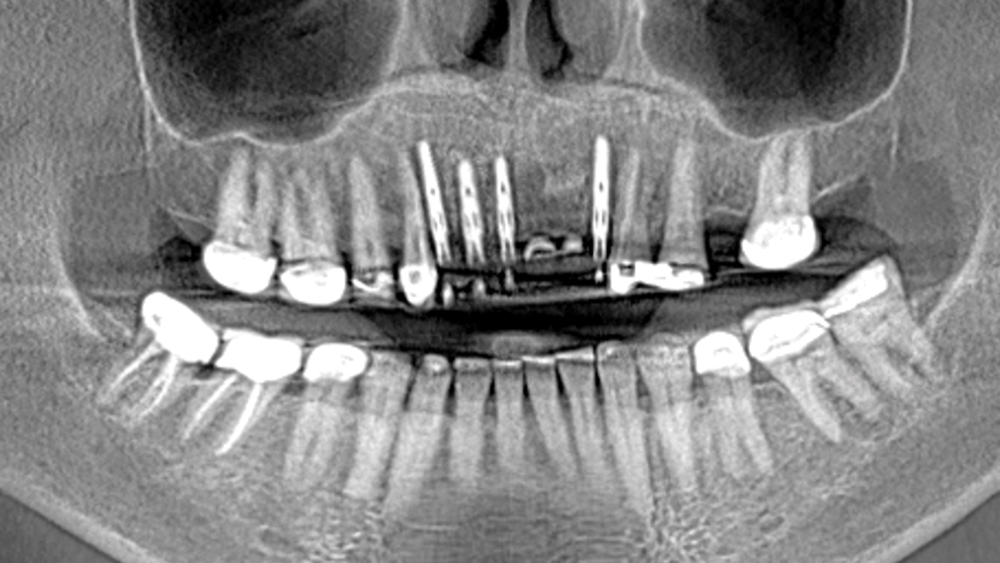
Figures 7a, 7b: A CBCT scan was taken by Mobile Imaging Solutions (scans4you.com; Richmond, Va.).
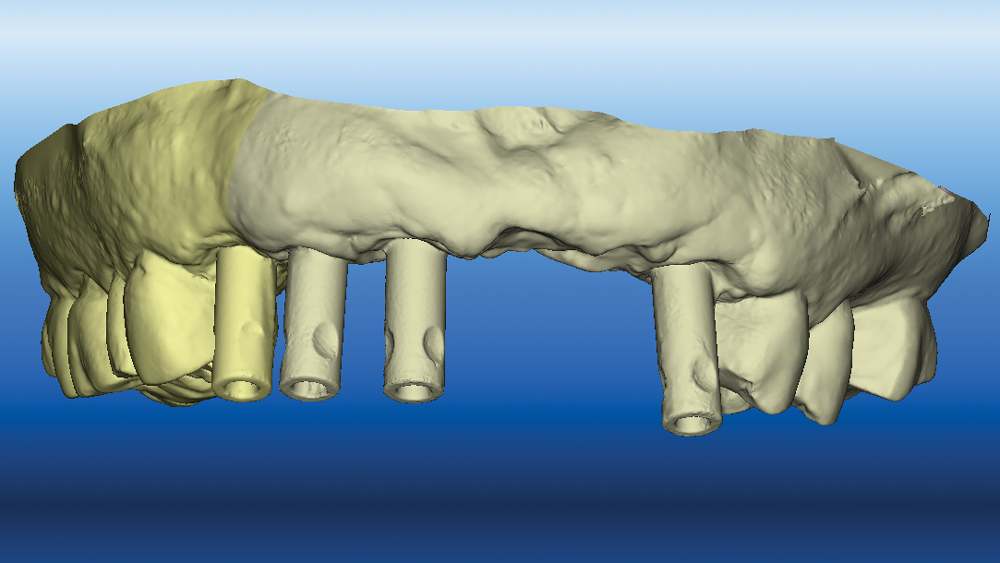
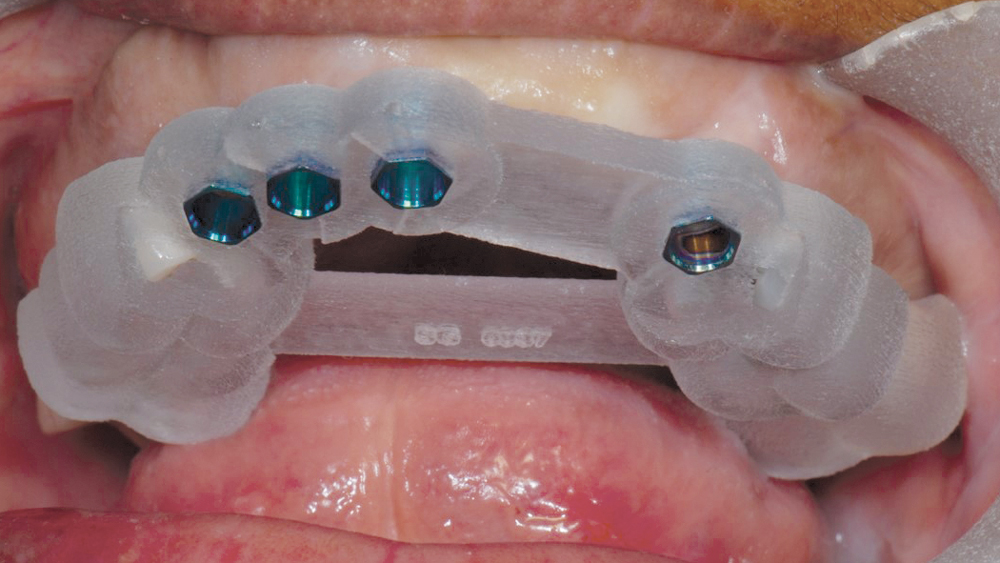
Figure 8: After connecting Inclusive Scanning Abutments to the implants, a final digital impression was taken with an iTero Element. Capturing the precise gingival contours along the edentulous span allowed the lab to optimize the emergence profile of the final implant bridge.
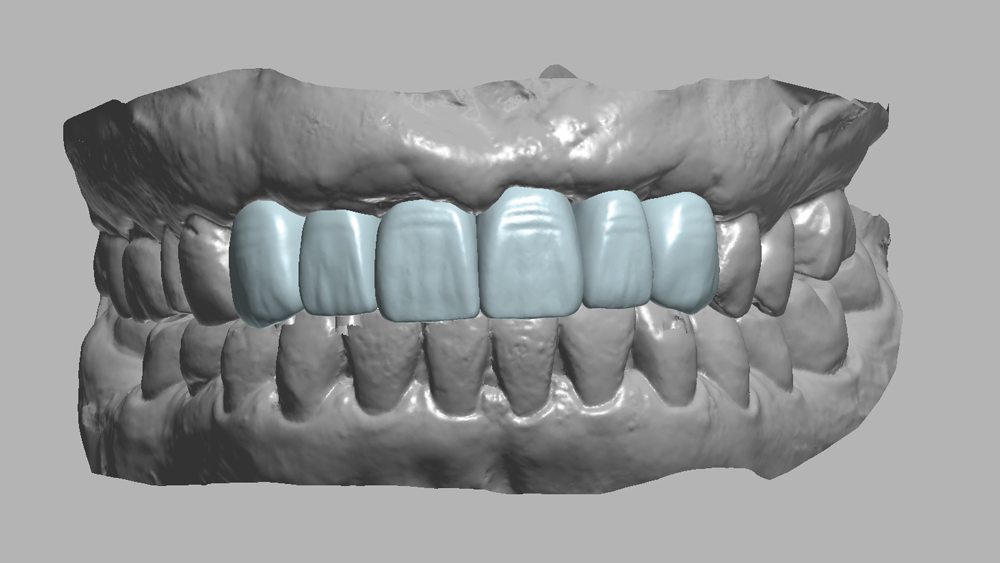
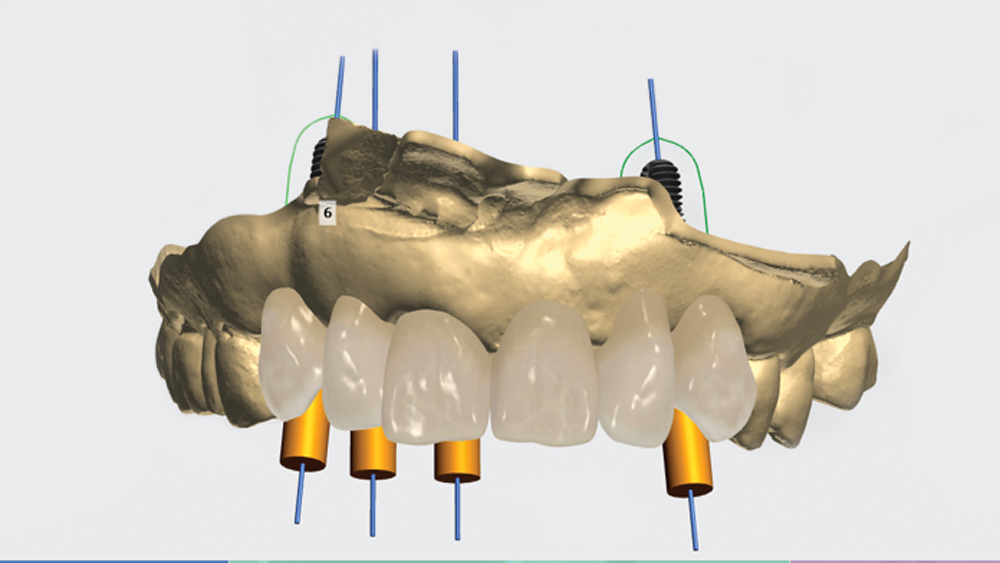
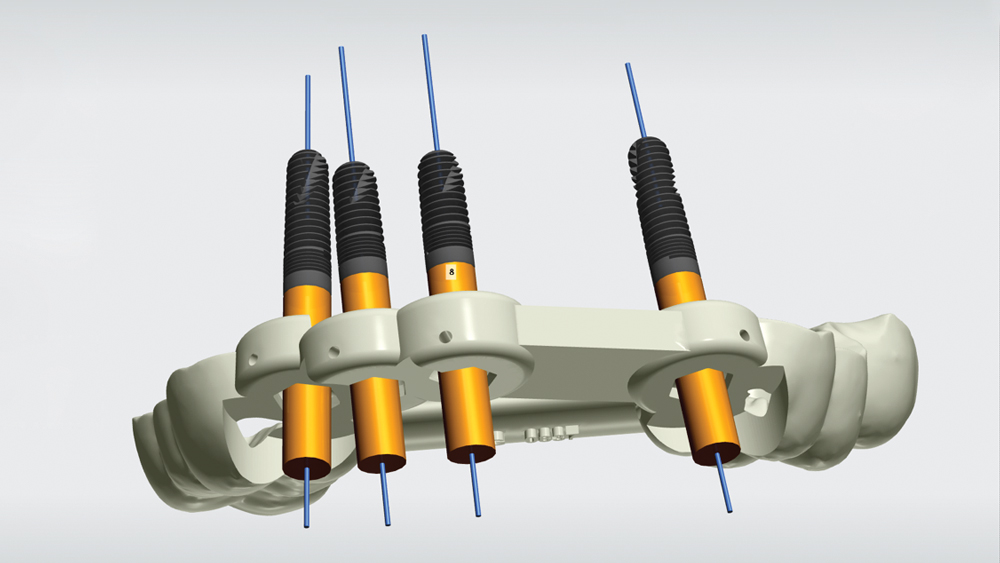
Figures 9a, 9b: The design for the 6-unit BruxZir implant bridge was fine-tuned based on the final digital impressions.
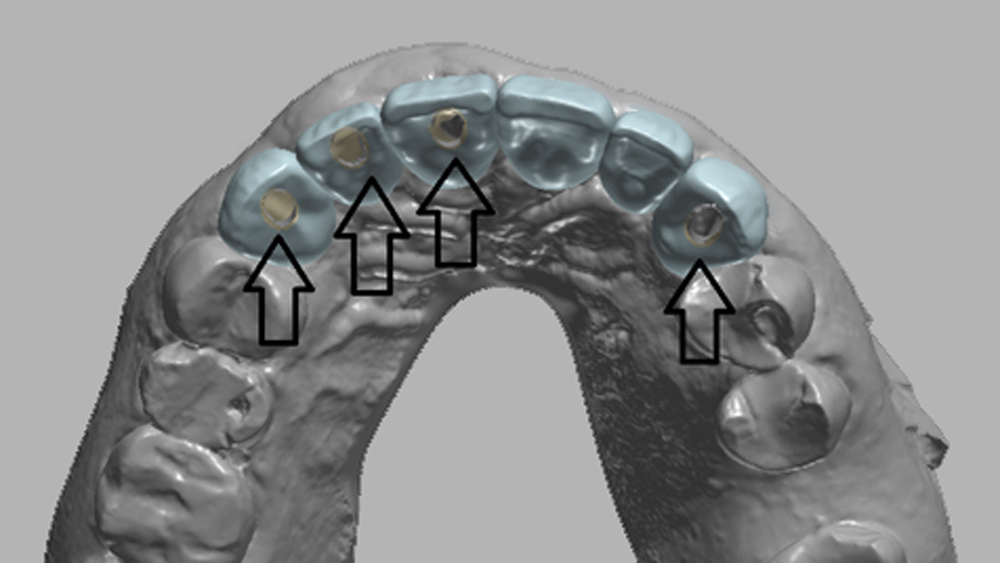
Figure 10: Occlusal view of design for the final restoration (blue) superimposed over the premade PMMA provisional implant bridge design (yellow). Note the optimal alignment of the screw access holes, verifying the accuracy of the guided surgical implant placement.
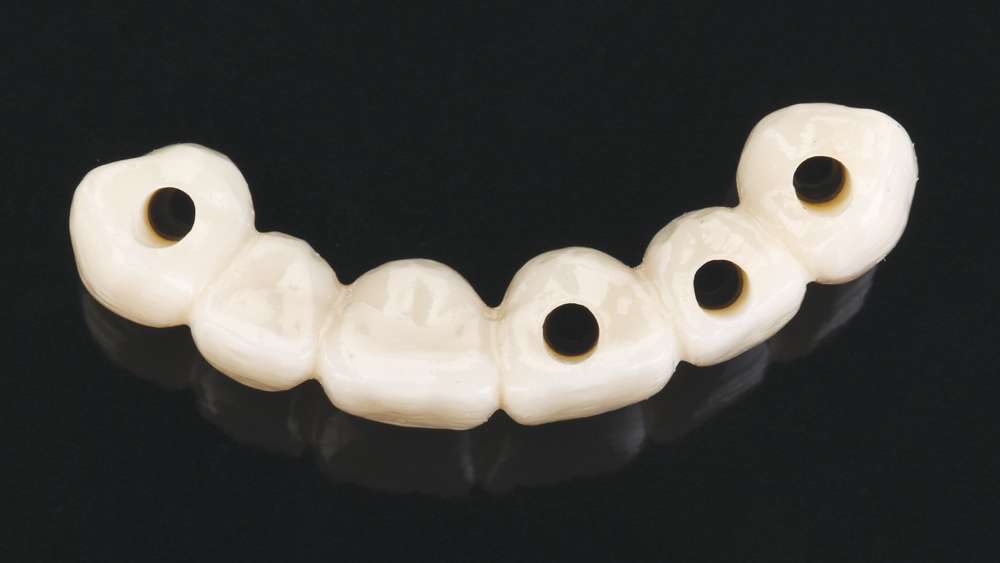
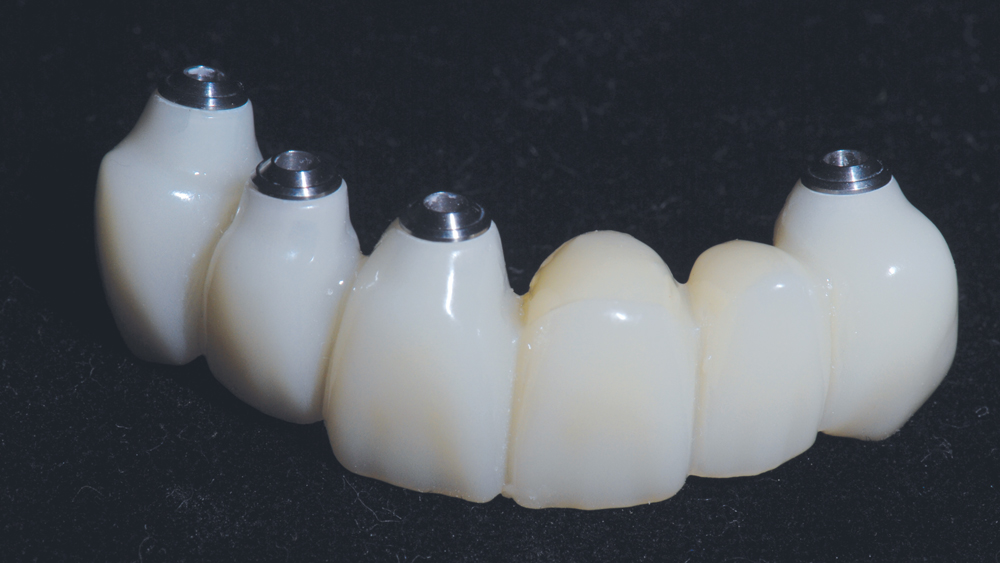
Figure 11: The final 6-unit screw-retained bridge was milled from BruxZir Solid Zirconia, ensuring an excellent long-term prognosis for the definitive restoration.

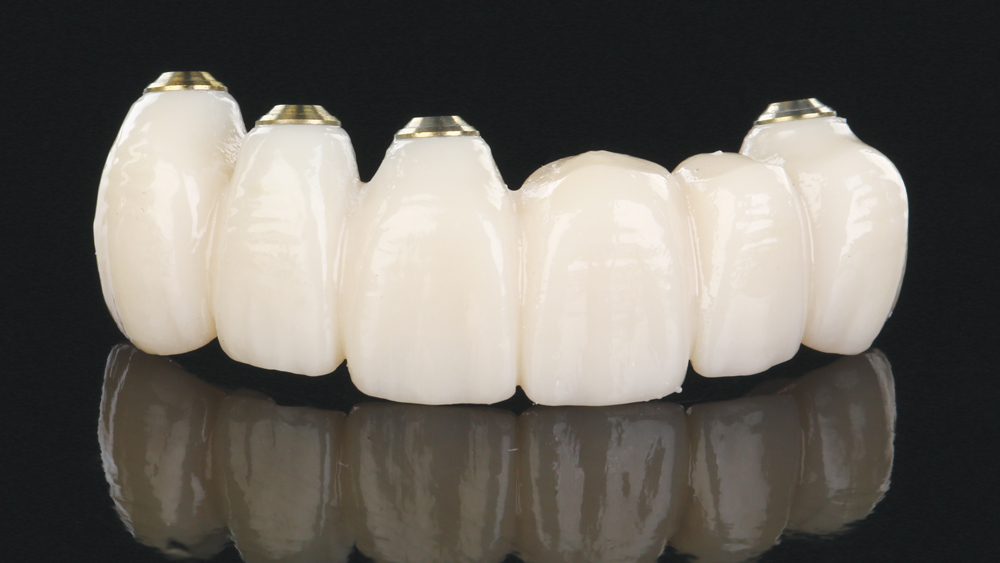
Figures 12a, 12b: Titanium bases were bonded into the screw access holes of the prosthesis, completing the fabrication process. Note the gold tone of the bases, which helps avoid the gray color of titanium showing through the soft tissue.
Inclusive® Scanning Abutments (Glidewell Direct; Irvine, Calif.) were connected to the four maxillary anterior implants, and intraoral scans were taken with the iTero Element, generating a digital impression of the final soft-tissue surface anatomy (Fig. 8). This provided the lab with the information needed to ensure the final prosthesis emerged from the soft tissue in the most esthetic manner possible.
Using dental CAD software, the intraoral scan of the original PMMA provisional was merged with the implant-level digital impression. The design for the final 6-unit screw-retained implant bridge was fine-tuned to match the patient’s final gingival anatomy and incorporate the slight modifications made to the canine cusp tips of the PMMA provisional (Figs. 9a, 9b). Note that a digital comparison of the PMMA provisional design and the final BruxZir design showed that the screw access holes were in optimal alignment, verifying that the integrated implants were situated in precise alignment with their virtually planned positions (Fig. 10).
The final design was digitally prepared for fabrication, and the 6-unit BruxZir implant bridge was milled from a blank of BruxZir Solid Zirconia (Fig. 11). Following milling, the lab bonded gold-tone titanium bases into the screw access holes of the prosthesis (Figs. 12a, 12b).
FINAL DELIVERY
At the final delivery appointment, the 6-unit screw-retained BruxZir bridge was seated on the four Inclusive Tapered Implants. Because the restorative design was verified with the BioTemps provisional, the restoration fit perfectly and required no adjustments. The titanium retention screws were threaded into the implants to a final torque value of 35 Ncm. Teflon tape was condensed into the screw access holes to help protect the heads of the retention screws and allow future retrieval of the prosthesis (Fig. 13). The Teflon tape was then covered with a composite resin, completing delivery of the final restoration (Fig. 14).
Because the restorative design was verified with the BioTemps provisional, the restoration fit perfectly and required no adjustments.
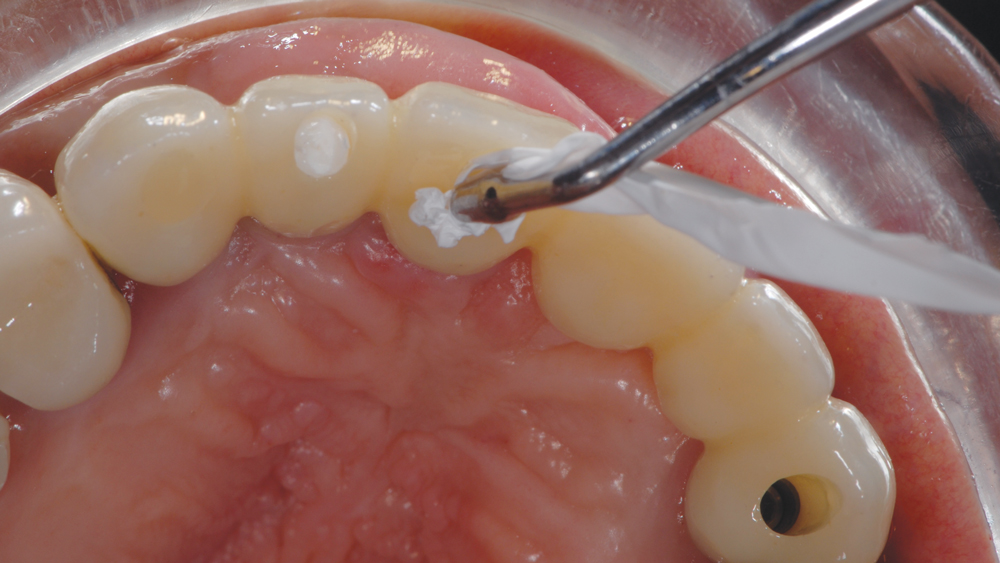
Figure 13: After seating the final 6-unit BruxZir implant bridge and tightening the titanium retention screws, the screw access holes were filled with Teflon tape.
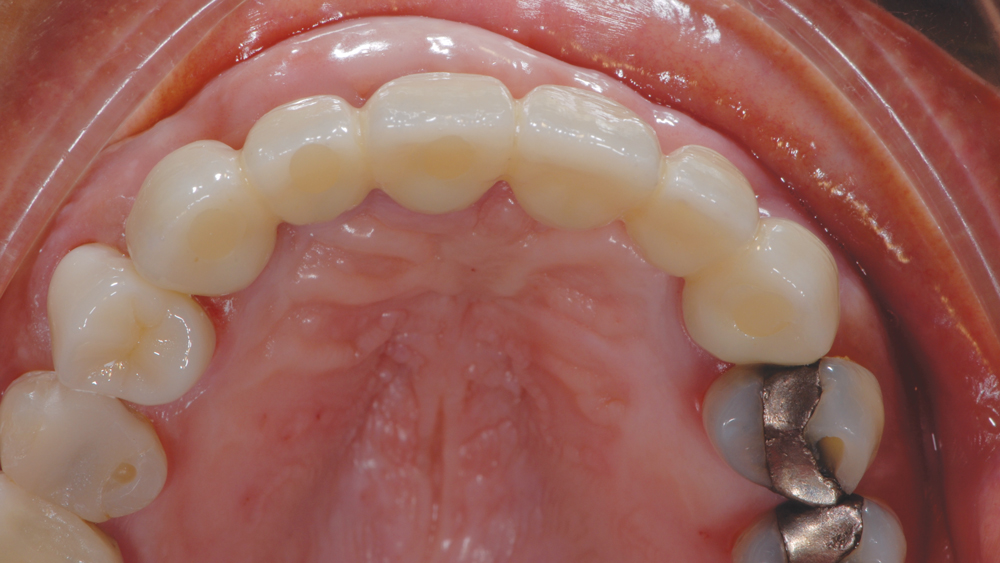
Figure 14: Occlusal view following sealing of the screw access holes with Camouflage® Universal NanoHybrid Composite (Glidewell Direct).

Figure 15: The patient was extremely happy with the final restoration, which replicated the form, function and occlusion she came to expect through wearing the BioTemps provisional implant bridge.
The esthetics, occlusion and function of the final restoration were excellent and precisely duplicated those of the patient-approved PMMA provisional restoration. Due to the restorative space and tooth positioning established by the pre-implant orthodontic treatment, the BruxZir implant bridge established ideal occlusion with the opposing mandibular incisors. The patient was very pleased with the final result, which restored her smile and corrected several dental problems present at the time of initial consultation (Fig. 15).
Due to the restorative space and tooth positioning established by the pre-implant orthodontic treatment, the BruxZir implant bridge established ideal occlusion with the opposing mandibular incisors.
CONCLUSION
In this three-part article series, we have outlined how digital dentistry and CAD/CAM prosthetics enable prosthetically driven treatment planning that enhances the precision of the surgical and restorative phases of implant therapy. This included the execution of precise tooth movements using Invisalign aligners to help optimize the restorative solution for the maxillary anterior restoration. Highly accurate CBCT and intraoral digital scan data allowed for the creation of a precise virtual platform for treatment planning. The CAD/CAM-fabricated surgical guide and PMMA implant bridge facilitated the placement of implants in the exact positions needed to support the immediate fixed provisional restoration. As a replica of the patient-approved and test-driven provisional appliance, the BruxZir implant bridge was delivered with a high level of confidence. The 100 percent digital workflow utilized to achieve the predictable final result illustrates why the future is now for clinicians who are ready to embrace these technological advancements.