In this issue:
Veneer Prep School: Designing the Ideal Preparation
Author

Veneers remain a popular option for cosmetic dental procedures, and recent advances in material options make this procedure more straightforward and predictable than ever. High-performing materials like BruxZir® Esthetic Solid Zirconia and Obsidian® lithium silicate ceramic (Glidewell Laboratories; Newport Beach, Calif.) are ideal restorative choices for a patient’s veneer makeover. Selecting the most suitable tooth preparation, however, can be challenging, especially when you’re debating no-prep versus minimal-prep veneers. In my experience, the correct decision is made by examining specific factors, starting with the patient’s desired treatment outcome.
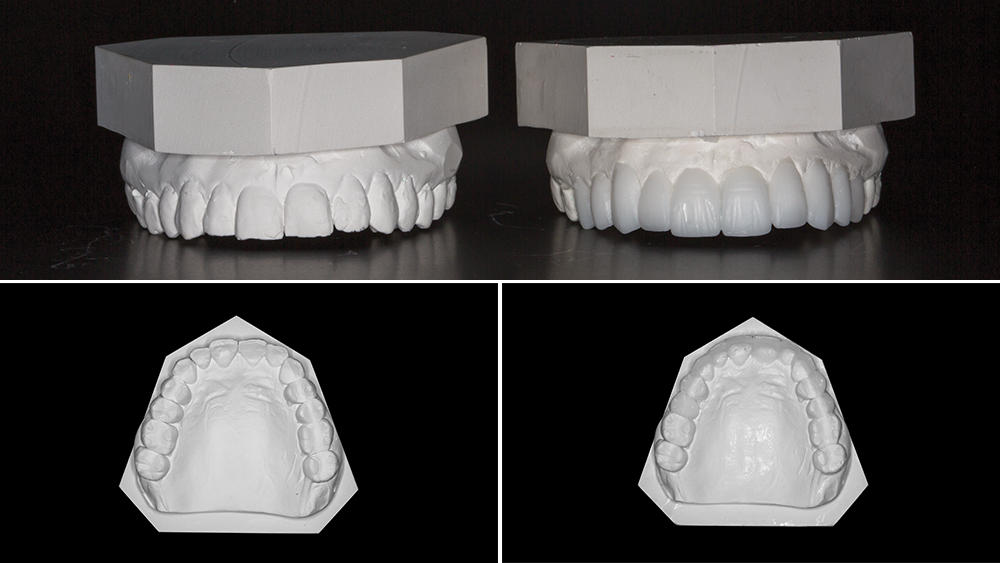
For treatment planning veneer preps, a diagnostic wax-up is essential.
During a veneer consultation, one of my first questions is how much shade change the patient is seeking. Ignoring this can lead to disappointing results if the desired amount of shade change exceeds what a chosen veneer type can deliver. No-prep veneers, for instance, can facilitate a change of only one to two shades. The thinness of this type of veneer is analogous to a contact lens, meaning no-prep veneers are going to underperform if a patient has dramatically stained teeth and wants to transition to a bleached shade; the veneers are going to be too thin to mask the chroma and value of the underlying stained teeth. Greater shade alteration can be secured with minimal-prep veneers, which enable changes of up to three shades. Minimal-prep veneers also can conceal fluorosis stains.
Other common considerations include tooth alignment, spacing and occlusion. For slight misalignments, minor chipping, and elimination of spaces, no-prep veneers are usually still feasible. More significant issues often require an additional phase of care, such as orthodontic treatment, to correct the problems. The patient’s bite must be assessed as well, to prevent occlusion at the margin of the tooth-veneer interface.
The health of the patient’s teeth is another subject for immediate evaluation. Are there any existing composite restorations on any of the teeth that will receive veneers? Research demonstrates complications associated with ending a veneer’s margin within an existing composite restoration.1 If interproximal decay is present, a minimal-prep or even conventional-prep veneer will be needed, as the decay must be removed, the tooth built up with composite, and the prep extended to end on tooth structure, rather than on the composite.
With these patient-specific factors determined, my choice between no-prep and conventional-prep veneers might still depend on other factors. A no-prep design allows the tooth to remain intact, offering the strongest bond because the veneer remains completely within enamel. However, it’s difficult to know where the veneer’s margin ends, making a no-prep veneer extremely demanding of time and technique. Periodontal issues can be avoided by having the finish line be supragingival or equigingival, but the restoration may seem to be at risk of slipping around on the tooth during placement. Overcontouring is another concern. And a result of no-prep veneers is a bigger smile with more tooth display, which might or might not serve the patient’s expectations; before treatment planning, the patient needs to be informed of how this veneer type will add to the tooth’s bulk and length.
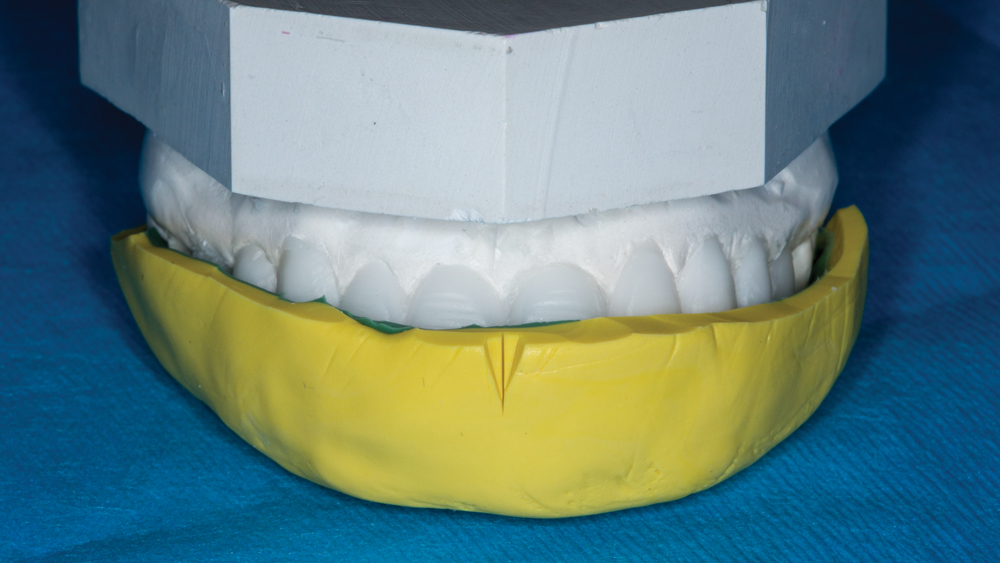
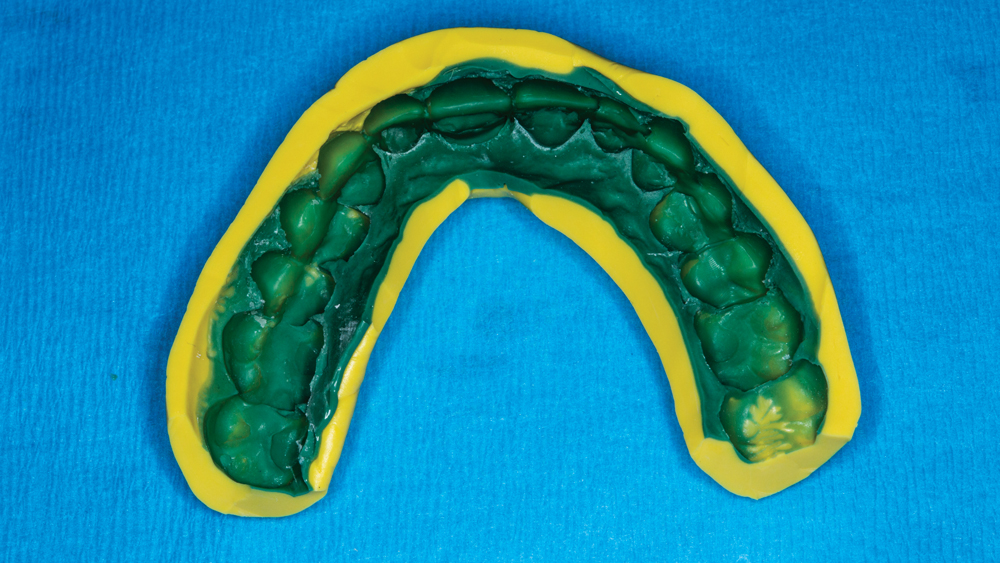
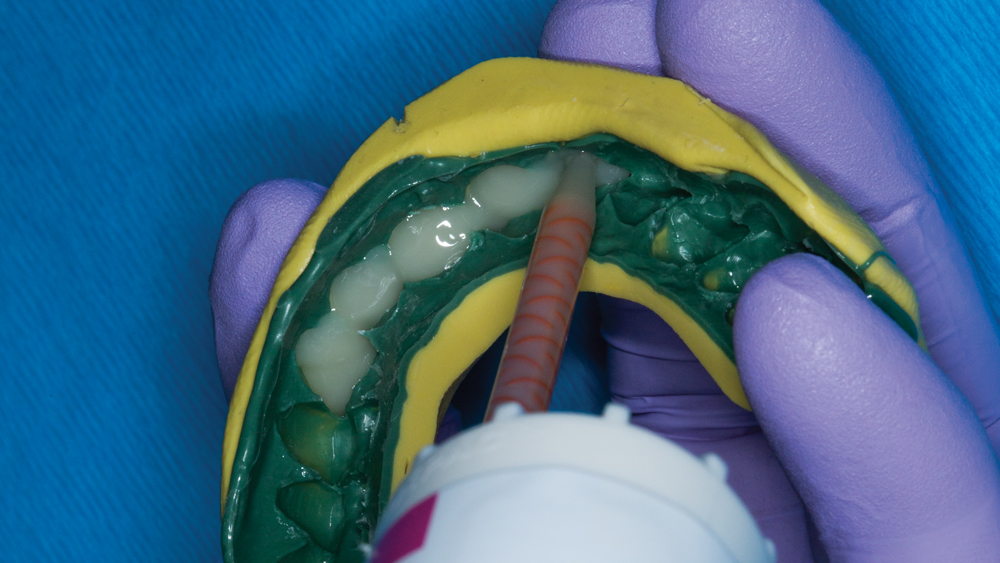
A putty-wash matrix is another key component. Using the matrix to create an acrylic mock-up is an effective way to visualize the planned veneers.
A putty-wash matrix is another key component. Using the matrix to create an acrylic mock-up is an effective way to visualize the planned veneers.
A putty-wash matrix is another key component. Using the matrix to create an acrylic mock-up is an effective way to visualize the planned veneers.
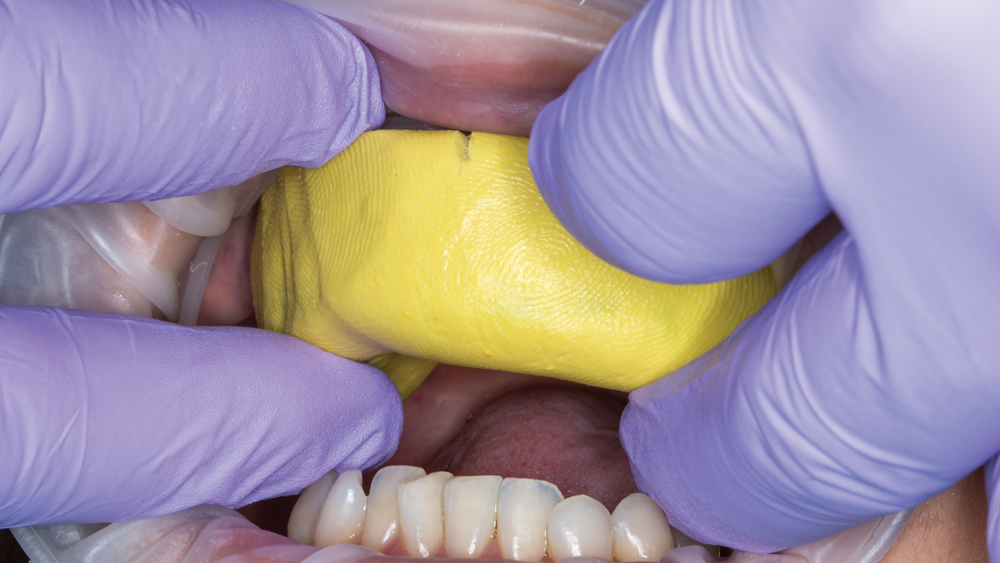
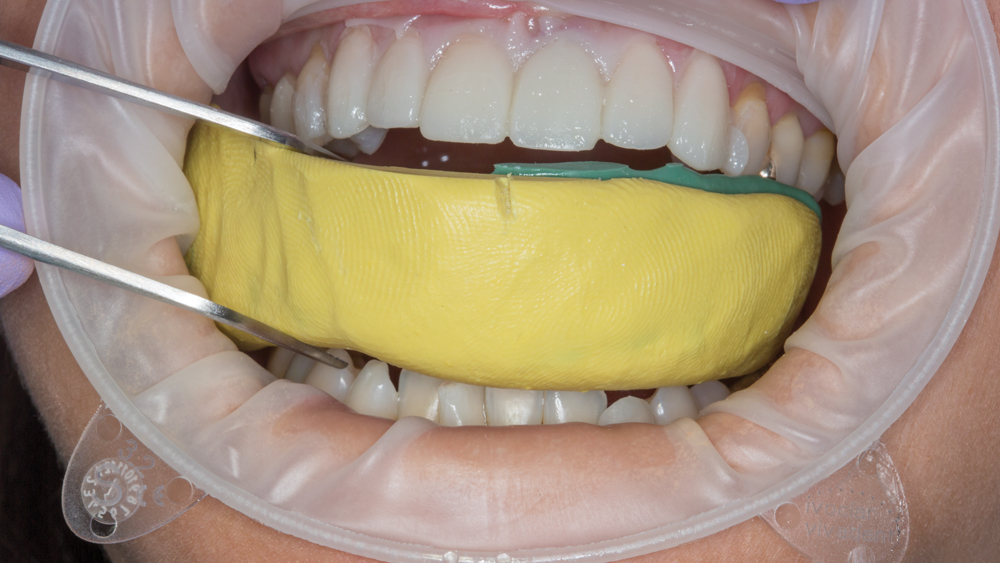
With patient and doctor acceptance, the mock-up then carries new purpose: as a preparation guide.
With patient and doctor acceptance, the mock-up then carries new purpose: as a preparation guide.
- 1
- 2
- 3
- 4
- 5
My view is that a mild degree of tooth preparation is worthwhile to obtain clearer margins. Precise minimal preparations can be accomplished — and as much enamel can be preserved as possible — by using an acrylic mock-up in conjunction with limiting depth-cut burs. A mock-up is always a part of my treatment plan for minimal-prep veneers. I first request articulated diagnostic casts from the lab and evaluate the required extent of preparations. Next, I have the lab send a diagnostic wax-up and putty-wash matrix. I can then use this matrix to create an acrylic mock-up, giving the patient a preview of his or her new smile.
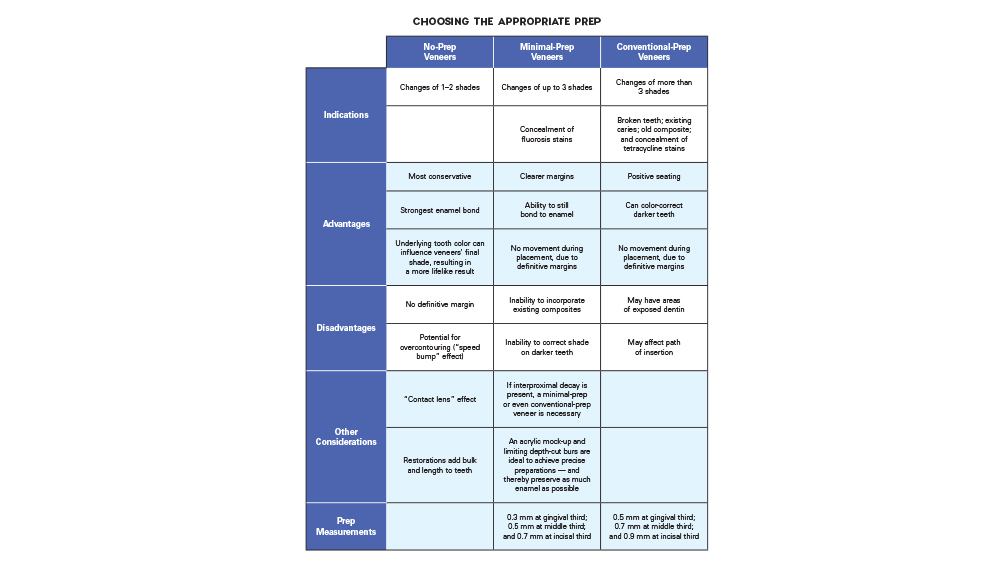
Leaving the approved mock-up in place, I have an efficient template for reduction and can choose burs from the K0233 Winter: Veneer Preparation kit (Brasseler USA; Savannah, Ga.), developed by Dr. Robert Winter. This method enables me to remove enamel only as far as the depth cuts, which means sometimes I’m barely touching the enamel. The more conservatively I can prepare and keep the bond in enamel — while still achieving the desired outcome — the better. In an in vitro study of porcelain veneers, bonding to enamel resulted in “substantially stronger and more damage-tolerant” restorations, compared to veneers bonded to dentin or a combination of enamel and dentin.2
CONCLUSION
Providing patients with veneers is a rewarding and popular service, and being mindful of certain criteria can make for a more straightforward process when choosing between no-prep, minimal-prep and conventional-prep veneers. The patient’s expectations, the condition of the teeth, and the benefits of each veneer design act as funnels for streamlined decision-making. And with these all-important considerations heeded, the patient’s dream of a smile makeover can be realized.
CLINICAL EXAMPLES

No-Prep Veneers — Obsidian Lithium Silicate Ceramic
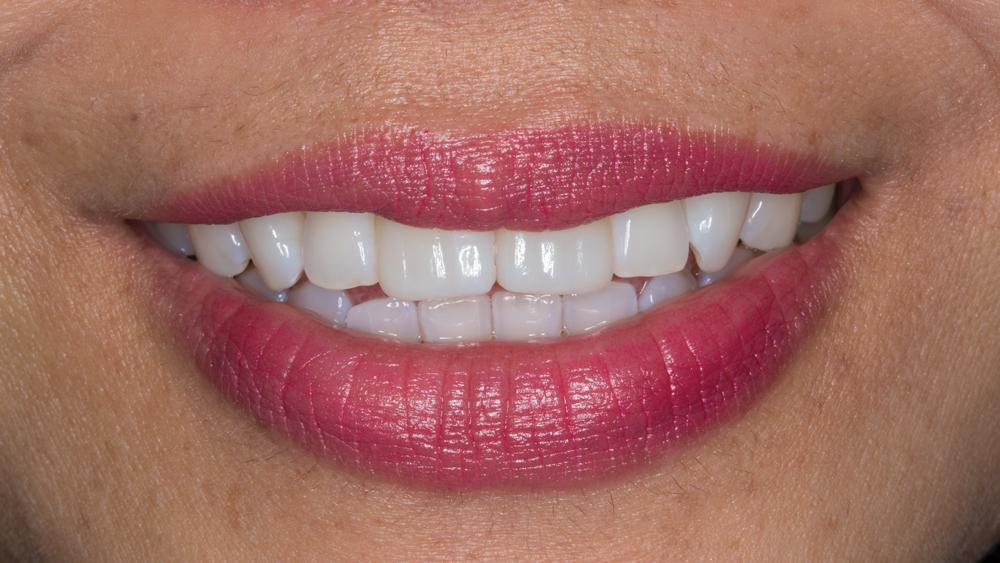
No-Prep Veneers — Obsidian Lithium Silicate Ceramic
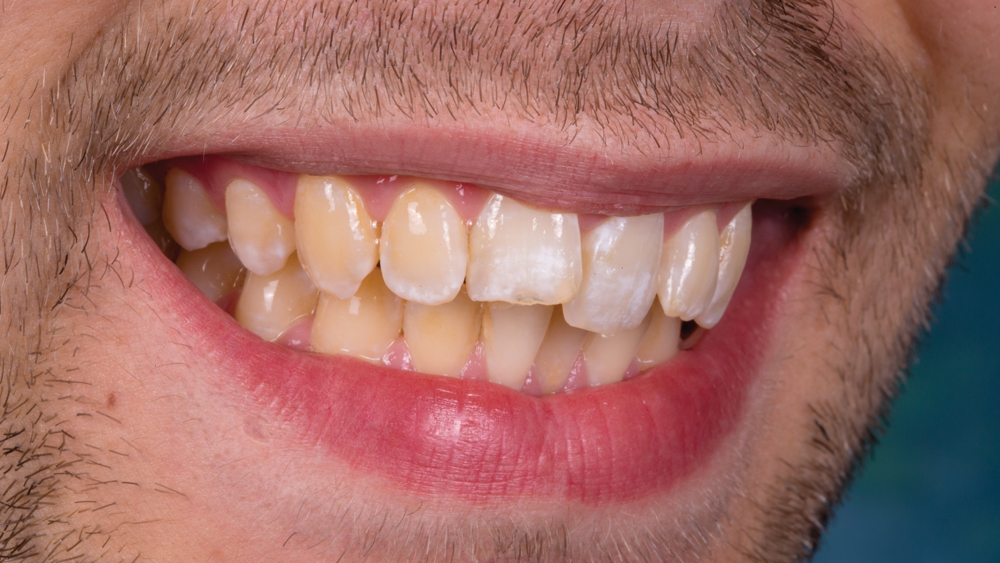
Minimal-Prep Veneers — BruxZir Solid Zirconia
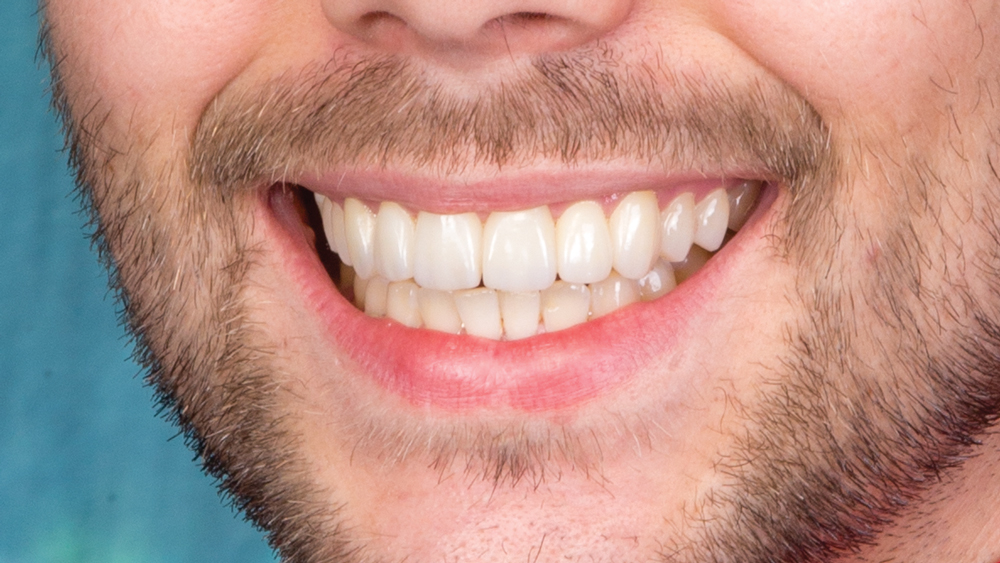
Minimal-Prep Veneers — BruxZir Solid Zirconia

Conventional-Prep Veneers — Obsidian Lithium Silicate Ceramic
Conventional-Prep Veneers — Obsidian Lithium Silicate Ceramic
- 1
- 2
- 3
- 4
- 5
- 6
Available CE Course
References
- ^Peumans M, De Munck J, Fieuws S, Lambrechts P, Vanherle G, Van Meerbeek B. A prospective ten-year clinical trial of porcelain veneers. J Adhes Dent. 2004 Spring;6(1):65-76.
- ^Ge C, Green CC, Sederstrom DA, McLaren EA, Chalfant JA, White SN. Effect of tooth substrate and porcelain thickness on porcelain veneer failure loads in vitro. J Prosthet Dent. 2017 Dec 19. pii: S0022-3913(17)30718-7. doi: 10.1016/j.prosdent.2017.10.018. [Epub ahead of print]