A Unique, Simplified Approach to Post/Buildup Placement with Lab-Fabricated BioTemps®

March 1, 2008
 image
Michael DiTolla, DDS, FAGD
A Unique, Simplified Approach to Post/Buildup Placement Thumbnail photo

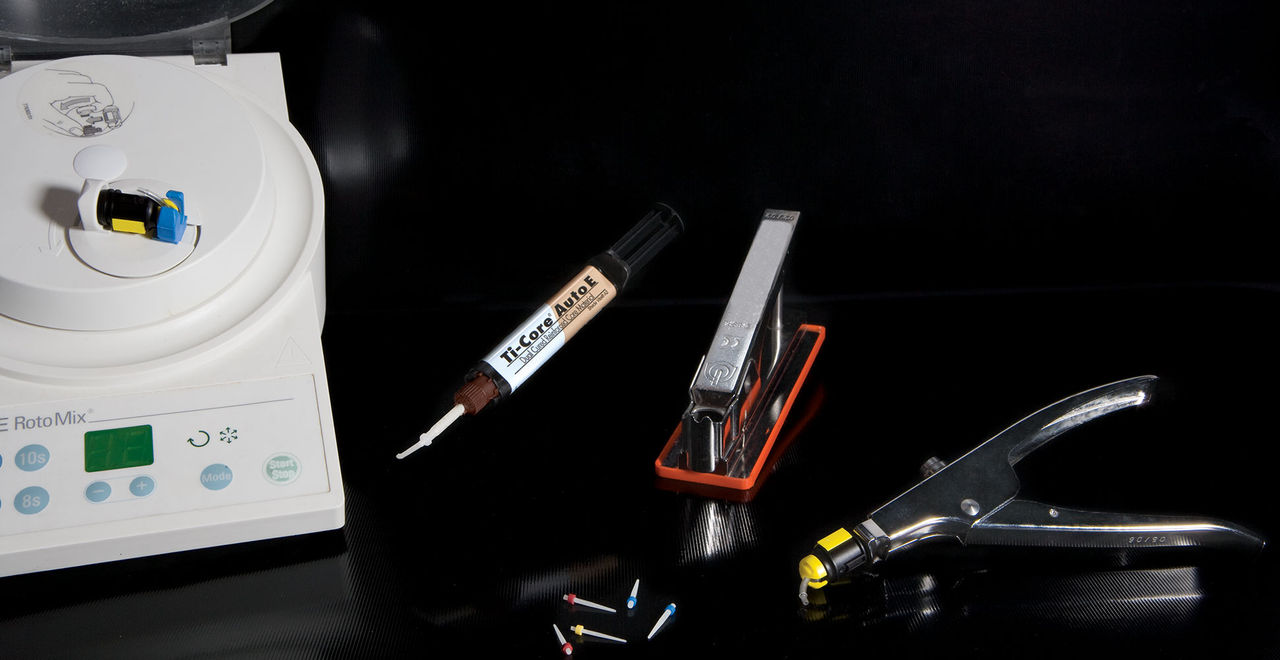
The following presents a fairly straightforward anterior crown & bridge case. However, I wanted to share this case with you because of a technique I use during post and core fabrication, which simplifies the procedure — and that valuable technique is called BioTemps®. I use BioTemps for these types of anterior crown & bridge cases because I can use the lab’s prepped model to shape the tooth preparations. Doing so ensures the BioTemps fall into place with minimum effort. If you have ever seen a BioTemps prepped model, you know that the preps are nearly flawless with approximately 1 mm of stone removed for the preparation. By the time I have replicated these preps with the buildup material and finished shaping them, I have removed the proper amount of material for the final restorations.

Figure 1

Figure 1: This male patient presented with PFM crowns on teeth #7, #8, #9 & #10. Because the patient was unhappy with the appearance of his crowns, we decided to replace them after endodontic retreatment on #8, #9 & #10 (#7 is a pontic). Note the gingival margins of the teeth are not visible when the patient smiles.

Figure 2

Figure 2: Facial retracted view of the preexisting crowns. Teeth #7 & #8 are a 2-unit cantilever bridge. Teeth #9 & #10 are single-unit crowns, and the patient dislikes the metal margin showing on tooth #10. There is a clinical crown length discrepancy between #8 & #9, but because the patient never shows this there is no reason to recontour the tissue. A low smile line is the esthetic dentist’s best friend.

Figure 3

Figure 3: Occlusal view of crowns on teeth #7–10. Again, the crowns on teeth #9 & 10 are single units, while #7 & #8 are a 2-unit cantilever bridge. A prior dentist had placed a metal wing on the distal of tooth #7 to engage the mesial of tooth #6 as an anti-rotational feature. This was a good decision, as it helped to prevent twisting forces on the 2-unit bridge that might act to break the cement seal.

Figure 4

Figure 4: This is a digital radiograph of the preexisting endodontic treatments on the patient. Somehow all three teeth with previous endodontists were symptomatic and had fistulated at some point during the last three months. There was also an extremely short post in tooth #9 that would be removed during retreatment of the three dentitions.

Figure 5

Figure 5: This is the digital radiograph from the endodontist who retreated all three teeth. In addition to performing the root canals, he was instructed to remove enough gutta percha to allow placement of a nonthreaded fiber post two-thirds of the way into the canals. Many endodontists will prepare the post space for you, given they know the post system you plan to use.

Figure 6

Figure 6: Facial view of the BioTemps restoration on the model. I had the lab splint all four teeth together, both to keep them from falling off and for esthetic purposes. However, on these splinted BioTemps, it is important to ensure you do not damage the interdental papilla by leaving the gingival embrasures on the BioTemps closed. Leaving the gingival embrasures open (see Figs. 25, 26) always leads to better esthetics at the seat appointment.

Figure 7

Figure 7: Occlusal view of the prepped BioTemps model. One millimeter of tooth structure has been removed from the stone model to create room for the BioTemps. We told the lab tech that tooth #7 is a pontic, so they have removed it from the model. While these preparations are under-reduced for the final restorations, the shape and contours of the preps are highly desirable.

Figure 8

Figure 8: The lab has fabricated a vacuum-formed splint on the prepped BioTemps model. Normally, I will use this if the BioTemps don’t seat, just to see if I have under-reduced any areas even though I feel like I’m done prepping. In this case, I chose to use the splint to form my buildups.

Figure 9

Figure 9: Facial view of what I uncovered once the old crowns were removed postendodontic retreatment; it’s obvious that posts and buildups will be necessary. In the old days I would have freehanded the buildup, which can be time-consuming and somewhat mistake prone, especially in terms of angulation. Today, however, I prefer to use the splint provided by the lab to make this very simple.

Figure 10

Figure 10: Occlusal view of the teeth upon crown removal. Again, the endodontist has removed two-thirds of the gutta percha and prepared the post space, and I will use 3M™ ESPE™ RelyX™ Fiber Posts on these three teeth. Fiber Posts flex with the tooth, which explains why dentistry has shifted away from rigid metal and zirconia posts.

Figure 11

Figure 11: The RelyX Fiber Posts have been cemented into place with RelyX Unicem low expansion self-etching resin cement. Because of its low expansion, Unicem is great for bonding posts; it reduces the chances of root fractures over time due to cement expansion in roots with thin walls. Unicem is a dual-cure cement, so we direct a curing light at the post while the chemical cure reaction takes place further down the canal.

Figure 12

Figure 12: The vacuum-formed splint from the prepped BioTemps model is tried in over the cemented posts to double-check angulation. Because the splint shows the basic outline of the buildups, we are able to see if our posts are overextended in any direction. To be sure the splint seats correctly, test to see if it snaps onto at least two unprepared teeth on either side of the preps.

Figure 13

Figure 13: With the splint in place, I can see that the post on tooth #9 contacts the lingual portion of the splint. I will use a football diamond bur to shorten the post slightly before I place a lingual bevel on it to ensure it closely matches the shape of the buildup as determined by the splint, which was constructed with the opposing teeth taken into consideration.

Figure 14

Figure 14: With the posts in place and the Unicem light-cured in the incisal portions, we can now begin the buildups. We begin by etching the post and the surrounding dentin, essentially etching all visible tooth structure. Be careful not to leave too much Unicem around the posts — it is cement, not buildup material. I typically remove all the Unicem I can coronally with a scaler, as I want the buildup material between the post and tooth structure to extend for 1–2 mm.

Figure 15

Figure 15: Once etch has been in place for 10 seconds, rinse it off completely. Because I tried to create a small cavity between the post and the tooth structure for buildup material to flow into, I need to make sure I rinse out all etch from inside this small ditch.

Figure 16

Figure 16: Once etch is thoroughly rinsed off, apply Kerr OptiBond® Solo with a microbrush. Make sure to coat all exposed surfaces of the post, as well as all exposed tooth structure. This is one of the other advantages of a fiber post: the strong bond between the bonding agent and fiber post. I feel much better about this bond than I do about bonding agent and a metal post.

Figure 17

Figure 17: After scrubbing the bonding agent into place using a microbrush, it is time to air thin the layer and evaporate the acetone. I use a light stream of air to make sure the trough created between the post and tooth structure is not accruing a pool of bonding agent. Oftentimes I will use just a dry microbrush to thin the bonding agent, which is fine, but you still need oil and moisture-free air to evaporate the acetone or alcohol. I light-cure the bonding agent after thinning and evaporation is complete.

Figure 18

Figure 18: Now for the simple part: first, I fill the BioTemps splint with the buildup material. In this case, I am using Ti-Core® Natural Dual Cure; it sets very hard, which makes it easy to prepare. I have a real pet peeve against softer buildup materials because I hate prepping a tooth when the bur moves from tooth structure to buildup material, and the bur then falls into the softer buildup material and ruins the prep.

Figure 19

Figure 19: Seat the filled splint onto the posts. Be sure the portion of the splint that extends onto the adjacent unprepared teeth fully seats. Once you verify that it does, seat the portion of the splint over the preps using finger pressure until you can see the splint contacting the soft tissue. Ensure the splint is fully seated to avoid overextended buildups.

Figure 20

Figure 20: Because the Ti-Core is a dual-cure material, I want to take advantage of this by starting to cure immediately. This also eliminates the need to hold the splint in place for three minutes while waiting for the dual-cure set time.

Figure 21

Figure 21: My assistant cures the Ti-Core from the lingual as well, to speed up the cure time. I want to begin preparation as soon as possible, and because my splint is translucent, I can cure all aspects and begin prepping as soon as it feels hard.

Figure 22

Figure 22: Remove the BioTemps splint once the buildup material has completely set. As you see, most of the prep shape now exists! At this point, I typically light-cure the buildups again with the splints off; however, I’m not sure this is necessary.

Figure 23

Figure 23: The main difference between the shape of the buildups and the BioTemps prepped model is that the buildups are fused together in the gingival third and need to be separated. This is still much easier than placing one huge lump of buildup material and then cutting three preps out of this shapeless block.

Figure 24

Figure 24: I am using an 856-016 bur to break the contacts between the adjacent buildups. Once separated, the BioTemps should fall into place passively because the buildups were made from the splint of the preps. Because the lab reduces only 1 mm on the models to create space for the BioTemps, additional reduction of the buildups is needed to make adequate space for the final restorations.

Figure 25

Figure 25: The preps are now complete. By separating the preps from each other and defining the gingival margins more clearly, I have gained the additional reduction needed for the final restorations. I am now ready to pack an Ultrapak® #00 cord and #2E cord on top of that, as part of the two-cord technique we use to make optimal impressions.

Figure 26

Figure 26: The two-cord technique ensures excellent impressions with a minimal amount of skill and effort from the operator. Placing a second cord may take more time than does a one-cord technique, but the results are well worth it. I prefer to take a little extra time placing a second cord (and as a result, get a great impression) versus explaining to my patient why their six-month-old crown has open margins and now needs to be replaced.

Figure 27

Figure 27: A proper bite registration is applied on the prepared teeth, as well as the incisal third of the opposing dentition. As you look at this bite registration, notice the pulls in the gingival third. While these pulls typically make an impression highly unacceptable, they are admissible on a bite registration because it will be trimmed back so that only the incisal third of the prepped teeth and the opposing teeth remains. Any areas of bite registration that contact soft tissue must also be removed.

Figure 28

Figure 28: The BioTemps are tried in to ensure passive fit. It is virtually impossible not to have the BioTemps fit perfectly with this technique. Depending on how much reduction you did to the buildups, you may not need to reline the BioTemps; you can simply use temporary cement. However, if the BioTemps rock while in place on the preps, they should be relined prior to cementation.

Figure 29

Figure 29: Notice I have left the gingival embrasures open at this point. This is a very important tip for getting good tissue adaptation when you try in the final restorations. I then tell patients to swish with Tooth & Gums Tonic® or to use a floss threader in order to keep the gums healthy during the two weeks of provisionalization. If you keep the gingival embrasures closed, there is too great a chance you will cause interdental papilla recession. I also insist on having a soft tissue model fabricated for any anterior case like this to ensure the gingival embrasures are closed at the seat appointment.

Figure 30

Figure 30: The final PFM restorations are tried into place. Note the gingival embrasures are ideal, even though they were open on the BioTemps. Although this patient has a low smile line and wouldn’t show the embrasures, if they are open whistling can occur when the patient speaks and the patient will hate how food gets caught in them. The metal margin on tooth #10 is gone because we are using 22kt gold Captek™ for teeth #9 & #10.

Figure 31

Figure 31: Occlusal view of the cemented restorations. We used a conventional PFM for the 2-unit cantilever bridge on teeth #7 & #8 with a mesial rest on #6. We utilized Captek crowns on teeth #9 & #10 because of its esthetic benefits and no gray metal margin, even if the patient experiences some gingival recession.

Figure 32

Figure 32: Facial nonretracted view of final restorations.

Figure 33

Figure 33: Right lateral nonretracted view of final restorations.

Figure 34

Figure 34: Left lateral nonretracted view of final restorations.

Figure 35

Figure 35: Final portrait of the patient with new PFMs on teeth #7–10.

Contact Dr. DiTolla at mditolla@glidewelldental.com or call 888-303-4221.

RelyX Fiber Posts and RelyX Unicem are a trademark of 3M ESPE.

OptiBond Solo is a registered trademark of Kerr Corporation.

Ti-Core Natural is a registered trademark of Essential Dental Systems, Inc.

Ultrapak #00 cord and #2E cord are a registered trademark of Ultradent Products, Inc.

Tooth & Gums Tonic is a registered trademark of Dental Herb Company.

Captek is a trademark of Precious Chemicals, Inc.