In this issue:
Impression Taking – Is It a Lost Art?
Author

If you walk around just about any dental laboratory today, you will no doubt find a large number of impressions for which a vivid imagination is required to find the margins of the preparations they are supposed to have recorded. But finding the margins (and the rest of the preparation) is exactly what we are asking our technicians to do. Otherwise, our full-coverage restorations will have only a slight chance of fitting the preparations adequately. After all of the new products that have been introduced recently to make impression taking less treacherous, how is it that many dentists still struggle with this procedure? Let’s review the latest developments and I’ll give you my take on them.
To stop the bleeding and retract the tissue, “all-in-one” products such as Expasyl™ (Kerr Dental; Orange, Calif.), Magic FoamCord® (Coltène/Whaledent, Inc.; Cuyahoga Falls, Ohio) and GingiTrac™ (Centrix; Shelton, Conn.) are being touted as being gentle, fast and effective. These types of products are supposed to relieve us from the drudgery of having to utilize the dreaded retraction staple (namely, the cord), but the sad fact is their performance leaves a lot to be desired.
Then there are diode lasers that promise to stop bleeding in its tracks and, at the same time, provide direct access to the margins by strategically and atraumatically zapping the tissue. But do we really want to do this unless there is no other option?
The newest impression materials are supposed to somehow find their own way to the margins — regardless of whether you have been able to control bleeding — due to their being hydrophilic (that is, absorbing the blood) or hydrokinetic (that is, moving the blood). While these properties may be of some minimal value, the latest impression materials are not capable of overcoming aggressive preparations that chew up the tissue. And without proper retraction, even these new impression materials still will be unable to find their own way subgingivally to register the margins.


The increasing overuse and/or abuse of closed mouth impression trays also can sabotage even the best of impression materials. Even though the newest trays such as QUAD-TRAY® Xtreme™ (Clinician’s Choice; New Milford, Conn.) and Gripper™ (Discus Dental; Culver City, Calif.) offer improved designs, it is my opinion that these trays should be limited to one or two teeth. Unfortunately, some manufacturers are producing these trays in sizes that permit impressions of even long-span bridges, which encourages dentists to use them for these types of restorations.
Unfortunately, some manufacturers are producing these trays in sizes that permit impressions of even long-span bridges, which encourages dentists to use them for these types of restorations.
I believe we need to get back to basics for our patients’ sake. I learned a long time ago that paying attention to the soft tissue before prepping subgingivally is the single most important aspect of impression taking. In other words, move the tissue out of the way before that coarse diamond you so proudly wield as the ultimate tooth reduction implement traumatizes the tissue beyond recognition and makes it hemorrhage profusely. This usually means using an aforementioned product many dentists consider to be old-fashioned and a nuisance to place — namely, the retraction cord.
I learned a long time ago that paying attention to the soft tissue before prepping subgingivally is the single most important aspect of impression taking.
Nevertheless, here are my steps to logical impression taking:
- Place a single cord in the sulcus of a tooth to be prepared subgingivally before venturing into this forbidden territory. The size of the cord should fit the tooth and should require only minimal packing pressure to place it. When you have finished placing the cord, the tissue should be moved laterally enough to allow your preparation diamond to enter the sulcus without any tissue contact. Note: You may not even have to prepare the tooth subgingivally if you are placing a metal-free restoration and using a clear resin cement for cementation. Not only are supragingival or equigingival margins easier to prepare and healthier for the tissue, they also facilitate impression taking and simplify the luting protocol.
- Use an impression tray that fits both your restoration and, of course, the patient’s mouth. For one or two posterior teeth, a closed bite tray can be adequate, although I still prefer a stock plastic tray in most instances. For three or more preparations, especially if the distal-most teeth are involved, I strongly suggest using a full arch tray. And don’t forget custom trays that can be fabricated relatively quickly using Triad (DENTSPLY Trubyte; York, Pa.). For some patients with unusual anatomic features, a custom tray can be the difference between capturing the impression the first time and having to retake it.
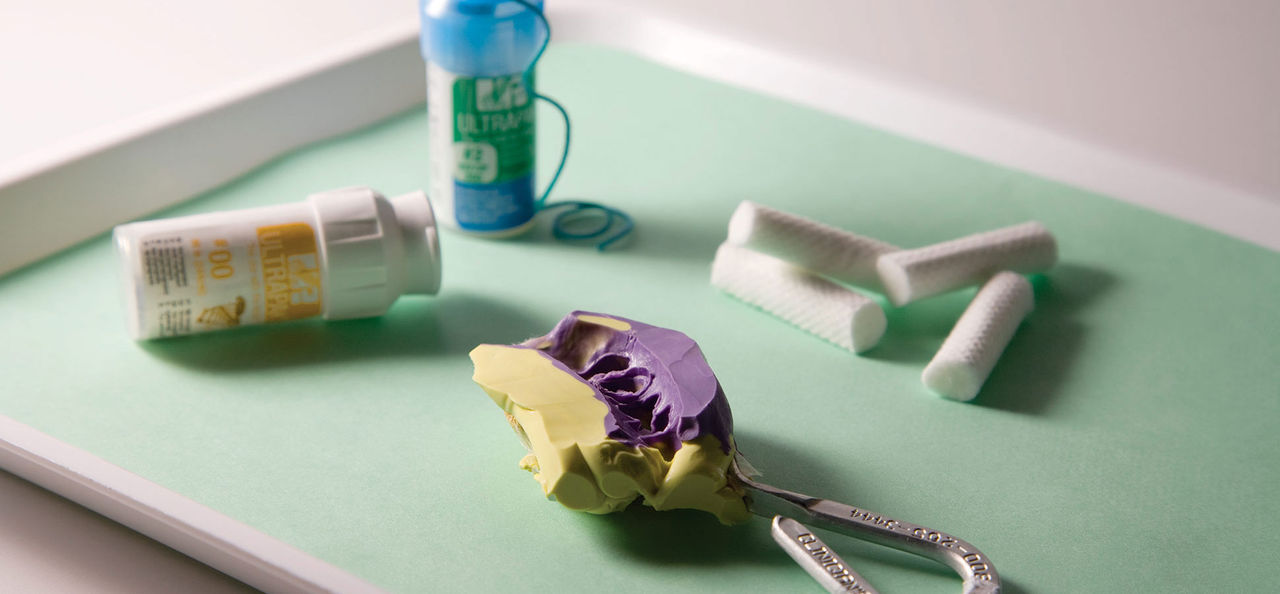
- After prepping the tooth, you may need to place a second cord to ensure that your margin will be fully accessible to the impression material. If you place a second cord, I suggest leaving it in place for at least five minutes. Just for hemostatic assurance, I usually dip the cord in an aluminum chloride medicament such as Hemogin-L (Dux Dental; Oxnard, Calif.).


- Select an impression material whose syringe viscosity has exemplary flow and wetting out characteristics, such as Aquasil Ultra XLV (DENTSPLY Caulk; Milford, Del.) or Imprint™ 3 Light Body (3M™ ESPE™; St. Paul, Minn.). As previously mentioned, these materials will not automatically record a subgingival margin under less than optimal conditions, but they will swing the success pendulum in your favor. However, if the tissue condition truly is compromised, a polyether such as Impregum™ Soft or Permadyne™ (both 3M ESPE) still has the best chance of overcoming the adversity of the situation.
- When it is time to take the impression, have the syringe material ready to inject as soon as you remove the cord. If you can see your margins after just removing the top cord, leave the bottom cord in place. But access, it also needs to be removed. Inject the syringe material using a fine tip placed in the retracted sulcus and continue coating the rest of the preparation. Then seat the tray filled with heavy body material as quickly as possible — we have found in our tests that many of the working times stated by manufacturers are grossly overstated.
- Time the impression from the beginning of mixing and don’t remove it until the timer beeps. Even then, feel the accessible tray material. If it still feels soft, let it dwell in the mouth for another minute or so. The time needed to retake an impression that was removed prematurely is far greater than the time it would take to let it complete its set for an additional minute or so. Having to retake an impression is one of my least favorite tasks, so I go out of my way to get it right the first time. Patients also disdain having to endure retakes. Although no technique works every time, the steps I have outlined should help you in this messy endeavor.
Until digital impressions become commonplace, we are stuck with this task whether we like it or not.
For more information about this article, contact Dr. Michael Miller at mmiller@realityesthetics.com or visit realityesthetics.com.
Reprinted with copyright permission from the Academy of General Dentistry. Copyright ©2007 by the Academy of General Dentistry. All rights reserved.