In this issue:
Matching a Posterior Composite to a BruxZir® NOW Crown
Author

Case Presentation
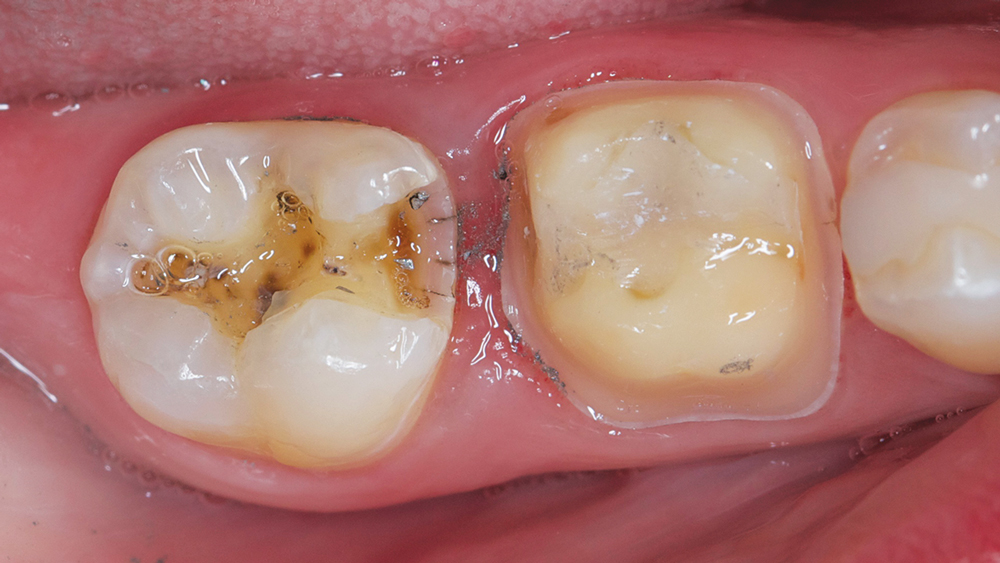
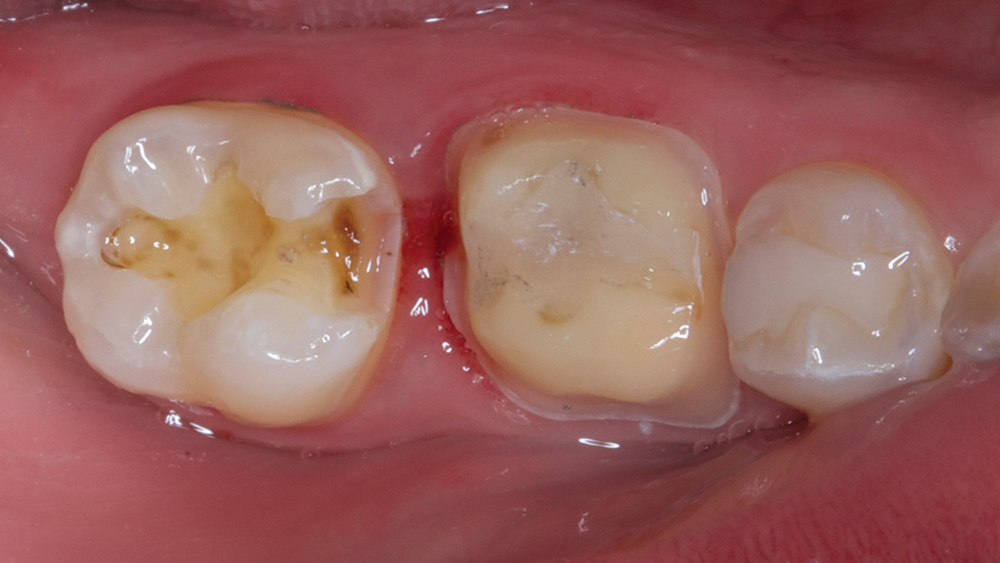
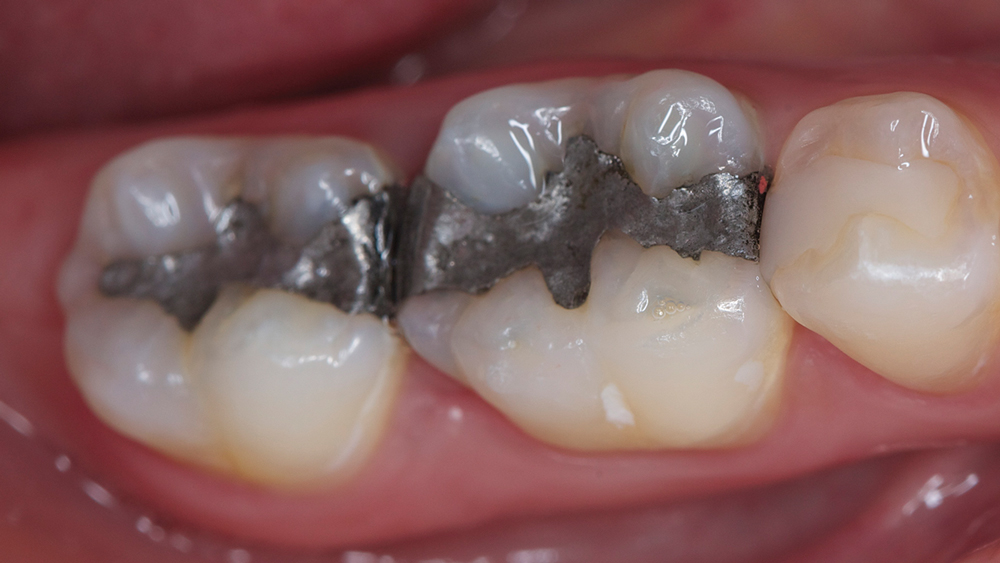
A young female patient presented to the operatory stating she no longer wanted metal showing in her mouth, and requested replacement of the amalgam restorations with a tooth-colored material. Examination showed tooth #30 and #31 with large amalgam fillings and recurrent decay, with #30 exhibiting a distal overhang (Figs. 1a, 1b). The patient also complained that floss would break every time she cleaned between #30 and #31.
After discussing restorative options with the patient, we decided to restore both teeth chairside, with a BruxZir® NOW crown on #30 and Camouflage® NanoHybrid Composite (Glidewell Direct; Irvine, Calif.) on #31. My rationale for choosing the BruxZir material was that using a high-strength monolithic crown would not only provide better esthetics than the existing amalgam but also ensure durability. Also, because of the availability of BruxZir NOW chairside milling blocks, the patient would be able to experience one-visit convenience. To save the patient valuable time, I planned to remove the old amalgam on #31 and prep for the mesial-occlusal (MO) composite while I was milling the BruxZir NOW crown for #30.
On tooth #30, I removed the existing amalgam and recurrent decay. After cleaning the preparation, the large isthmus remaining required a buildup, which I placed with Ti-Core® Flow+ (Essential Dental Systems, Inc.; South Hackensack, N.J.). The preparation was then modified to ensure that 1.5 mm of reduction had been achieved. The 1.5 mm of reduction enables the resulting occlusal anatomy to appear natural-looking and reduces the chance that the crown will need post-mill modifications. Cord was placed and a digital impression was taken (Fig. 2).
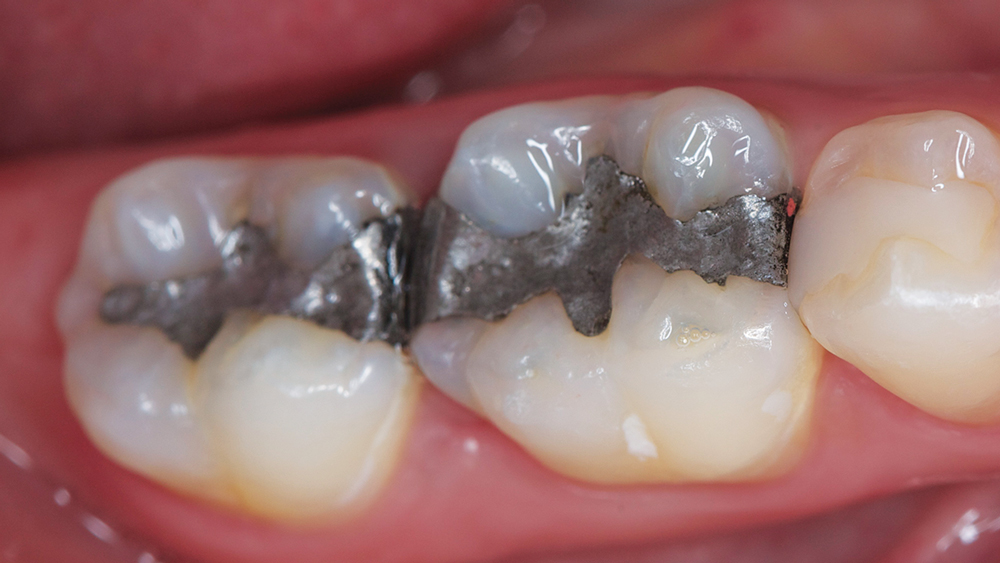
Figures 1a, 1b: Preoperative view of tooth #30 and #31.
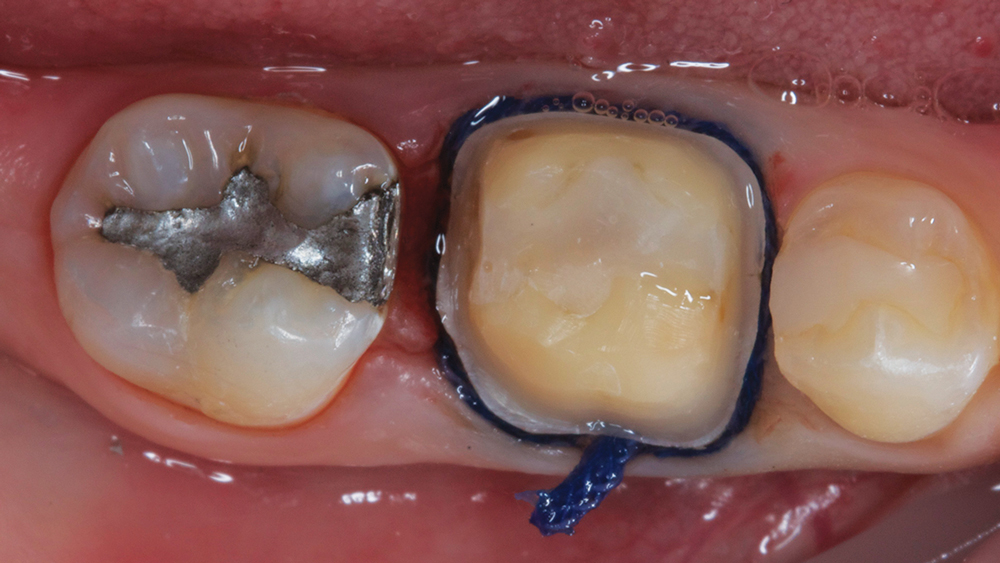
Figure 2: Prior to taking the digital impression, tooth #30 was reduced by 1.5 mm and cord was placed.
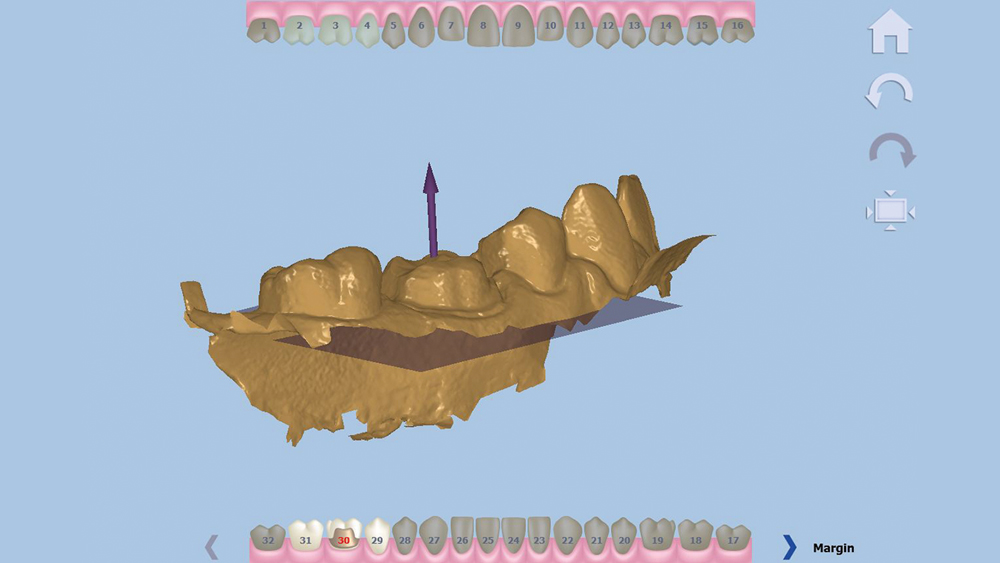
Figure 3: The design software asks the user to indicate the direction of the occlusal.
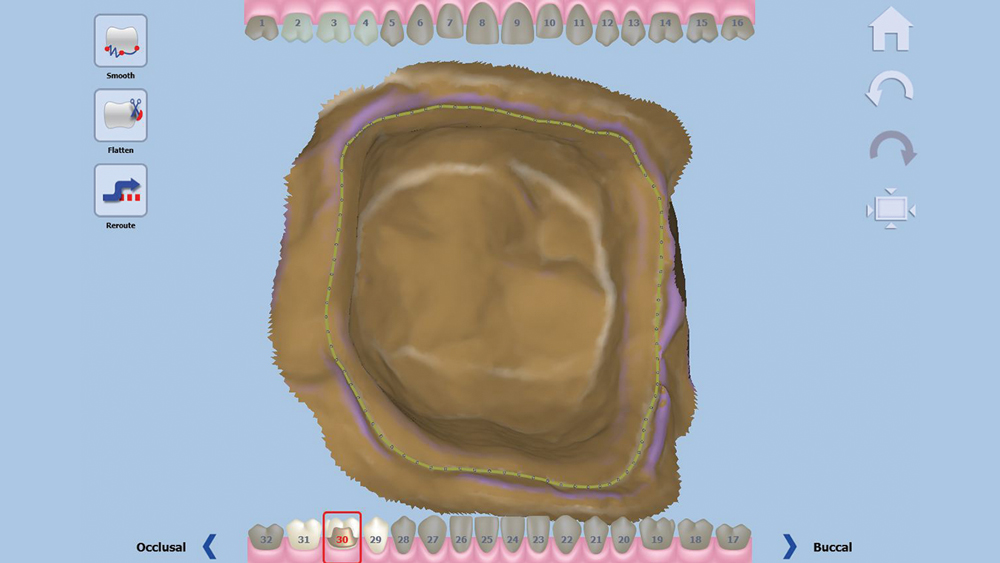
Figure 4: The user is asked to confirm the generated outline of the margin. If the line does not match, it can be adjusted digitally using tools in the software.
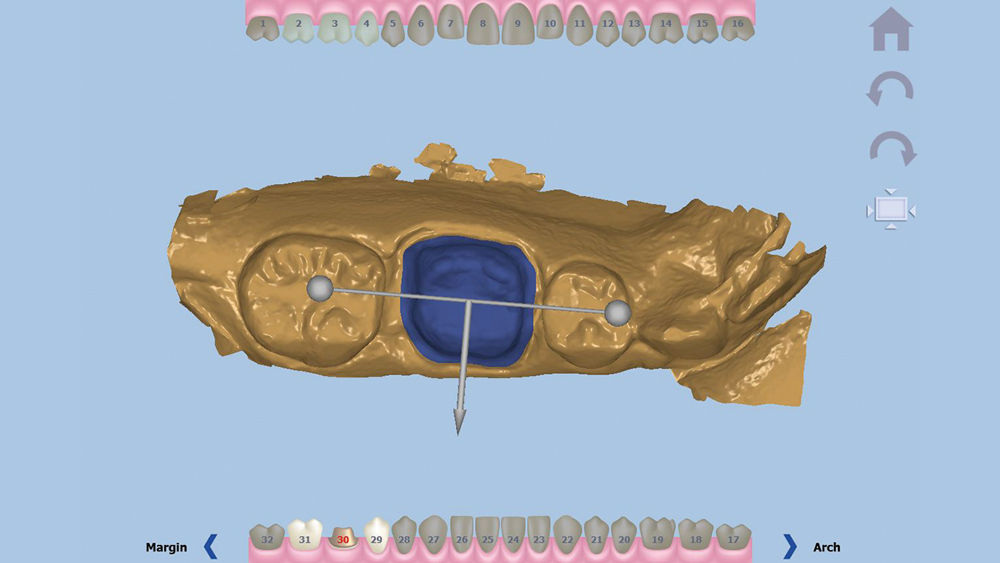
Figure 5: With the occlusal direction and margin confirmed, the user indicates the buccal direction.

Figure 6: The software generates an anatomical crown design over the prepared area.
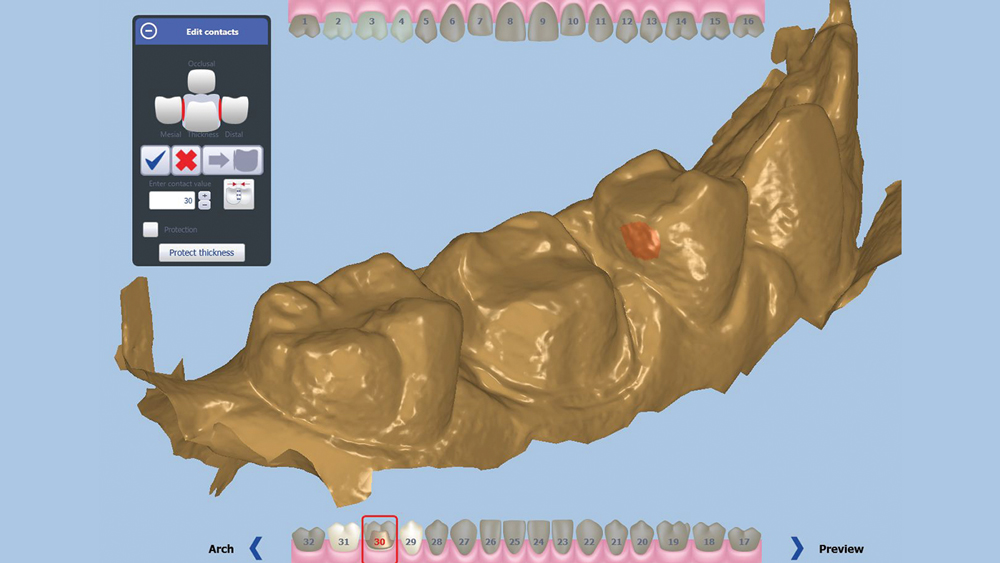
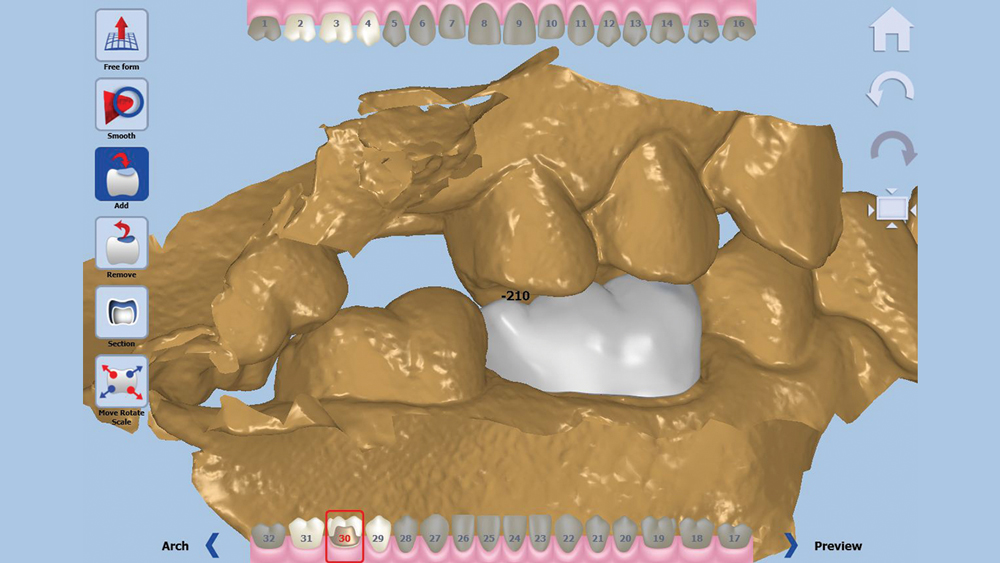
Figure 7: The contacts were broadened by 20 microns.
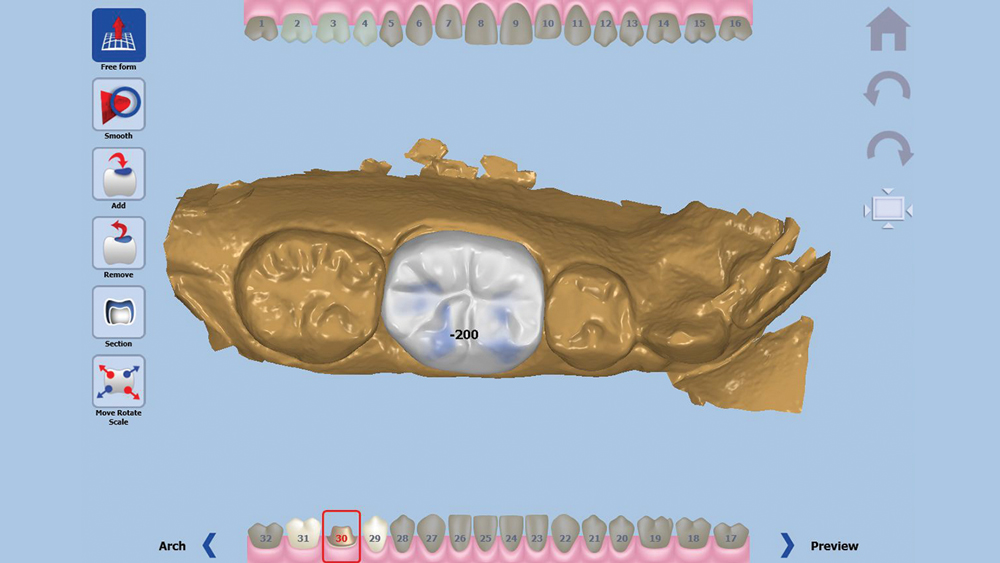
Figures 8a, 8b: The occlusion can be adjusted with or without the opposing in view. For this case, the restoration was taken out of occlusion by 200 microns.
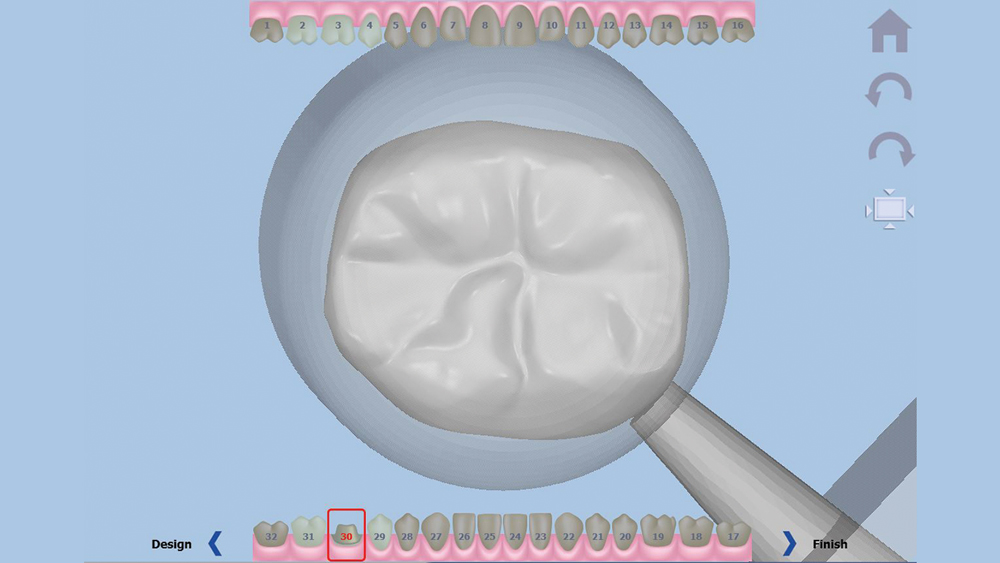
Figure 9: The final stage of the design software is placing the sprue.
Once the digital impression is uploaded, the software asks the user to confirm the occlusal direction of the restoration, the outline of the margin, and the buccal direction. With this information, a crown design proposal is automatically generated.
Once the digital impression is uploaded, the software asks the user to confirm the occlusal direction of the restoration, the outline of the margin, and the buccal direction (Figs. 3–5). With this information, a crown design proposal is automatically generated (Fig. 6). This design is the result of hundreds of thousands of approved cases delivered by Glidewell Laboratories, ensuring the anatomy will meet the clinician’s standards. Slight adjustments were made to this proposal, including broadening the contacts by 20 microns and reducing the occlusion by 200 microns (Figs. 7–8b). With the proposal satisfactory, a sprue is added to the design and the crown is sent to the chairside mill (Fig. 9).”
Because BruxZir NOW milling blocks consist of a fully sintered material, we are able to avoid the additional time of sintering after milling needed by other chairside zirconia materials. The strength and toughness of the BruxZir material leads to a chairside milling time of approximately 40 minutes. Knowing this, I organized my patient’s appointment for efficiency and planned to remove the amalgam on #31 during the milling phase of #30. (Figs. 10a, 10b). The resulting Class II composite preparation exhibited rounded internal line angles and a beveled cavosurface that exposed the maximum amount of enamel to promote bond strength.
The strength and toughness of the BruxZir material leads to a chairside milling time of approximately 40 minutes. Knowing this, I organized my patient’s appointment for efficiency.
When the BruxZir crown for #30 finished milling (Fig. 11), I was able to deliver it immediately after sprue removal and a quick polishing. For this case, however, I wanted to provide a more natural look, so I decided to add optional occlusal colorization to the BruxZir crown in order to achieve a more esthetic match. My assistant placed stain within the occlusal grooves and then glazed the restoration (Fig. 12). After a short 10-minute firing cycle the restoration can cool and then is ready for delivery.
The BruxZir NOW crown was delivered using Ceramir® Crown & Bridge cement (Doxa Dental Inc.; Chicago, Ill.). The restoration was milled with accurate mesial and occlusal contacts, so no adjustments were necessary. After eliminating the excess cement from the crown, I isolated tooth #31 using the Isolite® Illuminated Dental Isolation System (Innerlite, Inc.; Santa Barbara, Calif.) and the Triodent™ V3 Sectional Matrix System (DENTSPLY International; York, Pa.) (Fig. 13).
Figures 10a, 10b: While the BruxZir NOW crown was being milled, the amalgam on #31 was removed.
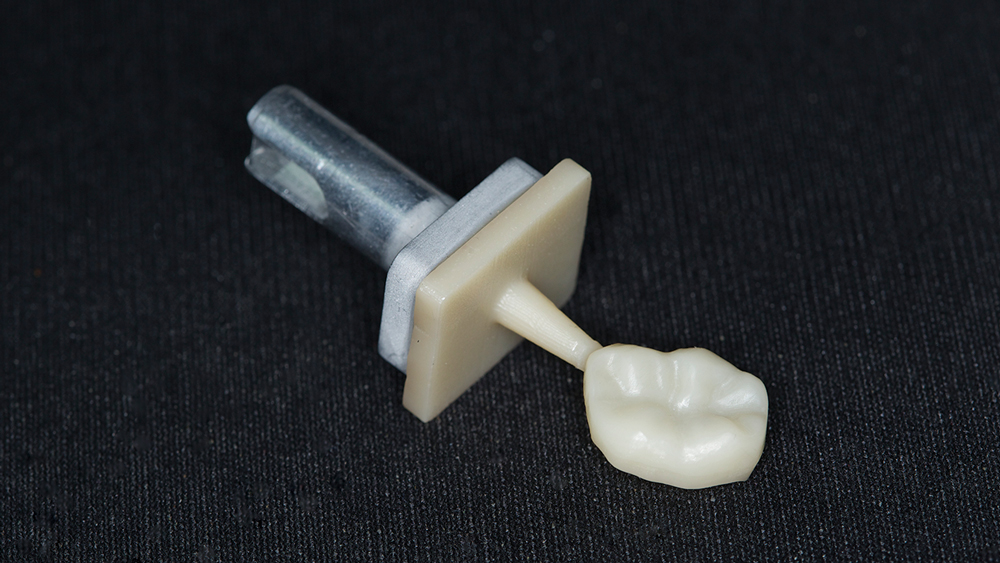
Figure 11: The milled BruxZir NOW crown can be seated directly after milling; however, for this case I decided to add custom staining.
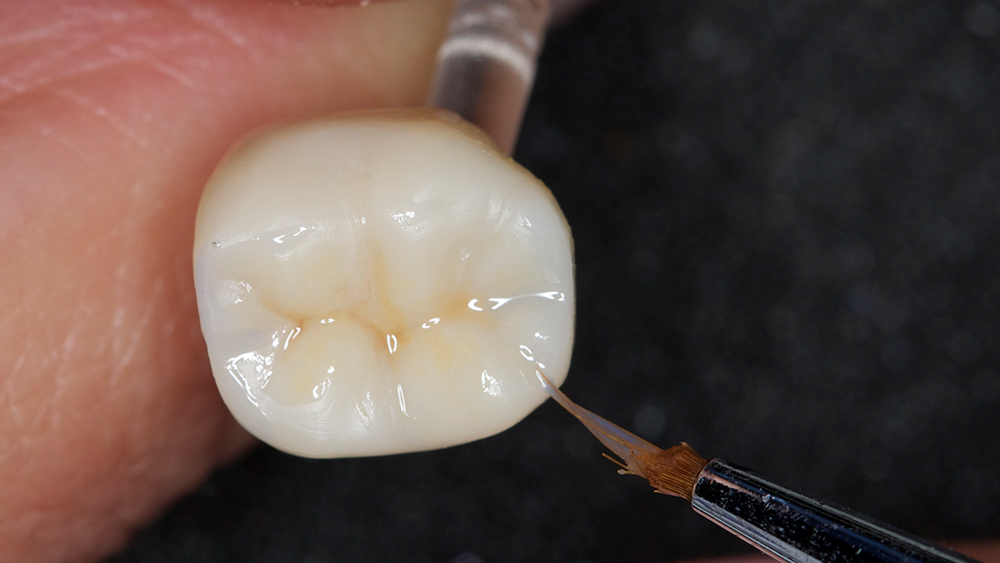
Figure 12: Occlusal stain was placed in the grooves of the BruxZir NOW crown.
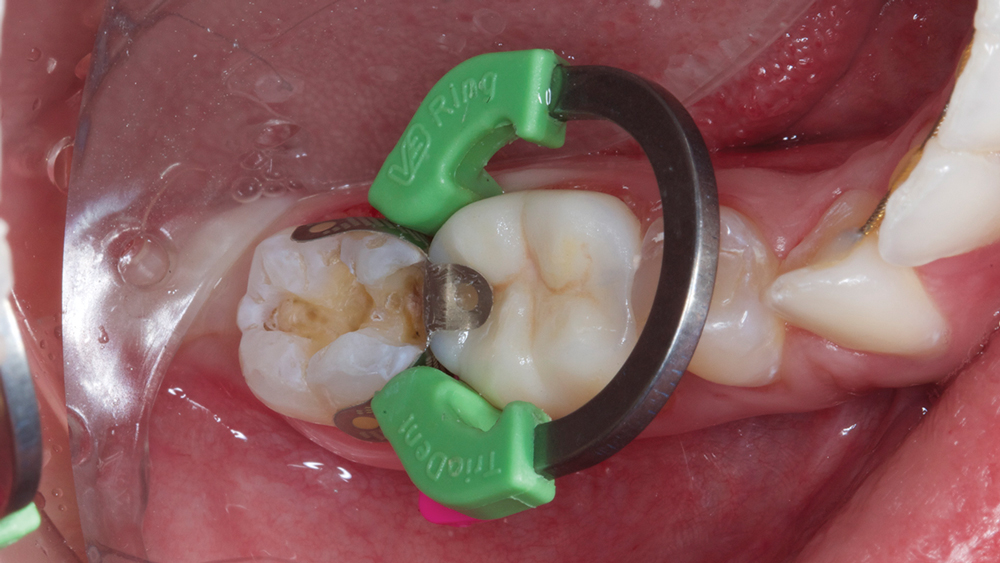
Figure 13: Isolation for the composite on #31 was achieved by using the Isolite Illuminated Dental Isolation System alongside the Triodent V3 Sectional Matrix System.
Camouflage composite offers a variety of hues, chromas and values. To accomplish an anatomical and color-matched restoration, I combined the incremental and layered techniques of placing composite. With the incremental technique, I place composite in small increments no more than 2 mm thick, which allows me to predictably control shrinkage and depth of cure. With the layered technique, we begin the layering process with a dark shade, and then move sequentially through the available shades to the desired final shade. This technique creates an esthetic outcome with a depth of color built into the restoration. Merging these two techniques together, by applying sequential shades in increments of no more than 2 mm, creates a result that emulates the appearance of natural dentition.
The prepared tooth #31 was etched and bonded. Layers of Camouflage were placed in increments that were no more than 2 mm thick and touched only two surfaces. For example, one layer will touch the gingival floor and an axial wall. By placing small amounts of composite in this manner, a low configuration factor (C factor) will be achieved, which reduces the amount of shrinkage that occurs within the composite during polymerization. The layers mimic the appearance of natural tooth structure because I used darker dentin chroma (A3) in the deeper portion of the preparation and then applied lighter and lighter shade increments, light-curing each layer for 15 seconds.
The composite layers should be placed in such a way as to follow the anatomical structure of the tooth to minimize the amount of contouring needed with a handpiece. Before placing the last layer, I used a composite stain from Kerr to simulate occlusal pits and fissures, and cured for 10 seconds. The final layer was A1 enamel, which was cured for 15 seconds. After contouring was completed, the Isolite device was removed and the occlusion checked.
Composite polishing cups and points were used in series from coarse to fine. To ensure a sealed margin that would last longer and be less prone to staining over time, a surface glazing step was completed after polishing. A layer of etchant was placed on the margin of the restoration for 10 seconds, then rinsed with a copious amount of water and air-dried. A protective coating of GC Fuji COAT™ LC — a light-cured glass ionomer sealant from GC America (Alsip, Ill.) — was placed using a microbrush, aspirated until there was no rippling, and light-cured for 20 seconds.
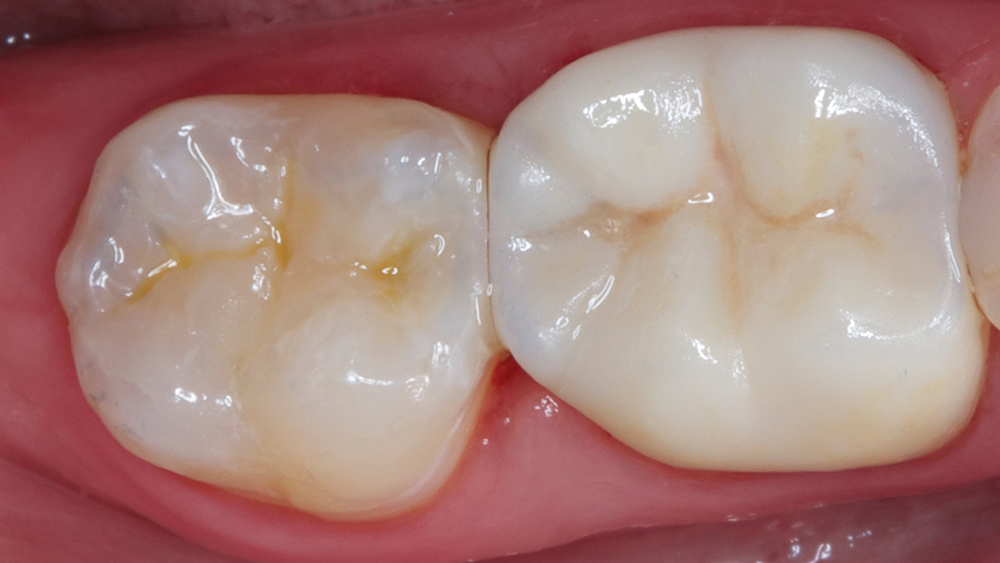
Figures 14a, 14b: Camouflage composite was used alongside a BruxZir NOW crown to create an esthetic result with a fully in-office workflow.
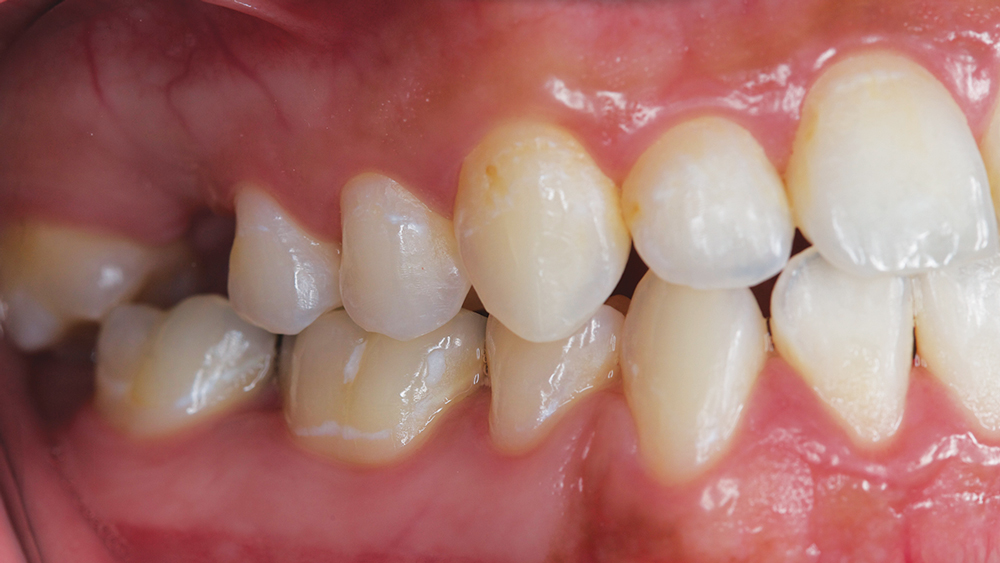
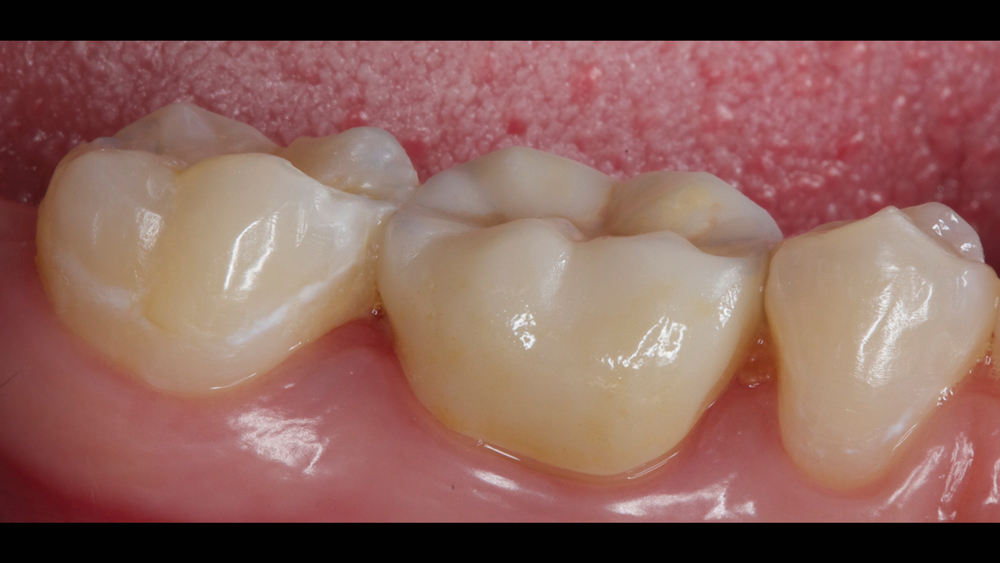
Figures 15a, 15b: A before and after view of the case.
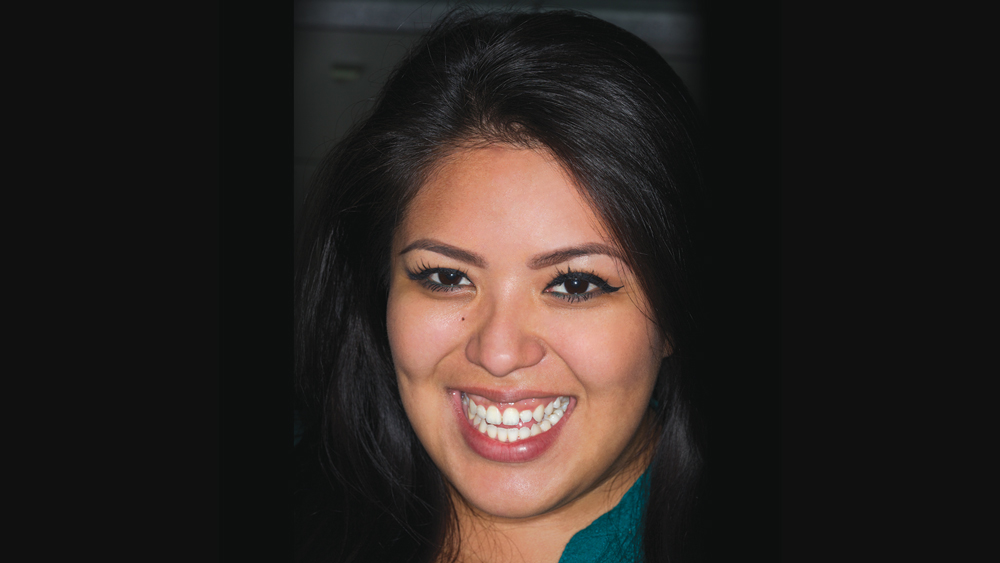
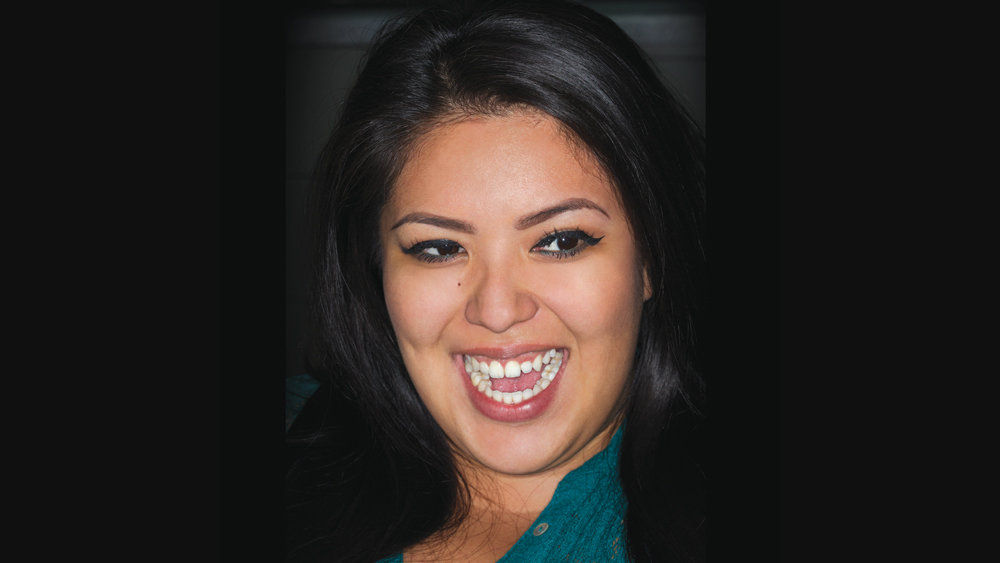
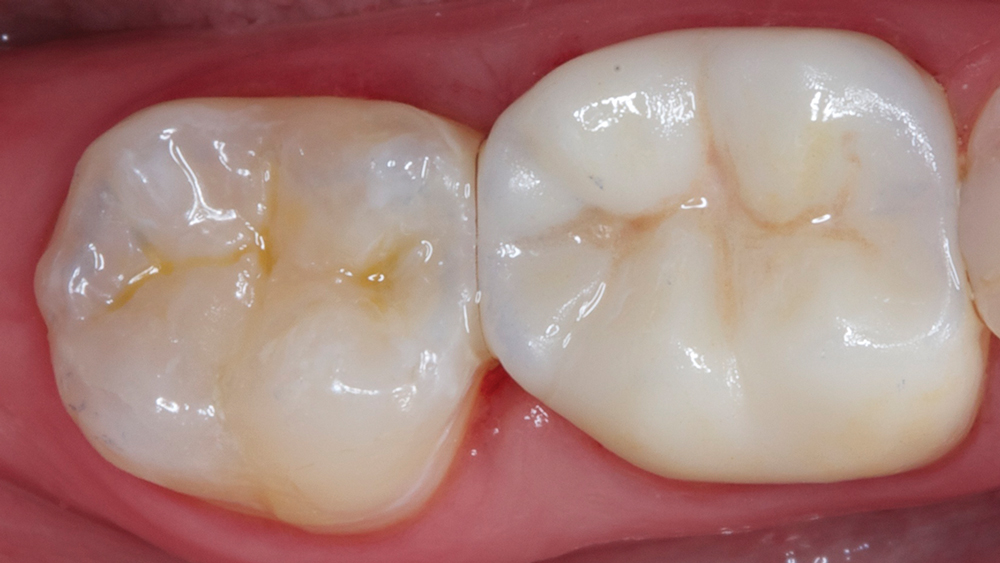
Figures 16a, 16b: The patient was pleased to be rid of her metal restorations.
The combined incremental and layered techniques created a natural depth of color within the composite restoration. Note how the two different materials, nanohybrid composite and monolithic zirconia, blend esthetically with the patient’s natural dentition (Figs. 14a, 14b). I was able to satisfy the patient’s desire for removing the amalgam in a single appointment (Figs. 15a, 15b). The patient loved her one-appointment results (Figs. 16a, 16b).
Conclusion
In-office milling has become increasingly accessible to private practitioners. The procedure is now easier, more accurate and less time-consuming, and newly available materials enable the clinician to produce chairside results that rival those produced in a commercial laboratory.