QC Alert: Avoiding Dreaded Remakes – Case of the Week: Episode 85

February 23, 2015
 image
Michael DiTolla, DDS, FAGD

We’ve got a great Case of the Week for you from Episode 85 of “Chairside Live.” It’s from a dentist who is actually a pretty big account here at Glidewell Laboratories, and she’s a really good dentist. She had been frustrated with some of her results, and I think they have to do with the impressions. I wanted to take some time to present alternative methods that might give her better results. They might be a little more time-consuming than those you’re doing now, but they’re completely worth it if you can eliminate remakes and adjustments in your office, and avoid having to send things back to the lab. So, let’s take a look.

Figure 1

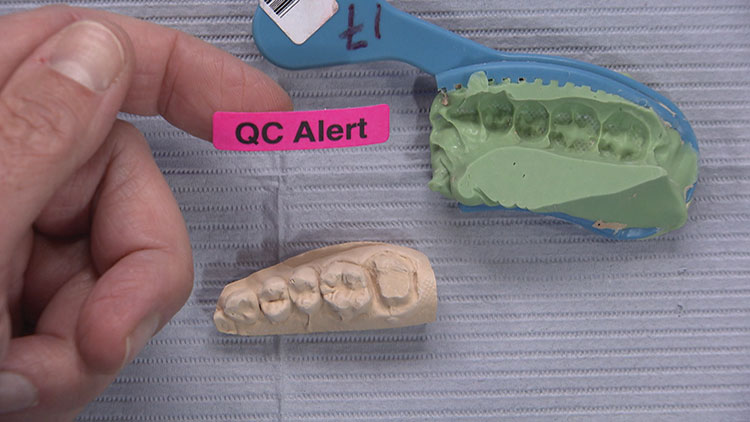
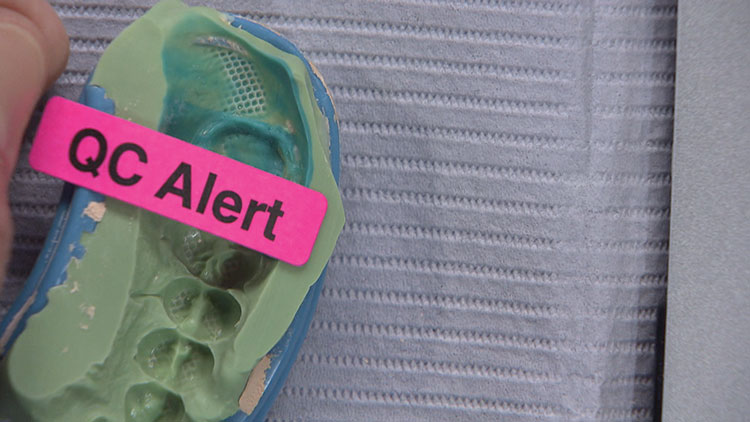
Figure 1: I was walking through the lab the other day and I saw my favorite sticker. That’s right: “QC Alert.” This means somebody from quality control needs to take a closer look at this case. And coincidentally, this is a dentist I know personally. She’s been working with us for a number of years and started to experience more remakes, and I think it really comes down to the impression more than the prep. Regardless of the quality of the prep, if the information is not properly picked up in the impression, there is a chance of recurrent decay because the resulting restoration is going to match the bad impression and not the actual prep. If a prep is not reduced enough on the lingual, there’s reduction copings and other things. The prep can always be fixed at the seat appointment, while the impression cannot.

Figure 2

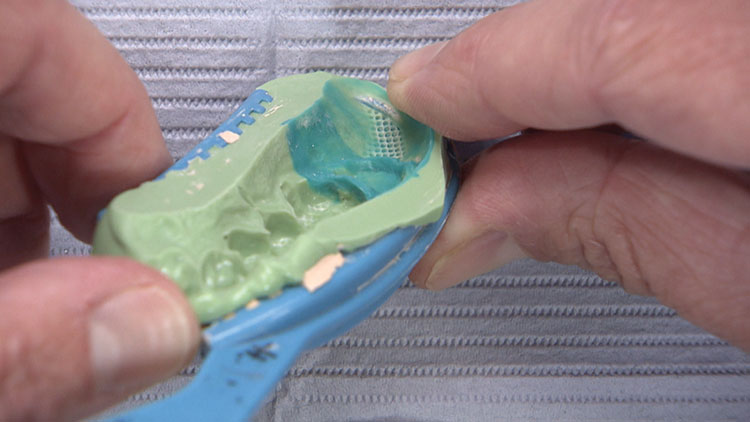
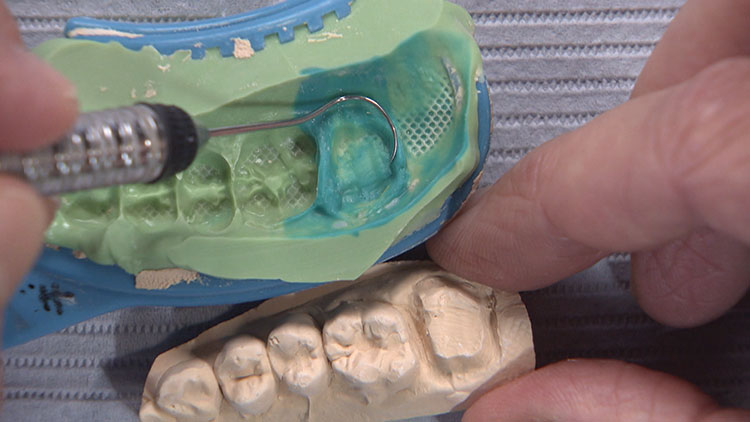
Figure 2: This impression for a BruxZir® Solid Zirconia crown on a second molar was taken in a double-arch plastic tray, which has got pretty good stiffness to it. The prep gets a little close to the plastic, but it’s really more about the look of the margin on the impression. Trust me, every impression I took for the first 15 years of my career looked exactly like this one.

Figure 3

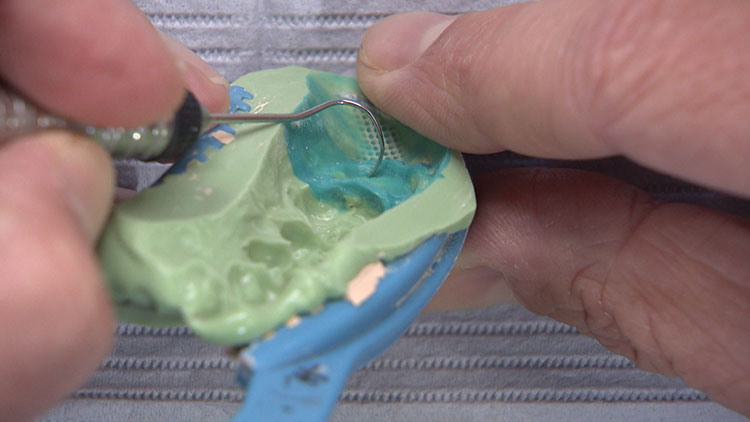
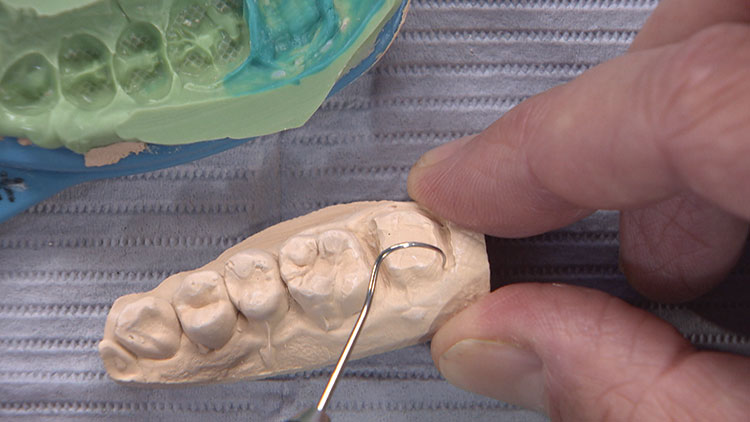
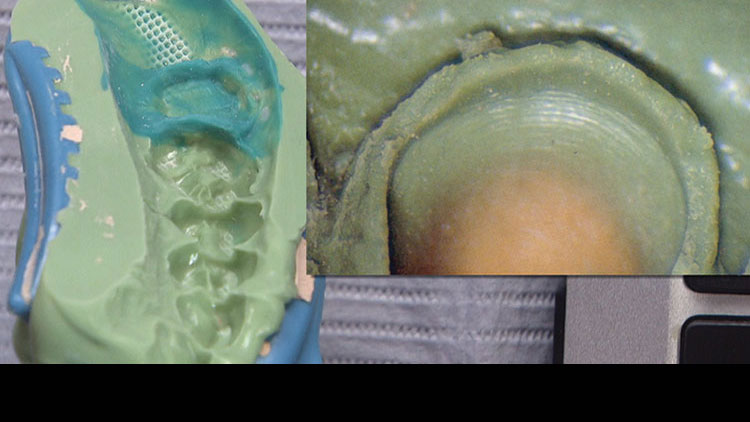
Figure 3: I was OK with my impressions at the time because it appeared that I had gotten the margin, but now I know that unless you can see impression material beyond the margin, you haven’t quite gotten it. This dip right here is a good example. It’s hard to tell whether that’s what the actual margin does, or if in fact that’s short of the margin, because we don’t have any material beyond that point.

Figure 4

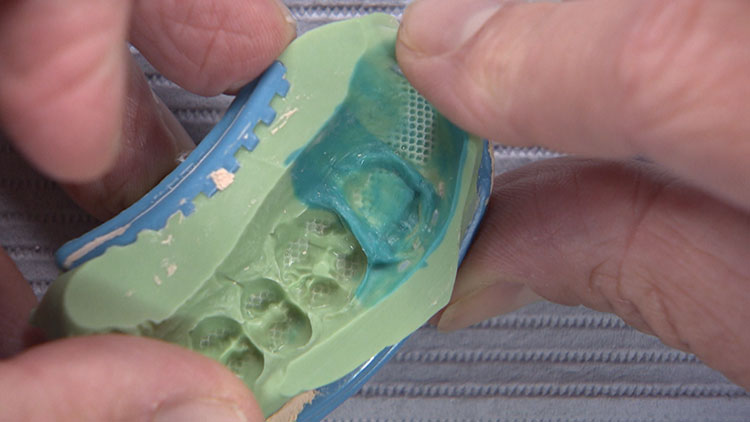
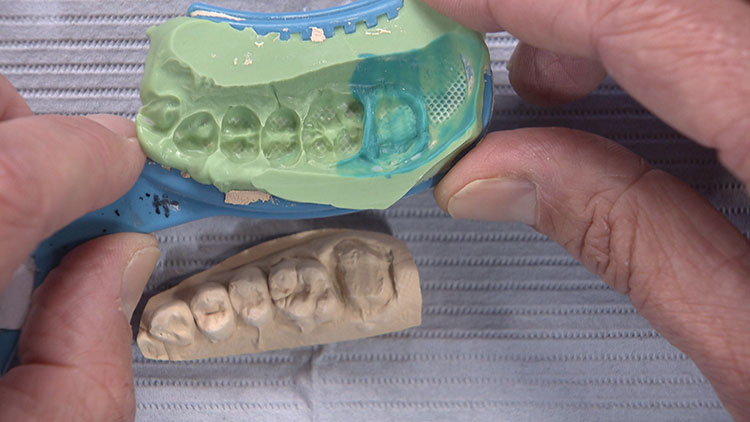
Figure 4: I used to think an impression like this was OK to be sent to the lab, but I don’t feel that way anymore. My time at the lab has made my eyes better at recognizing what a good impression is supposed to look like. The result of that enlightenment is the two-cord technique that I blab on about all the time; the technique that allows me to get great results with my very average set of hands.

Figure 5a
Figure 5b

Figures 5a, 5b: When you take an impression like this and the very edge of it is also the margin, what happens is once we pour it up in the lab, the prep goes down and then it just stops right against the stone. There’s no real way for us to tell if that is in fact the end of the margin. We have to trim it there and hope for the best. Even if it’s not a perfect prep in some other areas, if it’s a great impression, it can probably be worked with.

Figure 6

Figure 6: This impression is far from being the worst. When I show a really bad impression in a lecture, everybody “oohs” and “ahhs” because they know there’s something wrong with it, but they can’t specifically say what it is. Once it’s poured up, though, you go: “Oh, that’s what’s going on there. That’s what the problem is.” As dentists, we don’t always get to see the poured-up model, so we need to get good at looking at the impression, and knowing when it’s going to create a good model.

Figure 7

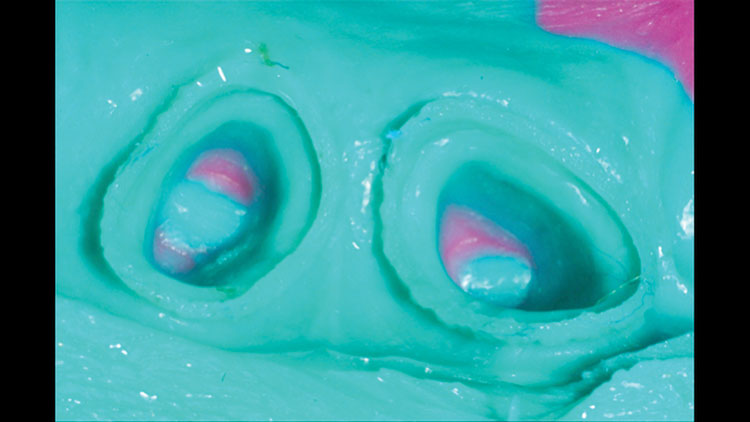
Figure 7: I talked to this dentist and sent her a few photos of what I feel are exemplary impressions. This is a picture of an impression I took where I used the Two-Cord Impression Technique alongside my Reverse Preparation Technique. That’s what gives you this kind of result. It’s this wall of material around the perimeter of the prep that lets the technician know the margin is right there. It’s clear as a bell where it is. This is the kind of case you give to somebody who’s been out of dental technician school for two weeks, because it’s simple enough that you could teach one of your kids to do it.

Figure 8

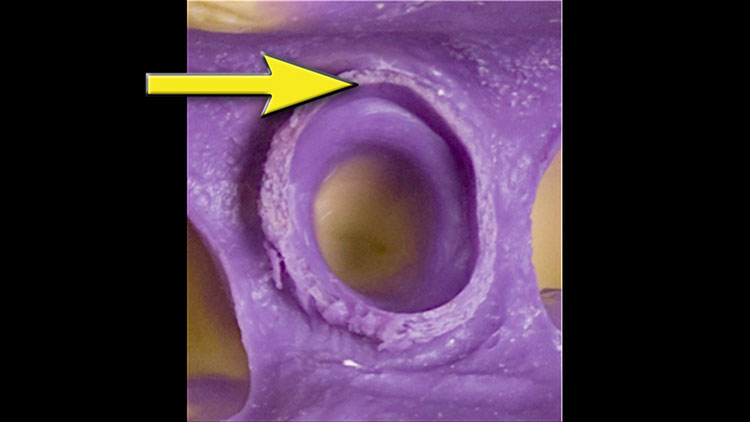
Figure 8: It was clear when I looked at her impression that it was just a one-cord impression; I’ve taken so many one-cord impressions, I know what they look like. When you see a margin like the one the arrow points to, this is what a two-cord impression looks like. The only other way to get a margin like this is by using a diode laser. Getting the thickness we see here is important because it won’t bend back and forth as we’re pouring in the die-stone. The thickness of this margin material is actually due to the bottom #00 cord that stays in the sulcus during impression. Keeping that cord there gives us that margin and prevents any bleeding that might occur with a one-cord impression.

Figure 9a
Figure 9b

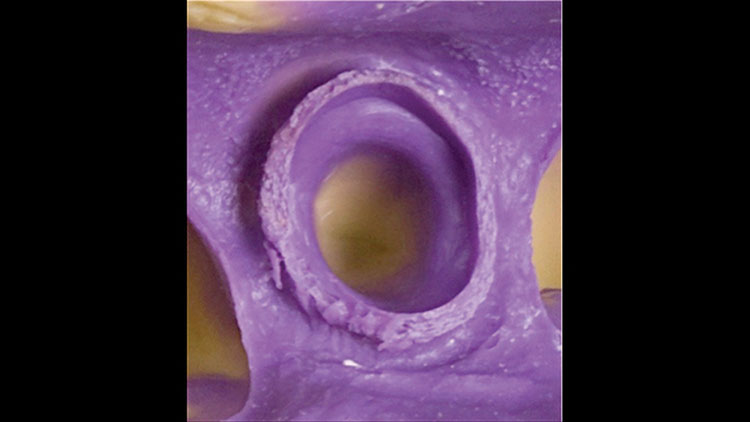
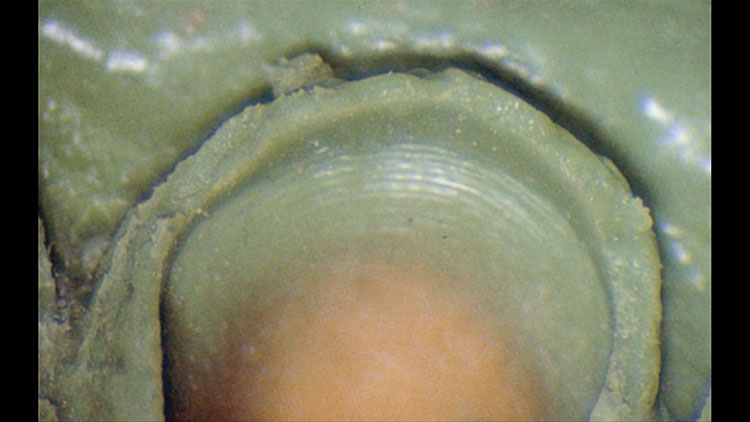
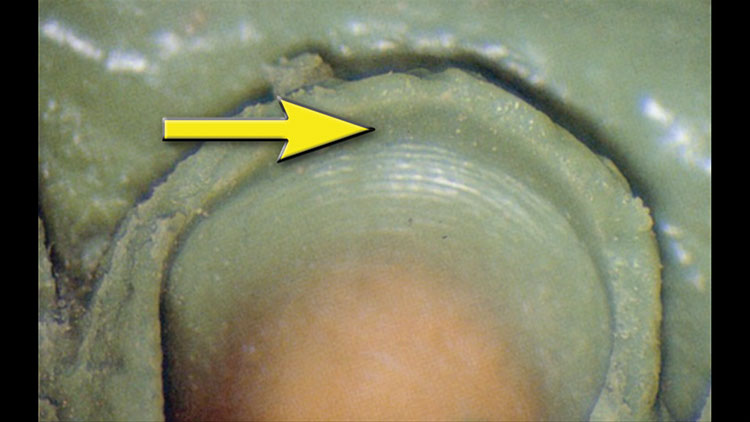
Figures 9a, 9b: Here’s a more detailed example of a two-cord impression. You can see exactly where the bur marks are on the margin, and exactly where it transitions to the root surface. Giving the technician an impression with 1 mm of root surface lets them really dial in the emergence profile. Whether it’s digitally or by wax, they can really blend the gingival third of the crown with the contours of this root surface here. In fact, if you’re taking impressions like this and not getting stunning crowns back from your lab, whether it’s us or somebody else, you have a right to be angry and should probably switch because this is as good as it gets. And again, you can really only get these results with the two-cord technique or with the diode laser. For me, the two-cord is the more useful of the two because that’s the one I’m going to be using on anterior teeth. With diode lasers I have a tendency to lose tissue-height on anterior teeth, and that’s worrisome.

Figure 10

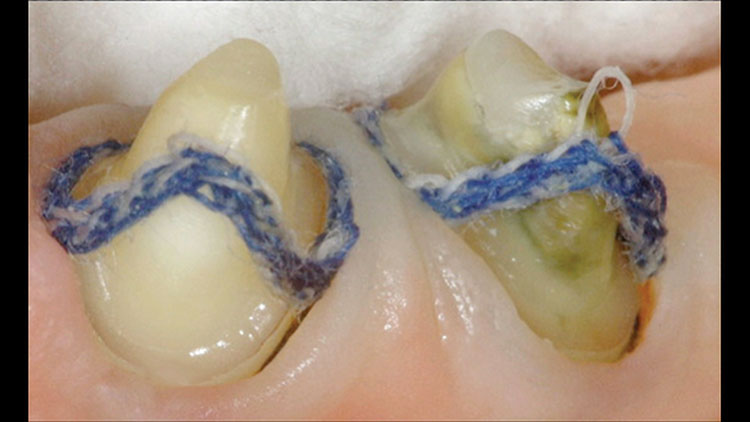
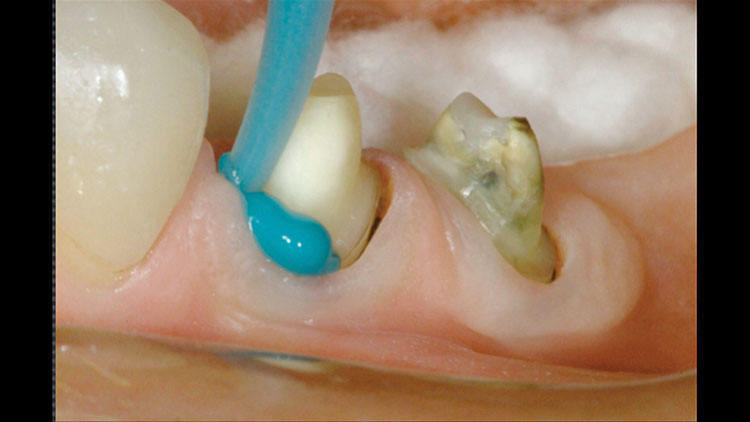
Figure 10: Here’s the two-cord technique. We’ve just teased out the top #02 cord, and you can see there is a line there in the sulcus; that’s the #00 cord. Because that cord is in place, there won’t be any bleeding. As soon as that cord comes out, just like with the one-cord technique, there will be blood. Any time you put one cord in and take it out, it bleeds. If you put two cords in and then take the top one out, the gingiva don’t bleed because the bottom cord is the one that’s in contact with the inflamed base of the sulcus. When you pull it out, it’s like ripping off a bandage.

Figure 11

Figure 11: The other problem with the one-cord technique is that when you put the cord in, it drops underneath this gingival cuff down to the base of the sulcus, so while it provides vertical retraction of the tissue away from the margin, it’s not until you put the second cord in that you move the tissue laterally away from the margin. In fact, when you take that second cord all the way out, you can see there’s just a moat around these teeth. It’d be almost impossible to miss this impression. I don’t even know if you need to syringe material into place. You could probably mix up some alginate and just flick it at the preps, and then seat a tray on top of it and still have it work.

Figure 12

Figure 12: After we completely remove the top cord, you can see that the syringe tip fits nicely into the sulcus. The material just flows right into that sulcus, giving us an impression of the margin by creating a distinct line where the margin stops. It’s also going to give us an impression of this 1 mm of root structure apical to the margin, so the technician will be able to blend the crown with the shape and contour of that root surface.

Figure 13

Figure 13: When the impression is taken out four minutes later, it gives us that same two-cord impression look where we can see the margin and then a thick, meaty band of impression material beyond the margin. I always describe it as “a Great Wall of China.” It should not look thin. Mine used to look thin with the one-cord technique, because I’d rip the cord out and then I’d try to squirt the impression material in before the sulcus filled with blood, and that’s kind of a hacky way to do it. This picture shows the prototypical, iconic look for the Two-Cord Impression Technique.

Figure 14a
Figure 14b

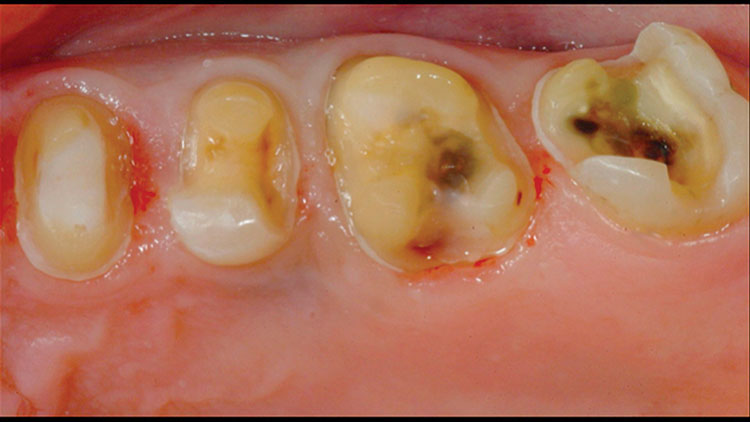
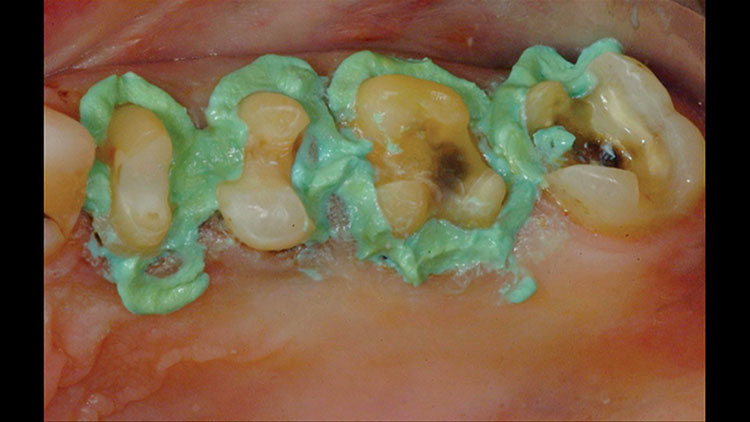
Figures 14a, 14b: Here’s another case. We didn’t replace any existing restorations here, so we don’t have many subgingival margins to speak of. I used a diode laser around these teeth just to expose the margins a little bit more, and then I placed retraction paste on top of it; not to retract, really, because we used a diode laser — the tissue is not going to grow back that quickly. I’m using this specific retraction paste because it has aluminum chloride, an astringent material that’s going to stop any bleeding that might occur because of what I did with the laser, or any seepage that might happen afterward.

Figure 15

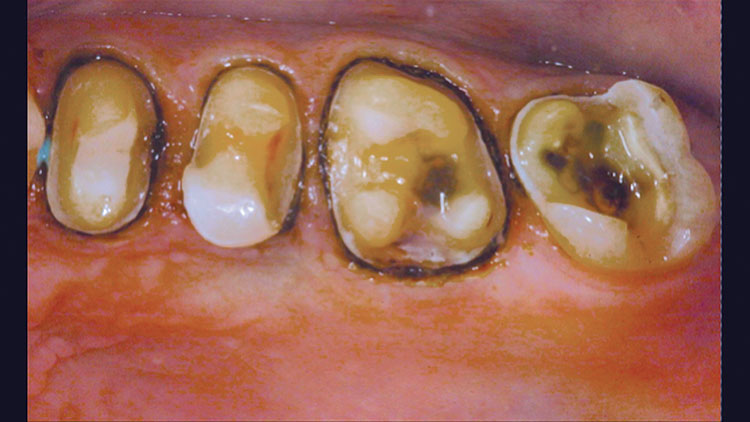
Figure 15: When we rinse the retraction paste off, you can see that we’ve got a nice-looking margin. You can see some of the remaining little tissue tags caused by the diode laser that we tried to clean up with the Ultradent brush (Ultradent Products, Inc.; South Jordan, Utah) and some hydrogen peroxide. We have the type of moat around the preparation that we want, but because of the thickness of the tip of the diode laser, we did lose a little bit of tissue height. Not a big deal here on these molars, but a much bigger deal on anterior teeth, when losing tissue height could really end up being a mess.

Figure 16

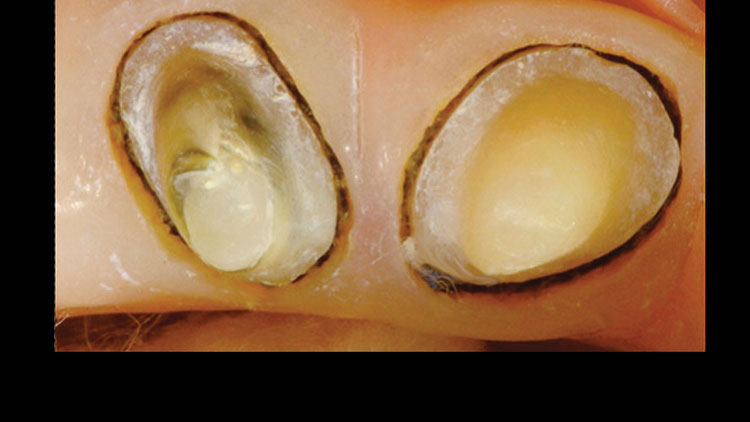
Figure 16: If we compare the impression the doctor sent in against the second example I sent her, you can see the striking difference caused by having that excess material beyond the margin. Having that 1 mm of root structure is crucial, and on my list of what’s required for an ideal impression. Getting an accurate margin is equally important, and the only two ways I know of to get these results are the two-cord technique and using a diode laser. Honestly, I’m much more likely to do that type of troughing with the diode laser in the posterior. In the anterior, I use my diode laser all the time for re-contouring gingiva to level out gingival levels on teeth #7 through #10, for example (you could also use an electrosurge; I just say diode laser because that’s become my instrument of choice, mainly because it can be used around implants and other metals, whereas the electrosurge cannot).

Figure 17

Figure 17: Commit this picture to memory, where we don’t have that material beyond the margin, and try to not make that mistake. If you look at an impression in your office and can see that material beyond the margin, you know it’s not going to end up with a “QC Alert” sticker. It’s going to end up with a sticker with a big happy face on it and a high-five because our technicians are going to have a much easier time fabricating a quality restoration for you and your patient.