Collaborating on a Smile Makeover – From Surgery to Obsidian® Veneers
Note: The Hahn Tapered Implant System is now known as the Glidewell HT Implant System
No matter the scope of your dental practice, collaboration is one of the most effective ways to set yourself apart as a practitioner. This might seem counterintuitive, but the benefits are clear as you face highly complex cases, in which multidisciplinary treatment plans stand to benefit the most from a wealth of experience, input and combined expertise. For these cases, close dialogue among colleagues allows for seamless care during complex treatments. In fact, your patients might come to feel like your practice is an extension of your colleague’s, and vice versa. Facing even the most intricate cases, with meaningful teamwork you’re poised to deliver transformative results that will position you as an elite practitioner in the minds of your patients.
Case Study
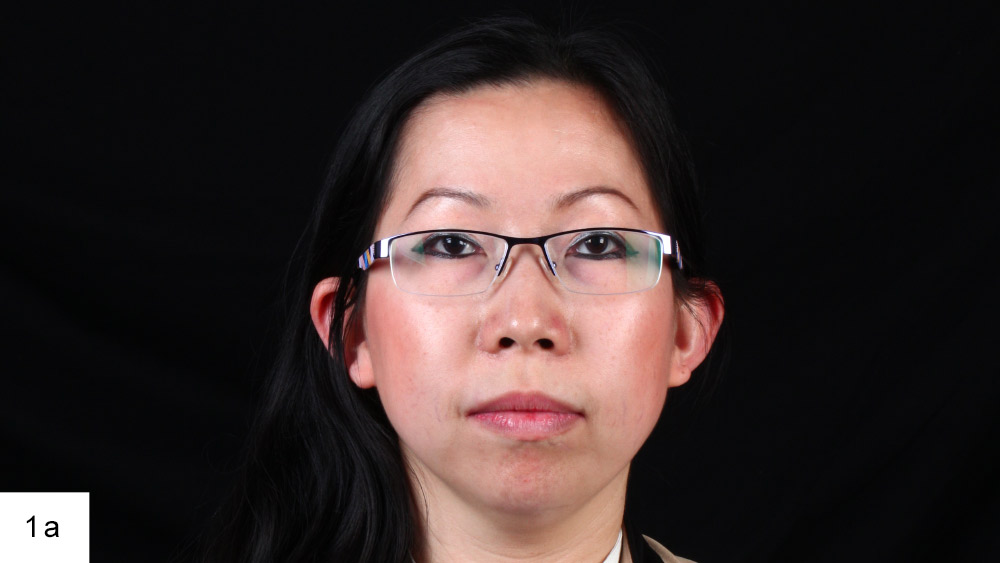
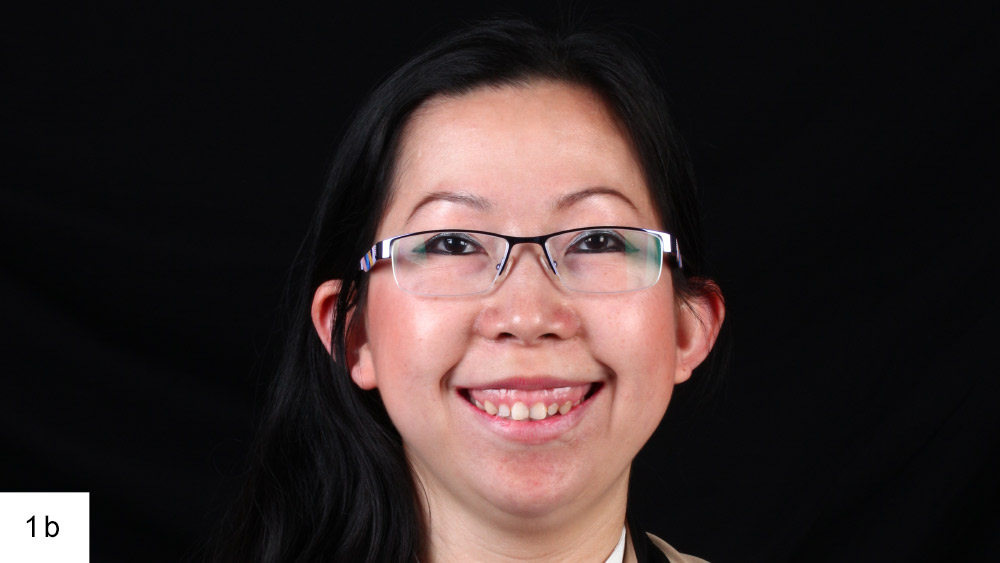
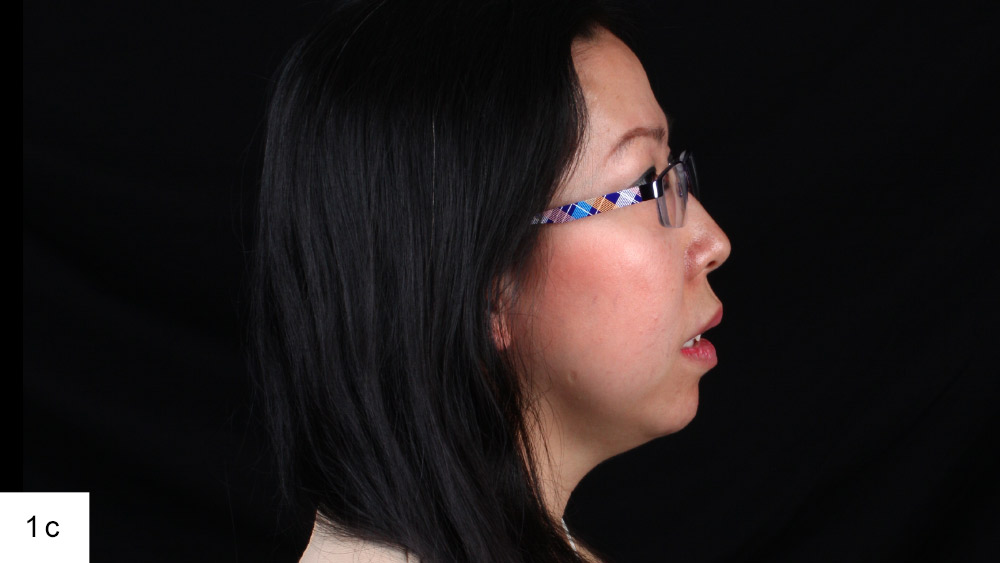
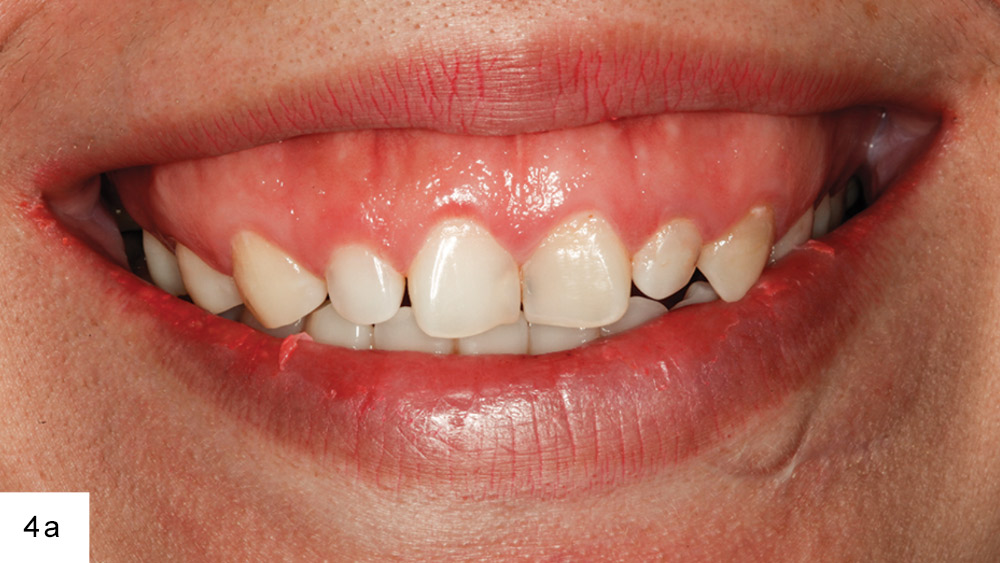
A female patient presented with concerns about her crooked teeth, gummy smile, and what she called a weak-appearing lower jaw profile. The patient exhibited shyness and had taught herself to smile with her mouth shut or a hand covering her mouth.
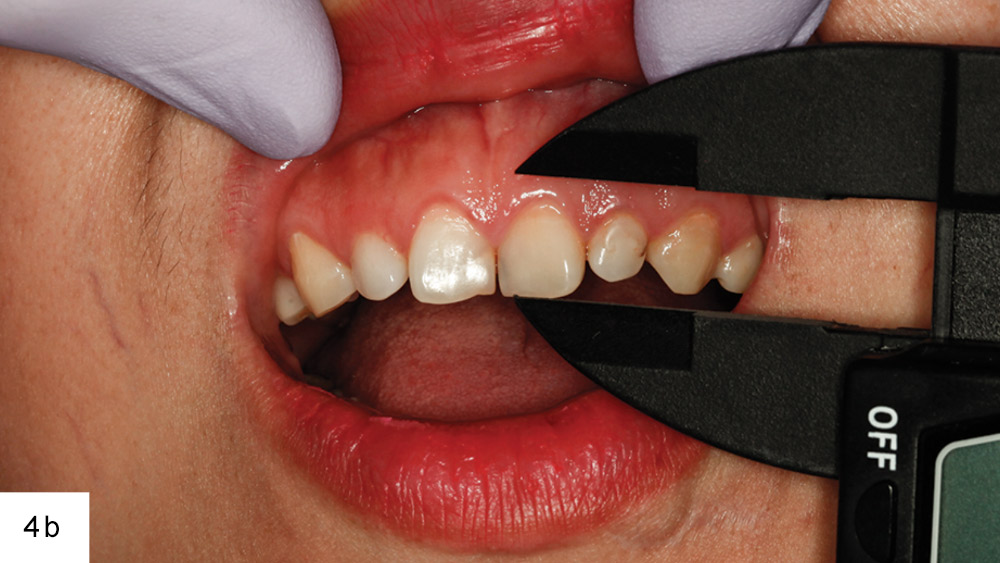
Upon examination, the patient’s excessive gingival display was attributed to vertical maxillary excess secondary to altered passive eruption, gingival hyperplasia, tooth malposition and unesthetic tooth proportions. Prior to treatment, the visible length of the patient’s cuspids and centrals was 7–7.5 mm from incisal edge to gingival margin — noticeably short of an ideal esthetic length of 11 mm for the cuspids and 10.5–11 mm for the centrals. Additionally, the patient was diagnosed with severe mandibular retrognathia, microgenia, crowding of anterior maxillary dentition, and underlying skeletal malocclusion.
In discussing treatment options, the patient asked to avoid a more intensive approach involving orthodontics and orthognathic surgery. The task then was to create a treatment plan that would circumvent Mother Nature, starting with a gingivoplasty and crown lengthening in the maxilla, in which the upper gum tissue and underlying bone would be recontoured. The gingivoplasty and crown lengthening were to be performed in conjunction with a genioplasty of the mandible. For the genioplasty, a silicone chin implant was considered but rejected due to concerns about lack of muscle attachment, in addition to the facial distortion seen with this type of implant. Instead, the patient’s own bone would be used to achieve a more natural and harmonious-looking result.
Moving beyond the surgical foundation for the patient’s smile makeover, Obsidian® lithium silicate ceramic veneers (Prismatik Dentalcraft, Inc.; Irvine, Calif.) were chosen for teeth #4–13. Ideal reduction was planned, with a focus on maintaining the proper biological width; proper tooth size and proportion; proper central-to-lateral-incisor-to-cuspid proportions; and the smile line and a harmonious gingival veil. To maximize the patient’s surgical time, placement of a Hahn™ Tapered Implant (Prismatik Dentalcraft, Inc.) was included for tooth #3; the tooth would then be restored with a BruxZir® Solid Zirconia crown.
Figures 1a–1c: The patient was unhappy with her gummy smile, her teeth and her facial profile.
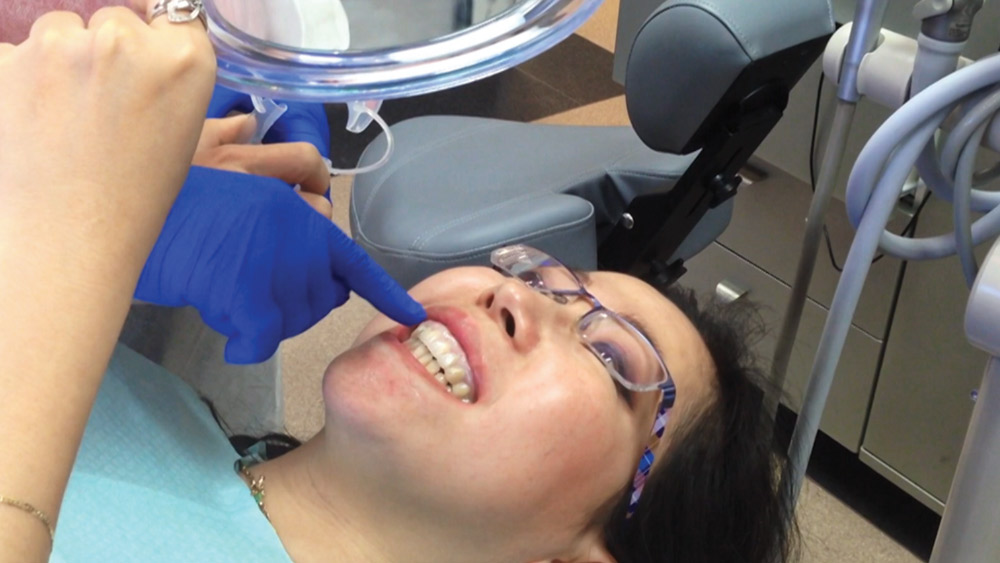
Figure 2: During the consultation, photos are taken and case planning gets underway. To demonstrate the possibilities for improving the patient’s smile, a cosmetic resin mock-up is produced chairside, based on a diagnostic wax-up. The diagnostic wax-up is used to procure a putty wash matrix, and Luxatemp® (DMG America; Englewood, N.J.) is injected; the mock-up is then placed in the patient’s mouth.
Figure 3: After the patient has an opportunity to analyze her potential smile, the decision is made for minimal-prep Obsidian veneers on teeth #4–13, with the centrals longer than the laterals.
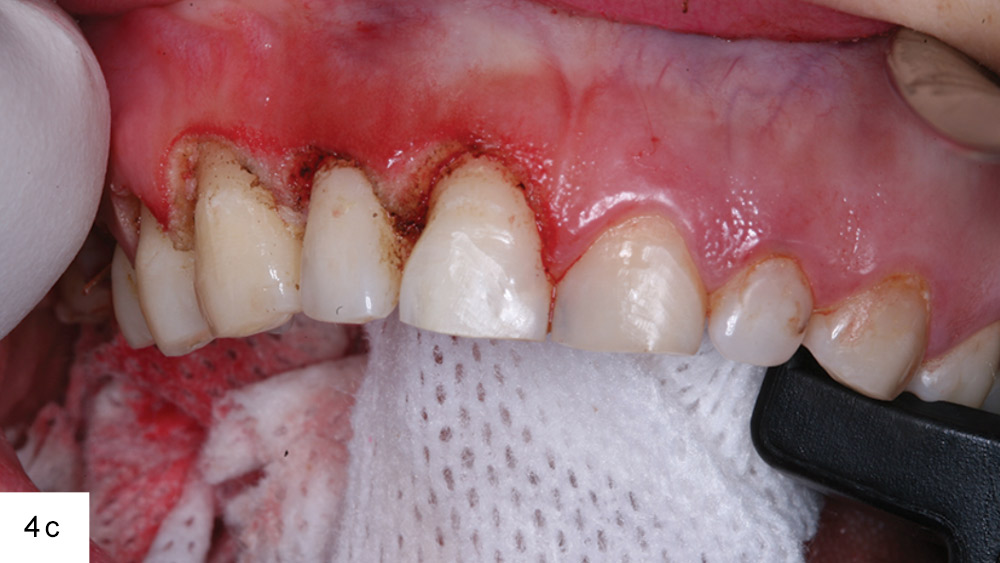
Figures 4a–4c: Crown-lengthening and gingivoplasty in the maxilla is performed to address the patient’s gummy smile, caused by vertical maxillary excess. Prior to surgery, a template is used to indicate the final destinations for the margins. The guide, based on an initial set of mock-ups, provides a blueprint to be followed during the oral surgery.
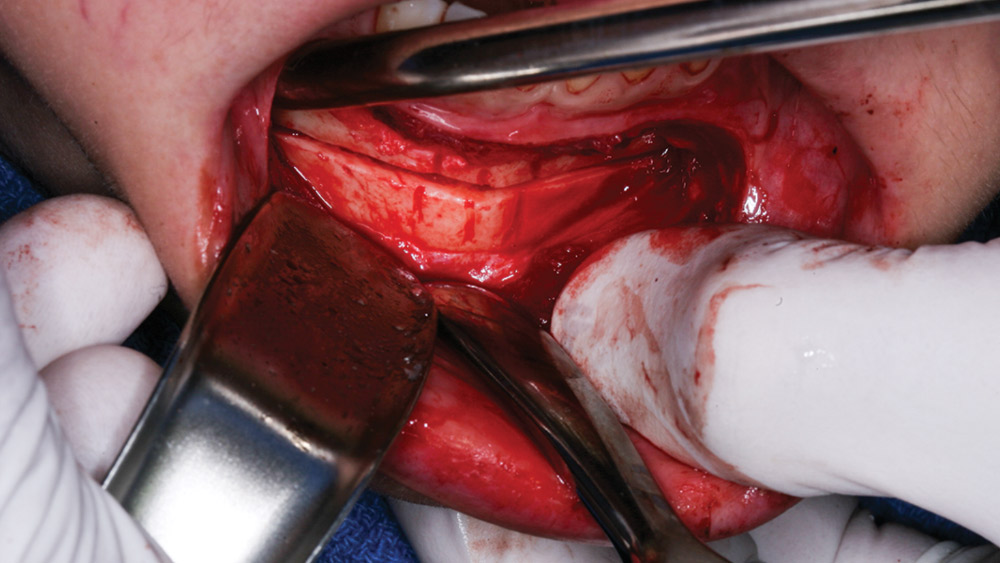
Figure 5: An inferior border sliding osteotomy-genioplasty is performed, resulting in a total advancement of 9.5 mm. In this procedure, a vestibular incision is made approximately 5 mm inferior to the attached mucogingival junction through mucosa and underlying mentalis muscle attachment. Then, a reciprocating saw is used to create a horizontal sliding osteotomy. In a sliding fashion, the patient’s own bone becomes the augmentation, rather than adding a silicone chin implant on top of the bone. The bone itself draws the muscle attachment forward, yielding a more harmonious, esthetically pleasing profile and providing more long-term stability than a silicone chin implant.
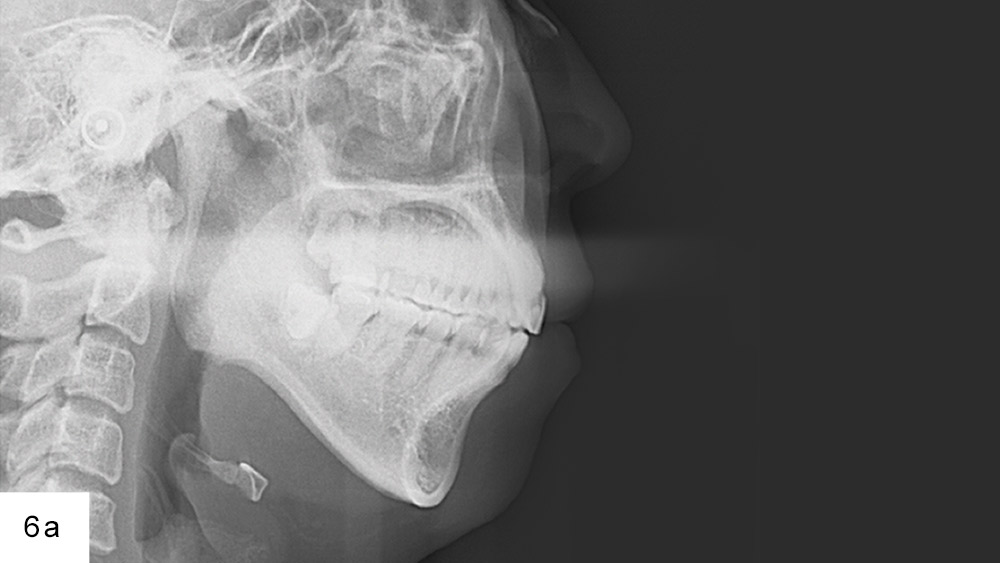
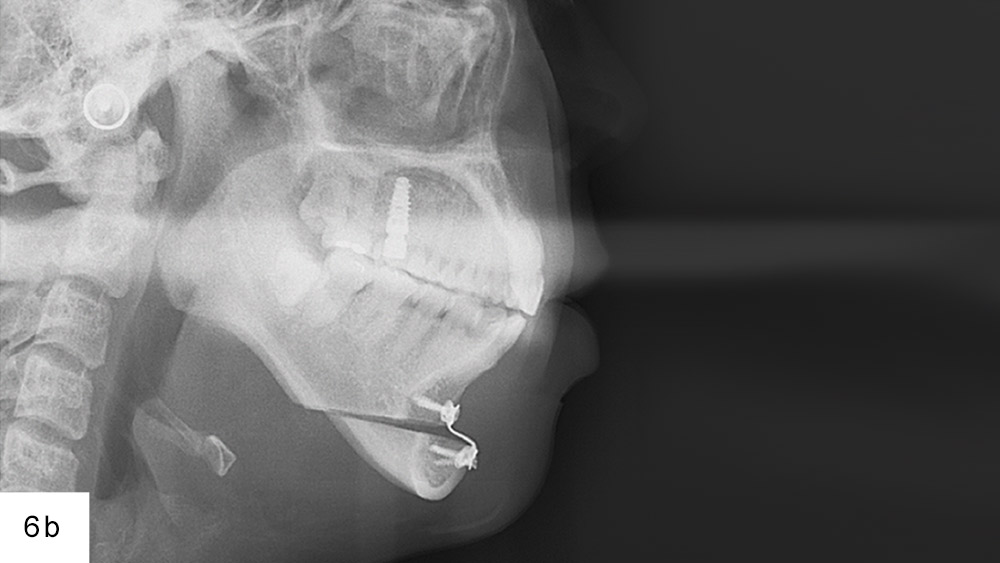
Figures 6a, 6b: Lateral cephalometric radiographs show the patient’s lateral profile pre- and immediately post-op. With a stepped titanium plate and fixation screws utilized to initially maintain the osteotomy, approximately three months are needed for the body to fuse the bone and repair the osteotomy site. The advantage of using the patient’s own bone is the muscle attachment is maintained, both on the inside and the outside.
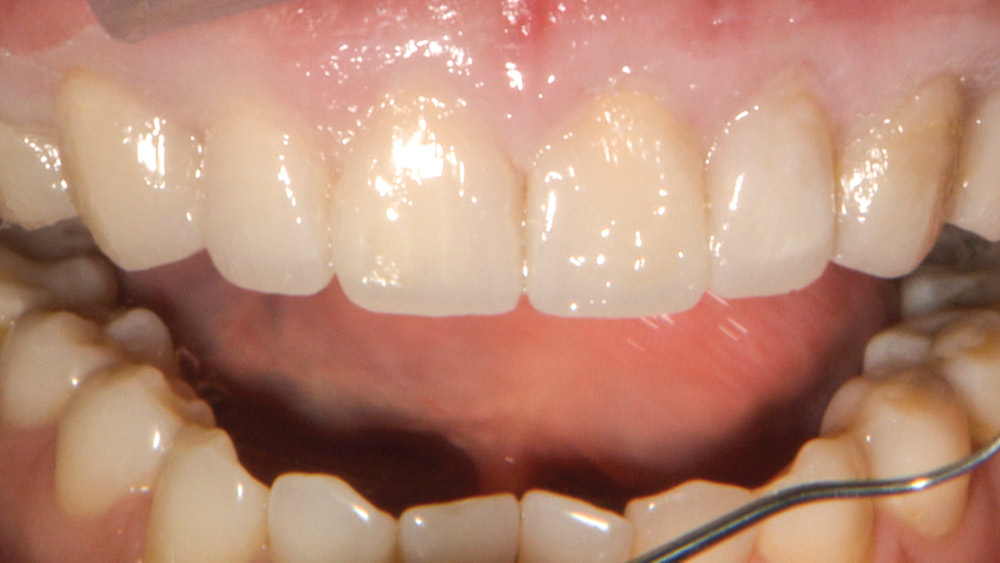
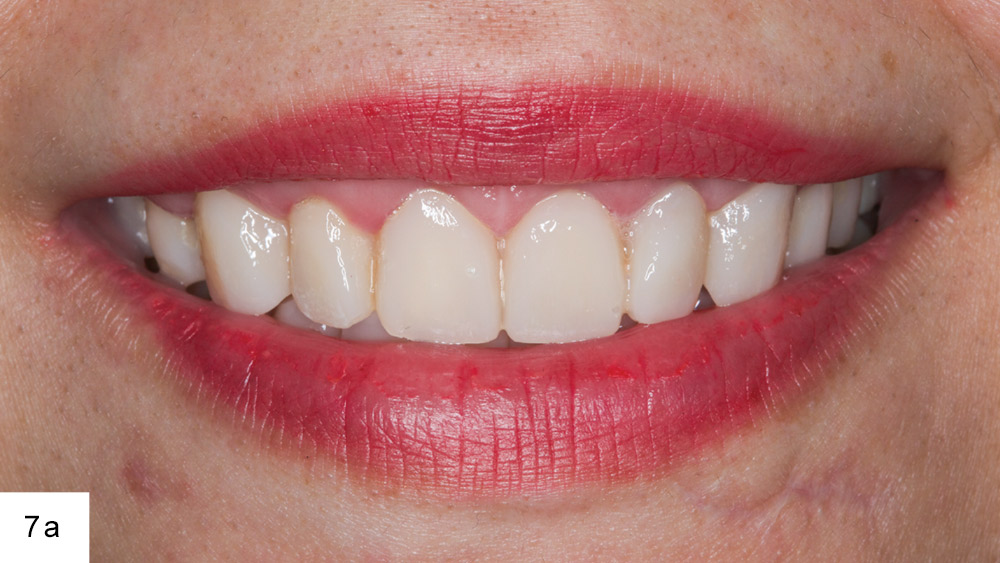
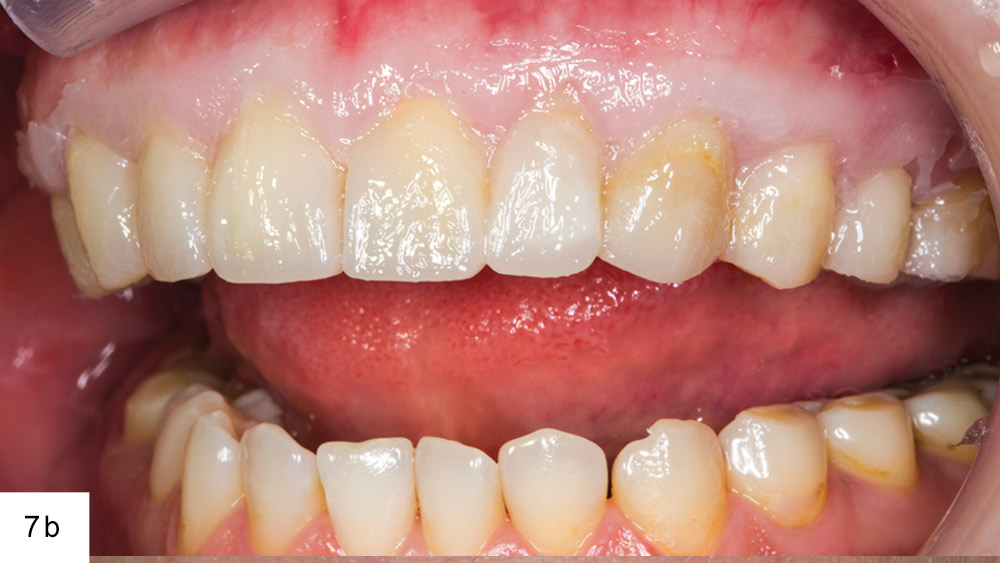
Figures 7a, 7b: Temporaries are placed, and the tissue is allowed to mature (Fig. 7a). A second set of mock-ups is used to achieve additional fine-tuning of the gingival veil (Fig. 7b). With the lips providing the general outline for a smile, the gingival tissue is the frame for the teeth.
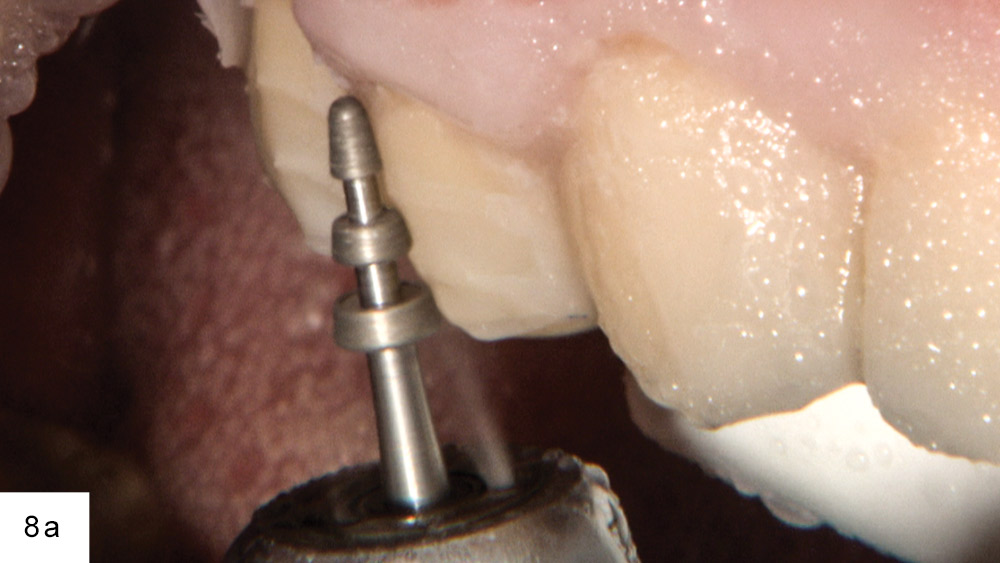
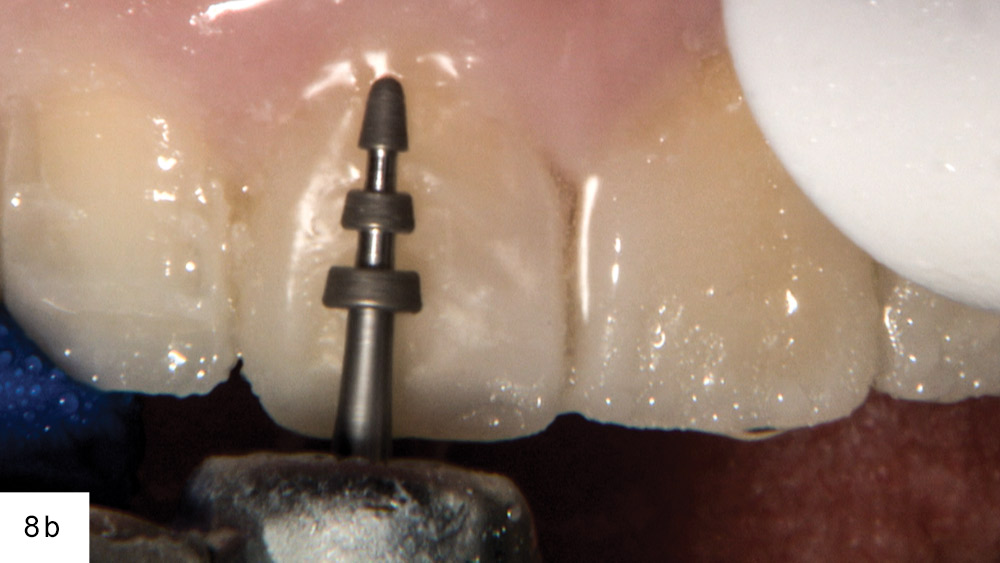
Figures 8a, 8b: A depth cut bur from Brasseler USA (Savannah, Ga.) is used to provide reduction strata with a depth of 0.3 mm gingivally, 0.5 mm at the middle third, and 0.7 mm incisally, resulting in a preparation that follows the three different planes.
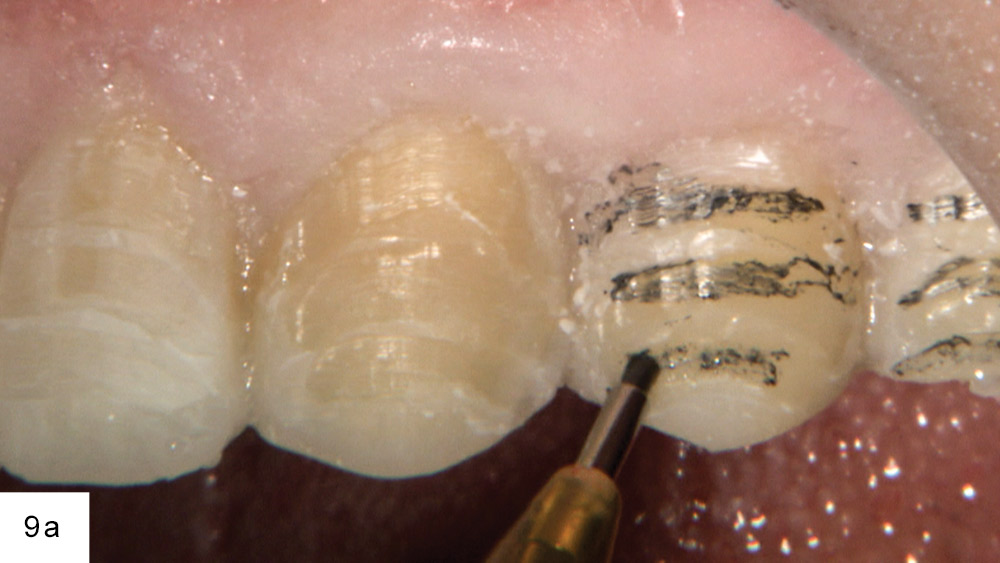
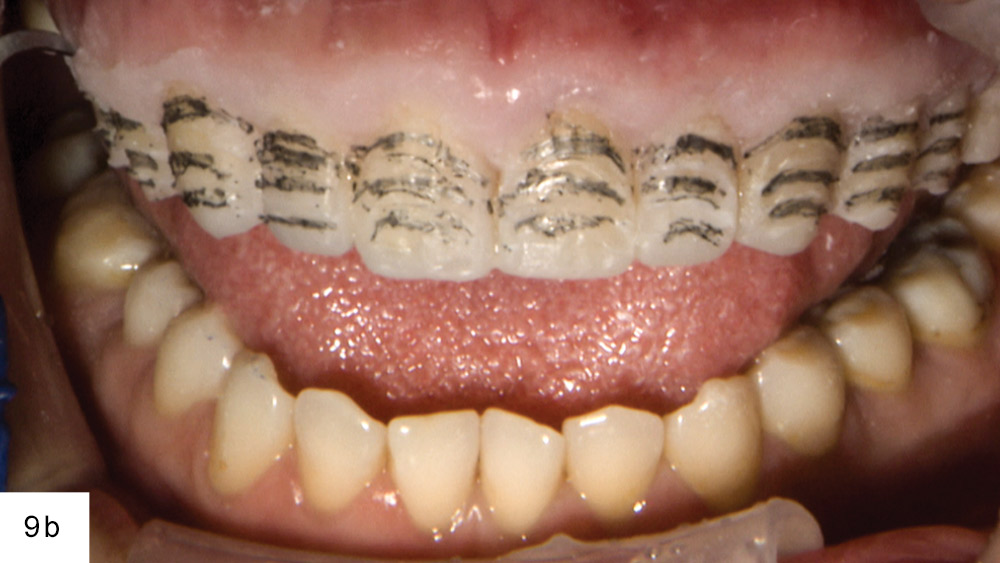
Figures 9a, 9b: With the depth cuts complete, the horizontal grooves are marked with a pencil and the matrix is removed using a curette.
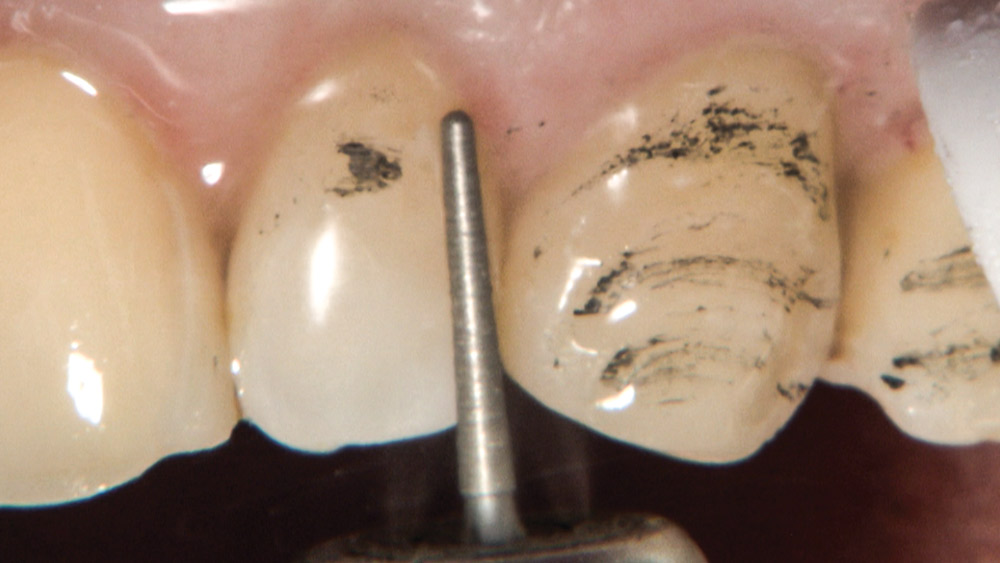
Figure 10: An 856-012 round-ended diamond bur (Brasseler USA) is used to finish the preparation. In order to avoid any unnecessary over-reduction, the temporary mock-up enables precise control of facial depth cuts and helps keep the preparation in enamel.
Figure 11: The patient is temporized for one week prior to the final impression. Great care is taken to open the gingival embrasures so as not to cause damage to the papillae.
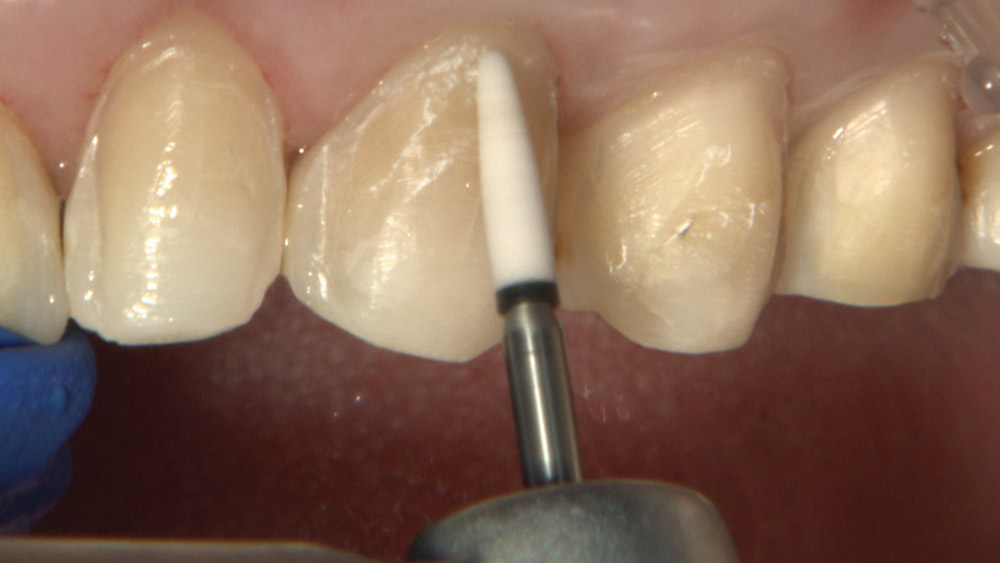
Figure 12: At the final impression appointment, a white stone from KOMET of America, Inc. (Schaumburg, Ill.) is used to remove any residue from the area where the temporary was spot-etched. After removal of the temporary, there will often be areas that need to be cleaned up.
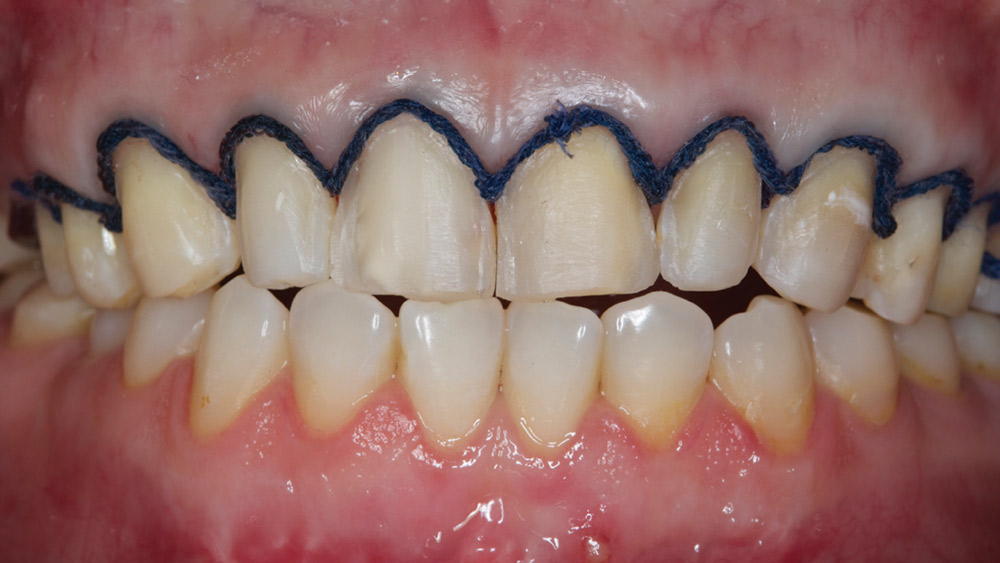
Figure 13: The double-cord technique is employed to expose the tissue apically and reveal the preparation margins. By giving lab technicians a view of the tooth below the margin, they’ll gain a better idea of how to contour the margin and blend the Obsidian material into the existing tooth contour.
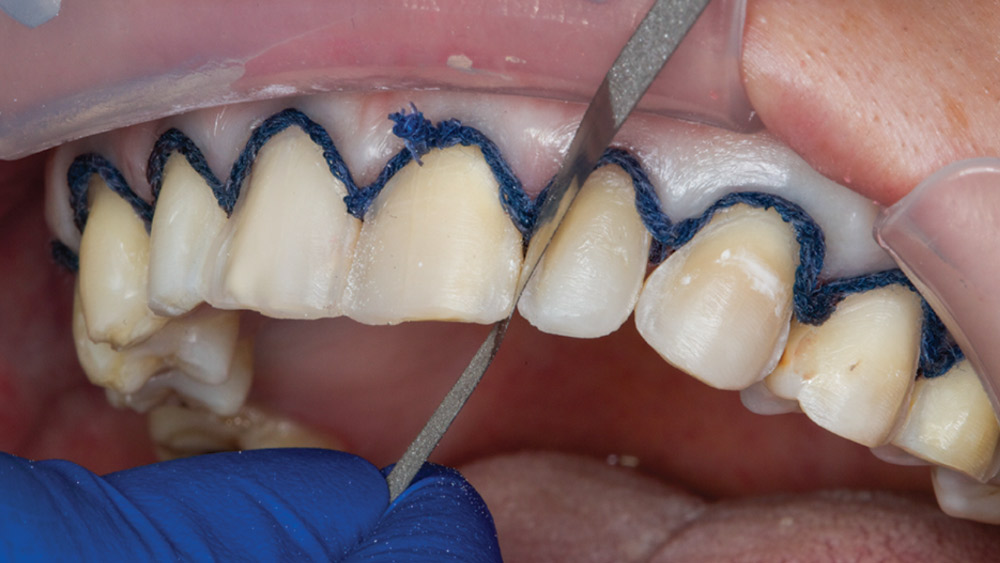
Figure 14: Before taking the final impression, Diamond GripStrip™ (Shelton, Conn.) is used to carefully separate the interproximals so the technician can visualize the margins.
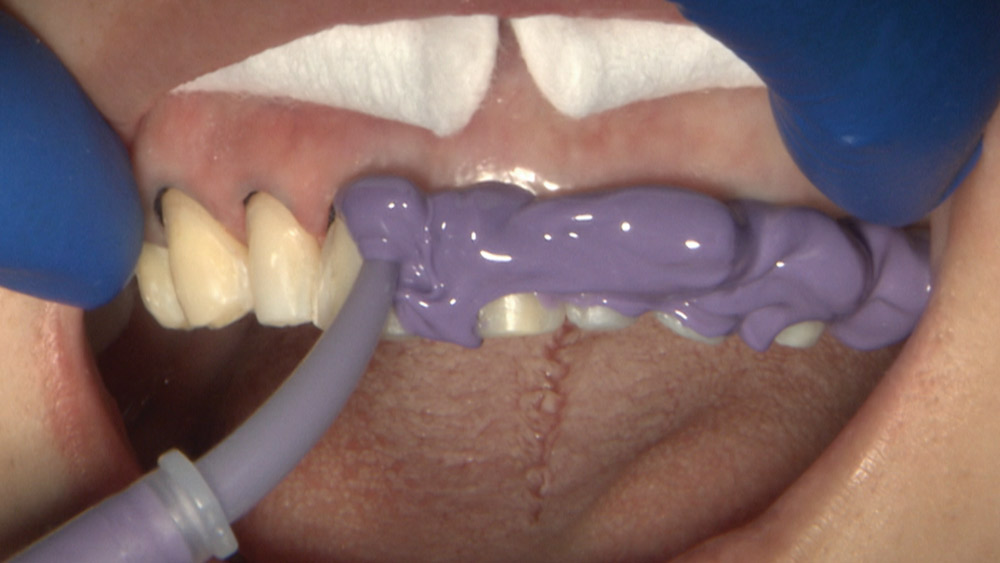
Figure 15: With the second cord removed, medium-body material from the Capture® VPS Impression System (Glidewell Direct; Irvine, Calif.) is syringed onto the prepared teeth. Meanwhile, a full-arch impression tray is filled with heavy body. The impression is left to set in the patient’s mouth for three minutes, and a hard bite is subsequently taken with Capture bite registration material.
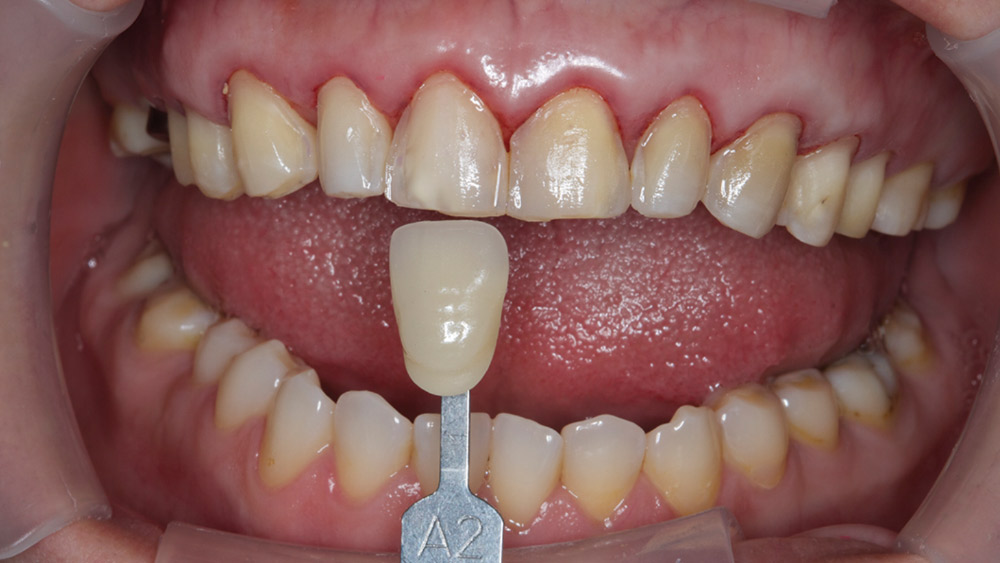
Figure 16: The stump shades are recorded to better communicate the shade to the lab. Obsidian is available in VITA® Classical and Bleaching shades (VITA Zahnfabrik; Bad Säckingen, Germany) and can be pressed or milled utilizing CAD/CAM technology.
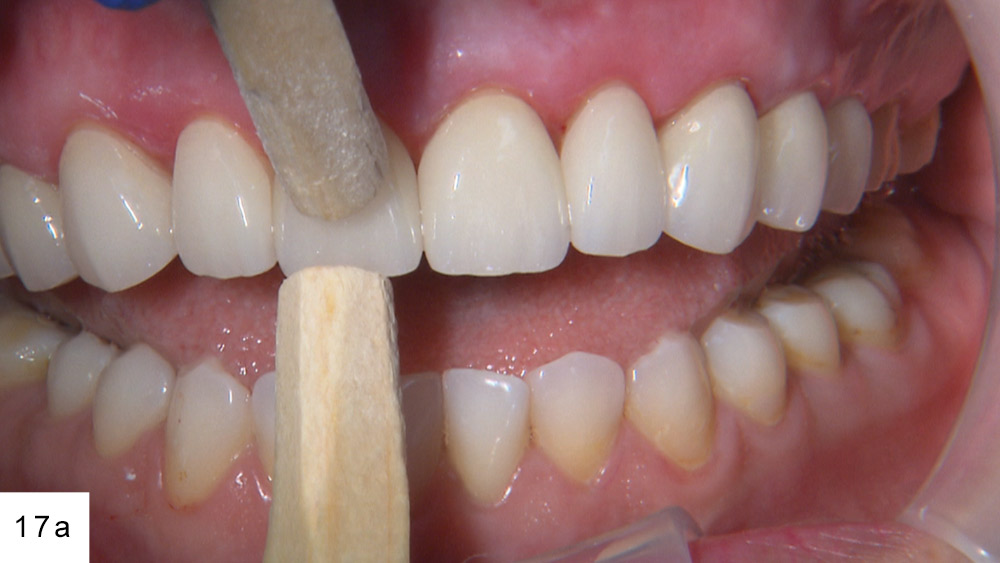
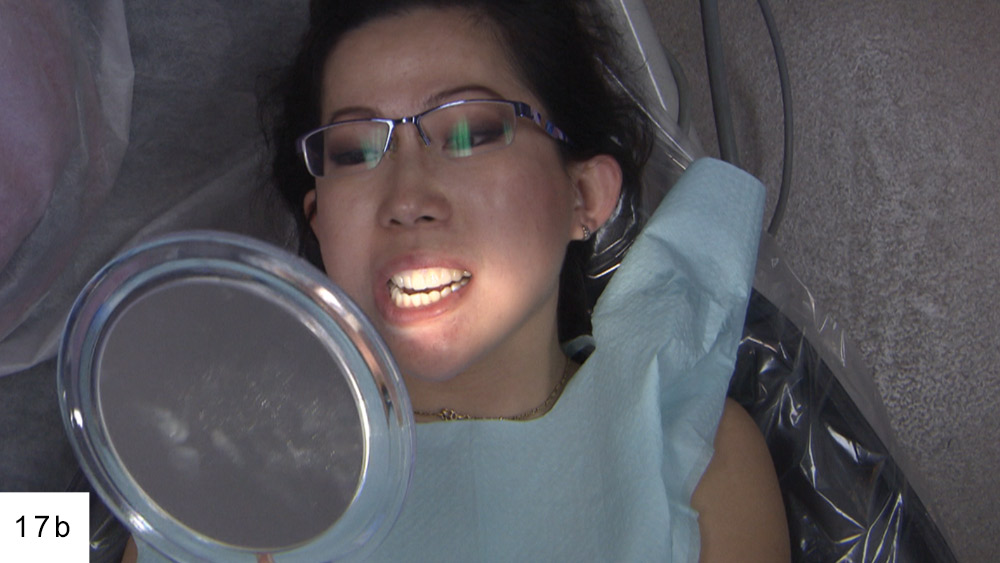
Figures 17a, 17b: At the final cementation appointment, the Obsidian veneers are tried in with water to verify color and to ensure fit and esthetics. The try-in provided a time for the patient to look in a mirror and approve her new restorations.
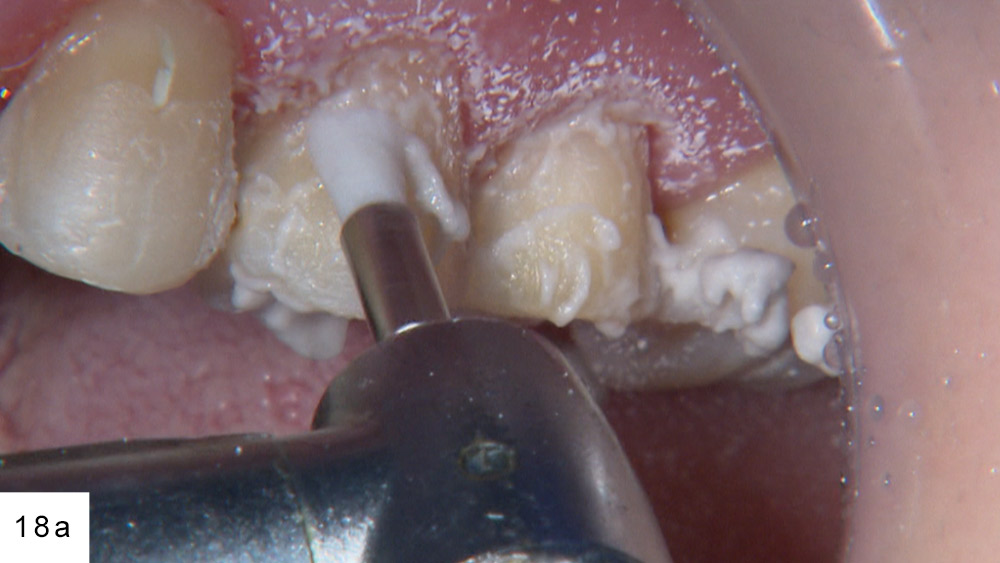
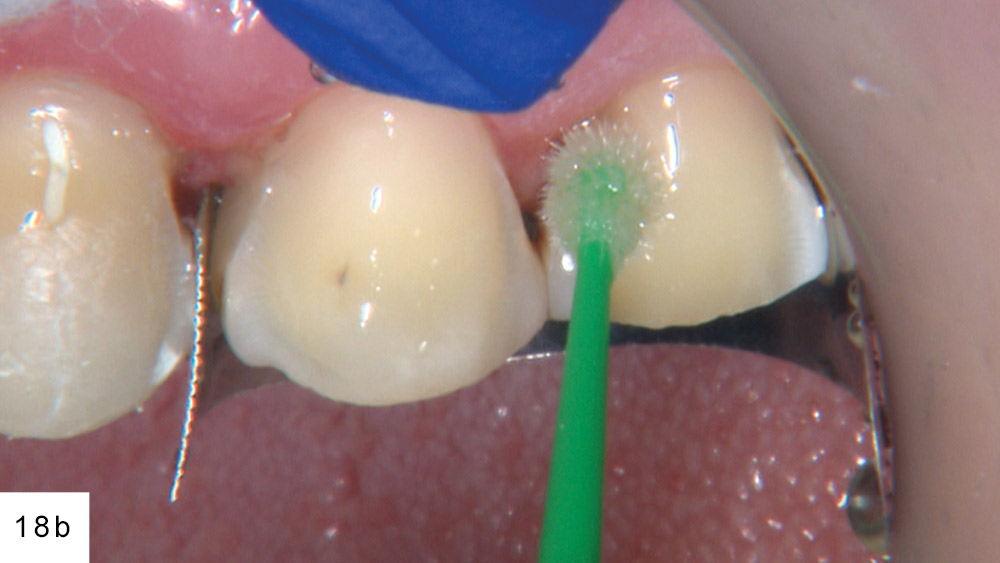
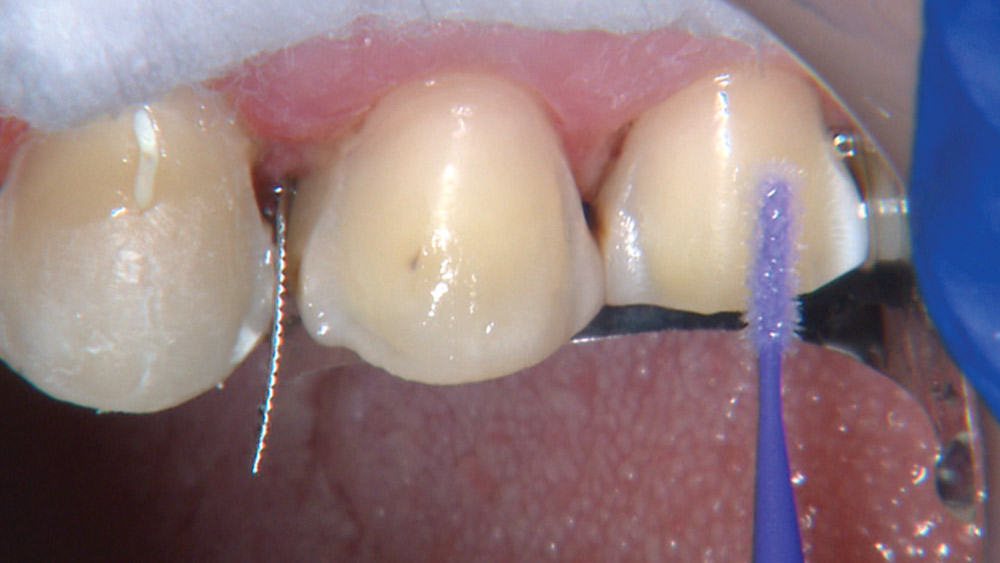
Figures 18a, 18b: Preppies Plus® pumice (Whip Mix Corp.; Louisville, Ky.) is used to clean the prepared teeth, and G5™ All-Purpose Desensitizer (Clinician’s Choice; New Milford, Conn.) is placed as an antibacterial and desensitizing agent. Isolation is achieved with cotton rolls and matrix bands. With the preparation on enamel, an oil-free warm-air tooth dryer (A-dec Inc.; Newberg, Ore.) is used to promote moisture evaporation and prevent any contamination.
Figure 19: A and B Multilink® Primers (Ivoclar Vivadent; Amherst, N.Y.) are applied to get the dentition ready for the resin cement. Note: Prior to cementation, the intaglio surface of each veneer is treated with Ivoclean (Ivoclar Vivadent) for 20 seconds. Also, before loading the veneers with Multilink Automix (Ivoclar Vivadent), Monobond Plus (Ivoclar Vivadent) is scrubbed in for 60 seconds.
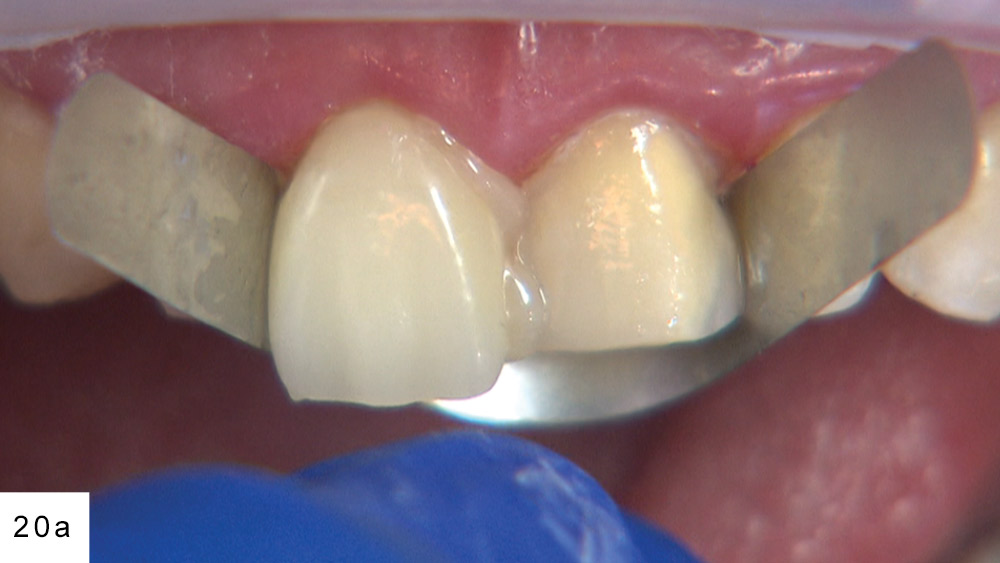
Figures 20a: The veneers are placed two sets at a time and are held in place with wooden sticks, with light pressure applied on the facial and the incisal to ensure correct seating. For this case, the clinical strategy called for starting with the posteriors, then bonding the two centrals, and working toward the cuspids.
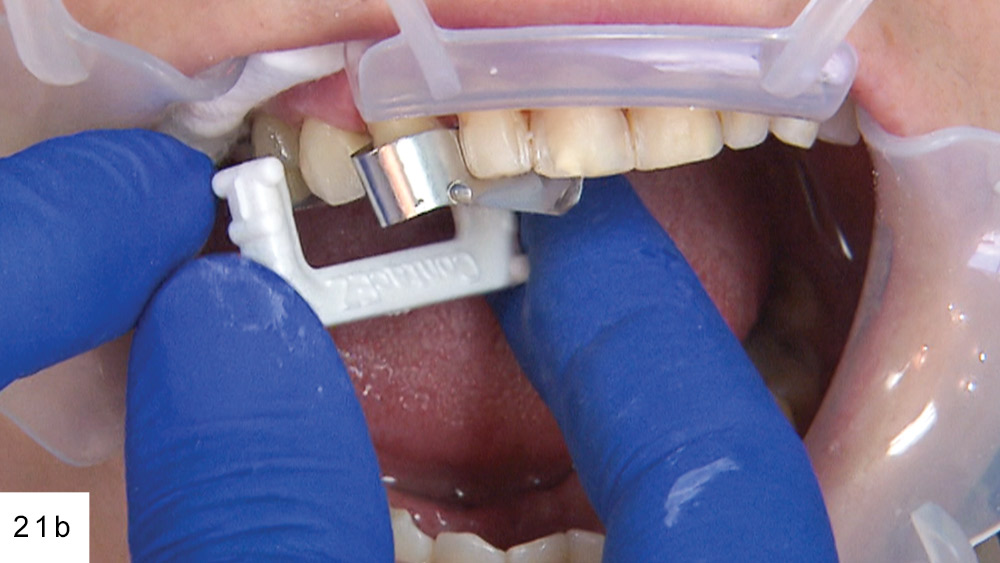
Figures 21b: Prior to the final cure, a small amount of glycerin (Liquid Strip [Ivoclar Vivadent]) is used to ensure there will be no oxygen inhibiting at the margins. Once the veneers are tack cured, the matrix bands are taken out to allow the removal of excess cement with an explorer. A serrated strip (ContacEZ® [ContacEZ; Vancouver, Wash.]) also is utilized to separate the cement from the interproximal areas.
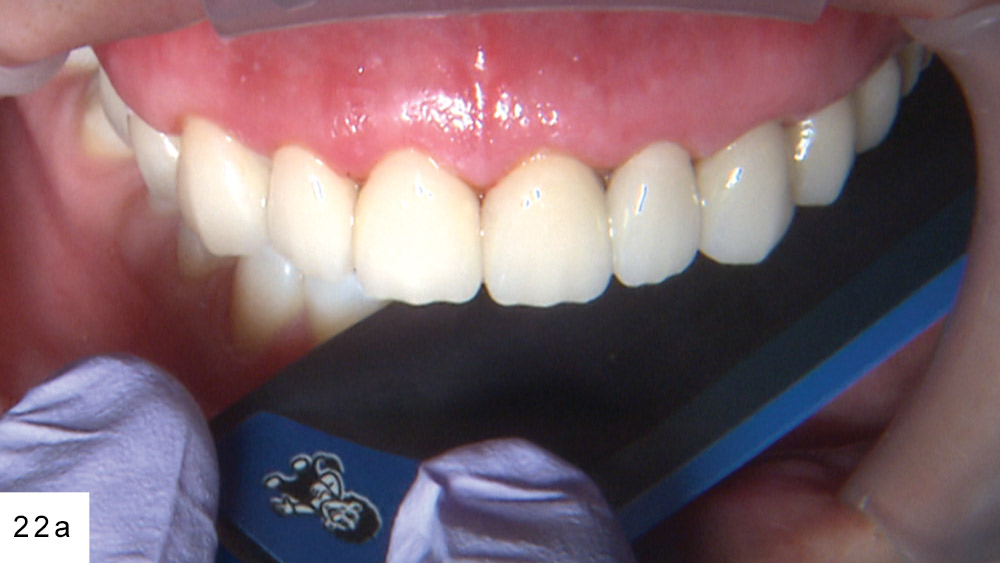
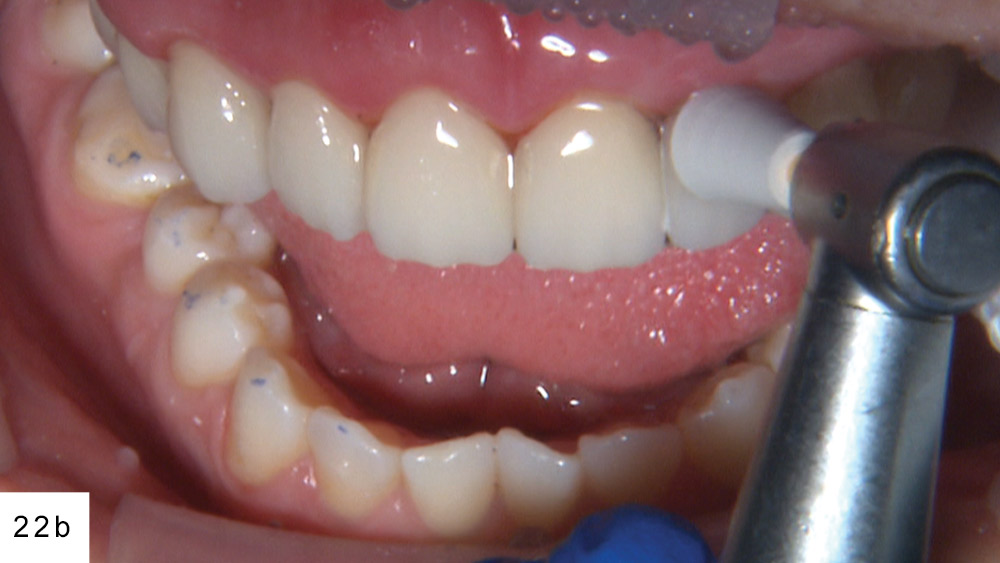
Figures 22a, 22b: The patient’s occlusion and lateral excursion are checked (TrollFoil [Almore International, Inc.; Beaverton, Ore.]), and the final restorations are evaluated for esthetics and phonetics. After all of the necessary adjustments, a rubber cup is used to polish the final restorations.
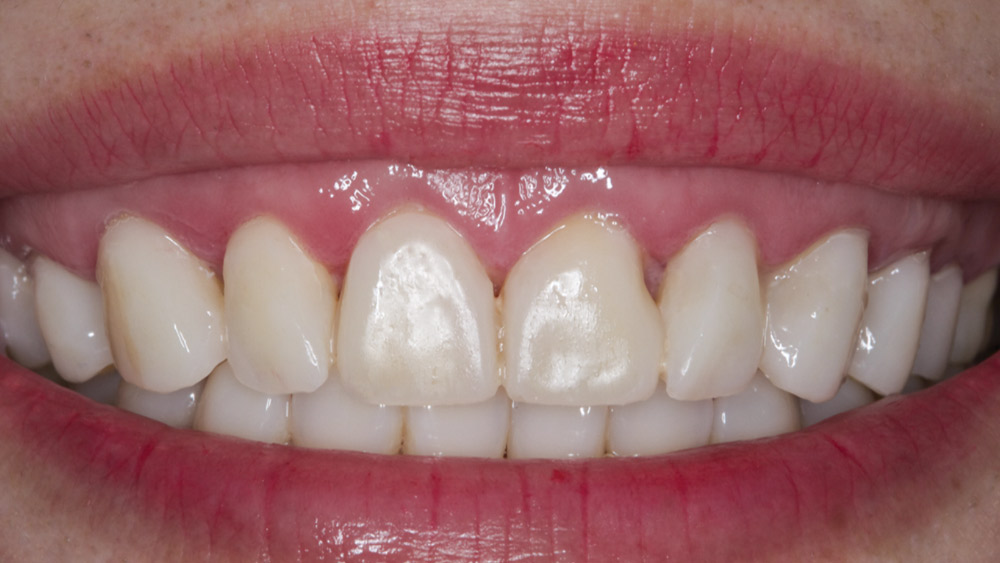
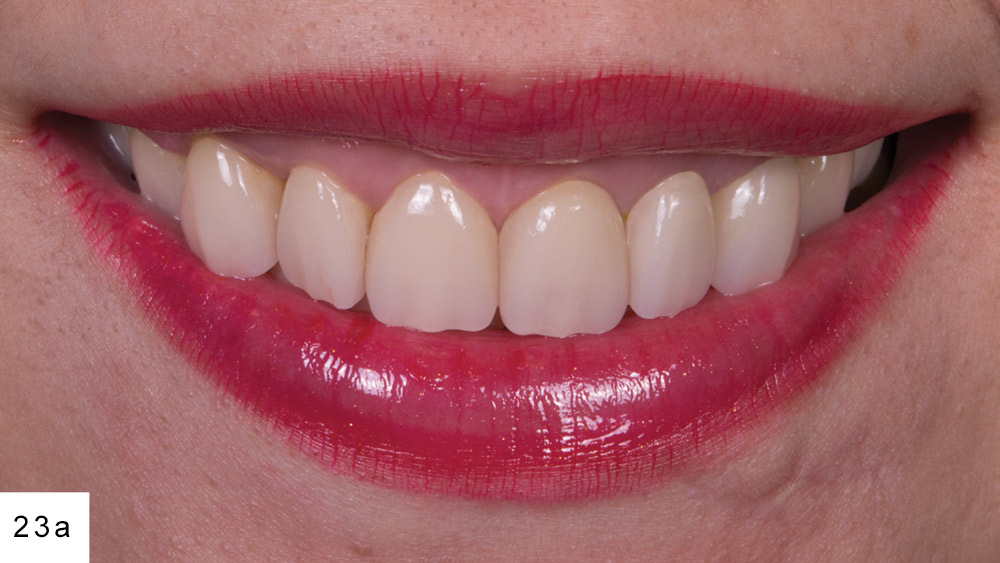
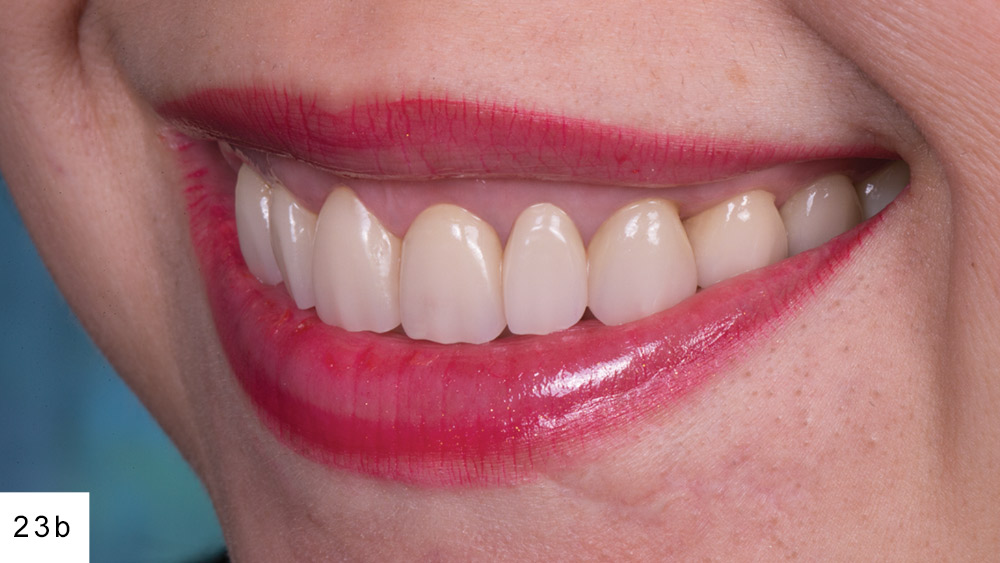
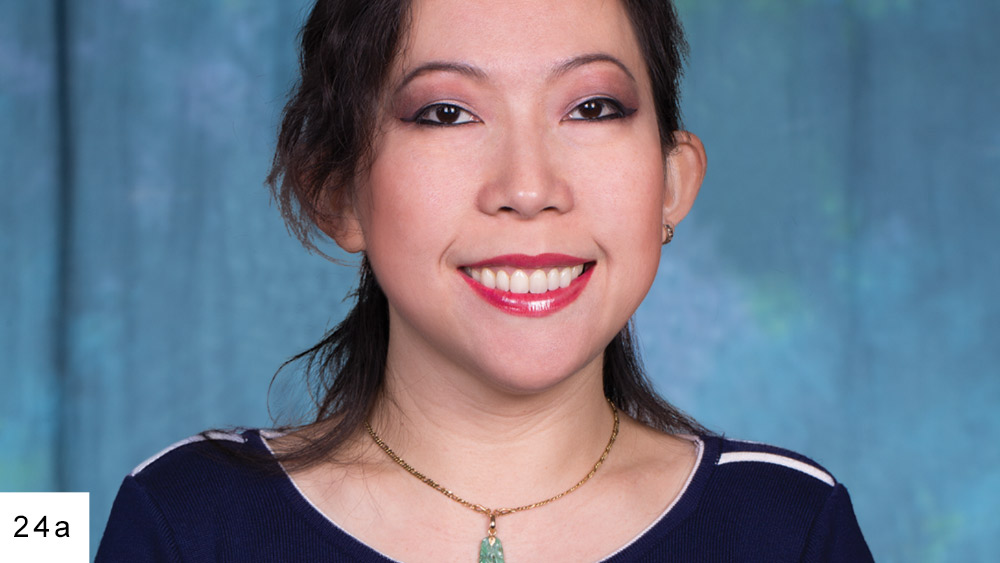
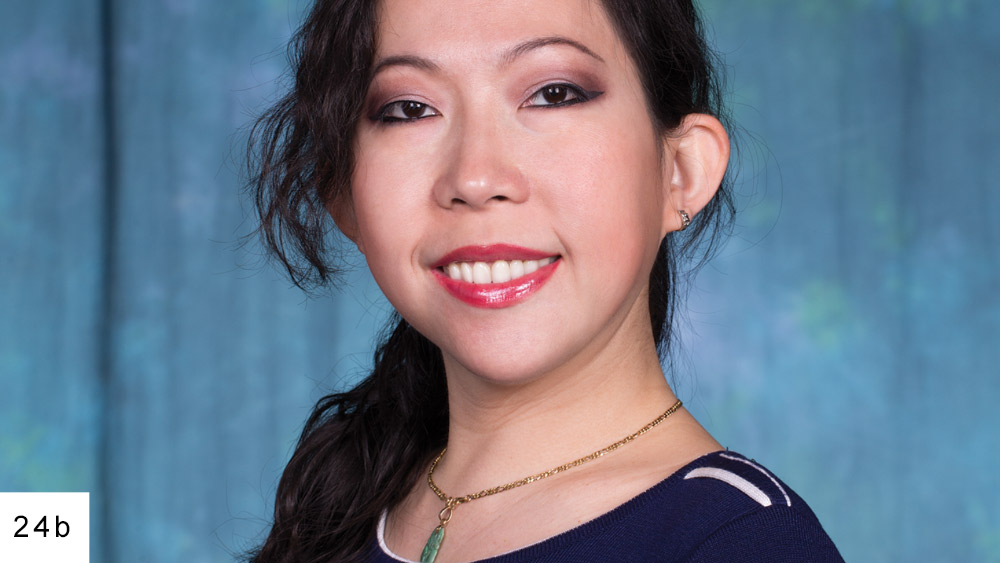
Figures 23a, 23b: The patient’s expectations were exceeded, thanks to her corrective surgical treatment and Obsidian smile makeover.
Figures 24a, 24b: Clinically, the overall results exemplified a beautiful home run. Most rewarding of all, the outcome spurred increased confidence in the patient’s personality.
Obsidian is available in VITA® Classical and Bleaching shades and can be pressed or milled utilizing CAD/CAM technology.
Conclusion
When cases require solutions beyond what you offer in your practice, meaningful collaboration with your colleagues is indispensable. Combining your skills and experiences with those of your fellow practitioners, a wellspring of dental knowledge is available to forge each treatment plan. The result is a multifaceted approach that answers the demands of highly elaborate cases and, more importantly, benefits your patients.

