In this issue:
Camouflaging Diastemata with Composite Bonding – Case of the Week: Episode 184
Author

In the Case of the Week for Episode 184 of “Chairside Live,” I addressed the esthetic concerns of Victoria from our Customer Experience team, who had prominent diastemata both mesial and distal to her maxillary lateral incisors. Victoria and the other devoted Customer Experience team members serve as the company’s friendly face, communicating with doctors by phone and email, and in person. While porcelain veneers could be considered the ideal solution to this esthetic challenge, composite restorations using a material like Camouflage® NanoHybrid Composite (Glidewell Direct; Irvine, Calif.) can be an appropriate interim solution. Direct composite bonding provides benefits such as affordability, reversibility and time savings. Follow along through this case to see how I utilized composite and minimally invasive methodology to transform the patient’s smile into an asset that helps her exude confidence.
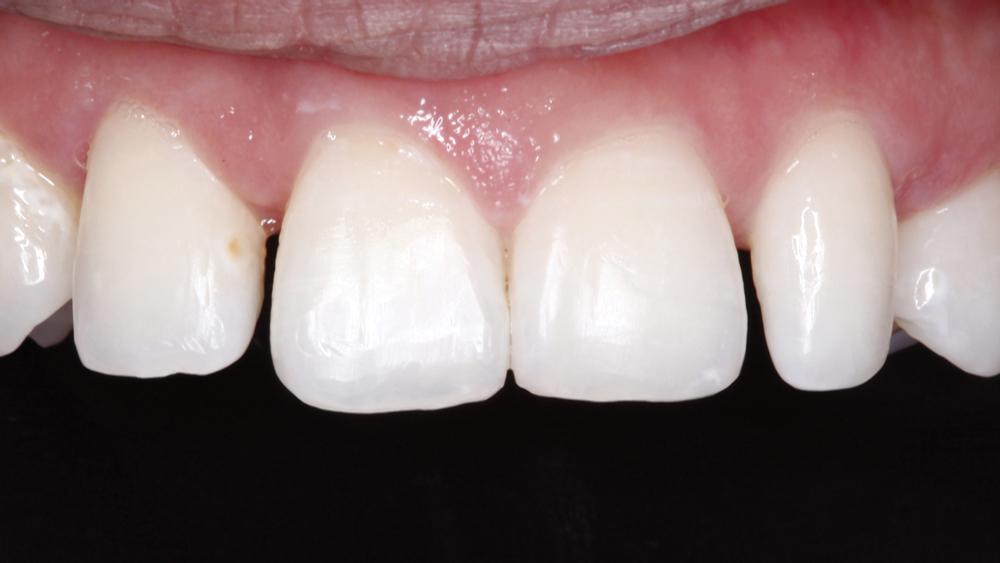
Figure 1: Victoria had peg laterals and a congenitally missing maxillary left canine. Because her natural teeth were not discolored, malformed or misaligned, but only lacking in size and shape, I determined that the additive technique of direct composite bonding would be an appropriate, minimally invasive treatment.
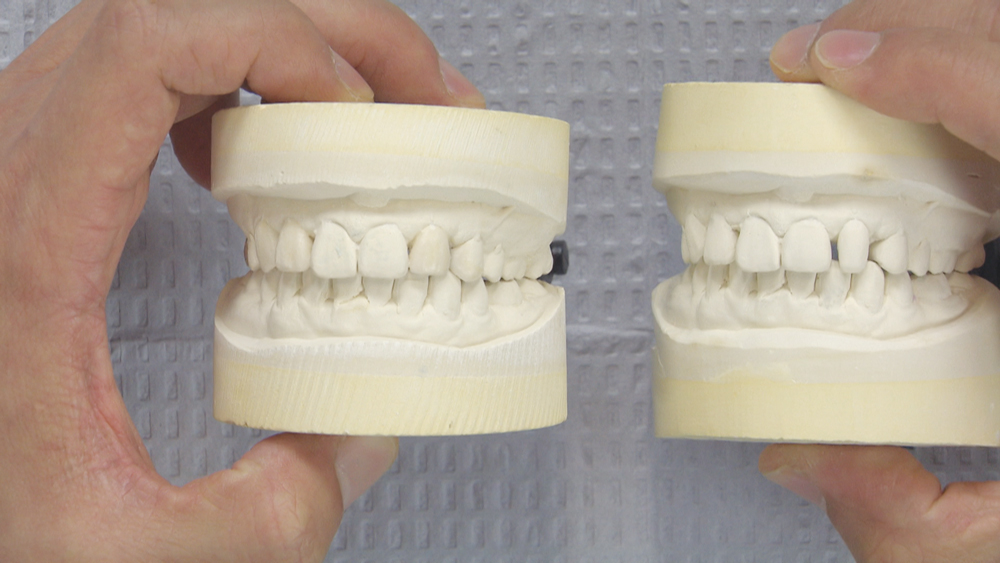
Figure 2: In order to treatment plan this case, I poured a separate model and created a diagnostic wax-up of the esthetic areas. I reduced the length of #10, which originally was about even with the centrals, to create a better esthetic result. I applied wax to the mesial and distal surfaces of #7 and #10, and to prevent the laterals from appearing too wide I added wax to the mesial portions of #6 and #12. The left bicuspid occupies the space of the congenitally missing canine on that side of the arch, so I’m attempting to mimic the left canine by extending the bicuspid, lengthening it a little bit and bringing the mesial surface over.
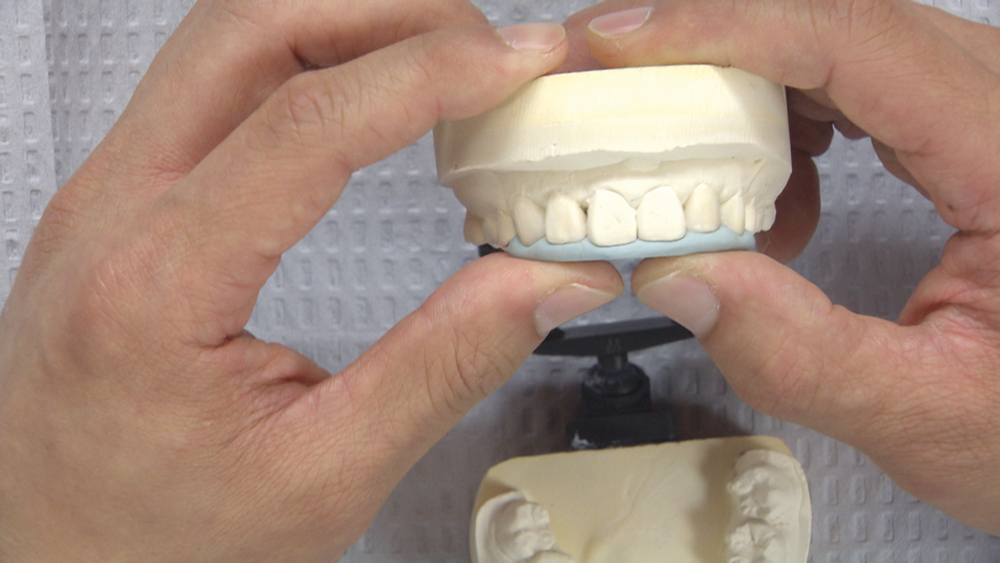
Figure 3: From the wax-up, I fabricate a putty matrix that enables me to transfer the planned changes from the wax-up model into the mouth. I position the putty matrix intraorally along the incisal edge to allow me to see the planned position of the incisal edges. Also, the scalloping of the matrix helps me determine exactly where to position the interproximal areas on each tooth. The only area where I will remove tooth structure will be on the incisal edge of #10, with the rest of the areas built up with composite resin. I will use Camouflage Universal, a nanohybrid composite.
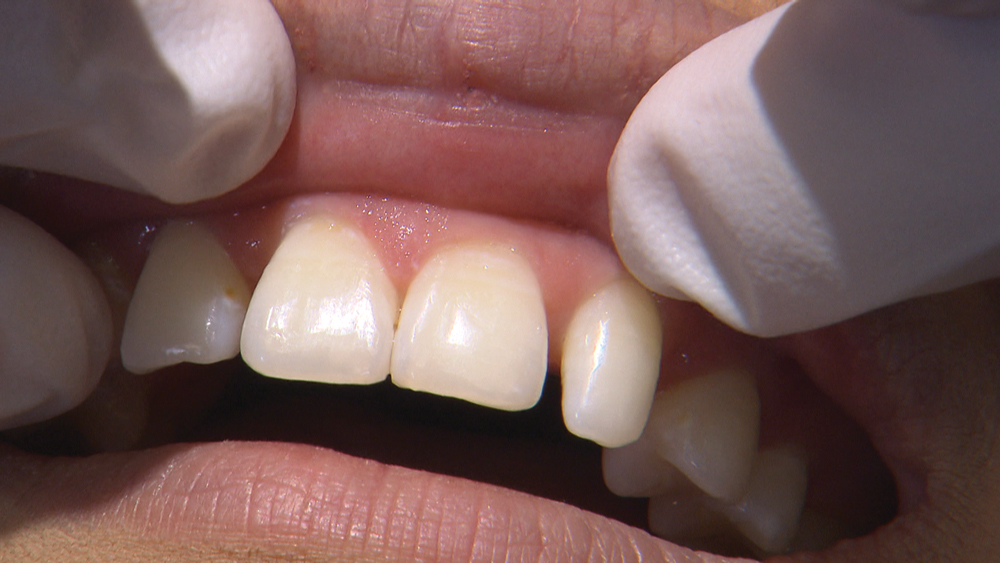
Figure 4: At the start of the case, I recommend the use of a prophy cup and pumice to ensure that the tooth surfaces are clean.

Figure 5: I place a rubber dam to avoid contamination, because I will be performing bonding procedures on multiple teeth. I use the second-to-smallest hole punch so it will be more constricting at the base of each tooth. For additional stability, I place individual floss ligatures, which help expose more tooth structure by displacing the soft tissue apically. Prior to isolation, I try-in the putty matrix to verify that it seats completely with the rubber dam in place.
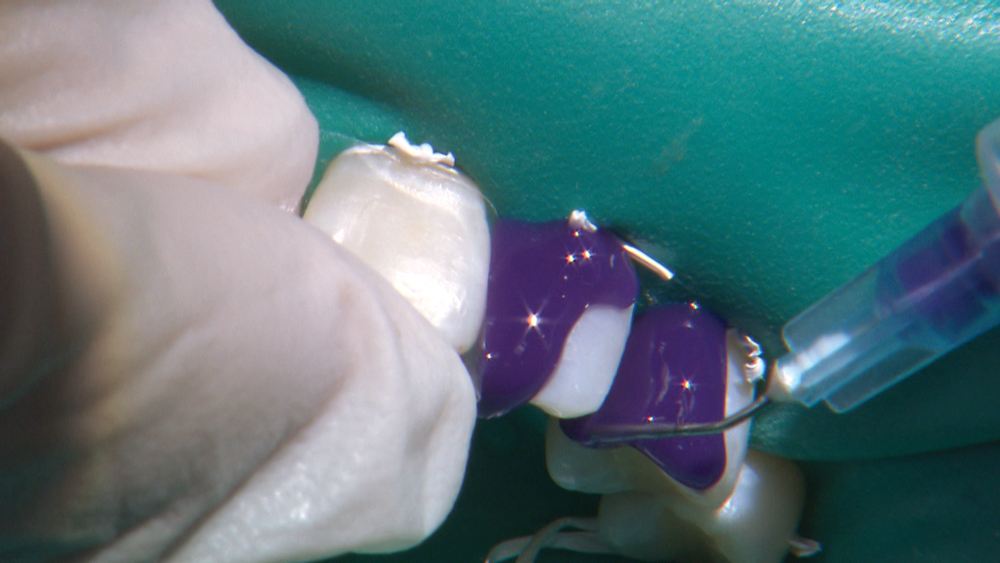
Figure 6: I start the bonding procedure by applying phosphoric acid in a 37 percent concentration to all of the surfaces I will bond to. Because I am entirely in enamel, I will allow the acid to etch the surfaces for at least 20 seconds. To ensure that the desired area is etched, it’s a good idea to apply the acid at least 2 mm beyond the anticipated restorative area. For these types of esthetic bonding cases, it can be challenging to delineate where the resin application should stop because there isn’t a margin present. I like Gel Etchant from Kerr Corporation (Orange, Calif.) because the material’s ideal viscosity allows me to apply it easily in exact areas without it being too runny or too thick, and it rinses off very quickly. When applying the etchant to the mesial surfaces of the laterals, I protect the centrals with a clear matrix.
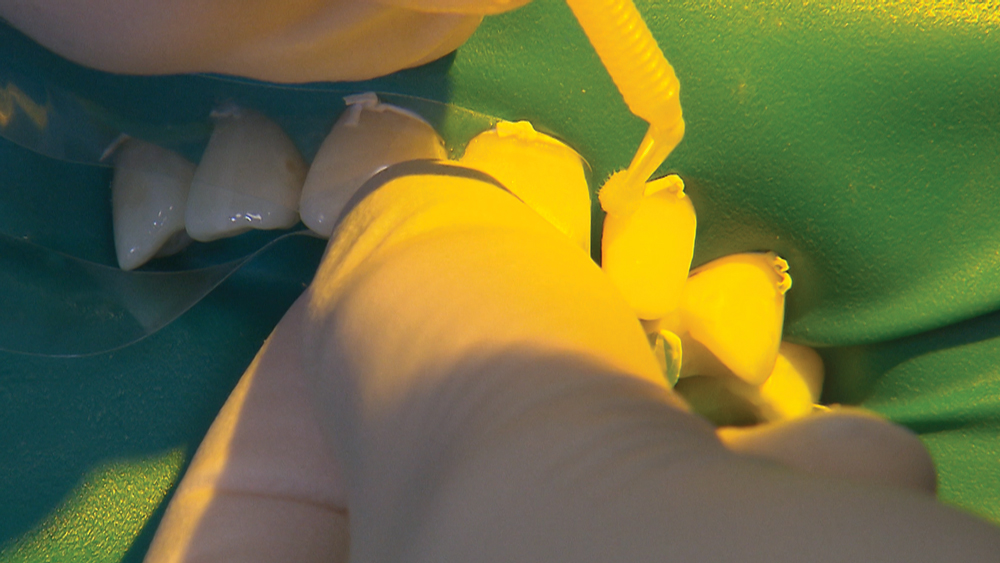
Figure 7: Once I confirm the enamel surfaces have a frosted appearance, I apply Scotchbond™ Universal bonding agent (3M Company; St. Paul, Minn.) to all of the bonding surfaces. Like the etchant, I extend the bond slightly beyond where I expect to apply the resin.
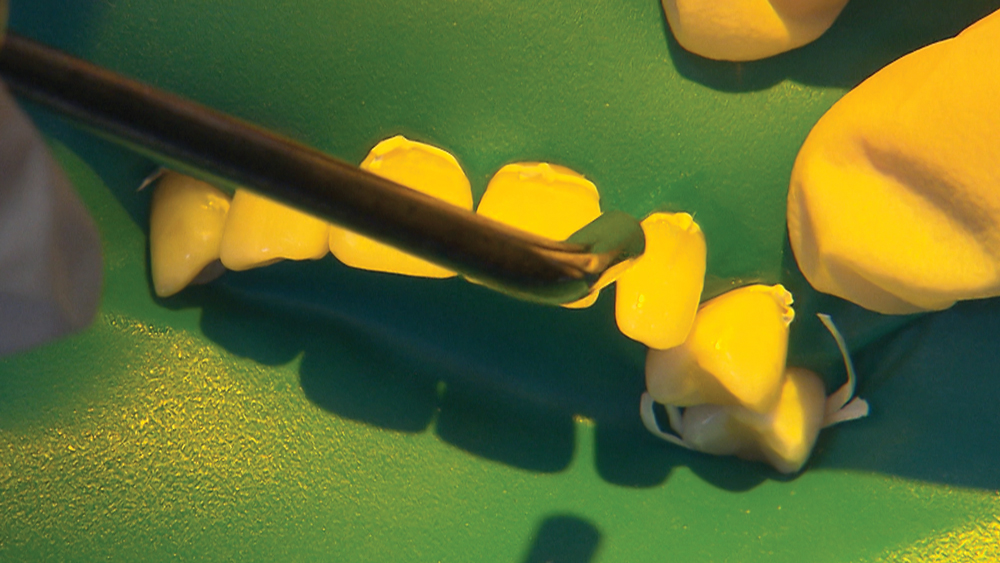
Figure 8: Once the bond is applied, I air-thin the bond to ensure the solvents evaporate. The solvents are volatile liquids such as ethanol, methanol and water, so they evaporate very quickly.
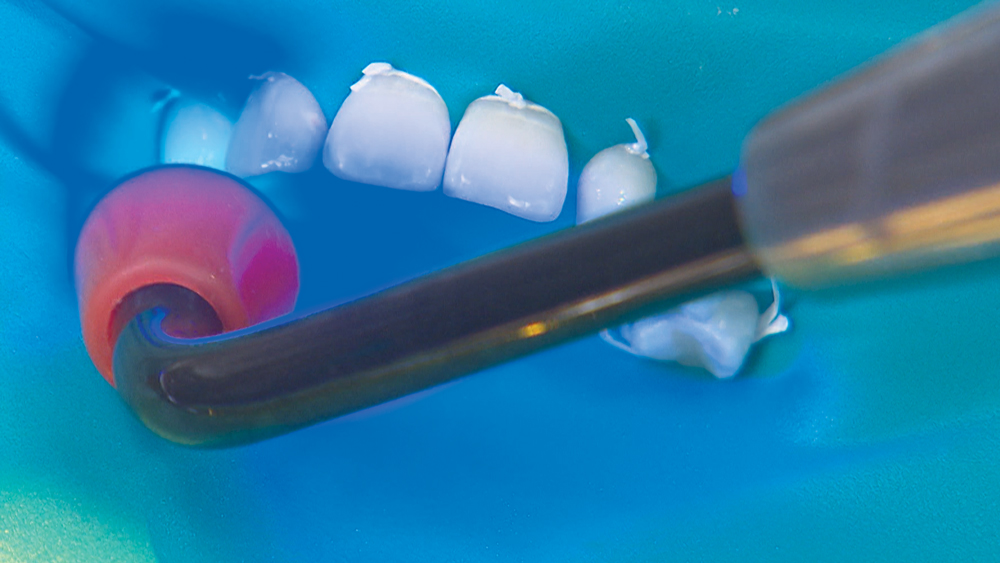
Figure 9: After drying, I polymerize the material for 10 seconds.
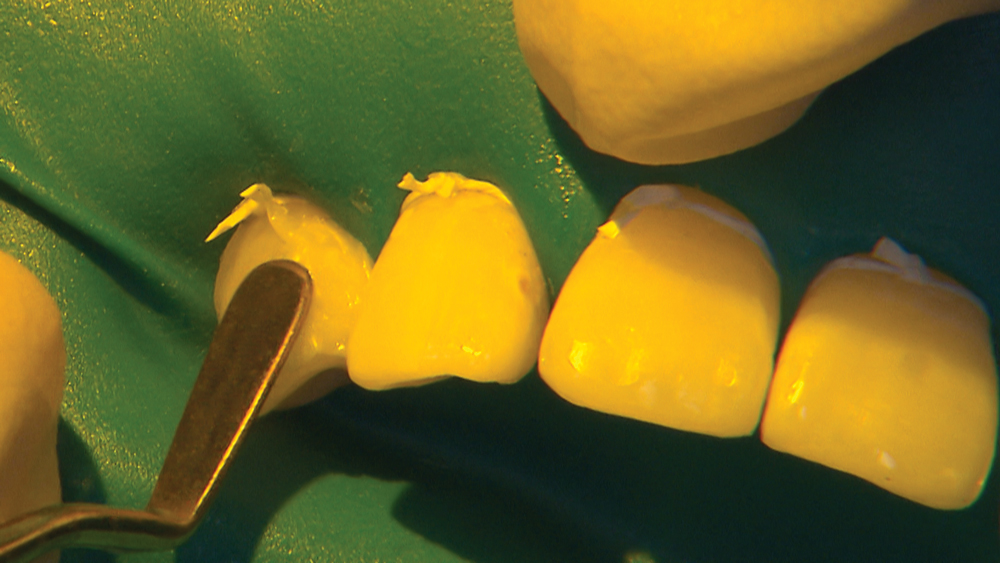
Figure 10: I begin the resin application with a spatula-shaped instrument by applying the material cervically to establish a new, natural emergence profile.
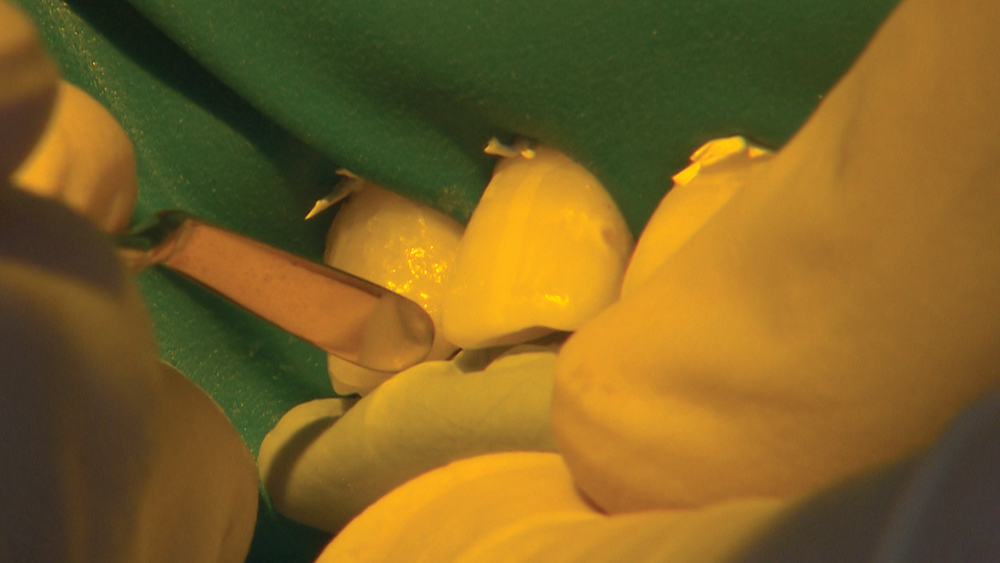
Figure 11: The putty matrix aids in determining the new incisal edge position, and the interproximal scalloping along the incisal embrasures indicates exactly where I should extend the resin application on the proximal surfaces. I use a spatula resin applicator for most of the resin placement and shaping. For some of the finer shaping, an explorer or probe can be used. I light-cure for 20 seconds to fully polymerize the material.
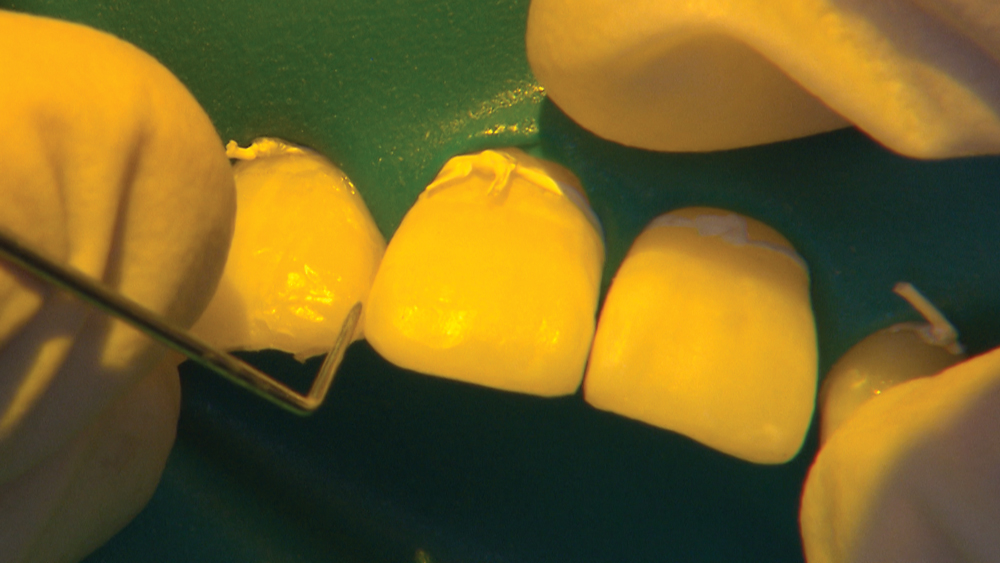
Figure 12: I extend the medial surface of the lateral out to contact the central. The Camouflage material is easy to manipulate to the desired position and shape. Also, it doesn't stick to my instruments. If composite materials stick to instruments during application, a light coat of bonding agent usually alleviates the issue.
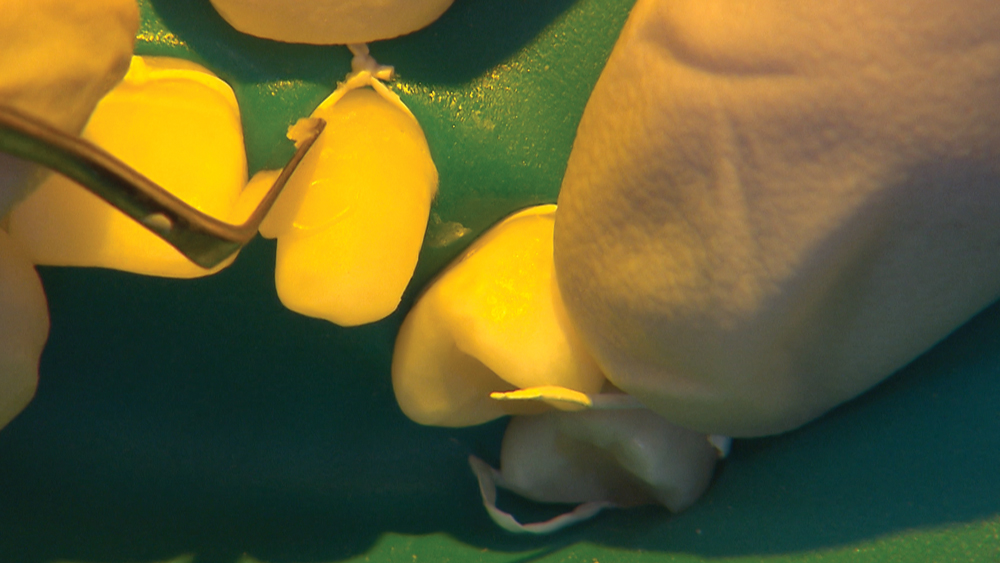 Figure 13a
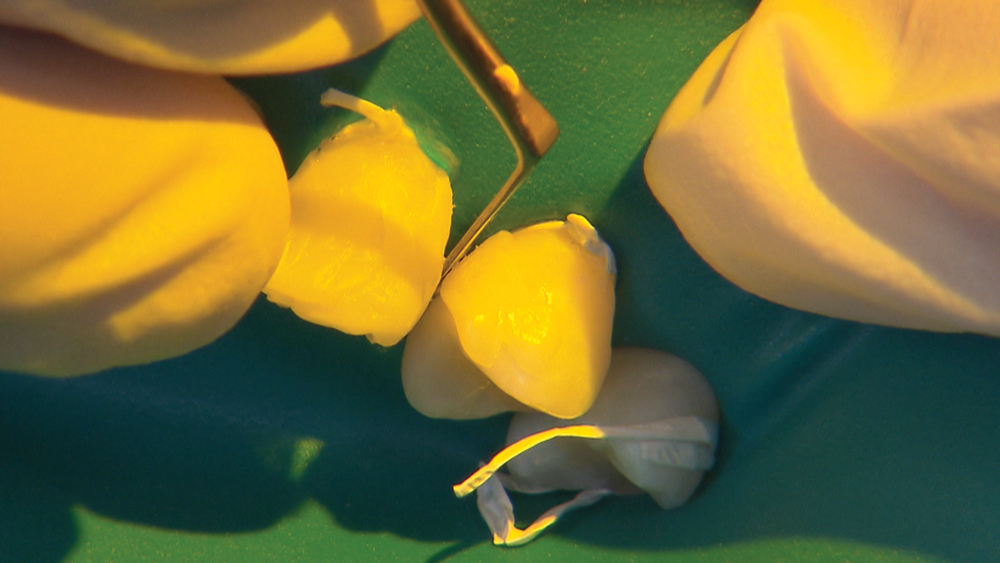 Figure 13b
 Figure 13c
Figures 13a–13c: In the esthetic zone, I try to shape the resin close to the final contours as much as possible, but slightly over-bulked. Rather than spend too much time smoothing the restoration during the resin application, I find it faster to dial in the final contours during the polishing phase. Camouflage Universal is very easy to manipulate intraorally; it has good wear characteristics; and it’s stain-resistant.
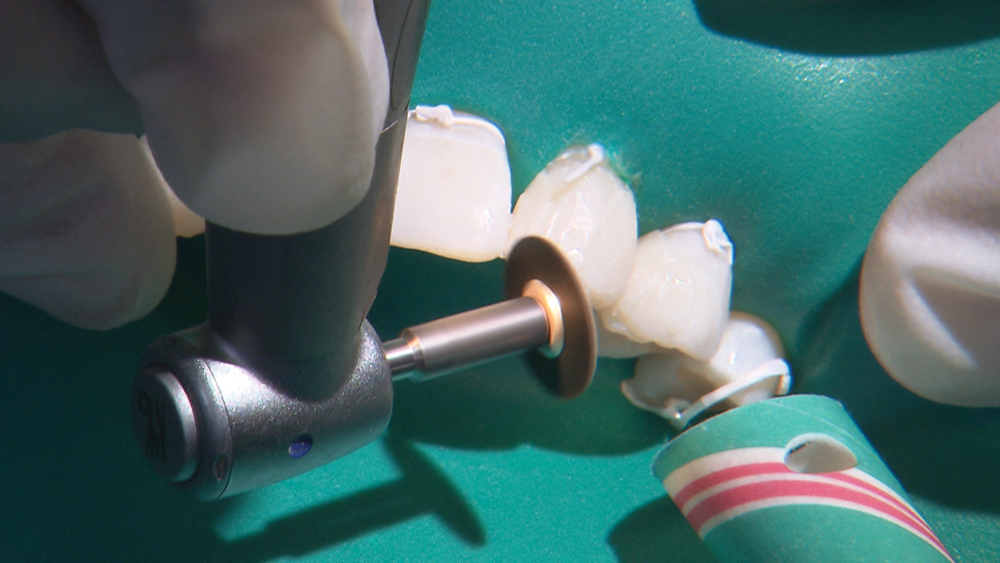
Figure 14: Using a Sof-Lex™ disc (3M Company) (the coarse variety as indicated by the black color), I shorten the length of #10 by about 0.5 mm. The next time I have a similar case, I will definitely do that step at the beginning rather than wait until the end because leaving it longer can interfere with the seating of the putty matrix.
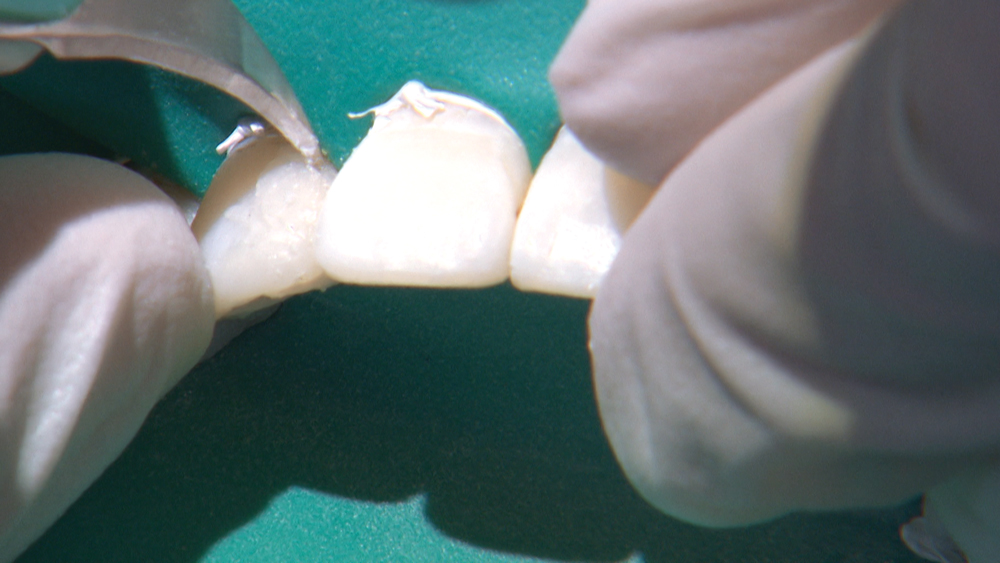
Figure 15: A #12 blade is very useful to remove any roughness along the transition between the natural tooth and the resin application. Any overhangs or roughness can lead to gingival inflammation.
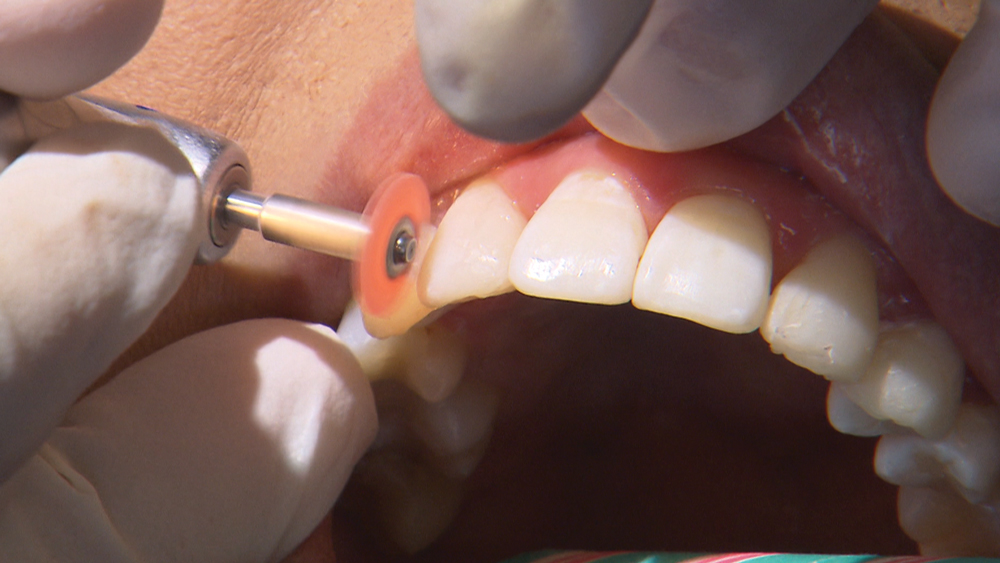
Figure 16: The darker colors of the Sof-Lex discs are used primarily for gross reduction, and the lighter ones are used for refining the contours and margins and also removing any large areas of surface roughness. The lightest colors allow the polishing of the restorations to a high shine. My goal is for the margins to be indiscernible.
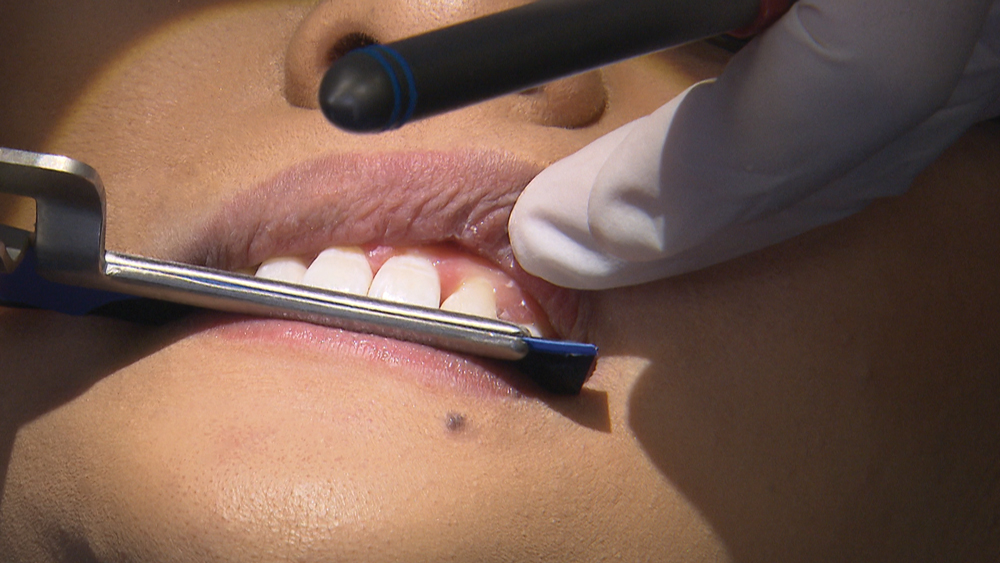
Figure 17: Checking the occlusion.
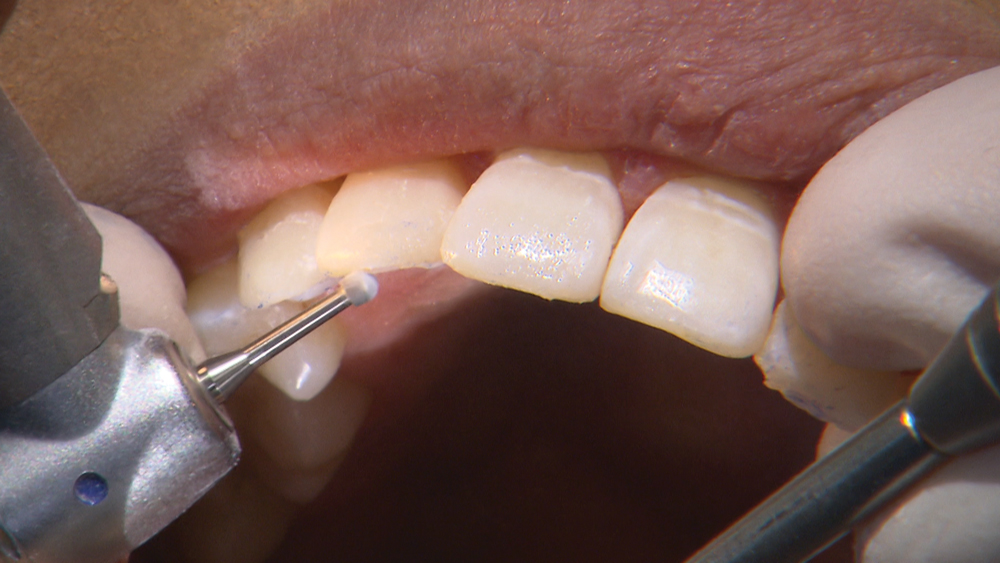
Figure 18: I use a slow-speed round bur to adjust any high spots. It will typically remove the composite material with a minimal effect on the enamel.
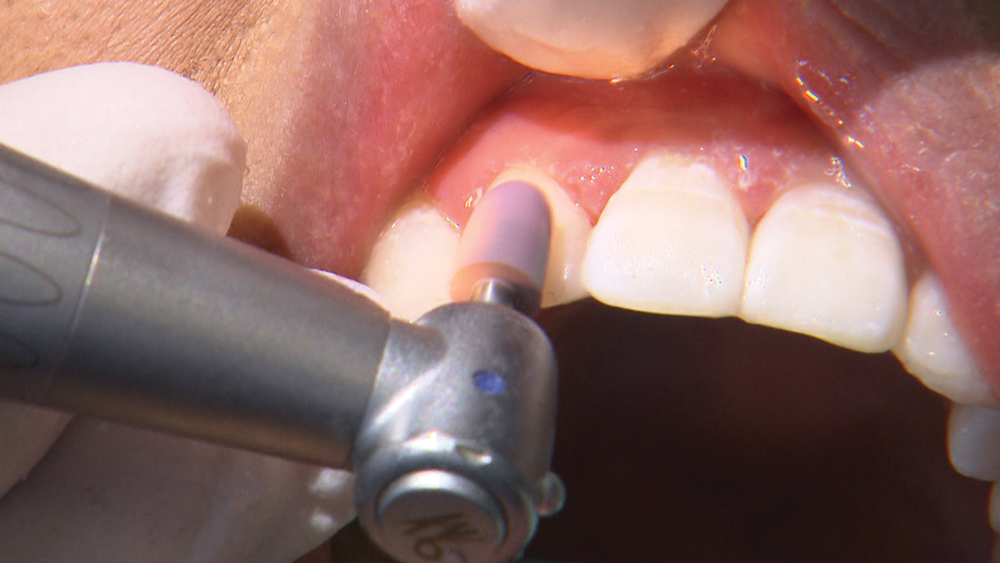
Figure 19: I finish the restoration with a coarse composite polisher and then a fine composite polisher, to remove any surface scratches.
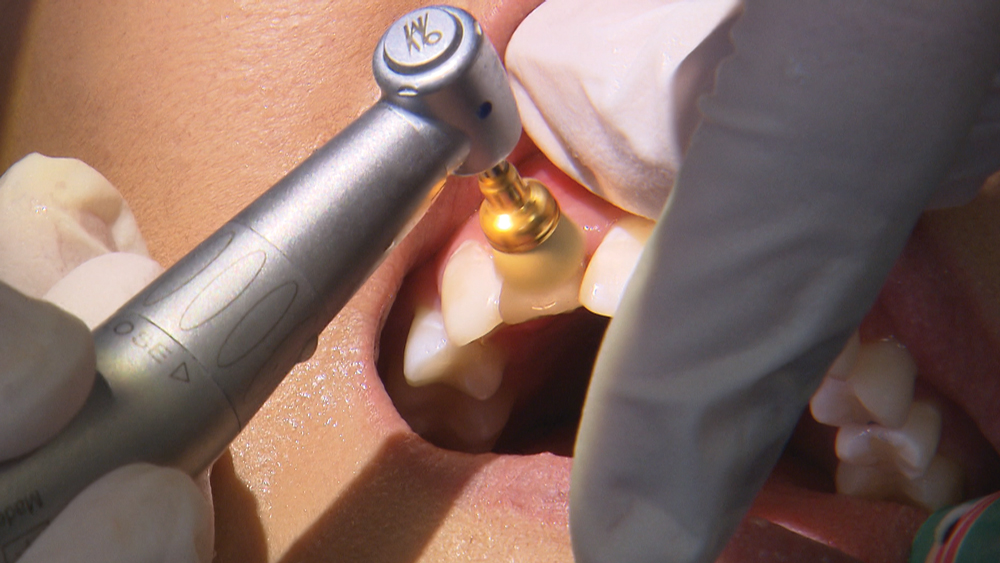
Figure 20: I finalize the polishing by using an Occlubrush® by Kerr Corporation. It has special impregnated fibers that polish the composite material to a high shine without the need for an additional paste.
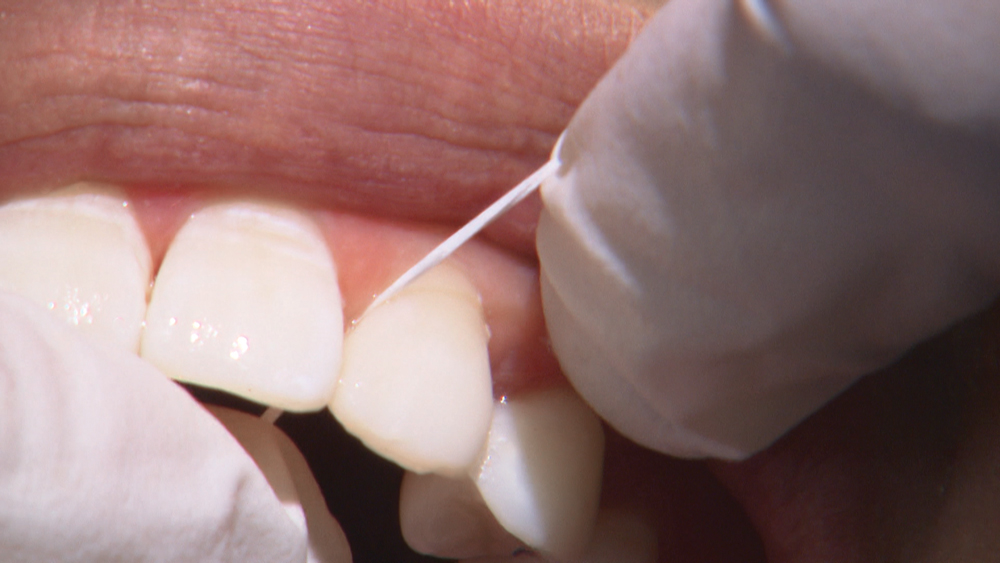 Figure 21a
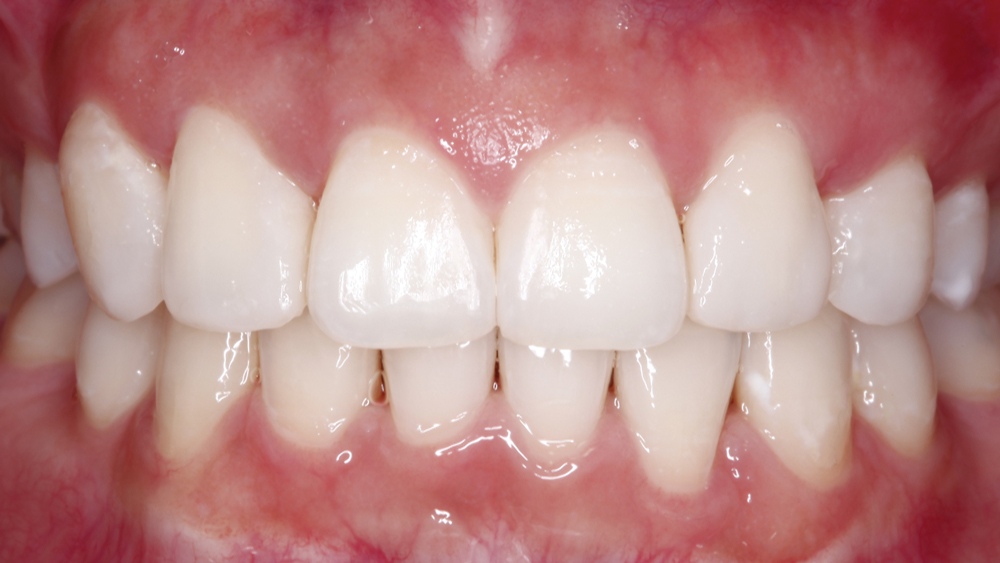 Figure 21b
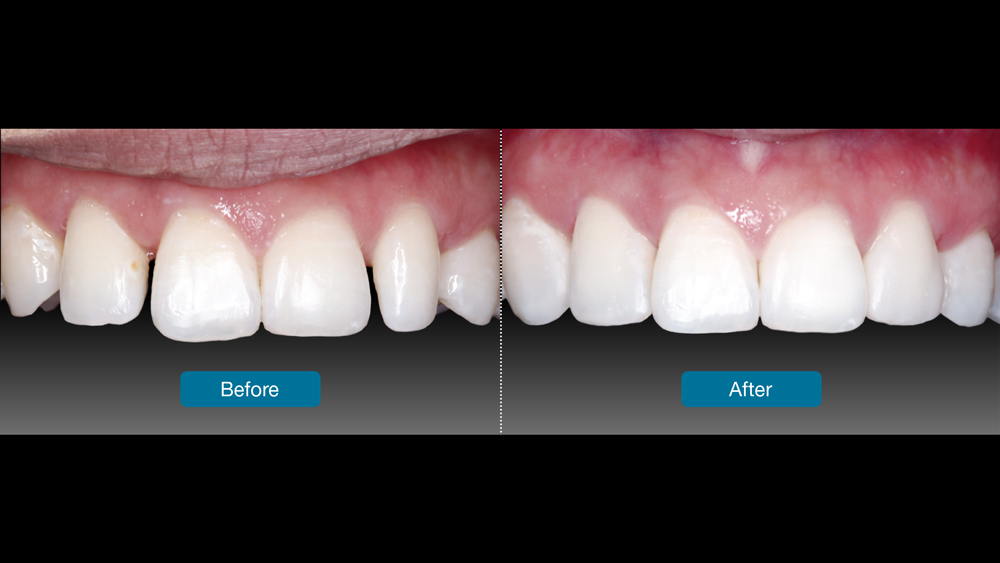 Figure 21c
Figures 21a–21c: I check the restorations with floss and ensure smooth contacts and the absence of rough areas along the transition to the natural tooth.
Conclusion
Victoria was very excited about the final esthetic improvement I was able to provide in a single appointment. The completed composite treatment served as an excellent, minimally invasive way to immediately alter the shape of the teeth in an affordable and reversible manner.