In this issue:
Delivering Strength and Esthetics with Obsidian® Pressed to Metal – Case of the Week: Episode 191
Author

For the Case of the Week for “Chairside Live” Episode 191, I turned to a state-of-the-art PFM solution to address a heavy bite. The patient, Maria, joined Glidewell Laboratories a year ago as a senior regulatory affairs specialist, a role in which she maintains the company’s strict compliance with all national and international regulations. Her case is emblematic of our culture at Glidewell, where employees are able to contribute to the dental industry and also receive dental work that embodies the latest materials and techniques available.
Maria’s previous restorations included a metal-occlusal PFM on one tooth and chipped porcelain on another; in planning her new restorations, I prioritized masticatory forces as a chief concern.
In addition to using a material that would be able to resist heavy bite forces, I wanted the new restorations to show ideal esthetics, which were lacking in the original PFMs. Of course, the old restorations’ inadequate esthetics were not surprising, as traditional metal occlusal PFMs require some compromise: Strength is maximized, but esthetics suffer.
Fortunately, Obsidian® Fused to Metal (Glidewell Laboratories; Newport Beach, Calif.) avoids this compromise. Offering superior chip resistance, an average flexural strength of 397 MPa, and a lifelike appearance, Obsidian sets a new clinical standard for PFMs. Read on to see how this material yields esthetic, strong restorations.
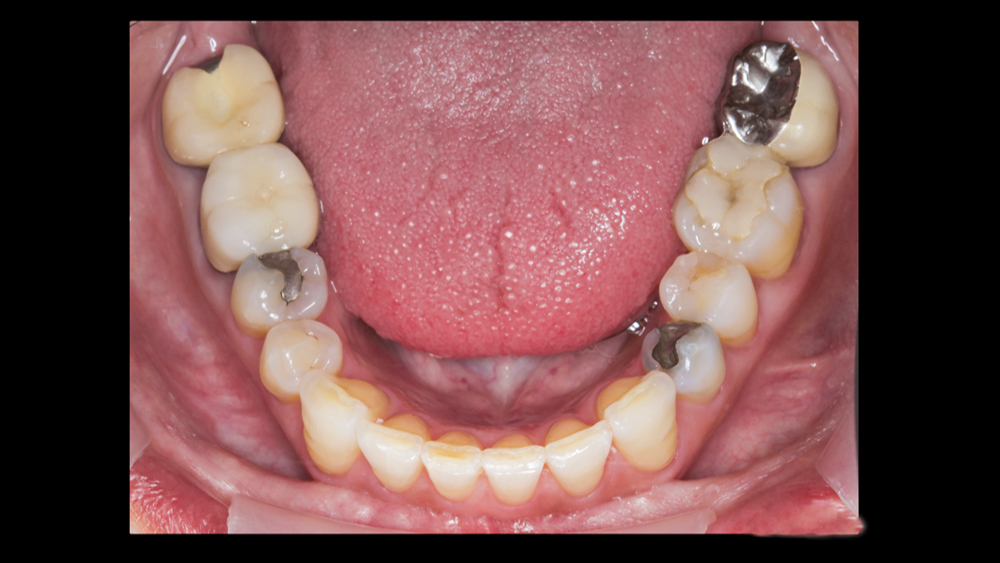
Figure 1: Maria has multiple defective restorations on first and second mandibular molars bilaterally. Secondary caries is also present beneath the amalgam on tooth #29. Traditionally, porcelain fused to metal crowns are used to protect the remaining tooth structure of broken-down or endodontically treated teeth.
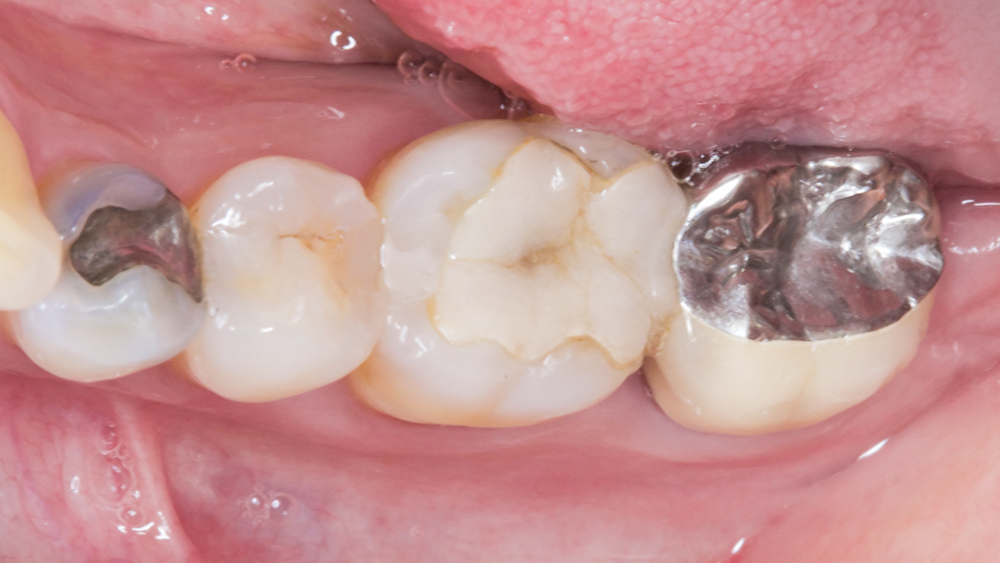
Figure 2: I will restore one side at a time, so the occlusal contacts on the contralateral side will remain unaltered and maintain the occlusion. Looking at the lower left side first, a lingual crack is visible on the first molar, and there is recurrent decay under the large composite filling. The second molar PFM includes metal on the lingual, in addition to the entire occlusal surface. Clinicians sometimes choose this nonesthetic option for a patient with a heavy bite or for a preparation where inadequate occlusal clearance was obtained.
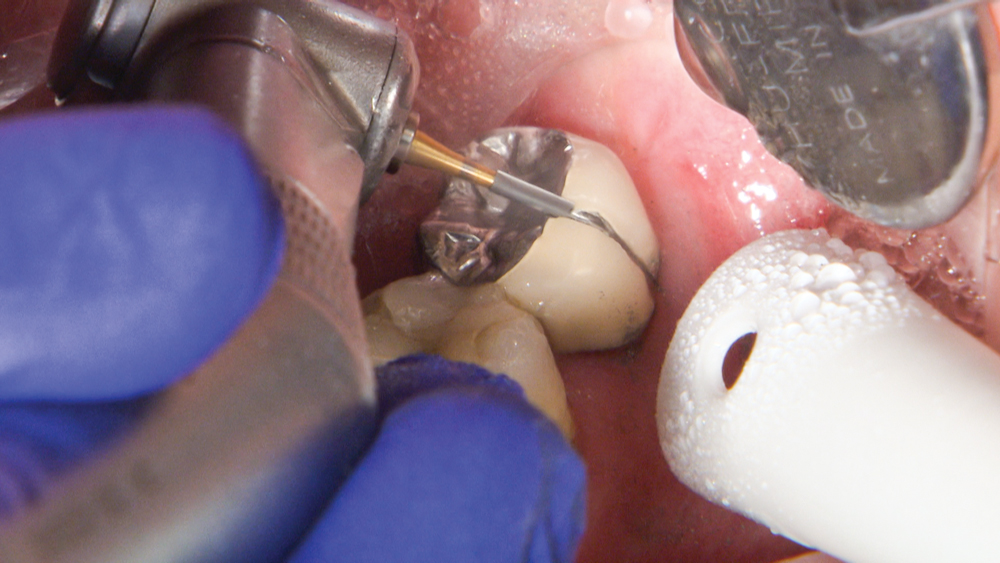 Figure 3a
 Figure 3b
Figures 3a, 3b: Using a Razor Operative™ Carbide bur (Kerr Corporation; Orange, Calif.), I’m able to cut through the defective PFM. After cutting the occlusal portion, I can see the metal is quite thick, indicating occlusal clearance wasn’t an issue for this endodontically treated tooth. Quite likely, the previous dentist chose to restore tooth #18 with a metal occlusal in order to withstand heavy bite forces. I’m going to prescribe Obsidian Fused to Metal for teeth #18 and #19 to put this revolutionary bilayer material to the test.
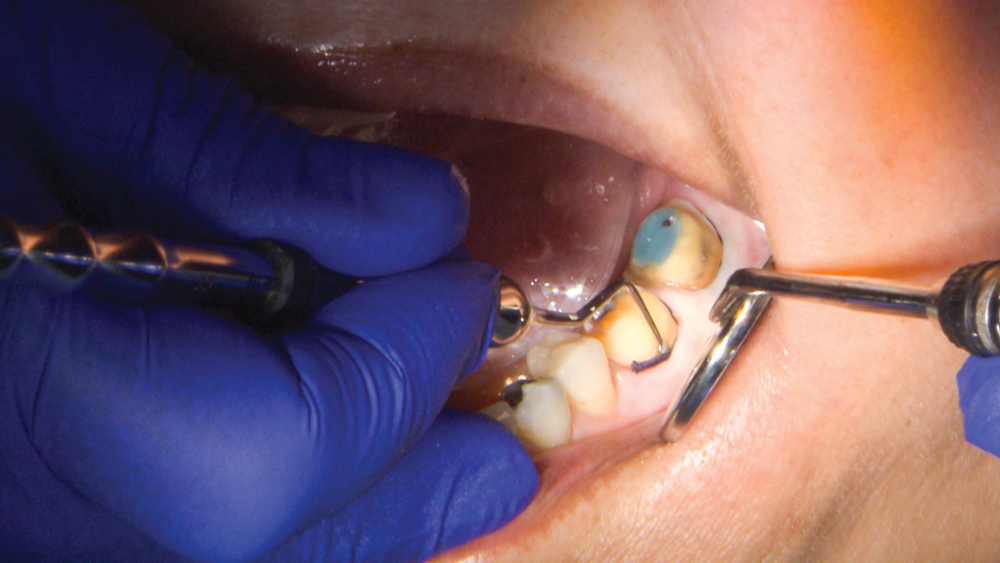 Figure 4a
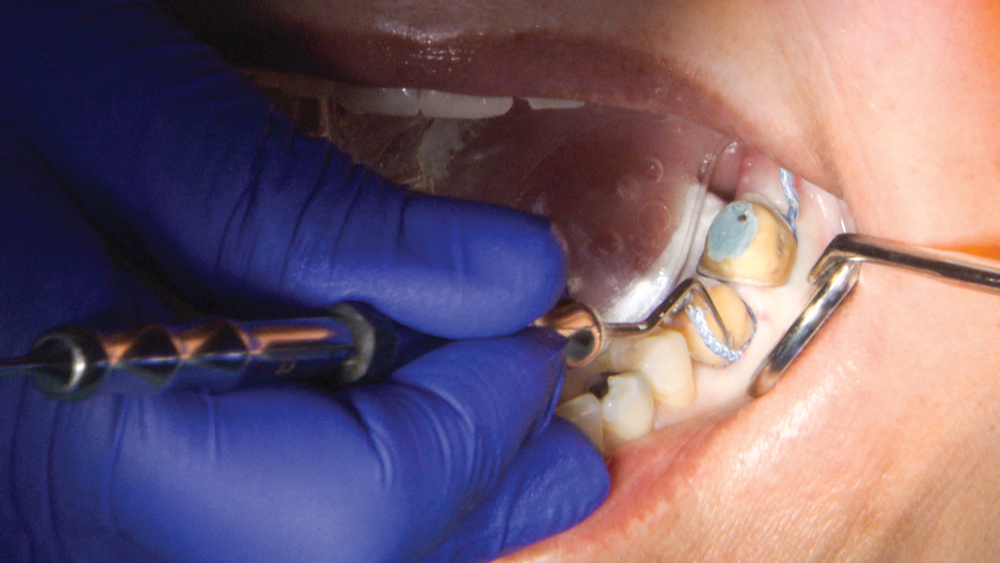 Figure 4b
Figures 4a, 4b: After using a carbide bur to remove the composite and preparing both teeth for Obsidian Fused to Metal crowns, I’m ready to proceed with the Two-Cord Impression Technique. I first utilize a #00 cord for apical displacement and then a #1 cord for lateral displacement. When placed dry into the sulcus, the cords expand by absorbing the gingival fluids, resulting in better displacement of the tissue.
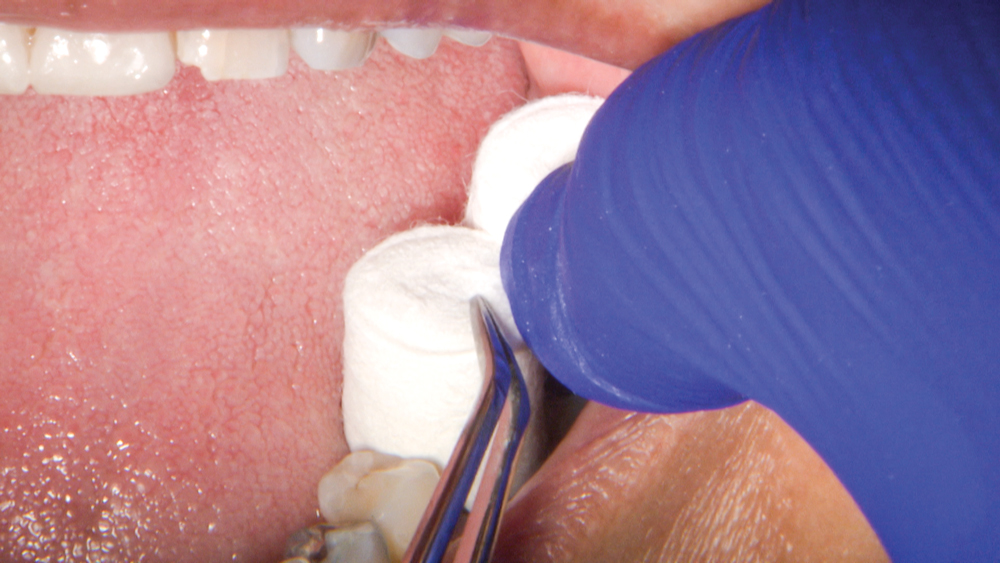 Figure 5a
 Figure 5b
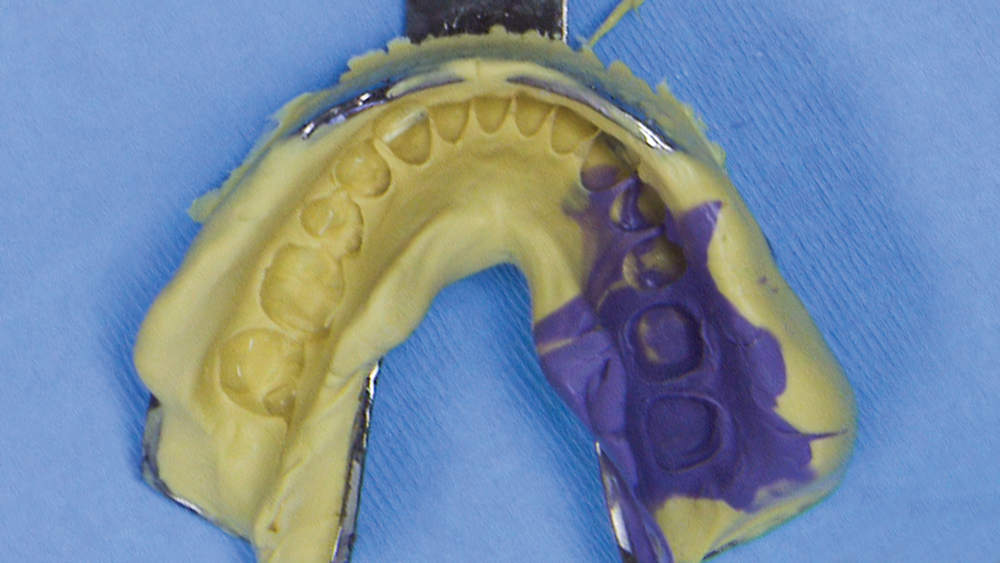 Figure 5c
Figures 5a–5c: Next, I place anatomically formed compression caps (ROEKO Comprecap anatomic [Coltène/Whaledent; Cuyahoga Falls, Ohio]) and instruct Maria to bite down to apply pressure for about three minutes. Afterward, it’s time to take the impression and a bite registration. Because there is no occlusal stop distal to the prepared teeth, we make a full-arch impression and a bite registration. This will minimize occlusal errors and avoid the possibility of excessive occlusal adjustment at seating.
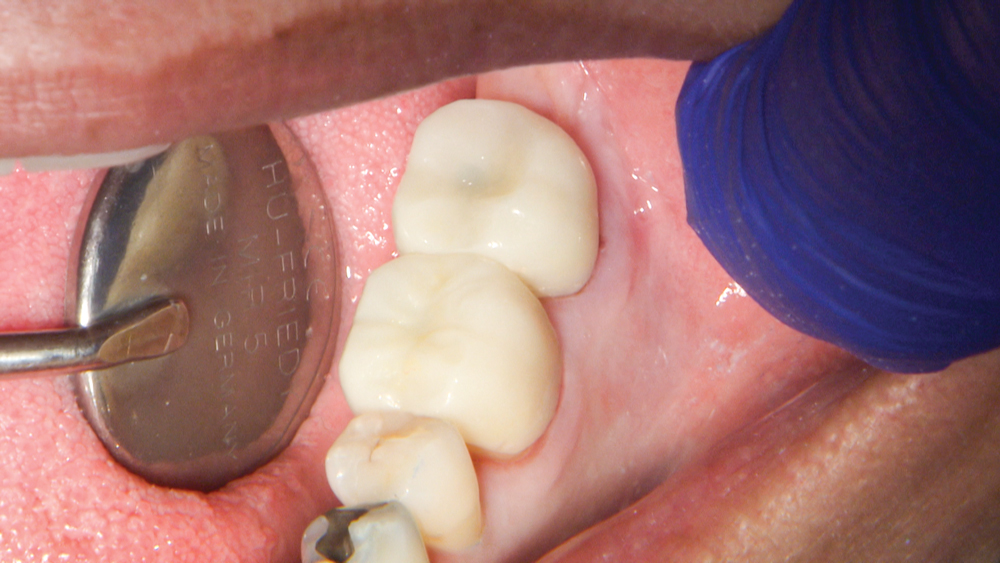
Figure 6: For the temporization stage, I use a 2-unit splinted BioTemps® Provisional.
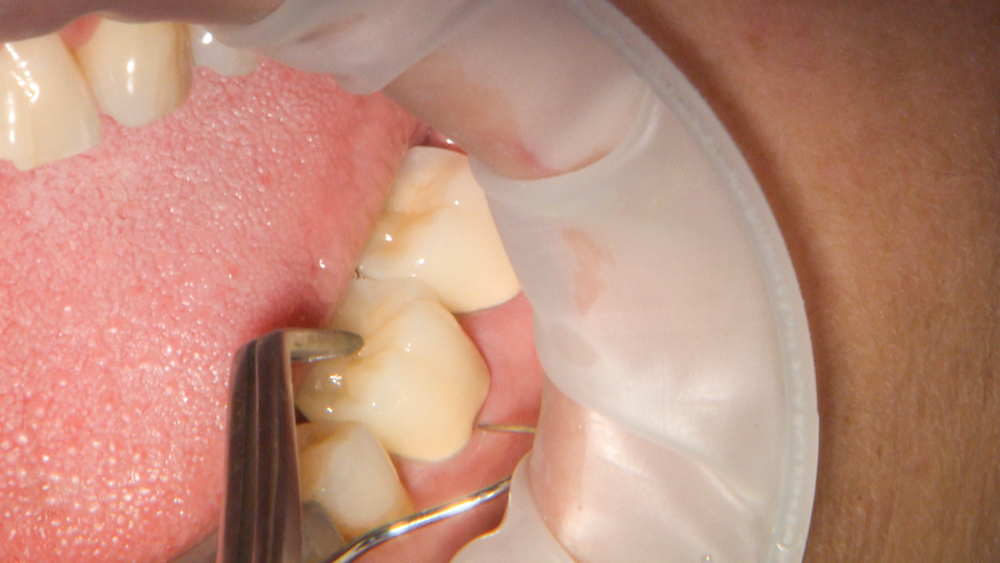 Figure 7a
 Figure 7b
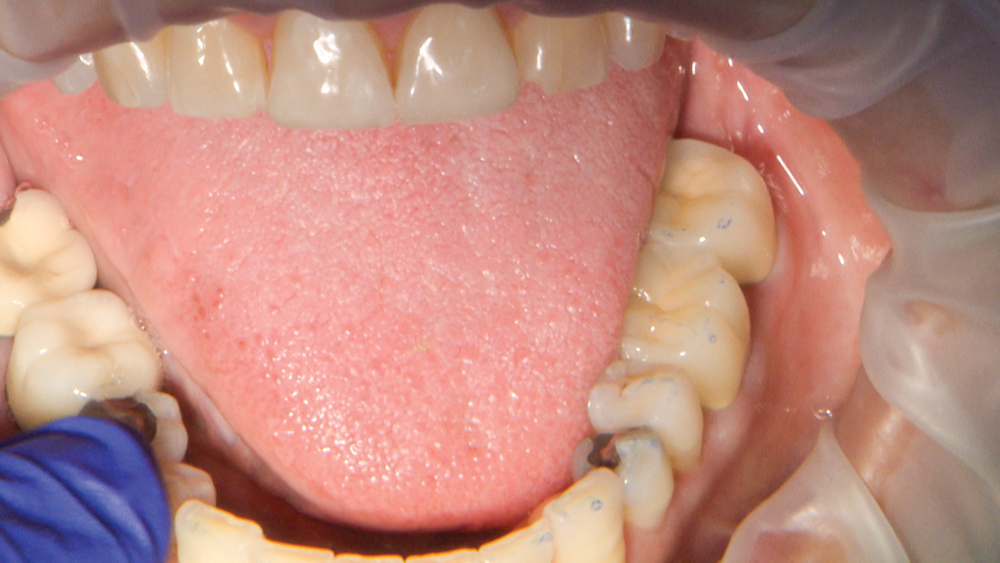 Figure 7c
Figures 7a–7c: At the delivery appointment, the crowns are tried-in, and I use an explorer to verify the margins are well sealed. An 8-micron-thin articulating paper (TrollFoil [TrollDental; Oakdale, Minn.]) allows me to check the occlusion. No adjustments are necessary.
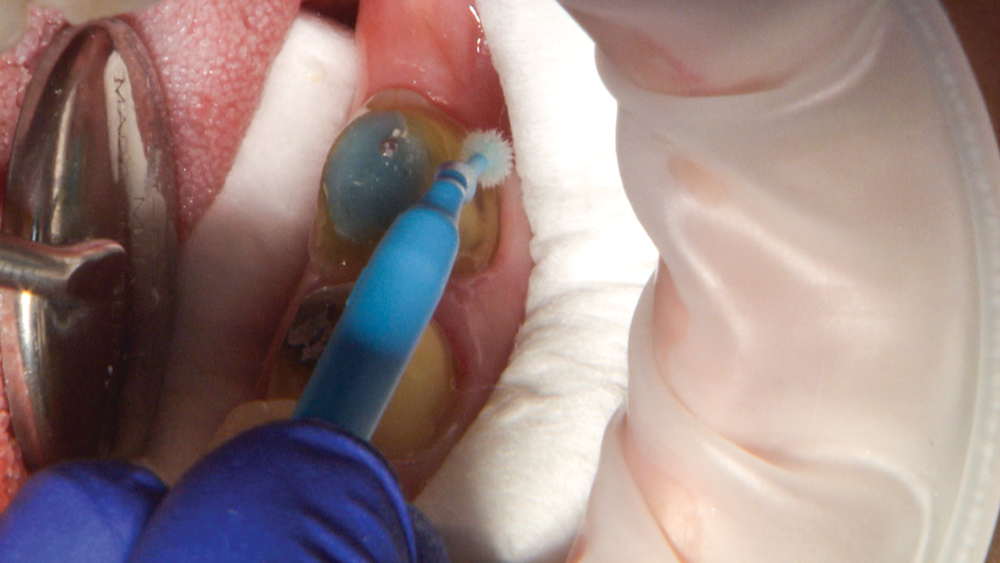
Figure 8: After pumicing the preparations, I’m ready to cement. I always apply G5™ All-Purpose Desensitizer (Clinician’s Choice; New Milford, Conn.) before cementation, even on an endodontically treated tooth, because the HEMA-containing desensitizer seems to inhibit bacterial growth.
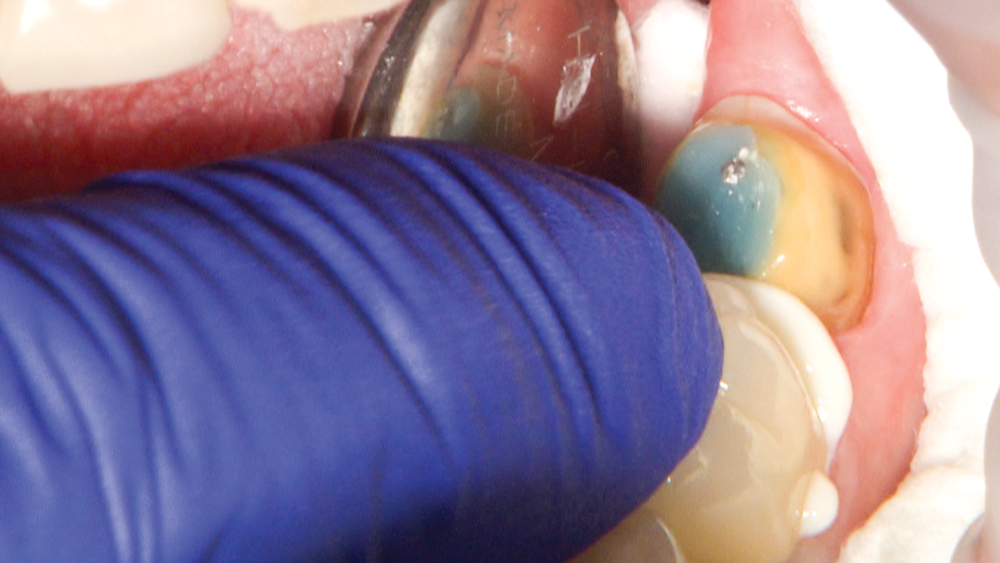 Figure 9a
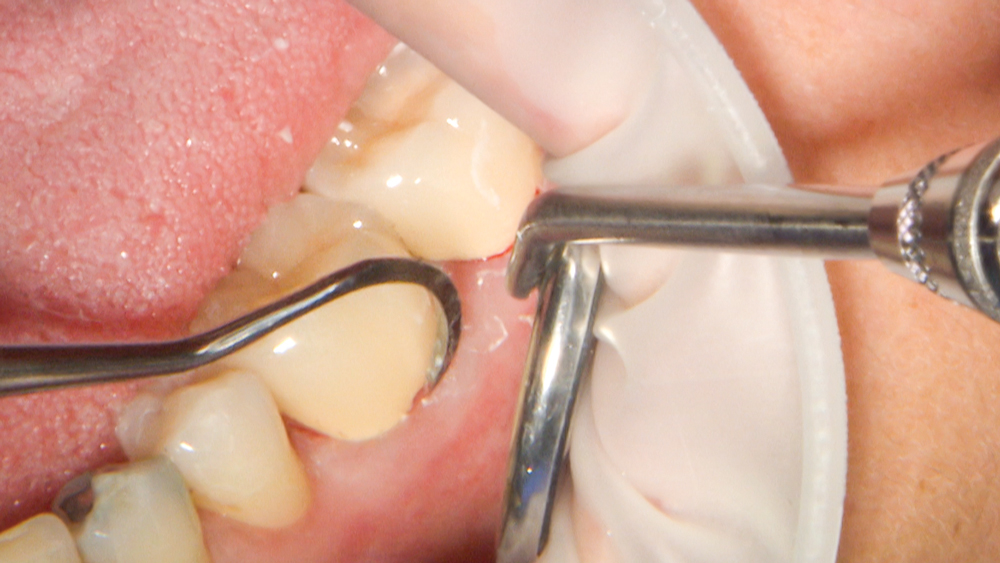 Figure 9b
Figures 9a, 9b: When cementing metal restorations, I prefer RelyX™ Luting Plus Cement (3M Company; St. Paul, Minn.). This resin-modified glass ionomer self-curing cement has a tack and wave light-curing option, which makes the excess easier to remove.
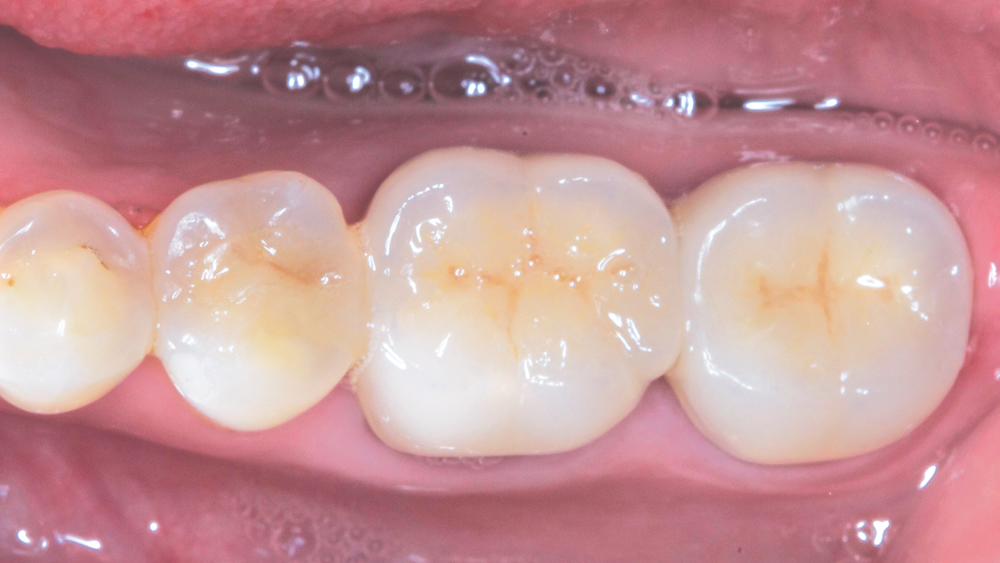
Figure 10: The appearance of the final Obsidian Fused to Metal restorations is impressively lifelike, and the material’s chip resistance allows me to be fully confident in the restorations’ longevity.

Figure 11: Now, the second part of Maria’s treatment can proceed, with replacement of the defective restorations on the contralateral side. Issues with these old restorations include fractured porcelain on the distal of tooth #31, marginal leakage under both PFMs, and recurring decay under the amalgam on tooth #29.
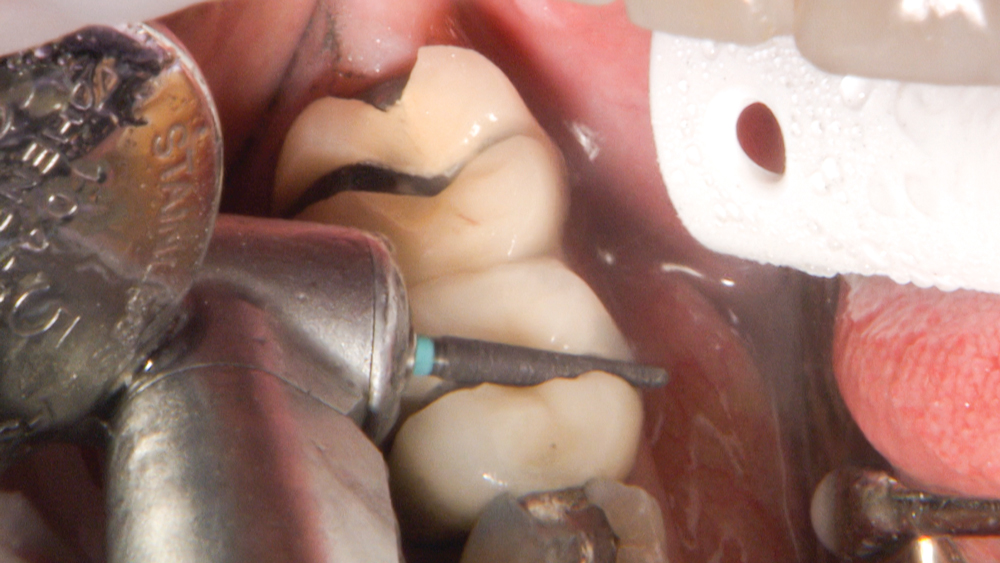 Figure 12a
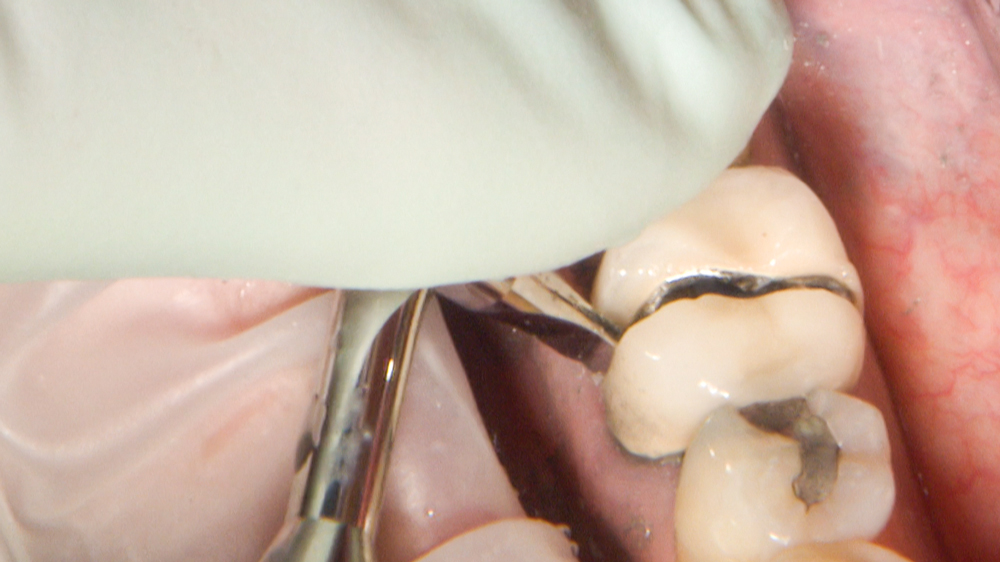 Figure 12b
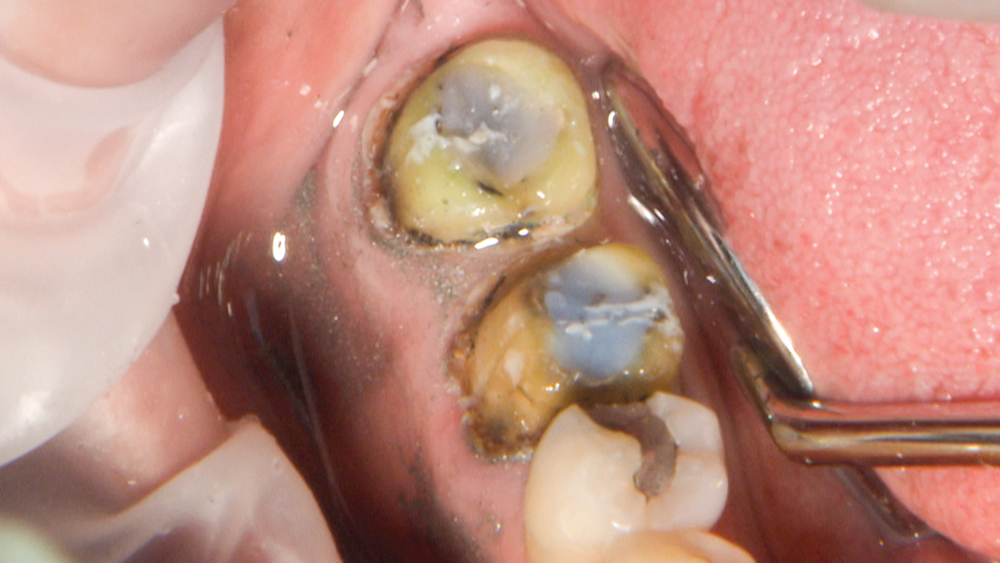 Figure 12c
Figures 12a–12c: The crowns are cut off using a ZIR-CUT™ Diamond bur (Kerr Corporation) and forced open with a Christensen Crown Remover (Hu-Friedy Mfg. Co., LLC; Chicago, Ill.). Now, I’m able to survey the amount of leakage that has occurred between the tooth and the crown interface.
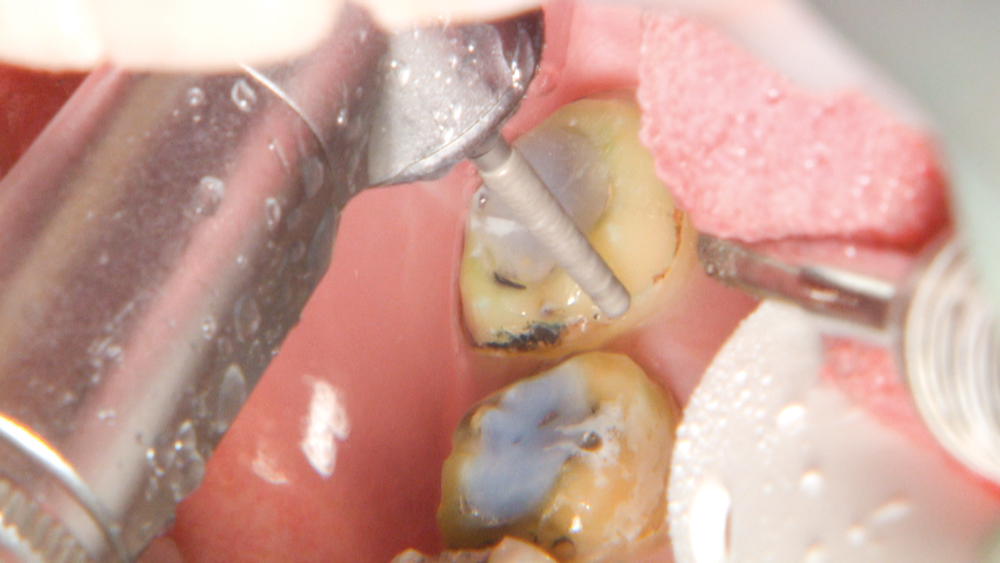
Figure 13: I remove the restorations and recurrent caries, and prepare teeth #31 and #30 to receive Obsidian Fused to Metal crowns, while tooth #29 will receive an Obsidian inlay.
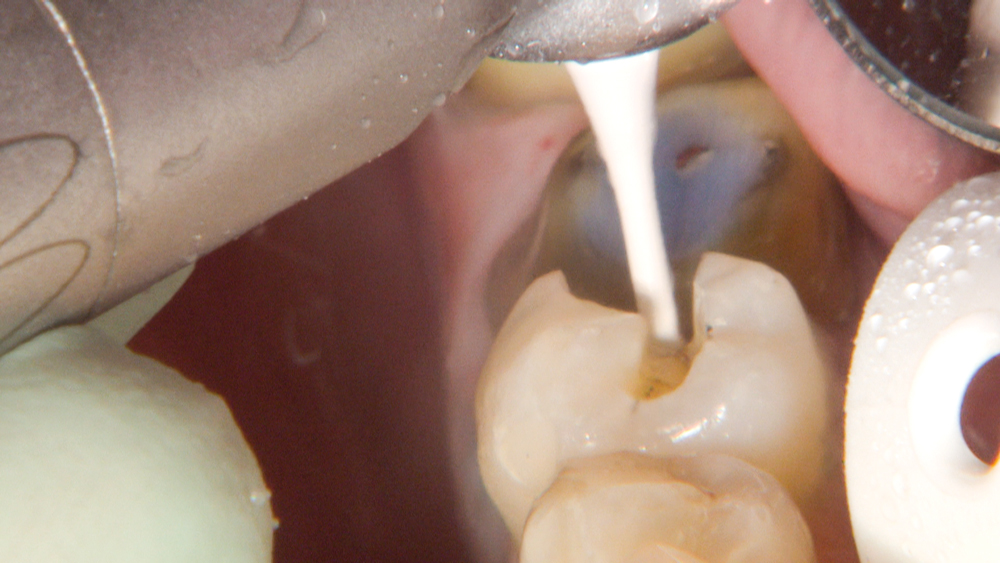 Figure 14a
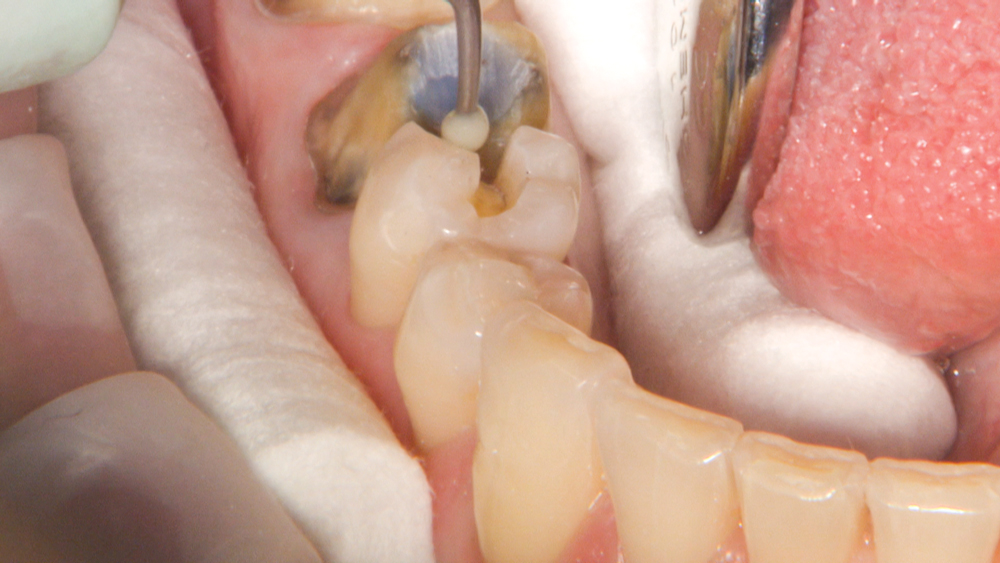 Figure 14b
Figures 14a, 14b: After removing the amalgam and re-preparing tooth #29 with a carbide bur, I’m going to use a round CeraBur® (Gebr. Brasseler GmbH & Co.; Lemgo, Germany) to address the distal carious, soft dentin. Once G5 is applied to the dentin, Vitrebond™ glass ionomer (3M Company) is added to the distal axial wall of tooth #29 and polymerized.
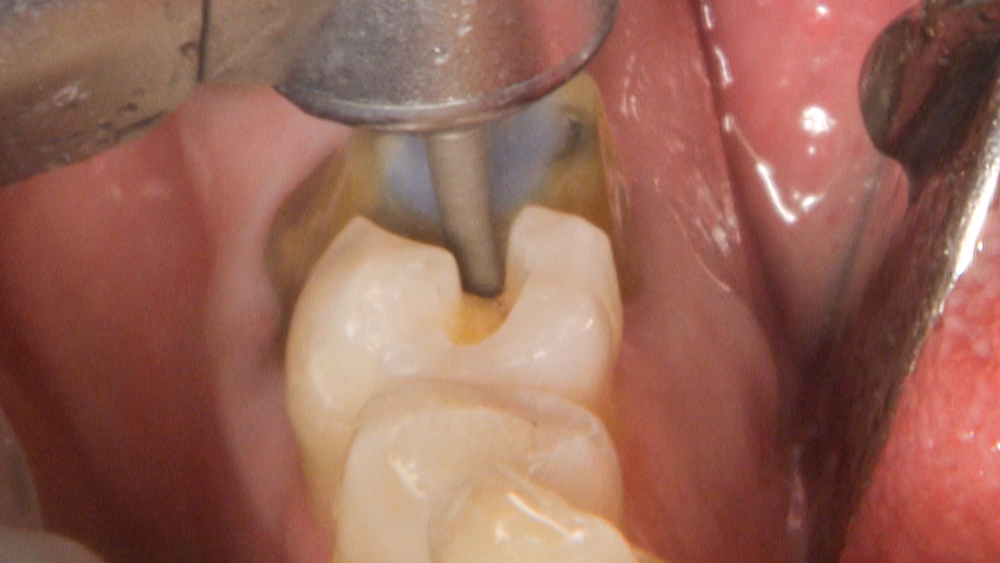
Figure 15: Just before the application of the dentin adhesive on tooth #29, I use a diamond bur at slow speed with water spray. This step helps to flush away any debris, refresh the dentin’s smear layer, and obtain a clean surface. Next, I’m going to seal the freshly cut dentin before taking the final impression.
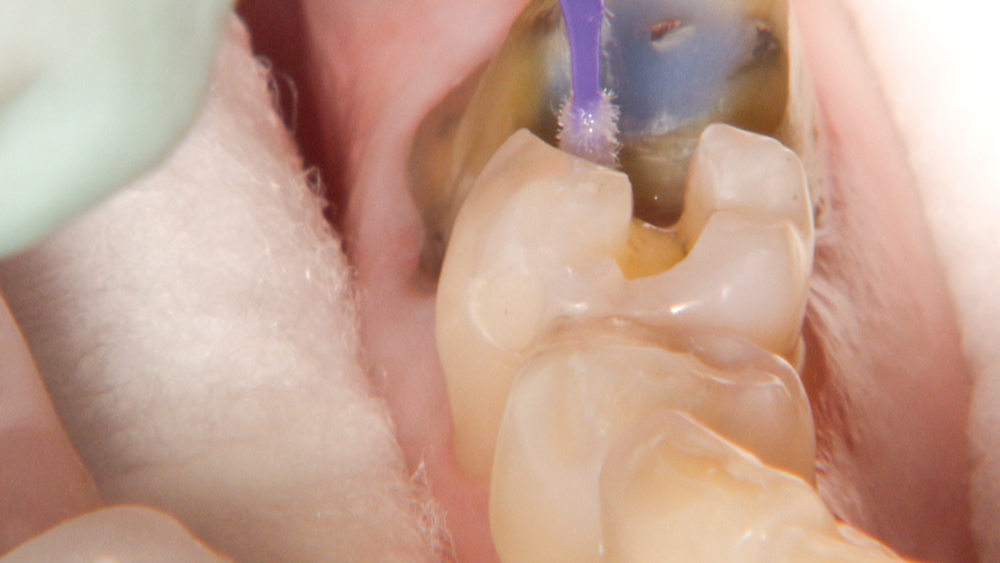 Figure 16a
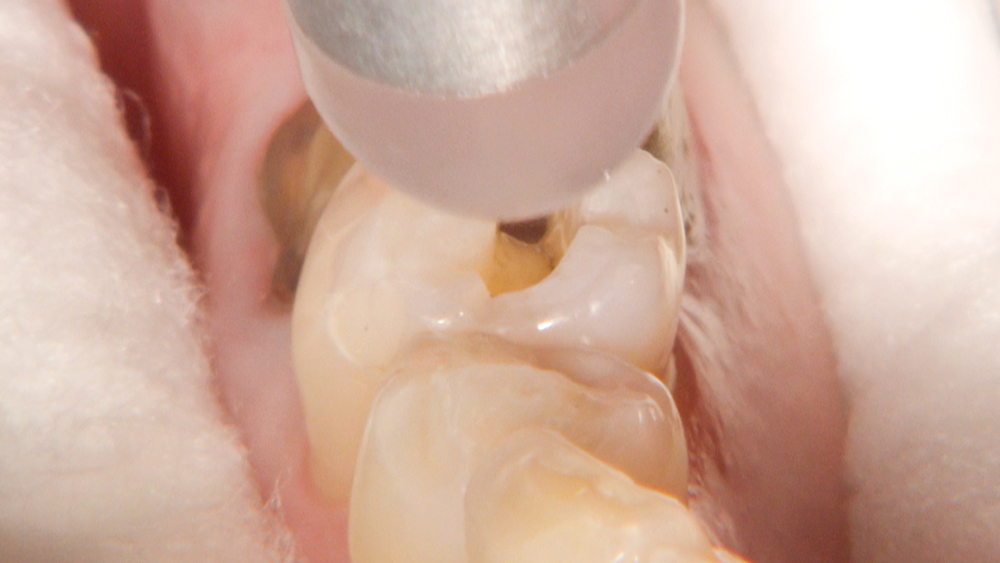 Figure 16b
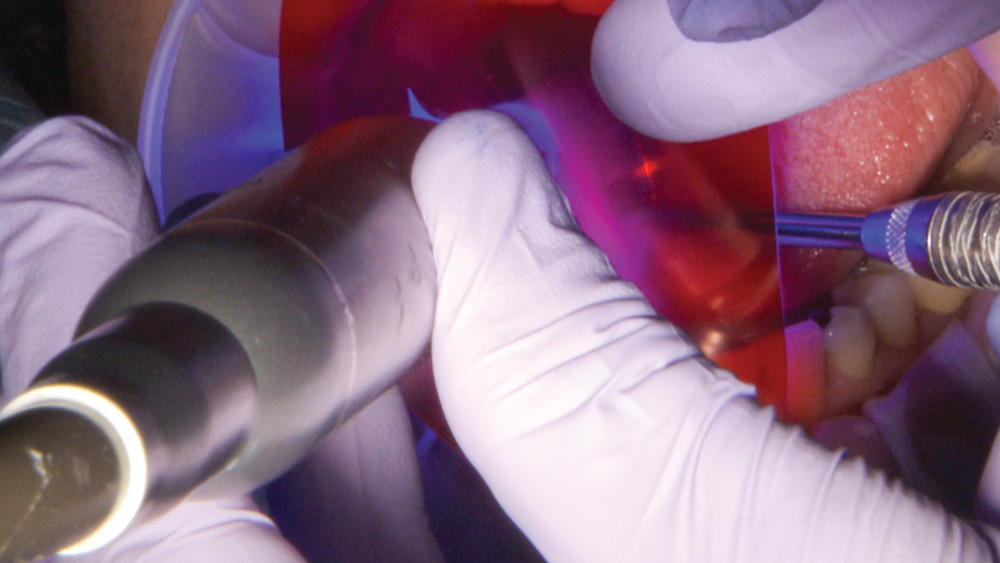 Figure 16c
Figures 16a–16c: Having applied acid etch using 35 percent phosphoric acid, followed by rinsing and drying, I now spread a layer of OptiBond® Solo Plus™ (Kerr Corporation) and polymerize. Because it is a vital tooth, I use 10-second light-curing increments to allow for cooling to prevent damage to the pulp.
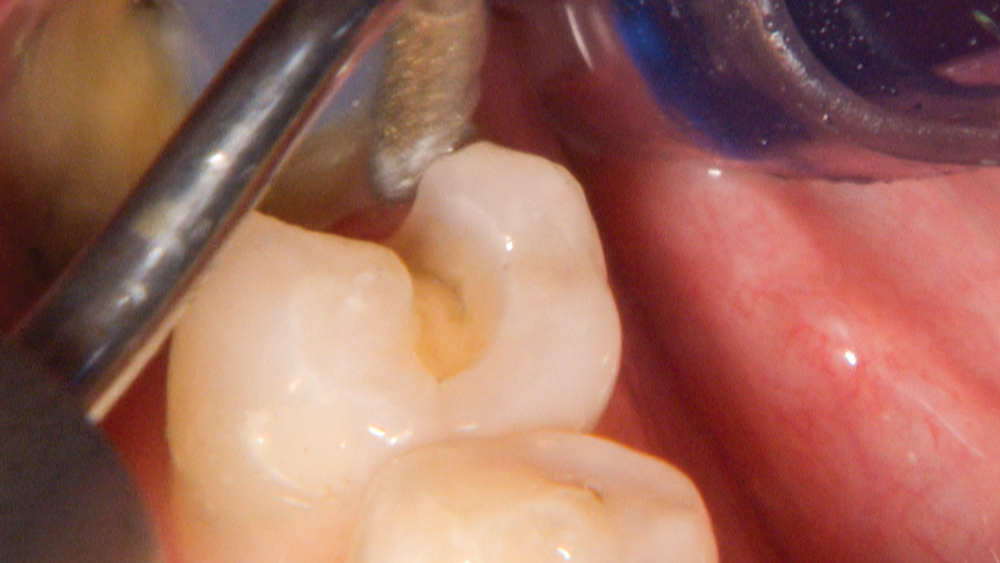
Figure 17: Using a KaVo SONICflex® scaler (KaVo Dental; Charlotte, N.C.), I remove the adhesive from the enamel and define the enamel margin before taking the final impression.
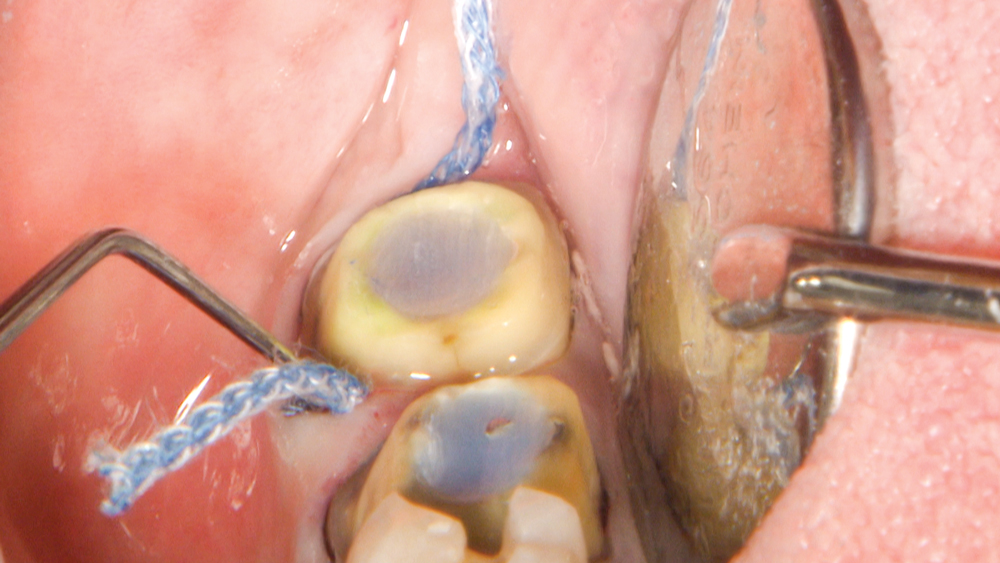 Figure 18a
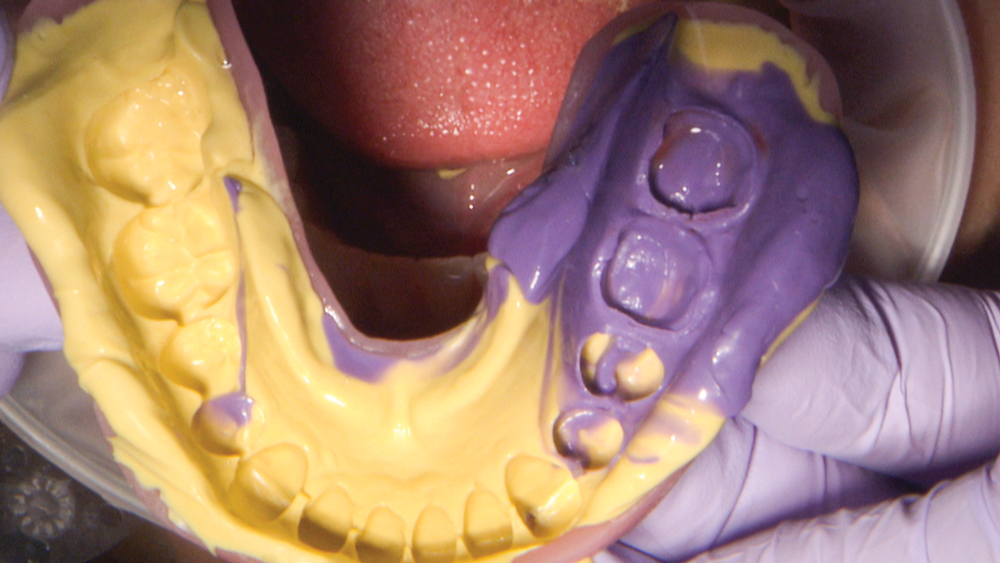 Figure 18b
Figures 18a, 18b: Similar to the process used for the left side, the final impression is taken utilizing the Two-Cord Impression Technique, providing mechanical displacement of the gingival tissue, enlarging the sulcus, and allowing access for the light-body impression material. Once again, a full-arch impression along with bite registration will be provided to the lab.
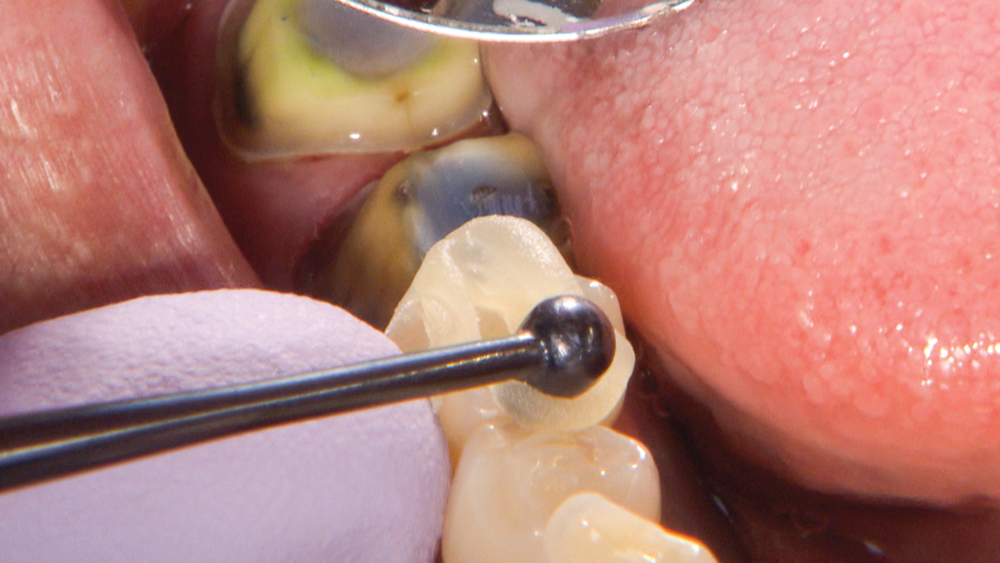 Figure 19a
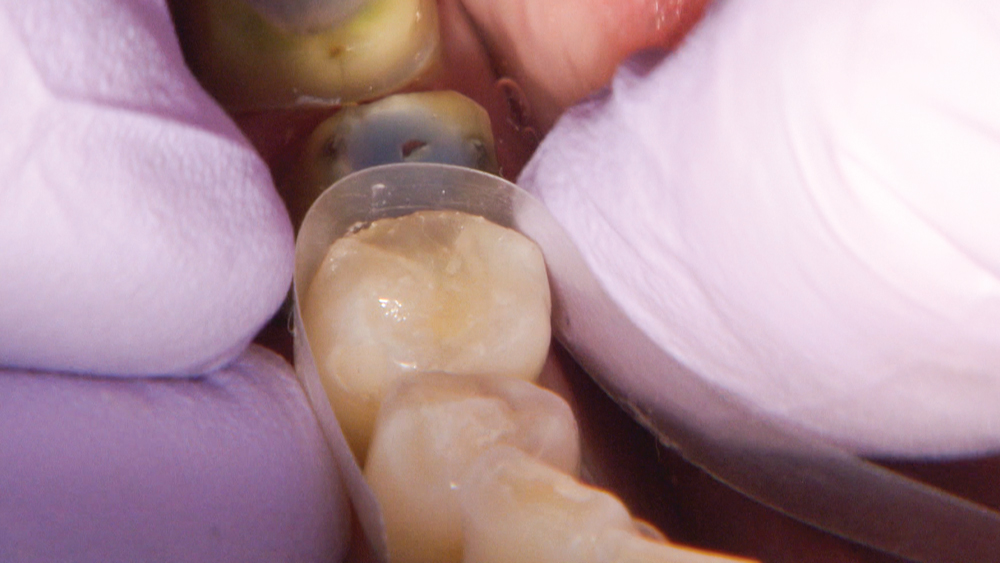 Figure 19b
Figures 19a, 19b: Because immediate dentin sealing was done for tooth #29, I prefer to temporize the cavity with Fermit™ N (Ivoclar Vivadent; Amherst, N.Y.), a light-curing, single-component composite resin. Excluding tooth #29 from the BioTemps prevents any interaction of the reline material with the freshly bonded surface. Fermit N is particularly suitable for deep inlay preparations with parallel walls.
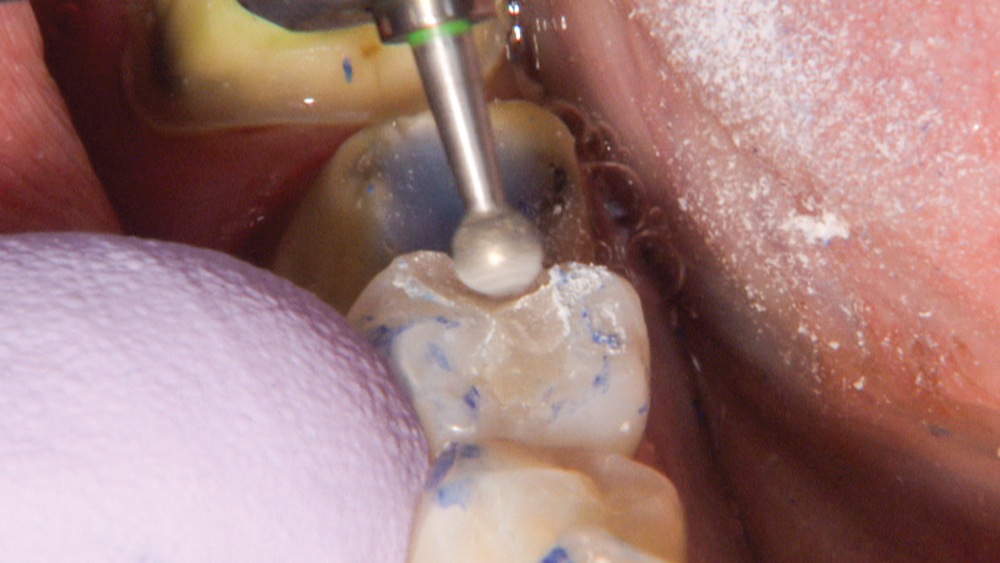
Figure 20: The Fermit provisional can easily be adjusted into occlusion using a fine diamond on a slow speed.
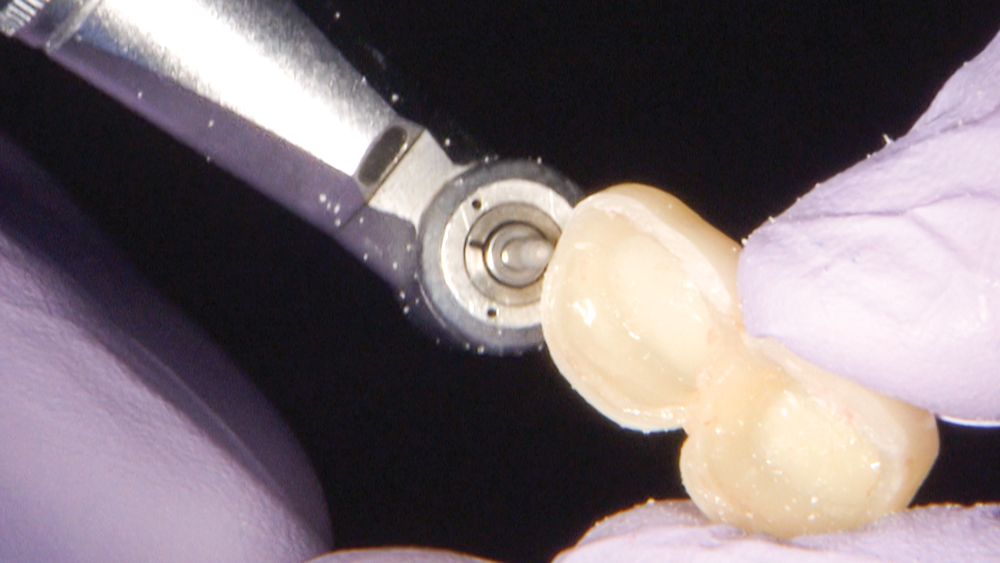 Figure 21a
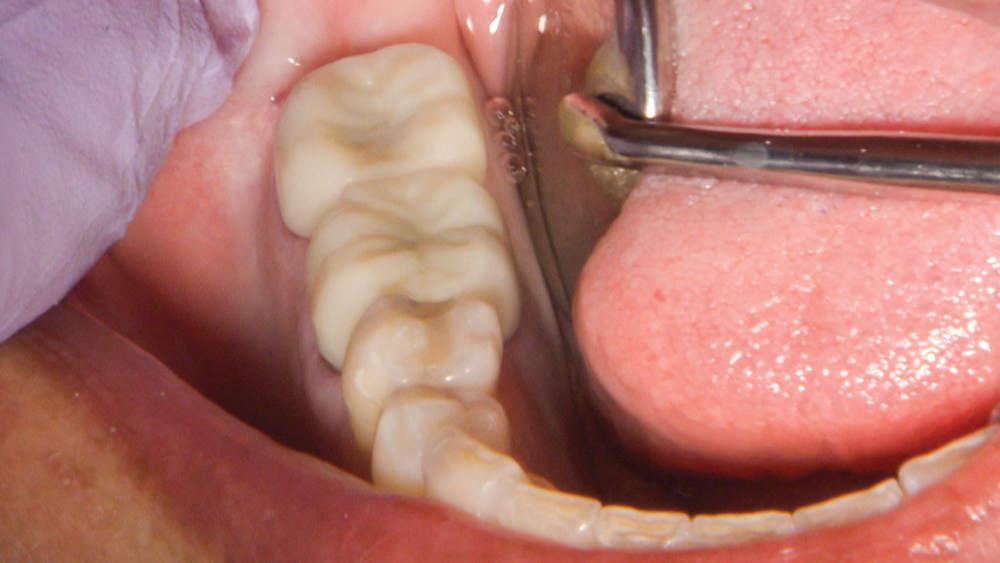 Figure 21b
Figures 21a, 21b: My assistant takes great care to ensure the previously relined BioTemps Provisionals have accurate marginal fit, as well as open interproximal embrasures to allow for cleaning.
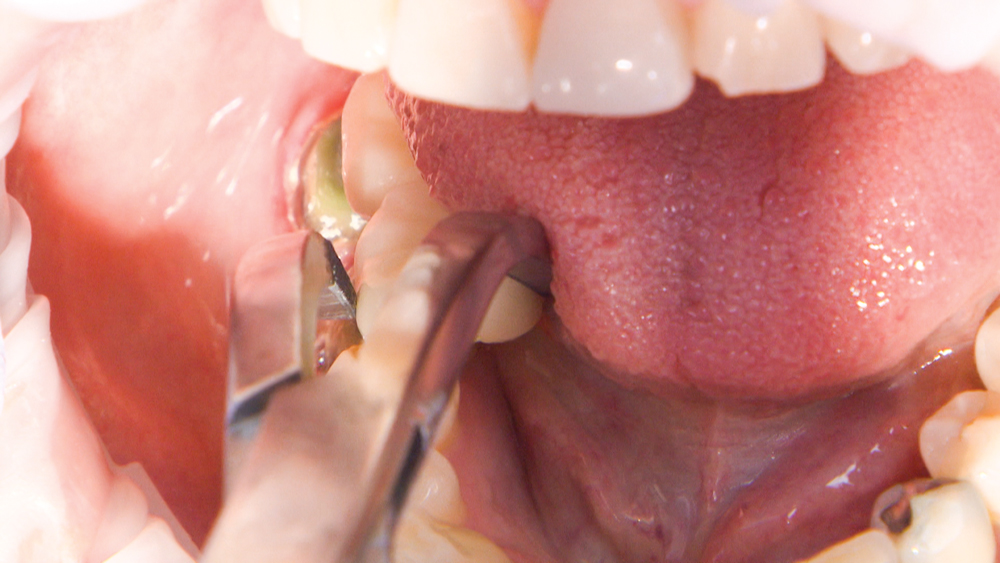 Figure 22a
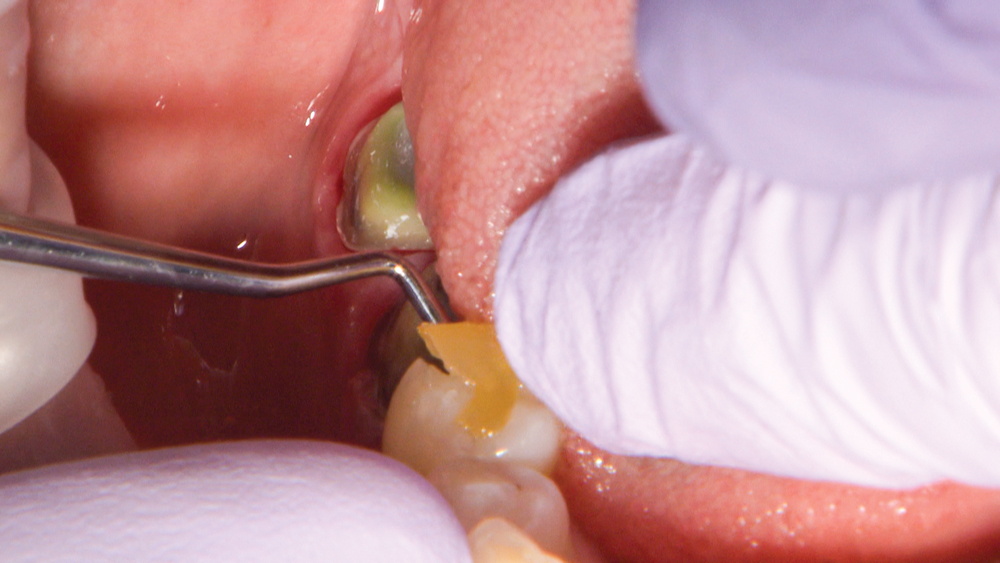 Figure 22b
Figures 22a, 22b: At the final delivery appointment, the BioTemps and Fermit N are removed and the sonic scaler is used to remove cement from the preps.
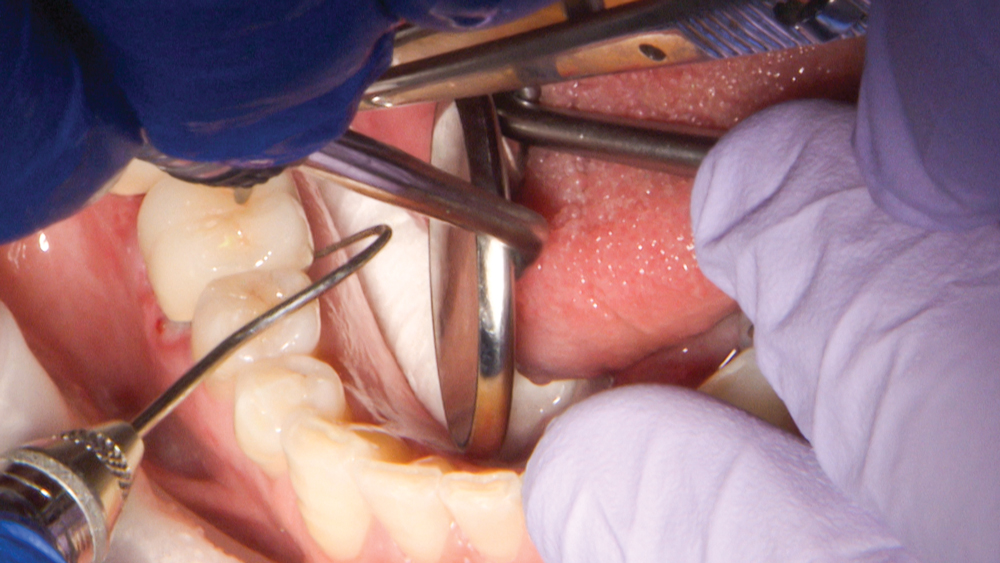
Figure 23: With the final restorations in place, I inspect contacts and margins and confirm the occlusion.
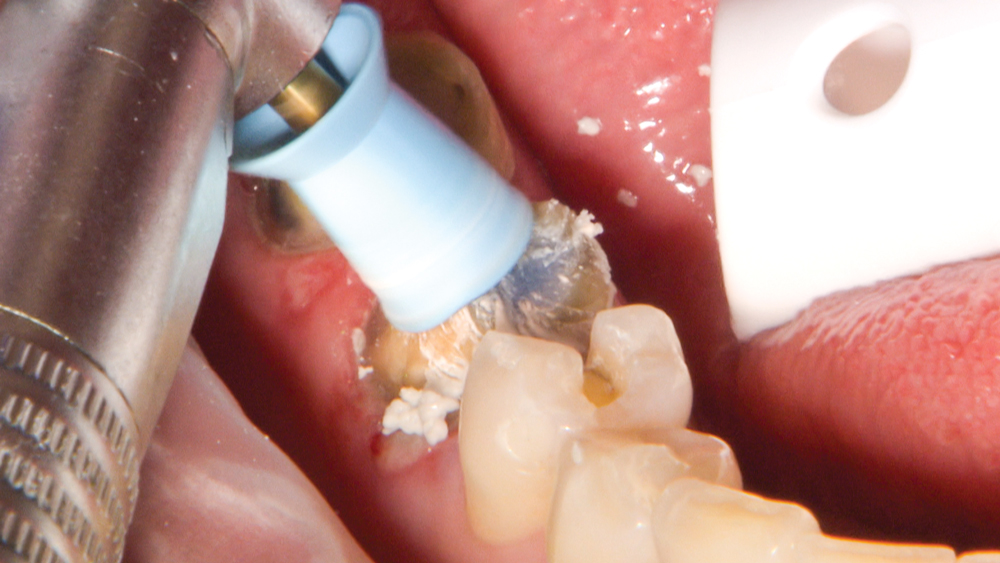
Figure 24: Prior to cementation, the preparations are cleaned with Pumice Preppies™ paste (Whip Mix Corp.; Louisville, Ky.), and then rinsed and dried.
Figure 25: My assistant applies Ivoclean® (Ivoclar Vivadent) to decontaminate the intaglio surface of the restorations. He also uses silane to prepare the inlay for bonding.
 Figure 26a
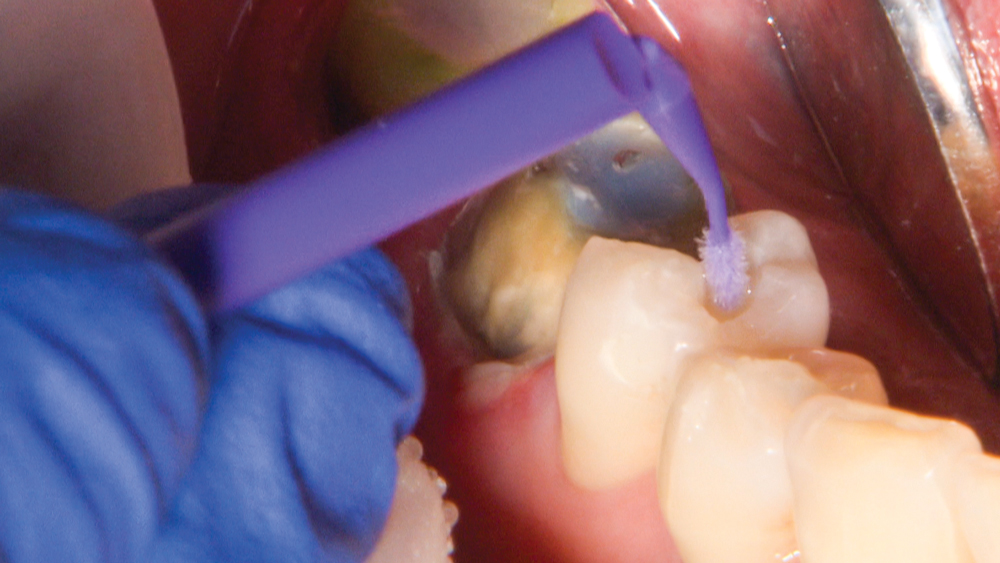 Figure 26b
 Figure 26c
Figures 26a–26c: After the preparations are clean and dry, I apply phosphoric acid to the preparation of tooth #29, rinse, dry and bond. Then, I apply RelyX™ Unicem 2 Clicker™ (3M Company) to the cavity to cement the inlay into place, verifying the inlay is fully seated and free of excess before curing.
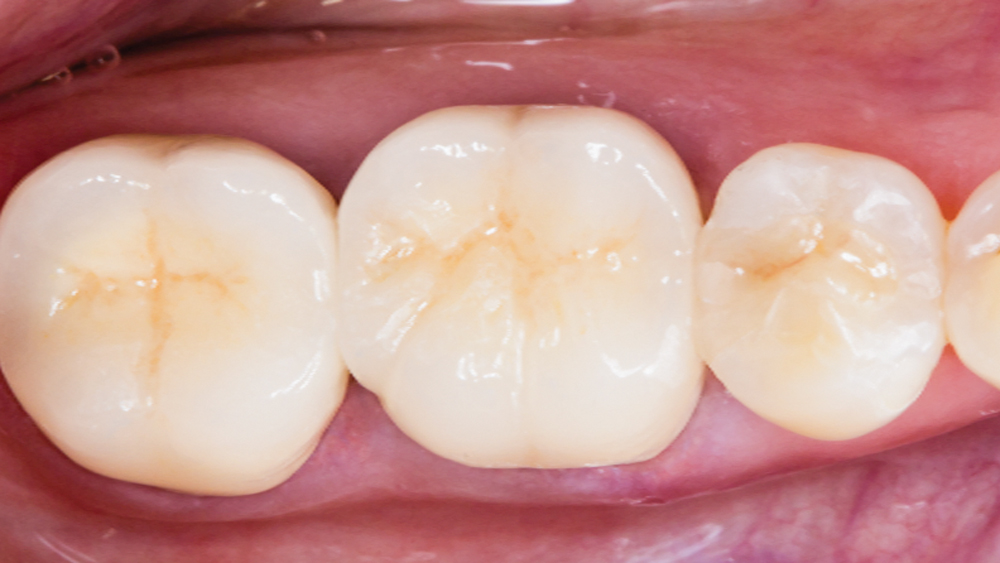
Figure 27: With the Obsidian Fused to Metal restorations seated using RelyX Luting Plus Cement, treatment of teeth #29–31 is now complete. The Obsidian Fused to Metal restorations provide great strength and are particularly suitable where traditional PFMs failed.
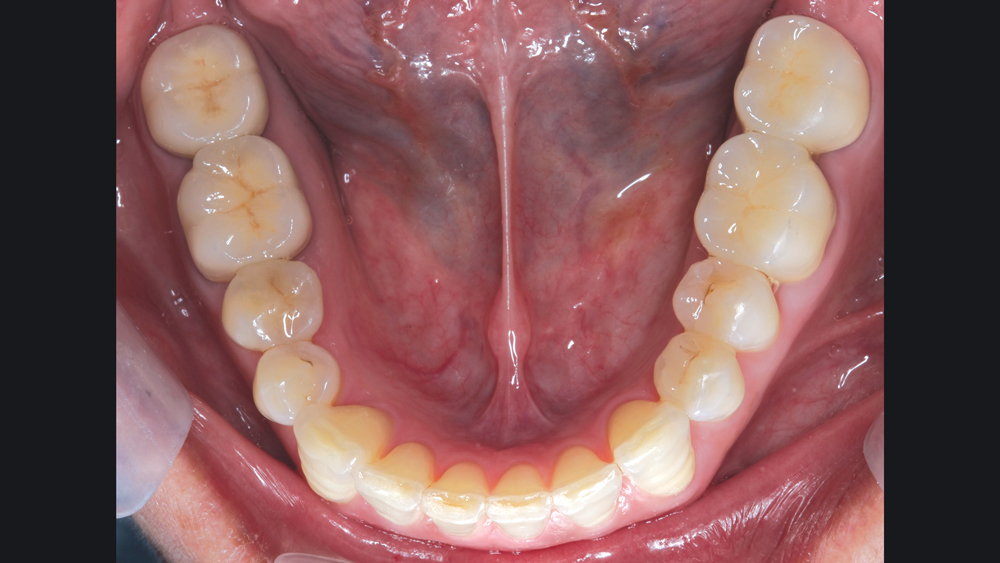
Figure 28: The final results showcase the remarkable esthetics of Obsidian, and the material’s proven strength provides confidence that these new restorations will withstand heavy bite forces. This “after” photo also shows replacement of the amalgam filling on tooth #21.
Conclusion
In the past, a case like this required traditional PFMs, which maximize strength but don’t deliver ideal esthetics. However, that tradeoff doesn’t exist in this case, thanks to Obsidian Fused to Metal. As a cutting-edge update of the long-standing PFM solution, Obsidian Fused to Metal raises the standard in every regard. The material’s flexural strength, chip resistance and ideal esthetics mean that clinicians can count on Obsidian for durable, lifelike restorative results.