Aesthetic Treatment of Dark Root Syndrome
Introduction
The aesthetic results of anterior full-coverage restorations are often compromised by myriad clinical factors. The inherent aesthetic inadequacy of ceramo-metal crowns is their inability to transmit and reflect light naturally, which often results in an inability to truly match the natural dentition, as well as a darkening of the area around the root and surrounding periodontal tissue. If the clinician is also dealing with a tooth that has received endodontic treatment, the sealer used can darken the root, and the coronal and root portion of the tooth loses its natural ability to transmit light when filled with gutta-percha. When a nonvital tooth has been restored with a cast or metal post, the metal in proximity to the gingival interface frequently creates shadows and discolored gingival tissues due to the shine-through that can adversely affect aesthetic results.1
Often when preparing extremely broken-down anterior teeth for full-coverage restorations, the remaining core structure is severely compromised. The small amount of tooth structure remaining, which is subject to vertical and lateral shearing forces, is often too weak to adequately resist these forces. Post placement is therefore indicated in these clinical situations.2 One of the reasons fiber post usage has increased is that, in highly aesthetic, demanding cases, their color and translucency allow for their use with translucent all-ceramic restorations.3 Strassler,4,5 in his article, discusses that “in the anterior aesthetic zone, a translucent fiber post will likely be a better choice if the tooth is being restored with translucent, aesthetic restorative materials — composite resin, porcelain veneers or an all-ceramic crown.” Fiber posts also enhance the aesthetic results of the coronal restoration as a result of their light transmission property.6 In his 2000 article on fourth-generation intraradicular posts, Martelli7 has also described the rationale and application of translucent glass fiber posts and their ability to diffuse light through a restoration, thereby enhancing their natural appearance.
To assess post systems used to treat endodontically treated teeth which may be functionally and structurally challenged, Boudrias et al.8 state that “the ideal post system should: complement minimal conservative preparation; reduce or eliminate stresses transferred to the tooth; approximate the taper of the canal walls; be resistant to dislodgement during function; and be retentive and possibly micromechanically attached to the tooth.” In another paper looking at the same clinical variables, Gluskin et al.9 state that “in selecting an appropriate post system, treatment should attempt to establish: a stable post system that transfers the stress of mastication throughout the radicular root and into the periodontal attachment uniformly; a post system that does not focus stress in function or create it during placement; a post system that resists permanent deformation to protect the integrity of the crown margins and cement seal; a cementation process that provides optimal luting of the dowel to the radicular dentin; and a conservation of the coronal tooth structure that allows adequate encasement of the dentin by overcasting the ‘ferrule’ effect.” A high-quality, adhesively bonded quartz fiber post fulfills all these criteria.
The excessive removal of radicular dentin, which is often the result of preparation for parallel-sided posts, compromises root strength and creates significant reduction in radicular toughness, especially at the apical terminus of the post.10,11 In contrast, an anatomical fiber post, such as the Macro-Lock Illusion (RTD; Saint-Égrève, France), requires minimal tooth structure removal during canal shaping and allows greater post-to-canal adaptation in the apical and coronal half of the canal.12 Because fiber-reinforced posts have an elastic modulus that more closely approaches that of dentin,13 fiber posts produce less stress on the root dentin around the post tip than do metal posts,14 and the stress fields around glass fiber posts are quite similar to that of the natural tooth.15 When fatigue loading post-and-cores, studies have shown that bonded composite cores supported by bonded fiber posts have better retention than cemented gold post-and-cores and cemented metal posts mated to composite cores.16 These nonmetallic fiber posts comply more satisfactorily with the requirements necessary to provide a mechanical behavior more similar to that of the dental structure, with the compatibility among the mechanical properties found in these systems and the dentin providing a biomimetic behavior that reduces the risk of failure or fracture of the root.17 It has been a long-held belief that posts are used mainly to retain the core and have little effect on the strength of the remaining tooth structure. However, a 2009 article states that there is growing evidence that fiber posts provide the additional benefit of increased fracture resistance.18
It is critical to understand that not all fiber posts are the same, and they do not all perform similarly in clinical situations. In a study by Seefeld et al.19 that looked at eight types of fiber posts, the fracture load of the tested systems ranged from 60 to 96 N, and the flexural strength from 565 to 898 MPa. The differences in fiber diameter ranged from 8.2 to 21 μm, and the fiber:matrix ratio from 41% to 76%. The fiber posts can be glass fiber, quartz fiber, glass fiber-zirconia enriched, and glass fiber and carbon fiber,20 with quartz fiber posts recording significantly higher failure loads.21 They can be translucent, white, dentin or color-changing translucent,20 and for light transmission, they can be excellent, good, fair or poor.22 Fiber posts can be tapered, double-tapered, parallel, parallel with a tapered end, parallel-tapered and serrated,20 with the parallel-tapered post also closely imitating the post-endodontic shape of the radicular canal, leaving a thin uniform thickness of cement at the post/canal interface. Flowable resin cements are essentially diluted composite resins so that flow is increased to allow insertion of the post, but this negatively affects the mechanical properties of the material. A highly loaded quartz fiber post has better mechanical properties than luting resin, and therefore it is best to minimize the amount of resin cement around the fiber post with improved adaptation to the canal shape.23 The quality, type and volume of fibers, the way the fibers are silanated, and the type of resin used all affect the mechanical performance of these fiber posts, with some failing in cyclic fatigue to fracture in a few cycles, and others (D.T. [Double Taper] Light-Post® radiopaque [RTD]) surviving more than 2 million cycles.24
A next-generation fiber post, the Macro-Lock Illusion X-RO, has been added to the RTD family of fiber posts. It is fabricated with a high-percentage loading (80% wt) of a new pretensed long continuous translucent unidirectional quartz fiber with epoxy resin, and is 50% more radiopaque than the Macro-Lock Illusion. This addresses the relative lack of radiopacity found in previous generations of fiber posts. Quartz crystal is the world’s purest form of silica. These quartz X-RO fibers are coated with a proprietary silane coupling agent that is specially formulated to optimize the bond between the X-RO fiber and the hybrid epoxy resin, together resulting in an improvement in the flexural strength from 1,800 to 2,000 MPa, which is approximately 20% stronger than the original. This post allows for microretention and macroretention of the bonded core and cement. The surface area of the new Macro-Lock Illusion X-RO has been enlarged by increasing the surface roughness, which eliminates the need for chairside silanization. Due to the added radiopacifiers, the light transmission capacity of the post is less than the previous version, but it is still very high, with enough light being transmitted even at 12.5 mm to adequately cure dual-curing resin cements. The color-changing technology of this post allows for the post to “disappear” when seated at oral temperature, as well as for it to be visible under water spray if retrieval is necessary. A study by Baldissara et al.25 showed that the Macro-Lock post, with its macroretention, reached generally higher results when testing against the retention of microretentive quartz fiber posts.
It has been a long-held belief that posts are used mainly to retain the core and have little effect on the strength of the remaining tooth structure. However, a 2009 article states that there is growing evidence that fiber posts provide the additional benefit of increased fracture resistance.
The clinician should be aware that not all dental adhesive systems are compatible with dual- and self-cure cements or composite resins, and that a meticulous clinical protocol and technique is critical for success. A highly acidic bonding agent will interfere with the chemical amine reaction of self-cure and dual-cure cements and therefore results in an incomplete setting reaction. The three-step etch-and-rinse systems are compatible. Of the etch-and-rinse one-bottle systems, those that are not highly acidic, such as SealBond Ultima (RTD) and One-Step® (Bisco, Inc.; Schaumburg, Ill.), are a couple of the most predictable available for use. The self-etch primer systems should not be combined with chemically (self-) or dual-cured cements because of the remaining acidic components of the primer.26 An etch-and-bond system, MPa Direct (Clinician’s Choice; New Milford, Conn.), shows high bond strengths to chemically (self-) cured composite materials when the oxygen-inhibited layer is removed with alcohol.27
Case Report
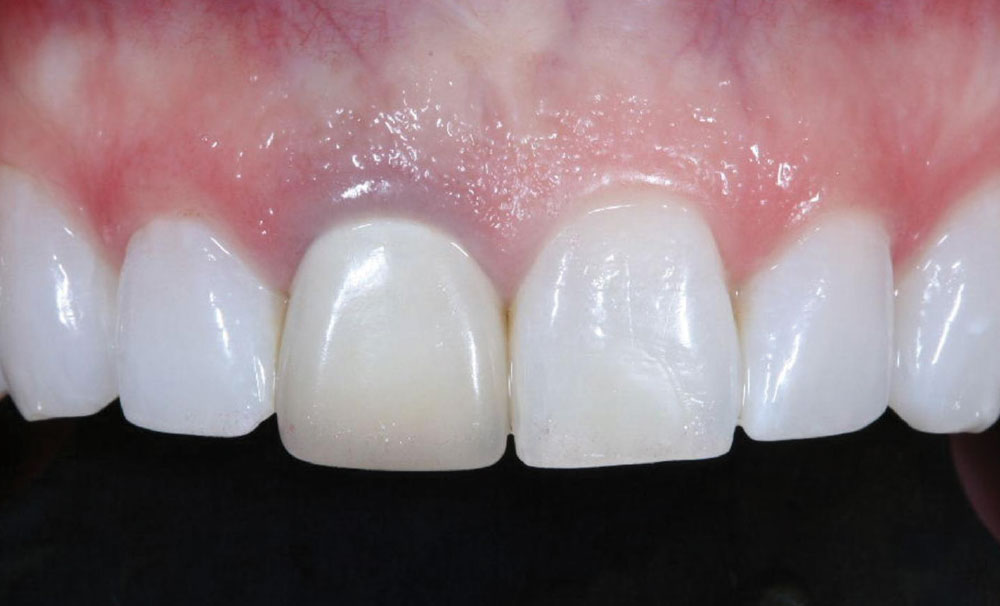
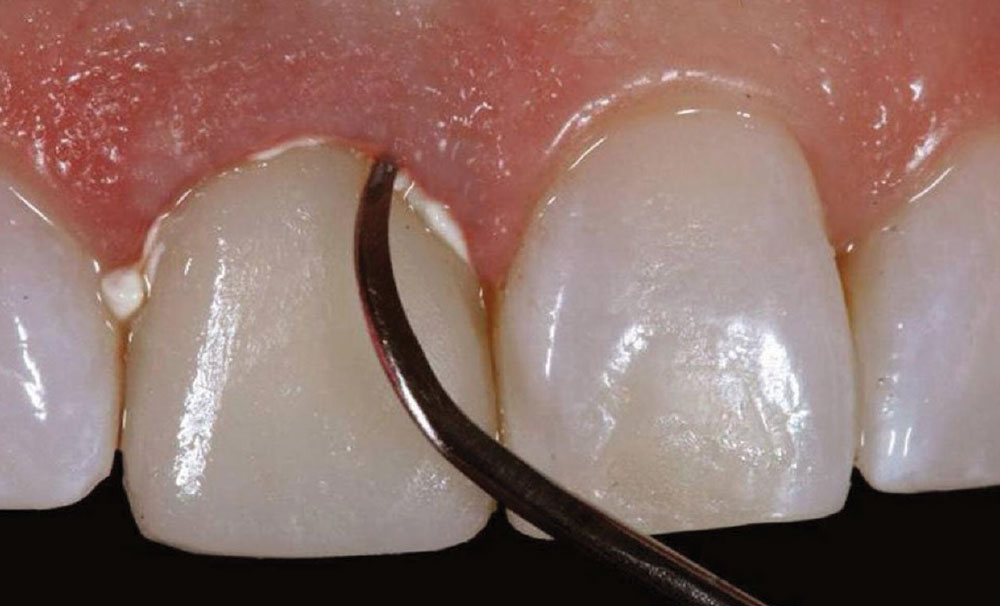
A 43-year-old female presented with concerns about the appearance of tooth #8 (Fig. 1). She had undergone root canal therapy and subsequent placement of a PFM crown to restore the tooth 20 years prior. However, she was increasingly self-conscious about its discolored and mismatched appearance. Being conservative in her philosophy about dental treatments, she was seeking to enhance of tooth #8 without any unnecessary removal of tooth structure. She also did not want to alter the adjacent teeth. Therefore, the patient sought a dentist who would provide a naturally aesthetic porcelain crown without a metal substrate, but that would be sufficiently durable and not break off at the gumline.
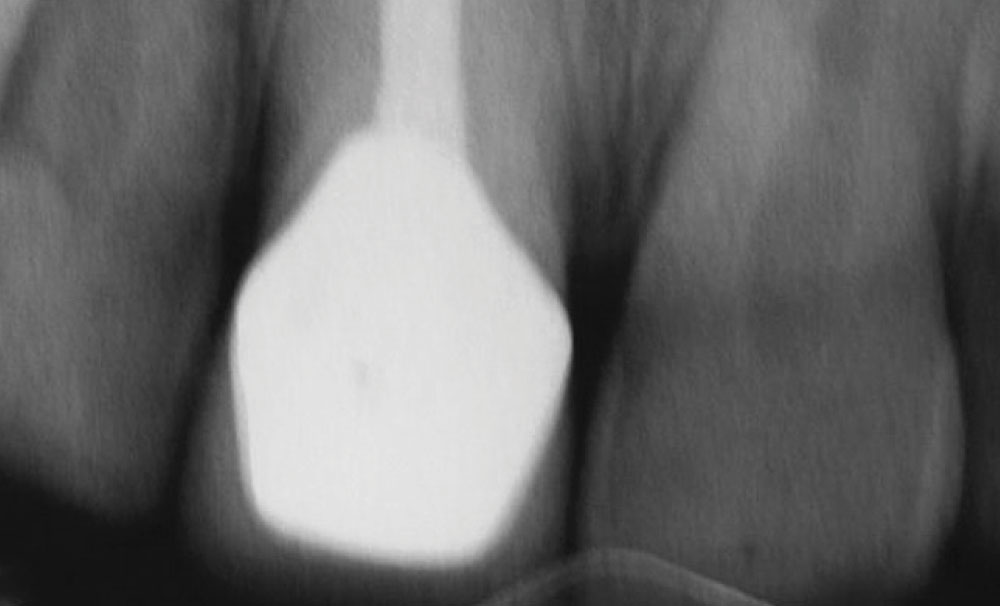
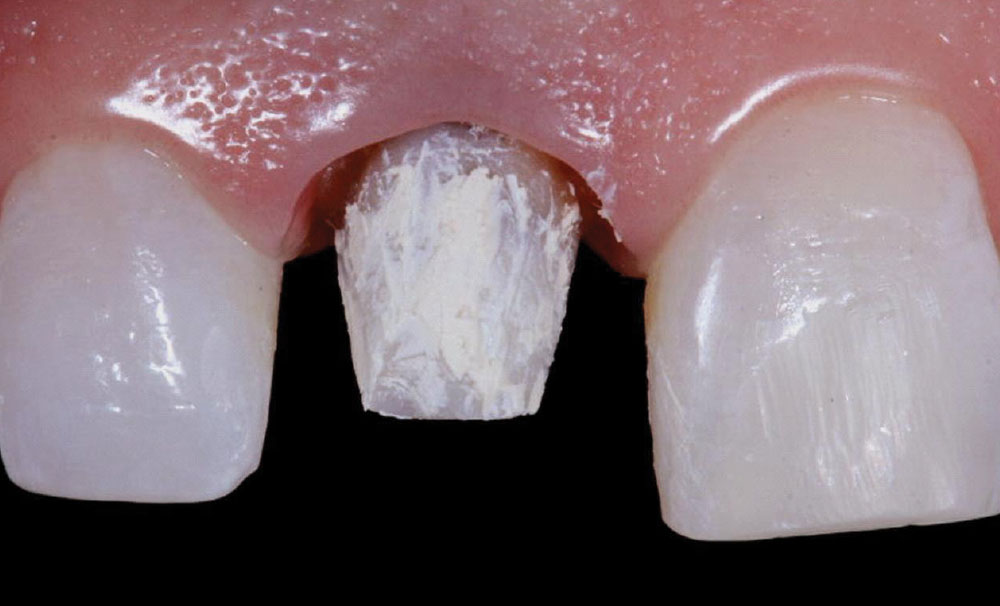
The patient underwent a thorough examination that included radiographs (Fig. 2), photographs and periodontal probings. Additionally, the patient was carefully evaluated in terms of her occlusion and the morphologic, histologic and optical characteristics of her anterior maxillary tooth, the decided focus of treatment.
It was determined that the patient’s existing PFM restoration could be replaced with an aesthetic, metal-free zirconia-based restoration (Lava™ [3M™ ESPE™; St. Paul, Minn.]) veneered with an aesthetic porcelain (VITA VM® 13 [Vident; Brea, Calif.]). However, to enhance the aesthetic effects of this restoration, as well as to strengthen the tooth and improve its longevity,28,29 the patient was informed of the need to stabilize this tooth by placing an aesthetic post and subsequent core buildup before the aesthetic restoration could be placed.
The patient was assured that a minimal intervention approach in terms of the amount of natural coronal dentin that would be removed — as well as what would be placed to support the tooth — would be followed. Studies have indicated that maintaining an increased amount of coronal dentin significantly increases the fracture resistance of endodontically treated teeth when prefabricated posts are used.28,30 Root fracture is one of the most serious complications following a restoration of endodontically treated teeth.28,30 Therefore, in order to maintain the principles of minimal intervention — which essentially mandate that the restoration and re-restoration cycle be curtailed and/or limited31 — prevention of the need for further restoration of tooth #8 was necessary. Because these principles were to be maintained, the patient approved the treatment plan.
Shade Selection and Preliminary Work
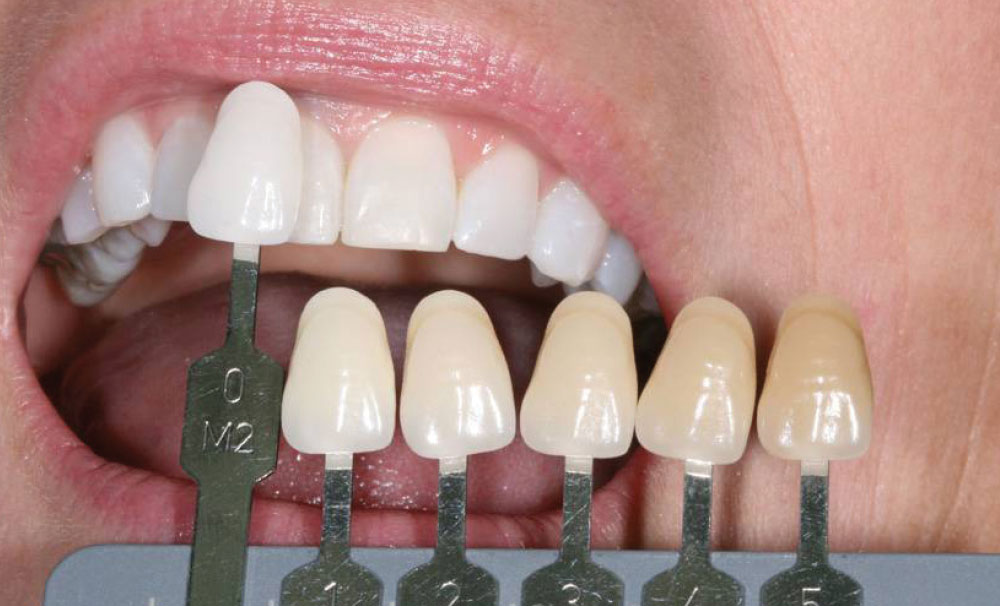
A shade of the patient’s teeth was taken using a combination of traditional shade tabs (VITA 3D-Master® Shade Tabs [Vident]), an innovative system of linear shade tabs (Fig. 3), and a spectrophotometer (VITA Easyshade® [Vident]). Using a combination of these shade-taking methods enabled excellent collaboration with the dental ceramist with the goal of obtaining the most accurate color assessment. Ultimately, this would facilitate the creation of a restoration reflective of the patient’s desired tooth shade in terms of value (i.e., brightness), chroma (i.e., color intensity) and hue (i.e., basic color based on wavelength of visible light).32 In this case, additional shade-taking was also performed at the dental laboratory.
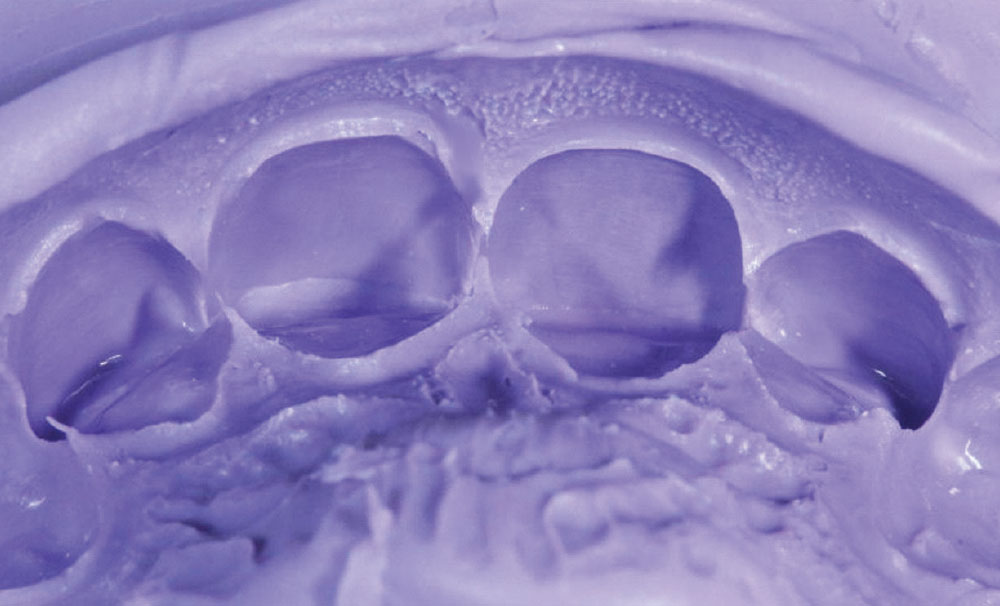
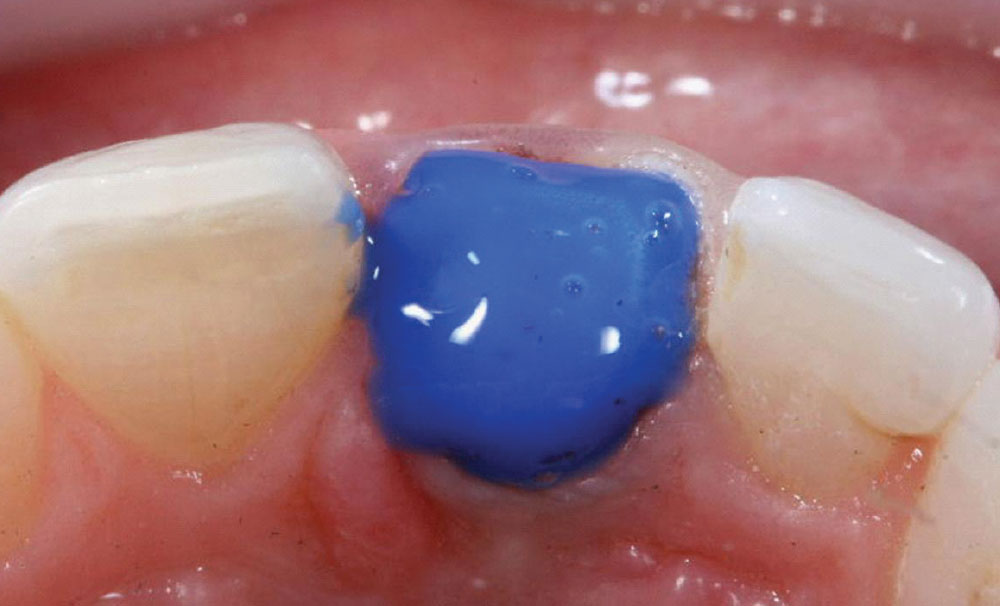
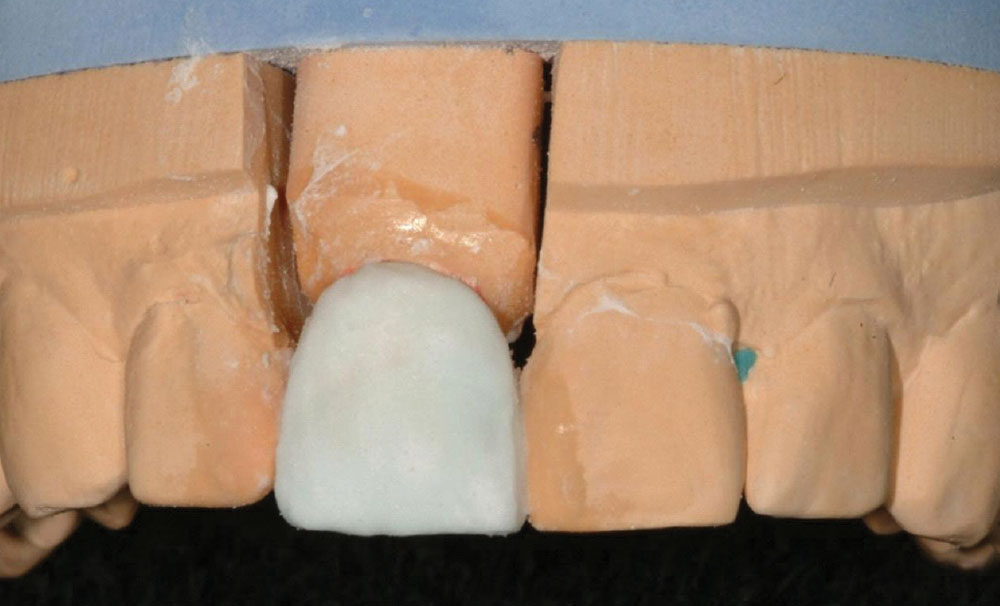
A preoperative impression of tooth #8 was taken using a customizable metal temporary tray (TempTray [Clinician’s Choice]) and a fast-setting matrix material (Template [Clinician’s Choice]). This single-use disposable aluminum tray is designed for sectional arch impressions and resists distortion during insertion and removal. The silicone matrix material sets in 30 seconds and, when cured, provides an accurate, stable and detailed matrix for use in temporary fabrication.
To obtain the impression, the silicone matrix material was rapidly injected into the customizable temporary tray, after which the tray and matrix material were inserted intraorally. The matrix material was able to flow into the embrasure areas, as well as into the finest morphology. Yet, when removed after 30 seconds of curing, the tray and material released easily, with the matrix maintaining its form (Fig. 4). The matrix was set aside for later use in fabricating the temporary restoration.
Preparation: Post Placement and Core Buildup
The decision was made to reinforce tooth #8 using the innovative Macro-Lock Illusion post. Its color-changing technology enables it to disappear when placed. Further, the post demonstrates high translucency for good light transmission, so its placement in this case would enhance the aesthetic and optical properties of the restorative treatment.12
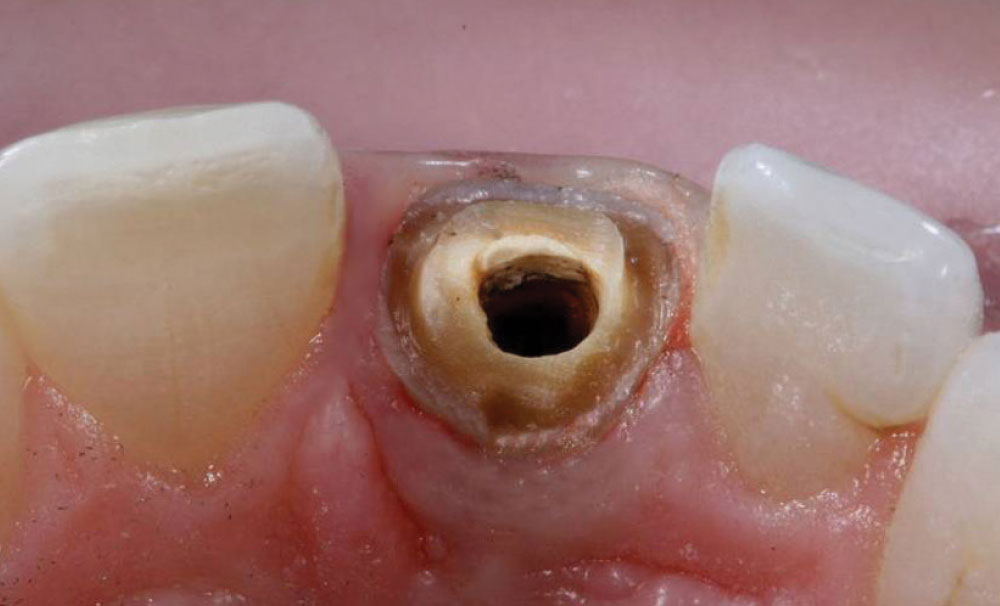
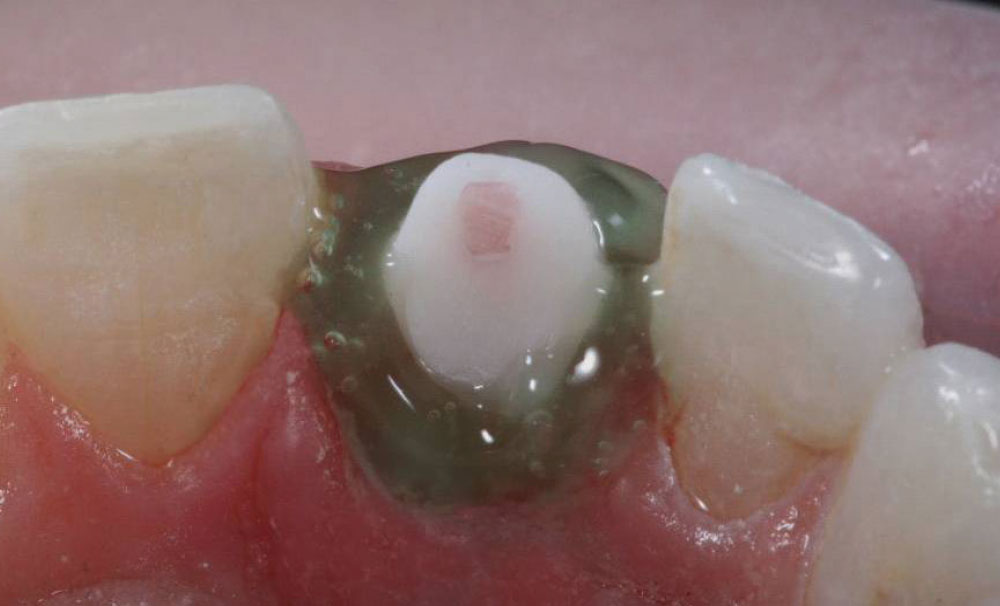
The previous restoration was removed, and suitable isolation was achieved. Minimal reduction of the remaining tooth structure was performed in order to facilitate endodontic access. The appropriate post space then was created using the Macro-Lock Illusion post drill (Fig. 5), after which the post measurement was taken. The selected post was then trimmed to size using a diamond disc.
The adhesive sequence was initiated by etching the canal by inserting the etchant (Ultra-Etch® [Ultradent Products, Inc.; South Jordan, Utah]) into the canal for 15 seconds from the apex coronally using an Endo-Eze® tip (Ultradent Products, Inc.) (Fig. 6). Then the post space was thoroughly rinsed from the bottom of the post space coronally, after which a Capillary tip attached to a Luer vacuum adapter (Ultradent Products, Inc.) was used to dry the canal.
Next, a fifth-generation adhesive bonding agent (Sealbond Ultima) specifically designed for post cementation was applied in two consecutive coats to the canal using a tapered brush that was long enough to reach the bottom of the post space. Simultaneously, this highly light-sensitive adhesive also was applied in one coat to the post. Excess solvent was evaporated with a light flow of air, after which the bonding agent was light-cured in the canal and also on the post for the manufacturer’s recommended time.
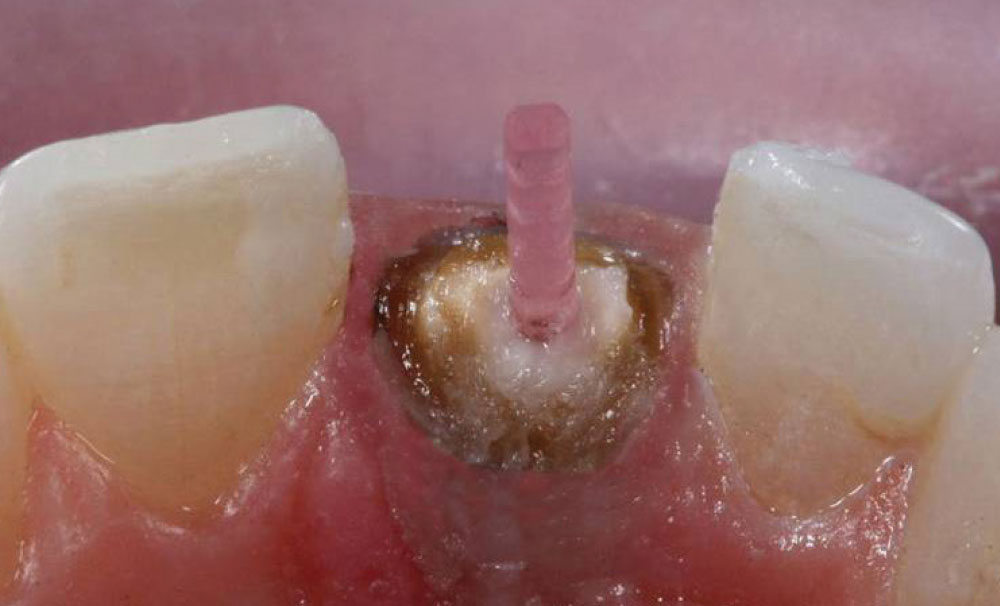
A dual-cured resin cement (Corecem® [RTD]) was injected into the canal from the apex coronally, after which the post was seated into the dual-cure cement. This cement, in particular, was developed for use in reconstructing nonvital teeth with fiber posts as part of a durable, monobloc core buildup. The post and resin cement complex was light-cured for 20 seconds (Fig. 7).
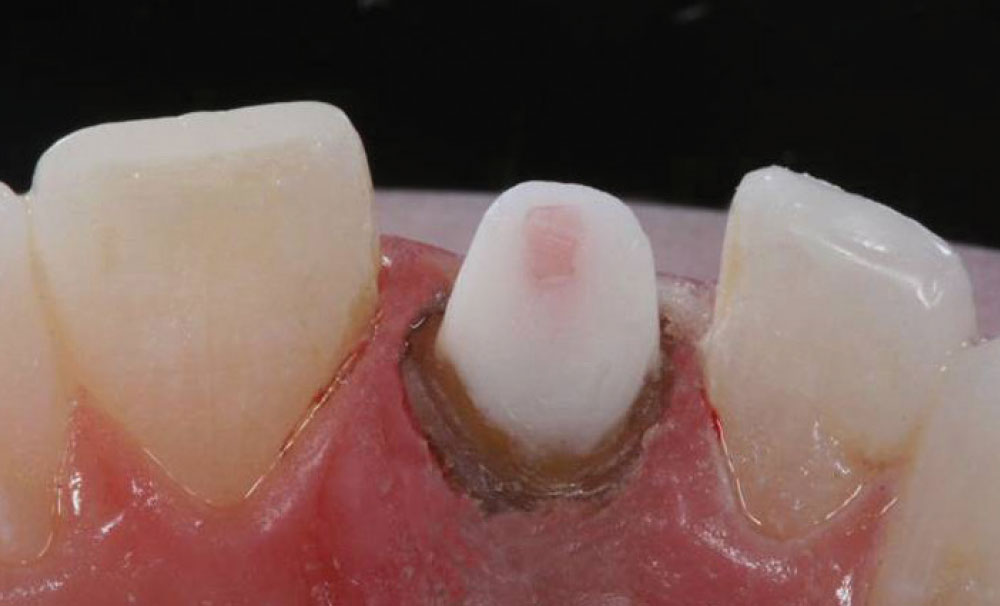
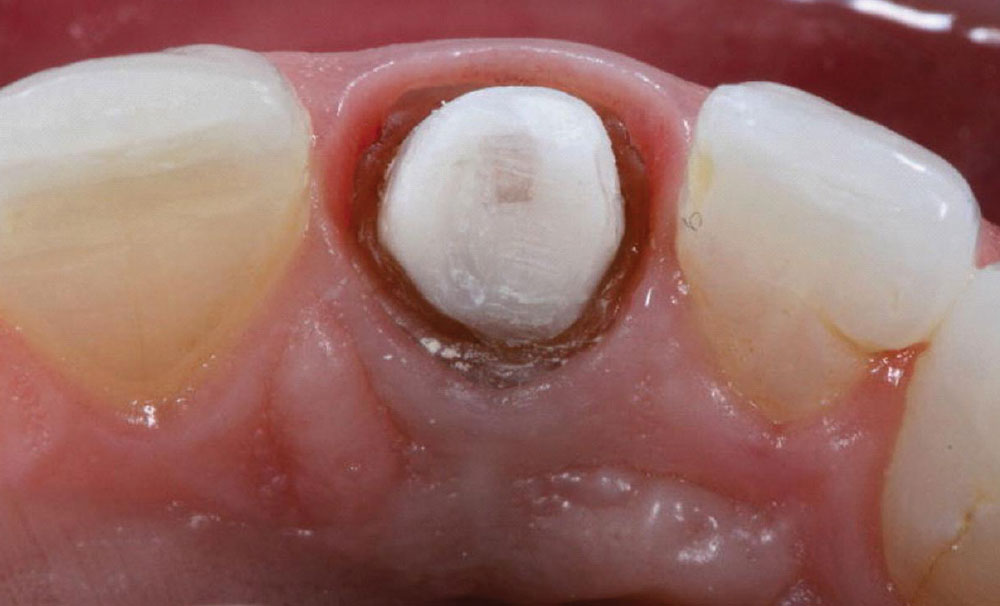
The core for tooth #8 was built up using a radiopaque composite material (Amelogen® Plus, Opaque Snow shade [Ultradent Products, Inc.]) according to the manufacturer’s instructions. The Opaque Snow shade allowed the dentist to create a stump shade that was as light as possible, thereby eliminating the need for too much opaque in the all-ceramic restoration (Fig. 8).
The decision was made to reinforce tooth #8 using the innovative Macro-Lock Illusion post. Its color-changing technology enables it to disappear when placed. Further, the post demonstrates high translucency for good light transmission, so its placement in this case would enhance the aesthetic and optical properties of the restorative treatment.
Impression Taking
In anticipation of the final impression-taking process, a viscous, yet spreadable, 25% aluminum sulfate hemostatic gel (Tissue Goo [Clinician’s Choice]) was applied along the gingival margins of tooth #8 to facilitate hemostasis (Fig. 9). When placed prior to packing retraction cord, this hemostatic agent also acts as a lubricant. Then, a 100% cotton-braided retraction cord (First Strong [Clinician’s Choice]) with a tight weave for easy handling was packed through the hemostatic gel to enable the reproduction of greater detail in the final impression.
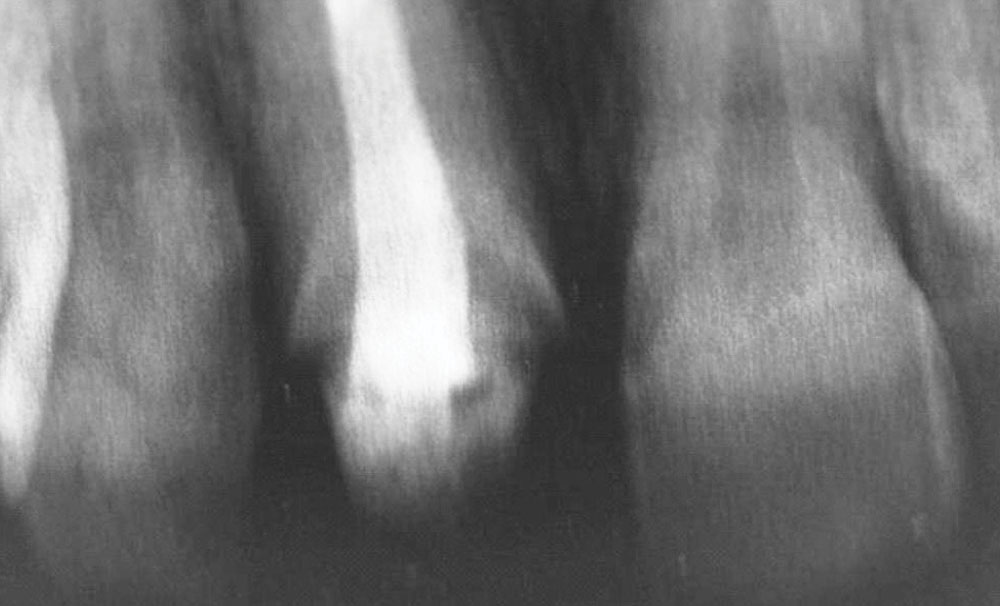
Radiographically, the post-and-core complex appears as an opaque monobloc entity (Fig. 10), achieving an optimal seal and fit with the canal and remaining coronal dentin. This complex was then treated with a pre-impression cleansing gel (Detail [Clinician’s Choice]) in order to clean and decontaminate the core buildup to ensure an accurate impression. In particular, this conditioning gel lifts organic debris and contaminants like sulfur and methacrylate residue from the preparation site in 7 to 10 seconds. Also, Detail decreases the surface tension of the prepared tooth, allowing for better wetability and adaptation of the vinyl polysiloxane (VPS) impression material.
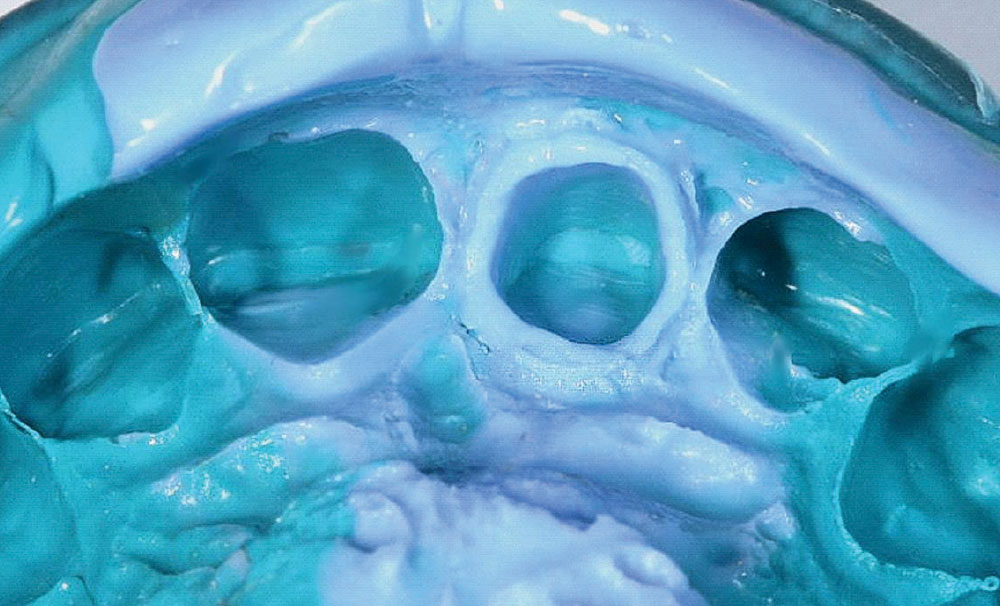
The retraction cord was removed, and the final impression was taken using a third-generation heavy body/light body VPS impression material (AFFINITY™ Heavy Body and Light Body [Clinician’s Choice]), which has matched rheology so as not to over-displace the light body from the preparation, resulting in more accurate detail (Fig. 11). An alginate substitute, multipurpose replication silicone (COUNTER-FIT™ [Clinician’s Choice]) was used to impress the opposing arch. This material is an addition silicone with a short setting time in the mouth; it demonstrates easy removal, has long-term stability and is highly detailed. This increased detail reproduction over an alginate ensures better mounting of opposing casts when using a VPS bite registration material, thereby minimizing the amount of adjustments needed at the cementation appointment. As a result, it is an ideal substitute for alginates.
To obtain the bite registration, a fast-setting (45-second) impression material was used (AFFINITY Quick Bite [Clinician’s Choice]). In particular, this VPS material was chosen for capturing the bite registration based on its high tear strength and dimensional stability, and its ability to capture details with rigidity without brittleness.
Provisionalization
Endodontically treated teeth can have an improved prognosis when the canals are sealed and leakage of oral fluids and bacteria into the periradicular areas is minimized as soon as possible after the completion of endodontic therapy.33 The core buildup was treated with a lubricant designed to prevent the formation of the oxygen inhibition layer (DeOx® [Ultradent Products, Inc.]). Then, the previously made matrix was used to create a provisional restoration for tooth #8. In particular, a self-curing hard bisacryl temporary material (Temptation® NOW [Clinician’s Choice]) in shade A1 was used. This provisional composite material demonstrates an initial cure of one minute or less, with a complete cure in fewer than five minutes. Therefore, resulting provisionals can be trimmed sooner.
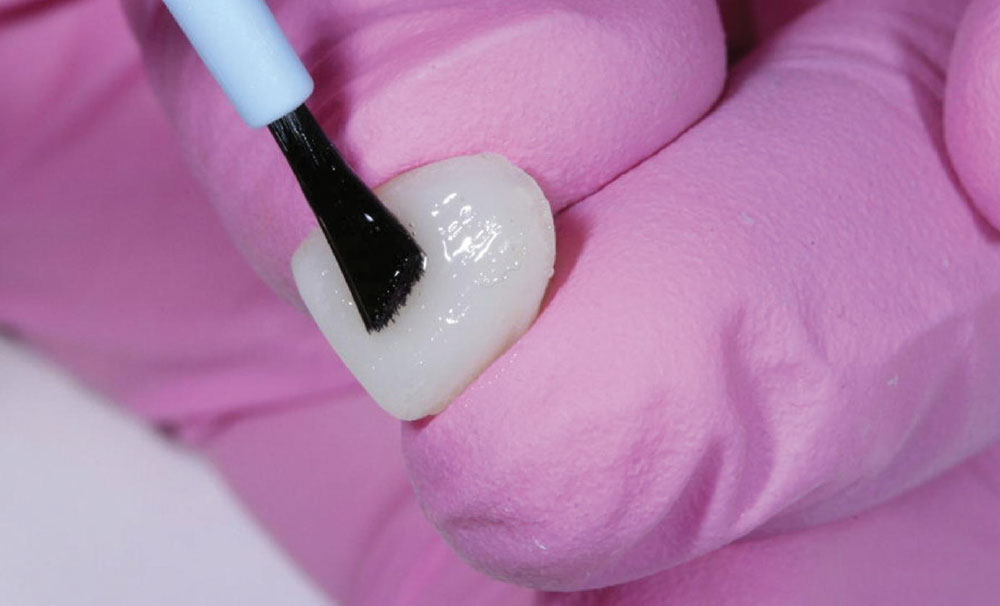
The provisional material was injected directly into the matrix from the handheld syringe, after which it was placed in the mouth for a preliminary 45-second set. The matrix and provisional were removed from the mouth and allowed to final cure. Minimal flash was removed with a diamond bur, after which a methyl methacrylate glaze (Tempglaze™ [Clinician’s Choice]) was applied to the surface of the provisional with smooth, even brush strokes in one direction (Fig. 12). The glaze was then light-cured for 30 seconds per surface with a curing light that produced in excess of 1,000 mW/cm2, eliminating the need for polishing of the provisional restoration and increasing its wear resistance.
The provisional restoration was then cemented into place using a resin-optimized temporary cement (Cling2® [Clinician’s Choice]) that enables easy removal of excess from the margins, produces a good marginal seal to minimize sensitivity, is antibacterial, and demonstrates good retention — yet easy removal — of the temporary. The internal aspect of the provisional was completely dried, after which the internal aspects were lined with the noneugenol, automix temporary cement.
The provisional restoration was immediately seated over the core buildup preparation, after which a 2 x 2 cotton gauze was placed over it and the patient instructed to gently close into centric occlusion. The patient held this position for 60 to 90 seconds, after which excess cement was removed with an explorer once firm (Fig. 13). Characterization was added to the provisional restoration to enhance its lifelike appearance (Fig. 14).
Endodontically treated teeth can have an improved prognosis when the canals are sealed and leakage of oral fluids and bacteria into the periradicular areas is minimized as soon as possible after the completion of endodontic therapy.
Restoration Fabrication
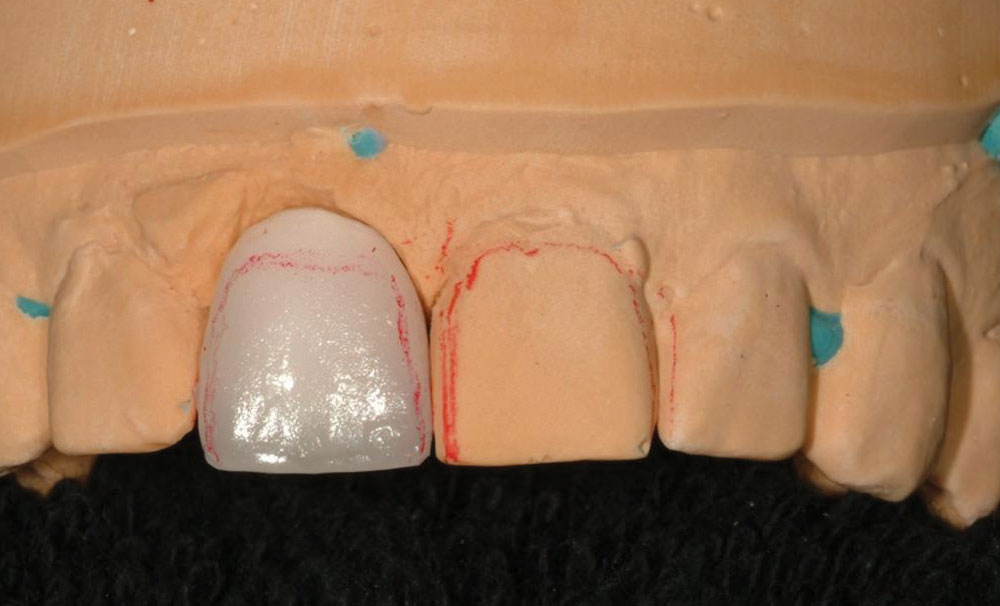
The laboratory ceramist was provided with study models, preoperative photographs and shade maps, and impressions of the core buildup preparation. In addition, custom shade-taking with the patient in the laboratory also occurred. Using this information, the ceramist fabricated the zirconium oxide coping (Lava) for the crown restoration for tooth #8. Then, based on the patient’s shade selection, the base dentin and enamel porcelains (VITA VM 13) were applied in a two- and three-powder cutback and buildup technique. Effect and enamel powders over the dentin, incisal corners, and facial line angles were applied where appropriate and baked (Fig. 15). Custom stains were applied by the ceramist, after which the restoration was glazed and fired (Fig. 16).
Final Cementation
At the final cementation appointment, the provisional restoration was removed (Fig. 17) and the preparation was cleaned with an antimicrobial scrub (Consensus® Scrub [Ultradent Products, Inc.]). The antimicrobial effects of the Cling2 temporary cement — which facilitates adhesive cementation — were evident in the healthy gingival tissue that emerged following the temporization phase (Fig. 18).
The all-ceramic crown was tried in to verify the interproximal and centric contacts, as well as marginal adaptation. The restoration was seated using a self-etching adhesive resin cement (G-CEM™ [GC America; Alsip, Ill.]). The selected resin cement was loaded into the restoration, and it was then seated onto the core buildup preparation. After the release of excess resin cement, a glycerin gel (DeOx) was placed along the gingival margins to prevent the formation of an oxygen inhibition layer.
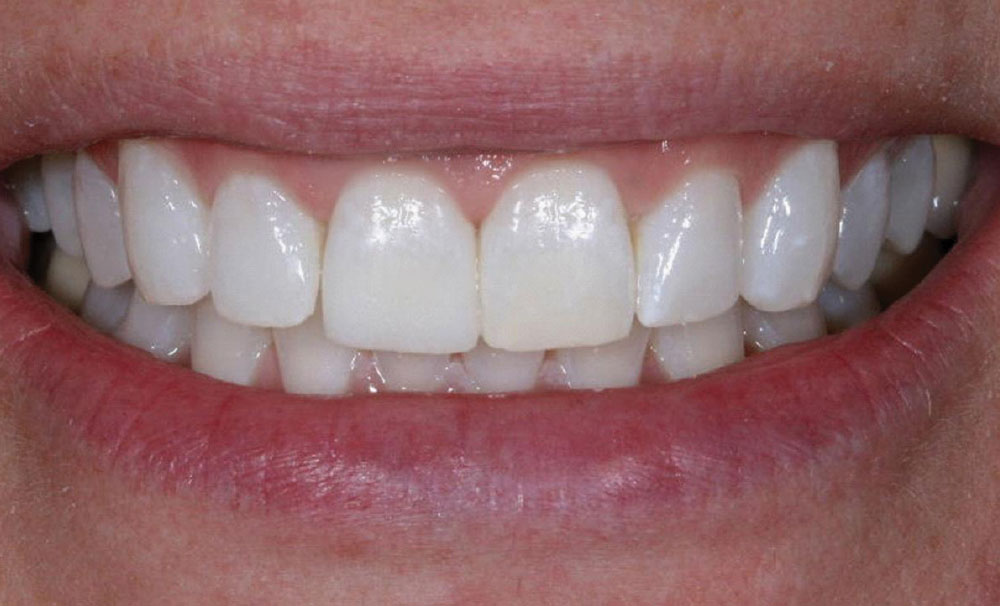
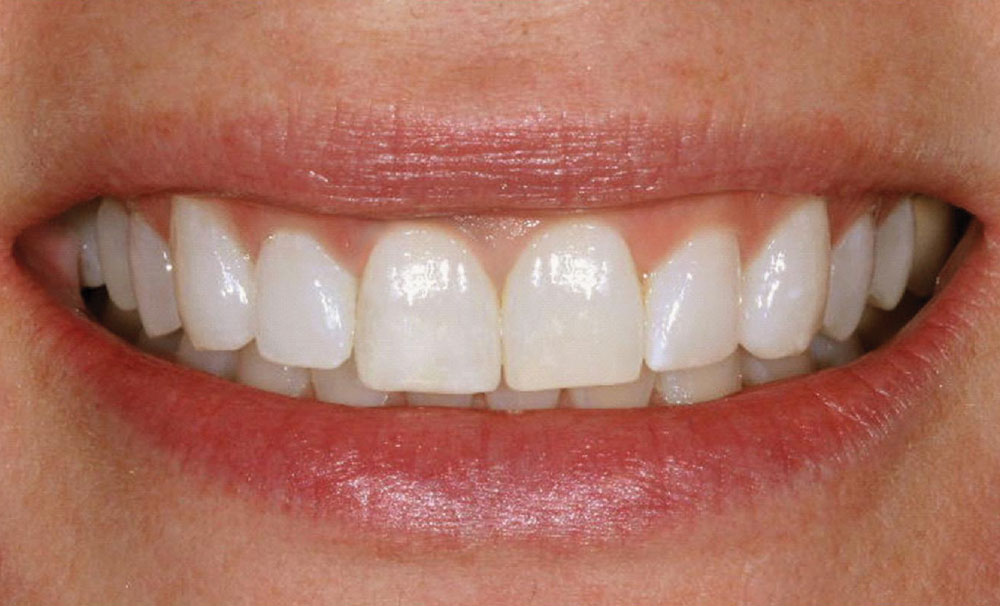
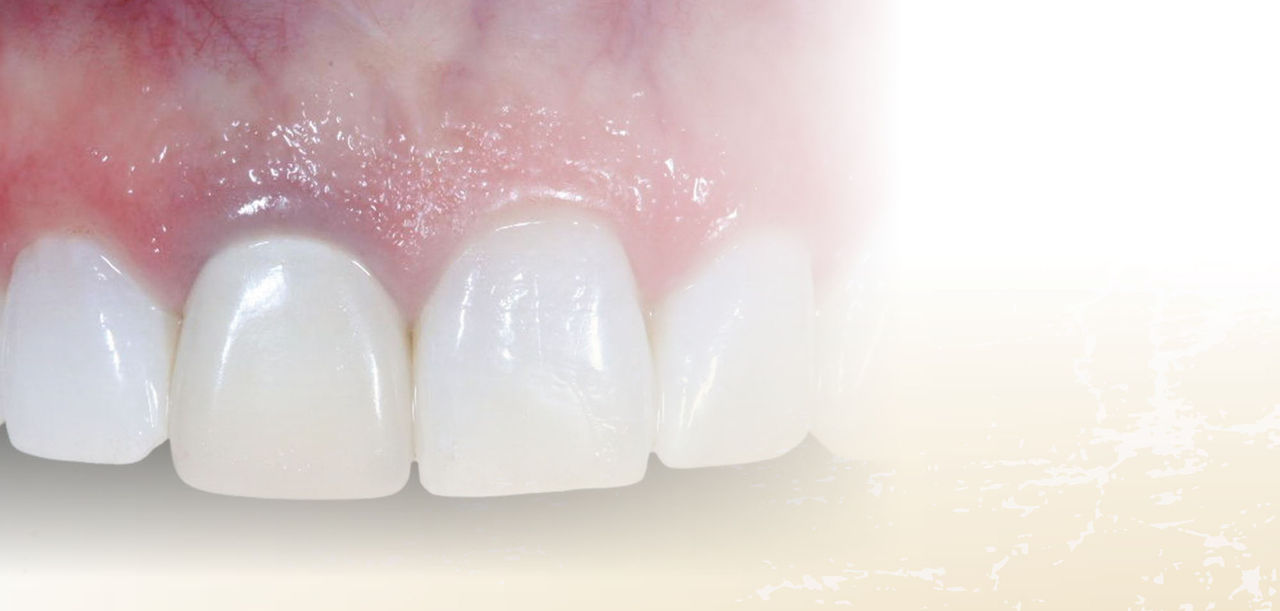
Once the restoration was definitively cured into place, excess cement was removed from the margins, and the patient was given the opportunity to evaluate her smile. The final aesthetic restorative outcome completely satisfied her expectations (Figs. 19, 20).
Conclusion
Developing treatment strategies for the restoration of anterior maxillary dentition in need of endodontic support can be challenging. When faced with such cases, a detailed diagnosis and thorough understanding of the patient’s needs are required to ensure that the most appropriate materials and techniques are considered. In the case presented here, such knowledge contributed to the selection of restorative materials that, collectively, would enable a conservative and aesthetic approach to the preservation and re-restoration of the patient’s central incisor.
The significance of this case is the fact that the dark root syndrome with which the patient presented with her previously placed PFM restoration disappeared following treatment with the aesthetic fiber post (Macro-Lock Illusion) and a metal-free (all-ceramic) crown. This suggests that an added benefit of fiber posts is that they carry light down into the root when there is light transmission through the crown, thus helping to eliminate the dark root appearance.7
Dr. Milnar maintains a full-time private practice in St. Paul, Minnesota. He has published numerous articles about the direct placement of composites, shade selection and porcelain materials. Contact him at frank@milnardds.com
Acknowledgment
The restoration fabricated to satisfy the patient’s aesthetic and functional demands was completed by Denise Quitter, CDT, of Valley Dental Arts, Stillwater, Minnesota.
References
- ^ Strassler HE. Using fiber posts to reinforce and restore traumatically fractured incisors. http://images.benco.com/pdf_files/cecourses/Using_fiber_posts.pdf. Accessed July 2, 2010.
- ^ Schwartz RS, Robbins JW. Post placement and restoration of endodontically treated teeth: a literature review. J Endod. 2004;30:289-301.
- ^ Teixeira EC, Teixeira FB, Piasick JR, et al. An in vitro assessment of prefabricated fiber post systems. J Am Dent Assoc. 2006;137:1006-12.
- ^ Strassler HE. Restoring endodontically compromised teeth with fiber-reinforced light transmitting anchors. Contemporary Esthetics and Restorative Practice. 1999;3:58-60.
- ^ ADA Professional Product Review. Volume 1; Spring 2006 (Online) ada.org/goto/ppr.
- ^ Tait CM, Ricketts DN, Higgins AJ. Weakened anterior roots — intraradicular rehabilitation. Br Dent J. 2005;198:609-17.
- ^ Martelli R. Fourth-generation intraradicular posts for the aesthetic restoration of anterior teeth. Pract Periodontics Aesthet Dent. 2000;12:579-84.
- ^ Boudrias P, Saikal S, Petrova Y. Anatomical post design meets quartz fiber technology: rationale and case report. Compend Contin Educ Dent. 2001;22:337-50.
- ^ Gluskin AH, Ahmed I, Herrero DB. The aesthetic post and core; unifying radicular form and structure. Pract Proced Aesthet Dent. 2002;14:313-21.
- ^ Tjan AH, Whang SB. Resistance to root fracture of dowel channels with various thicknesses of buccal dentin walls. J Prosthet Dent. 1985;53:496-500.
- ^ Trabert KC, Caput AA, Abou-Rass M. Tooth fracture — a comparison of endodontic and restorative treatments. J Endod. 1978;4:341-5.
- ^ Boksman L, van As GA. Prosthodontics: clinical predictability using fiber posts. Oral Health. Nov. 2008:12-8.
- ^ Plotino G, Grande NM, Bedini R, et al. Flexural properties of endodontic posts and human root dentin. Dent Mater. 2007;23:1129-35.
- ^ Nakamura T, Ohyama T, Waki T, et al. Stress analysis of endodontically treated anterior teeth restored with different types of post material. Dent Mater J. 2006;25:145-50.
- ^ Pegoretti A, Fambri L, Zappini G, et al. Finite element analysis of a glass fibre reinforced composite endodontic post. Biomaterials. 2002;23:2667-82.
- ^ Goto Y, Nicholls JI, Phillips KM, et al. Fatigue resistance of endodontically treated teeth restored with three dowel-and-core systems. J Prosthet Dent. 2005;93:45-50.
- ^ Oliveira LCA, Candido MSM, Duarte S Jr, et al. Comparative study of stress distribution in upper incisors. Biometric behavior of post system. J Dent Res. 2003; Abstract 0548.
- ^ Hajizadeh H, Namazikhah MS, Moghaddas MJ, et al. Effect of posts on the fracture resistance of load-cycled endodontically-treated premolars restored with direct composite resin. J Contemp Dent Pract. 2009;10:10-7.
- ^ Seefeld F, Wenz HJ, Ludwig K, et al. Resistance to fracture and structural characteristics of different fiber reinforced post systems. Dent Mater. 2007;23:265-71.
- ^ Freedman G, Jain C. Restoration of the endodontically treated tooth — a buyers’ guide to pins and posts. Dent Today. 2008;7:106-8.
- ^ Akkayan B, Gülmez T. Resistance to fracture of endodontically treated teeth restored with different post systems. J Prosthet Dent. 2002;87:431-7.
- ^ CRA Newsletter — Posts: a shift away from metal? May 2004;28(5):1-3.
- ^ Boudrias P, Sakkal S, Petrova Y. Prosthodontics: Anatomical post design applied to quartz fiber/epoxy technology: a conservative approach. Oral Health. Nov 2001:9-16.
- ^ Grandini S, Goracchi C, Monticelli F, et al. An evaluation using a three-point bending test of the fatigue resistance of certain fiber posts. Il Dentista Moderno. March 2004:70-4.
- ^ Baldissara P, Monaco C, Valandro LF, et al. Retention of quartz fiber posts using different luting cements. J Dent Res. 2009;88(special issue A): Abstract 976.
- ^ Tay FR, Pashley DH, Yiu CK, et al. Factors contributing to the incompatibility between simplified-step adhesives and chemically-cured or dual-cured composites. Part I: Single-step self-etching adhesive. J Adhes Dent. 2003;5:27-40.
- ^ Swift EJ Jr, Vargas MA. Dentin/enamel adhesives: their current status. Oral Health. July 2009:12-22.
- ^ Ritter RG. Selecting from post-and-core options to ensure anterior esthetic continuity. Inside Dentistry. May 2006;2:40-1.
- ^ Milnar F. Esthetic restoration of the single endodontically treated anterior tooth. Compend Contin Educ Dent. 2004;25:56-60.
- ^ Pereira JR, de Ornelas F, Conti PC, et al. Effect of a crown ferrule on the fracture resistance of endodontically treated teeth restored with prefabricated posts. J Prosthet Dent. 2006;95:50-4.
- ^ White JM, Eakle WS. Rationale and treatment approach in minimally invasive dentistry. J Am Dent Assoc. 2000;131(suppl):13S-19S.
- ^ Baltzer A, Kaufmann-Jinoian V. Shading of ceramic crowns using digital tooth shade matching devices. Int J Comput Dent. 2005;8:129-52.
- ^ Heling I, Gorfil C, Slutsky H, et al. Endodontic failure caused by inadequate restorative procedures: review and treatment recommendations. J Prosthet Dent. 2002;87:674-8.
Disclosure: Dr. Milnar has received an educational grant from CLINICIAN’S CHOICE Dental Products.
Reprinted by permission of Dentistry Today, ©2010 Dentistry Today.

