A Disastrous Double-Arch Impression Tray – Case of the Week: Episode 32

May 1, 2013
 image
Michael DiTolla, DDS, FAGD

When dentists attend my lectures, they are often fascinated by the clinical cases I show of what other dentists are sending in to Glidewell Laboratories. “Chairside Live,” our weekly web series, is a great opportunity for me to share these cases with dentists on an ongoing basis. Episodes can be viewed online and on demand at chairsidelive.com, or on YouTube and iTunes. If you aren’t already a viewer, I encourage you to start watching now for informative case examples from our lab and intriguing dentistry-related news stories.

The video stills that follow highlight an interesting Case of the Week from Episode 32 that addresses what is probably my biggest dental pet peeve: when a double-arch tray is used for a bridge impression. While double-arch impressions can be suitable for one single-unit crown or two single-unit adjacent restorations, they should never be used for a bridge. A closer look at the case illustrates why.

While double-arch impressions can be suitable for one single-unit crown or two single-unit adjacent restorations, they should never be used for a bridge.
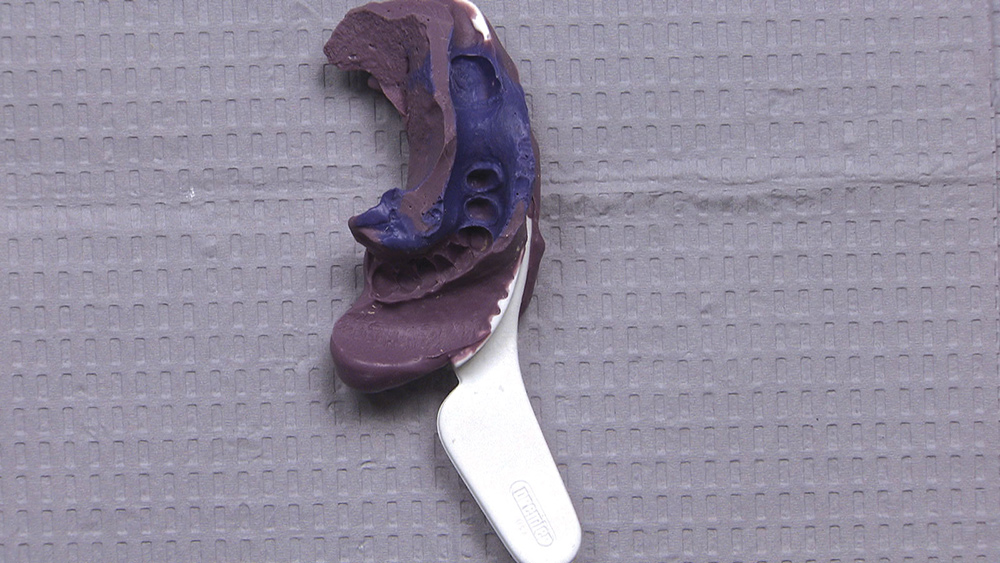
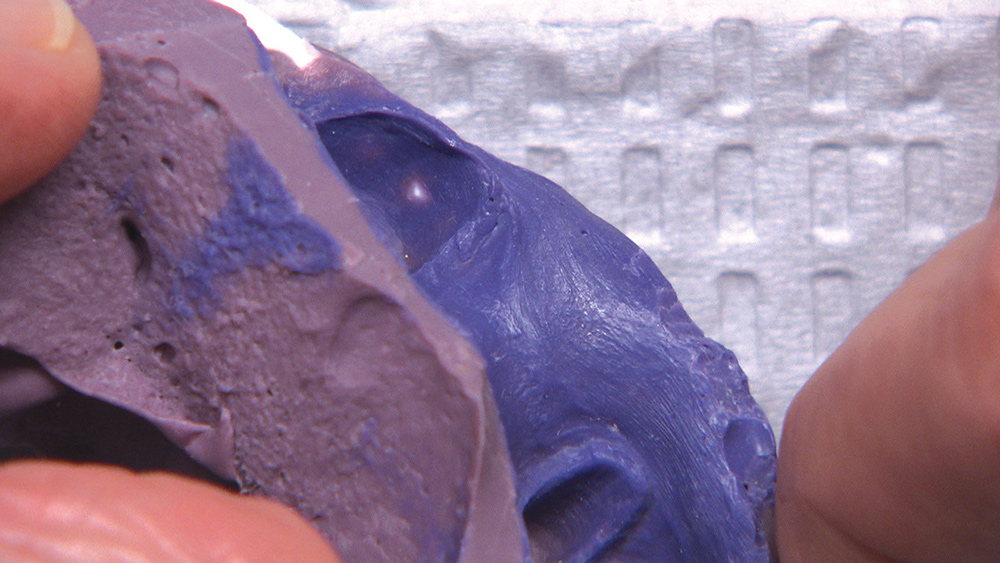
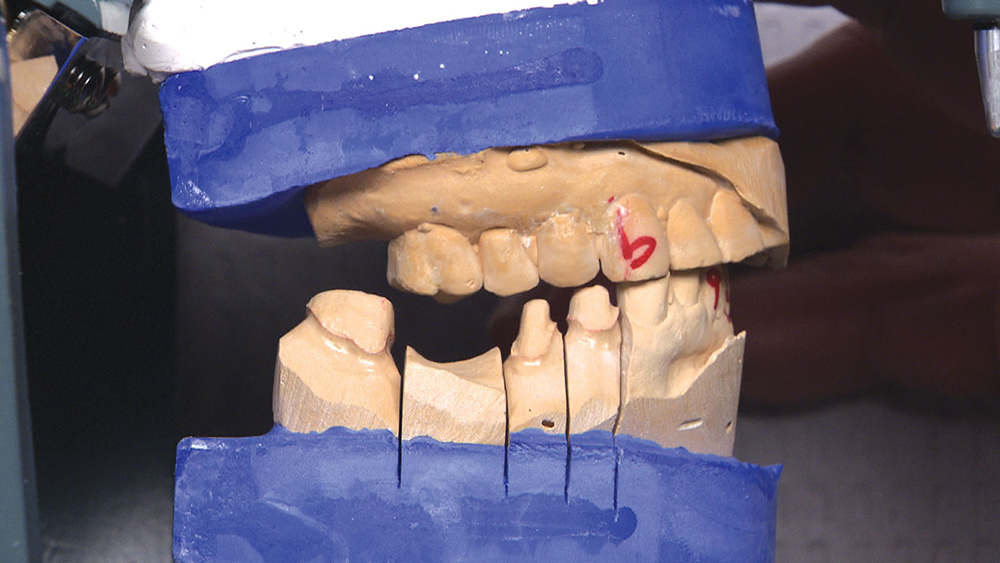
Figure 1: When walking through Glidewell’s crown & bridge department the other day, I stopped to ask a technician what one thing dentists do in cases they send to the lab that drives him crazy. “I’m glad you asked!” he said, and handed me this impression.

Figure 1: When walking through Glidewell’s crown & bridge department the other day, I stopped to ask a technician what one thing dentists do in cases they send to the lab that drives him crazy. “I’m glad you asked!” he said, and handed me this impression.

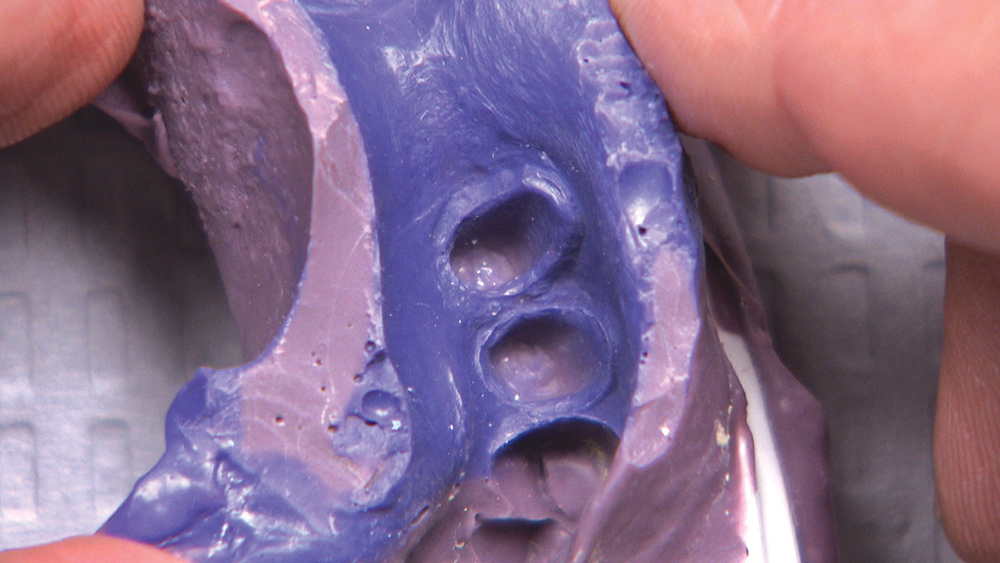
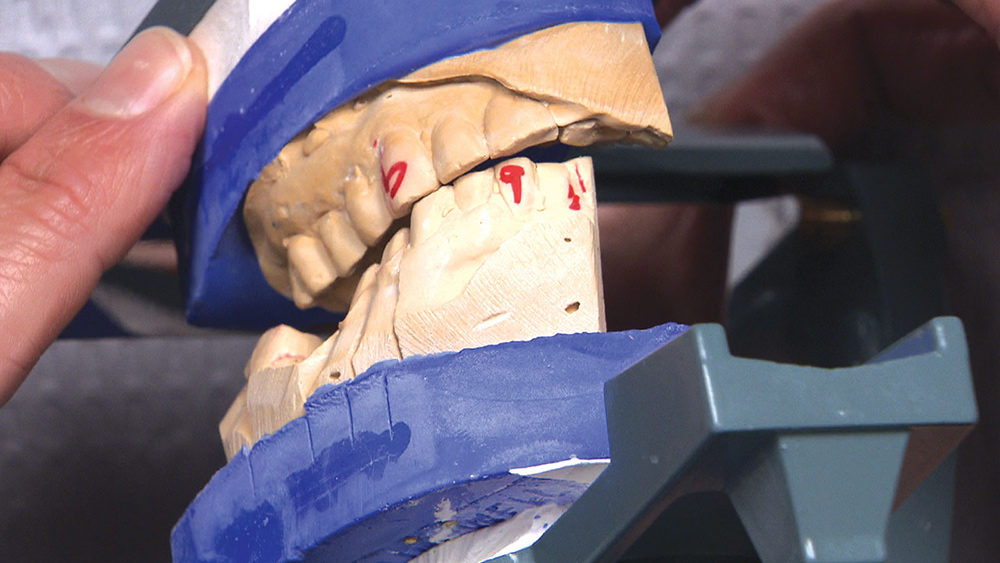
Figure 2: Looking closer at this impression, we can see that it is for a 4-unit bridge, but it was taken in a double-arch tray. I learned from Dr. Gordon Christensen many years ago that this is a no-no, and now this technician wants me to know that he dislikes this technique just as much as Gordon does.

Figure 2: Looking closer at this impression, we can see that it is for a 4-unit bridge, but it was taken in a double-arch tray. I learned from Dr. Gordon Christensen many years ago that this is a no-no, and now this technician wants me to know that he dislikes this technique just as much as Gordon does.

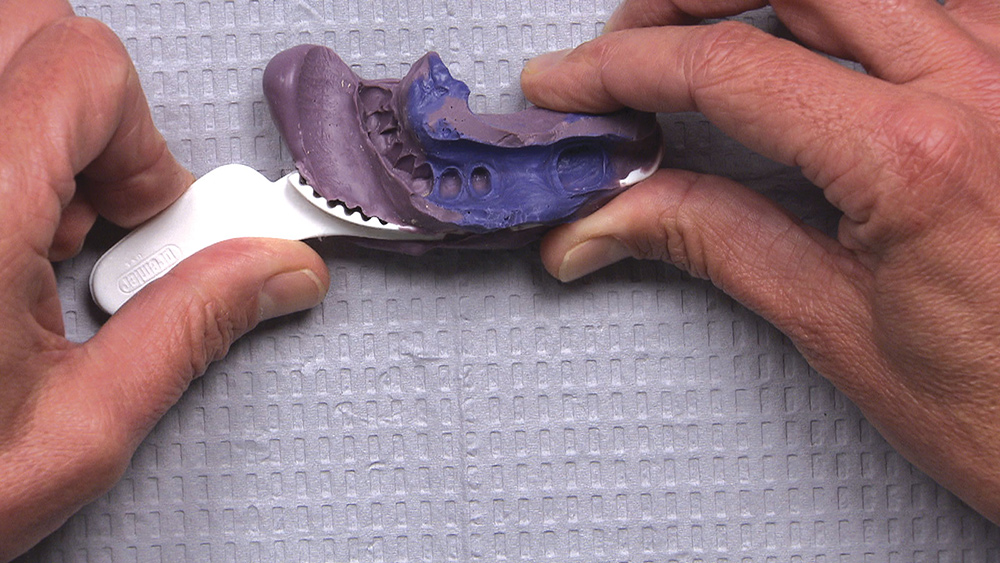
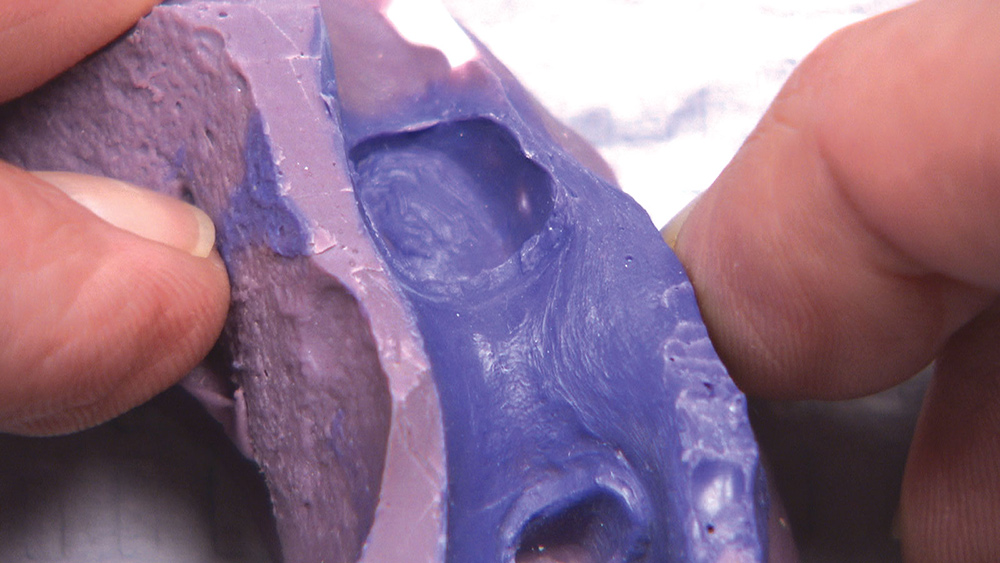
Figure 3: Turning the impression, we can see that the prep was in contact with the tray — another no-no. As hard as it may be to believe, all it takes is one point of contact like this between tray and prep to prevent the entire bridge from seating properly.

Figure 3: Turning the impression, we can see that the prep was in contact with the tray — another no-no. As hard as it may be to believe, all it takes is one point of contact like this between tray and prep to prevent the entire bridge from seating properly.

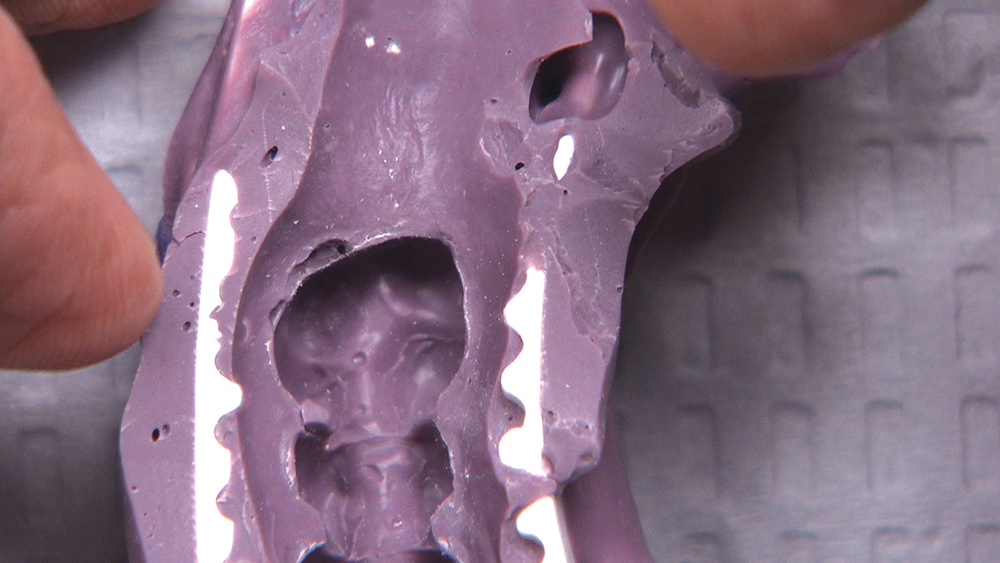
Figure 4: The impression itself around the splinted abutments is so-so; tooth #29 appears to have a void on the facial and the lingual margins, while tooth #28 has some very thin material on the facial and distolingual margins. This always makes me nervous as we pour the die stone because the material is heavy enough to bend those margins.

Figure 4: The impression itself around the splinted abutments is so-so; tooth #29 appears to have a void on the facial and the lingual margins, while tooth #28 has some very thin material on the facial and distolingual margins. This always makes me nervous as we pour the die stone because the material is heavy enough to bend those margins.

Figure 5: The margins on tooth #31 also appear thin and friable, and it’s hard to tell definitively whether tissue retraction took place. Using the Two-Cord Impression Technique, or to a lesser degree by using a diode laser, we can create enough lateral retraction to end up with a big, thick margin on the impression that won’t distort.

Figure 5: The margins on tooth #31 also appear thin and friable, and it’s hard to tell definitively whether tissue retraction took place. Using the Two-Cord Impression Technique, or to a lesser degree by using a diode laser, we can create enough lateral retraction to end up with a big, thick margin on the impression that won’t distort.

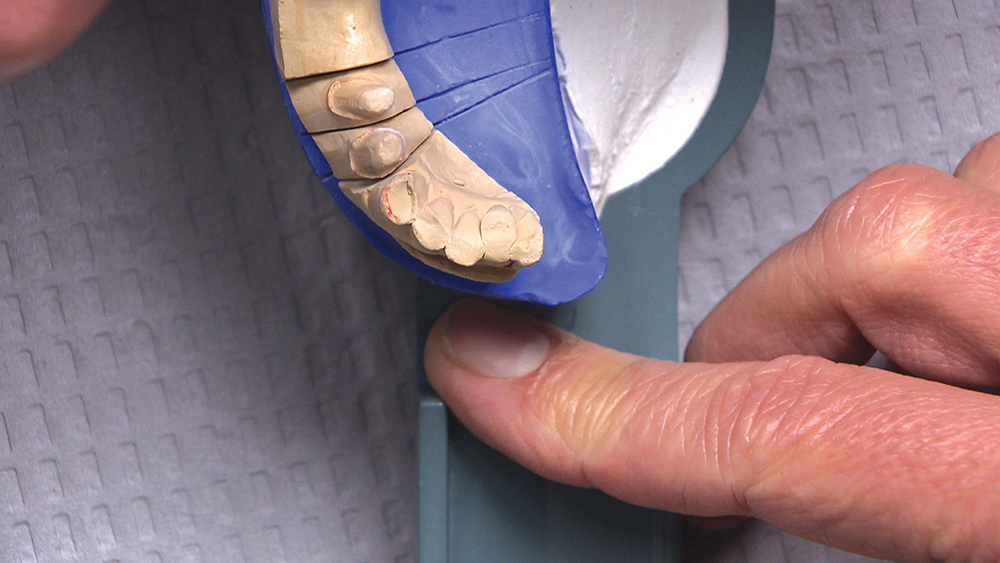
Figure 6: As I flip the impression over, notice that we are missing the second molar opposing the bridge and that the first molar is the most distal tooth. You may recall that we are missing the first molar on the lower arch as well, which is going to make it more difficult to verify a correct bite.

Figure 6: As I flip the impression over, notice that we are missing the second molar opposing the bridge and that the first molar is the most distal tooth. You may recall that we are missing the first molar on the lower arch as well, which is going to make it more difficult to verify a correct bite.

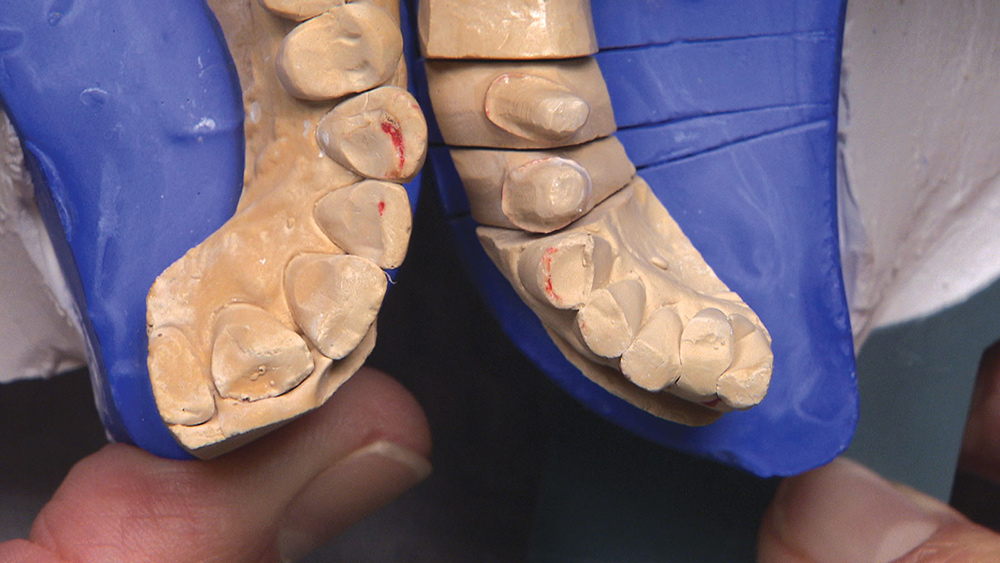
Figure 7: Here is the poured model of the impression. It looks like we have enough reduction for the BruxZir® bridge (Glidewell Laboratories) the doctor prescribed, except for on tooth #28 perhaps. I would have prescribed a PFM bridge, but that is another story. I am still concerned about the bite because there aren’t any stops distal to the bridge.

Figure 7: Here is the poured model of the impression. It looks like we have enough reduction for the BruxZir® bridge (Glidewell Laboratories) the doctor prescribed, except for on tooth #28 perhaps. I would have prescribed a PFM bridge, but that is another story. I am still concerned about the bite because there aren’t any stops distal to the bridge.

Figure 8: When I spin the articulator around and view the case from the anterior, my fears are confirmed. I have a hard time believing that the bite from the impression is correct. I cannot believe that the patient only bites on that cuspid. Without any unprepped teeth on the opposite side to hand articulate, the situation looks dicey.

Figure 8: When I spin the articulator around and view the case from the anterior, my fears are confirmed. I have a hard time believing that the bite from the impression is correct. I cannot believe that the patient only bites on that cuspid. Without any unprepped teeth on the opposite side to hand articulate, the situation looks dicey.

Figure 9: As I look at the lower anterior teeth, I realize the bite problems are getting bigger because this patient spends some serious time with these teeth in contact with the uppers. Every once in a while you will see a case like this with an anterior open bite, but if this isn’t one of these cases, this bite will drive the patient crazy.

Figure 9: As I look at the lower anterior teeth, I realize the bite problems are getting bigger because this patient spends some serious time with these teeth in contact with the uppers. Every once in a while you will see a case like this with an anterior open bite, but if this isn’t one of these cases, this bite will drive the patient crazy.

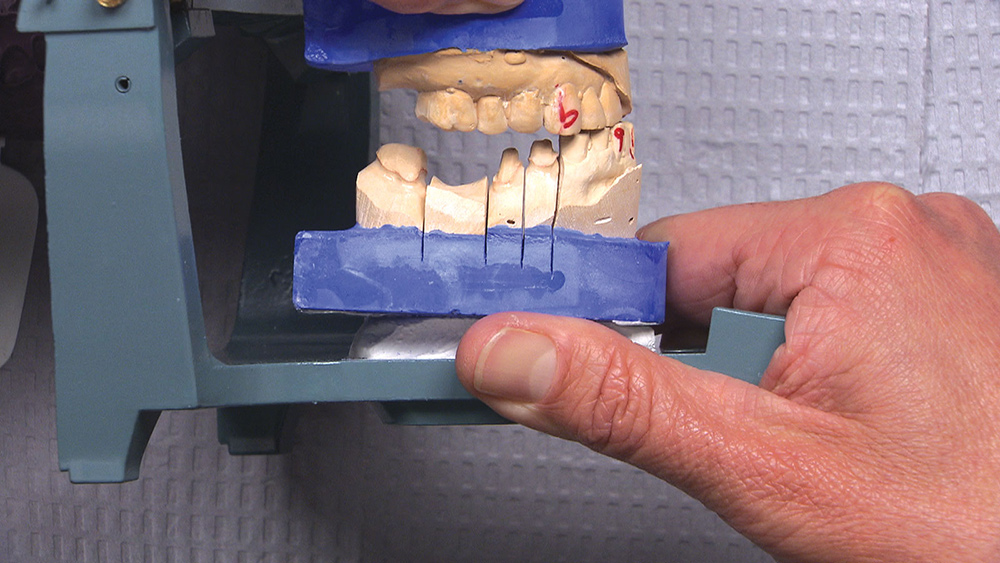
Figure 10: A little twist of the articulator brings the other two anterior teeth into contact, but now there is a huge gap between the posterior teeth. Again, there is no way to verify where the bite is correct. If only we had a full-arch impression on the upper and the lower, we could take an educated guess.

Figure 10: A little twist of the articulator brings the other two anterior teeth into contact, but now there is a huge gap between the posterior teeth. Again, there is no way to verify where the bite is correct. If only we had a full-arch impression on the upper and the lower, we could take an educated guess.

Figure 11: Look at all these wonderful wear facets; usually, these make it a no-brainer for us to hand articulate a case. Even a separate bite registration over the preps could have saved this impression — if you ignore the fact that many bridges made from double-arch trays don’t fit. Bottom line: This case needs to go back to the doctor for new, full-arch impressions.

Figure 11: Look at all these wonderful wear facets; usually, these make it a no-brainer for us to hand articulate a case. Even a separate bite registration over the preps could have saved this impression — if you ignore the fact that many bridges made from double-arch trays don’t fit. Bottom line: This case needs to go back to the doctor for new, full-arch impressions.

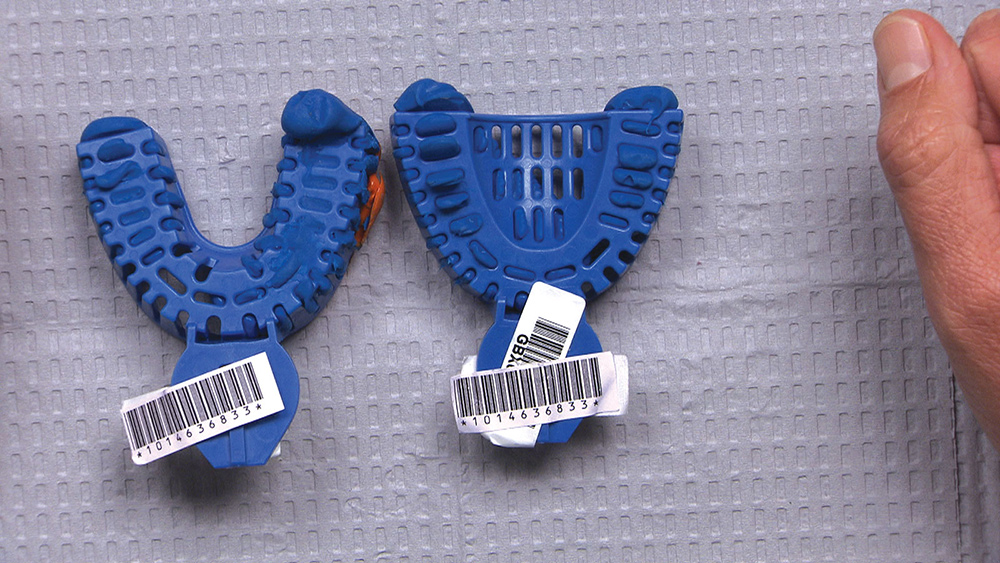
Figure 12: As I was leaving the technician’s workstation, he also handed me these full-arch impressions. I was instantly suspicious when I saw the trays the dentist used. Do you recognize them? You do if you do Invisalign® (Align Technology Inc.; San Jose, Calif.). These are the plastic trays you have to take Invisalign impressions in so that the company’s X-ray scanner can read through the trays.

Figure 12: As I was leaving the technician’s workstation, he also handed me these full-arch impressions. I was instantly suspicious when I saw the trays the dentist used. Do you recognize them? You do if you do Invisalign® (Align Technology Inc.; San Jose, Calif.). These are the plastic trays you have to take Invisalign impressions in so that the company’s X-ray scanner can read through the trays.

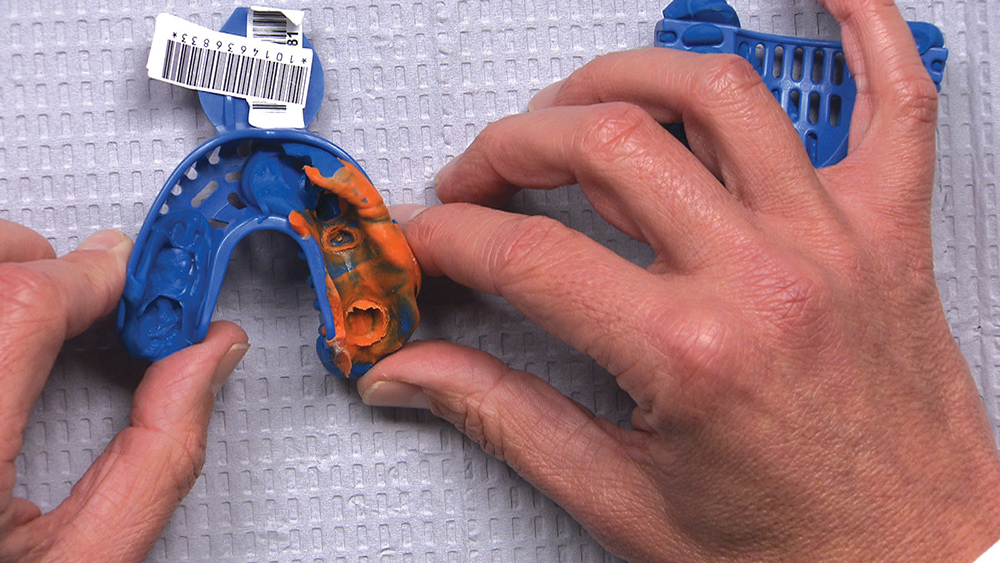
Figure 13: I thought we had seen it all when it comes to impressions, but this may be a first. It’s a 3-unit bridge impression on the lower, but the dentist took what looks like a half-arch impression with a full-arch tray. There is also some material placed on the other side of the tray to impress two molars and a bicuspid. Was this done purposely?

Figure 13: I thought we had seen it all when it comes to impressions, but this may be a first. It’s a 3-unit bridge impression on the lower, but the dentist took what looks like a half-arch impression with a full-arch tray. There is also some material placed on the other side of the tray to impress two molars and a bicuspid. Was this done purposely?

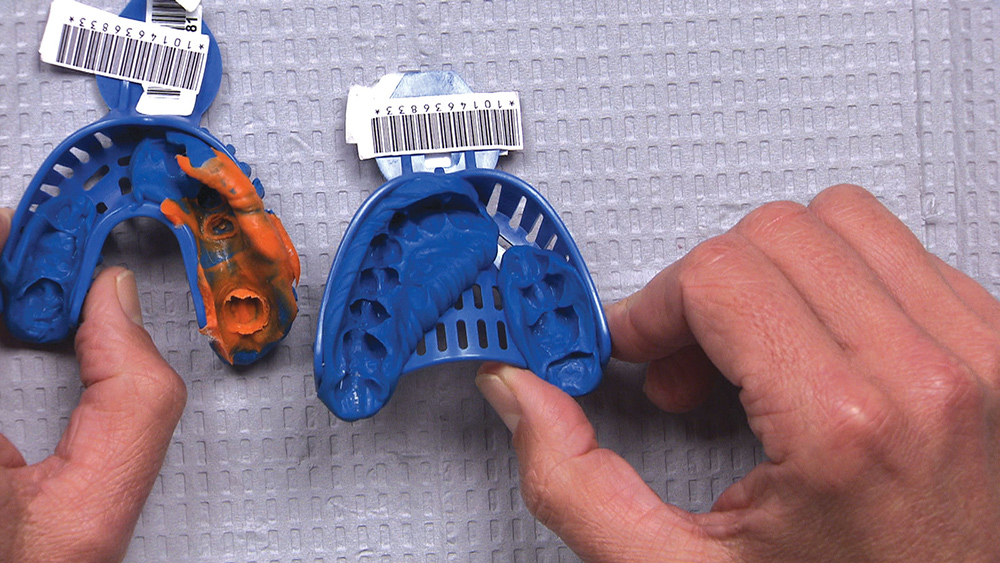
Figure 14: Apparently, this was done intentionally. Even on the opposing model the doctor put a large amount of impression material on the side opposing the bridge — impressive! He then put some material on the other side to impress four additional teeth. How much money did the dentist save by not impressing that lateral and cuspid? Twelve cents? Pouring these impressions is going be a challenge and make excursions tougher to accurately replicate.

Figure 14: Apparently, this was done intentionally. Even on the opposing model the doctor put a large amount of impression material on the side opposing the bridge — impressive! He then put some material on the other side to impress four additional teeth. How much money did the dentist save by not impressing that lateral and cuspid? Twelve cents? Pouring these impressions is going be a challenge and make excursions tougher to accurately replicate.

Conclusion

Using a double-arch tray looks so easy and seems so tempting when taking an impression on just one side of the mouth, but it very rarely makes for an accurate multiple-unit impression. Impression errors are especially important to avoid when dealing with multiple-unit impressions because any mistakes will be multiplied across the entire length of the bridge. Even if the bridge still fits the patient’s teeth, the bite will likely be off, which does not make for a happy patient. For any bridge case like this, you, the lab and your patient will be better served if you use a full-arch lower impression tray and a full-arch upper impression tray, as well as a bite registration between the opposing teeth and the preps.

Impression errors are especially important to avoid when dealing with multiple-unit impressions because any mistakes will be multiplied across the entire length of the bridge.

General References

For clinical technique tips on taking a bridge impression, watch “Chairside Live Episode 36: The Do’s & Don’ts of Taking an Impression for a Bridge.”