Community Service: Giving Back with an Obsidian Smile Makeover
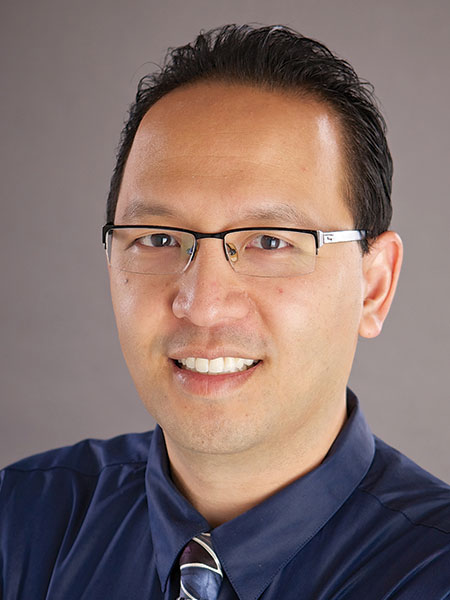
August 28, 2013
 image
Vu Le, DDS
Community Service with an Obsidian Smile Makeover

INTRODUCTION

The young woman in this case had fallen under some very tough personal circumstances and needed dental help. Community service takes many forms, and in our office, we give back by taking on huge reconstructive cases.

CASE DESCRIPTION

The patient presented with a large edentulous space in the anterior maxilla, severe vertical ridge atrophy and pronounced retrognathia. Due to the patient’s lack of vertical clearance, implants, bridges and partial dentures were contraindicated as treatment options. Instead, a fixed prosthodontic solution was chosen.

After using intraoral photography to communicate shade and translucency for the final restorations to the dental laboratory, chairside temporaries were made using a putty mold of the lab’s diagnostic wax-up. Porcelain fused to metal, Obsidian® lithium silicate ceramic (Glidewell Laboratories; Newport Beach, Calif.) and BruxZir® Solid Zirconia (Glidewell Laboratories) restorations were then fabricated at the lab. While the patient accepted all three restorative materials, Obsidian ceramic — a monolithic material that both exceeds the strength requirements for cemented all-ceramic restorations and can be bonded when desired — was selected for its combination of esthetics and high flexural strength.

The photo essay that follows details the restorative procedures used in this multiple-unit case to provide the patient with a successful smile makeover.

Figure 1

Figure 1: The patient was extremely timid and shy. It took quite a lot of coaxing to get even this tepid smile out of her.

Figure 2a
Figure 2b

Figures 2a, 2b: Her facial profile was obviously a skeletal Class II with pronounced retrognathia.

Figure 3

Figure 3: The first big challenge was the enormous mesial-distal width of the anterior space, which was almost large enough for two teeth. At one point, there was probably a diastema between teeth #8 & #9 — an indication not easily fixed with a flipper. There was simply no drop-in solution. One wide tooth would make the patient look like a beaver; on the other hand, placing two teeth in the space would require them to be unnaturally narrow. The main challenge of this case was the redistribution of tooth width. We decided to prep the interproximal surfaces relatively aggressively, giving the lab room to add more to the mesial and less to the distal. The net result would be mesial “movement” of the teeth via fixed prosthodontics. Outside of orthodontia, this solution was deemed the best way to fix such a large diastema.

Figure 4

Figure 4: The patient would have benefitted from palatal expansion during her formative years, but as clinicians, we have to deal with what we are given. Several steps were taken to capture an accurate photo for the lab and ensure its clarity. First, we used an Occlusal Contraster (PhotoMed; Van Nuys, Calif.) to remove any unnecessary tissue from the frame. The mirror was warmed in hot water first and then dried with a micro-fiber cloth to prevent fogging. By hovering our suction just outside the frame of the picture and using the air syringe sparingly, we avoided splashing saliva on the mirror and ruining the shot.

Figure 5

Figure 5: The other big challenge of the case was the vertical atrophy of the ridge. Without the benefit of bone grafts, an elongated pontic or an overly long implant crown is created. This could be less of a problem with a removable appliance.

Figure 6

Figure 6: From the three-quarter view, you can really see the patient’s dramatic atrophy and overbite. The case presented inadequate clearance for implants, bridges or even partial dentures because every one of these procedures requires at least some vertical clearance.

Figure 7

Figure 7: My two keys to shade success are using the VITA 3D-Master® Shade Guide (Vident™; Brea, Calif.) and sending accurate photographs to the lab. A black-and-white image more clearly shows the technician the value of the tooth relative to the reference shade. Even if your shade selection is off, accurate photographs will tell the technician by how much. If you give good visual information to a good lab, you should never fear the single veneer. If we insist on adhering to the outdated “six veneers or more” mentality, we lose out on smaller cases. You might have a patient with five to seven veneers and one or two chipped ones, or you may run into a young patient with peg laterals in an otherwise gorgeous smile. These smaller cases require precise matching that is only attainable through clear communication with the laboratory.

CONSISTENT INTRAORAL PHOTOGRAPHY

Accurate photography is as important to color communication as a clear impression is to the restorative fit. My recipe for reliable intraoral images is using a digital SLR (DSLR) camera that allows you to dial in the image. The settings on my Canon EOS 6D are: manual mode, ISO 200, f/22, 1/160 sec. or faster shutter, and white balance set to the flash preset. Or, you can leave the flash on automatic. Add flash compensation of +1/3 or +1/2 if the images are consistently too dim. If you consistently dial these settings into your camera, you will be rewarded with consistent results.

To ensure I get all the settings right every time, I have programmed a preset into my camera. Most mid-level DSLRs feature a custom preset mode, usually labeled C1 and/or C2. After the initial headache of programming all these settings, you can turn on the flash, spin the dial to C1 and now the camera is ready to shoot. If I mess something up, I click the mode dial off of C1, then back to C1 again to reset the camera to its memorized, foolproof dental settings.

Figure 8

Figure 8: Photographing with an Anterior Contraster (PhotoMed) shows the lab the amount of incisal translucency. Using one is helpful for makeover cases and crucial if you are only doing one or two front teeth. There is nothing worse than a lonely opaque tooth — except for maybe a dead-looking, overly translucent tooth. If you don’t have a contraster, you can use black matboard and throw it away afterward, or have the patient open his or her mouth slightly to remove the lower teeth from the frame. At minimum, the photographs necessary for an anterior case are: a facial portrait with the patient smiling, a frontal shot with the lips retracted, that same retracted frontal with a shade tab in place, and a retracted frontal with a contraster in place (pictured above) for translucency. I also include black-and-white copies of the images with shade tabs in them to show the relative value. Again, if you happen to pick the wrong shade, the benefit of the photos is that the lab technician can see the tooth positioned next to your selected shade tab and work from there.

Figure 9a
Figure 9b

Figures 9a, 9b: The 3M™ ESPE™ Retraction Capsule (3M™ ESPE™; St. Paul, Minn.) was used for gingival hemostasis. While this system is not great for retraction, it is far and away the best hemostatic agent I have ever used. For smaller jobs, I use ViscoStat® Clear (Ultradent; South Jordan, Utah). Laser troughing is useful when minor gingival trimming is needed, but I try to avoid the extra setup and cleanup. I rarely use ferric sulfates anymore because of the staining — there are better alternatives now.

Figure 10

Figure 10: Next, I fabricated a custom tray from cold-cure acrylic (Super Dent Self-Cure Tray Plastic [Darby Dental Supply; Jericho, N.Y.]) and painted it with V.P.S. Adhesive (Kerr Corp.; Orange, Calif.). When doing eight units, the uniform impression thickness, stiffness and accuracy created with a custom tray are really nice to have. Sometimes I use triple bite trays (Harmony Posterior [HO Dental; Las Vegas, Nev.]) to save time and material, but I reserve them for single-tooth cases.

Figure 11

Figure 11: To achieve the best impressions to send along with my cases, I use Dr. Michael DiTolla’s variation on the double-cord technique. Packing Ultrapak® #00 cord (Ultradent) moves the gingiva down 0.5 mm. Placing Ultrapak E #2 cord (Ultradent) with epinephrine gives you that big lateral retraction. The most important ingredient in the recipe is time; allow the cord to stay in place for 10 full minutes. ROEKO Comprecaps (Coltène/Whaledent; Cuyahoga Falls, Ohio) are helpful when the bleeding is more profuse, especially when used in combination with the 3M Retraction Capsules. I basically have the patient bite down on these cotton cylinders for the full duration. It is rare to have bleeding that breaks through epinephrine and 10 minutes of continuous pressure.

Figure 12

Figure 12: The best way to capture an accurate margin is to get a millimeter-thick collar of gingival sulcus. Stop blaming the lab or your impression material; accuracy is 95% about your retraction and isolation technique. For impression material, I use Genie VPS® (Sultan Healthcare; Hackensack, N.J.) and get good results by pairing it with my two-cord technique. Two cords for 10 minutes has been far and away the best way to achieve adequate tissue management. I have tried every clay- and PVS-based retraction product on the market, and there is nothing you can squirt before, during or after an impression that works as profoundly and cleanly as the two-cord technique. Expasyl® (Kerr Corp.) comes close, but it is rather pricey to use and difficult to clean up.

Figure 13

Figure 13: To capture a bite record along with the patient’s midline and facial planes, I used an anterior triple bite tray (Harmony Anterior [HO Dental]). The tray is designed to take impressions and the bite record at once, but I still prefer separate trays for multi-unit cases.

Figure 14

Figure 14: To create my temporaries, I injected self-cure temporary resin (Protemp™ Plus Temporization Material [3M ESPE]) into a lab-fabricated putty mold of the diagnostic wax-up. The minor voids were patched with CLEARFIL MAJESTY™ Flow composite (Kuraray America; New York, N.Y.).

Figure 15

Figure 15: It is very tough to polish these delicate veneer temps, so instead I painted on OptiGuard® (Kerr Corp.) to create a deep gloss clear coat. OptiGuard also fixes the dreaded white finish lines in your composites. TempBond® Clear™ (Kerr Corp.) was used to cement the one-piece temporary. Teeth #11 & #12 broke off, but it was not a big issue as they were minimal veneer preps to begin with.

Figure 16

Figure 16: Here is the bridge spanning teeth #7–9 in porcelain fused to metal. PFMs still have a proven track record, and the option of creating a polished metal margin in posterior units provides fantastic plaque resistance. The PFM still has a place in modern dentistry, especially for posterior bridges, where monolithic materials have not yet proven themselves.

Figure 17

Figure 17: For comparison’s sake, we also had the case milled in Obsidian lithium silicate ceramic (shown above) and BruxZir Solid Zirconia The biggest surprise for me was just how close all three choices were in terms of esthetics. The patient accepted all three materials that we tried in: PFM, BruxZir and Obsidian. Some labs are getting so good with their full-contour zirconia that they are approaching the look of IPS e.max®(Ivoclar Vivadent; Amherst, N.Y.). You would have to go to feldspathic porcelain or IPS Empress® (Ivoclar Vivadent) to do much better in terms of esthetics, but both options come with a significant loss in strength. Every dental material is a compromise; simply pick the best set of trade-offs for each case.

Figure 18

Figure 18: Obsidian ceramic was ultimately chosen for its better esthetics and stronger veneer bonding. I used Ivoclean (Ivoclar Vivadent) to clean the intaglio surface of the all-ceramic restorations. Applying a generous drop or two directly into each restoration works great. Give it a good scrubbing to clean off the phosphate bonding sites, and your bonding strengths will be dramatically improved.

Figure 19

Figure 19: The new generation of “universal” bonding agents contains a silane group, so you apply them to the intaglio surface of the restoration just as you would a silane primer. Gel Etchant (Kerr Corp.), Scotchbond™ Universal Adhesive (3M ESPE) and RelyX™ Ultimate (3M ESPE) were used to bond the Obsidian bridge. RelyX™ Veneer Cement (3M ESPE) was used to bond the veneers. NOTE: “Universal” bonding agent really means “self-etch priming adhesive with silane.” These materials bond to tooth structure, light-cure resins and etched ceramics. Unless specified by the manufacturer, they are not compatible with dual-cure resin cements or dual-cure core buildup materials.

Figure 20a
Figure 20b
Figure 20c

Figures 20a–20c: Three weeks post-op, we shot studio-style portraits in my office. Note the dramatic difference in the patient’s confidence and body language. Because I shot the photos in a small space, minor touch-ups had to be done to even out the black background, but I did absolutely no retouching on the patient.

Figure 21

Figure 21: A three-quarter view of the finished smile is a pleasing way to present your finished cases to patients. The retracted frontal shots should be reserved for your lab technician, your colleagues, accreditation and journals.

Figure 22

Figure 22: If you find that your cosmetic cases are disproportionately Angle’s Class II malocclusions, this is because the front teeth stick out more. Most makeover cases deepen the overbite because the teeth are lengthened. We opened this patient’s VDO about 2 mm; while not enough to fix the overbite, it was enough to maintain the existing display of lower teeth.

Figure 23

Figure 23: All four incisors were bulked up to conceal the extra-large edentulous space. We basically redistributed the mesial-distal width to eat up the former diastema. Using large-radius line angles for a female patient also has the benefit of minimizing the apparent width of the teeth.

Figure 24

Figure 24: Finished upper anteriors photographed with contraster in place. Gratuitous incisal translucency looks great in glossy lab brochures, but often you really just need a touch of it. If the lab adds too much translucency, the darkness of the mouth will show through, and the restorations will look gray and lifeless. If time and resources had permitted, crown lengthening of tooth #9 would have been helpful.

Figure 25

Figure 25: View of the post-op maxillary occlusal arch. Eight units were done spanning teeth #5–12, instead of the customary six, in order to fill out the buccal corridor. Very little preparation was done on the canines and premolars.

Figure 26

Figure 26: In order to make room for the bridge connectors, I had the lab open the articulator 2 mm. No adjustments were made when seating the restorations, so everything initially felt very high. Using the bite stop technique borrowed from the orthodontic field, composite was bonded to the functional cusps of the lower posterior teeth (see teeth circled in image). After etching and bonding, I cured the composite as the patient bit down on it. Basically, the patient was reverse equilibrated with occlusal buildups. Compared to a full-arch reconstruction, this is a more conservative way to make small changes in vertical dimension. If the composite breaks off the occlusal surfaces, it is easily replaced. Best-case scenario, the composite wears faster than the ceramics up front and the posteriors gracefully extrude to rebalance the bite. Only time will tell.

FINAL THOUGHTS

Few patients have the knowledge, circumstances and resources necessary to achieve functional or esthetic perfection. It is our job as clinicians to deliver the best possible set of compromises that fits within the patient’s needs, wants and means. For this multiple-unit case, an Obsidian makeover provided the patient with a successful restorative result. Sometimes we are faced with problems far in excess of the funds available to solve them, but when the opportunity comes to give back to the community, don’t be afraid to dream big. The rewards from cases like these far outweigh the costs.

Dr. Vu Le has a general dentistry practice in Foothill Ranch, California, with a strong emphasis on technology and photography. For examples of his work, visit his office website, simpletooth.com, or his photography website, vulephoto.com. Contact him at 949-600-7777, vuledds@simpletooth.com, or on Twitter (@theSimpleTooth) or Facebook.

Disclosure: The author has no ownership or financial stake in any dental vendor or lab, including Glidewell Laboratories. Lab fees were waived in this case. No monetary compensation was received for the photography, written content or professional services performed.