Optimizing Shade Match Using All-Ceramic and Composite Materials
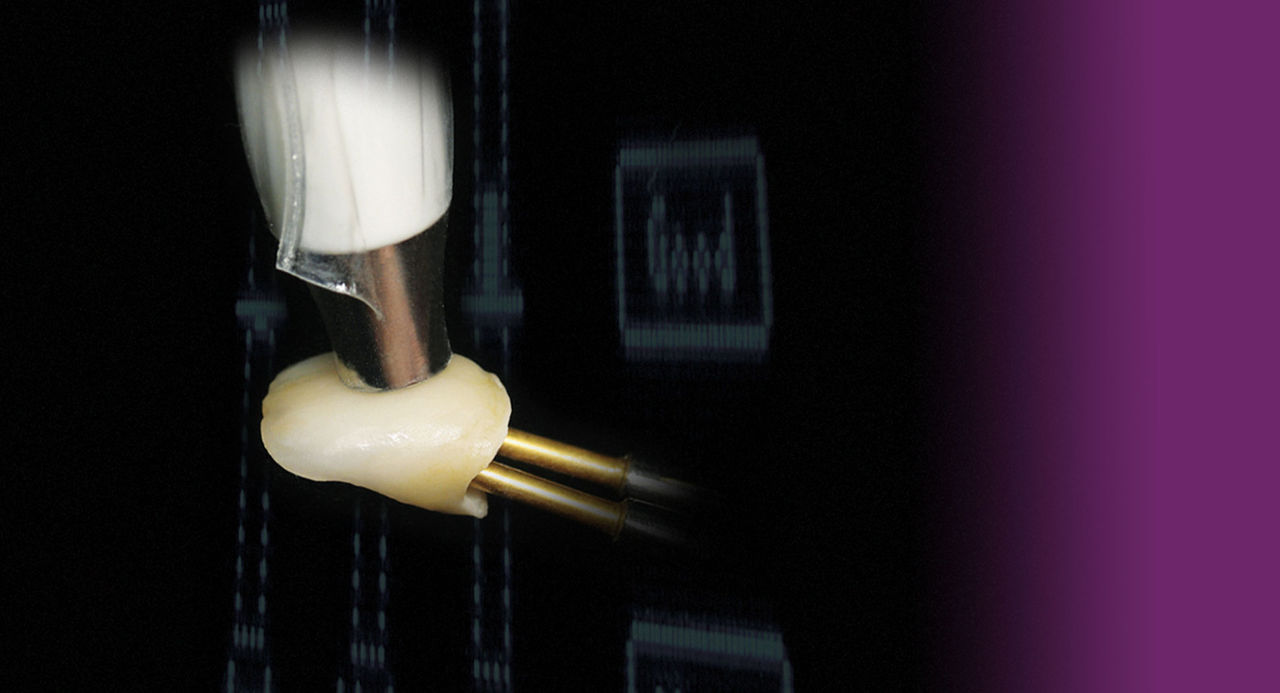
Aesthetic management of the anterior dentition often requires the restorative team to use materials of varying color properties. The utilization of shade-selection devices to assist in color interpretation along with dental photography can improve communication between dentist and technician. Additionally, a shade guide system that addresses the four components of color, in both ceramics and composites, can have a profound impact on the predictability of matching different restorative materials. This article addresses several key elements that should be considered when utilizing different restorative media.
Learning Objectives
All-ceramic crown systems and composite restorations allow clinicians to be effective at creating a natural-looking appearance while optimizing shade matching during restorations. Upon reading this article, the reader should:
- Realize how carefully selected crowns and composites can be utilized to achieve translucency control and the true three dimensions of color.
- Understand color matching is an important step that should be properly conveyed between the clinician and the dental technician.
To keep pace with the increasing popularity of aesthetic procedures, manufacturers continue to develop stronger, more durable, restorative materials with characteristics similar to natural enamel in both aesthetics and wear. These materials are not only for appearance-related enhancements; they can also be used for procedures in which existing restorations are replaced with a more appealing material that imparts superior strength and aesthetic properties.
Numerous all-ceramic systems are currently available, differing in their aesthetic capabilities, strength, longevity and core material. It is imperative, therefore, for the clinician to study the various methods to select the appropriate and most efficient system. As with many all-ceramic systems, the VITA In-Ceram® system (Vident™; Brea, Calif.) is an excellent group of materials because of its ability to modify the translucency and opacity of the core material, in addition to its long-term clinical history and documented 99.1% success rate.1,2,3,4,5
Contemporary microhybrid resins (e.g., 3D®-Direct™ [Vident]; Vit-l-escence™ [Ultradent Products, Inc.; South Jordan, Utah]) also support clinicians’ efforts to satisfy their patients’ increasing aesthetic expectations. Their handling properties, polishability and related physical characteristics enable their use in anterior and posterior applications. Of all of the available resin systems, 3D-Direct is unique in its fidelity to the 3D-Master® (Vident) shade selection system. This system allows for an accurate shade match of the tooth structure based on its ability to address the three color properties — value, chroma and hue. When combined with the use of a spectrophotometer, the ability of the clinician and laboratory technician to perform shade selection is enhanced.
Case Presentation
Treatment Planning and Preparation
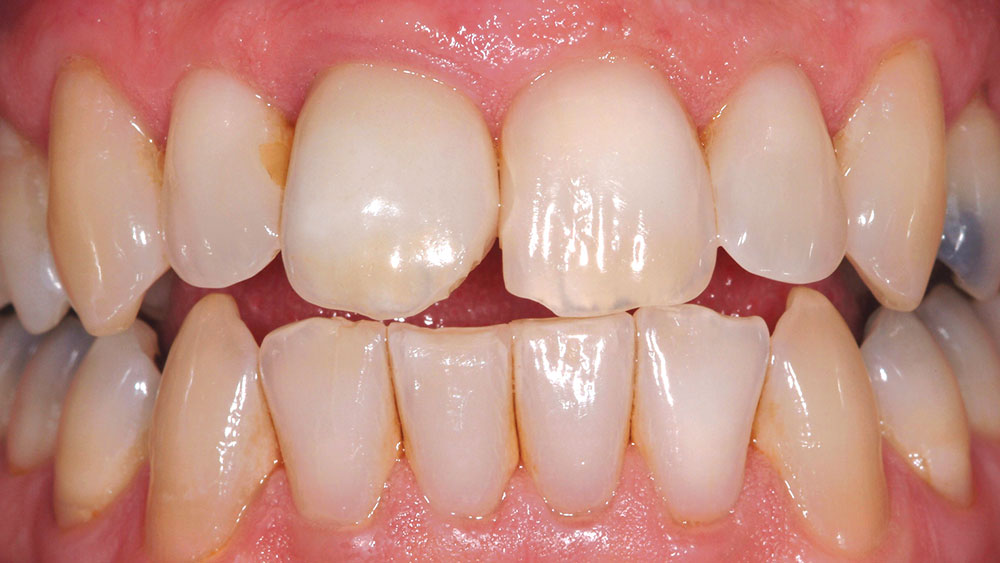
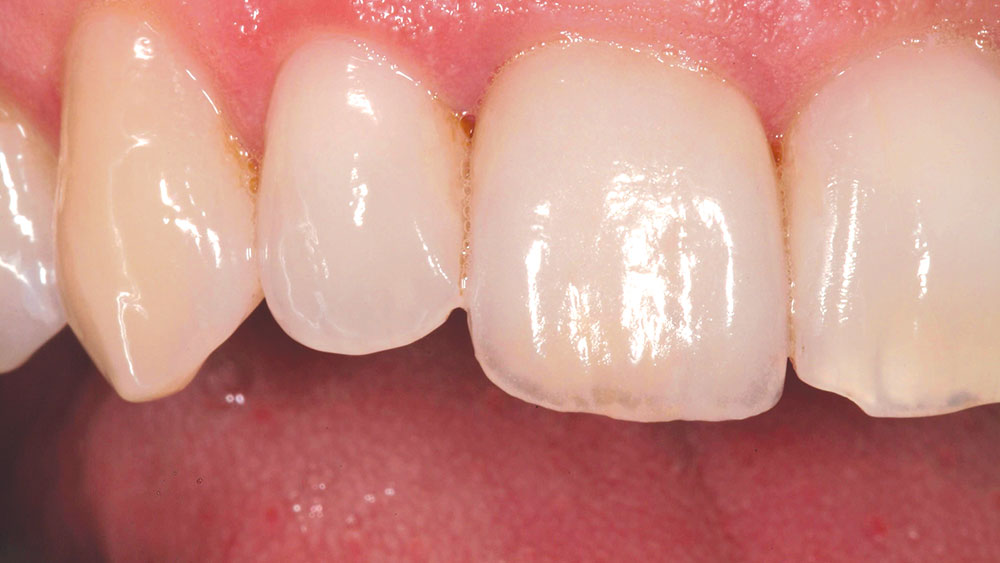
A 46-year-old male presented for the restoration of an interproximal crown, a fractured anterior crown and an adjacent tooth with an incisal fracture (Fig. 1). Due to the extensive damage revealed upon clinical examination, a full-coverage restoration was planned to replace the existing crown. A conservative composite restoration would restore the fractured incisal edge of the adjacent tooth to normal function and aesthetics.
As porcelain fused to metal (PFM) crowns often have marginal shadowing and a lack of translucency that could compromise aesthetics, an all-ceramic material (e.g., In-Ceram® [Vident]; Lava™ [3M™ ESPE™; St. Paul, Minn.]) was selected for fabrication of the anterior crown. This all-ceramic, high-strength core system mimics the translucency that can be observed in the natural dentition, as opposed to built-in static porcelain effects and superficial staining of a PFM.7 The strength and marginal integrity of this all-ceramic material would also be important in restoring the central incisor to optimal function and aesthetics.
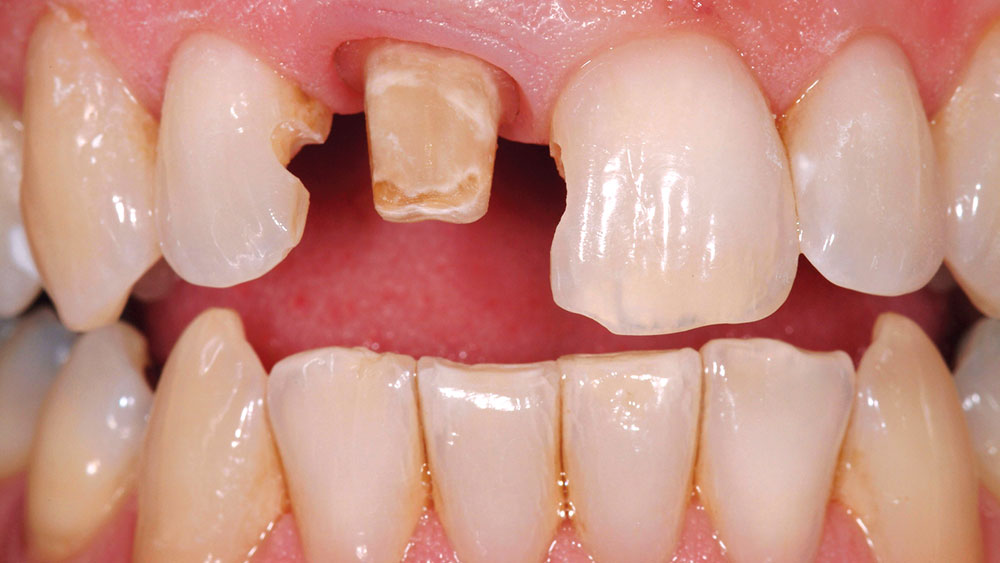
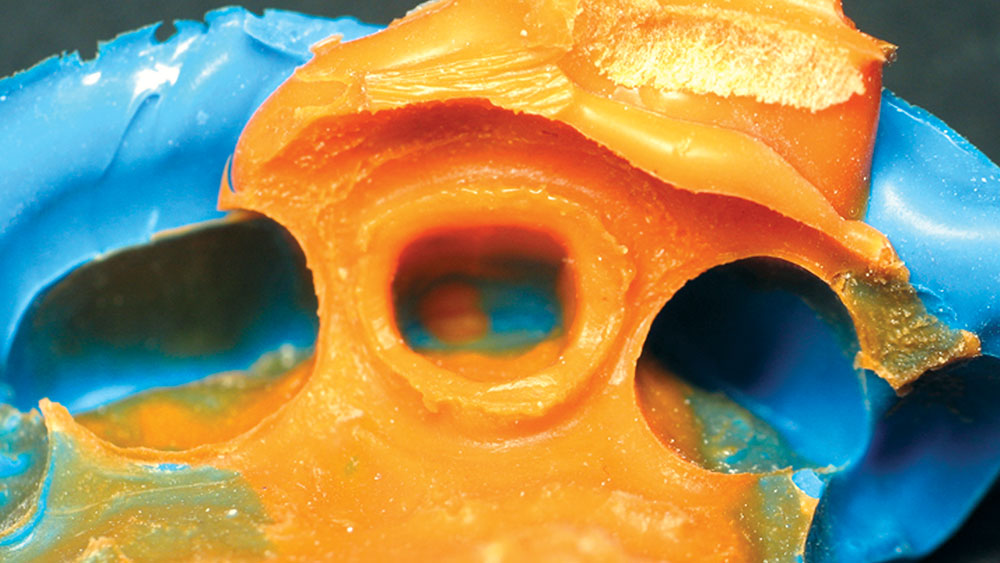
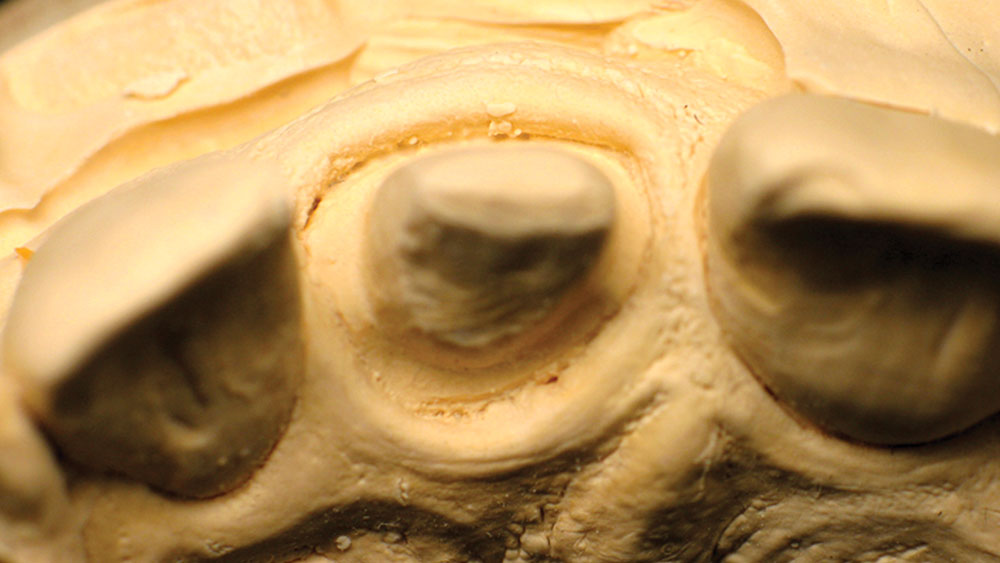
Shade selection and related information to the three dimensions of color were measured using shade tabs and a spectrophotometer (e.g., VITA 3D-Master and VITA Easyshade®, respectively [Vident]). Internal anatomy, maverick stains, perikymata, embrication lines and localized hypocalcifications were communicated by means of photography and visual assessment by the technician. Additional tooth structure was removed because the previous restoration was underprepared. The existing margin design also required additional tooth reduction to refine the margin (Fig. 2). A final impression was used with a nonimpregnated retraction cord (e.g., #00 [Ultradent]) and a polyvinylsiloxane impression material (e.g., Take 1® [Kerr/Sybron; Orange, Calif.]) (Fig. 3). No astringents were used. A bite registration and an opposing impression were also taken at this time.
Provisionalization of the tooth space was achieved with a bisacryl temporary material (e.g., Fill-In™ [Kerr/Sybron]). It was cemented in place with a coating of chlorhexidine gluconate as a precementation antibacterial rinse, which had a residual 48-hour bactericidal effect,8 followed by a noneugenol temporary cement (e.g., TempBond® NE [Kerr/Sybron]). Provisionalization included adequate papilla support and contact points to maintain soft tissue architecture and health for the definitive restoration.
Composite Technique
Achieving optimal aesthetics can be challenging when two restorative materials with different light reflective properties are used adjacent to one another. The risk of metamerism (or color differences) in materials viewed under different lighting conditions is quite high when restoring adjacent dentition with different materials.8 A ceramic restoration beside a resin-based restoration is made even more difficult due to their differing reflective properties. Thus, it can be advantageous in cases such as this for the clinician and technician to use complementing composite and ceramic systems. As the selected composite resin and ceramic material were both matched to the same three-dimensional shade selection system, a more ideal color match was possible.
The microhybrid composite was placed; the clinician implemented an anatomical layering technique for Class II restorations on tooth #7(12) and #9(21) to achieve three-dimensional color and replicate the internal structures of a natural tooth. Preparation was limited to the interproximal aspect of the adjacent central and lateral incisors; a coarse diamond bur kit (Aesthetic Dental Designs [Brasseler USA; Savannah, Ga.]) was used to remove existing composite resin and to create the irregular cavosurface margin that would refract light from the marginal areas of the definitive restoration. In addition, a beveled margin was used to blend the material with the tooth structure. The preparation was then etched with 38% phosphoric acid. After thorough rinsing and light air drying, layers of adhesive (e.g., Optibond® Solo Plus™ [Kerr/Sybron]) were applied. The volatile solvents were then evaporated using an air dryer and lightly cured for 20 seconds.
A thin layer of high-value, opaque dentin-shaded resin (e.g., OPOM2, 3D-Direct [Vident]) was placed interproximally and contoured to and across the incisal angle to decrease translucency. This allowed control of the value of the restoration and ensured optimal light transmission. Shaded (2M2) microhybrid resin was applied as the dentin layer, which was subsequently covered with an intrinsic stain (e.g., Kolor + Plus® [Kerr/Sybron]) mixture of A3 opaque and ochre. This layer was followed by an enamel layer (EN2) and then a translucent layer (T4) of resin. Each layer was cured for 40 seconds.
Finishing and polishing of the composite was performed with finishing disks and brushes (e.g., OptiDiscs™ and Occlubrushes® [Kerr/Sybron]), which were used with water irrigation, followed by the application of a surface sealant. The incisal edge fracture would be treated at the time the definitive all-ceramic crown restoration was placed, in order to match their incisal edge shape, color and translucency.
The Laboratory Sequence
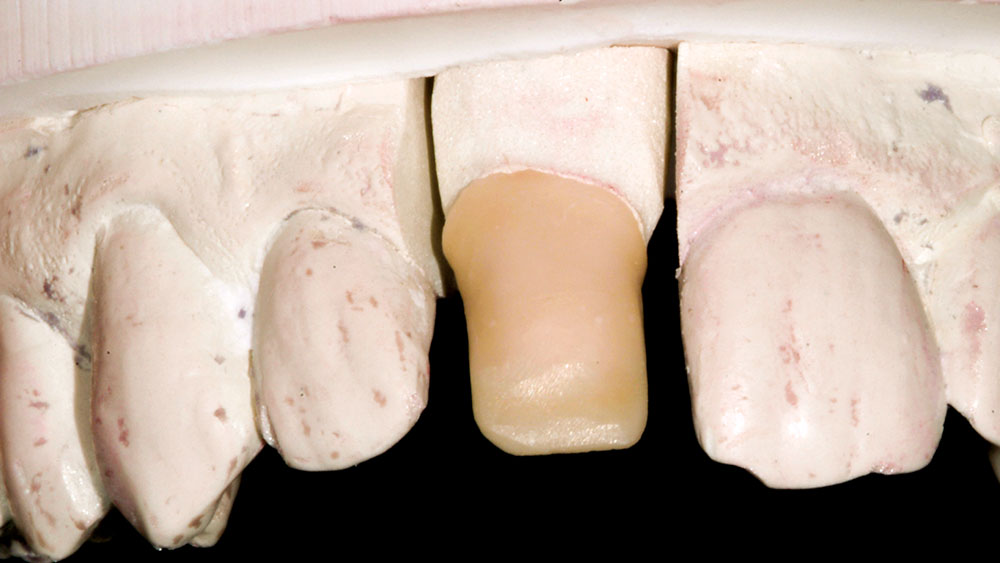
The impressions were disinfected, and the models were fabricated of a polyurethane material (e.g., Poly-Die™ [Vident]). The initial working time was three minutes to four minutes, with a final set being achieved at 60 minutes to 90 minutes for maximum strength. The model was separated and trimmed in a conventional manner (Fig. 4). What is unique about this new die material is its ease of die separation and trimming, albeit without the typical smearing that is often associated with existing resin or epoxy-type alternatives. The restorative material of choice was a VITA In-Ceram ALUMINA (Vident) block milled using CAD/CAM software. Other options that could have been chosen include ProCAD® (Ivoclar Vivadent; Amherst, N.Y.) and Paradigm™ MZ100 Block for CEREC (3M ESPE). The surface of the exposed die was then sprayed with a laser-reflecting coating and placed within the system for scanning. The die required no attention of undercut relief or die spacer, as the integral fit is determined when designing the coping with the inLab software.
The total fabrication time to produce the milled coping, including setting of the margins and adjusting the incisal height, required less than 25 minutes. The all-ceramic coping was subsequently removed from the milling chamber, and its fit was checked on the master die, with small adjustments made using a flexible silicone ceramic wheel at the proximal. After light steam cleaning, the coping was glass-infiltrated with the appropriate glass AL1 (Fig. 5). Prior to the ceramic buildup, the patient’s shade (e.g., 2.5M1) was reconfirmed using the VITA Easyshade spectrophotometer and shade tabs.
VITA VM 7 (CTE, 7.2–7.9) all-ceramic porcelain (Vident) was selected to veneer the crown. First, a thin layer of base dentine was applied to the coping. This is not an opacious dentin, but a highly chromatic subdentin that ensured the shade would be maintained in limited cross-sections without the typical opacity associated with standard opaque dentins.6 The dentine powders (e.g., 2M1 and 3M1) were then equally dispensed and mixed to match the desired shade (e.g., 2.5M1) and applied over the base dentin.
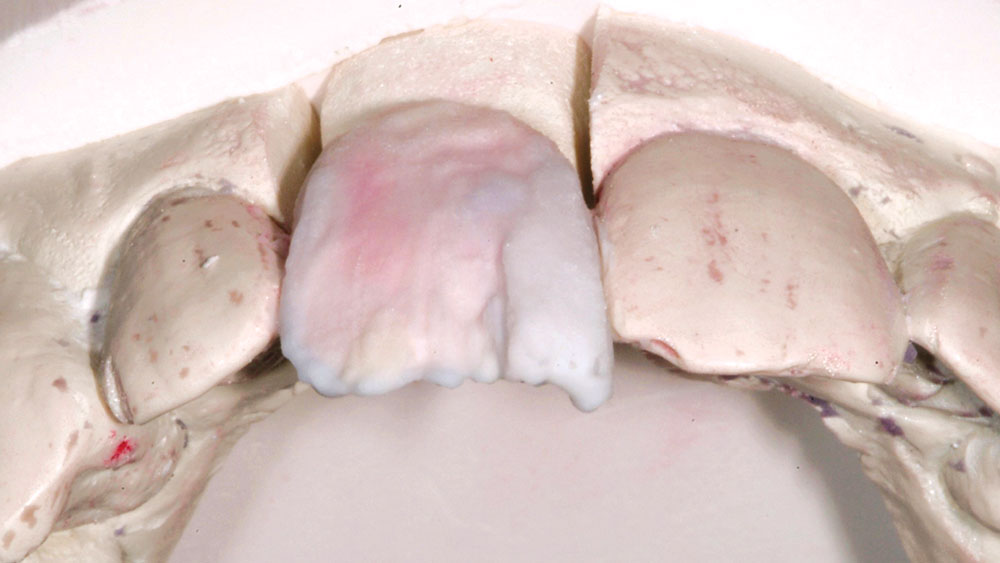
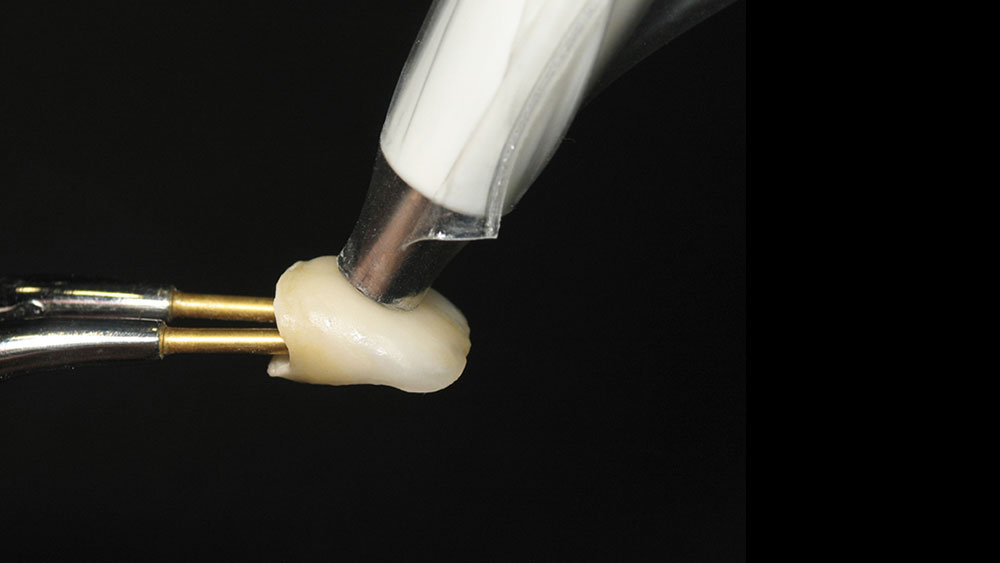
After considering the supplied photographic images, a cutback for translucency was then carved in the restoration (Fig. 6), allowing the subsequent placement of mamelons (e.g., Effect MM1 [Vident]) and individual categorization with amber translucent (EE7 and EE9) materials. Enamel light (ENL) was used to maintain the overall value in the proximal aspects and final enamel coverage. After the initial bake at 910°C, the crown was checked using the spectrophotometer to confirm that its shade was accurate.
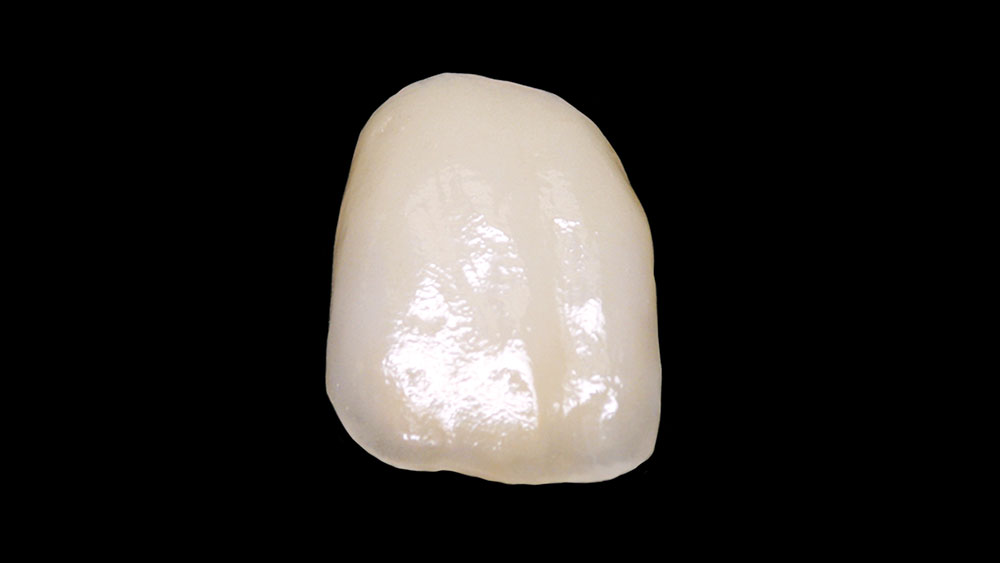
Stones and medium fine diamonds were then used to shape and finalize the contours of the crown. A second correction firing was completed using additional ceramic shades (e.g., VITA VM7 Neutral and ENL [Vident]) and functional articulation was considered. The crown was then examined on a second uncut model to confirm proper contacts, proximal closure and emergence. Visual references to notes and photographs made at the time of the original shade match were considered, and the crown was lightly glazed and stained at 900°C for one minute (Fig. 7). The shade was again verified with the spectrophotometer and then lightly pumiced using a diamond-polishing compound before being returned to the clinician for delivery and the completion of the treatment (Figs. 8–10).
Conclusion
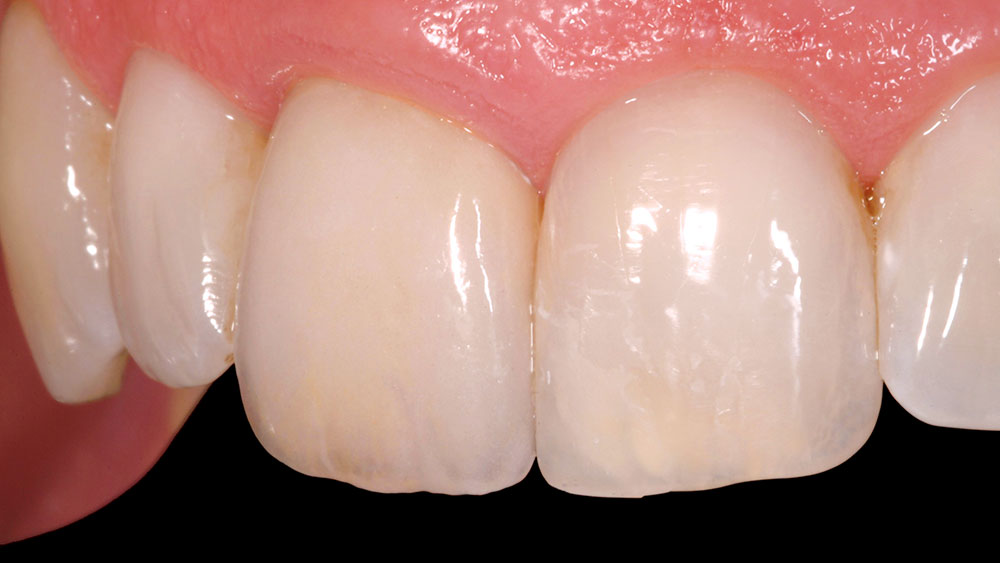
The creation of natural-looking composite and ceramic materials allows dentists and technicians to provide patients with predictable, long-lasting aesthetic restorations. Linking systems that use the three-dimensional shade-matching VITA 3D-Master system allowed for greater color communication and aesthetic case management, with successful color matching between the different materials. In this case, conservative direct composites and a milled all-ceramic crown enabled the predictable reconstruction of a fractured tooth, two old failing composites and a broken crown, thus restoring aesthetics and functionality that matched the natural dentition.
Acknowledgment
The authors declare no financial interest in any of the products mentioned herein. Dr. Todd C. Snyder operates a private practice in Laguna Niguel, California, and may be contacted by email at tcsnyder@aestheticdentaldesigns.com or 949-643-6733. Mark Baker is a Certified Dental Technician.
References
- ^Segal BS. Retrospective assessment of 546 all-ceramic anterior and posterior crowns in a general practice. J Prosthet Dent. 2001 Jun;85(6):544-50.
- ^Lehner C, Studer S, Brodbeck U, Schärer P. Short-term results of IPS-Empress full-porcelain crowns. J Prosthodont. 1997 Mar;6(1):20-30.
- ^Ellison JA, Lugassy AA, Setcos JC, Moffa JP. Clinical trial of molar cast glass ceramic crown, seven-year findings. J Dent Res. 1992;71:207.
- ^Seghi RR, Sorensen JA. Relative flexural strength of six new ceramic materials. J Esthet Restor Dent. 2002;14(3):188-91.
- ^McLaren EA, Giordano RA, Pober R, Abozenada B. Material testing and layering techniques of a new two-phase all-glass veneering porcelain for bonded porcelain and high-alumina frameworks. Quintessence Dental Technol. 2003;26:69-81.
- ^Rutten L, Rutten P. A Date with VITA VM 7. Dental Dialogue. 2004;4.
- ^Turkun M, Ozata F, Uzer E, Ates M. Antimicrobial substantivity of cavity disinfectants. Gen Dent. 2005 May-Jun;53(3):182-6.
- ^Fondriest J. Shade matching in restorative dentistry: the science and strategies. Int J Periodontics Restorative Dent. 2003 Oct;23(5):467-79.

