In this issue:
Repair, Don’t Replace – Part 1: Resurfacing an Existing Porcelain Fused to Metal Restoration with a Porcelain Veneer
Author
Introduction: The Porcelain “Repair”
Repairing a broken porcelain (or porcelain fused to metal) restoration is a clinical reality in every dentist’s practice. The traditional technique is to use composite resin to repair chipped porcelain. This is an attempt to use unlike materials to accomplish a long-term repair, but it rarely works.
Early “porcelain repair kits” used 37% phosphoric etch, silane primer, and adhesive and composite resin to repair chipped porcelain. This system did not work because 37% phosphoric acid cannot appreciably etch a porcelain surface. Without adequate micromechanical retention to affix the composite resin to the porcelain surface, any repair will likely not withstand the forces of mastication.
The use of hydrofluoric acid provides an adequate etched surface to create an improved micromechanical bond of composite to porcelain. However, the bond of composite to porcelain is not the only clinical problem. Another is the finishing and polishing of the porcelain-composite interface. Regardless of the finishing and polishing technique and materials used, the fine line of demarcation between the composite and porcelain is hard to eradicate.
If the broken restoration is a single unit, a complete remake may be the most predicable solution. But what about multiple-unit fixed bridgework? It may not be feasible economically or clinically to sacrifice a long-span restoration for one unit with a porcelain fracture. In esthetic cases, a clinically acceptable posterior bridge may not be the same shade as the one chosen for the anterior reconstruction. So, for these clinical problems, is there a long-term solution short of replacing the entire restoration?
Reveneering Existing Porcelain Restorations
The patient in Figure 1 presented with the desire to remake his porcelain reconstruction. Some of the anterior units were fractured due to occlusal issues. The patient’s desire was to remake the restorations in the esthetic zone with a high value shade. The posterior bridgework was clinically acceptable, but the shade was much lower in value and hue than the desired anterior shade. Figure 2 shows a segment of this reconstruction, where an old single-unit crown was replaced and a veneer preparation was made into the existing anterior abutment of the posterior bridge immediately distal to it. The key to success with this procedure is the original thickness of porcelain on the existing bridge. The goal is to have little or no metal exposed. Teeth #27 and #28 are prepared for stacked porcelain veneer restorations (Fig. 3). The total thickness of the labial reduction of the natural tooth surface and porcelain surface is 0.5 mm facially and 1 mm incisally.


Once preparations are complete, the natural tooth surface is treated with a dentin desensitizer that has an antibacterial component (AcquaSeal™ B [AcquaMed™ Technologies; West Chicago, Ill.]) (Fig. 4). The porcelain preparation is treated with hydrofluoric acid for 60 seconds (Fig. 5). This material can be caustic to the gingival tissues, so if tissue contact is anticipated, a light-cured “liquid dam” is applied for patient protection. Thirty-seven percent phosphoric acid is applied for a 15-second total etch to the prepared tooth surface (tooth #27) (Fig. 6). Thoroughly rinse both the tooth and porcelain surface with water for 60 seconds (Fig. 7). Figure 8 shows the natural tooth surface and porcelain surface after rinsing and air-drying. AcquaSeal B is reapplied to tooth #27 and the excess is removed using a high-volume suction. A moist, wet surface is left for the application of a hydrophilic bonding resin, and adhesive resin is applied in multiple applications to create a quality hybrid zone for bonding (Fig. 9).


Without adequate micromechanical retention to affix the composite resin to the porcelain surface, any repair will likely not withstand the forces of mastication.
Following air thinning, the adhesive resin is light-cured (Fig. 10). Figure 11 shows the prepared surfaces after the adhesive resin has been placed and cured. The porcelain veneers are now ready for placement. A dual-cured resin cement is placed on the inside surface of the veneer restoration and the veneer is placed on the porcelain prepared surface (Fig. 12). A number 2 Keystone brush (Patterson Dental; El Segundo, Calif.) is used to remove excess resin cement prior to reaching a gel set (Fig. 13). The porcelain veneer restoration is then placed on tooth #27 (Fig. 14). The porcelain veneer on tooth #27 is stabilized using veneer stabilizers (Nash/Taylor Esthetic Instrument Kit [Hu-Friedy; Chicago, Ill.]) while the gel set is completed (Fig. 15). After using a scaler to remove marginal cement excess post gel set (Fig. 16), a cotton pledget is used to complete resin cleanup prior to light-curing (Fig. 17).


It may not be feasible economically or clinically to sacrifice a long-span restoration for one unit with a porcelain fracture.
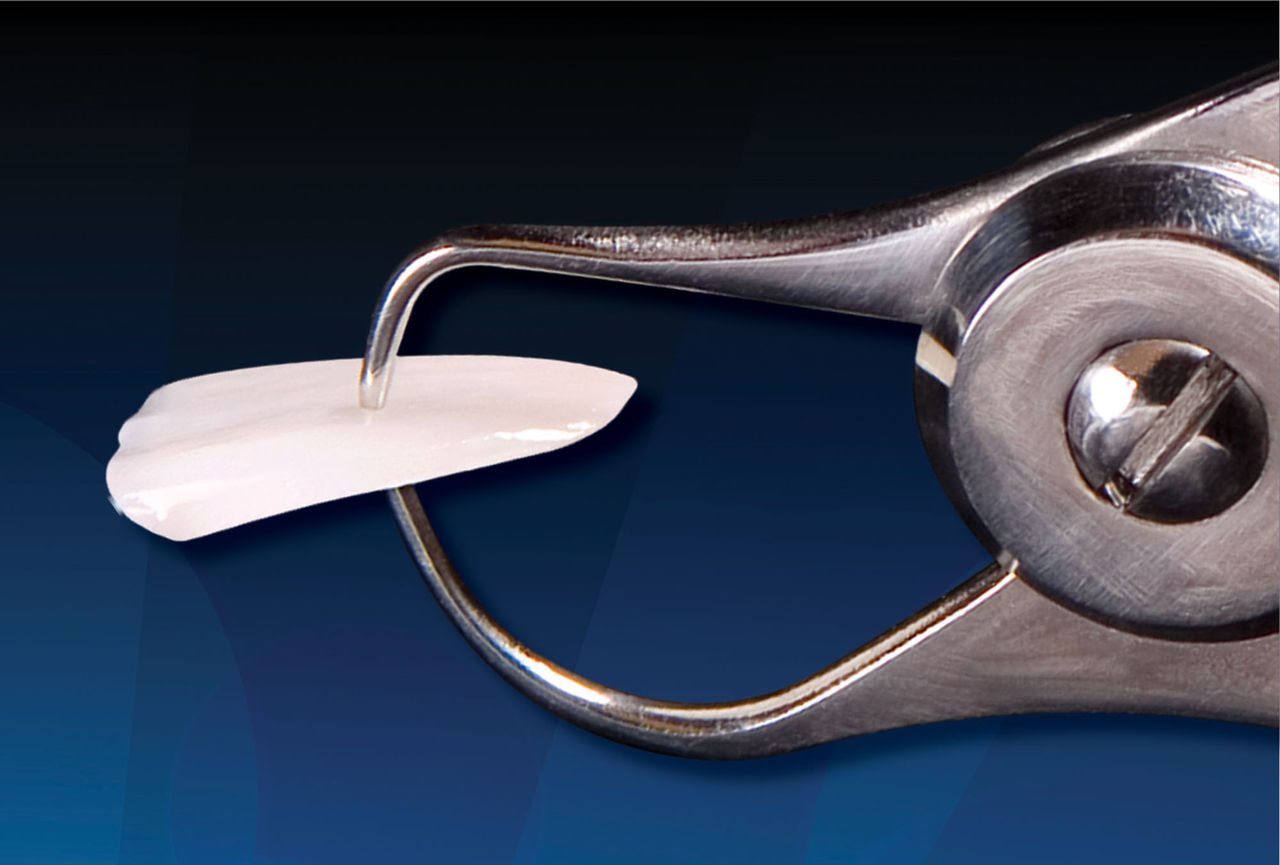
Figure 18 shows a cross section through a porcelain fused to metal crown that was reveneered with porcelain to change the facial color to a brighter value, in order to match the adjacent restorations. Note the uniform thickness of resin cement and veneered porcelain. The bond of the porcelain veneer to the prepared porcelain surface is as strong as that bonded to dentin. Figure 19 shows the affected area in a full-arch, retracted view after placement of the esthetic anterior restorations. The previous bridge was retained; however, the facial surface that was visible in the patient’s smile (tooth #28) was altered with a porcelain veneer to match the anterior restorations.


Conclusion
This technique demonstrates how to repair existing porcelain restorations by bonding a porcelain veneer to the affected porcelain surface. By taking advantage of the strength of a porcelain-to-porcelain bond using resin cement technology, we can now make predictable porcelain repairs and resurface existing porcelain (and porcelain fused to metal) crown & bridge restorations in a very predictable manner.
Dr. Robert Lowe is in private practice in Charlotte, North Carolina. He lectures internationally and publishes on esthetic and restorative dentistry. Contact him at 704-364-4711 or boblowedds@aol.com.