A Conservative Approach to Advanced Caries

October 1, 2026
 image
Jinny Bender, DMD
A Conservative Approach to Advanced Caries

Alyssa presented at the clinic with a large carious lesion on tooth #31, with minimal remaining healthy tooth structure. Because of the patient’s youth and financial situation, our treatment goal was to restore the tooth conservatively. Therefore, my objective was to preserve as much natural tooth structure as possible while eliminating caries and restoring function. I chose CAMouflage® NOW because it is convenient to mill, and the 20% resin component of the material works favorably when bonding to the tooth structure, supporting the minimally invasive treatment approach.

CASE REPORT
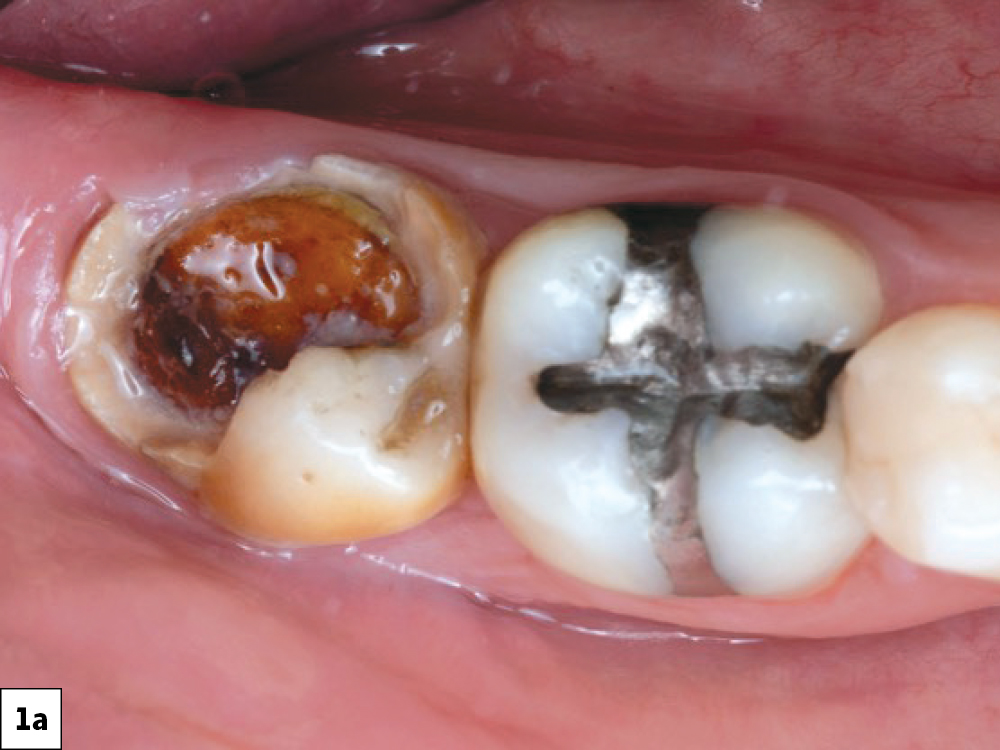
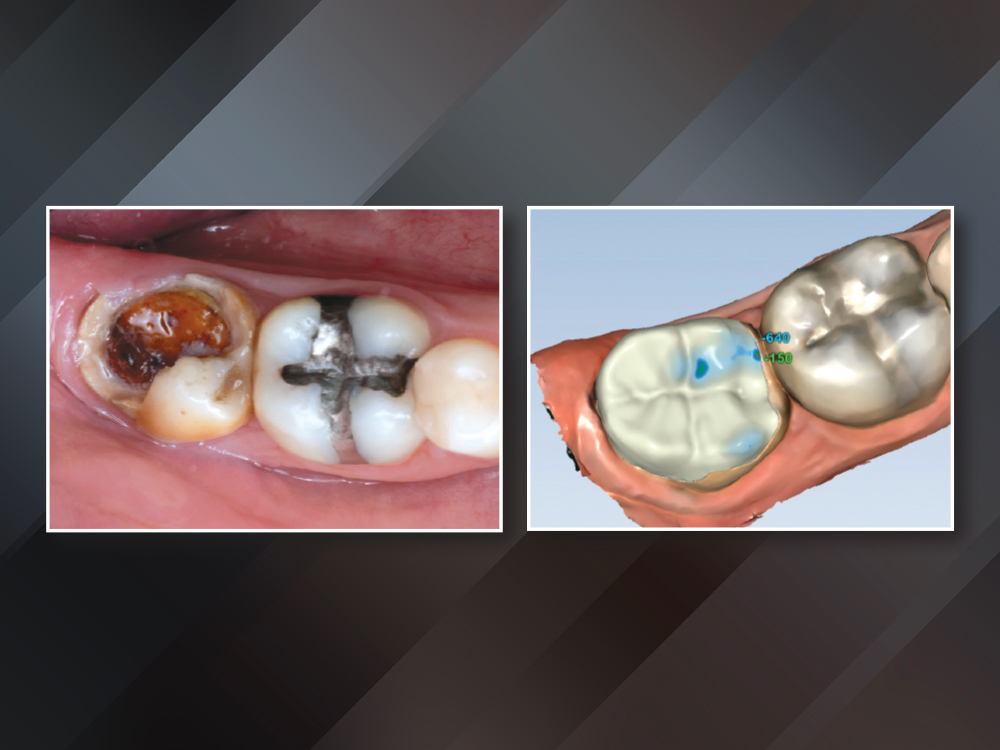
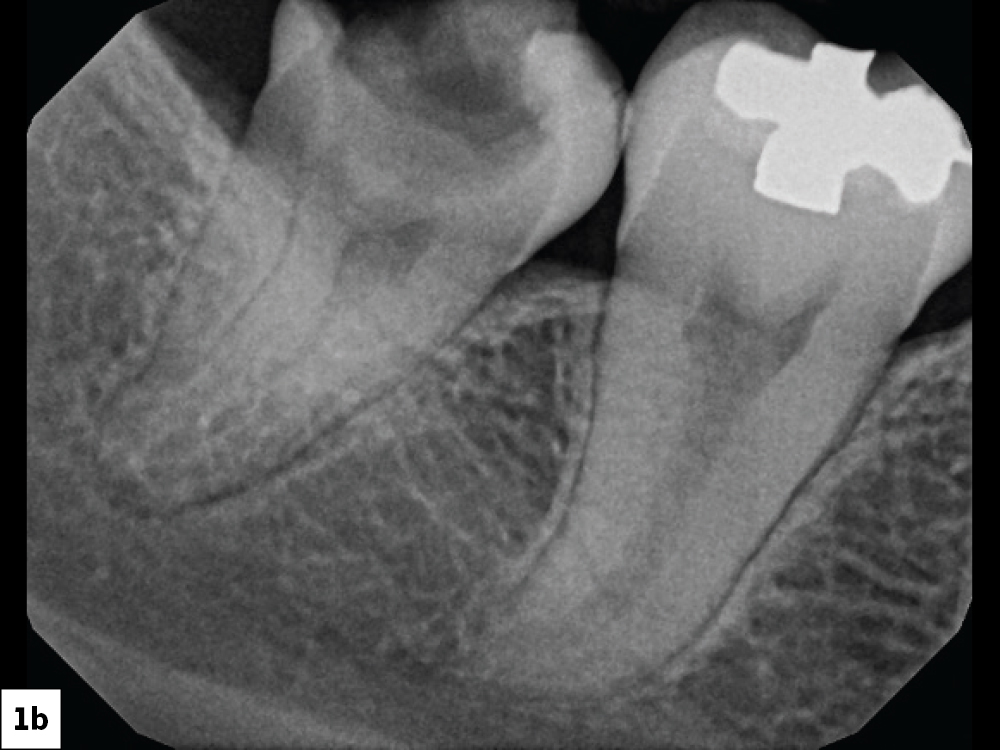
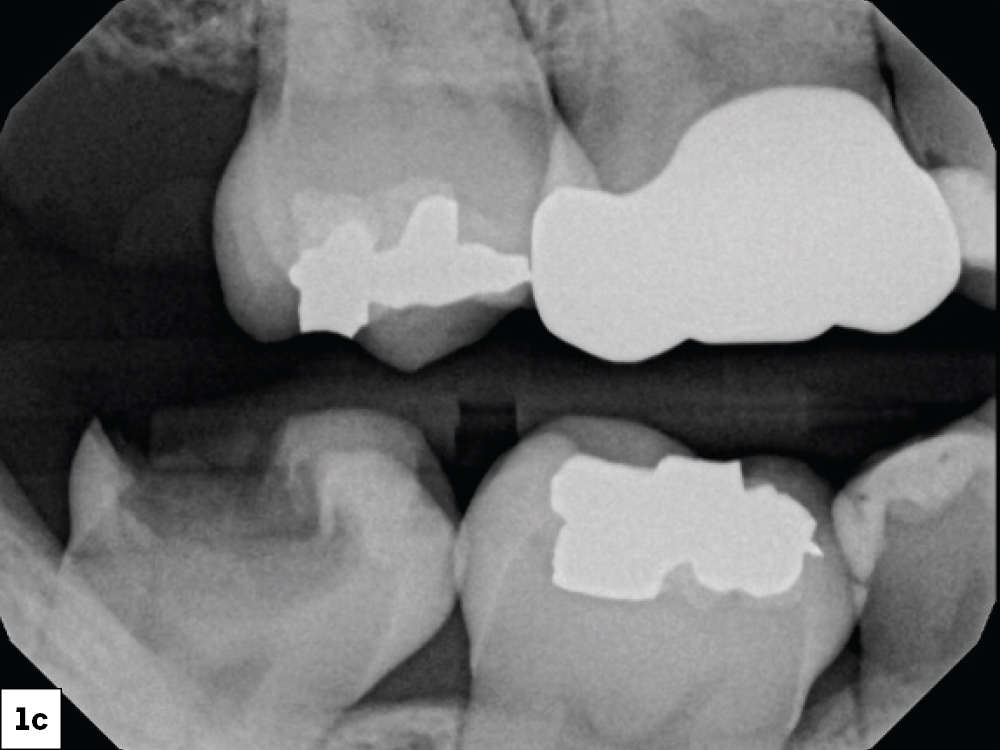
The patient presented with a large carious lesion on tooth #31.
full-coverage crown may be needed in the future, but at this juncture we could stay with a conservative approach
Due to the depth of the lesion and proximity to the pulp, the patient was informed that endodontic therapy and a full-coverage crown may be needed in the future, but at this juncture we could stay with a conservative approach

Figures 1a–1c: The patient presented with a large carious lesion on tooth #31. Due to the depth of the lesion and proximity to the pulp, the patient was informed that endodontic therapy and a full-coverage crown may be needed in the future, but at this juncture we could stay with a conservative approach.

The X-ray was taken two years prior to consultation
shows caries developing beneath the previous restoration and its significant progression over that period

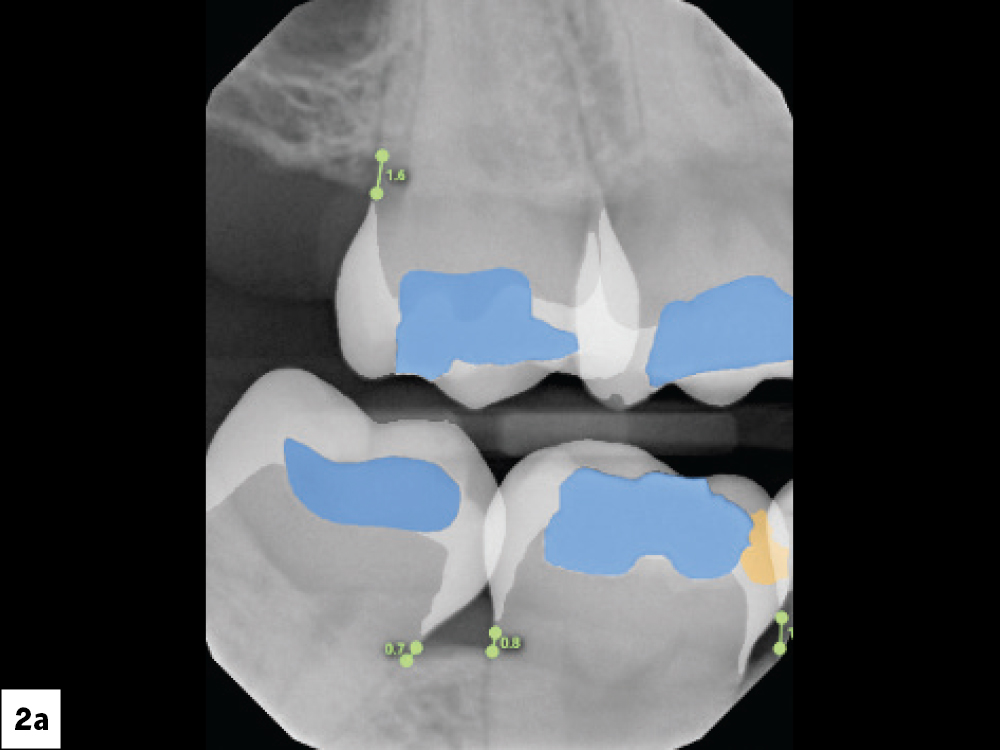
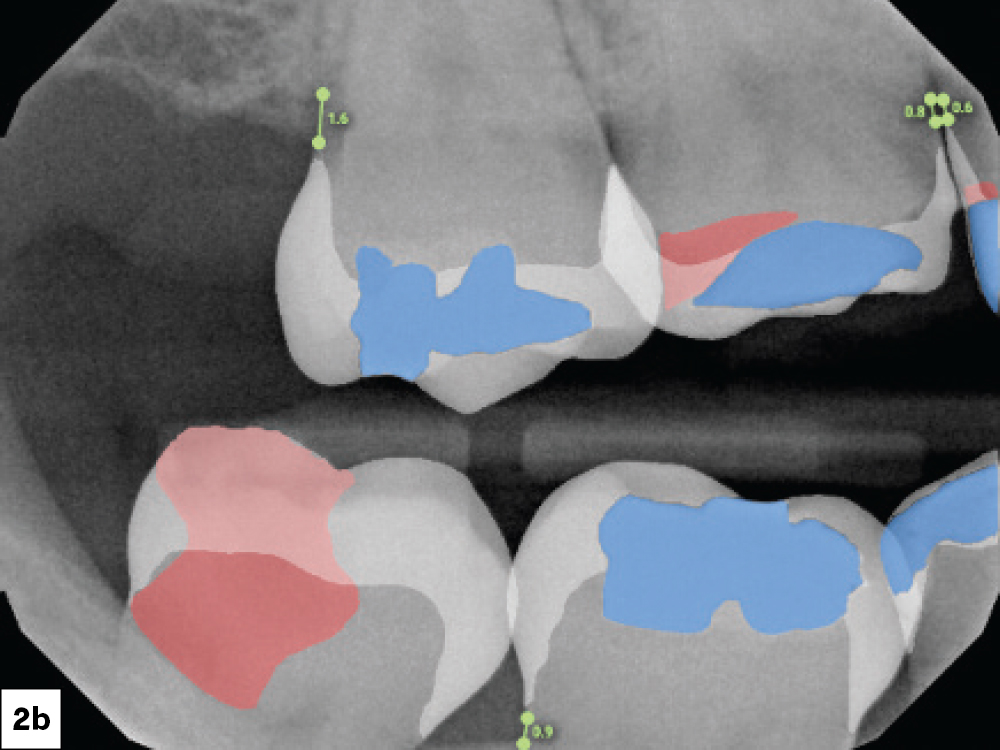
Figures 2a, 2b: Utilizing Overjet® annotation software (Overjet, Inc.; Boston, Mass.), which highlights restorations in blue and outlines decay and caries in red, we were able to determine the progression of the decay. The X-ray on the top (2a) was taken two years prior to consultation; the X-ray on bottom (2b) shows caries developing beneath the previous restoration and its significant progression over that period.

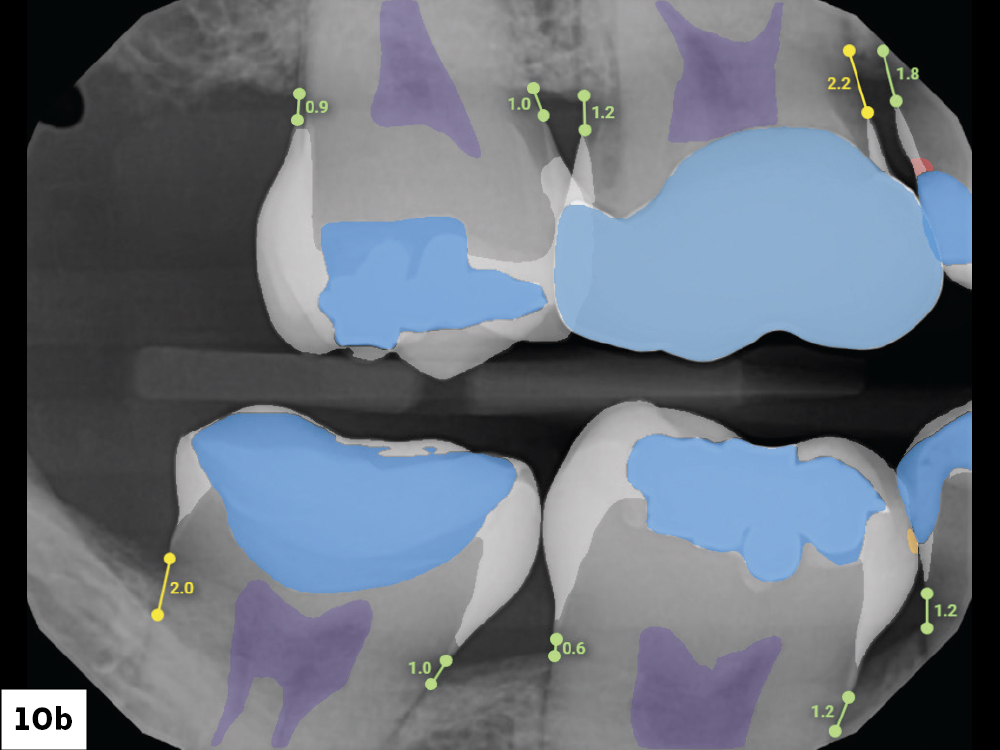
Note: The software highlights radiographic findings, enhancing interpretation, but it does not replace the dentist’s final diagnosis.

After I removed the decay, the outline of the pulp chamber was clearly visible, indicating a deep lesion, without pulp exposure.
Then I applied Lime-Lite™ cavity liner (Pulpdent Corporation; Watertown, Mass.) to protect the pulp. It is also a great material for bonding.

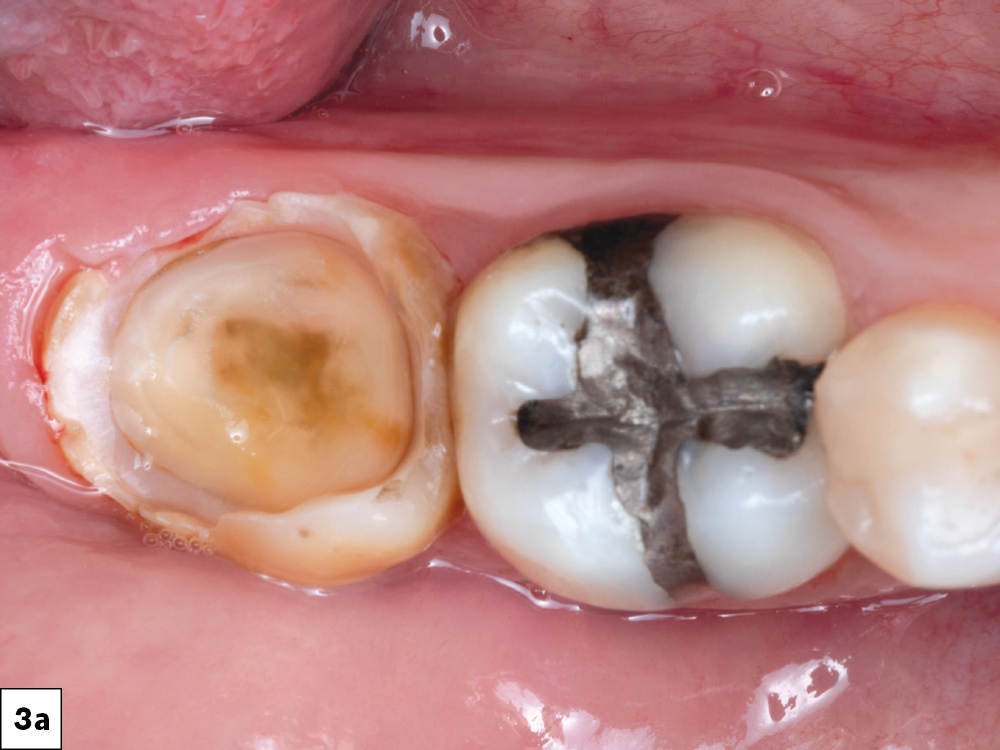
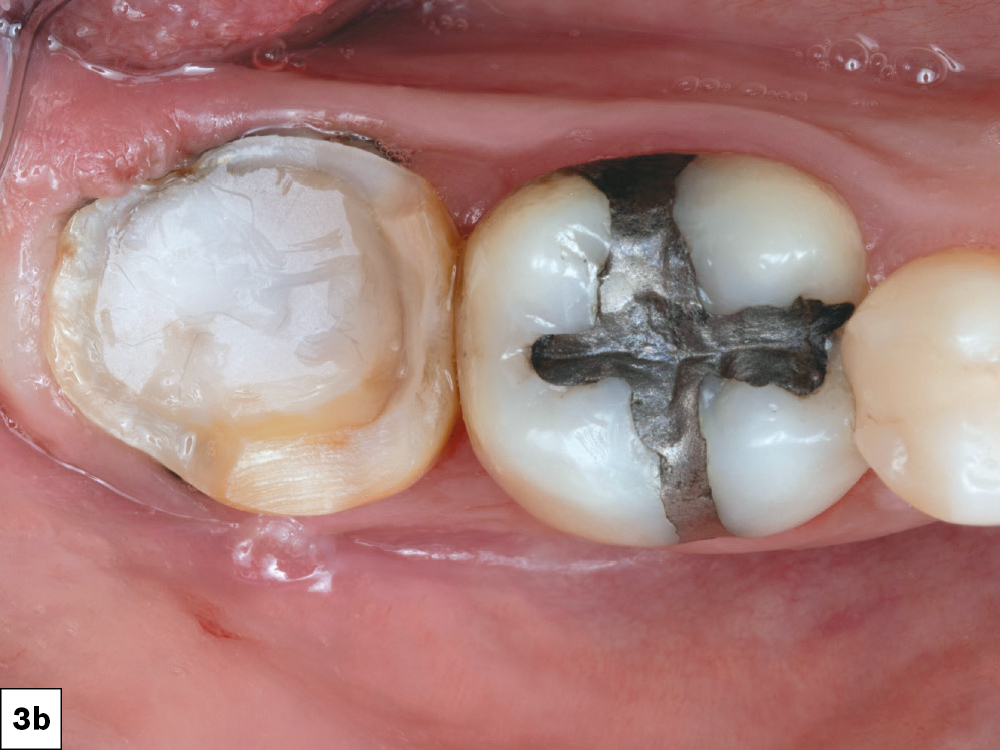
Figures 3a, 3b: After I removed the decay, the outline of the pulp chamber was clearly visible, indicating a deep lesion, without pulp exposure. I shaped the tooth in such a way that it would allow me to keep as much enamel as possible for adhesion. Then I applied Lime-Lite™ cavity liner (Pulpdent Corporation; Watertown, Mass.) to protect the pulp. It is also a great material for bonding.

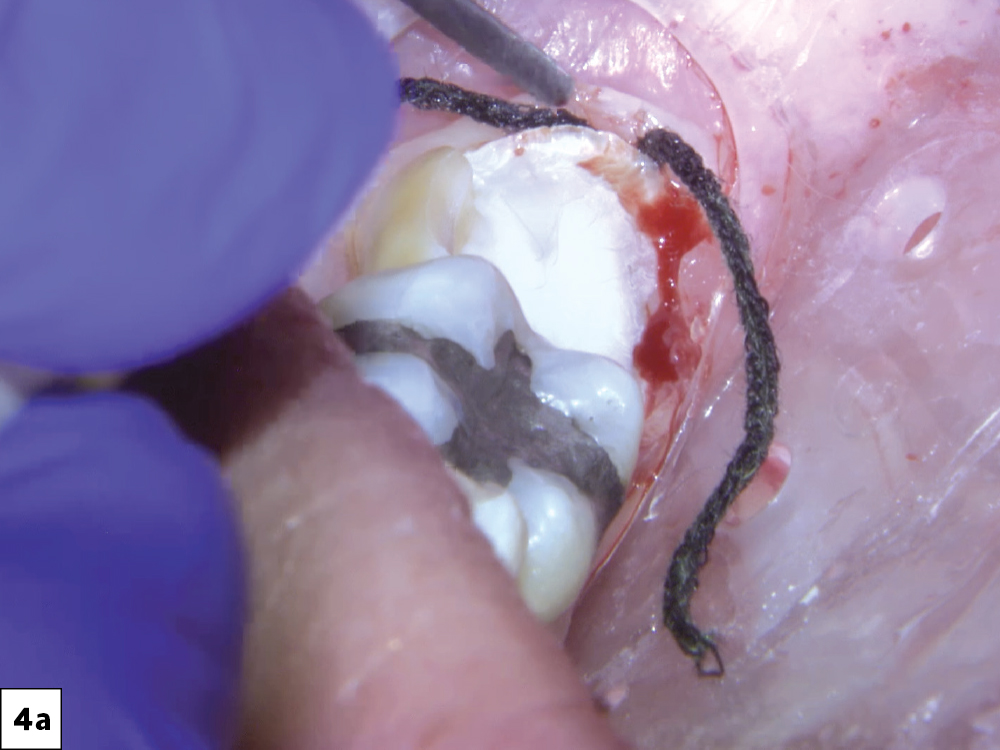
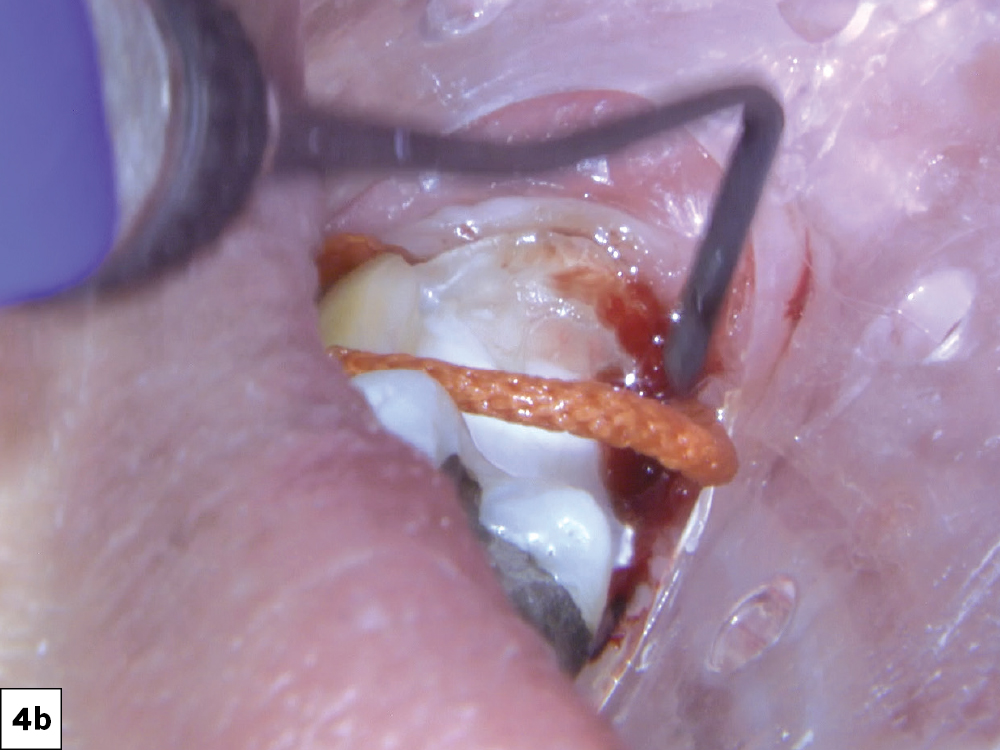
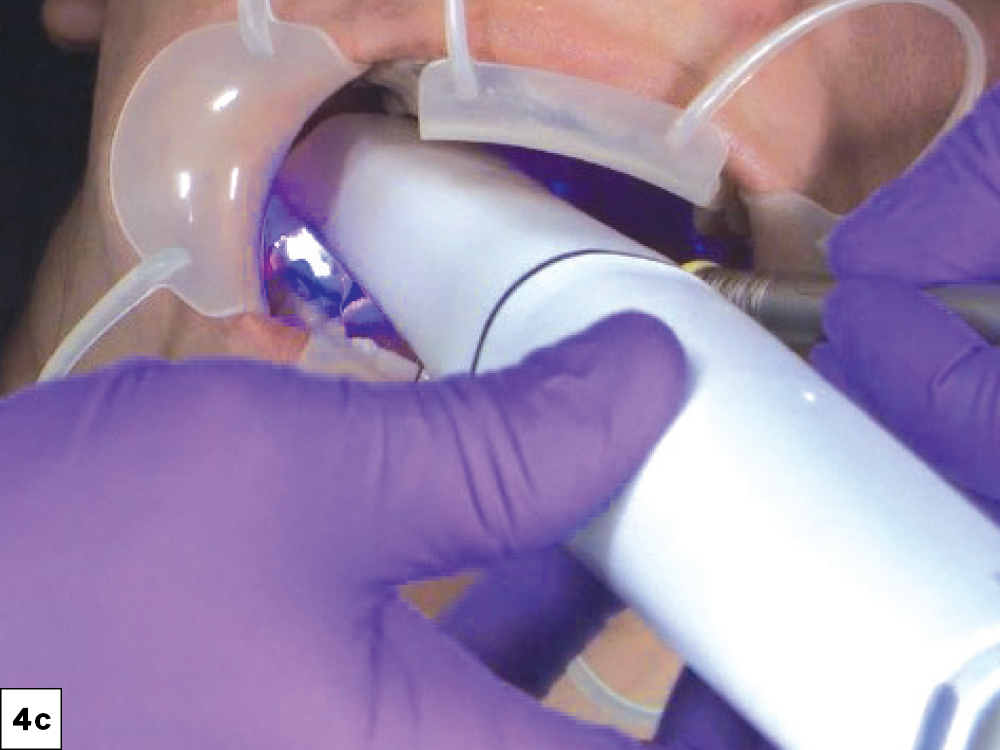
approach every intraoral scan with the understanding that a margin must be clearly identified in order to be restored

Figures 4a–4c: I approach every intraoral scan with the understanding that a margin must be clearly identified in order to be restored. This subgingival, nonretentive case required tissue deflection, so I used a twocord technique. I began by packing #00 retraction cord for apical compression of the tissue. Then I placed a second cord size #2 that was treated with Hemodent® (Premier Dental; Plymouth Meeting, Penn.) over the first cord for lateral deflection. The patient then pressed on gauze for five minutes to give the tissue time to retract.

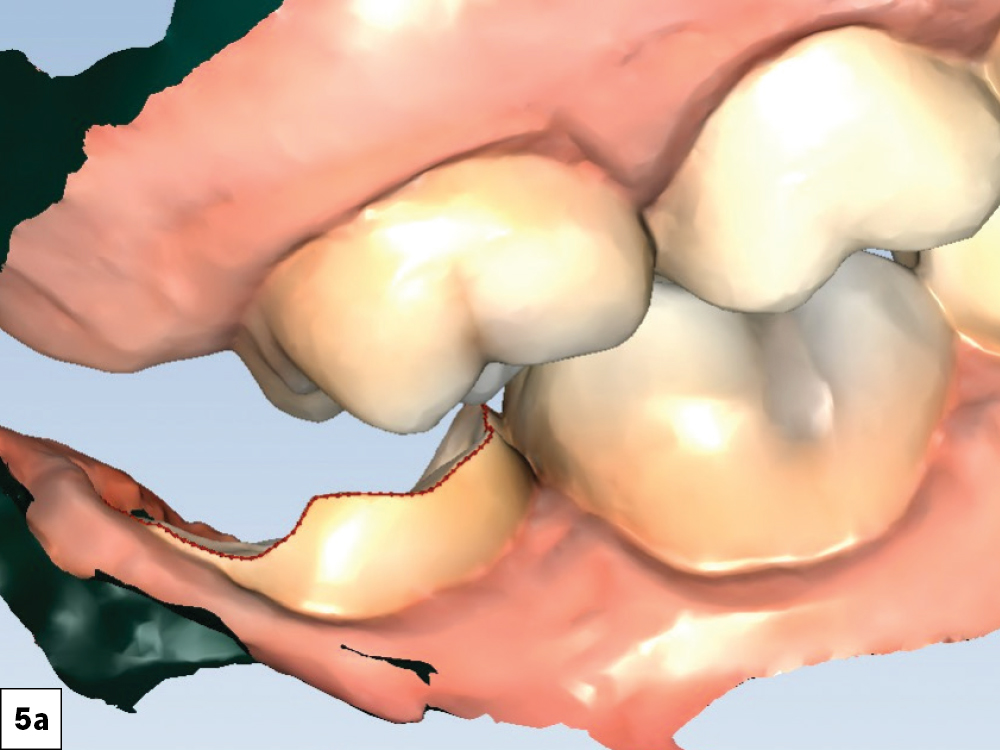
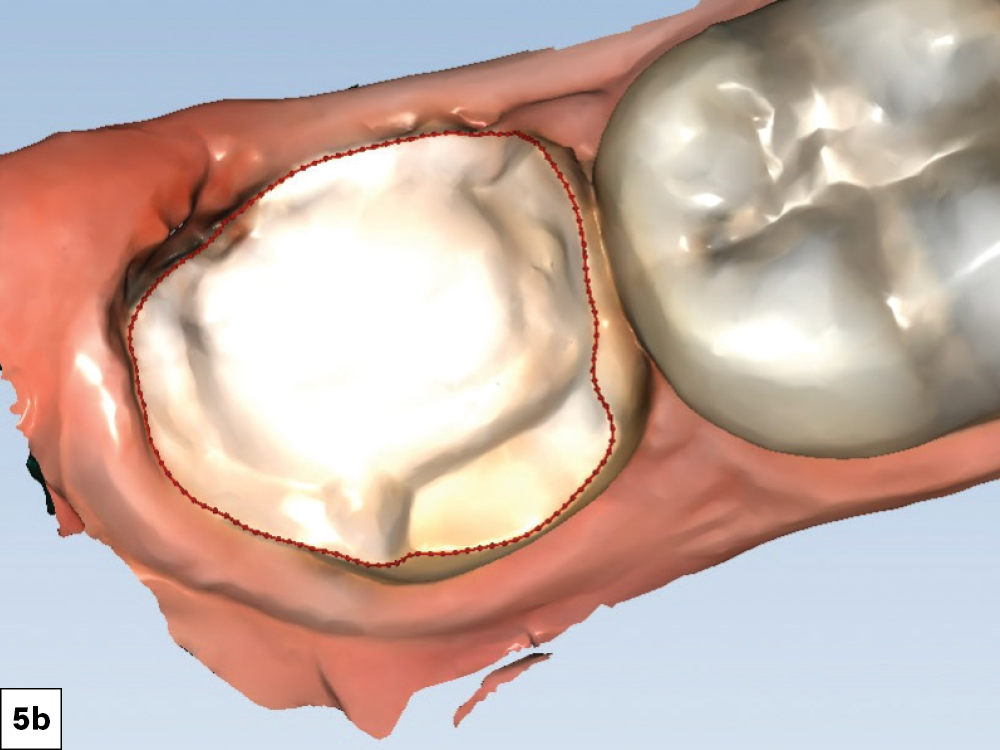
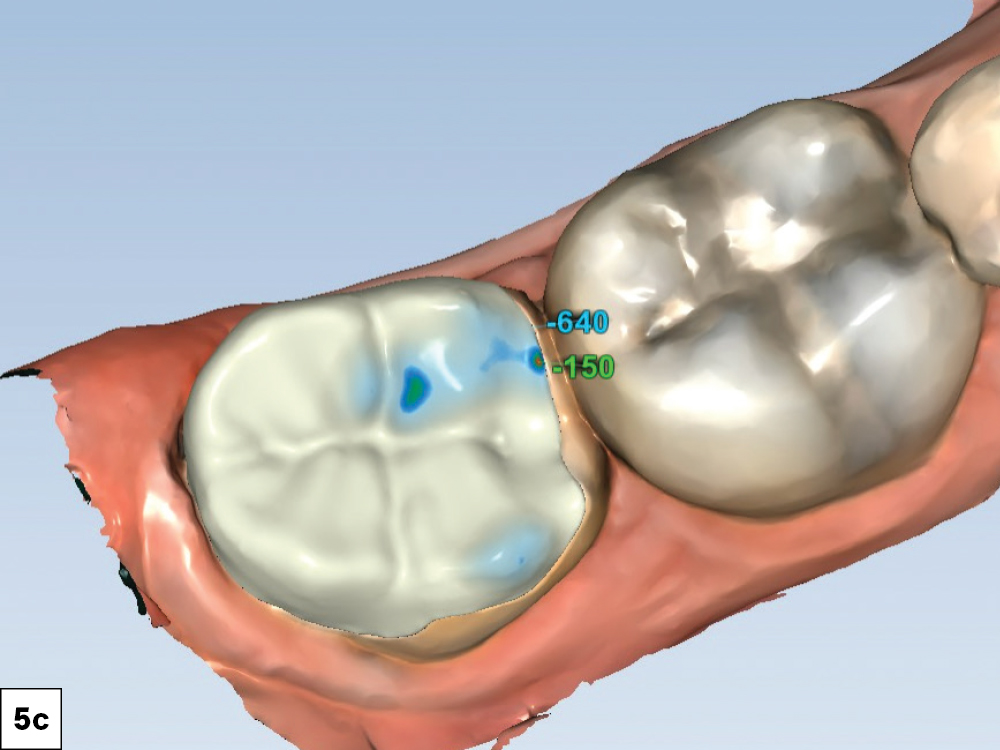
After scanning, I used the fastdesign.io™ Software and Design Station, which automatically marked the margins
I selected the InlayAI feature to generate an initial design that closely matched the patient’s anatomy and added slight customization to the design

Figures 5a–5c: After scanning, I used the fastdesign.io™ Software and Design Station, which automatically marked the margins. I selected the InlayAI feature to generate an initial design that closely matched the patient’s anatomy and added slight customization to the design.

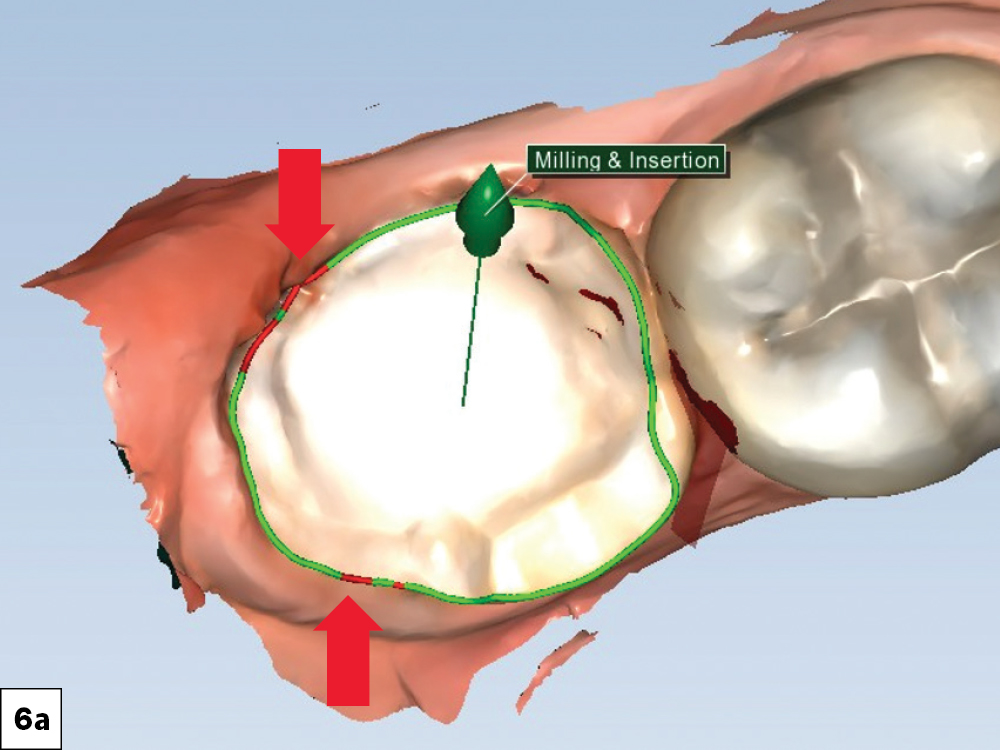
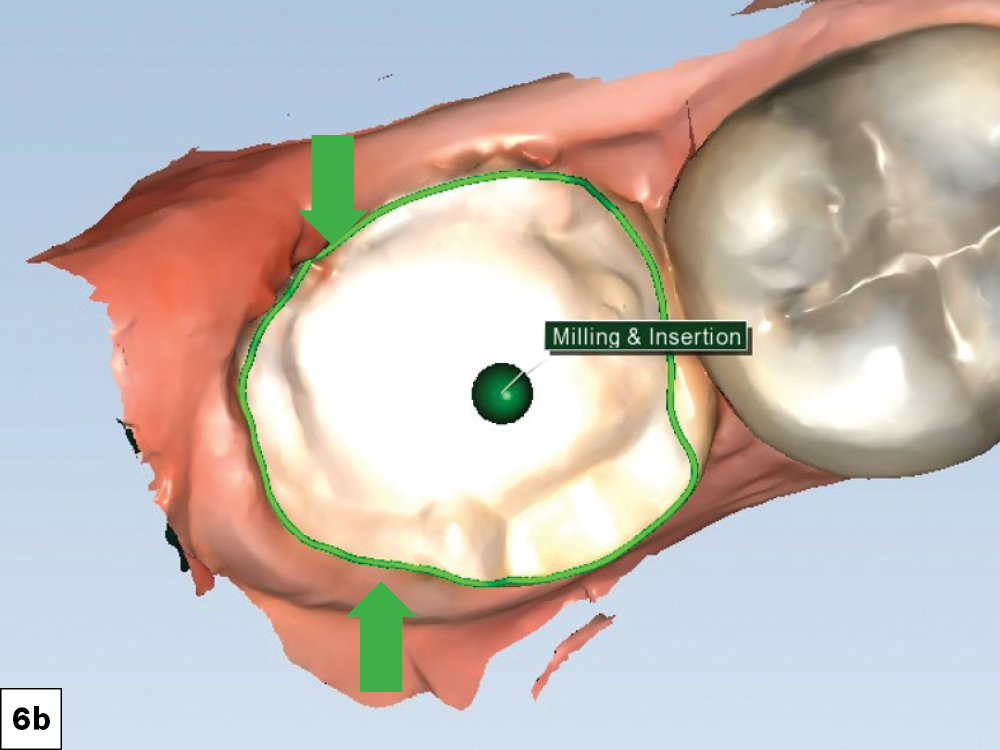
When checking the milling and insertion feature of the software, the areas marked by red arrows indicated unmillable areas at the margin
When checking the milling and insertion feature of the software, the areas marked by red arrows indicated unmillable areas at the margin (6a)

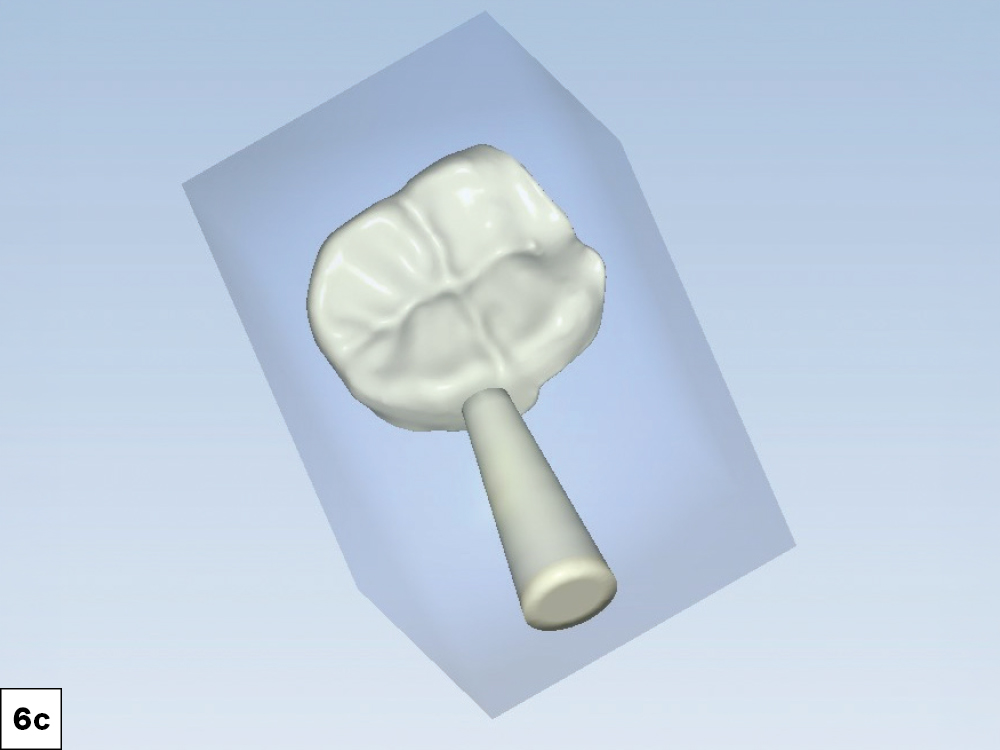
Figures 6a–6c: When checking the milling and insertion feature of the software, the areas marked by red arrows indicated unmillable areas at the margin (6a). I was able to correct this in the fastdesign.io software and confirm a clear path of insertion indicated by the green arrows (6b). Prior to milling, I visualized the location of the sprue by viewing the nesting in the block (6c).

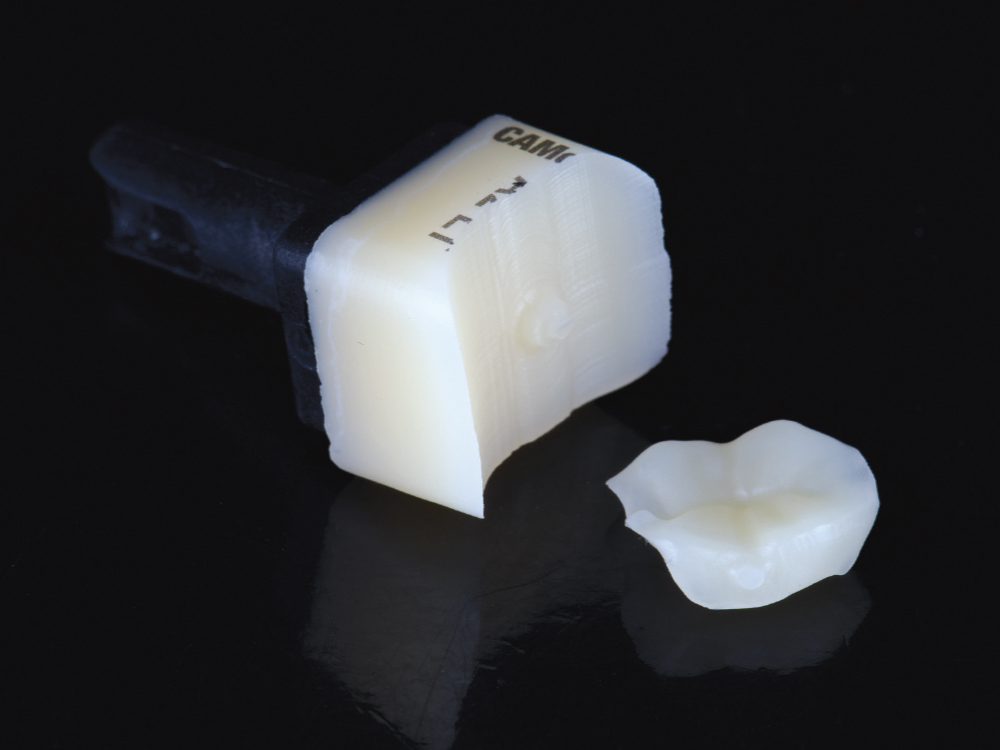
I milled a CAMouflage NOW onlay shade A2LT in under 10 minutes.

Figure 7: I milled a CAMouflage NOW onlay shade A2LT in under 10 minutes.

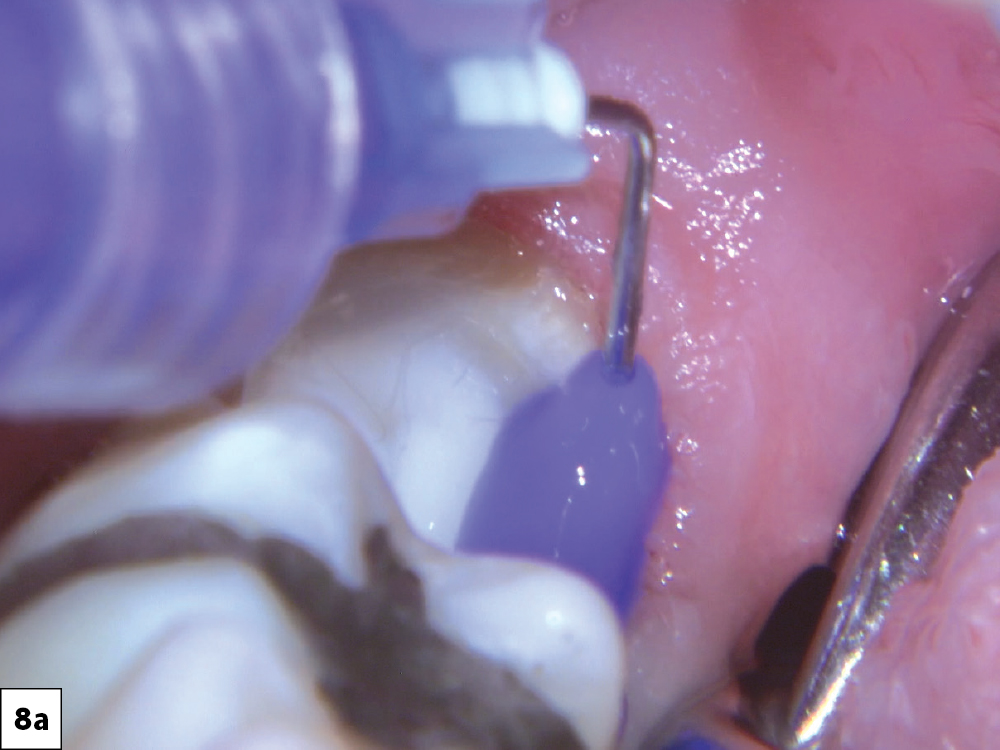
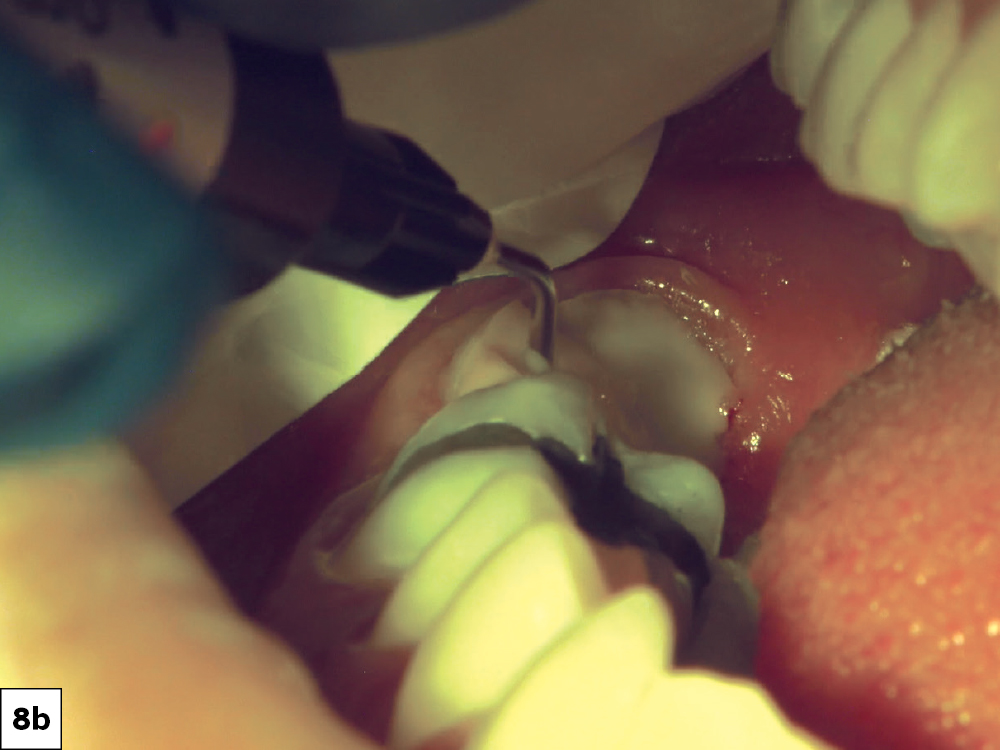
For the tooth preparation I used acid-etch on both enamel and dentin, followed by Gluma® (Kulzer North America; South Bend, Ind.) for desensitization and disinfection
For the tooth preparation I used acid-etch on both enamel and dentin, followed by Gluma® (Kulzer North America; South Bend, Ind.) for desensitization and disinfection. I then scrubbed Scotchbond™ Universal (Solventum; St. Paul, Minn.) for 20 seconds and a

Figures 8a, 8b: For the tooth preparation I used acid-etch on both enamel and dentin, followed by Gluma® (Kulzer North America; South Bend, Ind.) for desensitization and disinfection. I then scrubbed Scotchbond™ Universal (Solventum; St. Paul, Minn.) for 20 seconds and air-thinned without light curing. For the restoration, I air abraded the intaglio surface with aluminum oxide, cleaned with IvoClean® (Ivoclar Vivadent AG; Schaan, Liechtenstein), applied Scotchbond Universal, air thinned without light curing, and cemented with Omnichroma Flowable (Tokuyama Dental Corp.; Tokyo, Japan). I used a dry angle and rolled gauze under the tongue to achieve isolation and dryness.

While my assistant applied pressure on the occlusal of the restoration, I spot-cured it. I then removed the gross excess cement and cleaned the interproximal using knotted floss and a QwikStrip™ (Creative Dental Concepts LLC; Birmingham, Mich.) to break c

Figure 9: While my assistant applied pressure on the occlusal of the restoration, I spot-cured it. I then removed the gross excess cement and cleaned the interproximal using knotted floss and a QwikStrip™ (Creative Dental Concepts LLC; Birmingham, Mich.) to break contact. Next, I light cured each surface for 20 seconds and checked the occlusion.

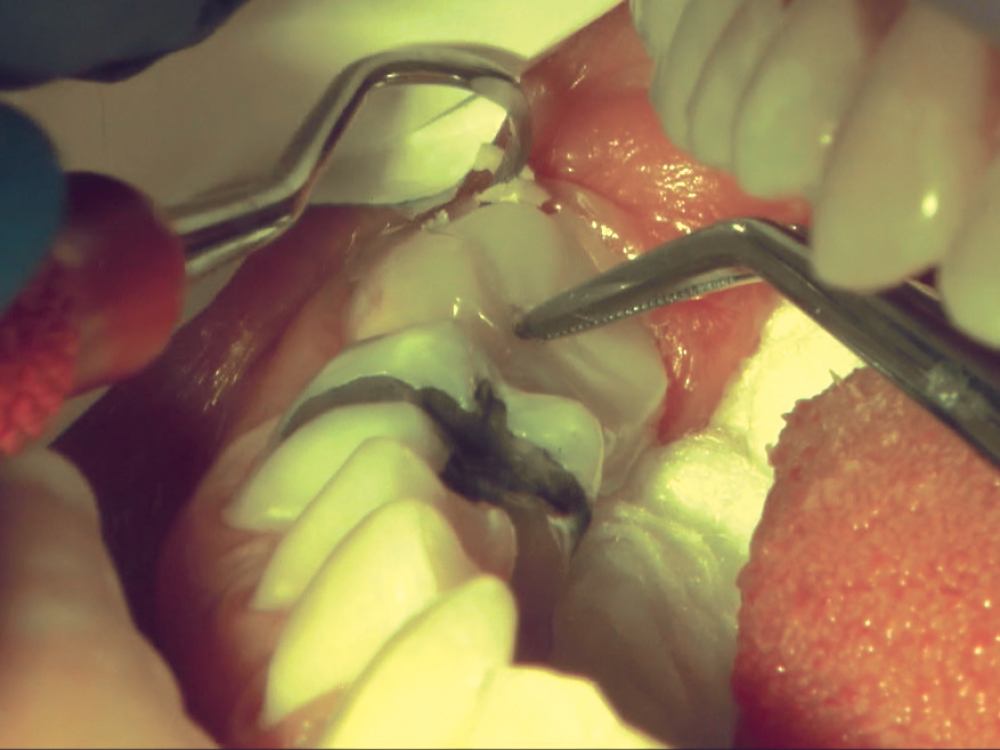
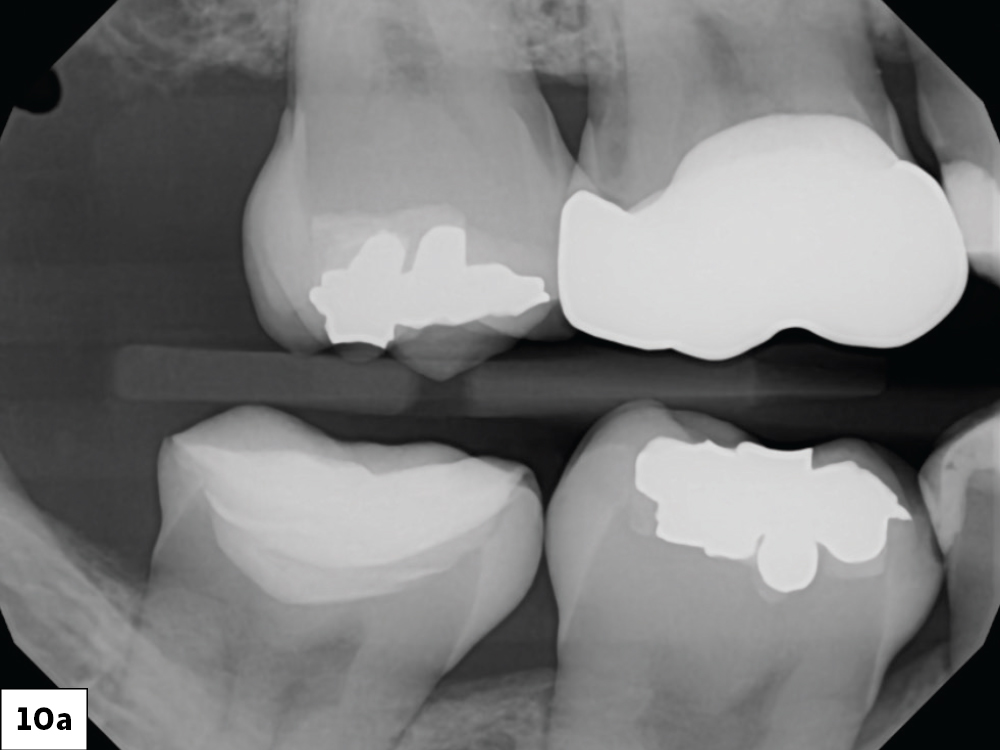
The first cord #00 remained after cementation and had to be removed. This step helped eliminate cement remnants from the sulcus. Finally, I took a bitewing X-ray to ensure no residual cement remained and reviewed the image with the Overjet software.

Figures 10a, 10b: The first cord #00 remained after cementation and had to be removed. This step helped eliminate cement remnants from the sulcus. Finally, I took a bitewing X-ray to ensure no residual cement remained and reviewed the image with the Overjet software.

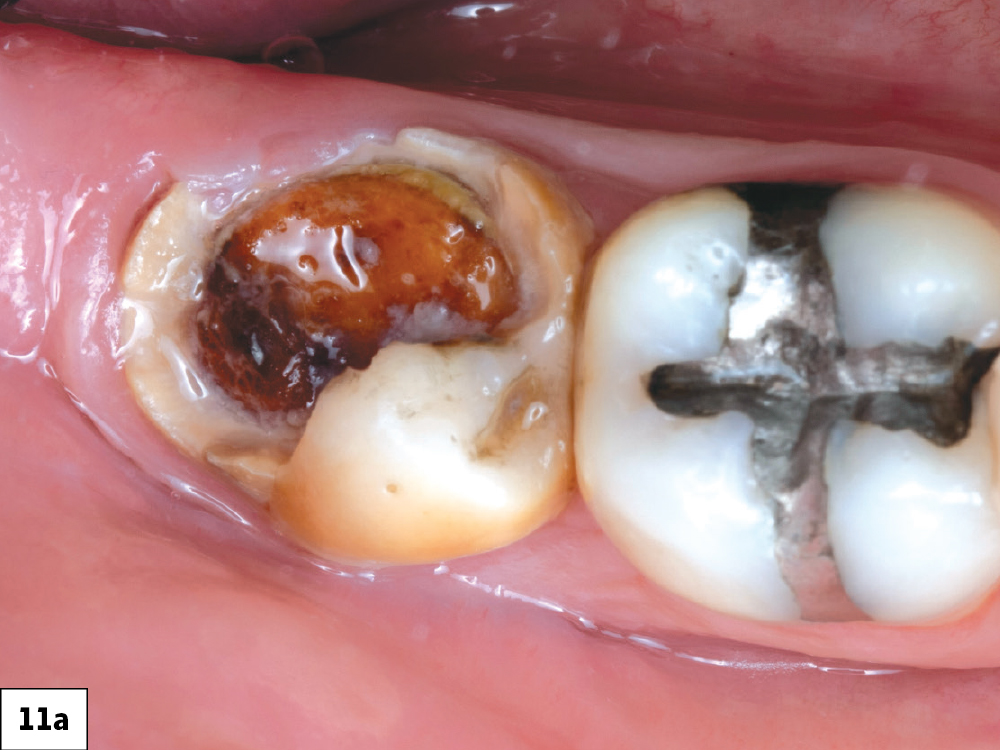
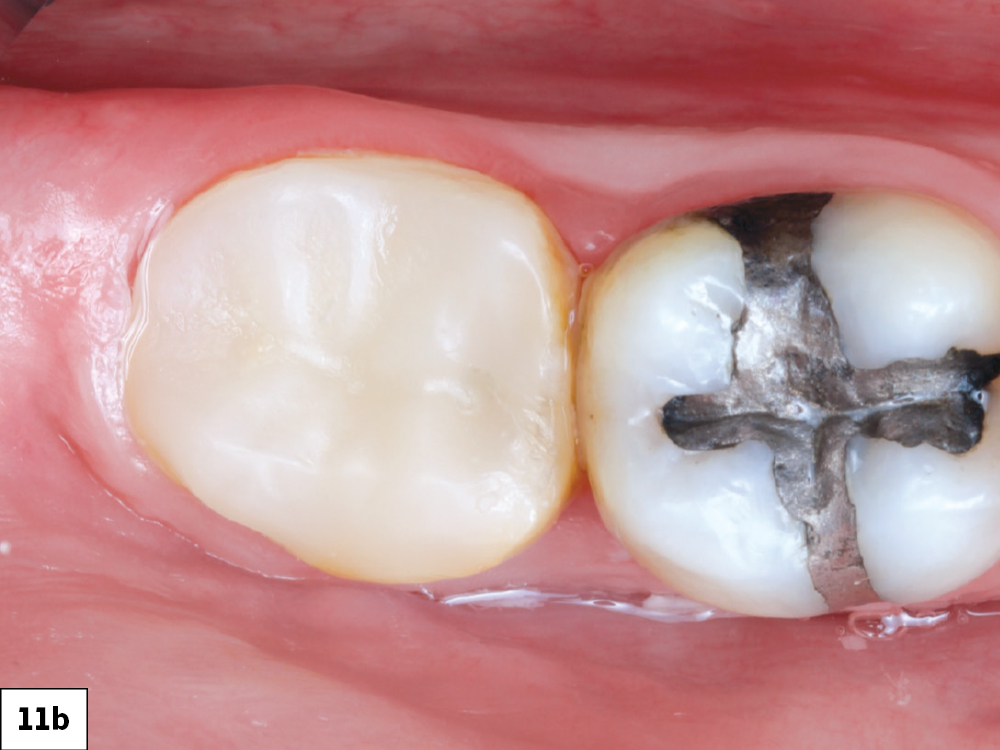
finished and polished the restoration using tools from the BruxZir™ Adjustment and Polishing Kit (Glidewell Direct; Irvine, Calif.) and the 3M Sof-Lex™ Extra-Thin Contouring and Polishing Discs Kit (Solventum Corporation; St. Paul, Minn.).
The patient presented with a large carious lesion on tooth #31. Due to the depth of the lesion and proximity to the pulp, the patient was informed that endodontic therapy and a full-coverage crown may be needed in the future, but at this juncture we could

Figures 11a, 11b: I finished and polished the restoration using tools from the BruxZir™ Adjustment and Polishing Kit (Glidewell Direct; Irvine, Calif.) and the 3M Sof-Lex™ Extra-Thin Contouring and Polishing Discs Kit (Solventum Corporation; St. Paul, Minn.).

CONCLUSION

By preserving the remaining healthy enamel and avoiding aggressive full-crown preparation, this case shows how adhesive dentistry can support the conservative treatment of extensive caries. With thoughtful material selection, careful bonding and a conservative mindset, I was able to deliver a durable restoration while preserving future treatment options, a meaningful win for both the patient and the practice.

All third-party trademarks are property of their respective owners.