From Failed Root Canal to Implant Success

October 1, 2026
 image
Paresh B. Patel, DDS
Owner, Advanced Dentistry of Lenoir Lenoir, North Carolina
From Failed Root Canal  to Implant Success

The patient presented with discomfort in the upper-right quadrant. Radiographic examination revealed a failing root canal on tooth #3. Treatment options discussed included nonsurgical retreatment of the existing root canal or extraction of tooth #3 followed by socket grafting and implant treatment. After reviewing the risks, benefits and alternatives, the patient elected to proceed with extraction and socket grafting.

The selected treatment plan included a five-month healing period after the extraction and grafting. The patient understood that the implant would subsequently require an additional five months for osseointegration prior to restoration. Since the tooth was located in the posterior, the edentulous space presented no significant esthetic concern, and the patient did not require a provisional during the healing phases.

CASE REPORT
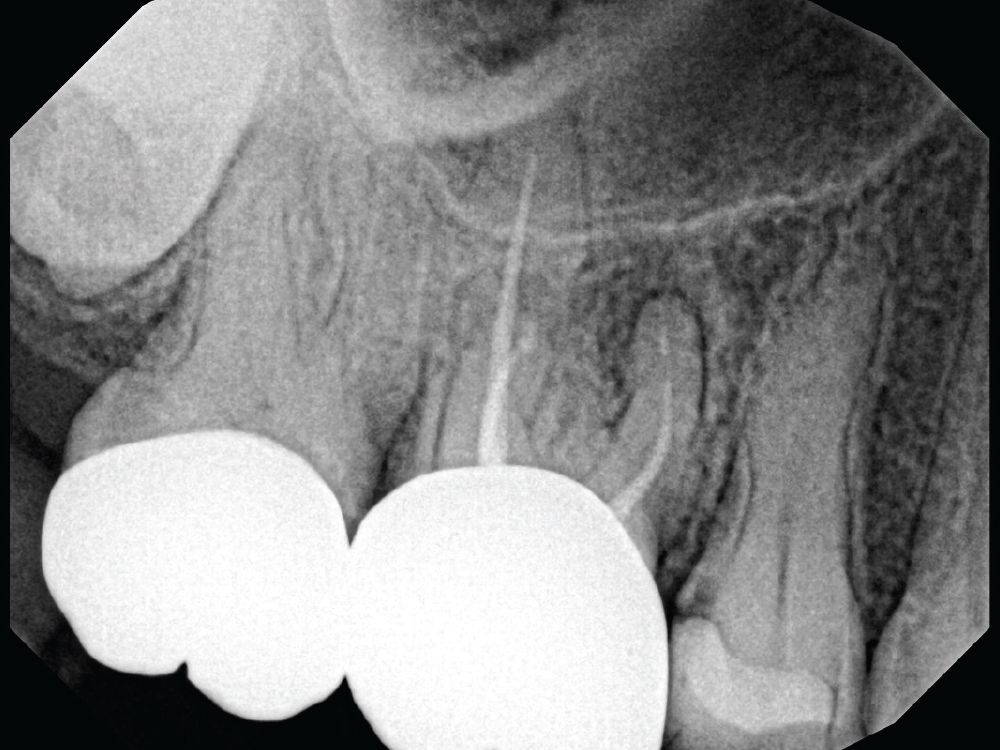
Preoperative X-ray of tooth #3 demonstrated failed root canal therapy.

Figure 1: Preoperative X-ray of tooth #3 demonstrated failed root canal therapy. The tooth was atraumatically extracted. Inspection confirmed that the buccal plate remained intact, resulting in a favorable five-wall defect. A wide range of grafting materials can be used successfully in a five-wall defect. Although a mineralized cortico-cancellous allograft or another suitable grafting material could have been used, I selected an OsteoGen® Plug (Glidewell Direct; Irvine, Calif.) because it simplifies the grafting procedure and offers the benefit of a graft and membrane combined. The plug was cut into three pieces, with one piece placed in each of the three root sockets. The site was then allowed to heal and mature for five months.

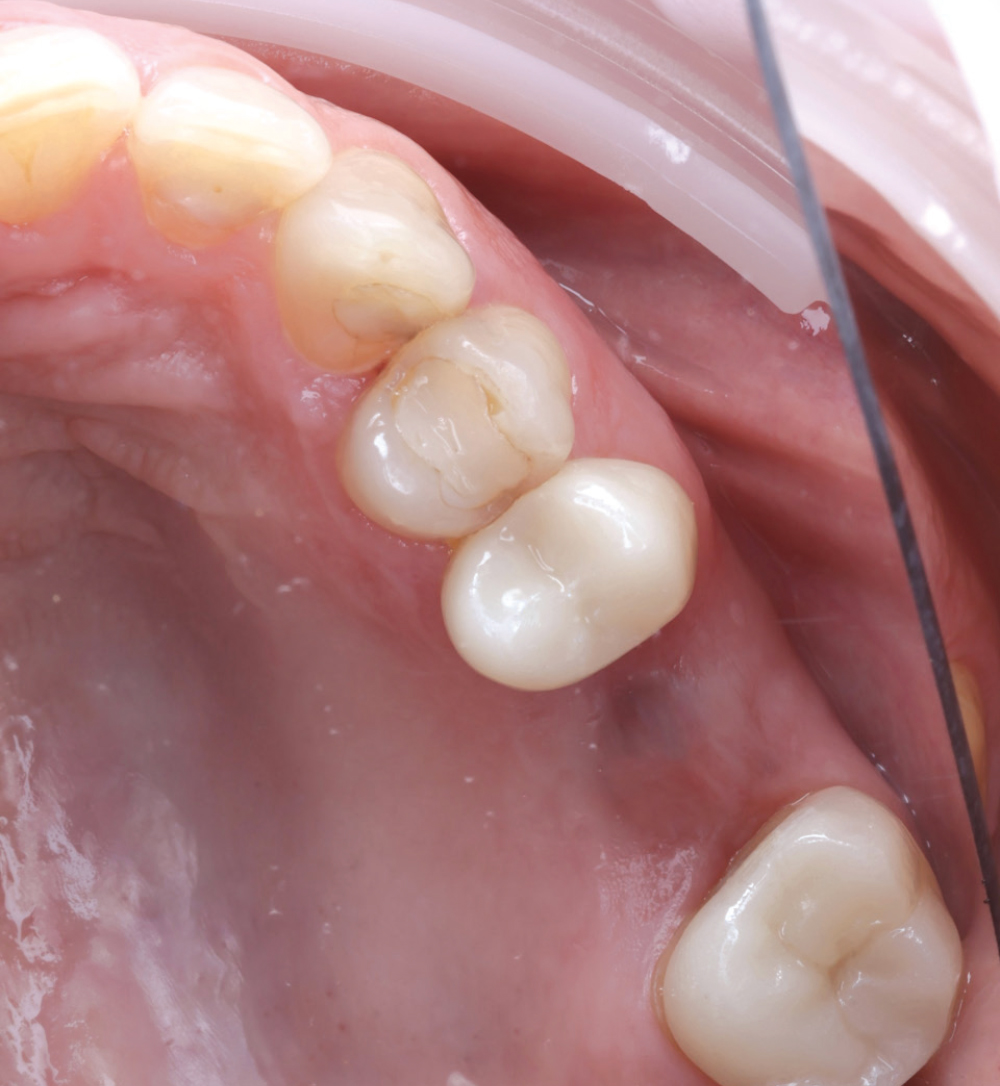
Surgical site demonstrating adequate soft-tissue healing prior to implant placement.

Figure 2: Surgical site demonstrating adequate soft-tissue healing prior to implant placement.

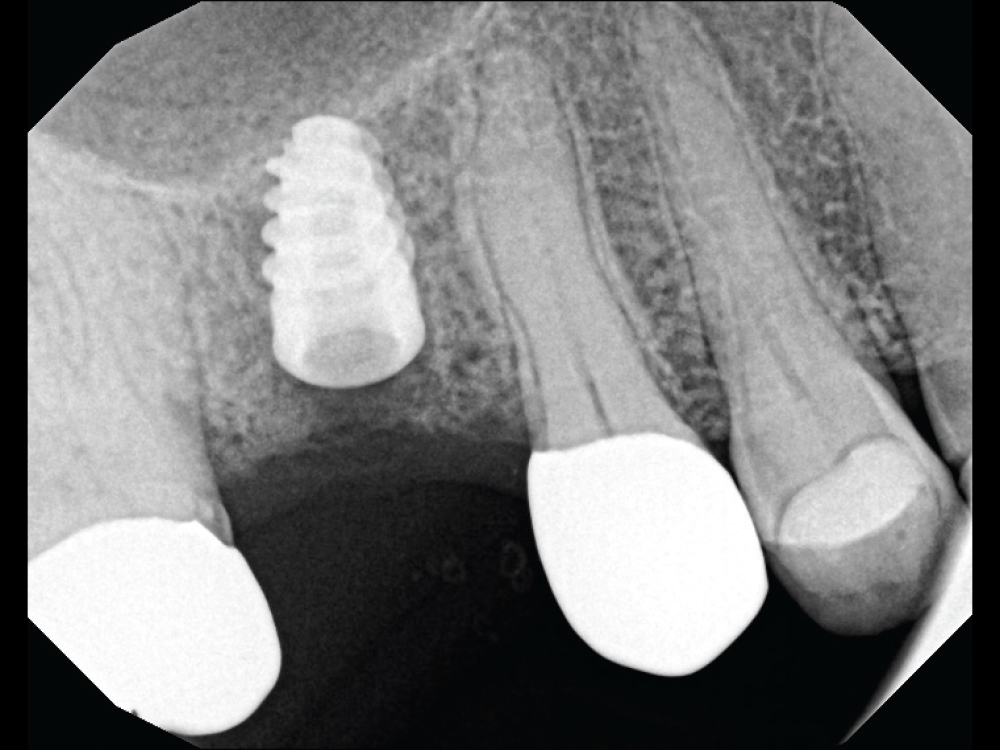
A 5 mm x 10 mm Glidewell HT™ Implant (Glidewell Direct) was placed 1 mm subcrestally

Figure 3: A 5 mm x 10 mm Glidewell HT™ Implant (Glidewell Direct) was placed 1 mm subcrestally. Because we attained adequate primary stability, a healing abutment was placed at the time of surgery, eliminating the need for a second-stage uncovering procedure.

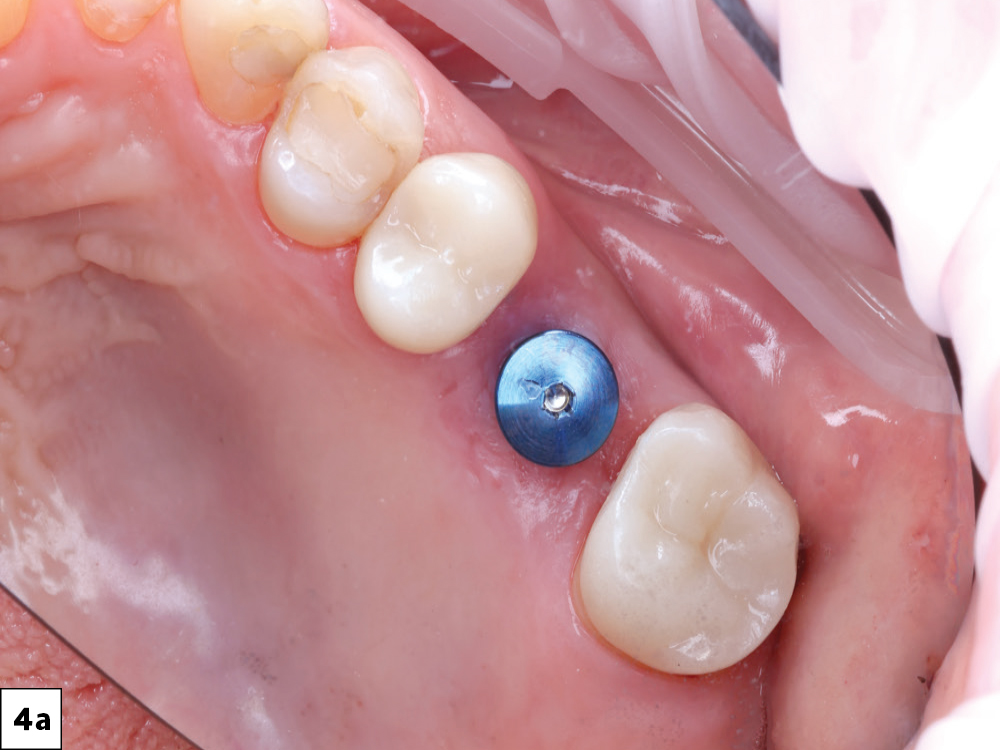
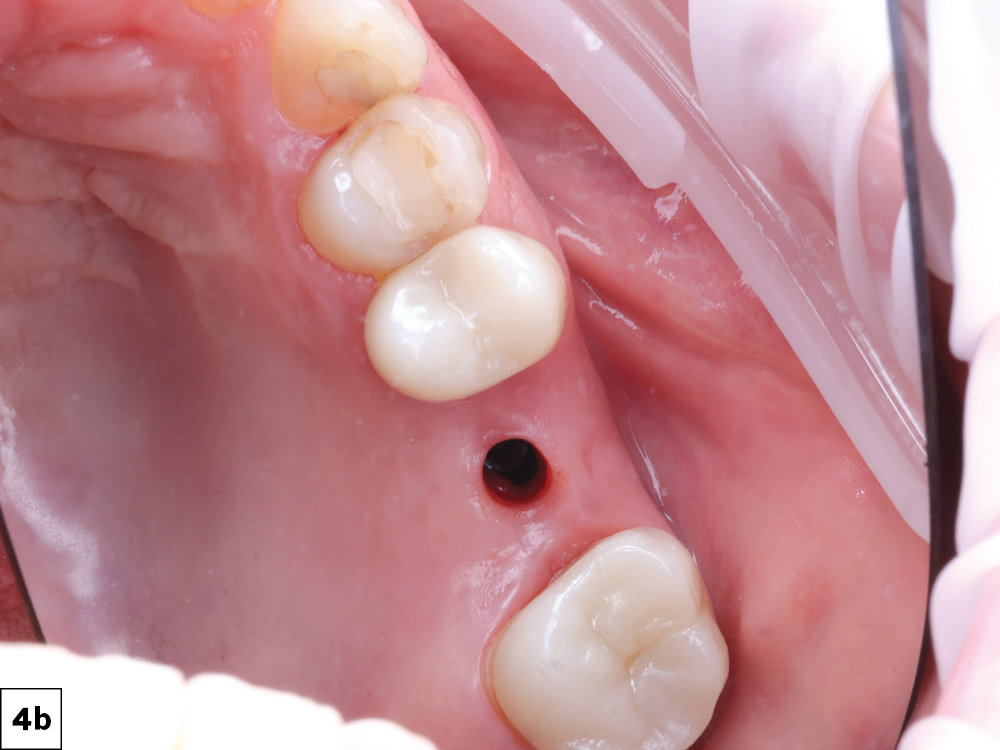
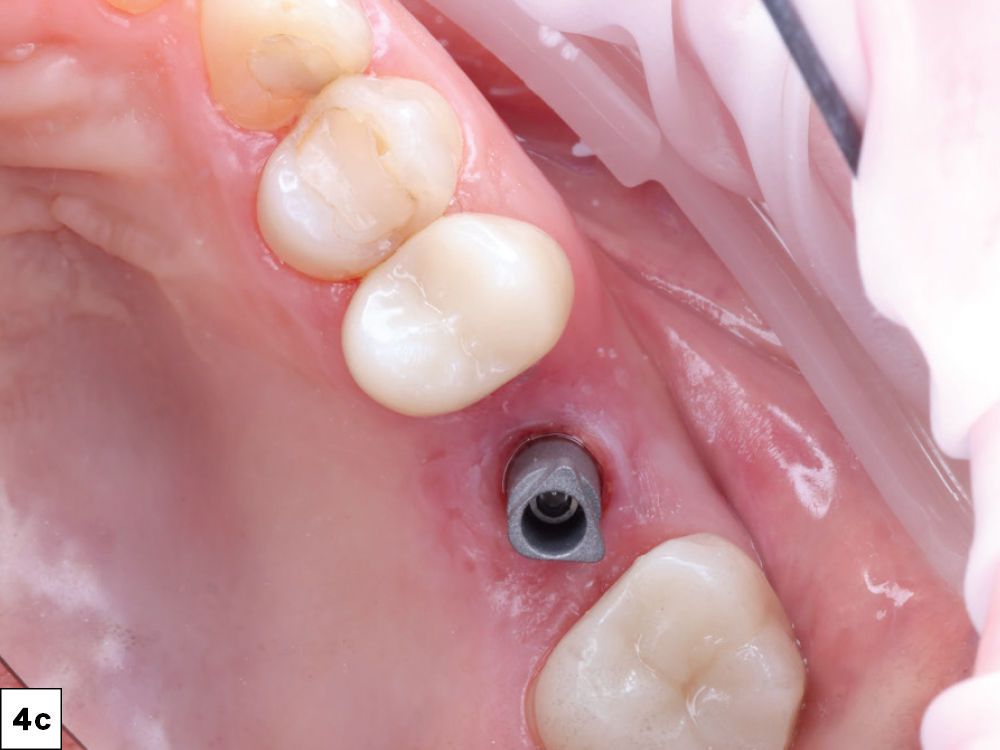
The 3-mm-tall healing abutment was unscrewed, revealing healthy keratinized soft tissue. Implant stability was confirmed using the Penguin RFA® device (Aseptico Inc.; Woodinville, Wash.) with an implant stability quotient

Figures 4a–4c: The 3-mm-tall healing abutment was unscrewed, revealing healthy keratinized soft tissue. Implant stability was confirmed using the Penguin RFA® device (Aseptico Inc.; Woodinville, Wash.) with an implant stability quotient (ISQ) reading of 76; an ISQ value above 70 indicates that the implant is safe for loading. A scan body was placed, and a radiograph was taken to confirm intimate seating to ensure the restoration would index correctly.

From Failed Root Canal

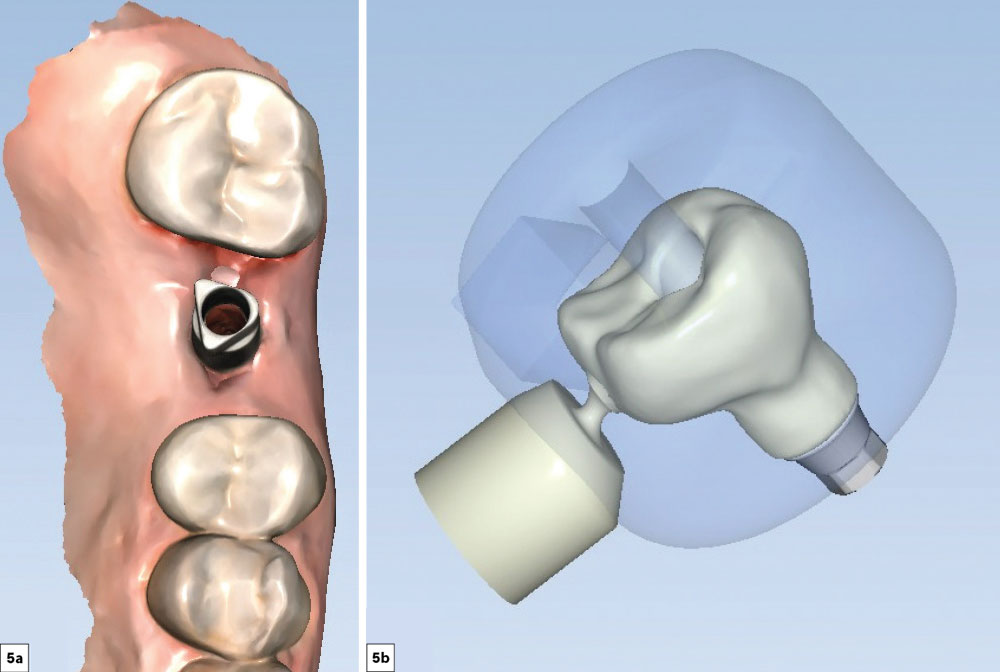
Figures 5a, 5b: An intraoral scan of the Glidewell scan body was captured using the fastscan.io™ Scanning Solution featuring Medit® i900®. The digital file was then imported into the fastdesign.io™ Software and Design Station for the design of a BruxZir® NOW screw-retained crown (SRC).

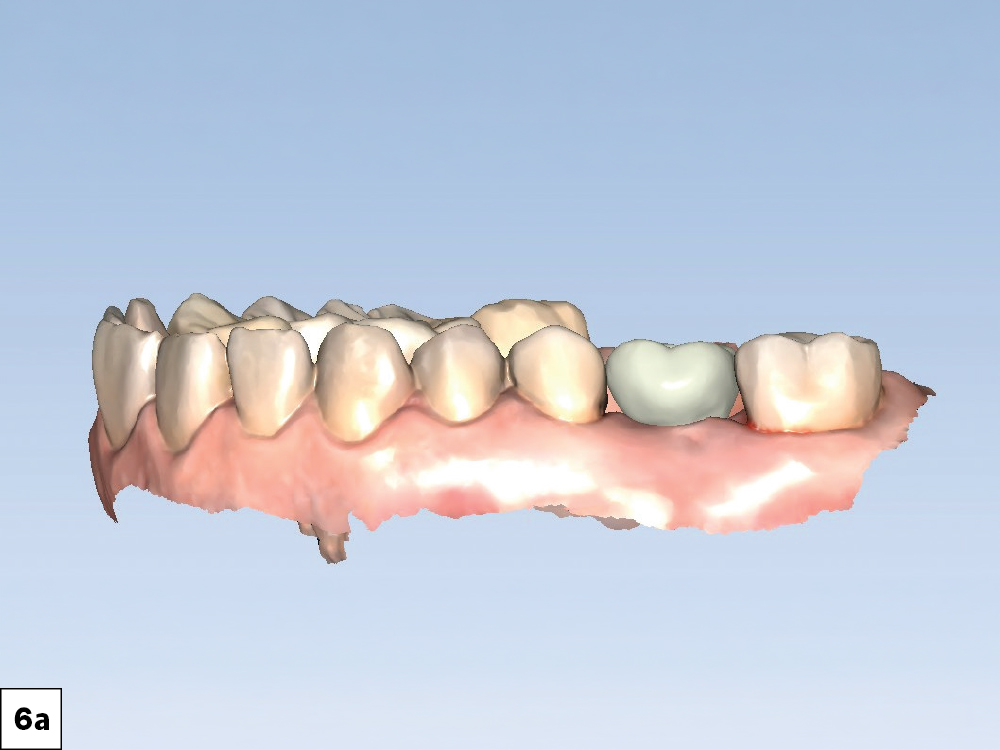
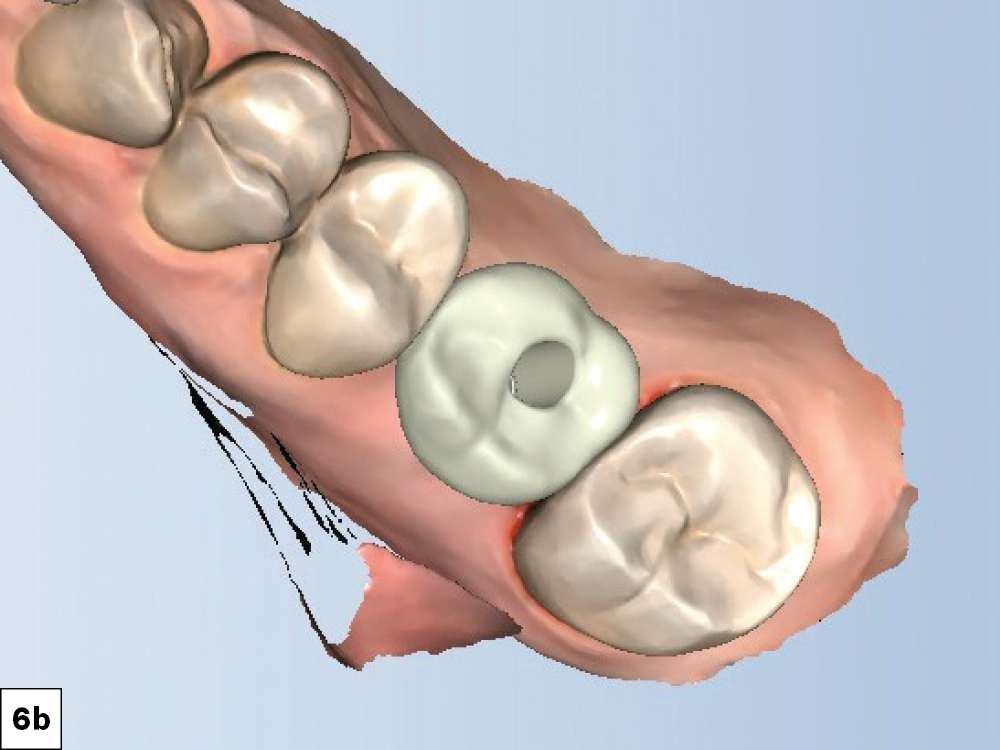
Proposed anatomy and design of the crown as shown in the fastdesign.io software.

Figures 6a, 6b: Proposed anatomy and design of the crown as shown in the fastdesign.io software.

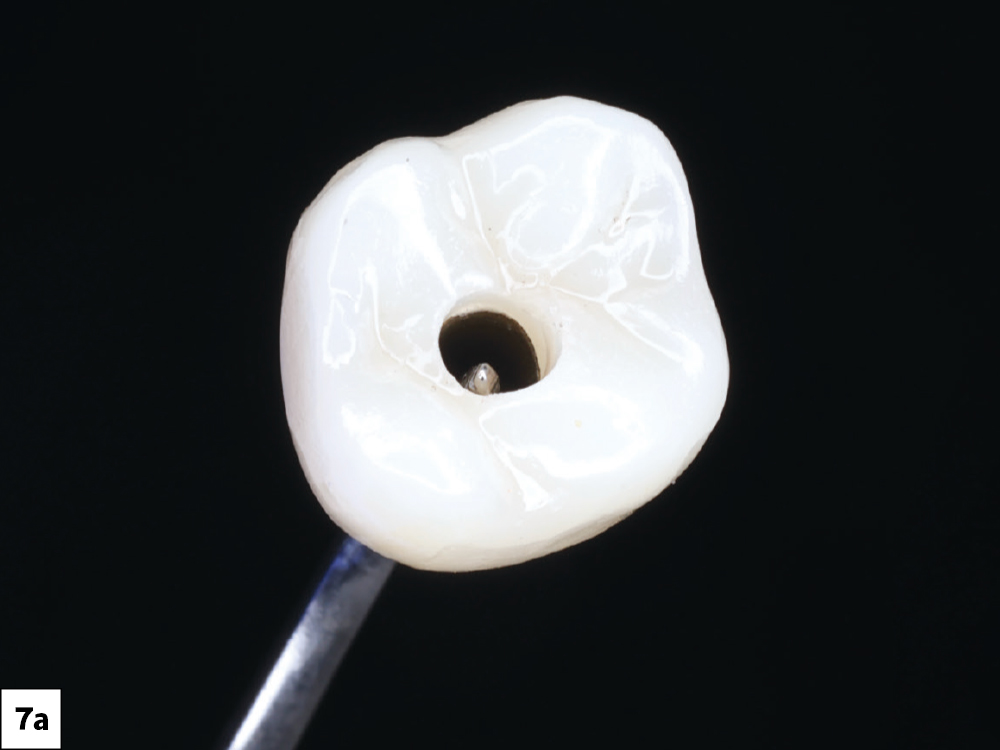
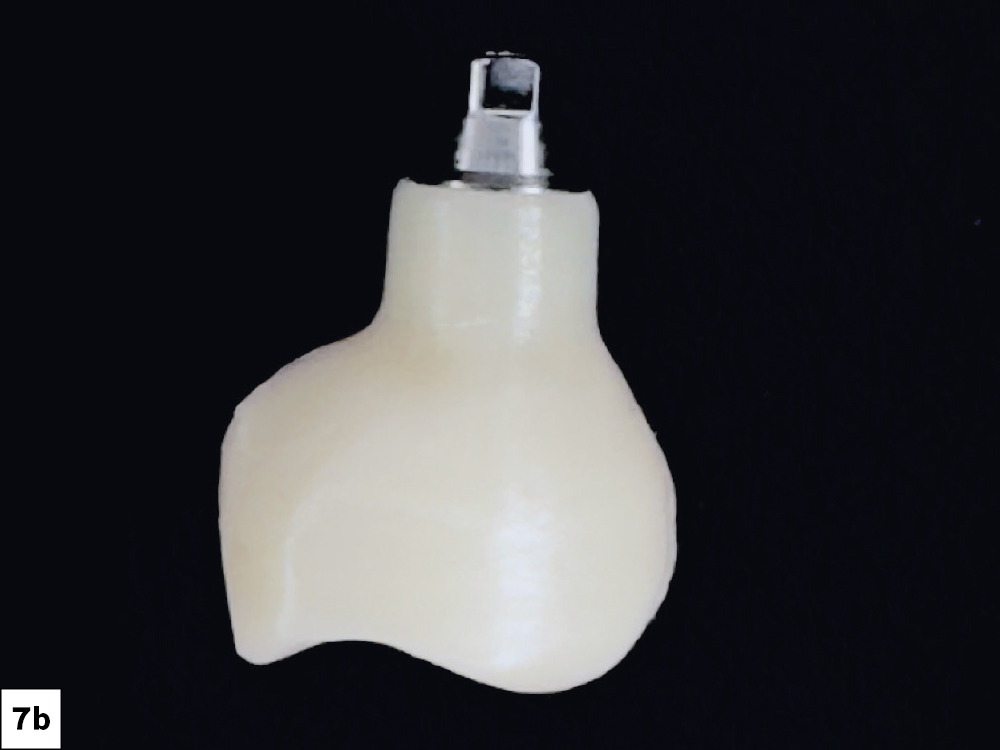
Final in-office-milled BruxZir NOW SRC immediately after chairside milling and hand polishing.

Figures 7a, 7b: Final in-office-milled BruxZir NOW SRC immediately after chairside milling and hand polishing. Knowing it would take under 30 minutes to mill and deliver, the patient chose to remain in the office, saving time and leading to a more efficient clinical workflow. 

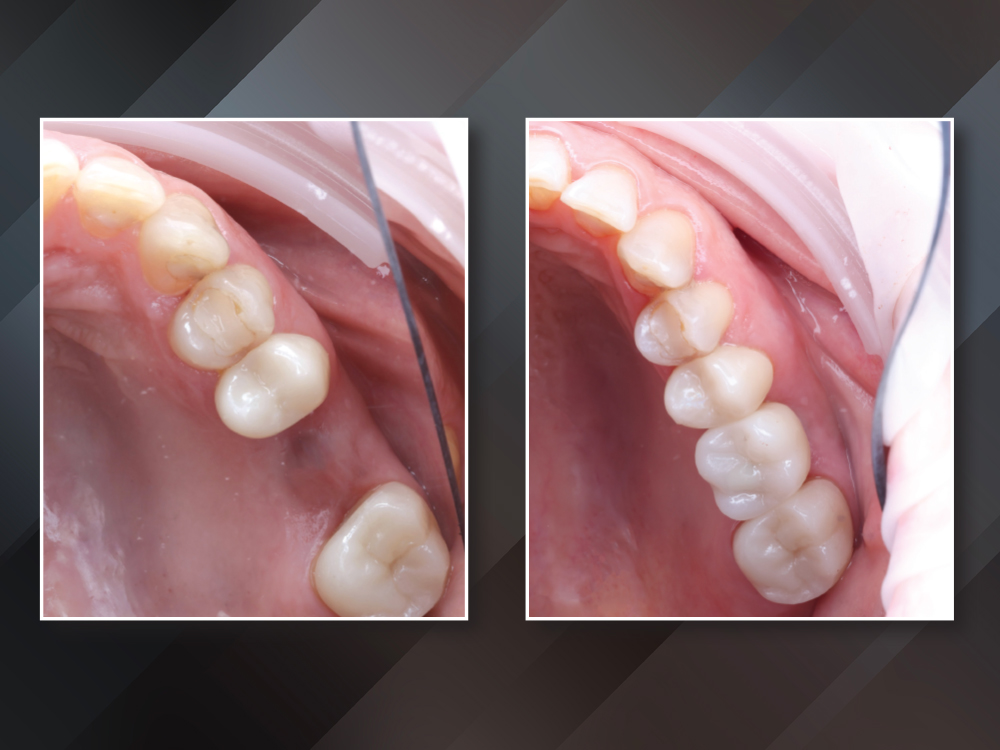
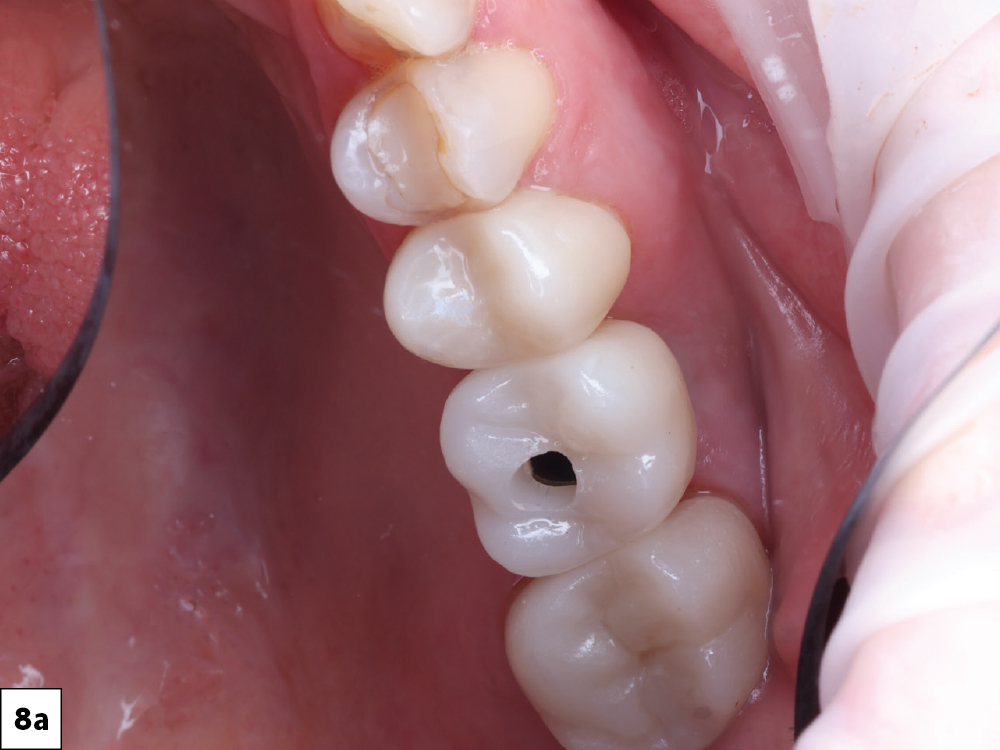
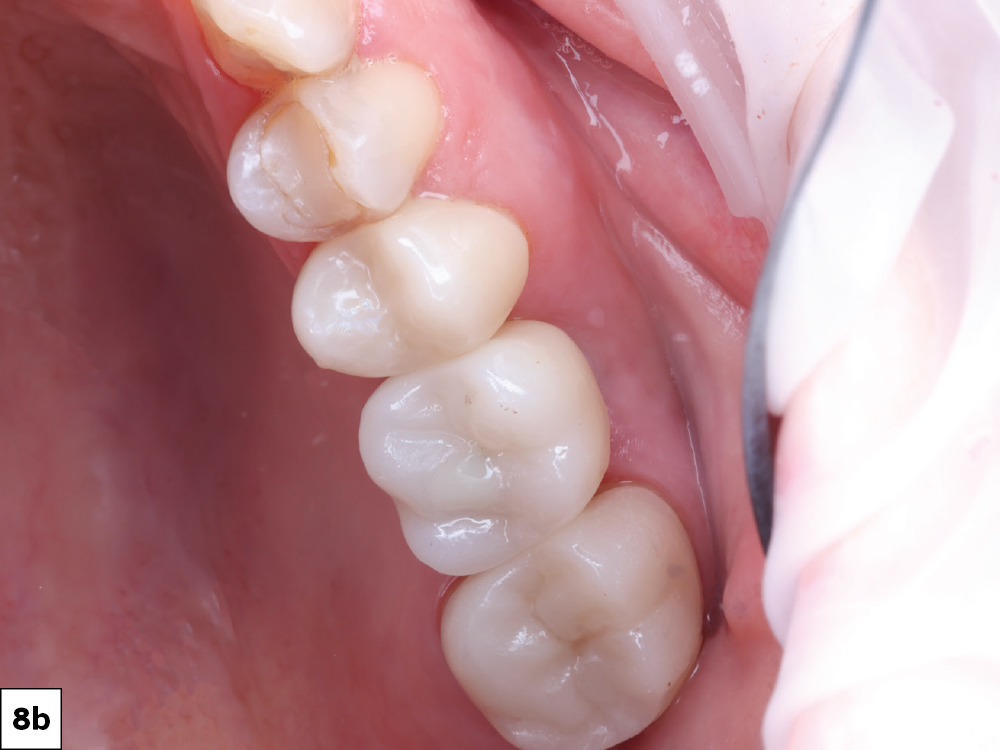
BruxZir NOW SRC at try-in and after final seating with the access channel restored with composite.

Figures 8a, 8b: BruxZir NOW SRC at try-in and after final seating with the access channel restored with composite. The Glidewell HT Implant’s conical connection made it straightforward to place and remove components such as the scan body and BruxZir NOW SRC

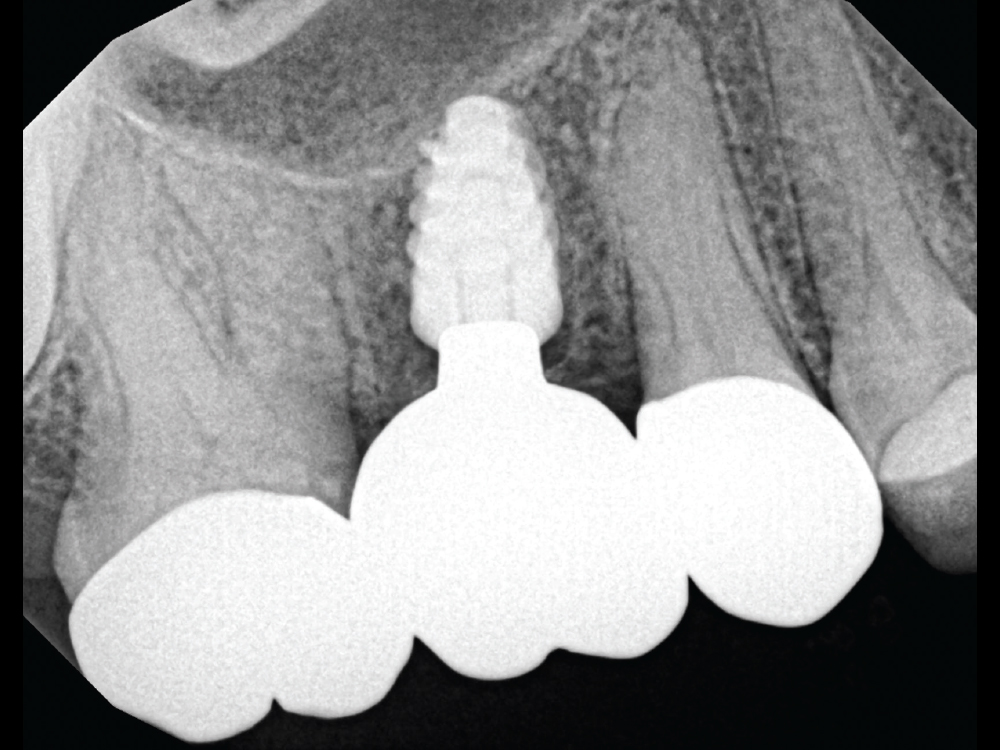
The proven digital workflow combining the Glidewell HT Implant and glidewell.io™  In-Office Solution enabled an efficient procedure for the restoration of this implant.

Figure 9: A final X-ray confirmed proper seating, form and function.

CONCLUSION

The proven digital workflow combining the Glidewell HT Implant and glidewell.io™ In-Office Solution enabled an efficient procedure for the restoration of this implant. The patient was thrilled to have her missing tooth replaced with a same-visit BruxZir NOW SRC. 

All third-party trademarks are property of their respective owners.