Cosmetic Aligner: A Smile Makeover Case Report
March 1, 2008
 image
Carlos Meulener, DMD
Cosmetic Aligner thumbnail image

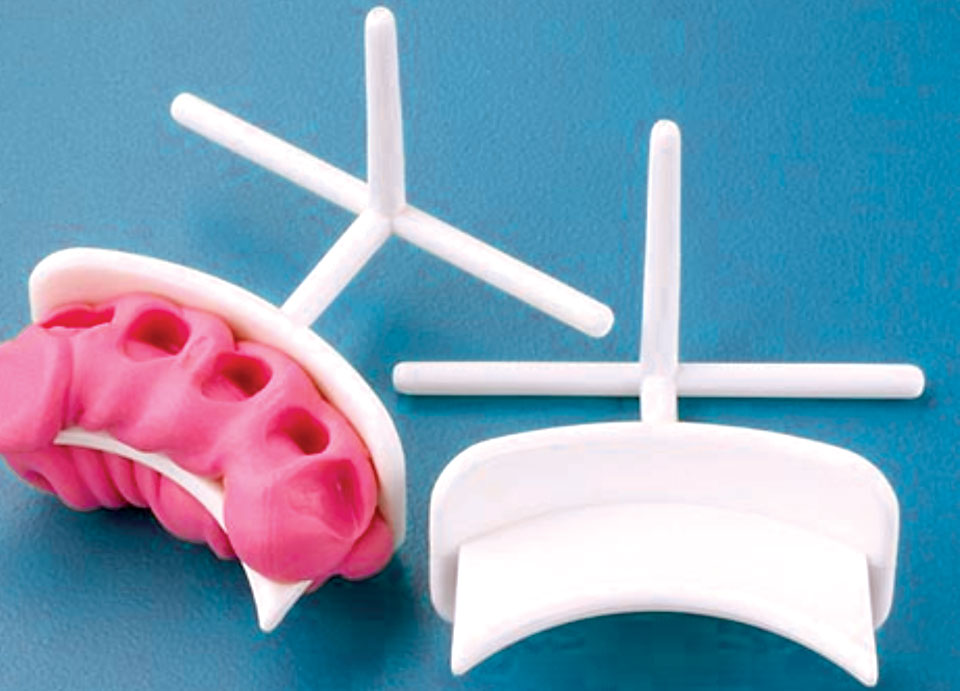
The Cosmetic Aligner is used to register the anterior midline and horizontal plane during dental treatment. Since these alignments are frequently difficult to determine from master models alone, the aligner easily transfers the information after tooth preparation. This information is crucial to effectively communicate with the lab tech for fabrication of anterior crowns and veneers, and to attain an excellent cosmetic result.

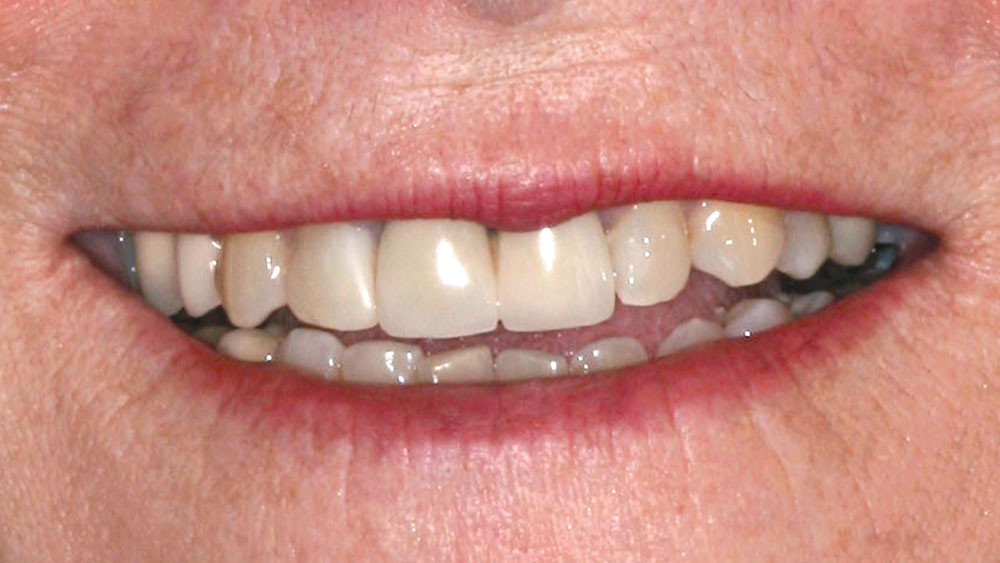
Figure 1

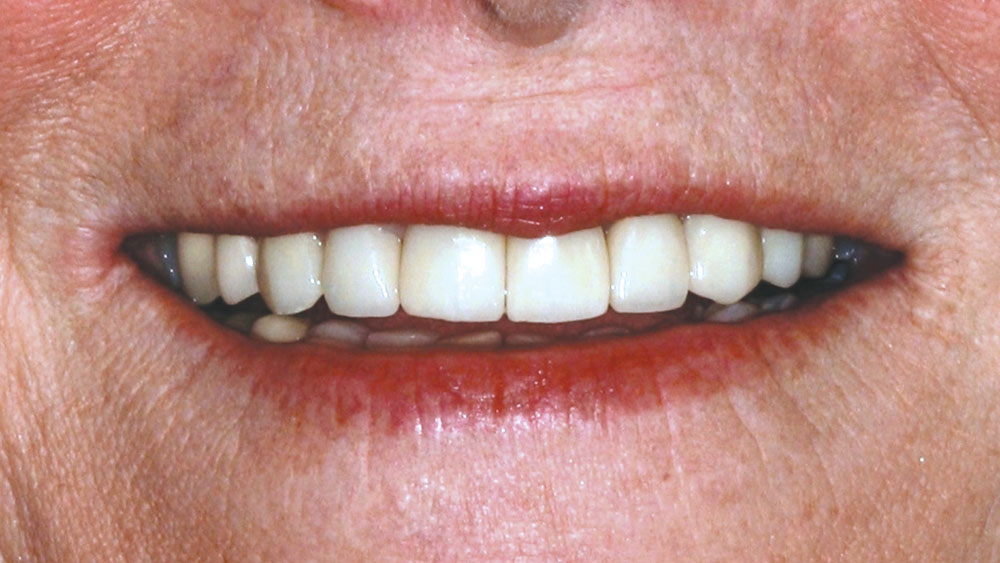
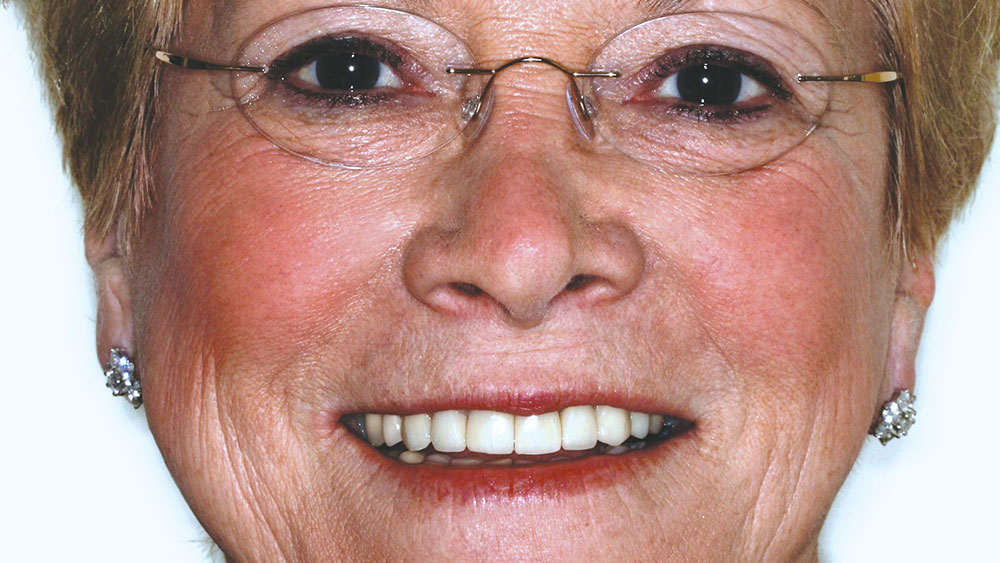
Figure 1: This patient’s smile does not match her facial features. The dentition is slightly tilted to her left, and the upper laterals and cuspids do not match symmetrically. The midline and horizontal plane are not aligned properly. She would also like to whiten her smile.

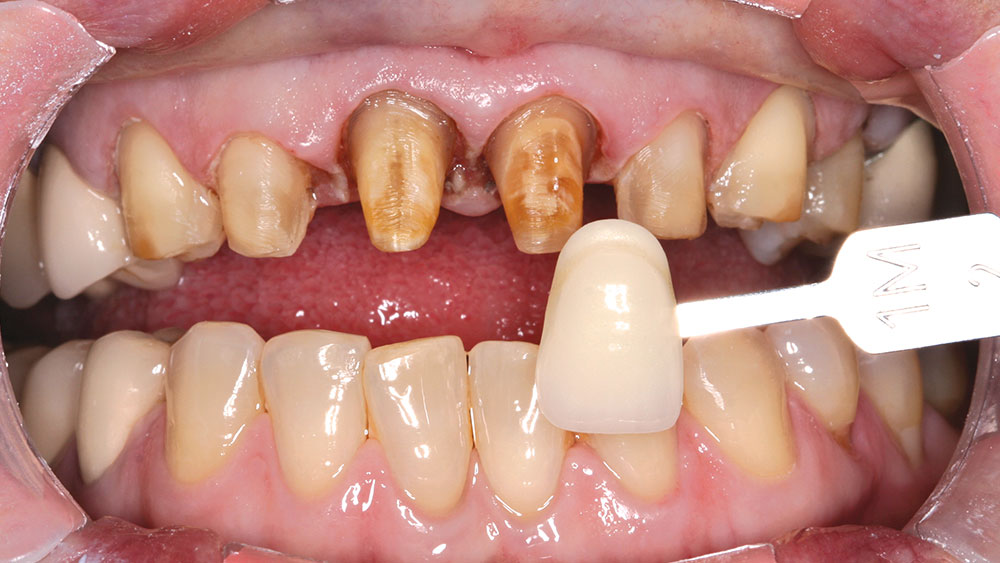
Figure 2

Figure 2: I have removed the patient’s existing central incisors and prepared teeth #6–12 for veneer restorations. A digital photo is taken with the chosen shade that will help our lab tech to see the entire picture and have a visual of the patient. I will use a whitening procedure to lighten her lower dentition to complement her entire appearance.

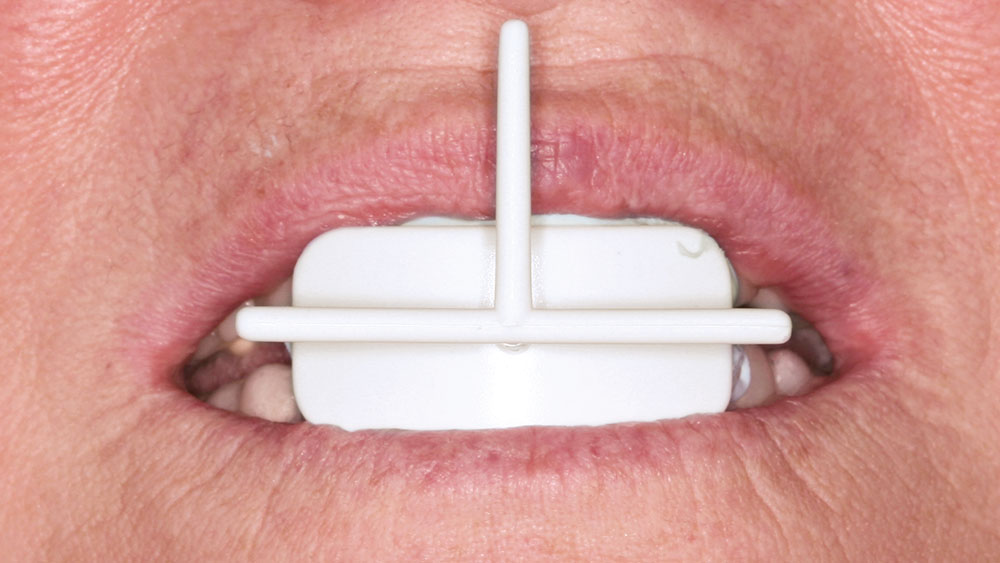
Figure 3

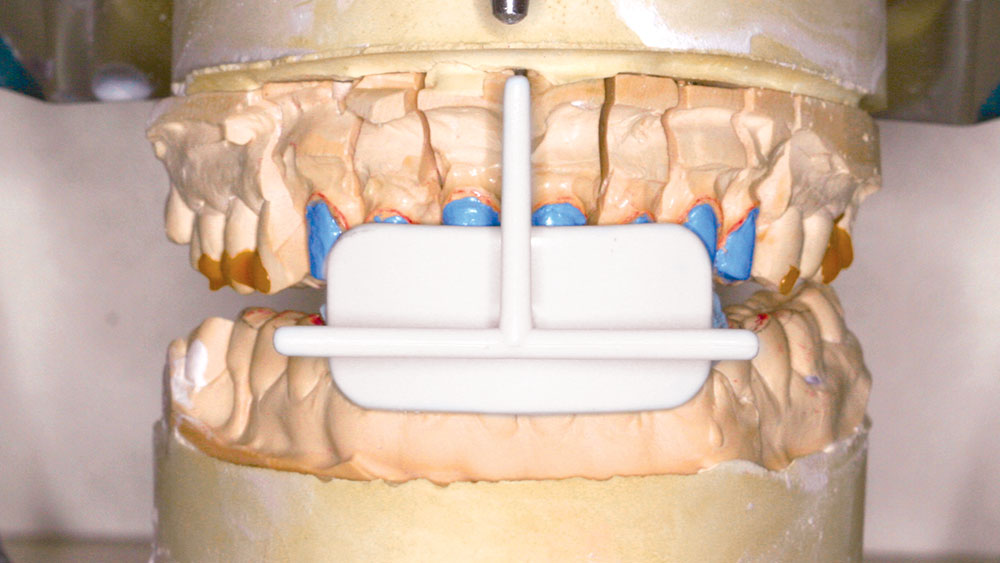
Figure 3: The Cosmetic Aligner is used to communicate to our lab tech exactly where we want the midline and horizontal plane. The device is placed between the patient’s upper and lower teeth after tooth preparation and is positioned in the correct midline and horizontal plane.

Figure 4

Figure 4: This technique involves brushing the upper portion of the aligner with adhesive and filling it with quick set (30 seconds) bite material. Position the aligner over the prepared teeth where the midline and horizontal planes are desired. Use of facial landmarks, such as the eyes, nose and lips, helps to determine where to position the aligner. The prepared teeth should barely touch the plastic as the material sets. Fill the lower portion of the aligner with adhesive and quick set bite material. Reposition the aligner on the upper prepared teeth and have the patient close down lightly to make an impression of the lower teeth. Allow the material to set without distorting the position of the aligner. This technique is not used for bite registration. The occlusal bite is taken separately using the same fast bite registration material.

Figure 5

Figure 5: The lab tech places the device on the master model and marks the midline and horizontal planes. Final check of the completed crowns or veneers is done by removing the upper bite material and placing the lower impression on the articulated model. This determines if the midline and horizontal planes are correct before returning the case back to the dentist.

Figure 6

Figure 6: Using the Cosmetic Aligner eliminates the guesswork from cosmetic cases and does not leave the dentist at the mercy of the lab. You can expect consistently beautiful restorations to place right where you want. The Cosmetic Aligner replaces the cumbersome and inaccurate use of the cross stick bite impression method and is easier, faster and more economical than other sophisticated articulation equipment. The lab will also find the number of redo cases is significantly reduced because the technician has additional information not available from models alone.

Figure 7

Figure 7: As you can see from the “after” picture, the Cosmetic Aligner plays a major role in this smile makeover. Thanks to this product, the patient’s bright smile now fits her face and we’re confident she’s pleased with her beautiful new look.

To contact Dr. Carlos Meulener or inquire about the Cosmetic Aligner, call 877-586-7396.