Clinical Spotlight: No-Prep Veneers
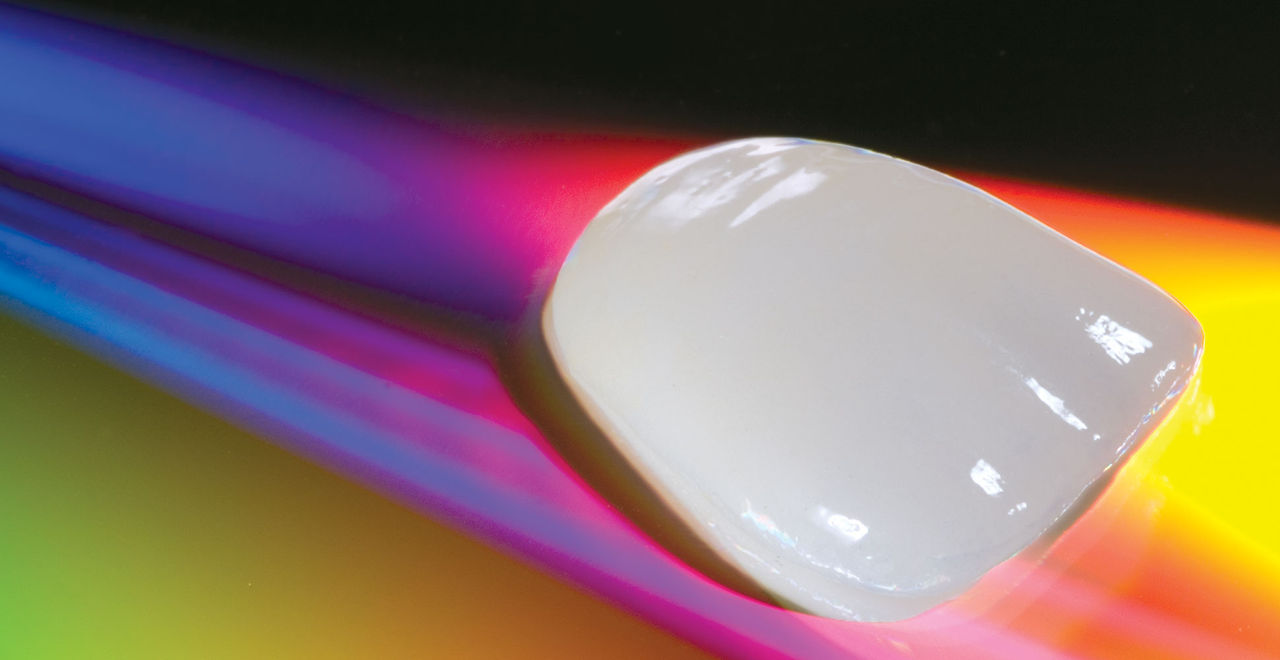
I get a lot of questions from dentists asking what type of patient makes a good candidate for no-prep veneers. This month I want to share a case with you of a patient who was an exceptional candidate, particularly because she had seen magazine advertisements for this type of procedure. I want to caution you, however, to focus more on the concept of minimal-prep veneers rather than no-prep veneers. My definition of a minimal-prep case is any veneer case where the preparation remains in enamel. I also like to call these minimally invasive veneers. By removing the least amount of tooth structure, ideally as indicated by the laboratory technician on a study model, we can achieve esthetic results while maximizing bond strength and minimizing post-operative sensitivity. While no-prep veneers may be preferred by the patient, minimal-prep veneers are typically more esthetic because the laboratory technician has instructed you where to reduce to achieve the best esthetic results. If a patient insists on no-prep veneers because they feel they are reversible, I would point out to them that removing no-prep veneers may very well result in the removal of enamel. Furthermore, you would have to charge them a large additional fee, as removing no-prep veneers takes more time and more effort than placing them. If it is the fear of preparation that is the motivation for no-prep veneers, I can often use a coarse sandpaper disc to “re-contour” a tooth versus prepping it with a bur. I know that sounds like a technicality but many patients accept that difference, which is important when the laboratory technician has asked you to reduce some facial tooth structure.
In a case like the patient profiled below, who has requested no-prep veneers and for whom the laboratory technician says no reduction is necessary, the prep appointment is simple: pumice the teeth and take a polyvinylsiloxane impression. I find it unnecessary and undesirable to use any type of gingival retraction for no-prep veneer cases. Because the margins of these types of restorations are always a little bulky, I prefer to keep them at the gingival margin rather than at my typical slightly subgingival level. The lab achieves this consistently without any retraction whatsoever. This is also the one situation in which I use light body syringe material for the impression instead of medium body. I typically use medium body for my crown and bridge impressions because I end up going subgingival for the impression and I need a material with suitable tear strength. Because there is no tissue retraction with no-prep veneers, I use the light body for better flow and surface reproducability with heavy body as the tray material. Make sure to syringe the light body material around the necks of all the teeth that will have veneers. Just because there is no cord packing or bleeding to struggle with on these no-prep impressions, resist the urge to get lazy. Take a full-arch impression, preferably in a custom tray, and make sure the free gingival margin is clearly represented around all of the teeth you are treating.
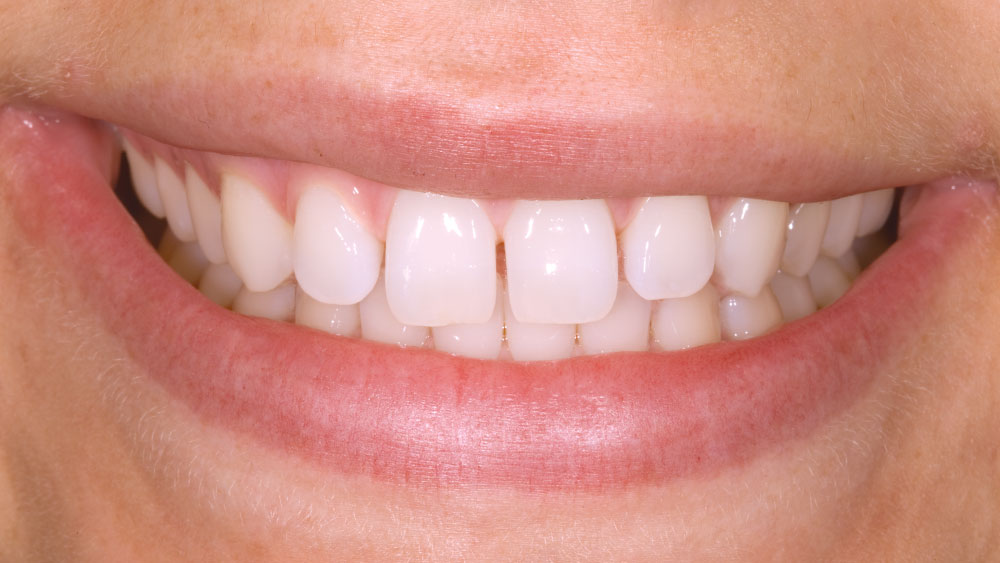
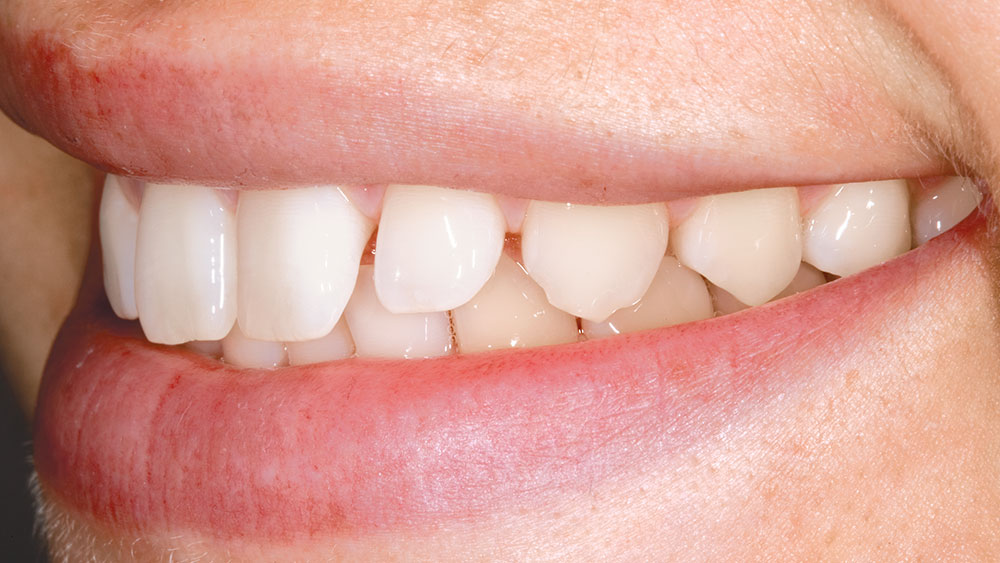
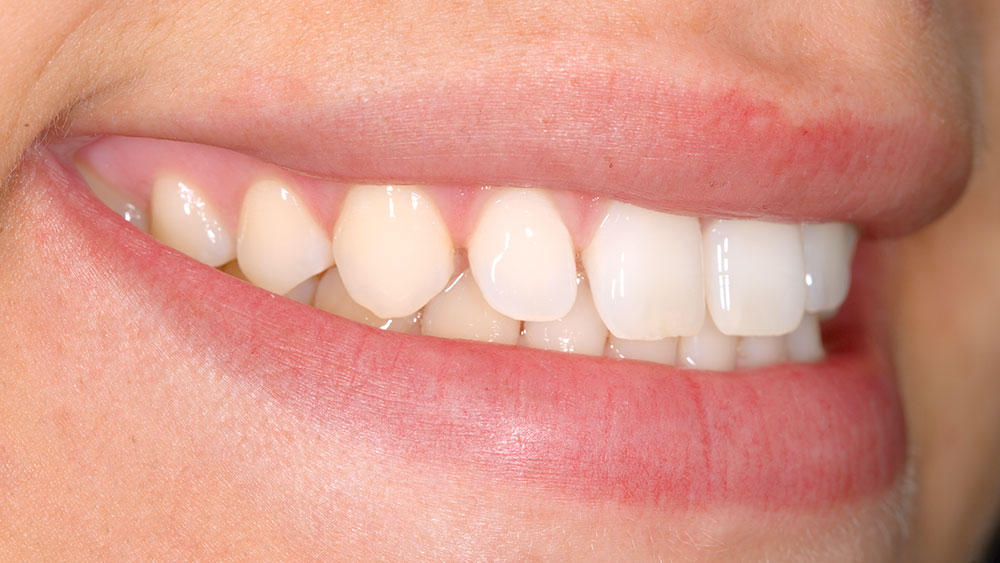
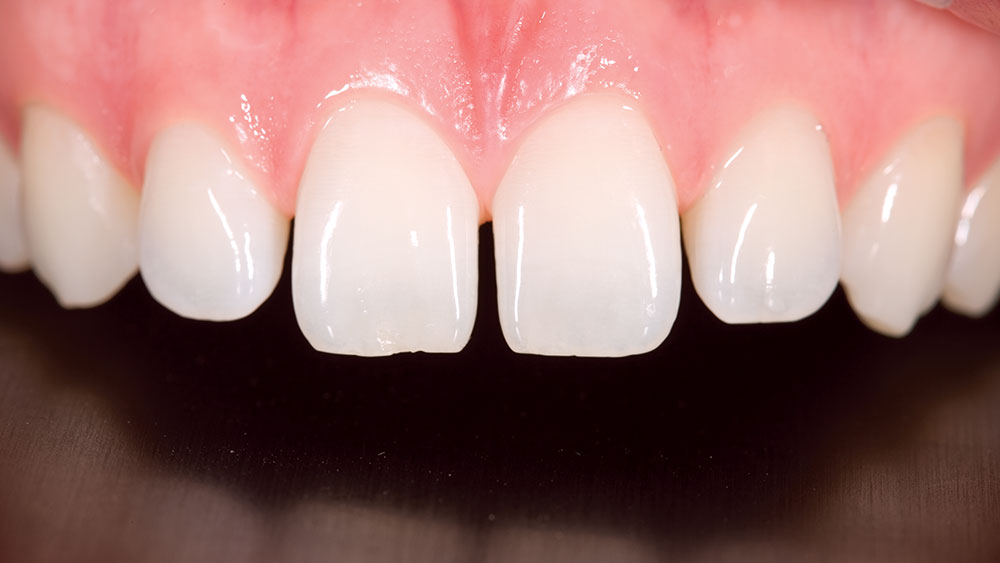
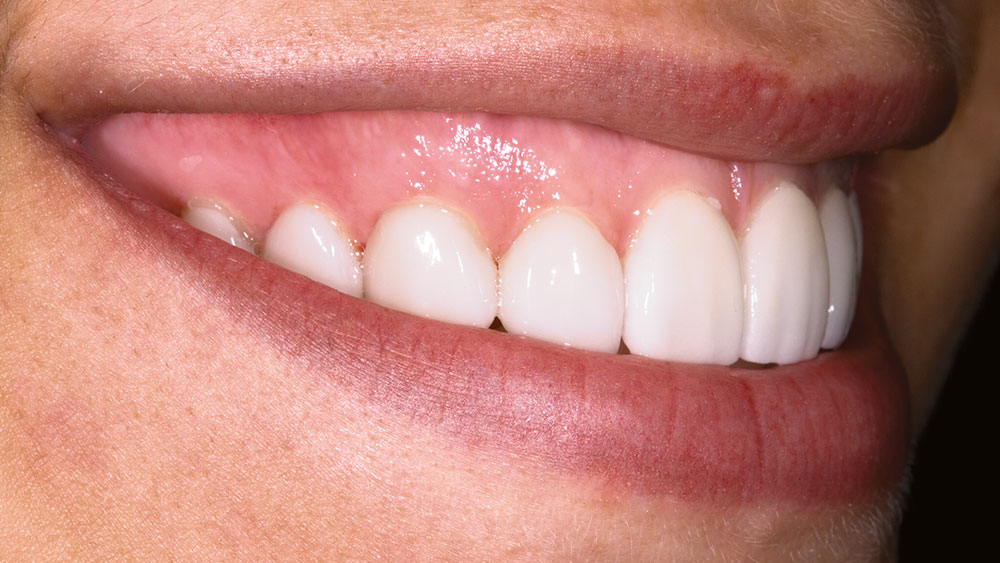
Figures 1 through 8 are the before pictures of our patient, a 28-year-old female. One of the more interesting aspects of this case was the patient’s asymmetrical smile. As you look through before and after pictures, you will notice that on the patient’s right-hand side her lip retracts more apically than on the other side. Simply put, when viewed from the front, the patient smiles bigger on the left than on the right. As a result, when you examine her smile, it looks as though a gingivectomy is needed over teeth #4 through #7 to make her smile appear symmetrical. However, when the lip is taken out of the picture in the retracted photos, you will see ideal symmetry between left and right. Looking at the nonretracted smile photos it becomes evident that the lip or smile line is canted in relation to the interpupillary plane. Fortunately, none of this bothered the patient and we were able to proceed with the veneers as planned.
Multiple diastema cases are easily the best no-prep veneer cases. In fact, I would almost go as far as to say that lack of diastema is a contraindication to no-prep veneers. Without diastema the no-prep veneers lead to very bulky embrasures faciolingually. As a result, the smile begins to resemble horse teeth. Unless the patient’s favorite athlete is Seabiscuit, this is probably not a look they want to pursue.
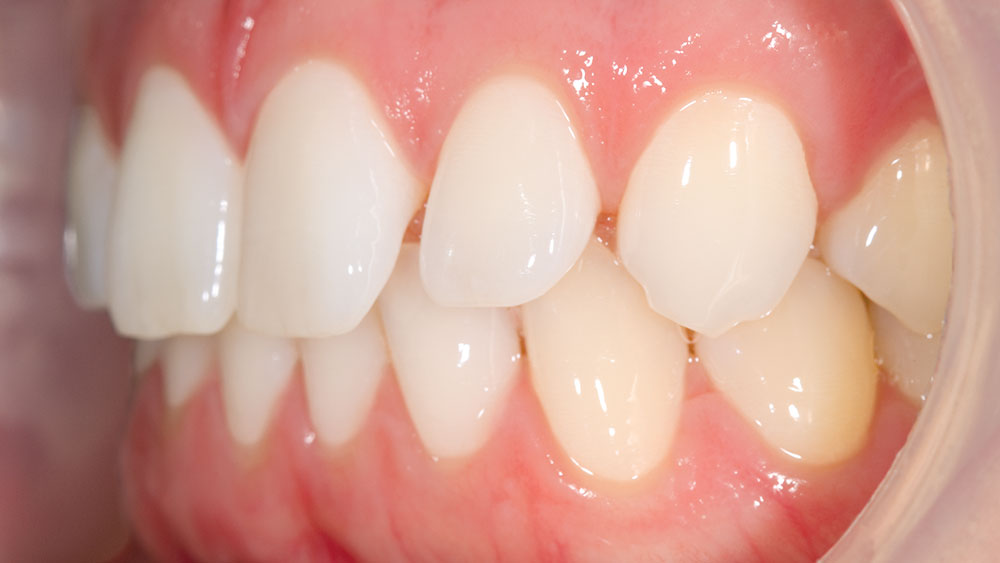
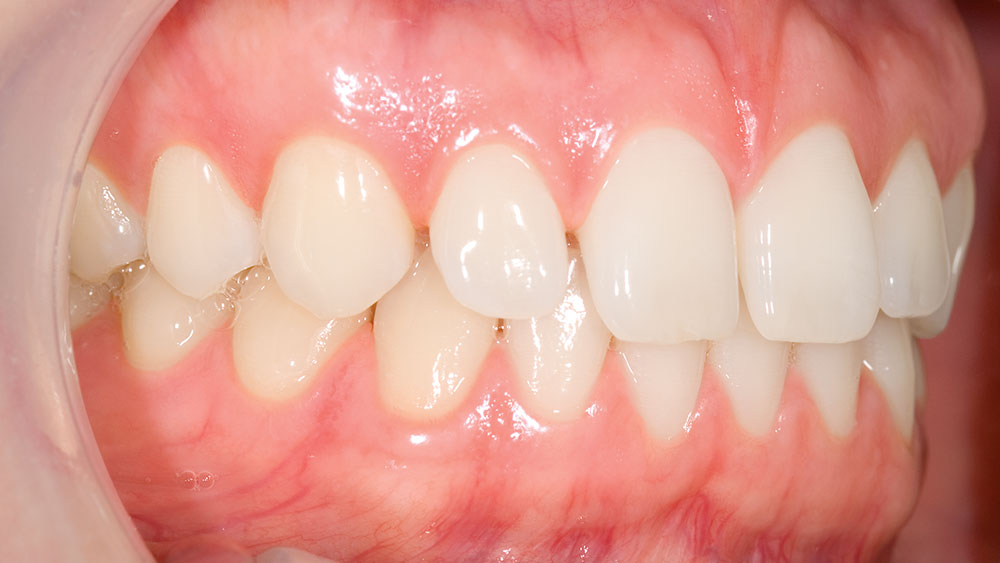
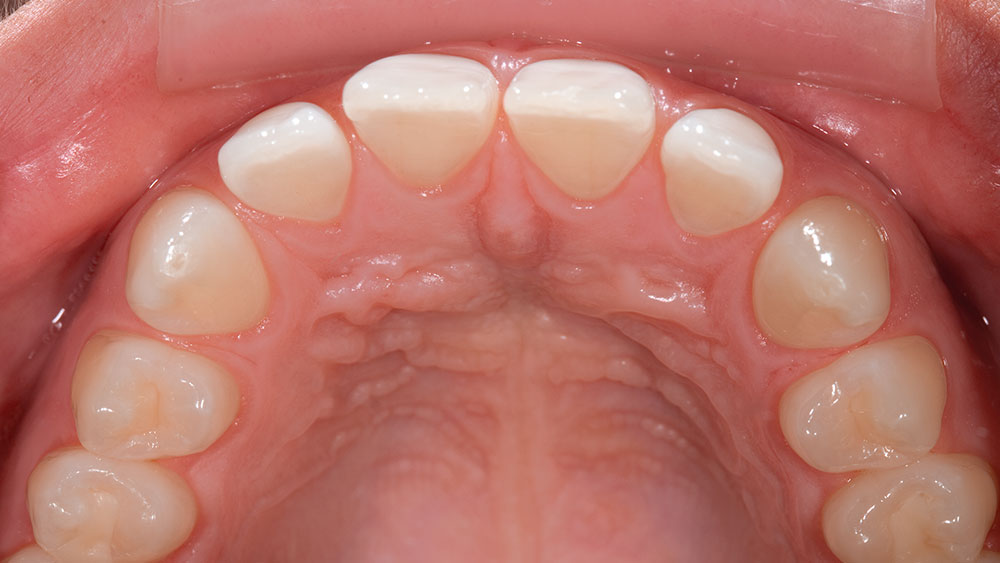
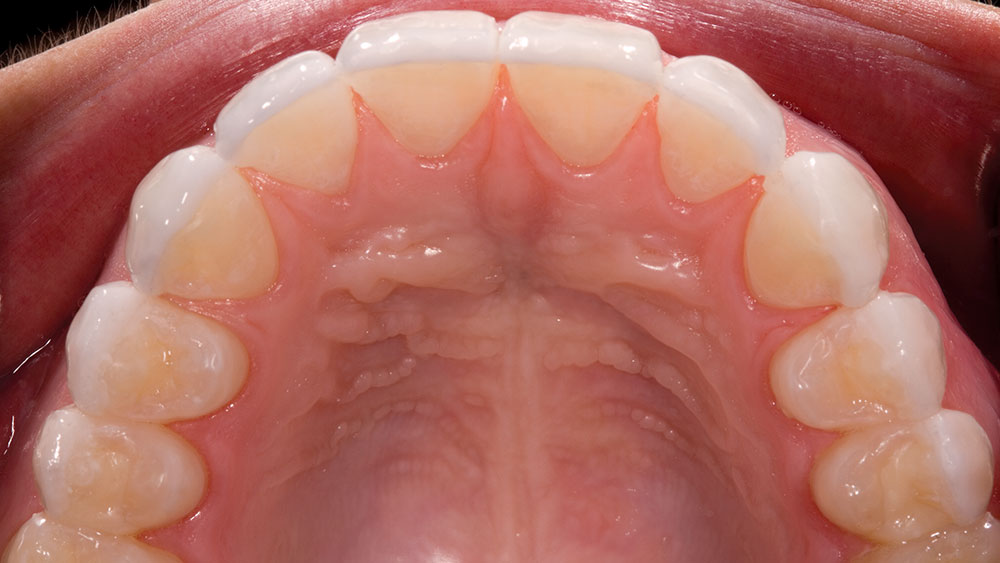
A look at Figure 8 gives the best view of the diastema; they are present on the mesial and distal of all the anterior teeth. Many times we see this type of diastema on patients who had first bicuspids extracted for orthodontic reasons when they were younger. Typically this creates too much excess space for the patient, and their ortho relapse consists of diastema formation rather than crowding. For this reason, first bicuspid extraction cases typically make good no-prep veneer candidates, as long as we don’t have any major facial limiting factors.
Facial limiting factors are those portions of tooth structure that lie facial to an imaginary line that denotes the ideal archform for the patient. Many times, I will set an orthodontic archwire onto the study model to help me see where these limiting factors are. When I send a study model to my laboratory technician, this is what they do to instruct me where to prep on a minimal-prep case. In Figure 8, you can see that only potential facial limiting factor is the facial surface of tooth #7 and the distal of tooth #8. After my lab technician looked at the models and pictures, however, he cleared it for a no-prep case.
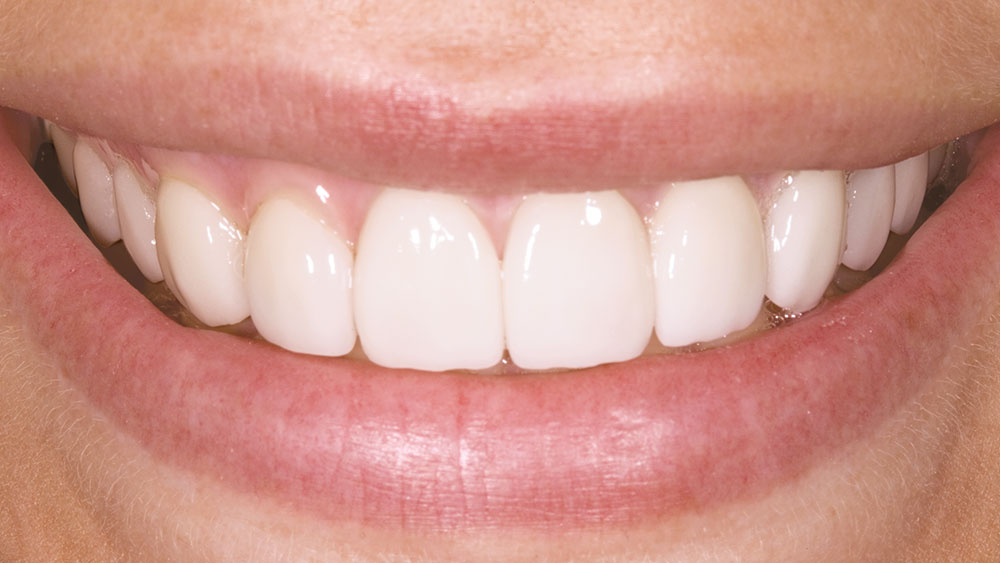
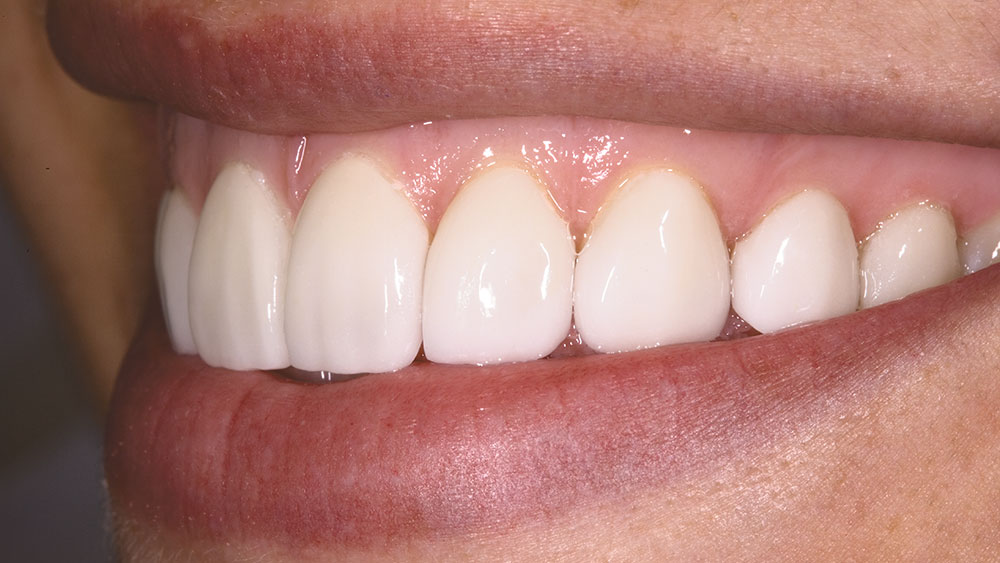
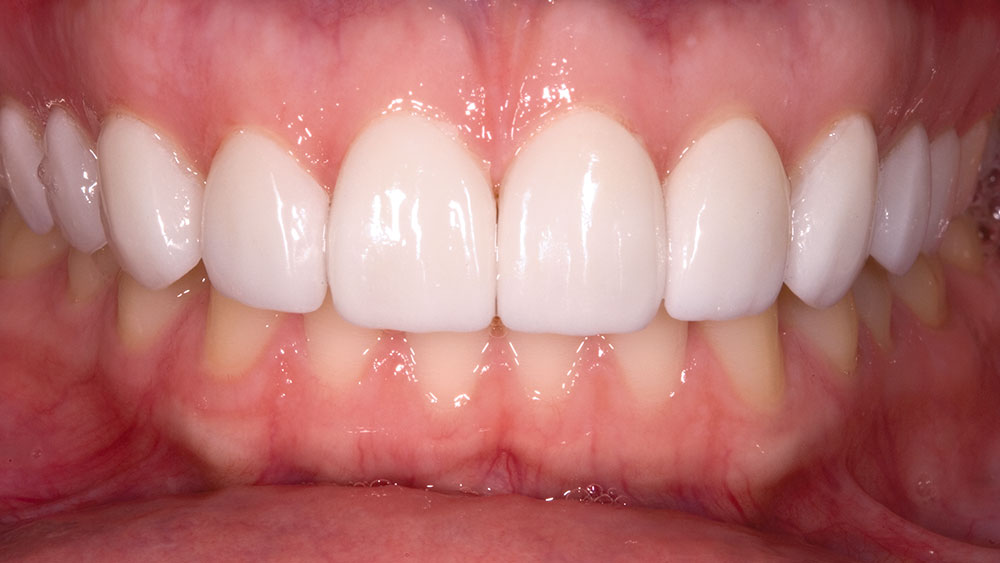
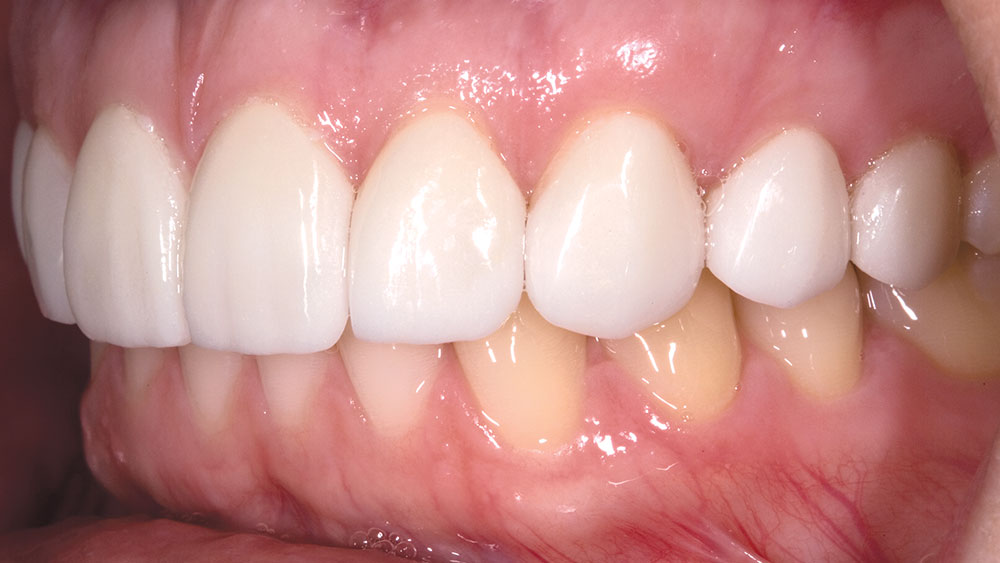
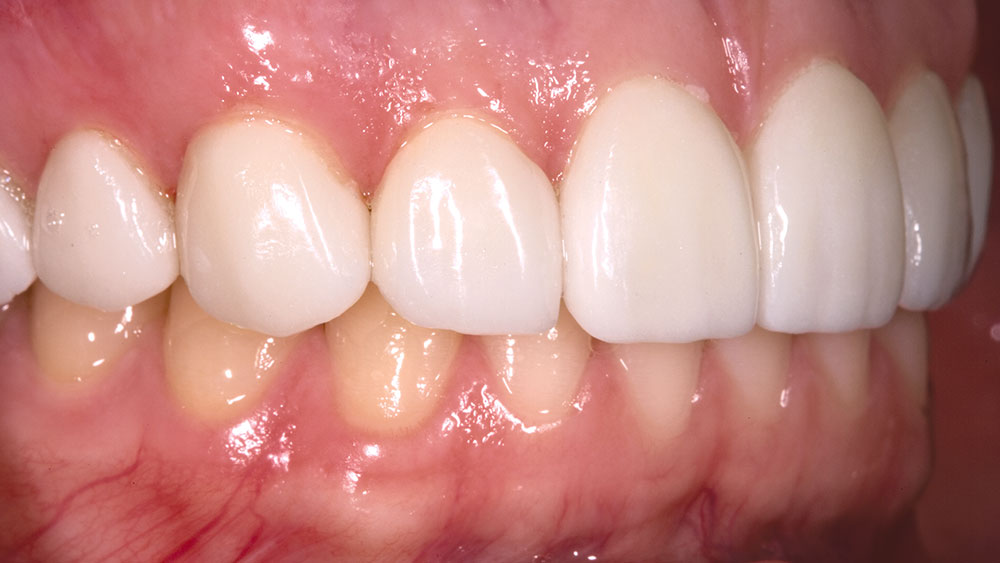
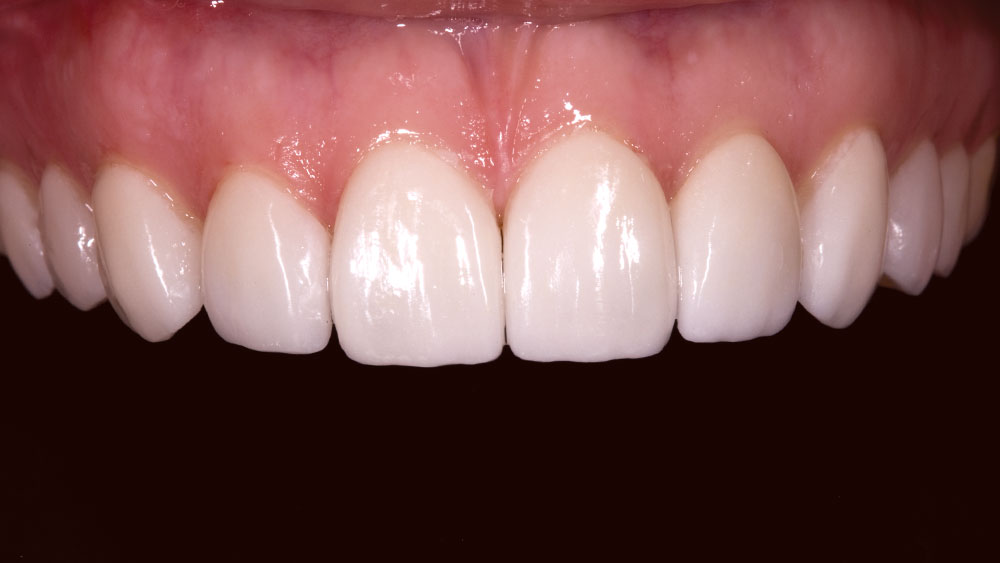
Figures 9 through 16 are the after pictures of this patient. A quick glance at Figure 9 shows the previously mentioned asymmetry. We still see the illusion that tissue needs to be removed from the patient’s right side to even out the gingival levels. But as you can see in Figure 12, the levels are acceptable as is. You will also notice that the bigger the patient smiles, the more pronounced the asymmetry becomes. As the patient pointed out, she had been living with this asymmetry for 28 years with no ill effect, and felt that it would be further diminished by upgrading the esthetics of her teeth.
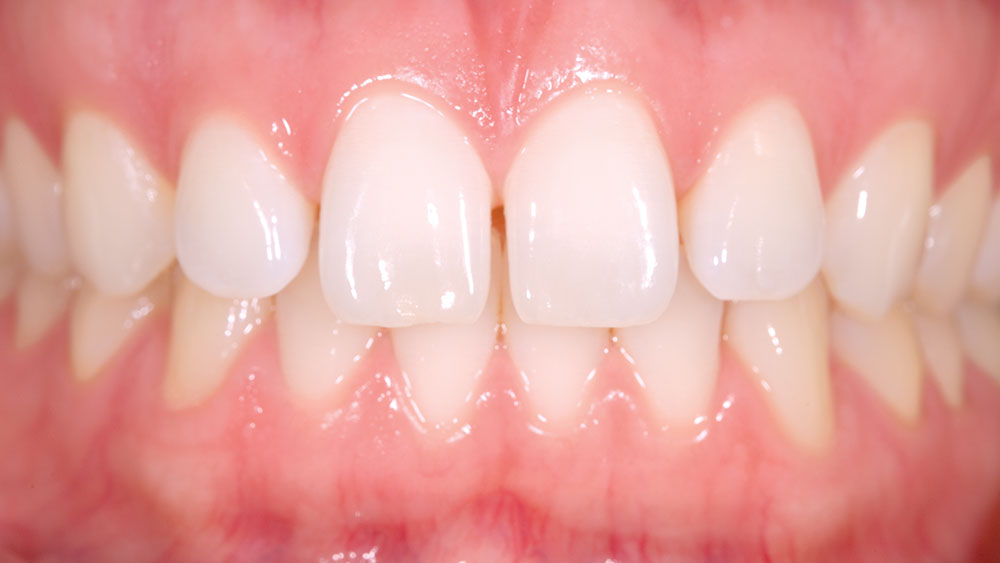
Compare Figure 12 to Figure 4 and note what has happened. Notice that in Figure 4 teeth #8 and #9 almost appear to be too long. This is because the width to length ratio is off. The ratio between width and length for a central incisor should be 75% to 80%. In other words, a central incisor needs to be 20% to 25% longer than it is wide. In Figure 4, teeth #8 and #9 had a width to length ratio of 36%. These two teeth either need to be shortened or widened, and no-prep veneers are great at making teeth wider. As you look at Figure 12, you will notice that the teeth no longer appear to be too long because they have become wider as they filled the diastema.
Compare Figure 15 to Figure 7 and you can see this effect even more. The diastema has been closed, and #7 and #10 have been lengthened slightly to correct their incisal edge positions. The smaller the teeth are in an arch the better no-prep veneers work, especially in combination with diastema. It really is no wonder that the patient was shocked during try-in of the veneers to see all the esthetic aspects of her smile change instantaneously.
My favorite pictures in the series are Figure 16 and Figure 8. As I mentioned before, Figure 8 is the one picture I really need to determine whether or not a particular case is going to be no-prep or minimal prep. With that single occlusal picture and a study model, you can make a lot of decisions about what type of veneer cases are possible for this patient. Figure 16 sums up a lot of the good aspects of well-done no-prep veneers. There is no doubt in my mind that these veneers are 0.3 mm in the spots where they need to be. For all the talk about how bulky and ugly poor no-prep veneers can look, Figure 16 shows there is hardly any bulk present. I was concerned about the facial of tooth #7 and the distal of tooth #8, but the technician handled these areas well. When I placed an orthodontic archwire on the post-operative models of this case, the ideal archform had been achieved.
I hope this case has pointed out some things to look for when deciding whether or not a case should be considered as a no-prep case. As always, sending the study model and some photographs to the lab technician, to have them assist in deciding what area to reduce (if any), is a huge help in achieving your desired esthetic result. Diagnostic wax-ups are extremely helpful in no-prep cases as well, and in this issue, I have an article in which I go into great detail on how to utilize these wax-ups.
Contact Dr. DiTolla at mditolla@glidewelldental.com or call 888-303-4221.

