
2201 Dupont Dr., Irvine, CA 92612
© 2026 Glidewell. All rights reserved.
800-854-7256 USA
Learn the 5 preventable digital implant scanning errors that lead to poor-fitting restorations and download the free e-book for building a more predictable scanning workflow.

Implant treatment planning, placement and restorations have been transformed by digital scanning technology. What used to be messy impressions and error-prone physical models has now shifted to a process that’s faster, more efficient, and more scalable for implant practices. That process starts with the intraoral scanner.
While the benefits are clear, the process still has user pitfalls that can negatively impact accuracy, fabrication and final fit. Every day, Glidewell's implant lab processes thousands of scans, and the same handful of preventable errors show up again and again. These errors trace back to the same mistakes: breakdowns in preparation, execution, or review that no level of scanning technology can compensate for.
The good news is that once doctors know what they are, these errors are completely preventable. This post will outline five of the most common intraoral scanning mistakes in implant dentistry, and what can be done to mitigate them.
For even greater depth on all things implant scanning, check out our free, downloadable e-book on implant scanning best practices.
Before reviewing the mistakes, it's important to understand the differences between scanning natural teeth and scanning implants:
Even minor inaccuracies in positional data when scanning implants can cascade into improper abutment seating, rotational misalignment, occlusal discrepancies, or poor interproximal contacts. Unlike tooth-supported restorations, implant restorations offer little forgiveness; the crown either fits the implant precisely, or it doesn't fit at all.
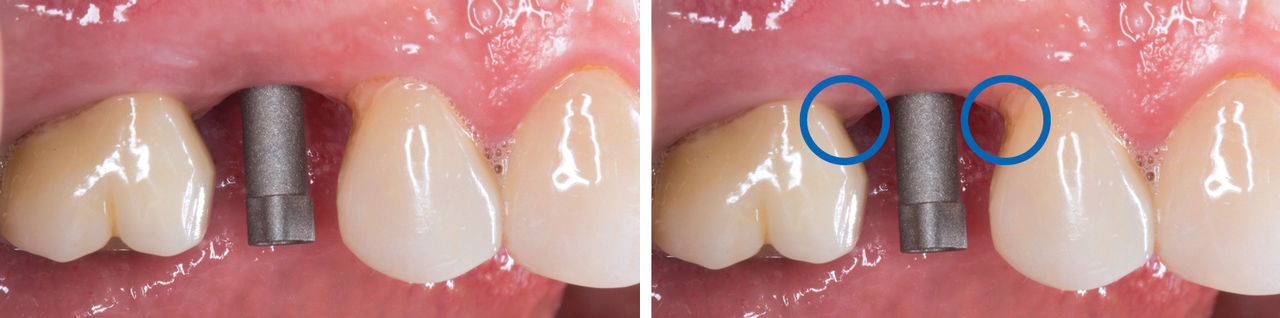
Pictured above is the ideal positioning and scan of a scanning abutment. Careful consideration of the relationship between the long axis of the implant and the adjacent contacts creates an intentional path of insertion to guide the lab.
Due to the smaller margin for error, the five mistakes outlined below matter more in implant cases than almost anywhere else in digital dentistry — starting with poor pre-scan preparation.
Inadequate tissue management, poor field isolation, or limited visibility before scanning sets up the entire workflow to fail, regardless of what happens next. A clean, dry field across the full scan area affects scanner accuracy and data stitching quality. Saliva, blood and debris on adjacent teeth are easy to overlook when scanning the implant site, but they introduce artifacts and stitching errors that compromise the final digital model. Similarly, an unclear path of draw or inadequate emergence profile makes accurate restoration design harder for the laboratory, even when the scan itself looks clean on screen.
Pro tip: Treat pre-scan preparation as part of the impression protocol, not just a preliminary step. Tissue management, field isolation and adjacent tooth cleaning should all become standard operating procedures.
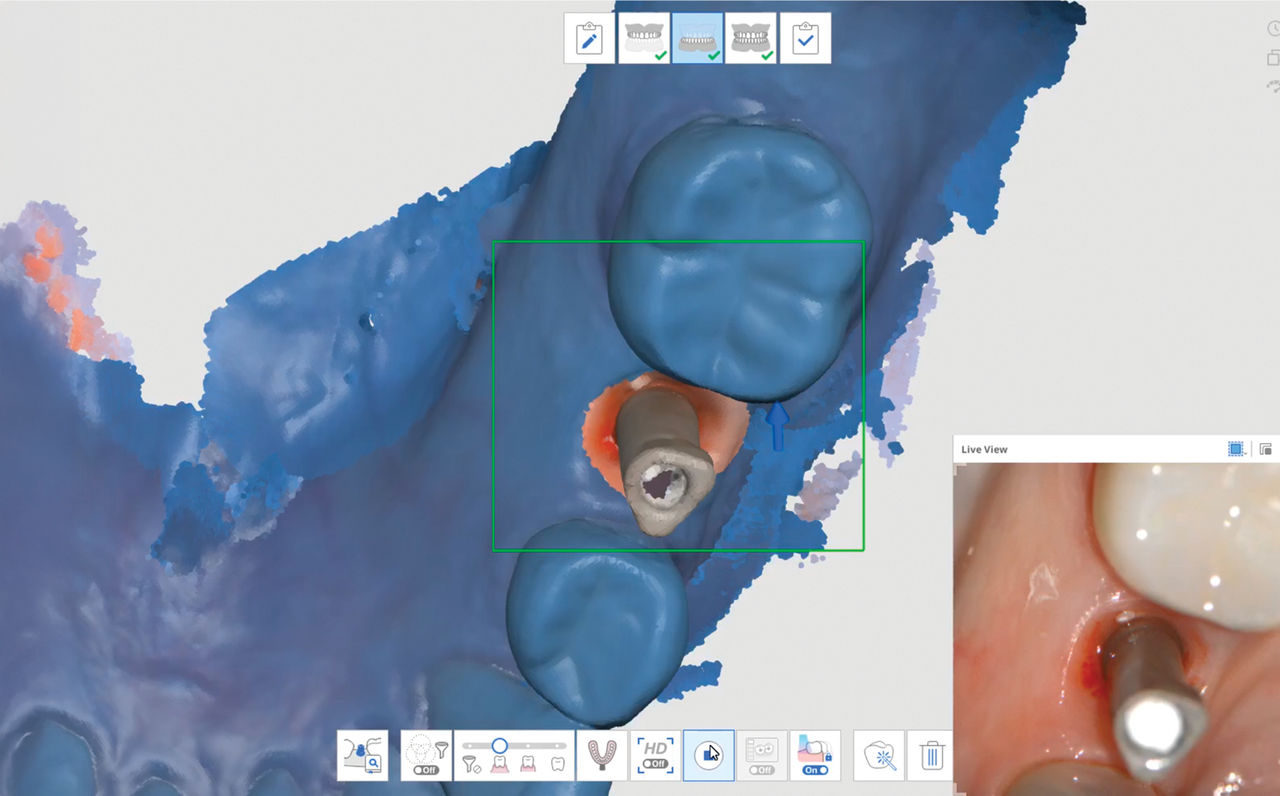
Missing or distorted scan body data is one of the most direct routes to a poorly fitting restoration. No matter the quality of the scan body, if it isn't fully captured from all critical angles, the positional data transmitted to the lab is compromised, an error that carries through the entire CAD/CAM design and fabrication process.
This can happen when the operator moves past the implant site too quickly, when soft tissue partially obscures the scan body, or when stitching artifacts around the implant create gaps in the data. The result often looks acceptable at a glance but falls apart when the lab attempts to seat the restoration in the digital model.
Pro tip: Begin scanning directly over the scan body and surrounding soft tissue before extending to adjacent teeth. Capturing implant-site data first reduces stitching distortion, and reviewing the scan carefully before submission catches problems while the patient is still chairside.
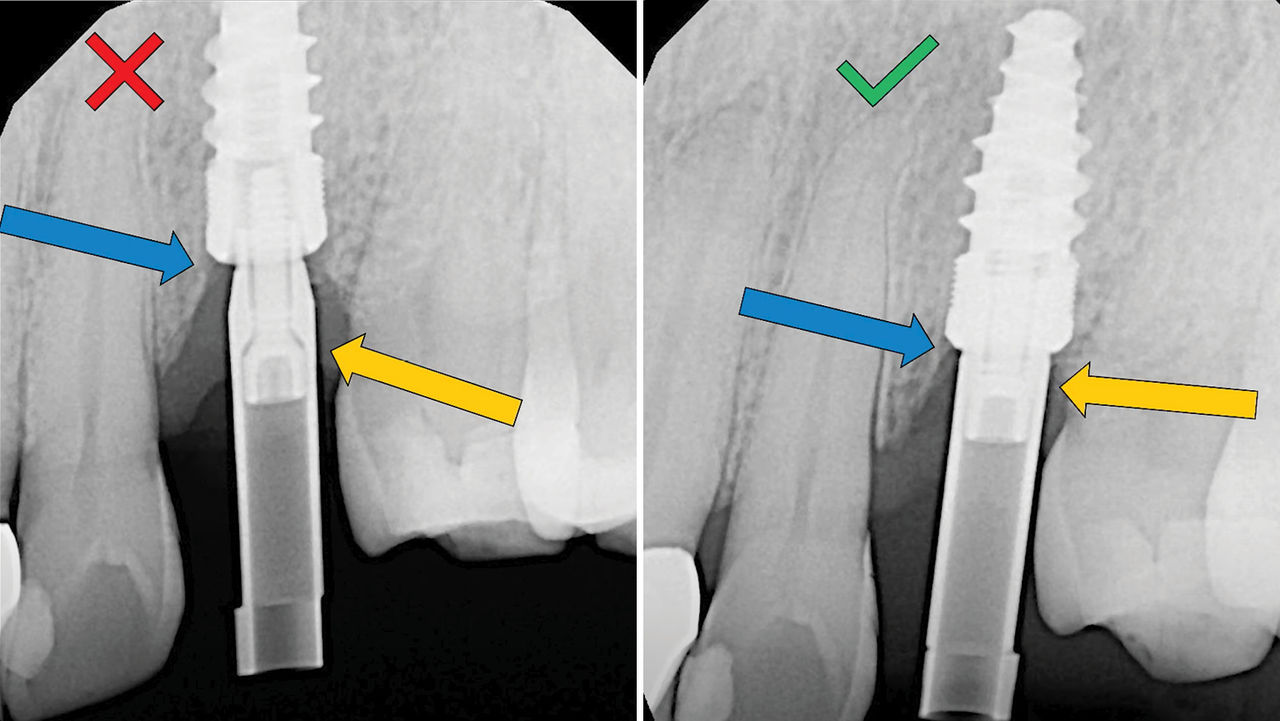
This one deserves its own entry because it's equally common and consequential. An incompletely seated scan body will result in a restoration that does not seat properly regardless of how technically excellent the scan itself is.
The challenge is that incomplete seating isn't always visible to the naked eye. The scan body may appear flush and stable while still transmitting positional data that places the implant in the wrong location within the digital model. That error doesn't become apparent until the restoration arrives and fails to seat properly.
Pro tip: Visual confirmation alone isn’t enough. Tactile confirmation and, when there's any uncertainty, a periapical radiograph before scanning eliminates this mistake almost entirely. It takes 60 seconds and prevents days of remake time.
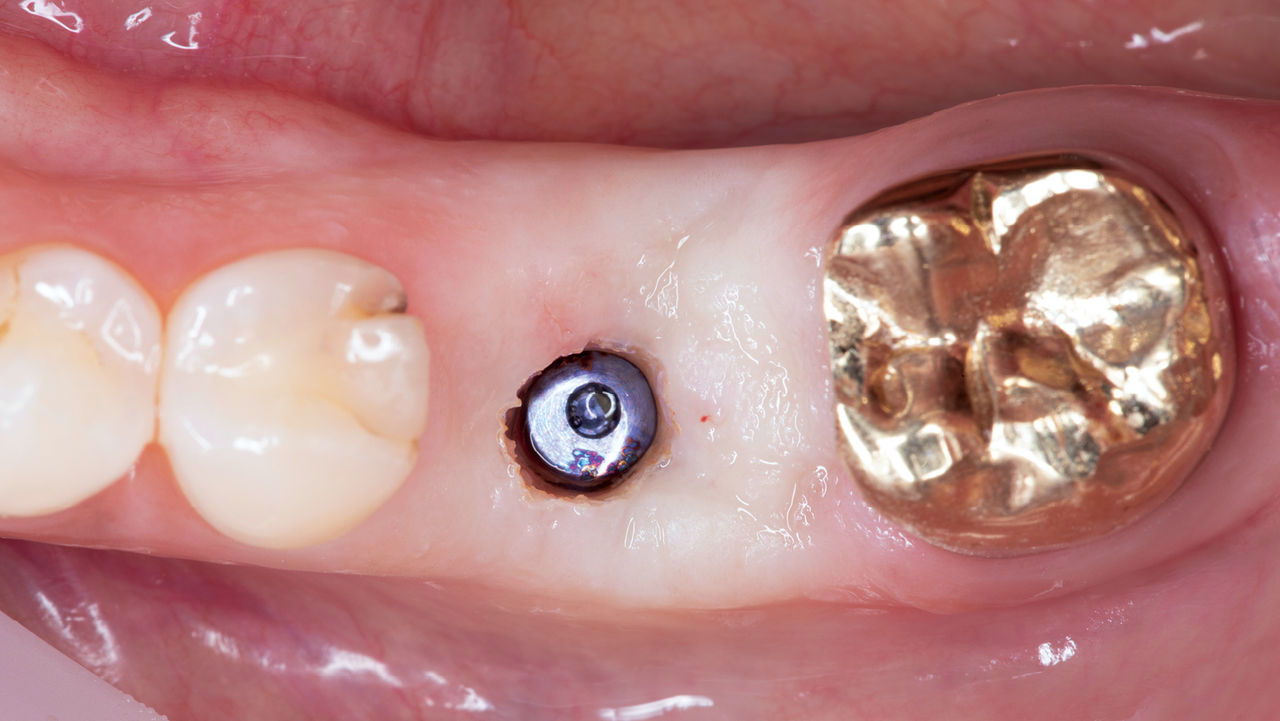
Tissue encroachment or movement during scanning is a subtle and frustrating problem because it can be difficult to identify in the final scan data. When soft tissue obscures critical areas around the scan body or implant site, the resulting model may have voids or distortions that compromise positional accuracy — even when the rest of the scan looks clean.
This is particularly common in subgingival cases, recently healed implant sites, or situations where tissue contours are still maturing. Soft tissue that shifts during scanning creates data inconsistencies that stitching algorithms cannot reliably resolve.
Pro tip: Verify tissue management before scanning and include a deliberate review of soft tissue contours around the implant site as part of the pre-submission check. If tissue capture looks incomplete or irregular, it should be addressed while the patient is still in the chair.
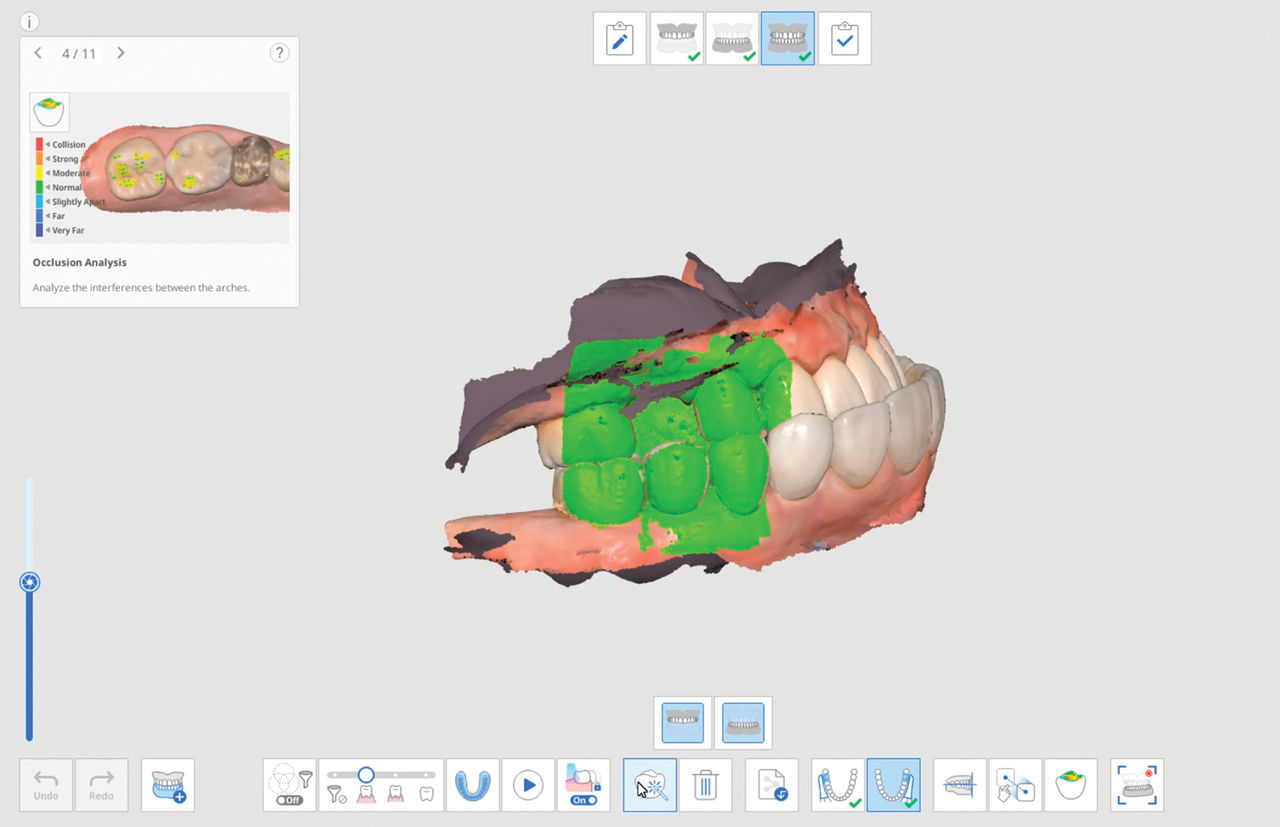
Incomplete occlusal records are among the most common issues dental laboratories encounter with digital implant cases, and one of the most direct contributors to restorations that require significant chairside adjustment.
Without a complete, artifact-free bite scan, the lab must make assumptions about contact points, occlusal relationships and articulation. Those assumptions, however educated, increase the probability that the final restoration will feel off — too tight, too open, or out of occlusion — when seated in the patient's mouth.
Pro tip: Treat the bite record and opposing arch scan with the same deliberateness you bring to the implant site. Review them specifically before submission. An incomplete or artifact-heavy bite record is one of the easiest reasons for a case to be kicked back, and it’s one of the easiest to prevent.
What makes this list both discouraging and encouraging is the same: None of these errors are caused by the technology. They're process failures, which means they're solvable with a consistent, well-defined scanning protocol and a disciplined review step before every submission.
The practices producing the most predictable implant-supported restorations aren't necessarily those with the most advanced intraoral scanners. They're the ones with the most repeatable workflows, and teams that understand what accurate scan data looks like from the laboratory's perspective. If you want to eliminate these mistakes from your implant practice, download Glidewell’s
free e-book that dives into every aspect of intraoral scanning. It covers pre-scan preparation, recommended scanning sequence, how to review scan data before submission, and direct insight from the lab on what makes a truly submittable digital impression.

Send blog-related questions and suggestions to hello@glidewell.com.
/GL-DB-6859919-080426-1.jpg/_jcr_content/renditions/thumb-jpeg-mobile-full.jpeg)

2201 Dupont Dr., Irvine, CA 92612
© 2026 Glidewell. All rights reserved.