2201 Dupont Dr., Irvine, CA 92612
© 2025 Glidewell. All rights reserved.
800-854-7256 USA
Discover the simplified workflow for the new BruxZir® Esthetic Implant Prosthesis.
When fully edentulous patients receive a fixed implant restoration, they expect a prosthesis that will last. Having to repair or replace a damaged appliance is frustrating to the patient and doctor alike — and costly to the practice. Since its release in 2013, the BruxZir® Implant Prosthesis has been my restoration of choice for full-arch dental implant cases. Constructed from 100% solid zirconia, the BruxZir Implant Prosthesis has proven itself a lifelike, more durable alternative to the screw-retained acrylic hybrid denture. Dealing with disappointed patients who return to the office with a damaged restoration has become a thing of the past in my practice.
Now, with the recent launch of the BruxZir Esthetic Implant Prosthesis, I have the option of offering my edentulous patients a full-arch restoration that pairs premium esthetics with long-term durability. This new formulation is milled from a block of BruxZir Esthetic Zirconia — without the use of veneering material — affording clinicians confidence that the restoration will serve the patient well without succumbing to chips, stains or fractures. The BruxZir Esthetic Implant Prosthesis exhibits optimized translucency and exceptional gingival anatomy, making it ideal for patients with high esthetic expectations — at nearly half the price I’ve been charged by boutique labs for zirconia full-arch dental implant restorations. At the same time, BruxZir Esthetic Zirconia boasts flexural strength of 870 MPa, with a monolithic construction that avoids the premature wear that I’ve seen compromise the layered porcelain or acrylic used in comparable implant solutions.
The original BruxZir Implant Prosthesis, which offers maximum strength of 1,150 MPa, remains my recommended restorative solution for patients with a strong bite or parafunctional habits. Whichever formulation best suits the individual patient, the restoration is now backed by the new BruxZir Lifetime Warranty from Glidewell, providing the clinician with confidence that the prosthesis will last for the life of the patient.
In the following case report, we’ll look at the clinical workflow for delivering a BruxZir Esthetic Implant Prosthesis, with a focus on the new and improved restorative protocol, which was recently streamlined to minimize setup try-ins, save chair time, and provide patients with the ideal, long-lasting outcome they expect when they invest in this form of treatment.
A female patient presented with terminal dentition resulting from severe caries. The patient was self-conscious about her smile and desired a restoration with maximum durability and the most beautiful esthetics possible. Intraoral and radiographic examination revealed adequate bone volume to receive fixed full-arch dental implant restorations. The patient accepted a treatment plan in which implants would be placed to support full-arch restorations fabricated from BruxZir Esthetic Zirconia.
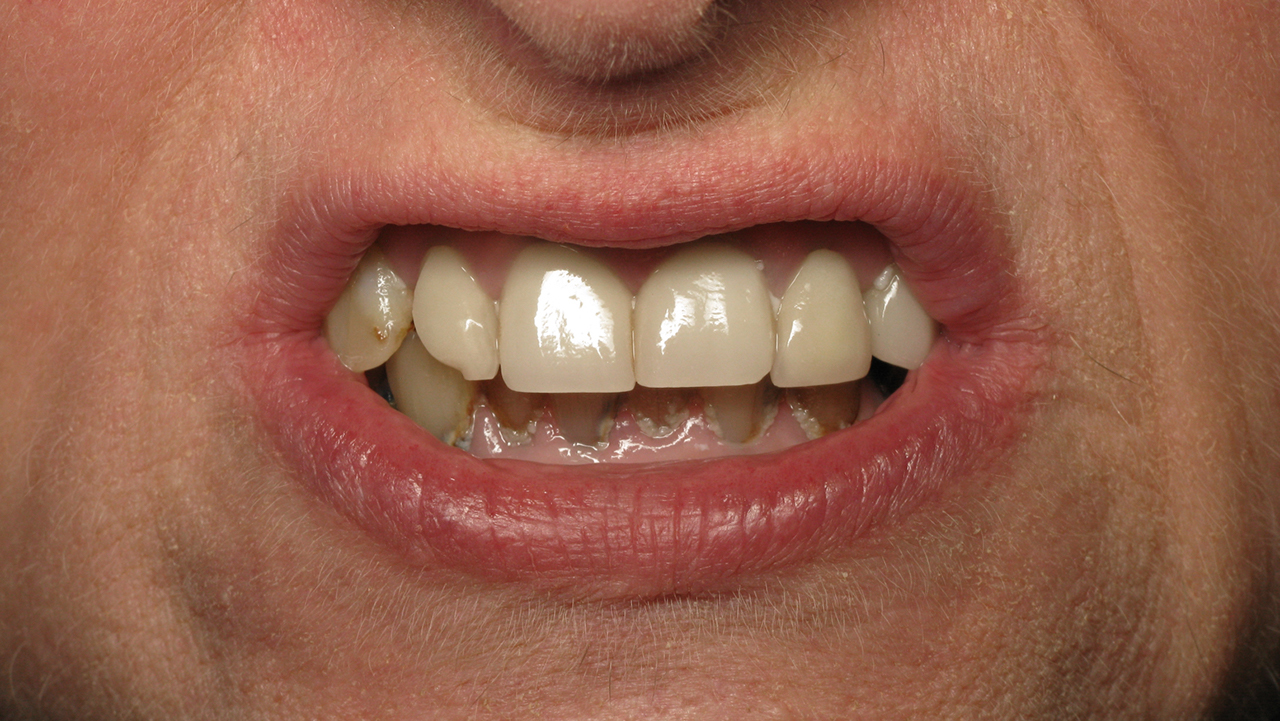
Preoperative condition of the patient, who presented with terminal dentition. The patient, who was uncomfortable with the appearance of her smile, desired a fixed implant restoration with premium esthetics. The BruxZir Esthetic Implant Prosthesis was selected for the upper and lower full-arch restorations.
At the surgical appointment, her remaining teeth were extracted. Great care was taken to extract the teeth atraumatically, preserving the buccal plate and allowing for the immediate placement of six Hahn™ Tapered Implants in each arch. The implants were positioned within the available bone around the length of the arch to maximize the anterior-posterior spread, allowing for the eventual delivery of fixed full-arch restorations. The pronounced thread design of the Hahn Tapered Implant helped keep the implants engaged with the buccal bone during placement, maintaining the proper distance from the facial aspect while situating the screw access holes behind the incisal edges of the eventual restoration.
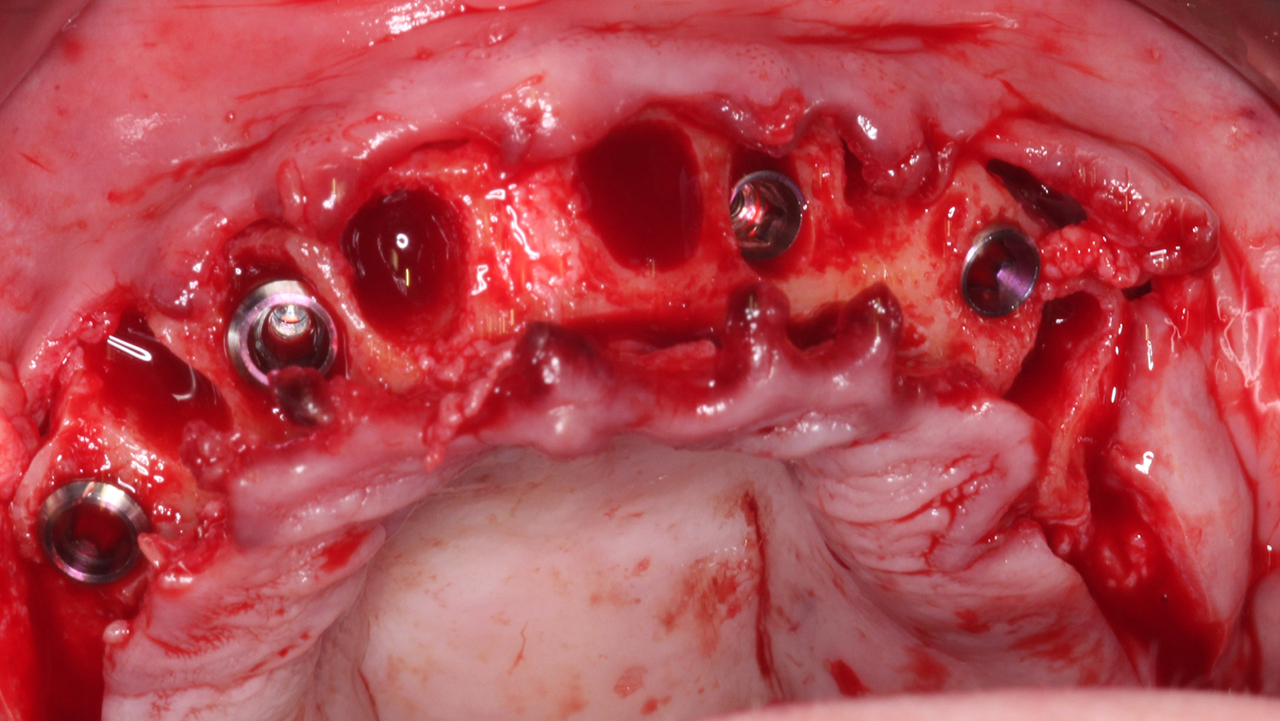
After extracting the patient’s teeth, Hahn Tapered Implants were immediately placed into extraction sockets and achieved excellent initial stability. The implants were positioned against the palatal walls of the extraction sockets, which is an important technique when immediately placing implants. The extraction sockets and the gaps between the implants and the walls of the osteotomies were filled with Newport Biologics™ Mineralized Cortico/Cancellous Allograft Blend.
Multi-unit abutments were connected to the implants, creating a level restorative platform for the restoration. Having achieved sufficient primary stability, immediate dentures were modified chairside to serve as fixed temporary prostheses to serve the patient during the healing phase of treatment. First, temporary cylinders were connected to the multi-unit abutments and the immediate dentures were tried in. Then, burs were used to create holes for the temporary cylinders, which were used to attach the fixed provisional dentures to the implants. The immediate dentures were seated over the temporary cylinders in the patient’s mouth. Quick Up, a self-curing denture relining material, was used to affix the temporary cylinders to the prostheses.
Next, the temporary cylinders were trimmed to rest beneath the occlusal plane. The appliances were seated over the Hahn Multi-Unit Abutments, the prosthetic screws were tightened, and the screw access holes were sealed with Capture® VPS Impression Material. The patient was extremely pleased to receive fixed provisional dentures on the day of surgery, which immediately restored function along with her personal confidence.
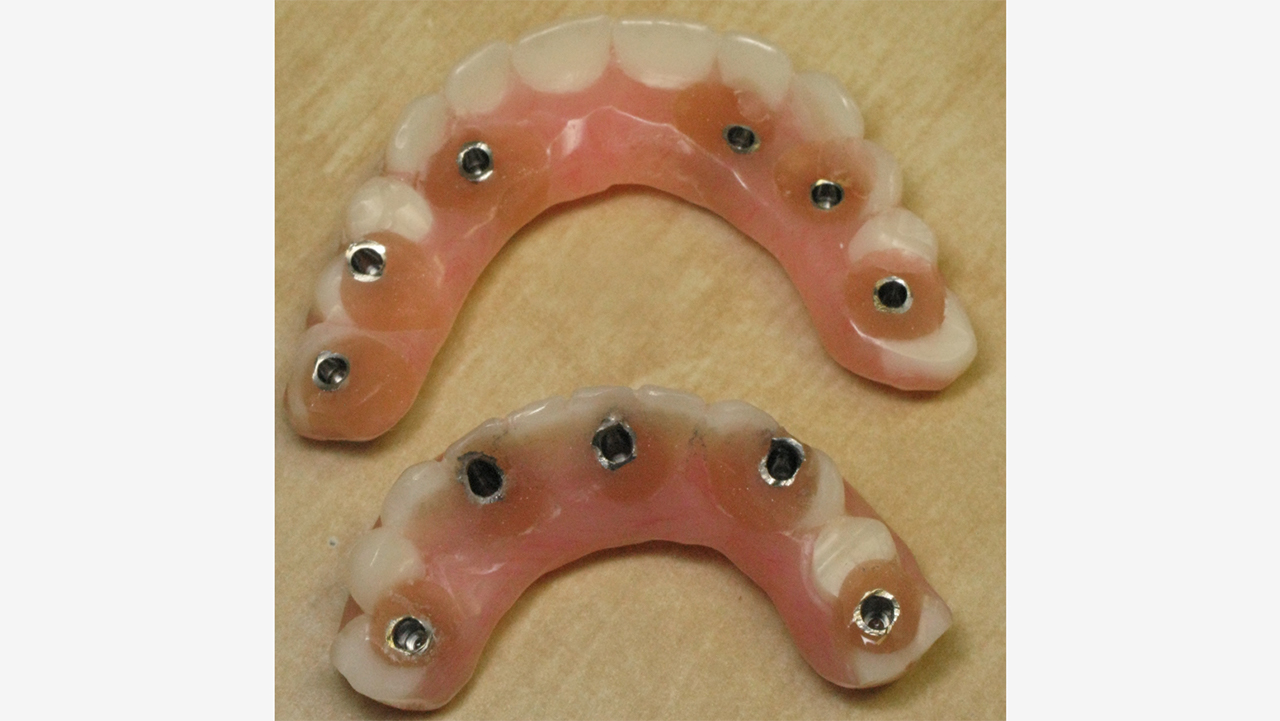
Immediate dentures were modified chairside to serve as fixed temporary prostheses. The process involved picking up temporary cylinders in the dentures and trimming them to reside beneath the occlusal surfaces. After trimming, polishing and relining the prostheses, the temporary dentures were ready for delivery.
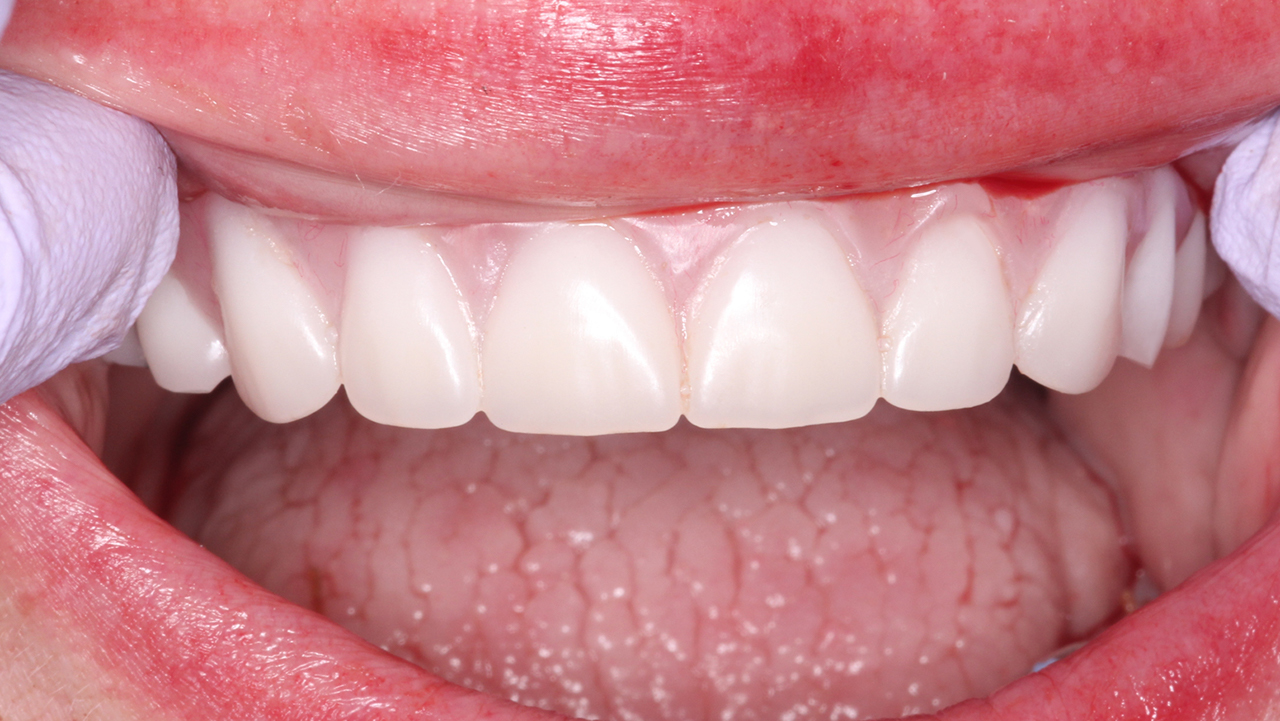
The converted immediate dentures were delivered on the day of surgery, satisfying the patient’s desire to leave the surgical appointment with fixed teeth.
For the restoration, we followed the streamlined, new and improved step-by-step clinical workflow for the BruxZir Implant Prosthesis and BruxZir Esthetic Implant Prosthesis. The process was refined based on feedback from numerous dentists and years of clinical research & development. Note that the clinician is provided with detailed clinical checklists and instructions for each appointment, and how-to videos are available for key steps in the process. To learn more and access the clinical guides, visit glidewelldental.com/bip or call 800-854-7256.
After five months of healing, the patient returned and VPS impressions were made to begin the restorative process. Open-tray impression copings were connected to the multi-unit abutments and periapical radiographs were taken to confirm complete seating. In addition to preliminary impressions, the lab requests a bite registration, a smile photo of the patient wearing their existing denture or prosthesis, and a duplicate of the patient’s existing denture or prosthesis to help with the design of the restorations. The denture duplication process typically involves the use of a flask and VPS putty. Because the patient had functioned with her temporary dentures for months, they served as an excellent starting point for the design of the restorations.
At the next appointment, the lab-provided implant verification jigs (IVJs) were connected to the maxillary and mandibular multi-unit abutments. By precisely capturing the inter-implant positions in the final impressions, the IVJs would help ensure a passive fit for the full-arch BruxZir restorations. After luting the individual sections of the IVJs together and injecting impression material around the IVJs, the final impressions were made from Capture VPS Impression Material.
At the same appointment, the wax rims were seated and the checklist provided by the lab was completed, including an evaluation of the midline, incisal edge position, lip support, occlusal plane, vertical dimension of occlusion (VDO) and phonetics. After making the necessary adjustments to the wax rims, a bite registration was made. The wax rim was then removed and the case was returned to the lab, including the models, wax rims, final impressions and bite registration.
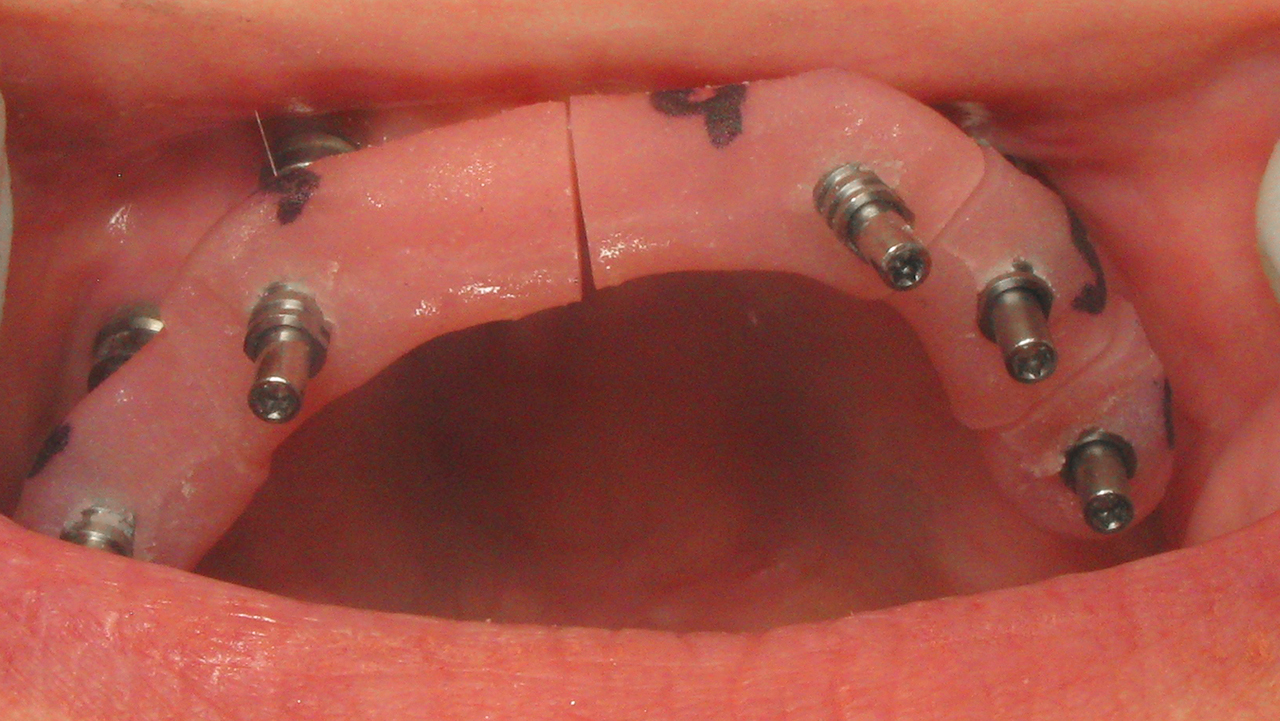
The lab-provided implant verification jigs, which capture the precise inter-implant positions of the implants in the final impression, thus ensuring a passive fit of the restoration, were attached to the multi-unit abutments.
The lab fabricated wax setups for try-in. With the setups in place, the midline, teeth arrangement, incisal edge positions, lip support, esthetics, phonetics and other design elements were verified, and minimal adjustments were required. The accuracy of the IVJ impressions, the use of multi-unit abutments, and the denture duplicates submitted to the lab all contributed to the smooth wax setup appointment. The wax setups were then returned to the lab, and the minor adjustments to the setups were noted on the Rx along with the gingival shade selection.
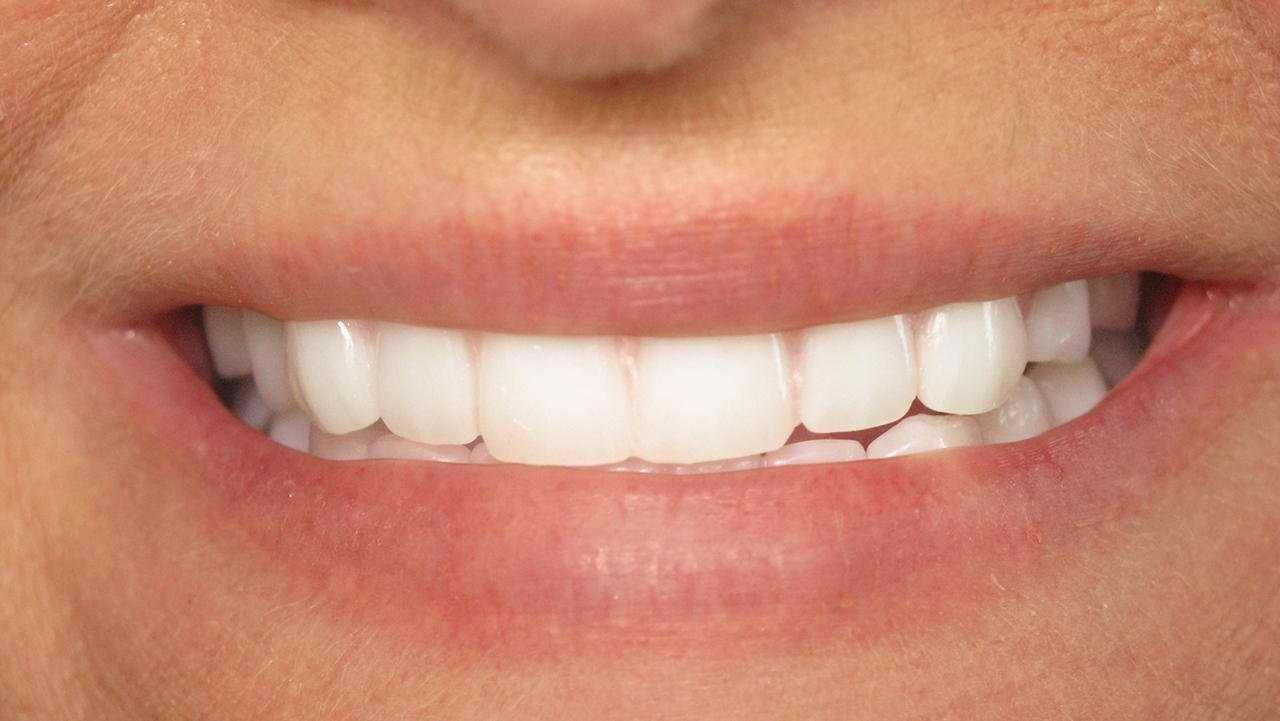
The wax setups were tried in and only required minor adjustments. With the prosthetic designs approved, the case was returned to the lab.
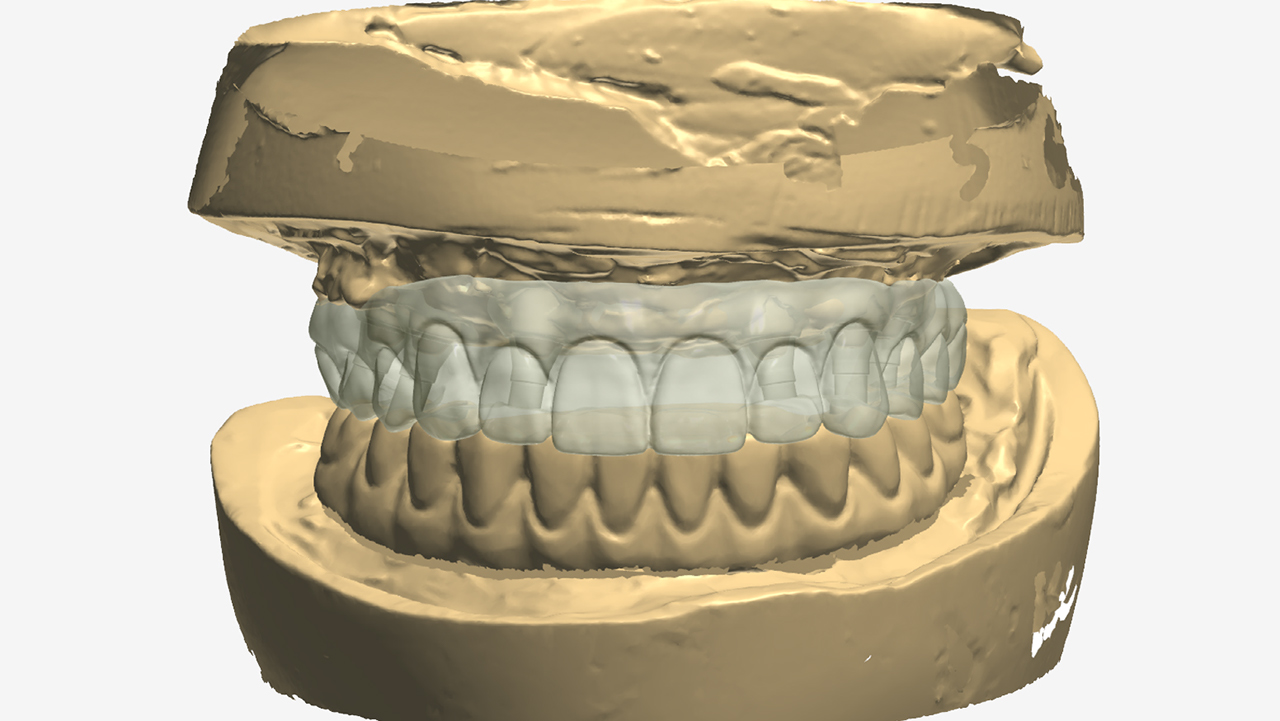
The wax setups and master casts were scanned by a lab technician, and dental CAD software was utilized to create the designs for the BruxZir Esthetic Implant Prostheses.
For the next step in the process, the lab 3D-prints a provisional implant prosthesis, which is easily adjusted to accommodate additive or subtractive alterations. The provisional implant prosthesis is essential to finalizing the prosthetic design and offers the opportunity to fine-tune the occlusion, ensure a cleansable intaglio surface, and make any other final adjustments before the restoration is fabricated from solid zirconia.
Provisional implant prostheses were 3D-printed as precise replicas of the approved prosthetic designs. After this point, only minor alterations are typically required, and modifications made to the provisional are carried over to the final restoration with precision via the CAD/CAM copy-mill process.
The provisional implant prostheses were tried in, and the patient wore the provisionals for a trial period of two weeks to confirm the designs during real-life function. After one week, the doctor and patient alike were satisfied with the esthetics, phonetics and function of the provisionals, and only minor occlusal alterations were required. The opportunity to fine-tune occlusion and esthetics with the provisional is a significant advantage, as the denture teeth of a wax setup lack the stability to precisely capture occlusal adjustments.
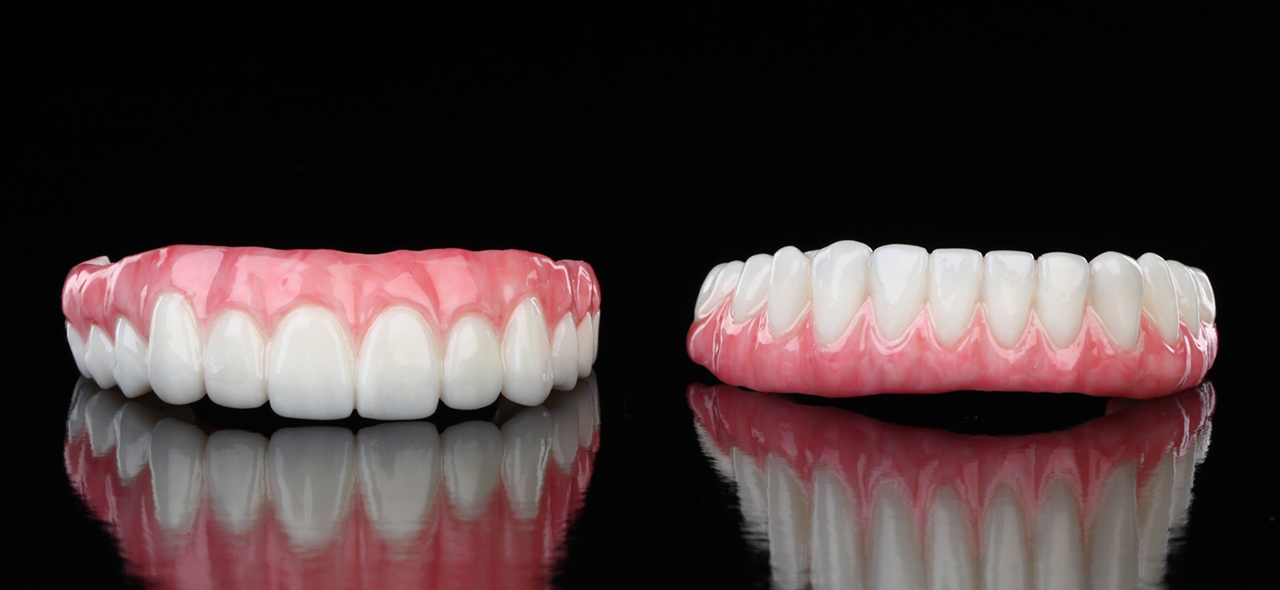
After patient approval of the wax setups, the patient wore the provisional implant prostheses to verify the prosthetic design during day-to-day function. The final restorations were then milled from 100% BruxZir Esthetic Zirconia.
The case was returned to the lab, and a technician scanned the provisional implant prostheses so the occlusal alterations could be incorporated into the CAD fabrication of the final prostheses. The restorations were milled from BruxZir Esthetic Zirconia, affording lifelike translucency and gingival anatomy without the need for veneering material. At the final delivery appointment, the restorations required no adjustments due to the multiple phases of design confirmation throughout the restorative process. And with highly durable restorations in place backed by the BruxZir Lifetime Warranty from Glidewell, the patient and doctor could rest assured that these stunning results will last.
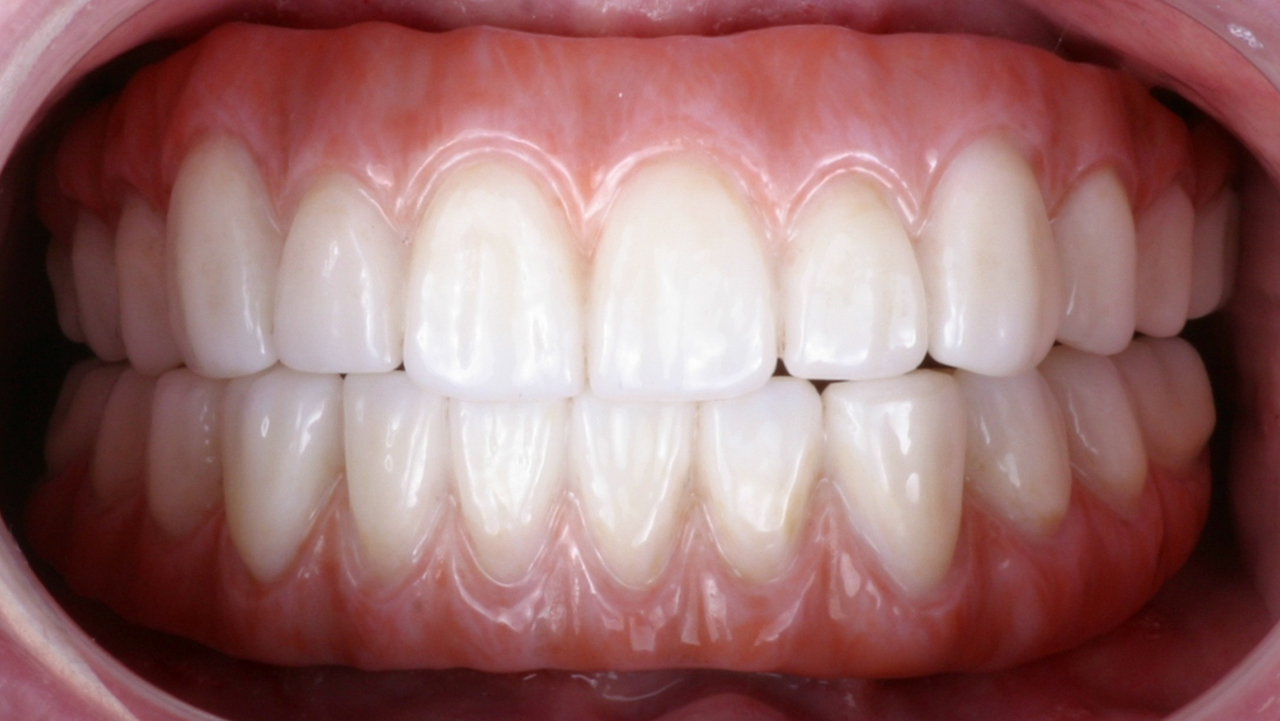
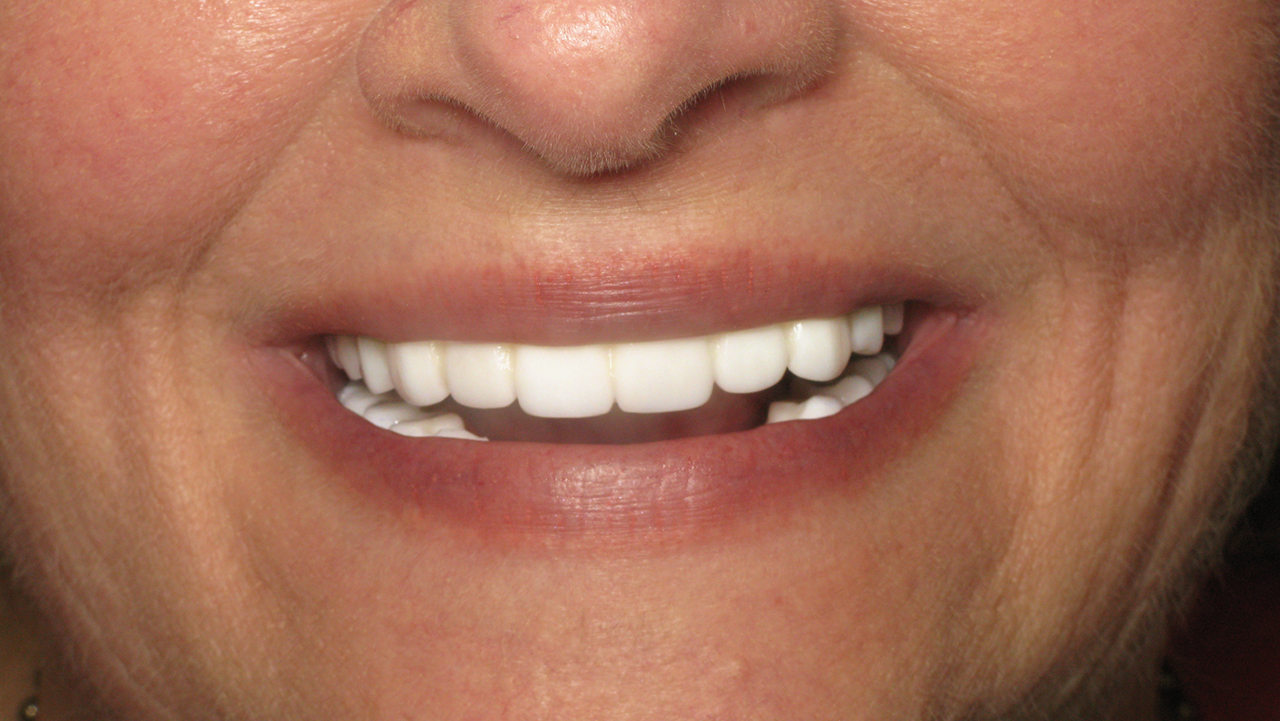
The BruxZir Esthetic Implant Prostheses restored form, function and quality of life, with a durability that avoids the need for repairs or replacement. The patient was extremely satisfied with the beautiful esthetics of the restorations and the confidence that comes with knowing they are warrantied for life.
Send blog-related questions and suggestions to hello@glidewell.com.
