Dental CE
- Michael DiTolla, DDS, FAGD: “Material Selection for Crown and Bridge”
Related Dental Article
- Justin Chi, DDS, CDT: “Recommended Bonding Protocol for BruxZir® Esthetic Veneers”
800-854-7256 USA
Follow these steps to get the best results for your zirconia crowns.

Zirconia crowns offer excellent performance and reliability, which are the prime reasons for the monolithic material’s rapid adoption in dentistry. Dentists across the U.S. have turned to zirconia crowns at an astounding rate, with tens of millions delivered since monolithic zirconia first hit the market just over a decade ago. This swift acceptance marks a significant restorative material shift in dentistry. The many monolithic zirconia brands, most notably BruxZir® Zirconia, have resolutely overcome the dominance of PFMs and full-cast crowns in dentistry — a great boon for patients who want strong, tooth-colored restorations without metal and for clinicians looking to satisfy those demands.
As more dentists turn to zirconia crowns, here is a reminder of the recommended chairside protocol for securing lasting results.
Monolithic zirconia’s unique characteristics allow for minimal preparation. For the clinician, this means that the material can be used in a wider array of indications.
BruxZir Zirconia crowns were developed by Glidewell to provide a tooth-colored alternative to PFMs and full-cast crowns that still maintained the versatility, simple workflow and performance characteristics of their metal-based predecessors. As a result, the preparation requirements of the BruxZir brand of materials are very clinician-friendly, and set up the opportunity for dentists to preserve more healthy dentition when providing treatment.
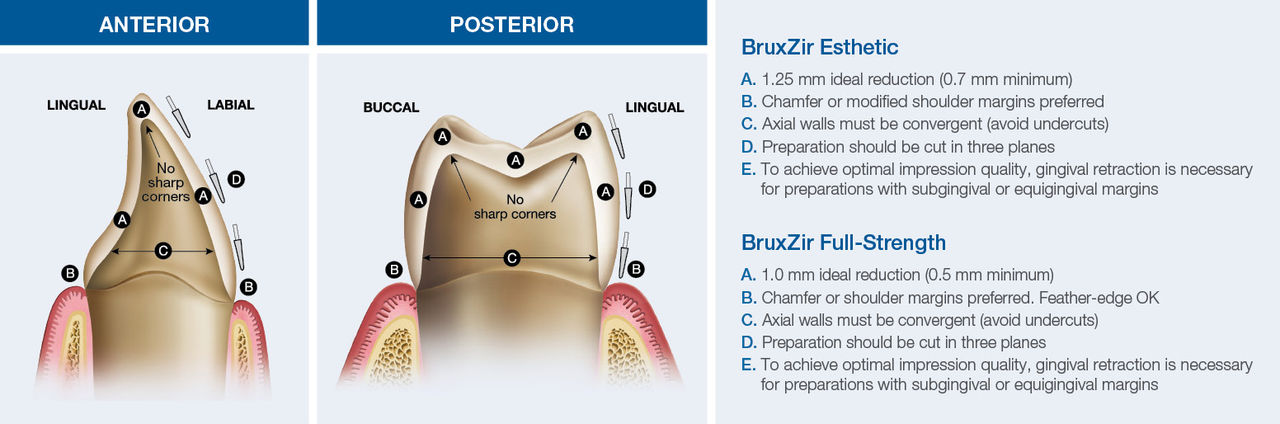
BruxZir Full-Strength crowns only require 0.5 mm of reduction, though 1.0 mm of reduction is ideal. BruxZir Esthetic crowns require 0.7 mm of reduction, though 1.25 mm of reduction is ideal. Both BruxZir formulations provide high-performing strength even when prepared minimally.
BruxZir Zirconia crowns allow for minimally prepared situations.
For both formulations, the margins should be prepared with either chamfer or shoulder design. Further, the axial walls must be convergent and undercuts must be avoided. And to achieve optimal impression quality, gingival retraction is recommended unless the margins are supragingival.
BruxZir Zirconia crowns support multiple cementation methods, with either luting or bonding indicated. With zirconia restorations, it is simple to achieve treatment success regardless of your preferred cementation protocol.
It is important to note that all zirconia crowns require a special decontamination phase after try-in. When a restoration is tried in the mouth, it becomes contaminated with salivary phosphates that have a very high affinity for zirconia. These phosphate groups must be cleaned off in order to establish a strong cementation between the tooth prep and the restoration. If the decontamination is not performed, the cementation is much more likely to fail.
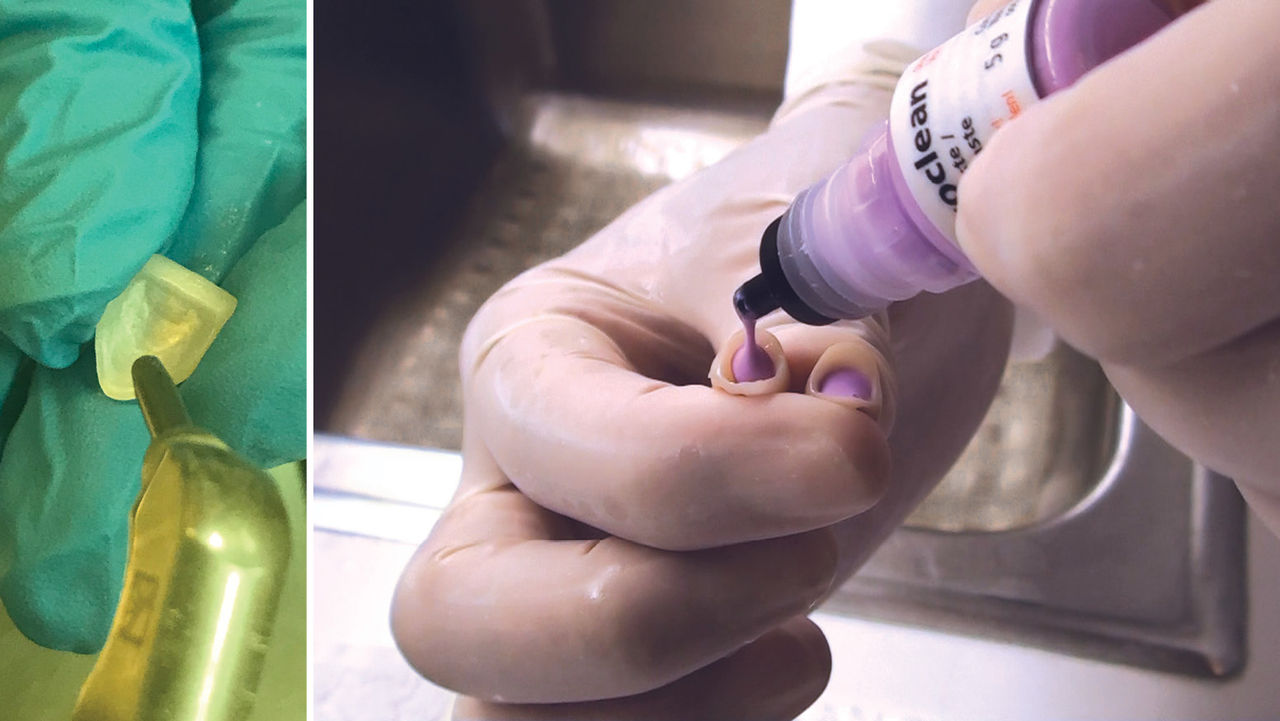
All zirconia crowns require a decontamination phase after try-in to rid the restorations of excess salivary phosphates, with clinicians able to choose from multiple decontamination protocols.
The protocol for luting zirconia crowns is fairly straightforward. As long as clinicians employ one of the recommended decontamination processes, cementation should create predictable and lasting results. The zirconia crown luting protocol is as follows:
Step 1. Try In Crown: Evaluate fit and make adjustments if necessary.
Step 2. Decontaminate Crown: Clean internal surface of restoration using one of the following options.
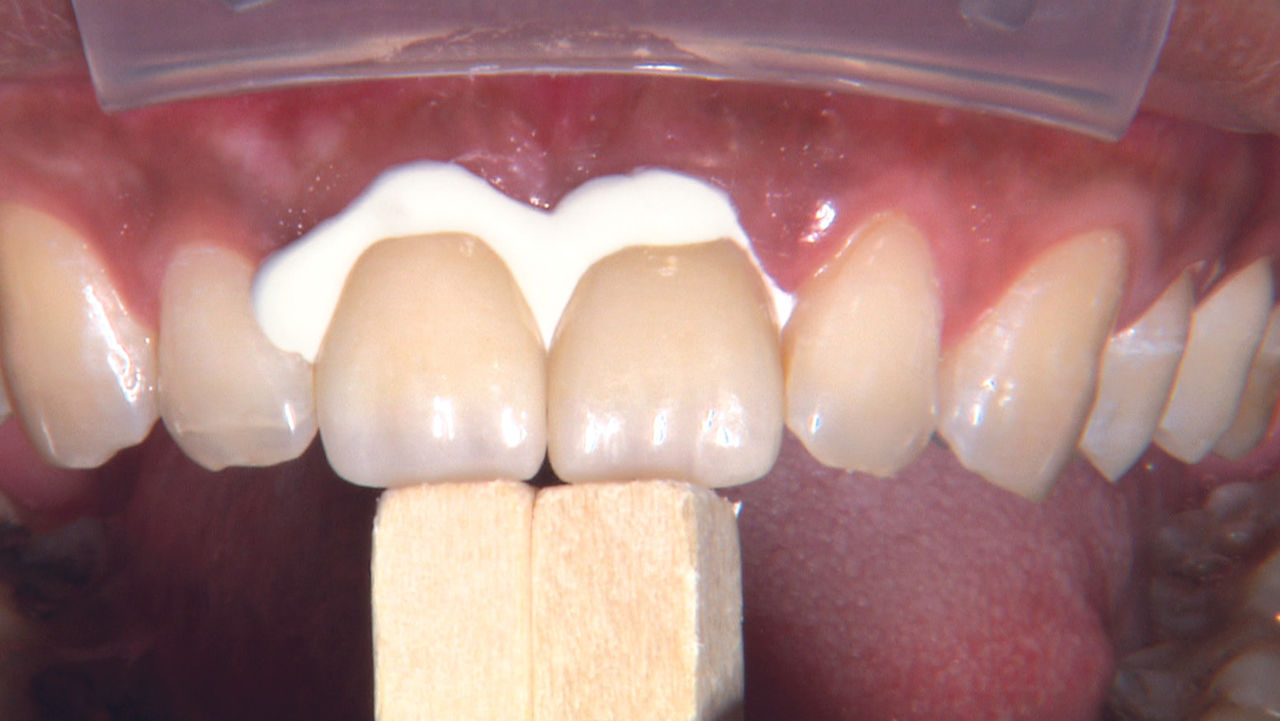
Step 3. Lute Crown: Follow the cement manufacturer’s instructions.
Dentists can choose between luting and bonding depending on what is best for the clinical situation at hand.
Should the clinician choose to use a bonding agent for their zirconia crowns, there is one additional step compared to the luting protocol. Considering that the strength of the bond between zirconia and tooth structure is determined by a combination of micromechanical retention and chemical bonding, it is important to ensure that the intaglio surface of the zirconia crown is both free of contaminants and primed for the bonding agent. Thus, application of an MDP-containing primer is required after the decontamination phase to prepare the zirconia surface for bonding. The zirconia crown bonding protocol is as follows:
Step 1. Try In Crown: Evaluate fit and make adjustments if necessary.
Step 2. Decontaminate Crown: Clean internal surface of restoration using one of the following options.
Step 3. Apply Primer to Crown: Prime internal surface of restoration using one of the following MDP-containing primers.
Step 4. Bond Crown: Follow bonding agent manufacturer’s instructions.
With monolithic zirconia, clinicians can choose their preferred workflow from multiple approved chairside protocols to achieve lasting care. This flexibility is yet another benefit of zirconia crowns and bridges, making them an even more attractive solution to dentists across the U.S.
Dental CE
Related Dental Article
All third-party trademarks are property of their respective owners.
Send blog-related questions and suggestions to hello@glidewell.com.


2201 Dupont Dr., Irvine, CA 92612
© 2025 Glidewell. All rights reserved.