Predictable Cementation for Monolithic Zirconia Crowns
Of the 1.39 million restorations Glidewell Laboratories made in 2014, reportedly more than 60% were full-contour zirconia (BruxZir® Solid Zirconia).1 This is compelling evidence that dentists are relying heavily on these materials — with good reason, as this method of treatment provides both simplicity and strength. Despite objections from some about the esthetics of full-contour (also referred to as monolithic) zirconia crowns, the truth is that a capable lab technician can use stain and glaze techniques to create very good posterior esthetics. Many dentists are now realizing that in cases where they can create a prep with good resistance and retention form (that isn’t heavily tapered and that provides a good amount of tooth structure), a very simple restoration can be placed that will serve the patient well.
Of course, much of the simplicity in placing a full-contour zirconia crown or other high-strength metal oxide materials (including bilayer restorations that utilize a core with a compatible layering porcelain) is the ability to use nonresin traditional/conventional cements; glass ionomers (GI) (such as GC Fuji II® [GC America; Alsip, Ill.]); resin-modified (RM) GI cements (such as RelyX™ Luting Plus [3M™ ESPE™; St. Paul, Minn.]); or an aluminate-based cement (Ceramir® [Doxa Dental; Newport Beach, Calif.]). By taking advantage of the ability to use conventional nonresin cement, and leaving adhesive bonding for cases that lack resistance and retention form, clinicians can complete the seating process quickly and effectively.
DENTISTS' GO-TO MATERIAL FOR "TRADITIONAL" CEMENTATION
When selecting material for traditional (or “conventional”) cementation, dentists have for many years favored RMGI cements.2,3,4 A 2009 survey2 found that RMGIs were the most routinely used cement for 62% of survey respondents. There are several factors that help explain the popularity of these cements: Postoperative sensitivity is very rare; they possess the ability to chemically bond with tooth structure; and they provide one of the signature benefits of GIs, the release of fluoride ions.2 An RMGI can be used for monolithic zirconia restorations and also for bilayered restorations using porcelain over a zirconia core; and, in addition, an RMGI can be used for cementation of PFMs and all-metal restorations.5
First introduced in the 1980s as a hybrid of resin luting agents and traditional GI cements, RMGIs successfully addressed the shortcomings of GI cements — specifically their high solubility and low strength — while still providing fluoride release.5,6 Today, after so many years in use and with the development of a long clinical track record, many dentists now feel a high comfort level using these luting materials.2
One often-noted shortcoming of RMGIs has been difficulty removing excess material. The materials undergo a snap set, and if excess material is not cleaned away very quickly during this stage, it can be very difficult to remove. Removal must also be performed very carefully in order to avoid pulling material out from the margins of the restoration.4,5 If the early removal window is missed, the dentist risks damaging tissue while trying to remove the material in a more set stage; this can, in turn, damage the cement margin via exposure to blood and saliva, thereby reducing bond strength.4 An additional challenge in this area is that the working times for these materials can vary significantly, so dentists must always pay close attention to the instructions and not rely on a timing routine developed with another RMGI cement.5
RMGI materials can also vary in their mixing techniques, with different formulations including paste/pastes and powder/liquids.7 As with any material that is mixed before use, dentists and their staff members must pay very careful attention to using the proper ratios and technique.
Improvements to an Established Material
Recent improvements in RMGIs are designed to address the few drawbacks of the materials and make them even simpler to use. One such example can be seen with RelyX Luting Plus. This paste/paste material is itself an improvement of the original RelyX Luting cement that was a powder/liquid system originally made available in a clicker dispenser. The clicker dispenser was developed to ensure that the correct ratios of materials were dispensed. The separately dispensed base and catalyst then required hand mixing for 20 seconds before use, with a working time of 2.5 minutes. More recently, the material has become available in an automix dispenser, with base and catalyst pastes that are mixed together in the tip as the material is being extruded. This allows the dentist to dispense the cement directly into a restoration.
Perhaps more notably, this improved RMGI material has an option for tack-light-curing, the first RMGI cement with this capability. With the addition of a photo initiator, the clinician can light-cure excess material for 5 seconds after a restoration is seated; in this way, the cement reaches a gel stage that can then be easily cleaned away. For many dentists, this is far preferable to waiting the 2–3 minutes for the self-cure gel phase and risking missing the window of time for cleanup. A field evaluation has shown that the vast majority of users agree that the tack-cure ability makes removal of excess material faster and easier.8
The chemistry of this material results in two setting reactions: an acid-base reaction between the glass and the polycarboxylic acid, and a free-radical polymerization of the methacrylate polymer and hydroxyethyl methacrylate. It is the methacrylate reaction that enables the high strength and reduced solubility, both qualities that are typical of RMGI cements.
The following case will demonstrate the simple use of this cement in a full-contour zirconia crown case.
CASE REPORT
Diagnosis and Treatment Planning
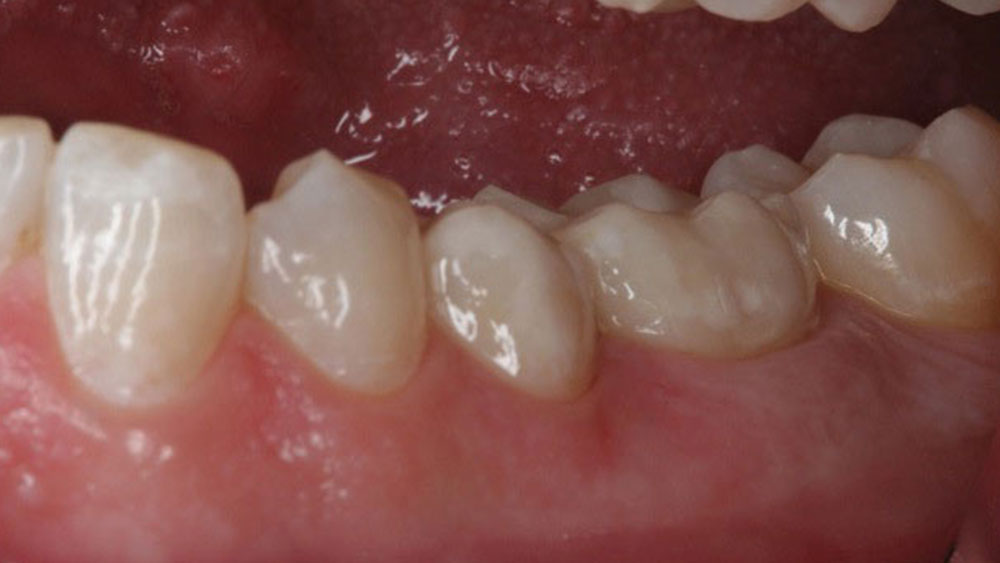
A 35-year-old female presented to our office. Root canals had been performed on teeth #19 and #20 (Fig. 1) and her teeth showed overall signs of wear. The patient had a history of breaking and chipping teeth, and stated that she felt she was “rough on her teeth.”
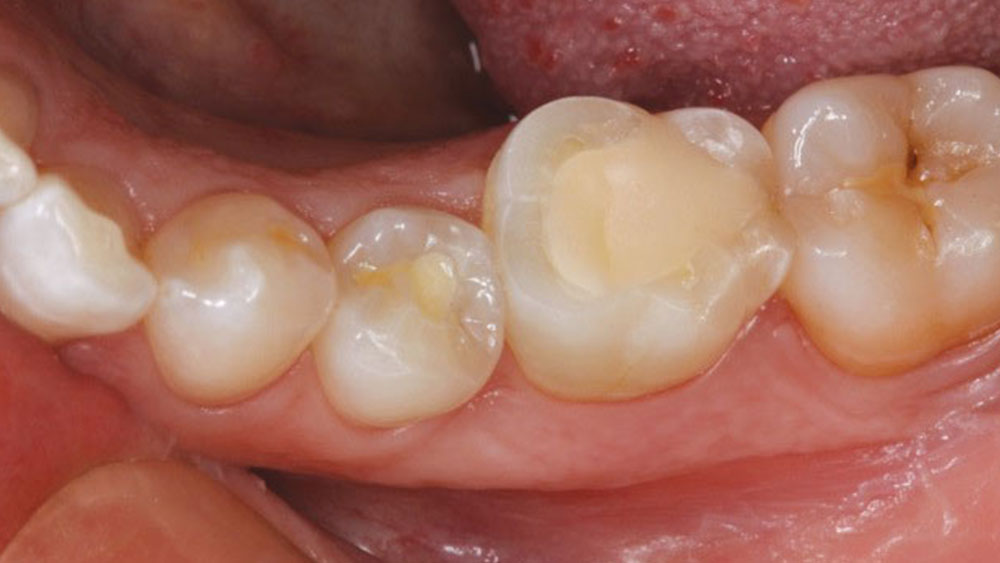
Figure 1: Teeth #19 and #20 following endodontic treatment and core buildup.
When discussing restorative options, the patient stated she did not want gold crowns, but still wanted something that she couldn’t break. She agreed to proceed with treatment of monolithic full-coverage zirconia crowns.
Clinical Protocol
Local anesthesia (4% Citnest Plain, one carpule [DENTSPLY Pharmaceutical; York, Pa.] and 2% Lidocaine 1:100,000 epi, one carpule [Henry Schein; Melville, N.Y.]) was administered and the preparations were done using a Brasseler USA® No. 8856L 018 bur (Brasseler USA; Savannah, Ga.) (Fig. 2). A vinyl polysiloxane impression (Imprint™ 3 [3M ESPE]) was taken and then temporary crowns were placed. The case was then sent to the dental laboratory team along with shade tab photographs to communicate the desired color and characterization. The lab team scanned the impression and digitally designed the crowns. After milling the restorations, they were stained and glazed (Figs. 3, 4). After completion of all lab steps, the case was returned to our dental office.
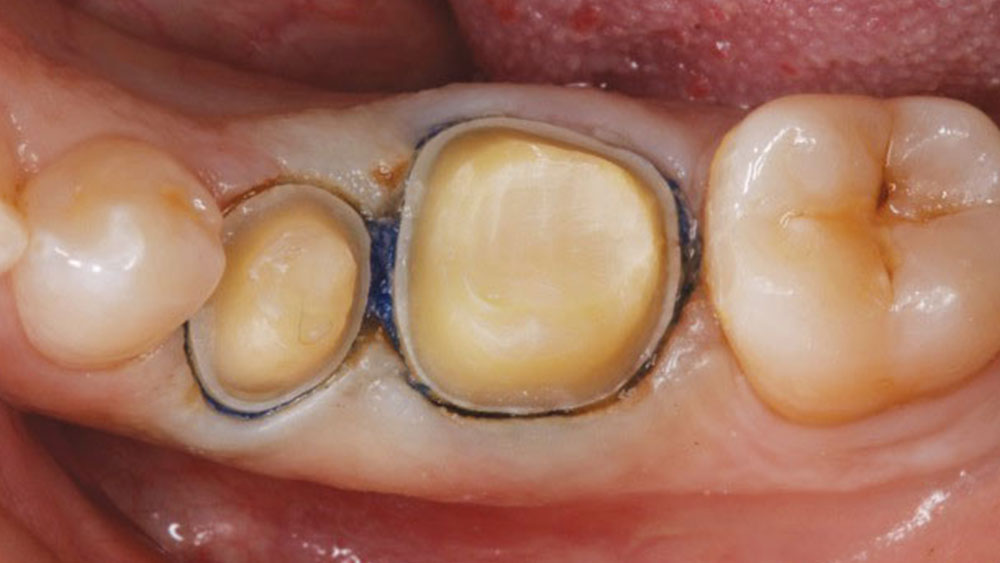
Figure 2: The teeth following preparation for solid zirconia crowns.
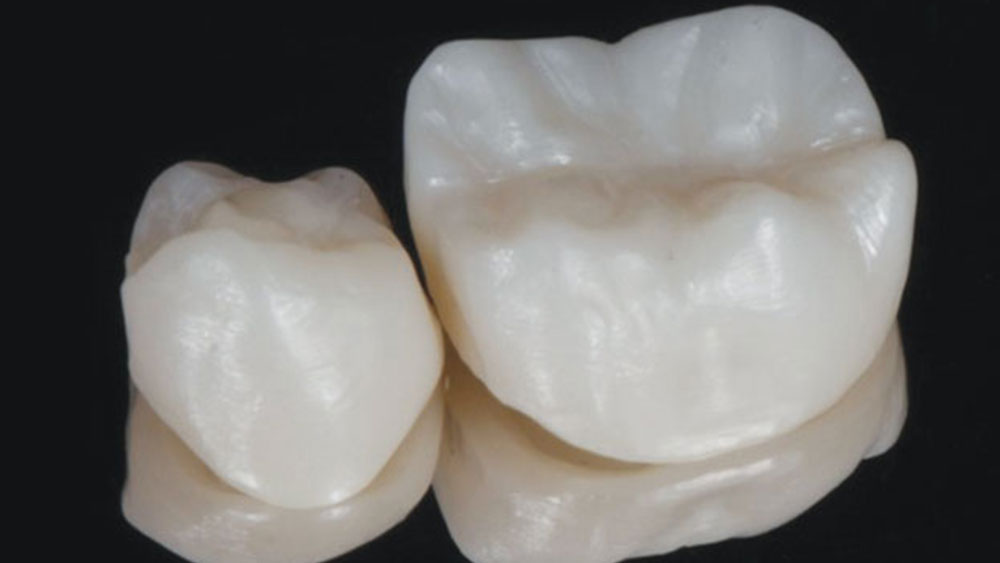
Figure 3: The crowns in a raw state immediately after milling and sintering.
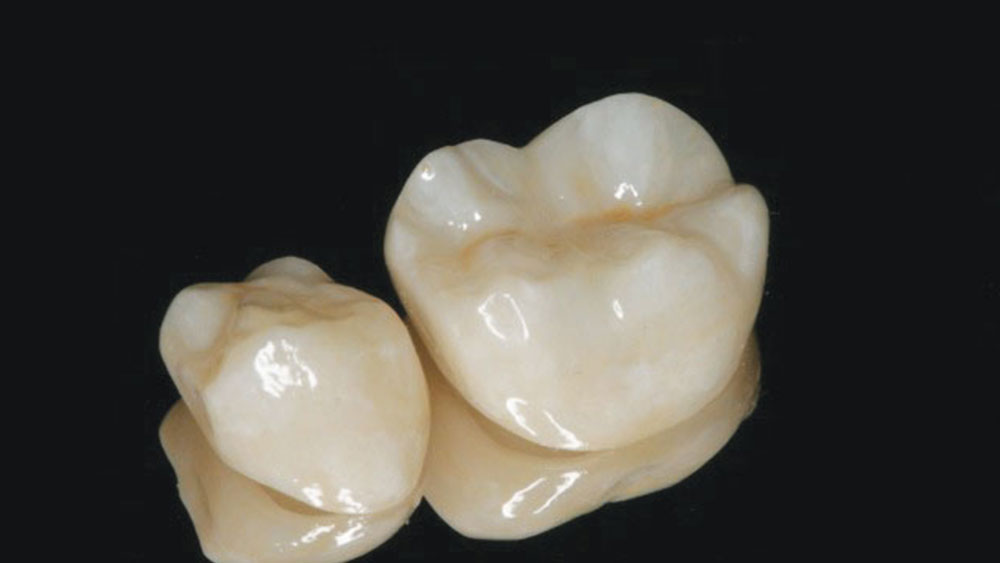
Figure 4: The more natural appearance of the restorations following staining and glazing.
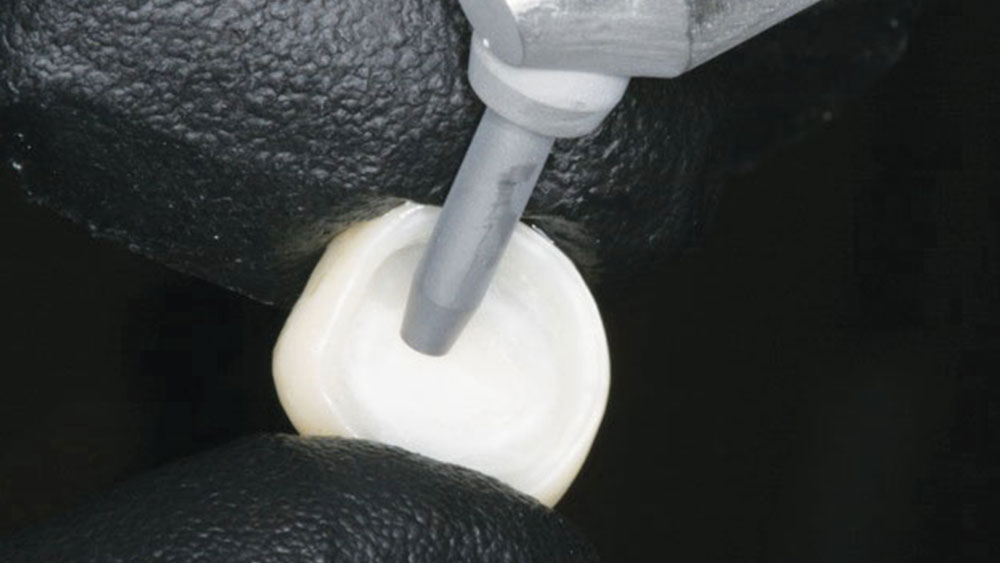
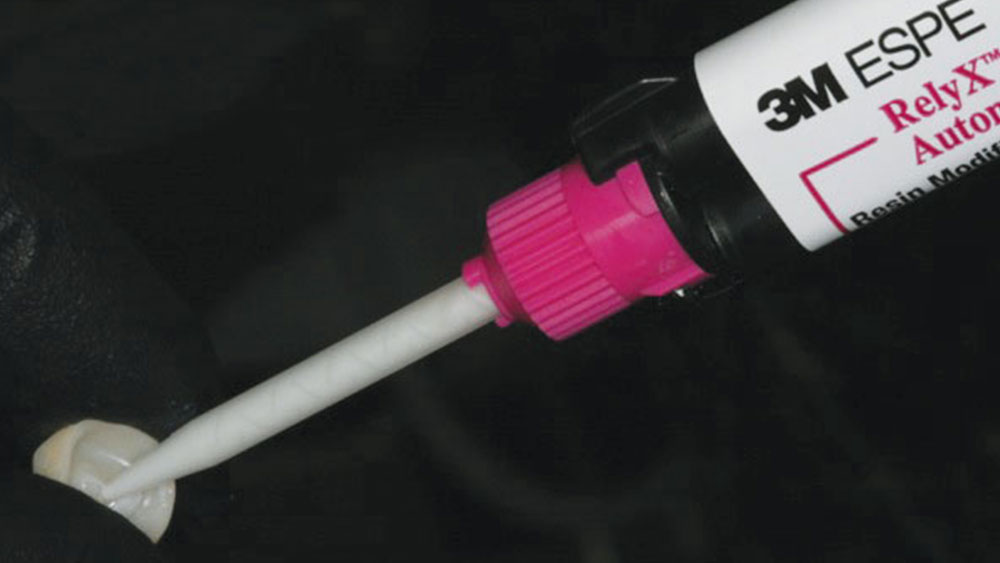
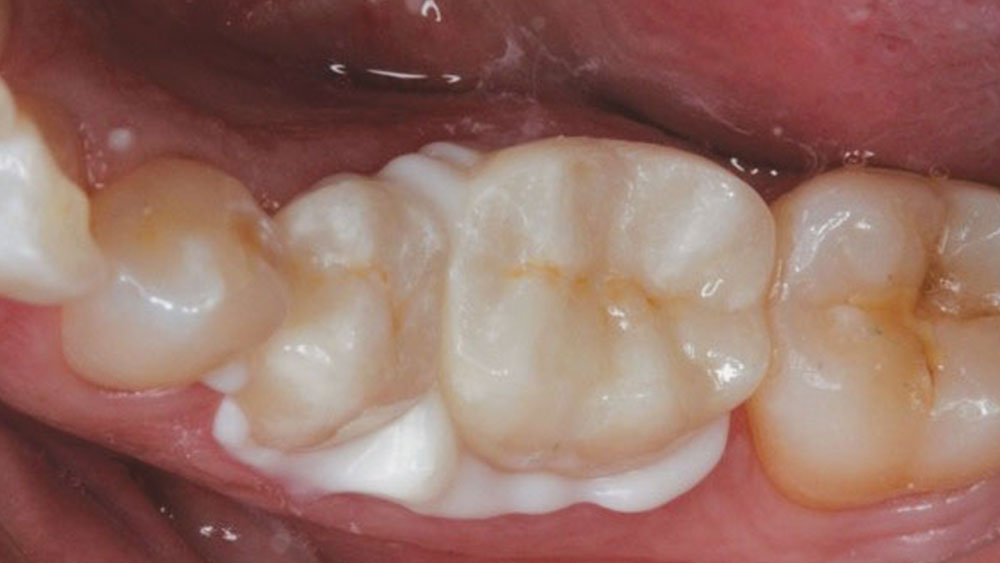
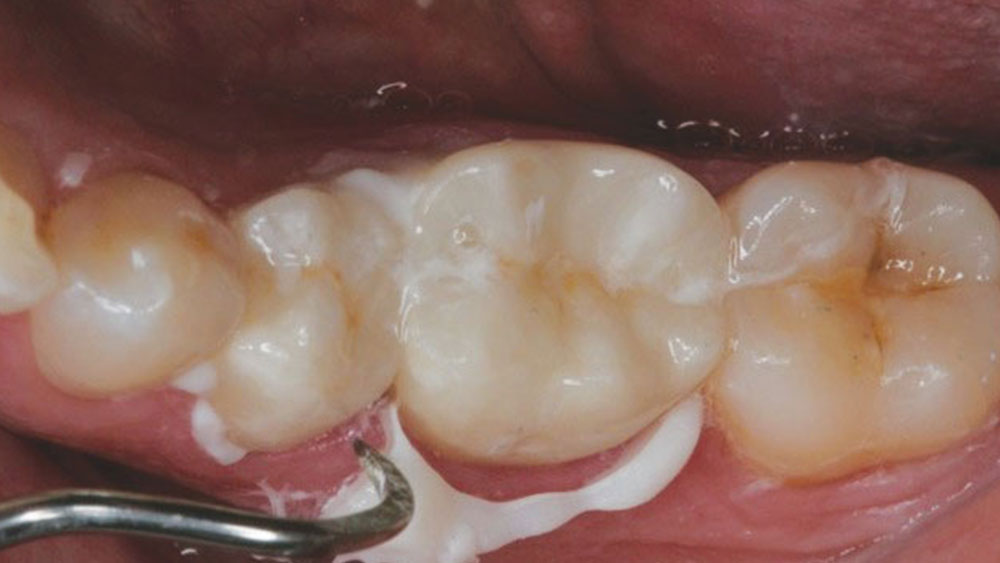
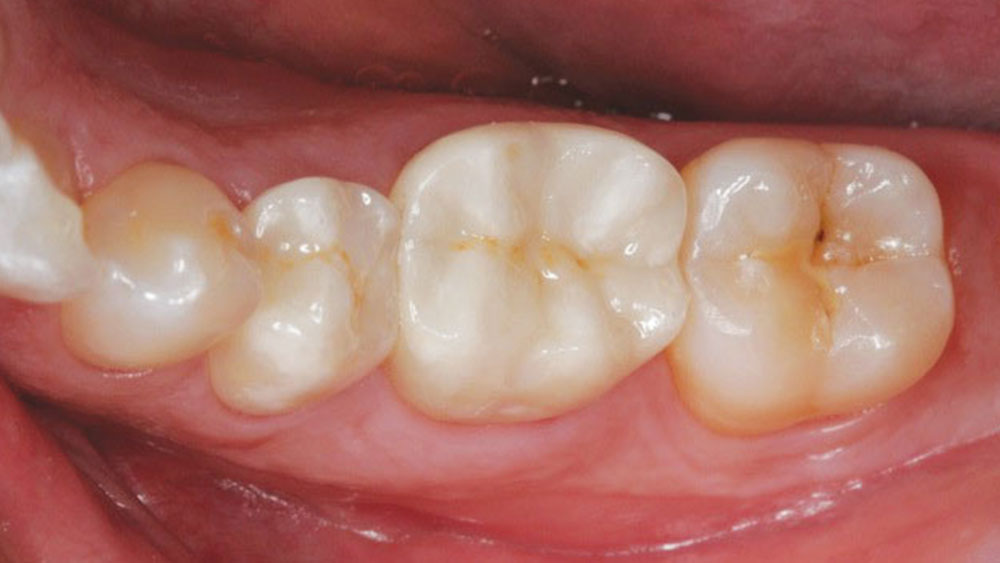
The temporary crowns were removed and the preparations were cleaned, rinsed and dried just enough to leave the surfaces slightly moist. The final BruxZir crowns were then tried in to confirm a good fit. The crowns were then removed and the internal surfaces were cleaned and treated with CoJet™ Silicate Ceramic Surface Treatment System (3M ESPE), applied with a chairside microetcher (Danville Materials; San Ramon, Calif.) (Fig. 5). A new mixing tip was attached to the RelyX Luting Plus Automix dispenser and a small amount of cement was dispensed and then discarded to ensure an even mix in the product to be used. A thin layer of cement was applied to the interior of the crowns, keeping the mixing tip immersed during application to prevent air bubbles (Fig. 6). The crowns were then seated and held in place with firm pressure (Fig. 7). Next, excess cement was tack-cured with a curing light (Elipar™ S10 [3M ESPE]) for 5 seconds to reach a gel stage, and then cleaned away (Fig. 8). Interproximal areas were flossed, and the patient was instructed to bite down for several minutes. After the self-cure setting time had elapsed, the restorations were complete (Figs. 9, 10).
CLOSING COMMENTS
RMGI cements have a proven track record and have been around long enough for several generations of dentists to utilize. However, they also now have benefits that appeal to a new generation of dentists who put a premium on efficiency.
RMGI cements have a proven track record and have been around long enough for several generations of dentists to utilize.
While the materials have been around for a long time, the recent addition of a photo initiator in the cement used here brings new benefits to users. Instead of waiting chairside for the cement to reach its cleanup stage, or attending to another task for 2–3 minutes and risking missing the window for easy cleanup, now the dentist can immediately tack-cure the excess material and remove it.
Predictability is something that all dentists strive for in their techniques and selection of materials, and the materials used here have proven themselves to be very reliable. This article does not attempt to illustrate an exotic case or unusual technique, but rather to highlight a very typical case in type and materials. The ongoing evolution of RMGI cements is making them even easier to use than before, and helping ensure they remain a standby material in many operatories.
The ongoing evolution of RMGI cements is making them even easier to use than before.
Dr. Ramsey currently practices in Jupiter, Florida, focusing on comprehensive esthetic and restorative dentistry. A product consultant for THE DENTAL ADVISOR and numerous dental manufacturers, he has lectured internationally on the latest techniques, materials, technology and protocols needed to create successful esthetic-based practices. He can be reached via email at drcramsey@ritterandramsey.com.
Disclosure: Dr. Ramsey has received honoraria from 3M ESPE.
Please go to dentalCEtoday.com to register, conveniently pay for, and take a short CE quiz; and once passed, to receive a certificate for 2 CEUs from Dentistry Today.
Reprinted by permission of Dentistry Today, ©2014 Dentistry Today.
References
- ^ Glidewell Laboratories (internal data).
- ^ Christensen GJ. Why use resin cements? J Am Dent Assoc. 2010;141:204-6
- ^ Christensen GJ. Should resin cements be used for every cementation? J Am Dent Assoc. 2007;138:817-9.
- ^ Hill EE. Dental cements for definitive luting: a review and practical clinical considerations. Dent Clin North Am. 2007;51:643-58, vi.
- ^ Hill EE, Lott J. A clinically focused discussion of luting materials. Aust Dent J. 2011 Jun;56 (suppl 1):67-76.
- ^ Haddad MF, Rocha EP, Assunção WG. Cementation of prosthetic restorations: from conventional cementation to dental bonding concept. J Craniofac Surg. 2011 May;22(3):952-8.
- ^ Pameijer CH. Crown retention with three resin-modified glass ionomer luting agents. J Am Dent Assoc. 2012;143:1218-22.
- ^ 3M ESPE. RelyX Luting Plus Automix Resin Modified Glass Ionomer Cement (technical data sheet).

