Changing Smiles with Conservative, No-prep Veneers

Porcelain veneers have become a standard procedure in many American practices, even though this technique is still not routinely taught in most dental schools. For example, I had the opportunity to do the first set of porcelain veneers in the history of my dental school back in 1988, yet I have never spoken with another graduate since then who had that same opportunity. It is therefore left for most dentists to teach themselves how to successfully accomplish this technique.
This article will review what I have learned since that first nervous set of six veneers back in dental school.
Porcelain veneers are a great treatment modality for many patients, but should be considered as part of a differential diagnosis in which traditional orthodontics, direct bonding, esthetic recontouring and bleaching are considered as options.
While some clinicians advocate a no-prep approach to porcelain veneers, my experience has been that some type of preparation gives a more predictable esthetic result. The most common problems I have seen with no-prep veneers are overcontoured margins and bulkiness. These problems can make a case a failure and both doctor and patient unhappy.
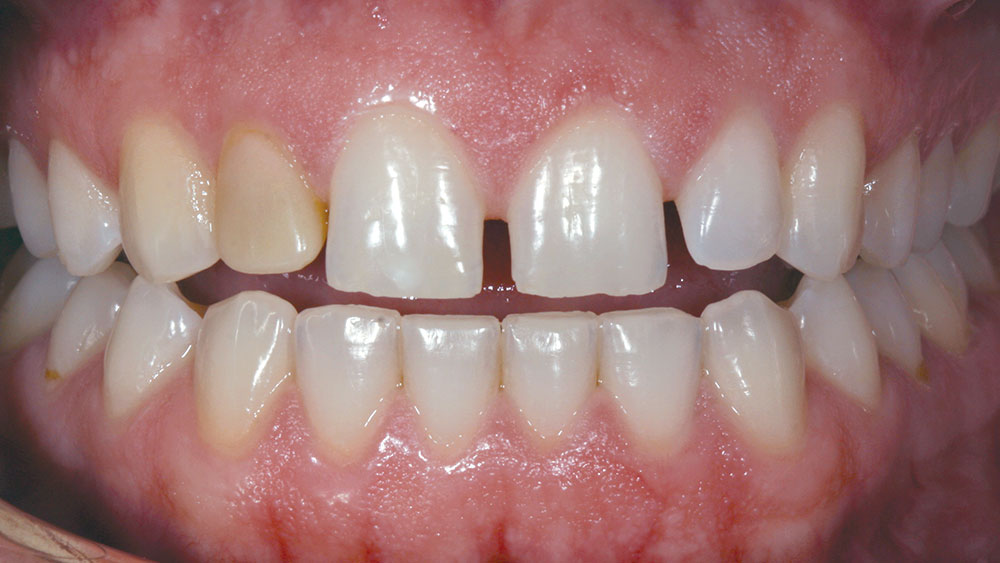
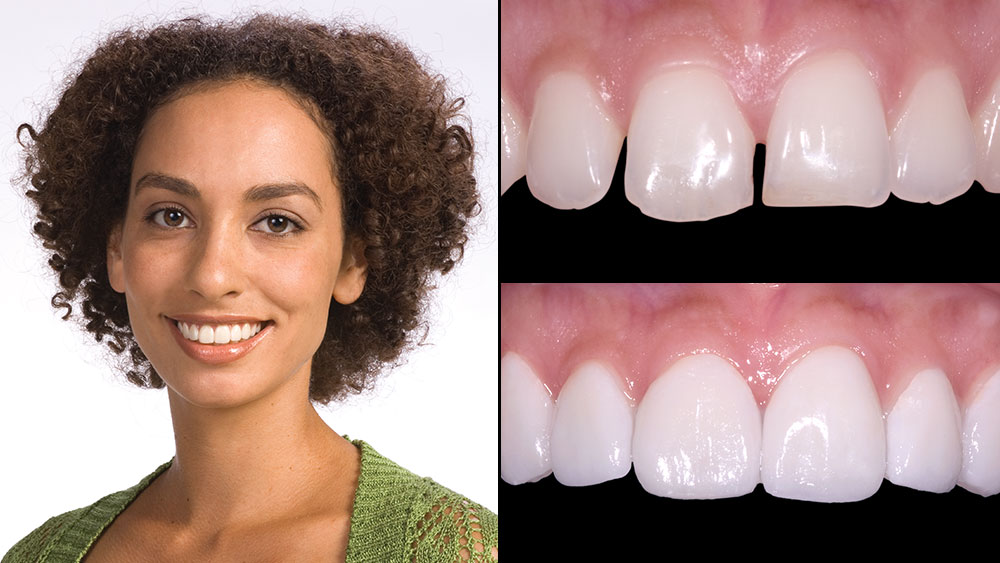
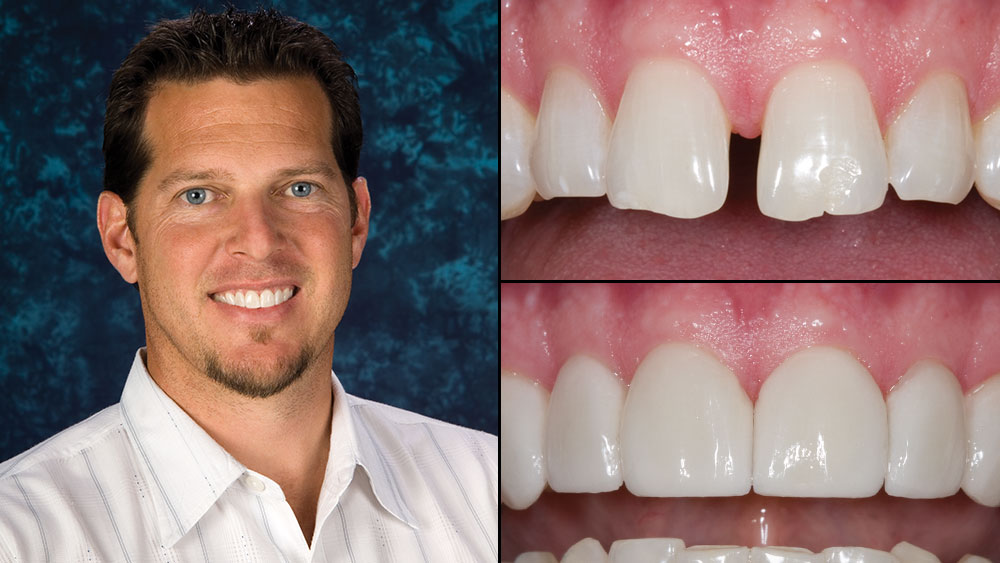
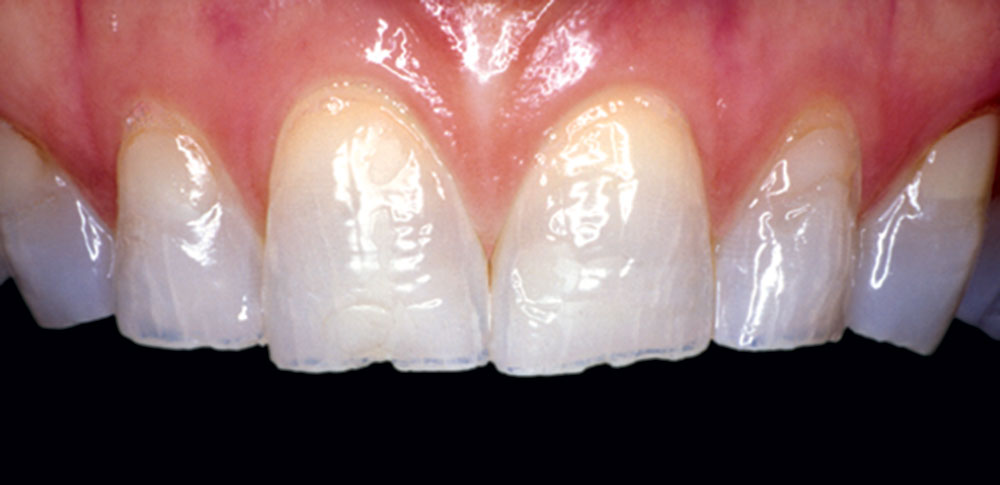
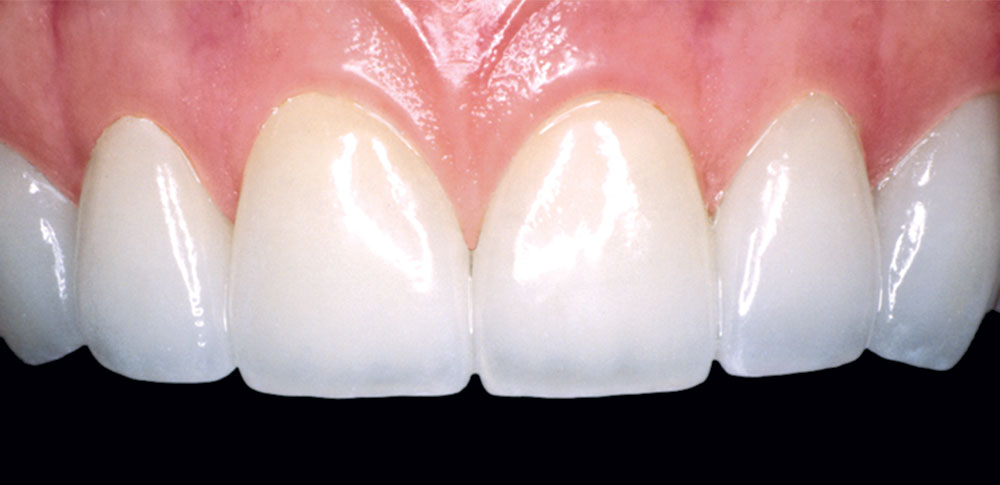
On the other hand, no-prep veneers can work well in “additive” type esthetic cases. These would be cases where multiple diastema are present, the teeth are shorter than they used to be due to trauma or wear, and where there has been a loss of facial enamel volume, and some cases where the only goal is the “permanent bleaching” effect. A no-prep approach can also work well in bicuspid extraction cases when residual space remains between the anterior teeth.
I believe no-prep veneers are an area where we need to have effective, written informed consent with the patient about the different veneer options available to them. The sound of “no-prep, no shots, no temps” is definitely music to any patient’s ears, but you still need to talk with them about the downside of the no-prep veneers.
If the patient still wants to go forward with the no-prep veneers after explaining about the bulkier margins and the need for excellent oral hygiene habits on the part of the patient, you can go forward with no-prep with a good degree of confidence.
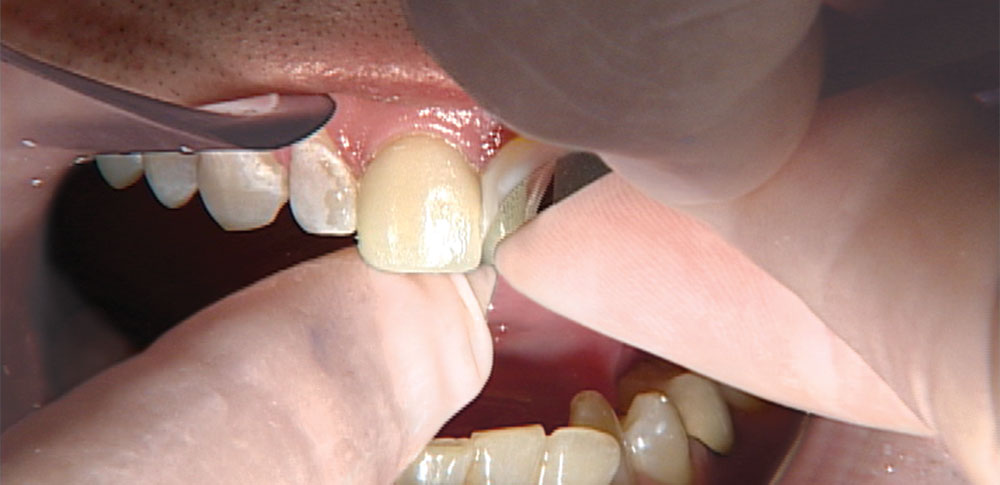
Also, be prepared to recontour the gingival margin if it feels too bulky to your explorer. I prefer the Brassier ET® Carbide kit (Savannah, Ga.) and using the ultrafine grit in an electric handpiece to smooth off any “speed bumps” that may be present at the margin. To protect the gingival, you will need to use a cord packer to retract the tissue, or, if you prefer, a Zekrya instrument to protect the tissue to ensure the bur does not contact tissue. The cord packer I use to accomplish this has many bur marks on it, which is much more preferable to leaving those marks on the tissue itself.
Glidewell Laboratories is happy to provide a diagnostic service for no-prep, minimal prep and traditional veneers. Many dentists send in pre-op models of their patients to see if they are good candidates for no-prep veneers. Our technicians are able to study the models and advise you whether it would be a good no-prep veneer case. If they determine that a minimal prep approach is best, they will prep the study model for you and show you where to recontour the patient’s teeth for the best esthetic effect. This service can be done with or without a diagnostic wax-up. It is highly recommended that you use this design service for your first five or six no-prep veneer cases, or any case where you have questions about whether this approach is feasible.
Typically, I will still call it a no-prep case if all I have to do is recontour teeth with a sandpaper disc. Once I need to use a high-speed handpiece and a bur, it becomes a minimal prep or traditional prep veneer case.
As always, be careful during any veneer try-in (including no-prep) not to try to push the patient toward accepting veneers they are on the fence about. It has always seemed like you have definitely “married” most veneer patients, and you want to make sure they love their veneers before they are bonded to place. I do not look at no-prep veneers as “reversible” at all. I make sure patients are happy with the veneers before proceeding.
I have removed no-prep veneers without any damage to teeth before using my Waterless® YSGG Laser from BIOLASE (Irvine, Calif.), but most dentists have not purchased this technology yet. I do not believe you can remove no-prep veneers bonded to enamel with a handpiece without doing some damage to the teeth. The only time I consider veneers reversible is while they are filled with try-in paste.
Part 1 of this discussion will cover no-prep veneers. Look for Part 2 on veneers seated using traditional prep techniques here.
Diagnostic Wax-Up
I have always considered diagnostic wax-ups a critical part of the porcelain veneer process. A big reason why I always use diagnostic wax-ups is to give the patient an accurate idea of what their finished case could look like. In fact, I have always been suspicious of digital imaging programs because of the way they show patients what their smile could look like. Many of these systems have a smile library in which a smile is somewhat arbitrarily taken from the library and “pasted” over the patient’s existing smile. Unfortunately, this method of imaging doesn’t take the patient’s tooth position or hard or soft tissue architecture into account, and can show the patient an “after” scenario that is literally impossible to achieve.
The diagnostic wax-up also helps many patients make up their minds about treatment just by looking at the wax-up and comparing it to their existing smile. It is for this reason that I insist that all diagnostic wax-ups be fabricated from white stone models with white wax added for the veneers.
Yellow models and yellow wax just don’t elicit the same emotional response from patients when they view them, even though darker models and wax may make it easier for the dentist and technician to see certain details such as surface texture, etc. The bottom line is, if you are planning on showing the diagnostic wax-up to the patient or are going to let them take it home to show to their spouse, make sure your lab uses white models and white wax.
The diagnostic wax-up can also act as a financial screening tool. We charge $20 per tooth for this service, but we have the patient pay for it. So, for a typical 8-veneer case, the diagnostic wax-up would cost $160, and that amount is credited toward the overall case fee if the patient decides to have the treatment done. Years ago I would pay for the wax-up myself. However, many times I discovered that the patient wasn’t really that serious about having the treatment done.
After I became the owner of five or six wax-ups, the decision was made to have the patients pay for them. Any patient who balks at the $160 fee for the wax-up to see what their new smile could look like is probably not that serious about having the treatment done. This keeps you from wasting $160 on a wax-up you don’t need.
Bonding Technique
Seating veneers is typically the most difficult part of the procedure, especially compared with cementing PFM restorations. Most of this difficulty is due to the increased difficulty in working with a resin cement as opposed to a resin-reinforced glass ionomer (RRGI) cement for typical crown and bridge cases. Most dentists are comfortable “walking away” from cases where RRGIs are used.
For example, they will cement crowns on teeth #7, #8, #9 and #10 and then exit the operatory, leaving their RDAs to do all the cleanup of excess cement. If you walk away from bonding veneers, you will most likely bond all the anterior teeth together and spend the next two hours sawing through all the contacts, trying to make the teeth individual once again! As a result, the more cleanup you can do prior to curing the cement, the better the chance you won’t have to use burs and other potentially dangerous cleanup methods.
For color-stability purposes, only light-cured resin cements should be used when luting veneers. Dual-cure and self-cure resin cements are not as color-stable long-term as light-cure resin cements, and typically are not the best choices for under-porcelain veneers.
If the prep shade is within normal limits, I find I get the best results when using a translucent resin cement, such as Nexus® Clear from Kerr (Orange, Calif.). I use just the base, not the catalyst, to ensure the cement will be as color-stable as possible. Another good choice is Variolink® Veneer from Ivoclar Vivadent. I use the clear shade almost exclusively, which is also known as the medium-value shade.
The following is the step-by-step process of seating no-prep veneers.
Step 1
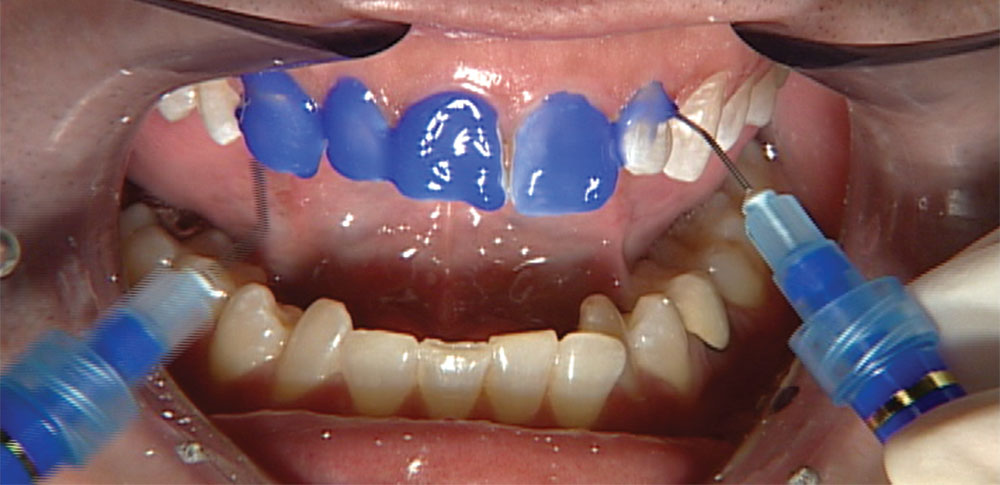
The veneers are tried in one at a time without try-in paste to make it easier to evaluate the fit of the individual units. Once all the veneers have been tried in and the fit has been verified, the units can now be tried in together to check contacts. At this point, we typically will try in the restorations with a try-in cement (Appeal Translucent [Ivoclar Vivadent; Amherst, N.Y.]/medium value shade) to help them stay in place.
Also, once all the restorations are in place, we will give the patient a hand mirror so that they can take a look at the restorations as well. At this point, I have also printed up an 8 × 11-inch picture of their “before” shot so they can remember what they used to look like. Whether or not they have had temps, this before picture helps give the patient some perspective on where they started and where they are now.
Step 2
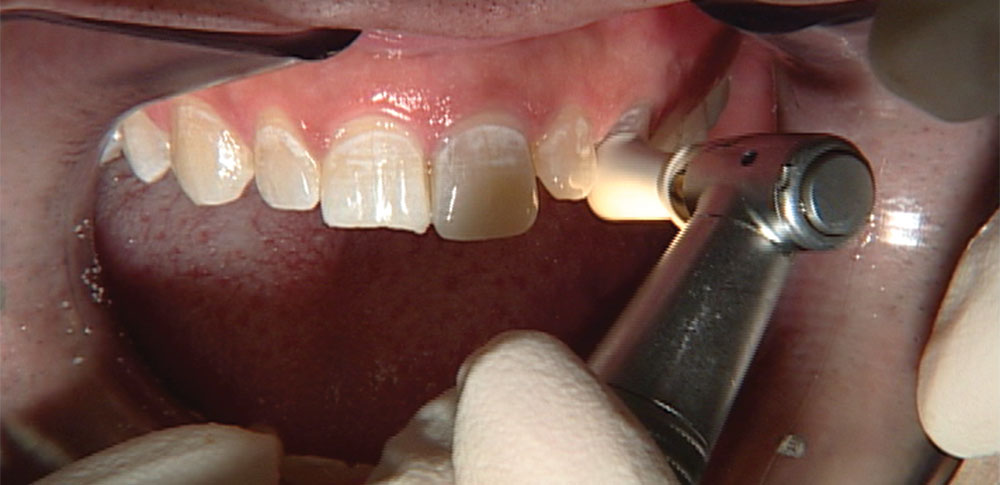
The try-in paste is water-soluble, so it is very easy to rinse out of the internal aspects of the veneers and off the teeth. At this point, I like to clean the teeth with some fresh pre-mixed pumice (Pumice Preppies™ [Whip Mix Corp.; Louisville, Ky.]) and then apply some liquid Consepsis (Ultradent; South Jordan, Utah) and air-dry the teeth.
Step 3
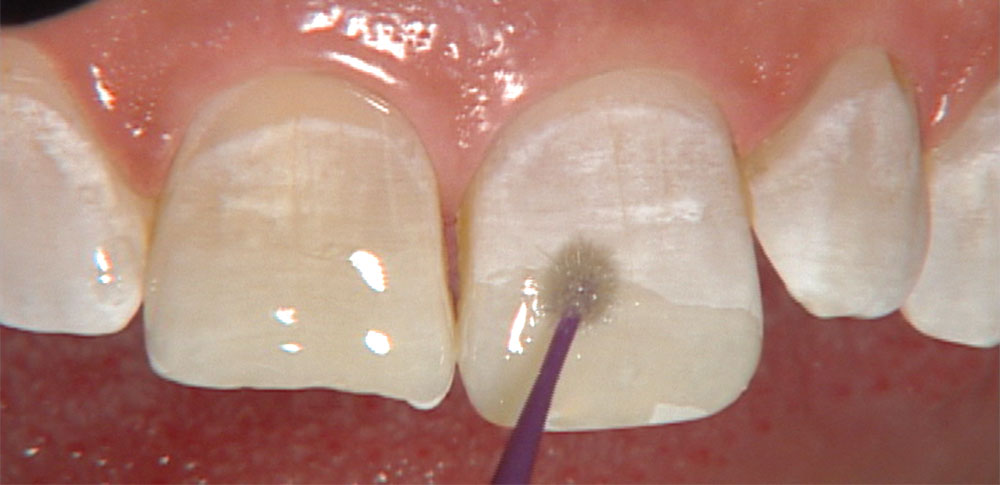
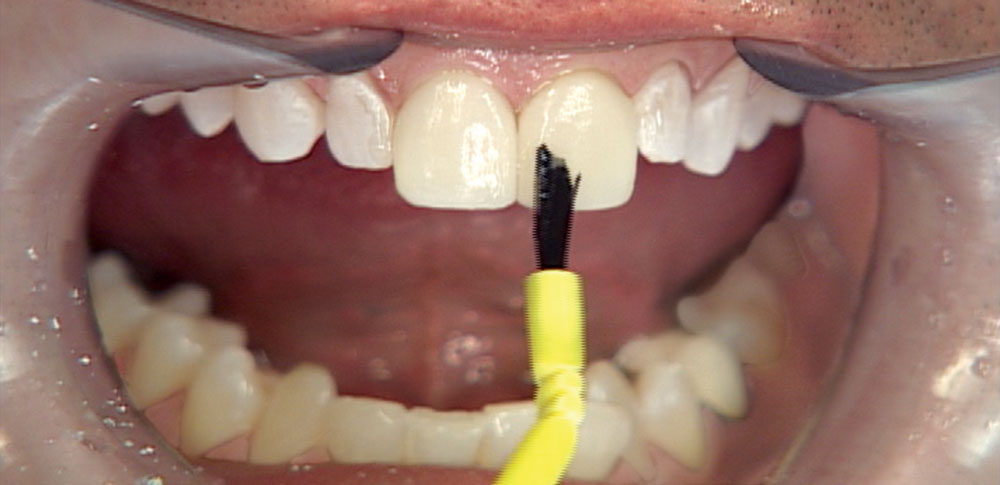
The unprepared teeth are now etched with 37% phosphoric acid for 15 seconds, and the etch is rinsed off. The teeth are now dried, and you’ll see the frosty appearance associated with etching enamel. A thin layer of Scotchbond™ adhesive (3M™ ESPE™; St. Paul, Minn.) is placed with a microbrush and air-thinned.
Step 4
The translucent veneer cement is placed in the veneer and the veneer is placed onto the tooth, ensuring that excess cement is visible around all the margins. If, for example, no excess cement comes out of the gingival margin when seating the veneer, I will quickly remove the veneer and add some more cement so that I can see the excess squirt out the margin.
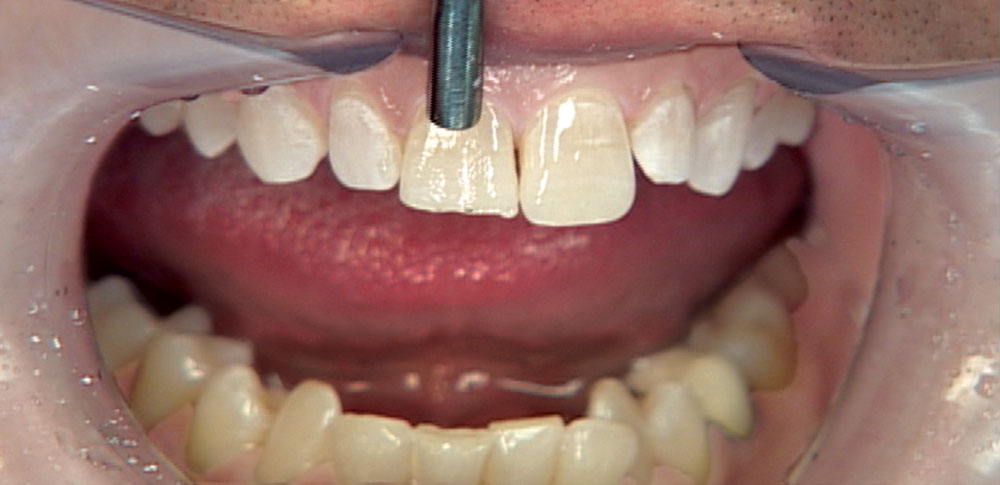
Every veneer case is done the same way, with the central incisors (#8 and #9) placed simultaneously. I apply pressure at the incisal edge with an orangewood stick to make sure the veneers are seated all the way, and I apply some pressure with another orangewood stick at the junction of the gingival and middle thirds of the tooth to make sure the veneer is all the way against the tooth here as well.
Step 5
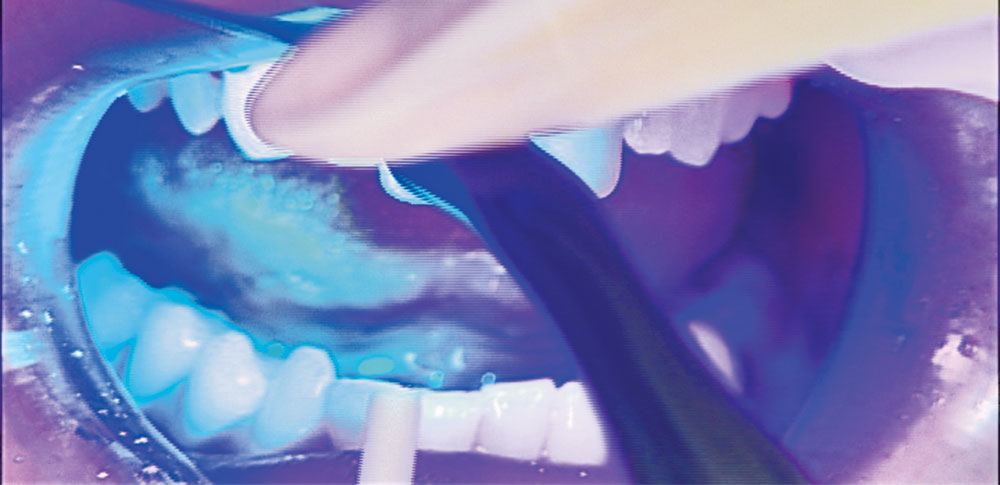
Then my dental assistant takes our LE Demetron curing light (Kerr; Orange, Calif.) and holds it about 5–7 mm from the excess cement at the gingival margin, and cures it for about five seconds as she waves the light back and forth. The goal here is simply to get the cement to its gel state without completely curing it, as the more cleanup we do now, the less we will have to clean up with a handpiece later.
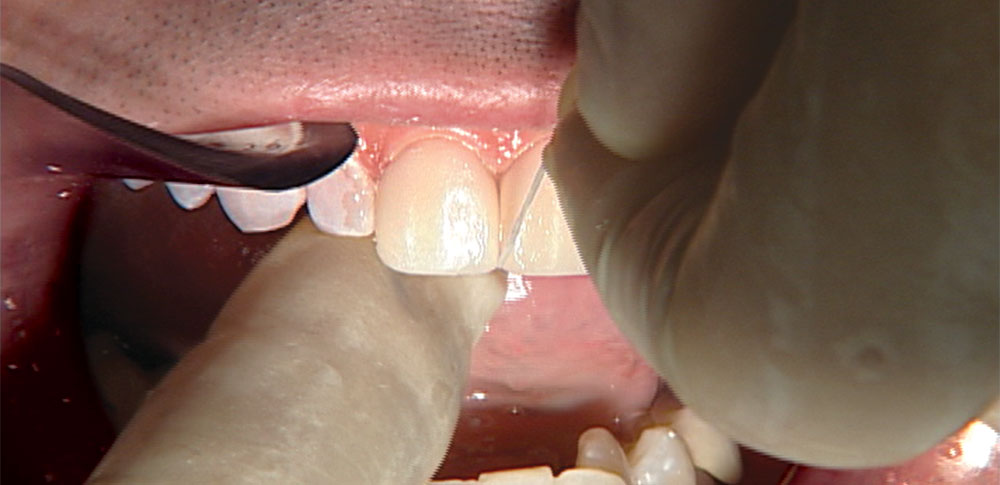
Once the gingival margin is cleaned up with an explorer, we place the light half on the gingival margin and half on the gingival tissue in order to complete the cure at the gingival margin and tack the veneer into place. This allows us to use Oral-B Glide® floss (Procter & Gamble; Cincinnati, Ohio) interproximally to clean the excess cement out of the contacts before it cures completely. Once the contacts are cleaned, the light is held 5–7 mm from the lingual surface, and is activated for five seconds to bring the lingual excess cement to the gel state and facilitate cleanup. Once the excess is removed, final curing is completed. The centrals are placed first and simultaneously because they are so crucial to the overall success of an esthetic case.
Step 6
After the centrals are fully cured, I will place the rest of the restorations on one of the sides. I then etch the lateral, cuspid, first bicuspid and second bicuspid if it was included in the case. The contacts have already been adjusted at the try-in, so at this point all of the veneers should go right into place. For cement that has been smeared across the glazed ceramic surface, such as on the facial, my favorite way is to clean it up with a Brownie® cup, from the Brownie/Greenie® kits (Shofu; Menlo Park, Calif.) we use to finish and polish cast gold restorations. The neat thing about using a Brownie is that it does a great job of removing cement but won’t do a thing to porcelain.
Step 7
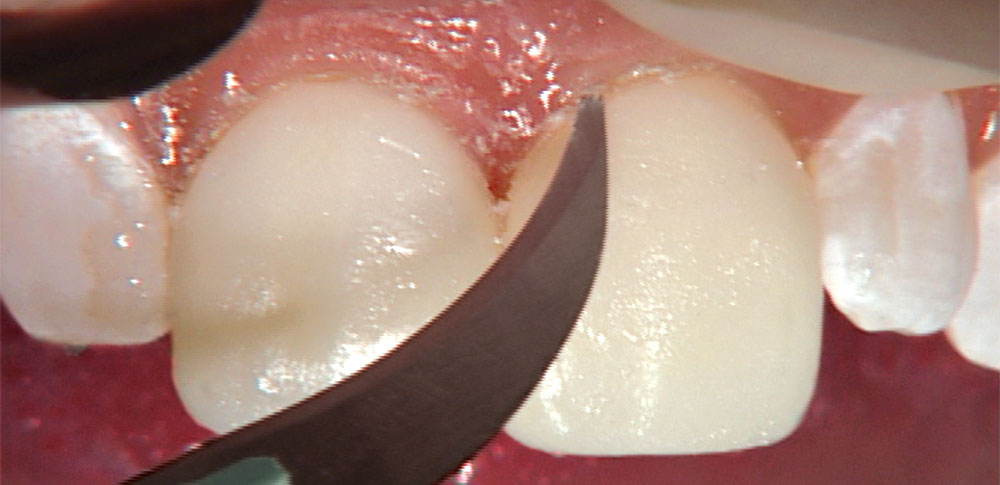
Axis also makes some excellent safe-sided serrated metal strips that do an unbelievable job of cutting through contacts that have been inadvertently bonded closed with resin cement. Because they are safe-sided strips and only cut on the end, they do not create open contacts like a finishing strip can if used too aggressively. Once you have vertically cut through the excess resin cement, Glide floss can often be used to remove the excess. Other cured cement can be removed with a sharp, disposable scalpel. The more cleaning you do with the Glide floss while the cement is in its gel state, the less cleanup you will have to do when it is rock hard.
Step 8
Once the veneers are completely cured, we can adjust the occlusion where necessary. As with any all-ceramic restoration, it is best not to put it under a lot of stress until it has bonded into place and gains strength from the underlying tooth structure that it is bonded to, and can withstand full occlusal forces. So when we try in the veneers we have the patient bite down gently to verify that the occlusion is right on, or very close. If it is, we can then bond the veneers into place and adjust the occlusion after the cement is fully cured. If the occlusion is way off, we gently address those issues before the veneers are seated, just in case they cannot be corrected.
Step 10
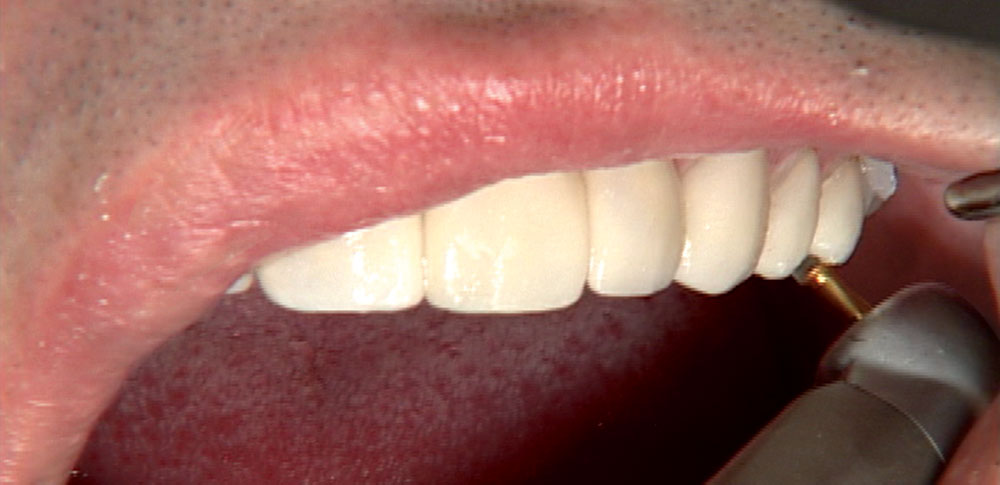
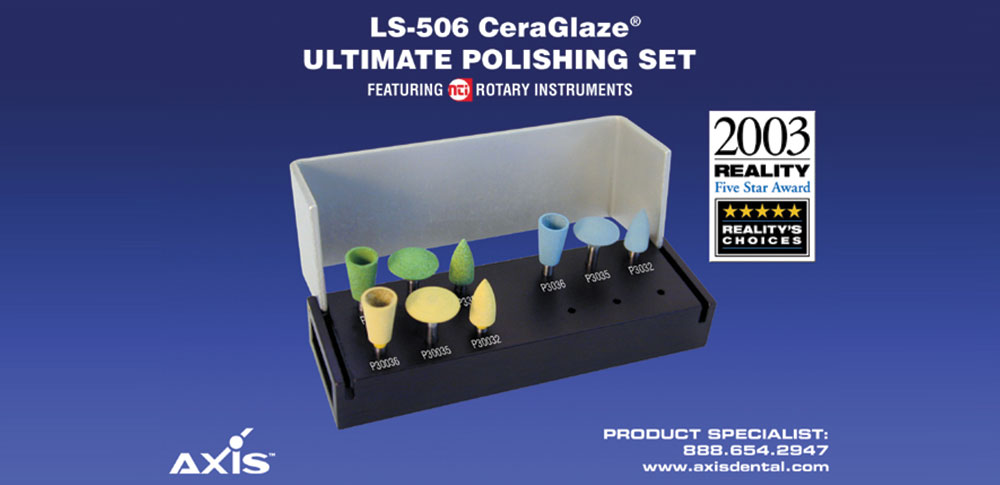
Final polishing of all adjusted surfaces is done with Axis Dental CeraGlaze® porcelain polishing kit (Coppell, Texas). These points and cups work extremely well for me intraorally because I use KaVo electric handpieces. Electric handpieces have so much torque that they can polish porcelain intraorally as well as a lab handpiece can extraorally, which is very important for PFMs and all-ceramic restorations.
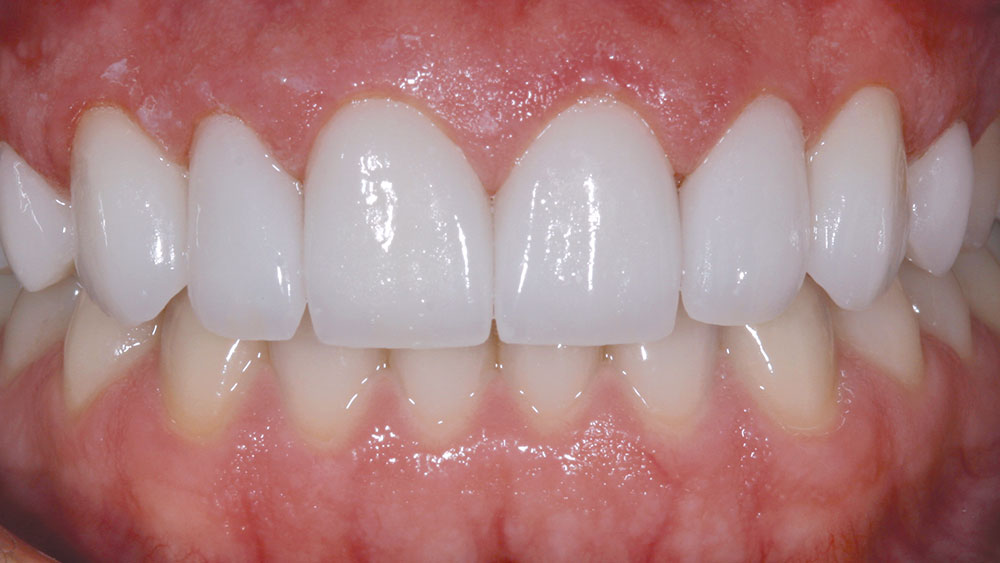
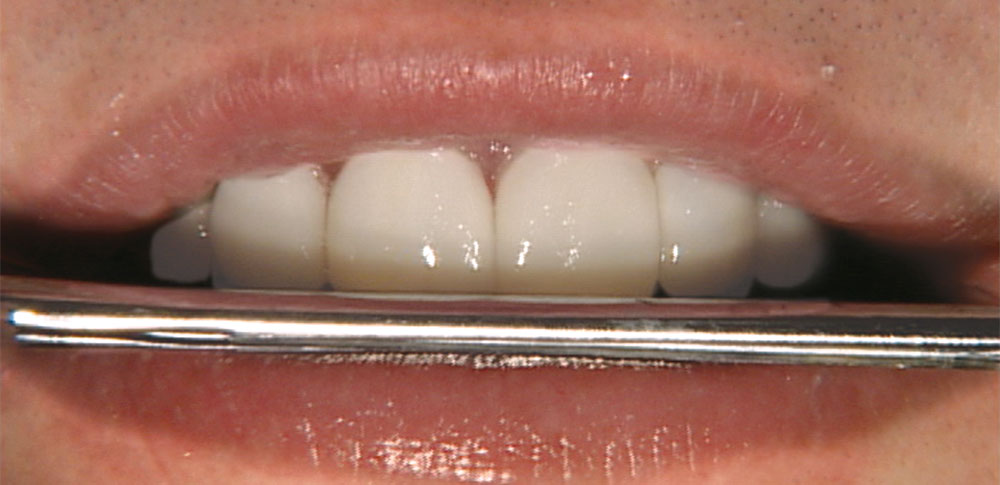
My experience with no-prep veneers has been overwhelmingly positive. My initial concerns about the bulkiness of the restorations and the gingival margins have proven to be non-issues in all the carefully selected cases where the patient requested no-prep veneers. Most importantly, the enthusiasm of the patients has made this procedure very rewarding for me, as I am able to change a smile painlessly in one appointment.
– Michael DiTolla, DDS, FAGD
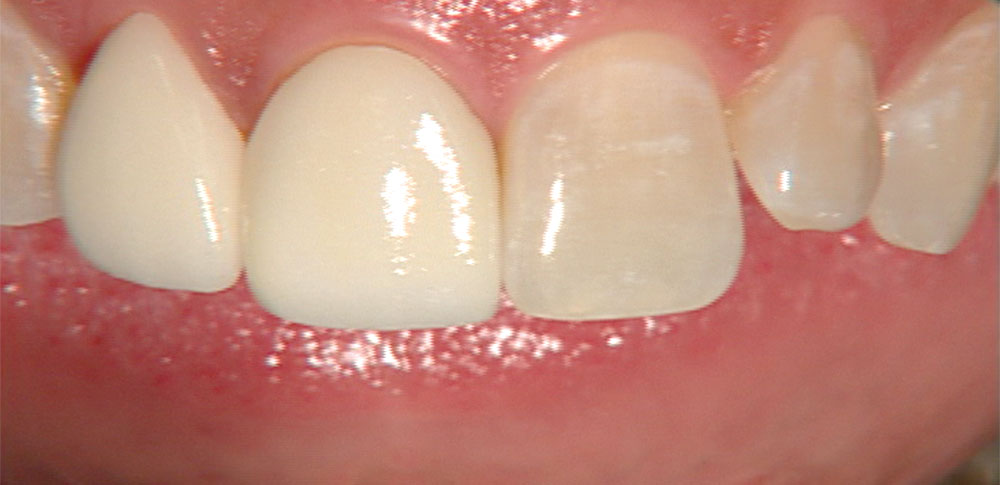
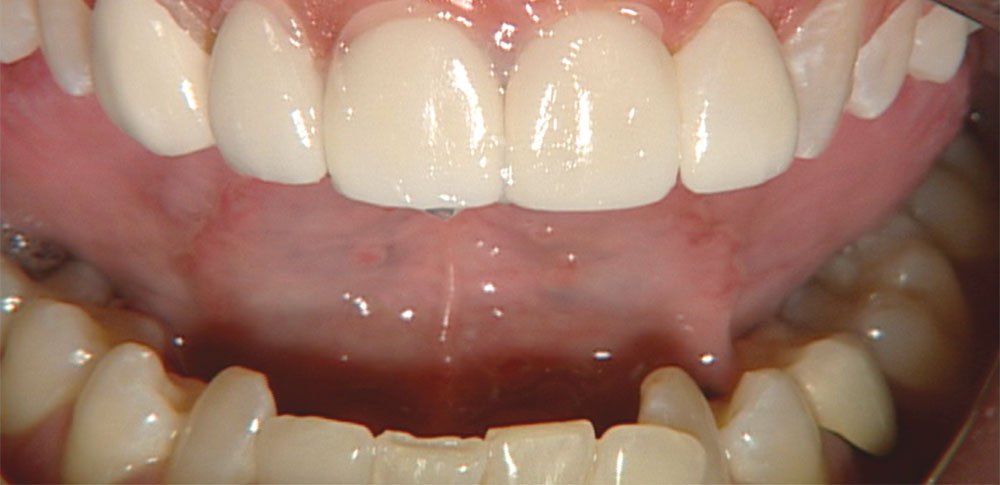
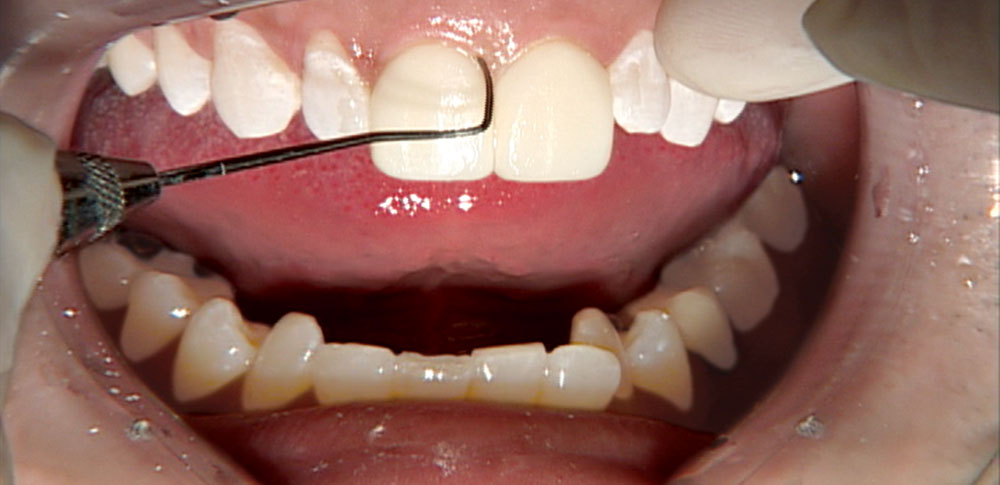
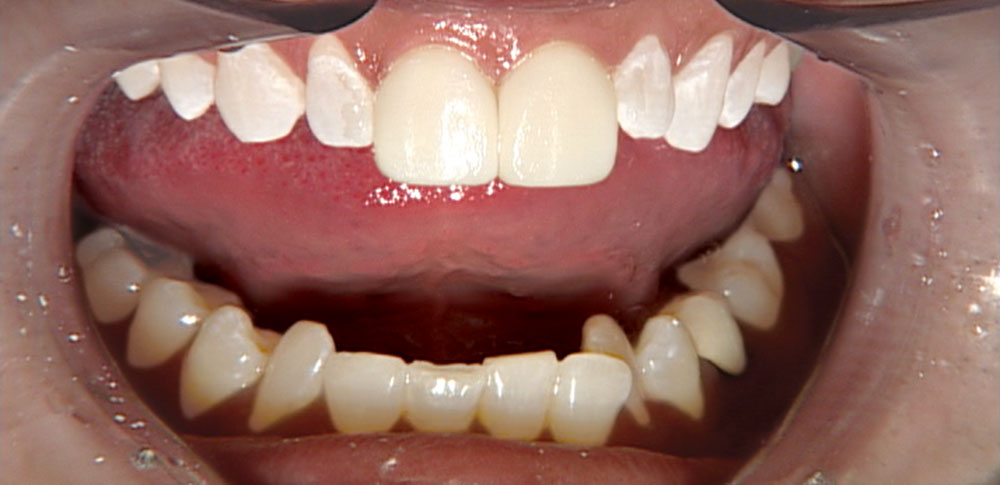
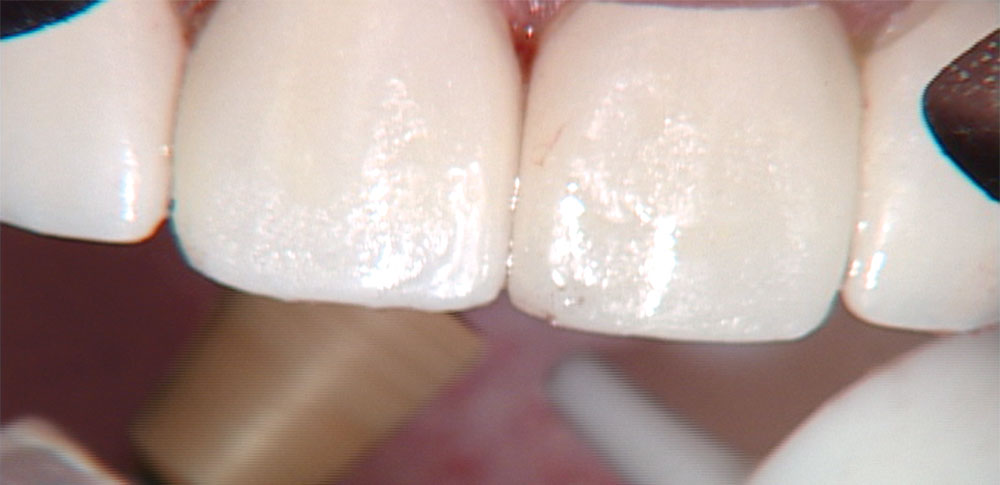
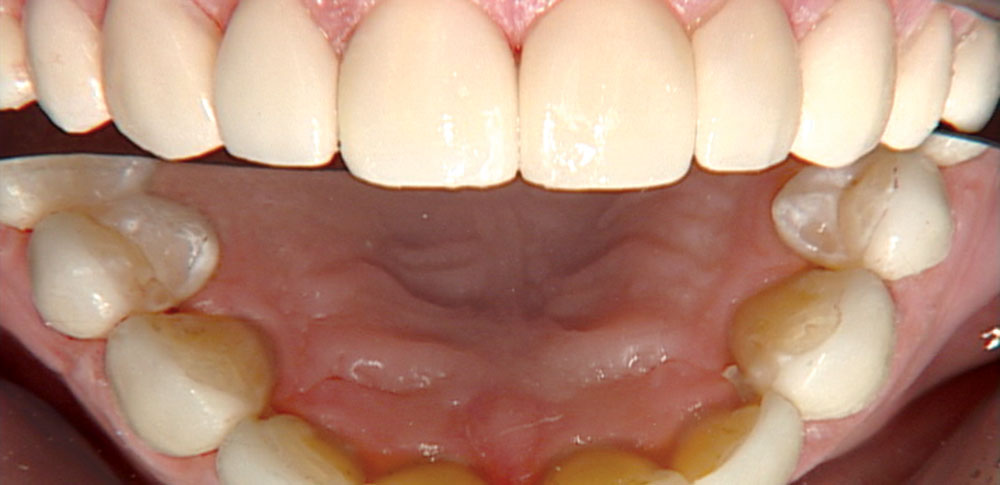
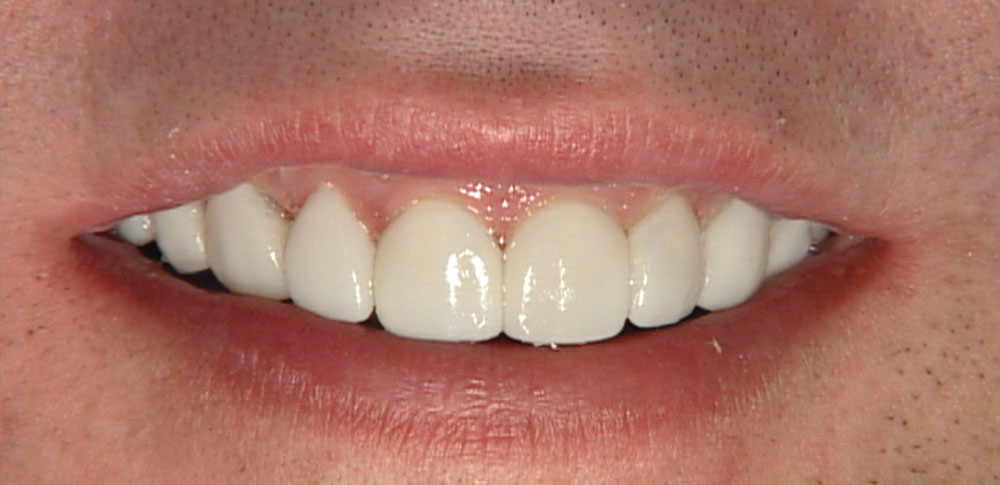
The final three pictures of the patient show that no-prep veneers can be an excellent way to conservatively restore esthetic challenges while meeting the patient’s treatment expectations.

