Digital Scanning of Implants: A Win-Win for GP, Specialist and Patient Alike
Abstract
With the introduction of new intraoral scanners to the dental equipment marketplace, dentists continue to develop procedures and protocols that are simpler, more accurate and more efficient, and reduce the amount of chair time needed to complete the work.
This simplification has benefited not only the general dentist restoring implants, but the surgeon placing them as well. For progressive implant surgeons who rely on referrals from GPs who do not place implants, the surgeon can offer a system that makes it very easy for the restorative dentist to restore cases. By using an intraoral scanner at the surgeon’s office, the need for impressions by the general dentist is eliminated, as described in the following case report.
Introduction
Although intraoral scanners have been available for decades, the ability to scan implants for restorative treatment was not available until 2004, when BIOMET 3i™ developed the Encode® (now BellaTek® Encode) Impression System (Zimmer Biomet; Warsaw, Ind.). This system features a coded healing abutment that, when scanned using an intraoral scanner, eliminates the need for a conventional fixture-level implant impression. The laboratory is able to fabricate the implant restoration accurately1 from the digital scan.
Other implant companies followed this logical path, and scanning abutments were developed by implant manufacturers and progressive dental laboratories. The technology allowed dentists to take intraoral scans using scannable abutments2 instead of a polyether or polyvinyl impression; however, due to the high cost of the equipment, only a small percentage of dentists have done this.
The introduction of new intraoral scanners with lower price tags has allowed more dentists to incorporate the technology into their practices. Using these systems, dentists can utilize newer protocols and techniques that benefit the patient, the restorative dentist and the implant surgeon.
Materials and Methods
The digital workflow involves the referral of the patient to the implant surgeon, who places the implant(s) and, after the recommended healing period, performs an intraoral scan of those implant(s). The resulting digital file is sent directly to the laboratory with the restoring dentist’s prescription.
The laboratory fabricates a custom healing abutment and restoration, and sends it to the restoring dentist to deliver the restoration and adjust if necessary.
The following is a case report of an implant-supported restoration that was completed using this protocol.
Case Report
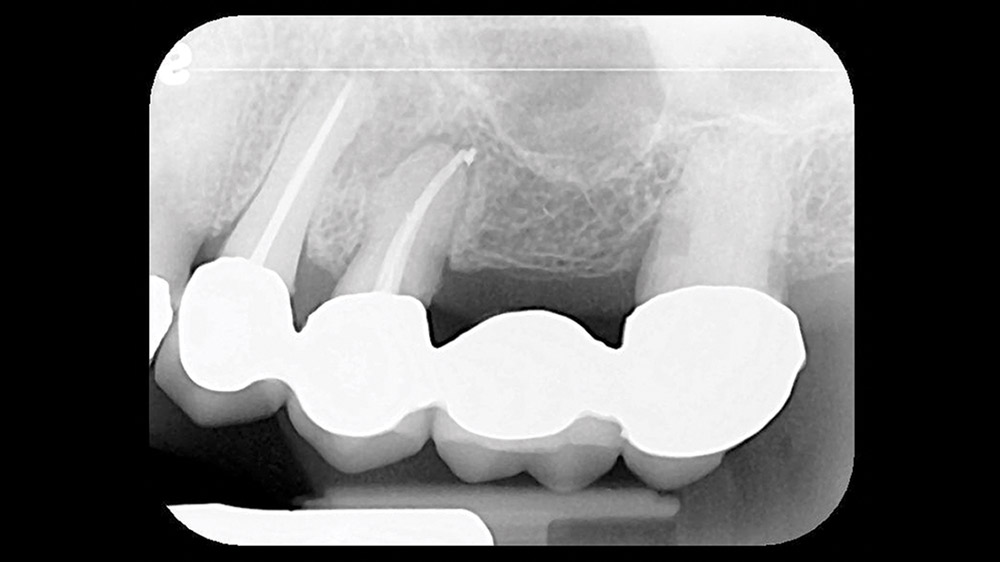
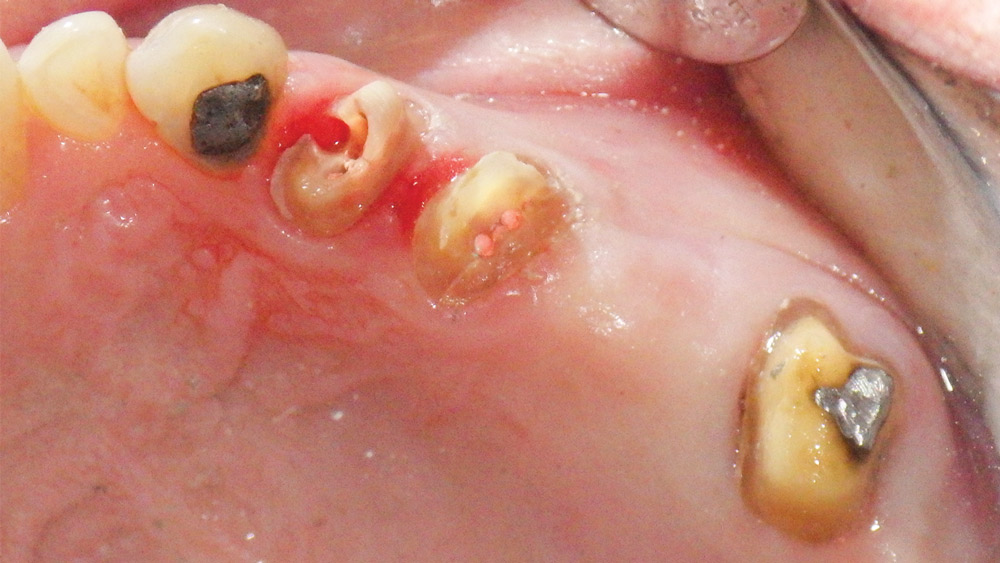
A 74-year-old female presented with a loose 4-unit bridge from teeth #12–15 with clinical evidence of decay under the two anterior abutments (teeth #12 and #13) (Fig. 1).
Her medical history disclosed Type 2 diabetes mellitus and hypertension, as well as mild to moderate osteopenia and arthritis. Her diabetes and hypertension were well controlled via oral hypoglycemic and antihypertensive medications, and she previously received several yearly infusions of Reclast® (Novartis Pharmaceuticals Corp.; East Hanover, N.J.) for osteopenia. Prior to her visit, she had not received an IV infusion for 14 months.3
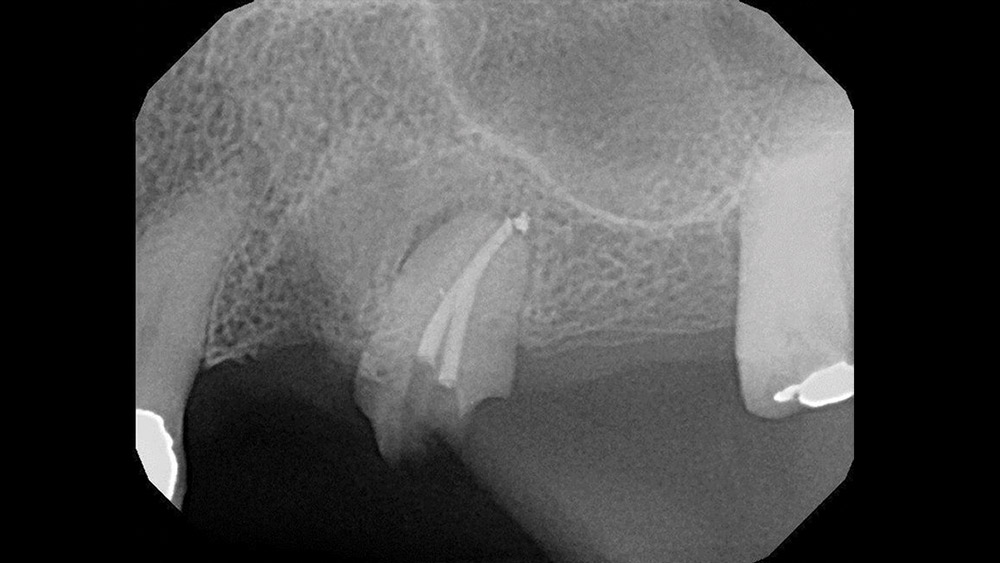
The bridge was carefully removed by sectioning. All decay was removed, and there was insufficient tooth structure remaining on both premolars to remake the bridge (Fig. 2). After a review of available options, the patient chose to extract the damaged premolars and reconstruct the area with an implant-supported bridge.
The patient was referred to the periodontist for consultation, and, based on her medical history and clinical presentation, the following treatment plan was recommended:
- Extraction and socket preservation at site #12, and a temporary bridge from #12–15.
- Three months later, implants are to be placed in the #12 and #14 positions with simultaneous osteotome sinus elevation for #14.
- Following integration, the temporary bridge is to be modified and converted into a 3-unit, screw-retained temporary bridge, with a separate crown on tooth #15.
- Extraction and socket preservation at site #13.
- Final restoration with a 3-unit fixed bridge from #12–14 and a single crown on #15.
Due to the history of IV bisphosphonate use, the treatment was staged so as to judge the patient’s healing potential and avoid multiple simultaneous procedures if impaired healing potential was present.
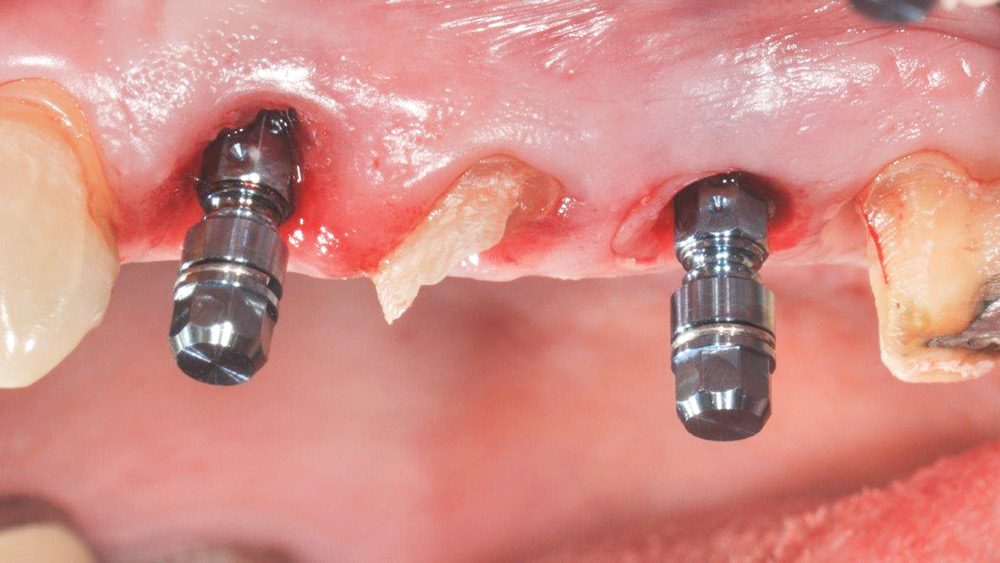
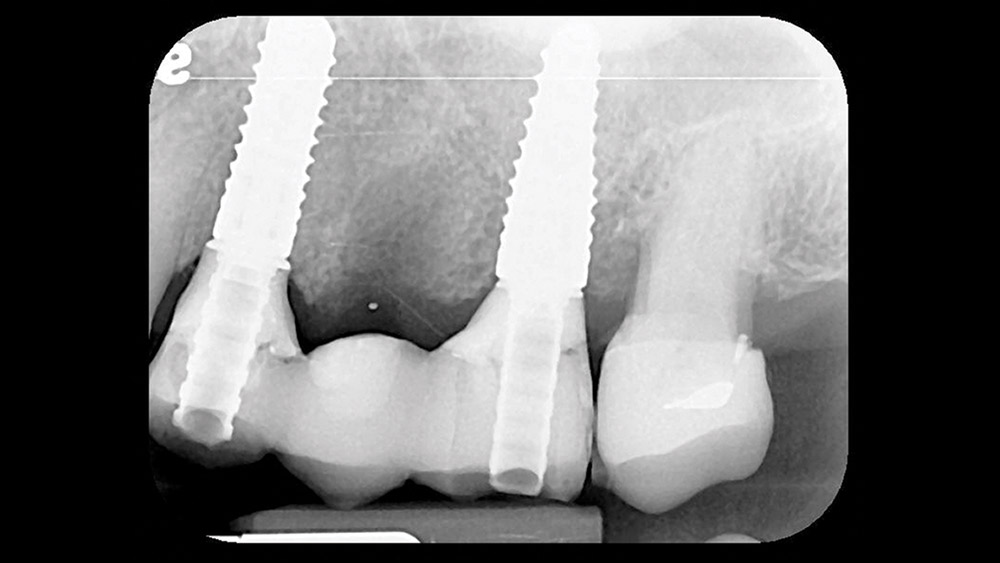
The extraction and socket preservation was done first as planned to evaluate healing, which was uneventful (Fig. 3). Three months later, Straumann® Bone Level Implants (Straumann USA LLC; Andover, Mass.) were placed at the #12 and #14 positions (Fig. 4) using a one-stage approach. Because only 4 mm of bone was present, a transcrestal osteotome sinus elevation with simultaneous implant placement was utilized in the #14 area. Monthly evaluations showed normal healing, and the patient returned to our office ready to begin the restorative phase (Fig. 5).
Due to the history of IV bisphosphonate use, the treatment was staged so as to judge the patient’s healing potential and avoid multiple simultaneous procedures if impaired healing potential was present.
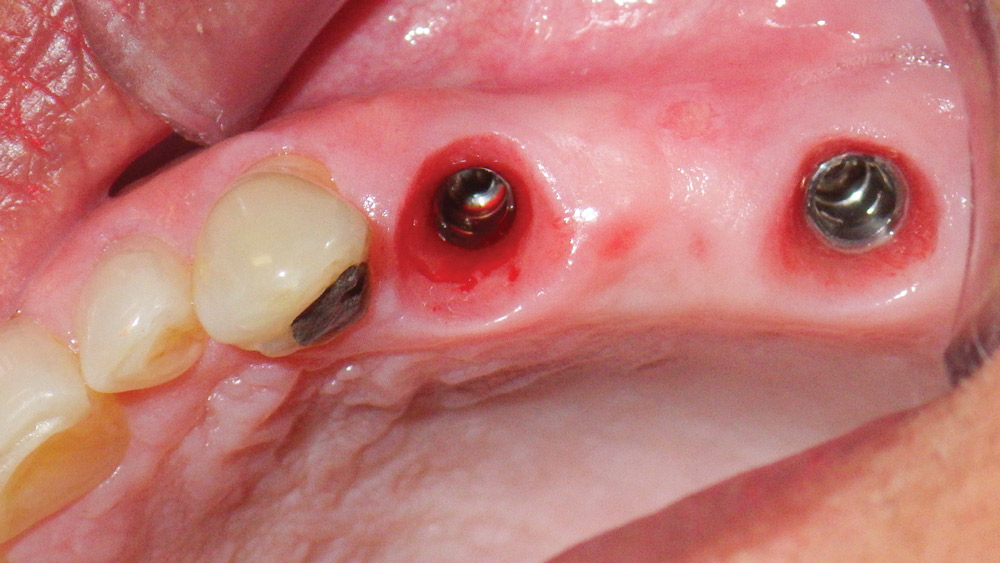
The residual root of #13 was extracted, the socket grafted, and the temporary bridge sectioned and used to create the new implant-supported, screw-retained temporary bridge and a single crown (Fig. 6). The single crown on the second molar was fabricated using the CEREC® system (Sirona Dental Systems, Inc.; Charlotte, N.C.) and delivered prior to sending the patient back to the periodontist for the intraoral scanning of the implant fixtures. By taking time to develop the emergence profile with a properly made temporary bridge, the most esthetic results and ideal healing of the soft tissues can be achieved (Fig. 7).
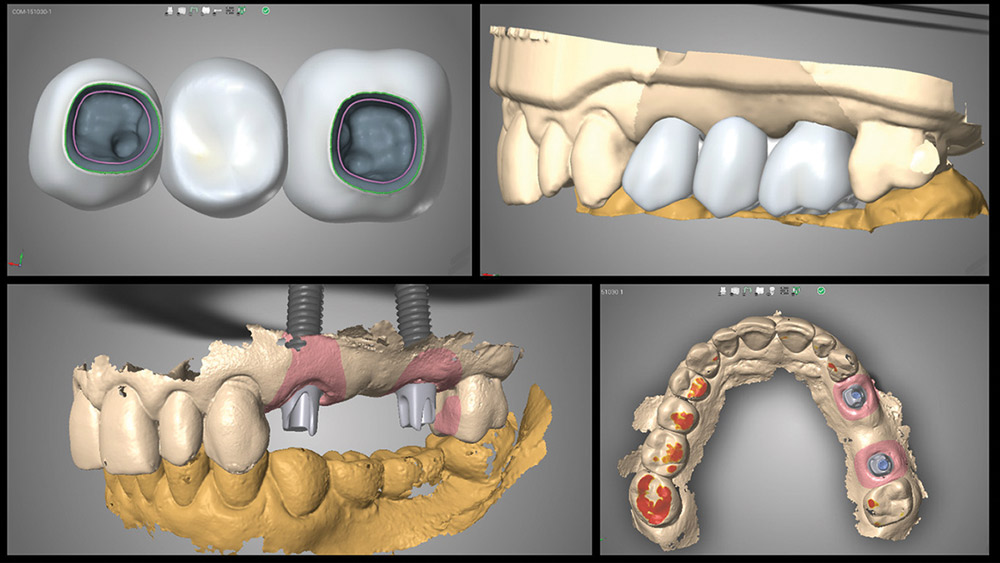
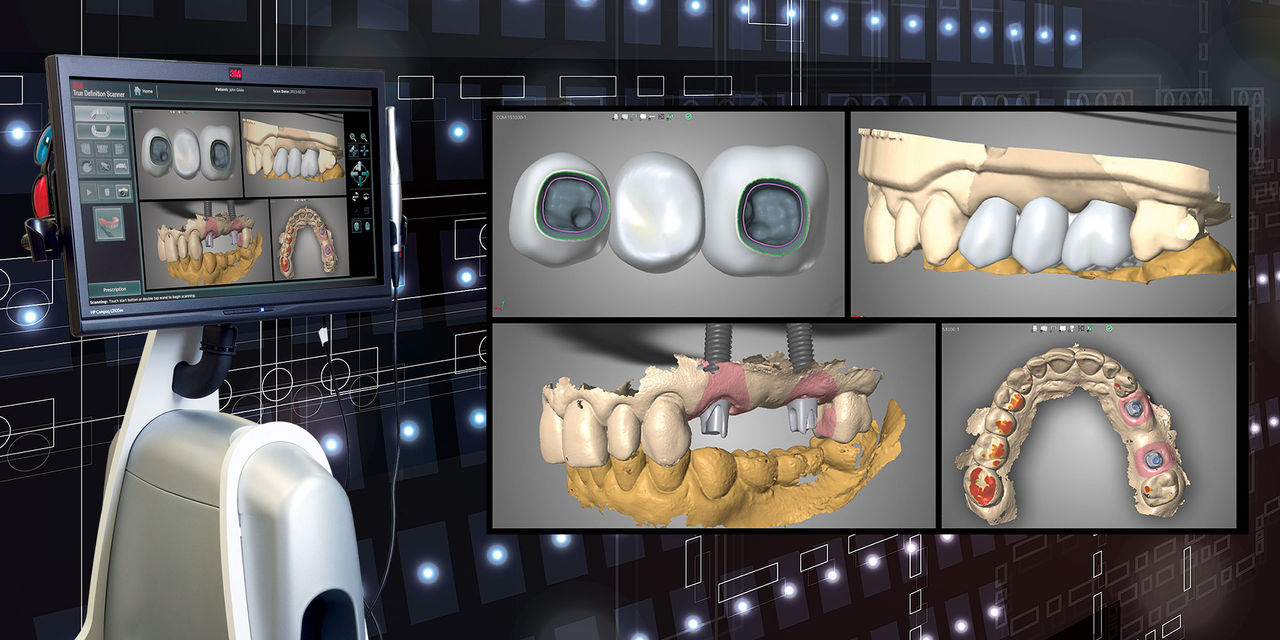
A digital impression was taken using the 3M™ True Definition Intraoral Scanner (3M™ ESPE™; St. Paul, Minn.) at the periodontist’s office. The impression, which included upper left and lower left quadrants and a digital bite registration, was sent to the dental laboratory. A prescription for a 3-unit monolithic zirconia bridge, along with the shade pictures, was sent along with the scan. The laboratory fabricated custom abutments and the 3-unit bridge as requested. During the design stage, communication by the laboratory was done using screen captures of the design (Fig. 8).
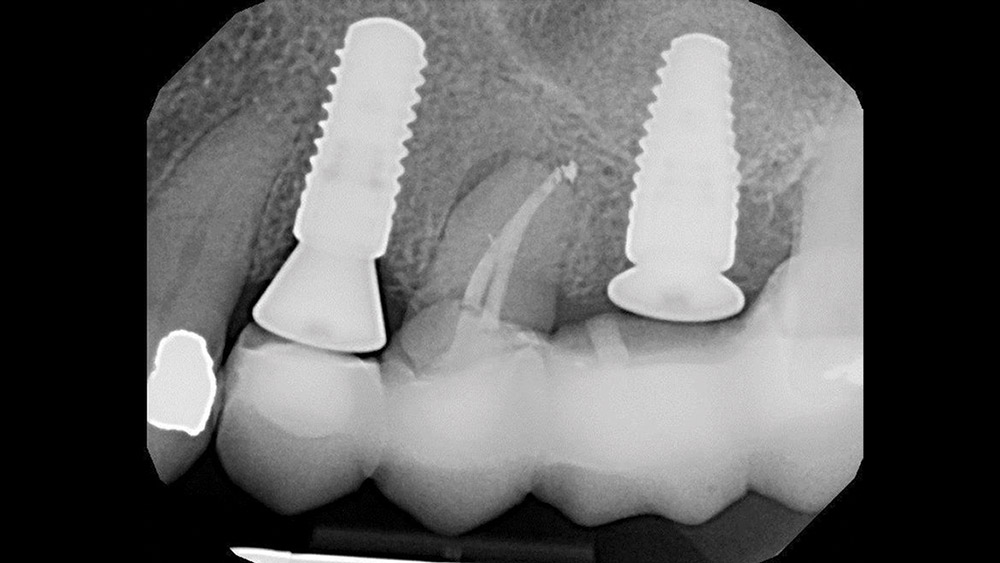
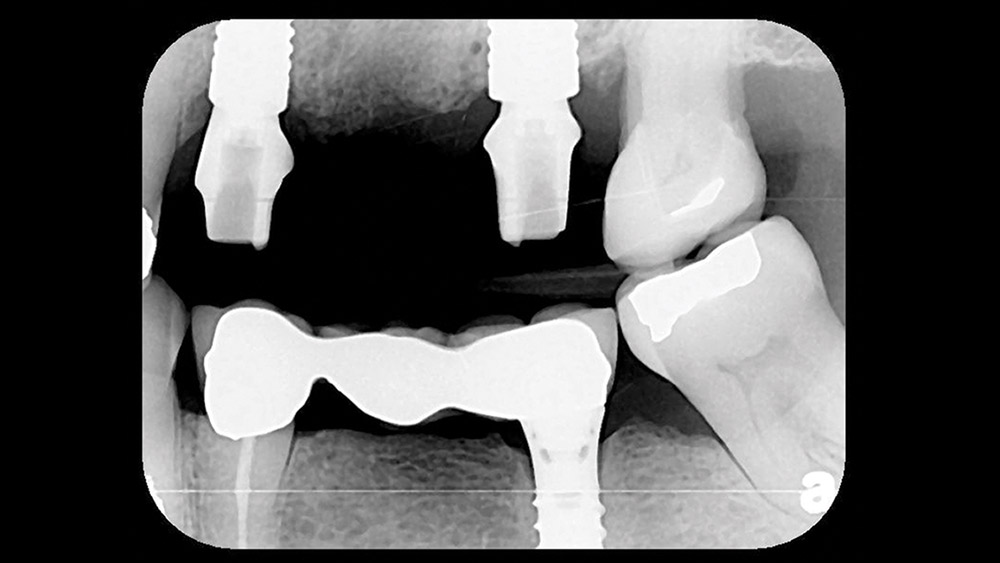
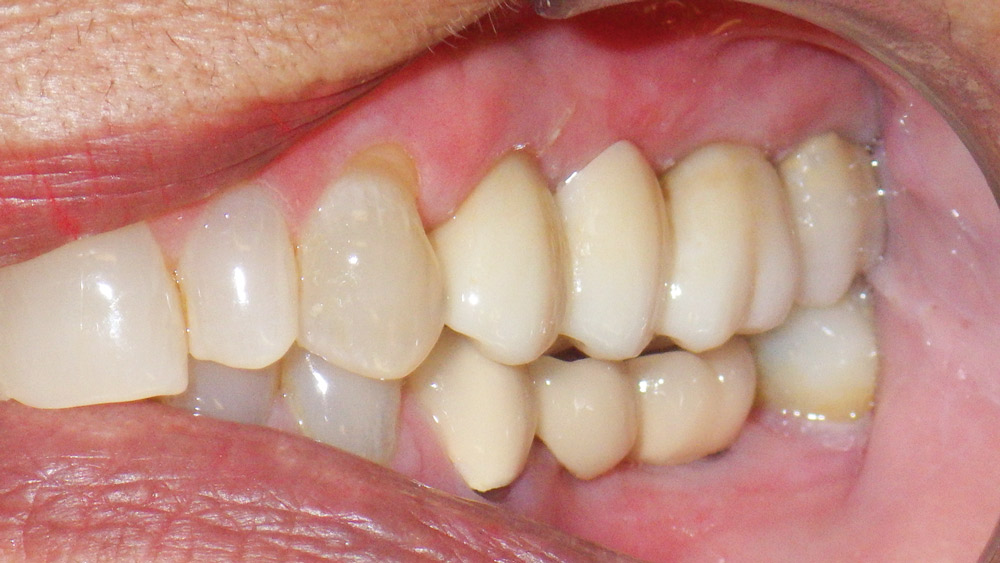
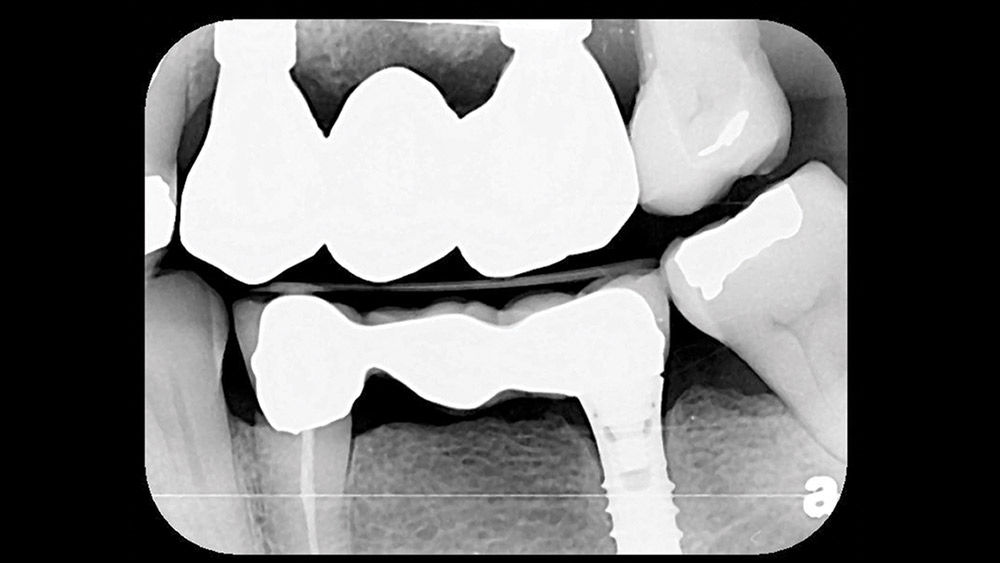
The patient returned for the try-in, and the abutments were placed. Seating was verified radiographically (Fig. 9) before torquing to specification. The bridge was cemented with RelyX™ Unicem 2 (3M ESPE) after very minimal adjustments (Fig. 10). A final bitewing film showed no residual cement immediately after cementation (Fig. 11).
Discussion
A new protocol for obtaining the necessary impressions for implant restorations with great simplicity and detail has been presented as a “game changer.” The accuracy of digital intraoral impressions has been established in the literature.4,5,6 The only remarkable characteristic in this case is the simplicity of the procedure for the restorative dentist. In this case, it required the modification of the temporary, but for single-unit implant restorations in the posterior region, the only thing the restorative dentist needs to do is deliver the crown. There is no need to order impression coping parts or schedule time to take conventional impressions.
The intraoral scanning at the specialist’s office benefits everyone involved. The experienced restorative dentist likes the simple procedure and reduced chair time. The inexperienced dentist benefits from the same things plus a close interaction with an experienced surgeon. The specialist benefits from increased referrals by restorative dentists who would like to benefit from the simplified, state-of-the-art procedure. Last but not least, the patient benefits from a more comfortable procedure, improved fit of the restorations, and reduced chair time.7,8
Acknowledgment
The authors would like to thank Grady Crosslin of Crosslin’s Creative Ceramics for the laboratory work.
References
- ^Howell KJ, McGlumphy EA, Drago C, Knapik G. Comparison of the accuracy of Biomet 3i Encode Robocast Technology and conventional implant impression techniques. Int J Oral Maxillofac Implants. 2013 Jan-Feb;28(1):228-40.
- ^Boudet C. Scannable abutments: digital impressions for dental implants. Chairside. 2012;7(3):45-8.
- ^Hellstein JW, Adler RA, Edwards B, et al. Managing the care of patients receiving antiresorptive therapy for prevention and treatment of osteoporosis: executive summary of recommendations from the American Dental Association Council on Scientific Affairs. J Am Dent Assoc. 2011 Nov;142(11):1243-51.
- ^Karl M, Graef F, Schubinski P, Taylor T. Effect of intraoral scanning on the passivity of fit of implant-supported fixed dental prostheses. Quintessence Int. 2012 July-Aug;43(7):555-62.
- ^Lee CY, Wong N, Ganz SD, Mursic J, Suzuki JB. Use of an intraoral laser scanner during the prosthetic phase of implant dentistry: a pilot study. J Oral Implantol. 2015 Aug;41(4):e126-32.
- ^Ahrberg D, Lauer HC, Ahrberg M, Weigl P. Evaluation of fit and efficiency of CAD/CAM fabricated all-ceramic restorations based on direct and indirect digitalization: a double-blinded, randomized clinical trial. Clin Oral Investig. 2016 Mar;20(2):291-300.
- ^Joda T, Brägger U. Patient-centered outcomes comparing digital and conventional implant impression procedures: a randomized crossover trial. Clin Oral Implants Res. 2016 Dec;27(12):e185-e189.
- ^Wismeijer D, Mans R, van Genuchten M, Reijers HA. Patients’ preferences when comparing analogue implant impressions using a polyether impression material versus digital impressions (intraoral scan) of dental implants. Clin Oral Implants Res. 2014;25(10):1113-8.

