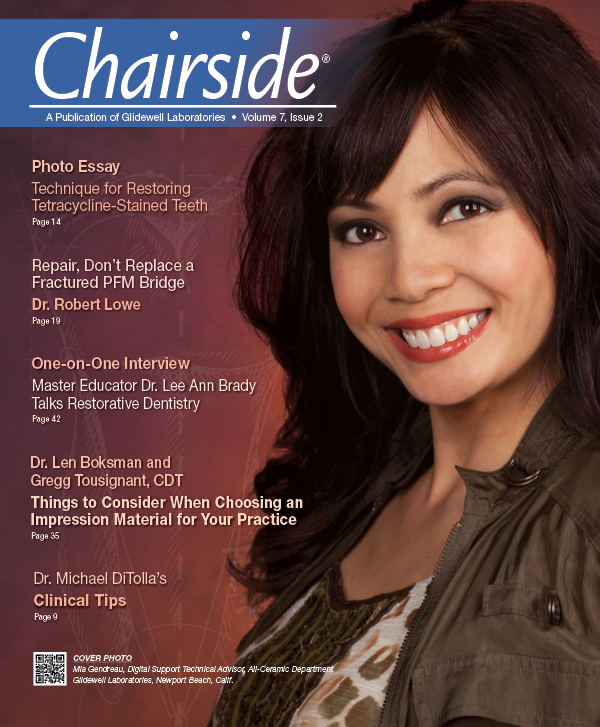
In this issue:
One-on-One with Dr. Michael DiTolla: Interview of Dr. Lee Ann Brady
Interview by

Interview with

As someone who is involved in dental education, reading Dr. Lee Ann Brady’s résumé makes my head spin! Having spent several years teaching side by side with some of dentistry’s best, she recently re-entered private practice to reclaim her nights and weekends. Lee is smart and funny, and I have been lucky enough to spend time with her when lecturing. I hope you enjoy our conversation.
Dr. Michael DiTolla: The thing I love about you, Lee, is that you are dentistry’s version of Justin Timberlake, in the sense that you really do it all. You teach photography. You teach occlusion. You teach adhesion. You teach preparation. There’s almost nothing beyond your reach. I think that’s due to a combination of talent and your educational background. It’s been an amazing path that has taken you to where you are today. So as we get started, for our readers who are not familiar with your background, take us through what you’ve done since you graduated from dental school.
Dr. Lee Ann Brady: Absolutely. As you were describing that broad range of topics, one of the things that came up for me is that it also mimics what I do in my practice every day because I’m a general practitioner, so I have to be well versed in all of those topics. My path did not happen with intention, so much as it just happened serendipitously. I am a general dentist, as I said. I graduated from the University of Florida in 1988 and was in and out of various practice models in the years between then and 2005, when I was asked to join The Pankey Institute down in Key Biscayne, Florida, as a full-time faculty member. So I moved down to Pankey and taught there full-time. I was their clinical director for four years.
MD: That’s amazing to me that you got asked to be a part of Pankey because the only communication I’ve had with Pankey is they have asked me not to come to the courses.
LB: (laughs) Oh, come on!
MD: So I’m amazed that they asked you to come on board like that. How did that happen?
LB: You know, I’ll tell you as best as I know the story. From a purely factual perspective, I was sitting in one of their classes — I was taking their second class, which at the time they called “C2,” their bite splint class — and Monday morning of that class, Irwin Becker, who was chairman of the department of education at the time, came up to me and said, “I’d really like for us to talk privately.” And, honestly, I thought for sure they were kicking me out. It was like being called into the principal’s office.
MD: You thought he was going to hand you a check with a refund for your tuition and have you leave out the back door?

I was sitting in one of their classes … and Monday morning of that class, Irwin Becker, who was chairman of the department of education at the time, came up to me and said, “I’d really like for us to talk privately.” And, honestly, I thought for sure they were kicking me out. It was like being called into the principal’s office.
LB: (laughs) Exactly. “Get out of here!” So I was nervous until we found a time to talk. We finally found the time and went to lunch together and he asked me, “Have you ever considered doing anything in dental education?” That’s literally how I got asked. Up until that point, I really hadn’t considered it. I taught briefly at the dental hygiene program at Santa Fe Community College, which is in Gainesville, Florida, my first year or two out of dental school, just because my practice wasn’t busy and I was looking to keep busy and make a little more money. So I went and taught in the dental hygiene clinic. But other than that, I had no experience in dental education. I went in cold turkey.
MD: So that was in 2005. How long were you there?
LB: I was there until the end of 2008, so just shy of four years. That accounts for my huge background in occlusion. I had already been doing that. Actually, as a student, I had decided at one point that I might focus my practice on TMD patients. I was taking some courses with Mark Piper. I went through the craniofacial pain mini-residency at the University of Florida with Henry Gremillion and was taking Pankey courses. When you’re there full-time at Pankey for four years, you are immersed in the conversation on occlusion.
MD: How interesting that early on you thought you might focus your practice on TMD patients. For most of the dentists I know, that’s one of the first early referrals they decide to make — pedo patients and TMD patients. I used to run from those patients. What drew you to that?
LB: I still do a fair number of those patients. But I decided that, as much as I enjoyed TMD, I also missed restorative dentistry. I loved that, too. So I’ve created a balance now in my practice. What I love about it is the unknown and the mystery. In the beginning, it’s daunting, and you wonder how you will ever figure it out. The more I got to learn about it, the more I realized it’s just a puzzle that can be solved if you are willing to stay curious and stay in the puzzle with the patient, and combine what they’re telling you with what you are finding in an exam. You really have to work through it. One of the things that I think is hard for folks to grasp when they start treating TMD patients is, you don’t actually know when you start what we call “therapy,” which for most of us is an appliance, that this is actually the therapy. The appliance is almost as much diagnostic as it is anything else, because you make it based on a design you think might work. But then, if it does or doesn’t work, that’s diagnostic information. It makes you go, “Oh, I need to go down this other path.” So I like that piece of it. I like the investigative piece of it; that it’s different and always a challenge. It’s not repetitive, like doing an MO composite.
MD: That might be where the disconnect is for some dentists. We take a bitewing radiograph. We find some decay. We go in and we drill it out. We place a restoration. It’s done, problem solved, and we’re on to the next thing. But TMD is not like that. It’s ongoing and you have to be inquisitive. You have to interpret what the patient is telling you and what you’re seeing through the therapy you’re providing.
LB: Exactly. If you’re one of those folks where you like to just do what you do and be done, and then in your mind it’s handled, TMD should not be the part of dentistry you go into. If you like the challenge of it being a continuous process and asking what’s next and how are we going to do this, then TMD is a great aspect of dentistry that has that, whereas a lot of other aspects of restorative dentistry don’t. For me, like I’ve said, I’ve balanced it. I like treating TMD patients in my practice, but I would miss restorative dentistry, so I don’t do that every day that I’m in my office. I have created a balance, and I think a lot of other folks can do that, too.
MD: So you like to be able to mix it up and change gears a little bit, go in and solve a few problems, and then also see a few TMD patients. This is starting to sound like what might be called the “thinking man’s dentistry,” if you will. Less about handpieces and injections, and more about interpretation and trying to figure out what might make the situation better.
LB: That’s the best way I’ve ever heard it explained!
MD: Well, then we’re going to end the interview here. Thanks so much for being with us. (laughs) So you were at Pankey until the end of 2008?
LB: Yep. Then I was asked to join Frank Spear. It was right when he was moving the Seattle Institute for Advanced Dental Education from Seattle and partnering with the Scottsdale Center for Dentistry, which of course now has become Spear Education and is based in Scottsdale (Arizona). So he asked me to be part of that transition, and be the person who moved to Scottsdale, because he and Greg Kinzer and Gary DeWood were still all in Seattle at that point. So I did that at the end of 2008, and I was there full-time until last year.
MD: How did that invitation come about? Because now, for the second time in your illustrious career, you’re being tagged by one of the more powerful people in dentistry to come be part of their organization. Are you just relying on your good looks? How did this happen?
LB: You know, that could be a part of it, and we won’t dismiss that piece. But, honestly, I knew Frank as a student because I had taken his classes in my own continuing education journey, and he also used to come down to Pankey once a year to do a program called “Masters Week,” so I got to know him even better at that point. Gary DeWood, who is a dear friend who I worked with at Pankey, was already in Seattle and had joined Frank at the Seattle Institute for Advanced Dental Education. I also had three kids at that point, and my daughters, who are now almost done with high school, were just on the crux of being teenagers. So I really was looking to not live in Miami anymore, to have my kids someplace where I felt more comfortable with them learning to drive and starting to date and do all of those things in a less cosmopolitan setting. Gary knew that, so I’m sure that was part of it. And, talk about having your heart stop, there’s nothing on the planet like having your phone ring (at that point I still had an actual house phone) and you go over and the caller ID says “Frank Spear,” and you’re like, “Really?” I can remember that evening at my house because I went over to the phone and was screaming to my husband, “It says Frank Spear.” My kids were like: “Answer it. What’s your problem?”
MD: That’s great. And when you answered the phone, did you say, “Frank, I’d love to talk, but I’ve got Gordon Christensen on the other line”?
LB: (laughs) No. Unfortunately, I was so tongue-tied that I don’t know what I said!
MD: I don’t blame you! So what was your role at Spear?
LB: I was the executive VP of clinical education.
MD: And you were there for how many years? About the same amount of time you were at Pankey?
LB: A little bit less. I was there for almost three years full-time.
MD: And you recently decided to get back into private practice and spend a little more free time with your family?
LB: Absolutely. June of last year I left Spear Education as an employee and went back into private practice. I practice here in Glendale, Arizona. I am still teaching. My intent was always to continue to teach some. But I really wanted a lot more control over my schedule because, as I said, I’ve got three kids and two of them are in high school and the other is just about to be in high school. The other part of it for me was I felt like I really needed to be seeing patients in order to continue to grow as an educator. I had spent eight years in formal general continuing education with very little opportunity to interact with patients, so I wanted to go out and do the things I was talking to other folks about.
MD: As I alluded to earlier, that really is an amazing background. With the experience you’ve had, I’m not sure what’s left for you to do, except maybe I’ll nominate you for ADA president because it sounds like you have a hard time saying “no.” But it really is an amazing background, and it has all added up to someone who is not only able to do all these things in your practice, but you’re able to teach it and teach it well. That’s a gift, too.
To get back to occlusion, because I know you’re so well grounded in that, here at the laboratory, about 75% of the restorations we do are single-unit restorations, and then another 11% are 2 adjacent units. Basically, 86% of what we do here at the lab is either 1 or 2 units. So, from our perspective, for the typical dentist out there sending us work, it looks like dentistry is being done one crown at a time; not big, full-mouth rehabs. For the doctors who spend most of their time doing single-unit crowns, I think occlusion is having the patient bite on the paper, see the blue dot and getting rid of an interference, and that may be all they need to be concerned about. But for those kind of basic cases, what do you do? What do you look for? Are you doing full-mouth occlusal adjustments on those patients who come into your practice and maybe just need one crown?
LB: That’s a great question, and my practice really mirrors what you guys are seeing in the lab. For the majority of my patients, we do dentistry in very small units. Honestly, even when I do patients where we’ve talked together about a comprehensive treatment plan and the patient is ready to do that, because of their time constraints or their economic constraints, we have to figure out how we do dentistry in little pieces over 10 years. So that’s mostly what I send to the laboratory.
MD: Wouldn’t you agree that it’s much easier for most of us to do 28 units of crown & bridge one or two crowns at a time then it is to do it all at once?
LB: It depends what you mean by easier, but I think there are pieces of it that are easier. It’s easier on the patient, definitely, from a patient experience. Unless you’ve been a patient and sat in the chair and had 14 units prepped on the same day, you have trouble comparing that. There are pieces of it that are easier from a treatment-planning perspective, from a case-presentation perspective.
I guess for me, when you ask what people should know about occlusion, it does go back to that planning piece. I think we need to spend a little bit of energy understanding who are our high-risk patients from an occlusal perspective. Those are the ones where you do the single-unit or the 2-unit, and now you find yourself in a situation you’re not sure how to get out of. So you lose your clearance on your prep, or you grind the crown in and the patient never feels that their bite is the same. You’re looking at the dots thinking it looks right to you and wondering what the heck they’re talking about. Or maybe, the worst one, where you come in and there’s a hole in the provisional. In the old days with porcelain fused to metal, at least you knew you could adjust through and the worst thing that would happen is you would tell the patient they had a little silver amalgam in their crown. With all-porcelain, now you don’t have that opportunity to back out any more. So I would say, figure out who those high-risk patients are and, at a minimum, know for yourself and have a conversation with the patient, so if some of those sequelae happen, now it’s something you knew might happen and it’s something you’ve already talked about and predicted. It’s not something where you’re wondering how you are going to make it right.
MD: Give me an example of a typical case that might walk in off the street, something simple like a single-unit crown. The patient walks in with a broken cusp — it’s cutting their tongue or their cheek — and they’re basically begging you to prep it. Give me an example of a case that might be one of those high-risk cases.
LB: Well, the first one I think of, which is super common in your scenario of a fractured cusp, is you’re going to do an upper or lower second molar. For most folks, if we look at, percentage-wise, which tooth in the arch is the one that trains our lateral pterygoid and has our brain know how to find intercuspal position, it’s going to be on a second molar. Now you look at that tooth and you don’t know, when you prep the rest of the occlusal table away, if they are going to lose that muscle memory, and therefore, the instant you do your prep, you go in to check and there’s no occlusal clearance. I don’t know if you’ve done this, but I’m geeky enough that I’ve actually looked at the research, and five minutes is nowhere on the bell curve for normal supereruption. Teeth don’t do that. If you lose your occlusal clearance literally while you’re prepping, it’s because the lateral pterygoid muscle is relaxing and releasing and the condyle is receding.
So what do I look for in that situation? Sometimes it’s hard if the cusp is broken because they may have just eliminated their own first point of contact. But I look for wear because patients who have wear on their second molars — no place else on their arch but on their second molars — what runs through my head is they get their condyles back in centric relation. They either peri-function back there or this is a place they go to. I need to be thinking about this. I also always look for the difference between intercuspal position and that seated condylar position from a standpoint of the relationship of their front teeth. How much do their front teeth come apart vertically? Is there an A-P piece of that? What’s the distance? Because if their front teeth open 3 or 4 millimeters when you get their condyle seated, and that gets deprogrammed, that is going to translate to 1 or 1.5 millimeters off the top of your prep, and there goes your clearance. If the discrepancy is little, which fortunately for us it is in 85% of the population — it’s less than 1 to 1.5 millimeters — we’re never even going to notice on that second molar.
MD: OK, let’s say the patient comes in and it’s not a broken cusp. Somebody’s got a large amalgam in a lower second molar and it’s got a little recurrent decay and you’re getting ready to prepare it. How do you handle that and how do you go into that to minimize the risk of those kinds of sequelae happening when you prep that second molar?

For the majority of my patients, we do dentistry in very small units. Honestly, even when I do patients where we’ve talked about a comprehensive treatment plan and the patient is ready to do that, because of their time restraints or their economic restraints, we have to figure out how we do dentistry in little pieces over 10 years.
LB: For me, it’s super simple. I reach for a leaf gauge. I keep a leaf gauge on my exam tray. It takes me probably less than a minute with a leaf gauge to find out, number one, if they have a positive load test, which tells me their lateral pterygoid is kind of tight. If I can get it released, can I find first point of contact? Is it marking on the tooth I’m about to prep? If it’s marking on a different tooth, my risk is really low. If I’m about to prep away that contact, now the risk just went up. I can also see visually with the leaf gauge in, when they’re touching that first contact, how far apart their front teeth are. Again, if the number is 3 or 4 millimeters and something changes, I know I’m going to see it and it’s going to affect my prep.
MD: So the take-home message for dentists is that the most common trap we’re going to fall into is on those second molars?
LB: Exactly. Then, statistically, are there first molars? Sure, but it’s a smaller number. Are there people who have it on a pre-molar? Sure, but now it’s a really small number. Maybe you do nothing more than stopping before you prep the second molar and asking if this is the tooth that’s the first point of contact. I used to get really weird about that when I thought I had to do a bilateral manipulation, and I don’t think I’m unique to that. I think that’s a technique where people aren’t sure what the heck they’re doing. But do it with a leaf gauge, and it’s super simple. You can learn to do it with a leaf gauge very quickly, probably one time using it and having someone explain it to you, and now you have it on your tray so you can figure that out.
MD: I’m sure that is one of the things you teach in your course. In fact, you do some online courses as well. Is that one of them, the occlusal therapy course?
LB: Absolutely. I just completed the online course called “Occlusal Diagnosis: Identifying Risk,” and it really is geared toward the general dentist, the restorative dentist. What we talk about is how you do an exam in a way that, if somebody is going to have risks from joints, muscles or their occlusion, you can identify those people; those red flags are obvious. With this group of people, you can say to yourself, I’m going to slow down and get more information, versus the folks where you can just prep the teeth.
MD: If people want to find that online and sign up for that course or watch that course, where do they go?
LB: They just go to my website: leeannbrady.com.
MD: Perfect. That would be a great place for them to go.
I was just reading the American Association of Cosmetic Dentistry’s State of the Cosmetic Dentistry Industry report they released for 2011, and it talks about how cosmetic dentistry has really been down. How veneers have been down almost 10% since 2007. When you break down the veneer numbers here in our laboratory, the IPS Empress® veneers (Ivoclar Vivadent; Amherst, N.Y.) continue to shrink and shrink at an alarming rate. But the good news is, at least for the veneer department, that the IPS e.max® (Ivoclar Vivadent) numbers for veneers continue to grow, and that mirrors what I do for any multi-veneer case now. IPS e.max is my go-to material, and I love something that looks essentially as esthetic as IPS Empress, though maybe not exactly the same in terms of esthetics, but certainly no patient can tell the difference. I love the fact that it’s three-times as strong as IPS Empress. Are you finding yourself using e.max more for veneers as well?
LB: That is a great question. Of my posterior restorations in my practice now, I can’t tell you what percentage are e.max, but the vast majority of them are lithium disilicate. For me, it has really replaced porcelain fused to metal. I do lithium disilicate almost exclusively in the posterior now. For the anterior, it’s a place where I’m playing with it. I go to the research and I look up how important that extra strength is in the anterior. Really the science doesn’t support that it makes much difference around materials, and we went through that for years when we talked about the different kinds of ceramics in the anterior. Now if you want to talk about a patient who is a bruxer, who has edge-to-edge wear, I wouldn’t even think twice about it now. When people say, “I want to do beautiful anterior veneers and I’m concerned about strength,” e.max, or lithium disilicate, is definitely the material of choice. But in patients where that’s not a concern, I don’t have a strong preference.
I’ll tell you how I do it: I actually talk with my technician. I send my technician all of the pre-op photographs for the case. I tell them what the pre-op shade is. I show them that this is what the patient wants. The patient wants this much of a shade change in the final restoration. They want Hollywood, where it’s monochromatic and it’s really high value, or they want totally natural. I give the technician all of those parameters, and then I say: “What do you think you can get me the best results with? What do you feel like you work with the best to get me those results?” At that point, it’s really an esthetics decision. I have preferences over what kind of composite I use for different esthetic situations, and I want them to know that I happen to like this color system or this staining system better, but because the ceramist is the person stacking the material and working with it, they get to choose.
One of the technicians I work with all of the time is a huge fan of lithium disilicate, so I have had a chance to do a number of anterior cases, veneer cases, using lithium disilicate. What they have done with the esthetics is just dramatic in the last couple of years. With the esthetics of Ivoclar’s new Opal series, their ingots and their blocks, it’s going to get to a place here really, really quickly, where it’s going to be hard to differentiate, from an esthetic point of view, what material was used. In that case, sure, why wouldn’t we use the strongest thing we have out there?
MD: If you look at the numbers of what we’re doing in the lab, probably the most shocking thing in the last two years has been how the PFM is literally disappearing. It’s gone from being about two-thirds of the crowns we made here five years ago to less than a quarter of the crowns we make here today. You would almost think that a bunch of research came out saying PFMs are causing cancer or something because of the way dentists are turning and running from them. But, really, it’s these high-strength, cementable all-ceramics like IPS e.max, and a product that is a little less researched and a little uglier than IPS e.max, the full-contour zirconia material BruxZir® Solid Zirconia — the one that we’re doing here at Glidewell. It’s amazing. We totally underestimated how much more the average American dentist was concerned about strength than they were about esthetics. So with what I’ve seen here in the laboratory, it has evolved to the point where I’m doing mainly BruxZir restorations in the posterior and the less esthetic areas, and mainly IPS e.max in the anteriors. I don’t do that many single-unit PFMs anymore. For me, the PFM has just really become a bridge material. Is that what you find for PFMs as well?
LB: Exactly. I cannot think of the last single-unit PFM that I did. Actually, I can. I had a patient who had some of the worst discolored teeth — combinations of secondary dentin and old metal post/cores — and we just decided to go with PFMs with metal cutbacks to try to maximize the esthetics. But that was a very unique situation. Single-unit PFMs in the posterior? I can’t remember the last time I did one. And, yes, Glidewell is right on the cutting edge of developing those materials.
I guess it doesn’t surprise me how it’s been adopted, simply because I think a lot of dentists, like me, have the experience of recommending a crown for a person and having them get this weird look on their face. If you actually stop and ask them about their reaction, they ask if the crown is going to have this “black line”? And they point someplace in their mouth to an old PFM that was done with a metal margin. It’s amazing to me how patients find that so offensive, where they can see that metal margin, way more so than having to have the exact shade of a posterior tooth match. It’s really rare for me with a patient, especially when you are doing single teeth, to have the patient say, “Oh no, I don’t want you to cement that one because it’s slightly darker than my tooth or slightly brighter than my tooth.” I actually show them. I will actually hand them a mirror and say, “I want you to look at the color before it’s fully cemented in.” And they usually look at me and say, “Why are you asking me this?” But that metal margin, they just hate. So my guess is that other folks’ experiences are similar. And then you know you have a material that’s strong, which has always been the PFM’s claim to fame. Why wouldn’t you use something that’s all-porcelain? You also have patients who say to you that they don’t want any metal in their mouth.
MD: I’ve had a couple of patients over the years get really demonstrative about that, and they did happen to be women — probably because they pay more attention to themselves than men do! Once most men get married, we just give up and stop caring about how we look. But I had a woman get really upset because she could see a lingual metal margin on an upper second molar. I told her no one was ever going to see it, and she said, “You can see it if I’m lying on my back with my mouth open.” I had to ask her what she did for a living. I mean, how often does someone find themself in this situation? I saw a patient who had a gold stud in her nose, but shuddered when I mentioned placing gold in her mouth on a lower second molar where I didn’t think I would be able to get enough occlusal reduction. So there is something weird. Gold is highly acceptable around your neck, hanging from your ears, stuck through your nostril, for some people, but you put it next to a tooth and it’s a cardinal sin.
LB: I agree. I think that’s been a huge boon to it. I also think the other part of it is it allows us to be more conservative, if we don’t have to put all of the margins subgingival. And dentists love saving a half-millimeter or a millimeter. I think that’s one of the things I love about our profession, how concerned we are about preserving tooth structure.
MD: Well, OK, I’ll give you that. I know that you’re conservative and you want to do that, but many of us under-reduce and when called out on it, we say we were trying to be conservative. If a dentist prescribes a PFM, for which our lab and the manufacturers of the materials have always asked for 2 millimeters of occlusal reduction, and they give us three-quarters of a millimeter, I’m not going to say, “Oh, doctor, you’re so conservative.” If you’re that conservative, prescribe a cast gold crown because you’re under-preparing. It’s either laziness or not having a system to reduce enough. But I hear what you’re saying because one of the things about BruxZir, or any solid zirconia for that matter, is it can be made thinner than, for example, an IPS e.max crown, especially if it’s not on a posterior tooth. You can’t go below a half-millimeter with a contoured zirconia restoration on a posterior tooth, but on an anterior tooth, you can get away with a half-millimeter, maybe a little less.
I’m going to start experimenting with minimally invasive crowns, where we remove the least amount of material possible and see what it looks like to put one of these super-thin, high-strength crowns on top of it. We’re not going to start selling those anytime soon, but we are going to start experimenting with those. It would allow us to be more conservative, like we’ve seen for veneers. When I went through LVI, we were not only prepping veneers into dentin, but prepping into deep dentin. Have you noticed over the years the change in the way that you prepare veneers, in terms of the depth?
LB: Oh, absolutely. I am much more conservative now. I make decisions about the amount of tooth reduction based on things like how much I am going to change the shade of the tooth. I don’t want to tie my technician’s hands behind his back and say, “I’ve given you 0.3 millimeter of reduction, but can you take this from an A5 to an OM3 please?” Part of that is we have to give the technician adequate reduction. I would tell you from the experience of teaching a lot of handson preparation courses — and I think every technician in every laboratory I’ve ever talked to agrees with this — that under-reducing is the classic problem in dentistry when we do indirect restorations. When I work with dentists on prep design, what I find is they mentally know how much tooth reduction they want to send the laboratory. Where it breaks down is they’re using their visual cues to try to assess how much they have, instead of actually using hard facts like depth-cutting diamonds to know how much they’re doing their depth cuts and reduction, and then going back and checking the amount of reduction.
I do a thing in my prep course where I have everybody prep a tooth without measuring. I have them write down how much they want to prepare, then prep the tooth. Then I go back and show them how to measure, and everybody, across the board, under-reduces. I do it! If I don’t measure, I always under-reduce. Now, one of the things that’s happened after a couple of years of doing a prep design technique, where I have been very meticulous about measuring my reductions, is that now my eye is getting better because I’m sort of training it. But I still don’t trust it. So one of the classic things that I’ve gone back to, if I’m going to do occlusal reduction on a posterior tooth, is placing depth cuts. But you’ve got to know what you’re doing. Pull out an old 330 carbide bur. Everybody has one of those in the office somewhere. You don’t use them for anything because they’re too wimpy for most preparations anymore, but they’re exactly 1.5 millimeters from the tip of the bur to where the shank starts. Just drop a bunch of pinholes in an occlusal table. Go up on the cuspid. Go on the inclines. Go on the central groove. And then connect the dots.

I do a thing in my prep course where I have everybody prep a tooth without measuring. I have them write down how much they want to prepare, then prep the tooth. Then I go back and show them how to measure, and everybody, across the board, under-reduces. I do it! If I don’t measure, I always under-reduce.
MD: Yeah, I had to do that when I started practicing in the lab and we started filming everything. I realized I had to start getting better in a hurry. I was a chronic under-prepper, too. I stumbled onto these depth-cutting burs, these self-limiting depth-cutting burs that come in different depths. There’s a 1.5 and 2 millimeter. I was shocked when I put a 2 millimeter hole in the occlusal surface of a molar and then prepped until I thought I was done. I had half the hole left the very first time! And I thought, no wonder I was chronically under-preparing, because if you’re not used to seeing 2 millimeters, it looks like a really deep hole. It looks like an endo access.
LB: It does!
MD: But the weird thing is that dentists will never give us, as a laboratory, 2 millimeters of occlusal reduction because when you under-prep for so long, it feels like malpractice to do 2 millimeters of occlusal reduction. But, meanwhile, they’ll do 2 millimeters of occlusal reduction for a Class I amalgam or composite, or a Class II amalgam or composite all day long because every time you do a crown prep and make a 2 millimeter hole in a molar, it goes all the way down to the base of the amalgam. So, for some reason, dentists don’t have a problem prepping 2 millimeters into the tooth if it’s for a direct restoration, but when it comes to an indirect restoration, all of sudden, 2 millimeters seems like it’s over the top. I’ve never quite figured out where that disconnect comes from.
LB: I actually don’t know. I haven’t thought about that. But, you’re right, that’s my experience of it, as well. I don’t know, maybe it looks more aggressive when the cusps are gone, but with a Class I or Class II direct restoration, it looks like there’s tooth there. I’m old enough that, when I first learned how to do crown preps, we actually depended on retention form and resistance form to keep them in. So my brain is going, “How much wall height do I go?” Nowadays, we bond everything, so that’s really almost become a non-conversation.
I know that when I really started paying attention to this, one of my least favorite words ever in dental school was “armamentarium.” If someone says that to me again, I’m going to lose it. Every day in the clinic you’d go to get ready and they would say, “Tell me about your armamentarium.” Oh man! Now I teach that to dentists and I use that word because, especially when it comes to preps and indirect preps, you’ve got to know what you’re putting in that handpiece. Tell me the diameter of that bur. Tell me the length of that bur. Tell me what the tip looks like. Are you trying to cut a chamfer or a shoulder? Well you need to put the right bur in the handpiece to do that, or you’re going to frustrate yourself and your lab is going to wonder what they’re supposed to do with it.
MD: Exactly, and so my prep technique — I just had to come up with it for myself because I couldn’t prep well without it — is really intellectually insulting, in a sense. I’m a professional, and my whole prep technique is a 2 millimeter hole on the top and a 1.5 millimeter one on the axial and a 1 millimeter round bur cut on the gingival. At times I think, “I should be better than this.” I graduated the same year you did. I should be able to prep this tooth and get it right without any depth cuts. But, you know what, it’s not a big deal. Pilots have a checklist before they take off in a plane for the 2,000th time. To me, it’s just an easier way to do it than to prep it and then go in with bite registration after the fact, or wax and calipers, and try to measure how much you took off. Just put some holes there and prep until you can’t see the holes.
LB: That’s exactly how I do it. The other thing I would say on that is, I think it’s actually more efficient. When I watch dentists prep, it seems less efficient when they’re taking the same burs in and out of the handpiece multiple times, versus using this one first until they’re done, this one second until they’re done. I find that by having those marks on the tooth, I can cut a tooth way faster and more efficiently than I ever did before, and it’s more effective! So I don’t get those phone calls from the laboratory. We love you guys and all, but I have to tell you that when my assistant tells me the lab is on the phone during the day in the office, I’m thinking: “Oh really? What did I screw up?” (laughs)
MD: Exactly. Once you have the depth cuts in, it’s just a race to see how quickly you can get the rest of the tooth structure off because you know exactly where you’re going. And, by the way, I hate the word “armamentarium,” too. I want to back you up on that. It’s my second least favorite word. My least favorite word in dentistry is “dentifrice.” Why are we calling it dentifrice? I hate when we try to sound like we know more than the patient does. “I’m going to suggest a dentifrice for you that I think is going to help with your abrasion problem.”
One of the things I teach at my courses, which I’ve learned from being here in the laboratory, is there doesn’t seem to be any easier or quicker thing you can do to get better results from your laboratory when it comes to esthetic dentistry than digital photography. I just notice here when I watch the technicians work that they try harder when there is a digital photograph in front of them because now they see what they’re aiming at. We are here in California, but we have dentists that prep crowns on tooth #8 and #9 in New Jersey, and they’ll send us the impression to make crowns on #8 and #9 using IPS e.max, shade A2, and there’s no photograph that goes with it. We can match the shape of the laterals next to it on the model, but there’s nothing about what the teeth look like, what the lateral incisors look like. It seems like a tall order for the technicians, and they have to think: “You’ve got to be kidding me. You want me to make crowns and match these teeth based on a yellow stone model?” I see what happens when we give them digital photographs. Then they know it’s a dentist who cares, who has a little bit higher standards. Even if they weren’t great photographs, I think digital photography is a great way to ensure that you get the highest-quality esthetic dentistry your lab is capable of. I know you teach courses on digital photography, and I just want to get your take on that.
LB: I couldn’t agree more. I couldn’t practice without photography. Let’s go back one step even before laboratory work. I would tell you that taking photographs in my practice is the thing that transformed my case acceptance, even if it’s just four simple photographs. You just want to take an upper and lower occlusal, a smile and a retracted with the front teeth in it. Now you and the patient can sit and look at the same thing. We don’t think about the fact that our patients don’t know what their teeth look like. They don’t know what their mouth looks like.
MD: Did you use an intraoral camera at any point, or have you always done it with digital photography?
LB: Yes, I used to use an intraoral camera myself. I actually still have an intraoral camera and both of my hygiene operators have them. To show a patient a single tooth, such as a recall patient where everything is healthy, but there is one little spot where there’s a little recurrent decay or a little recession, I think an intraoral camera is great for that. I always use my digital camera, mostly for new patients. I want them to see their whole mouth. I want to be able to talk to them about that ugly, old black filling on their lower first molar, and have them be able to see, without me saying it, that there are four more on their lower teeth, because they are all in the photograph.
MD: I take it you’re not just showing them this on the little LCD screen on the back of a camera after you shoot these four shots.
LB: No. Our protocol is I take the four photographs: upper and lower occlusal, full smile, and then with retractors in and the patient’s upper and lower teeth apart so both occlusal planes are visible. Then we take the card out of the camera, throw it into a card reader that’s connected to a PC in my office, Microsoft Photo Viewer comes up, which is preprogrammed on every Windows PC in the world, and it lets us print those four pictures on a single sheet of paper. I actually do it on plain paper; I don’t buy photo paper. I’ll print them and take them to the patient. My conversation with patients will be, “We’ve got these in your chart as a part of your permanent record, but I thought you might want a copy of these,” and I’ll hand them to the patient. Most patients will then look at them. As soon as they do, my next comment is: “Do you see anything in the photographs of your teeth that you’re curious about or that you have a question about? Let’s really make sure we talk about that,” and I’ll hand them a pen.
MD: Wow. See, I hand it to them and say things like, “I bet you didn’t know your smile was so ugly!” That’s too strong maybe.
LB: (laughs) That might be less effective. So I can’t imagine practicing without photography. For me, when I’m sending stuff to the laboratory, I actually need to go overboard and send too many photographs. This has made such a big difference for me as far as what I get back in shade matching. People say to me all the time, people who are techie, “But it’s not all color corrected,” and I say that’s almost not the point. The point is that the technician can actually see, relative to the other teeth, what that looks like. They can see nuances from the standpoint of chromo-gradient and if there are little decalcification spots. My experience is that every technician I’ve ever met sees 100 times more in a photograph of teeth than I do as a dentist because they have that eye.
MD: Exactly. Technicians love to have, not only the picture of the teeth, but let’s say an A2 in there next to the adjacent tooth. It doesn’t need to be a perfect match. They just need to see how it looks relative to the A2 shade tab because they’ve got that same shade tab in the lab and they can use that as a reference. Are you taking all of those pictures, or is your staff able to take those four pictures if you’re off doing something else?
LB: My assistants are all trained to use the camera and take digital photography. I’d say that a few of them are better photographers than I am. So we can switch in and out to do that. If I’m doing a single central and it’s really challenging because it’s a high-esthetic-demand patient, I’ll probably go in and do the photographs, because then I can get anal-retentive and do stuff like exposure bracketing, give the ceramist one that’s a little dark and one that’s a little light. But that’s not my routine. My routine is usually two to four photographs with the shade tab in there, without the shade tab in there, and the ladies in my office all do that very well.
MD: I bring that up mainly because I want dentists to understand that this isn’t something they have to do themselves. In fact, my assistant is as good as I am at this point, and she complains less. If I have to take those four photographs, and she’s not in there to help me, I’m pissed! But somehow she does all four without me anywhere near her, so in that respect I guess she does it better than I do. But I don’t want the doctors to feel like this is something else that’s thrown on their plate. This isn’t. You could just walk into the operatory and have the patient already be holding the sheet with the four pictures on it, and you could just sit next to them, say hi, ask them what they think, and let them tell you.
LB: Exactly. I’m a huge fan of photography, and it’s so much easier than it used to be. Most of the cameras we use in dentistry now are basically the same camera bodies that you can buy anywhere, so you can learn to use them. Dental photography companies have training sessions, there’s online stuff, there’s stuff on YouTube. There are so many resources now to get over the initial learning curve, and most of the new cameras can be set on automatic.
MD: Exactly. I understand why dentists were turned off from it in the past. I remember you would shoot Kodachrome or Ektachrome, and you would have to send it out for E-6 processing and you’d get it back a week later. Before you could even prep the case, you had to make sure the “before” pictures turned out. That was crazy. But it’s instantaneous feedback now and, literally, any dental assistant can be taught to do it now. There are plenty of good classes like yours, and there are tutorials on YouTube. For all we know, we’re two years away from taking these pictures with our iPhone and then sending them to the laboratory.
LB: Exactly.
MD: As you do a lot of stuff with adhesive dentistry, I want to talk to you about self-etching adhesives. One of the things I noticed after I came out of LVI and started doing a lot of deep veneer preps using the total-etch technique was that I had more postoperative sensitivity than I cared to see. It always bothered me when a patient came in, completely asymptomatic, and we did 10 veneers on them, and now he had two teeth that were pretty hot for a few months and maybe one of them needed endo. That was always one of the things that disappointed me. I can’t blame the technique or the materials or myself. It was some combination of all three — I’m willing the take the blame. But when self-etching materials came out, it seemed like, by lowering the postoperative sensitivity potential, that it was going to be a step in the right direction, even if we didn’t have the same high bond strengths. I interviewed Dr. Jose-Luis Ruiz a few months ago, and he has gone fully self-etch for everything. He does not use total-etch anymore. So that’s one far end of the spectrum. I think over at the other far end of the spectrum are the dentists who just love total-etch and still use it all the time. Maybe they will use self-etch under a direct composite, or something like that. What has your experience been with self-etch adhesives, and where do you find yourself using them most?
LB: I’m probably one of the folks in the middle. I was, for years, a total-etch fourth generation. I used to teach it as the gold standard. Technically, if you just want to look at brass tacks research numbers for bond strength, it’s still the gold standard. The challenge, for most people, is that it’s so technique sensitive that whether you talk about post-op sensitivity from the etching technique or marginal integrity because of the film thickness those generations of dentists use, the average general practitioner runs into trouble. So now we have three other generations of self-etching products and new total-etch products.
What I use right now is what we call a “selective etching technique.” I actually use phosphoric acid and I etch only the enamel, and then I let it go for 25 seconds and I rinse it off and dry it. What do I avoid with that technique? I’m not worried about over-etching, which is having the phosphoric acid against the dentin for more than 15 seconds, or overdrying the dentin; these are the two big reasons why dentists have post-op sensitivity with phosphoric acid. Then I switch to a self-etching dentin adhesive. I apply it over all of the dentin surfaces — if I get it on the enamel, it’s not going to hurt anybody, and I use a self-etcher to do the dentin. Actually, I was recently reading up on some new research, and what folks are finding in the newer research with the newer generation of self-etchers, is that it actually gets higher bond strength than the old, fourth generation total-etch technique.
MD: Wow. Isn’t it ironic? When we graduated in 1988, I remember Ultradent, in addition to the etch they made, also made something to put on the dentin to identify it so we didn’t accidentally etch it. So now you’re talking about a technique that’s a great middle ground, with the ability to etch the enamel like that with selective etching, and then go in and do a self-etch on the dentin. It’s kind of the best of both worlds and really represents a step forward in terms of common sense for what we’ve been doing in adhesive dentistry.

I can’t imagine practicing without photography. For me, when I’m sending stuff to the laboratory, I actually need to go overboard and send too many photographs. This has made such a big difference for me as far as what I get back in shade matching.
LB: I think so, too. It takes the stress off of worrying about the phosphoric acid, but it also takes the stress off of worrying that self-etchers don’t have the same bond strength to enamel. So you are getting the best of both worlds. It’s a technique I’ve been using now for almost a year, and it’s working really, really well. The other thing I like about it is I can do it for both direct and indirect. I can use the same technique, and that makes it easy as well. I’m fond of my new technique.

Whether it’s a Class I, Class II or Class III composite, even a metal Class V composite, I do selective etching. I put phosphoric acid just on the enamel. One of the things about that is you have to play with your etchings because you want one that is very viscous. It can’t be runny, or it runs everywhere.
MD: So tell me what you’re going to do on a deep, Class I posterior composite, something simple like that.
LB: How deep? Am I worried about the pulp? Am I thinking pulp cap?
MD: No. You’ve got 1.5 millimeters of remaining dentin. I just mean something that’s primarily bonding to dentin with an enamel rim around it. Are you doing your selective etching on those direct composites as well?
LB: I am. I’m doing my selective etching on those. I have been doing adhesive dentistry for a lot of years, and I really don’t have a lot of reason in my practice to not trust dentin bonding. Even with that, I like preparations that have enamel margins, and I want to make sure I have a great bond to that enamel. So even with something like that, whether it’s a Class I, Class II or Class III composite, even a metal Class V composite, I do selective etching. I put phosphoric acid just on the enamel. One of the things about that is you have to play with your etchings because you want one that is very viscous. It can’t be runny, or it runs everywhere. I’m actually using the new Select HV™ Etch from Bisco, and I use it for that reason, because it’s very thick. But the other reason I love it is the tip on there is teeny-tiny, so you can get literally a band of phosphoric acid that’s no more than a millimeter wide.
MD: Are you placing any kind of flowable in there as the base of that restoration?
LB: You know, I’m not. The only place I use flowable in my direct composites is on Class II and Class III, and I just run a little bead of it at the marginal interface on the box. I only do that because we still know that there are issues with adequate condensation right down into the corners of those proximal boxes. I’m not using it as a liner.
MD: Are you finding much use for self-etching resin cements? Walk me through what you might use for a PFM bridge; for an IPS e.max crown; and for a bonded, single-tooth restoration, an all-ceramic in the anterior. I’m curious to see if you’re finding much use for the self-etching resin cements.
LB: I do use the self-etching, self-priming resin cement family. I use them when I want to cement; when I have a prep that has retention form and resistance form, so I’m not worried about the bonding being my retention, and I want something translucent. If I’m doing a PFM and I’ve got subgingival margins, I don’t need something translucent. I’ll probably go with a resin-modified glass ionomer. If I’m doing that PFM and I’ve got supragingival margins because I did a 360 porcelain butt joint, I’ll use a self-etching, self-priming resin cement because I don’t want the white at the margins; I want the translucency of those resin cements. If I’m doing full-coverage or I’m doing BruxZir or I’m doing lithium disilicate, but my prep is such that I’ve got great retention form and great resistance form, I’ll use a self-etching, self-priming resin cement. Or, I might actually even bond and go to a true dual-cure resin cement, and that would more depend on isolation than it would the material. So if I’m going to have problems isolating and I need to get in and out quick and I want a true cement, I’m using a self-etching, self-priming. If I have great isolation and I really want to bond this, I’m going to go to something dual-cure in the posterior. In the anterior, I just use regular light-cure veneer cement.
MD: Our dentists love brand names. Give me some examples of your favorite resin-modified glass ionomers.
LB: Right now, my favorite resin-modified glass ionomer is RelyX™ Luting Plus (3M™ ESPE™; St. Paul, Minn.), and I’ve actually been using that for years. I used that when it was Vitremer™ Luting Cement. They’ve just changed the name a few times over the years. So I am still using that. As far as my dual-cure resin cement, right now I’m using NX3 Nexus® Third Generation from Kerr, and I use that because one of the things you run into with dual-cure resin cements is you need to think about your dentin adhesive and make sure it’s compatible. Kerr’s new self-etching OptiBond™ XTR actually is cured by their NX3, so it turns it into a dual-cure dentin adhesive. I am a little old-fashioned because I still don’t cure dentin adhesives prior to indirect placement.
MD: Oh, look at you. You’re bucking the trend! You are going old school. It makes sense, as long as you’re confident in your ability to cure that. I think that’s a good idea.
LB: Exactly. So I’ll use the OptiBond XTR with the NX3. I also use Multilink® Automix from Ivoclar. I use them interchangeably. When do I choose one versus the other? Part of it, for me, probably has to do with working time. If I’ve got a patient that’s really great, and I’m not worried about getting in and out, I’ll probably using NX3. Multilink, for me, sets so much faster. If I do need to get in and out and get it cured because I’m worried about patient isolation or something like that, I’ll go to Multilink.
MD: I think that makes sense.
LB: For anteriors, Variolink® Veneer (Ivoclar Vivadent) is my preferred veneer cement. I also do keep RelyX Veneer Cement (3M ESPE) in the office. The reason I keep the RelyX is because it’s more viscous. So if I think I need something to fill a bigger gap underneath, then I’ll use the RelyX. Especially with a 0.3 or 0.5 millimeter veneer, I like that the Variolink isn’t viscous; it doesn’t feel like you’re going to crack something when you seat it.
MD: Exactly. I know doctors who actually use Herculite® (Kerr; Orange, Calif.) to seat veneers. And you know they’re prepping at least a millimeter to be able to push a veneer down and not have it crack with an actual composite resin underneath it, versus cement. So as I have gotten more conservative and our veneers have gotten thinner and thinner, I have gone to something that’s a little less viscous, where you feel like you can get it completely seated, move it around and really get it settled without feeling like you’re going to crack the veneer down the middle. That would obviously be a mess.
Well, Lee Ann, I want to thank you so much for your time today. It’s been a fascinating look at how you got to where you are, and what you’re currently doing in your practice. I like that it all has a common sense ring to it. Even though you spent all the time that you have at these institutions of higher learning, it sounds like you still have that connection to what most of us are going through on a daily basis as we treat these patients. It doesn’t sound like you’re telling us to go in and do full-mouth equilibration on every patient who walks in the door, even if they are just there for a Class I composite.
LB: No, I don’t do that. (laughs)
MD: I like that. That’s what I like about you, that your approach is more common sense. That’s what really resonates with dentists. They need something that’s going to work for them in their practices and in the outside world, where they can still make a good living. But, like you said, they need to be able to be focused on not stepping into those huge potholes, where you’re prepping those lower second molars and things like that. That’s why I think your courses are so good, because they’re going to help dentists avoid those nightmare cases, the ones you never forget and make it hard to sleep at night.
I’m going to recommend that our readers go to your website and see where you’re going to be next. If they can’t get out to one of your lectures, I hope they will look you up and find one of your webinars, so they can connect with you that way.
Chairside® readers: Please read Lee’s blog. It’s a fantastic blog; I read it all the time. She’s very dedicated to making sure she puts something up on a regular basis. In fact, I’m kind of jealous and wish I had the drive to be able to update something as often as she does.
I appreciate what you do for our profession, Lee, and I appreciate you spending an hour with us. Thanks so much.
LB: My pleasure. It’s always fun to talk with you.
Dr. Lee Ann Brady is a privately practicing general dentist in Glendale, Arizona, and a nationally recognized educator and writer. Contact her at leeannbrady.com or lee@leeannbrady.com.