Blog Posts
- A Brief Guide to Intraoral Scanning
- Taylor Manalili, DDS: How to Take Quality Denture Impressions
Related Videos
800-854-7256 USA
Successfully fill out the Rx, capture impressions, and resolve issues with fit, form and function

In restorative dentistry, being meticulous in the beginning stages of any case can save you time in the end by reducing the likelihood of remakes. This is especially the case with dentures. From filling out the Rx, to taking the impression, to delivering the denture, many areas need to be carefully considered to ensure a smooth denture experience for your patient.
When submitting a case to your lab, properly filling out the Rx is crucial to ensuring accurate dentures. Make sure to keep in mind your patients’ needs, budget and fit before choosing the appropriate denture.
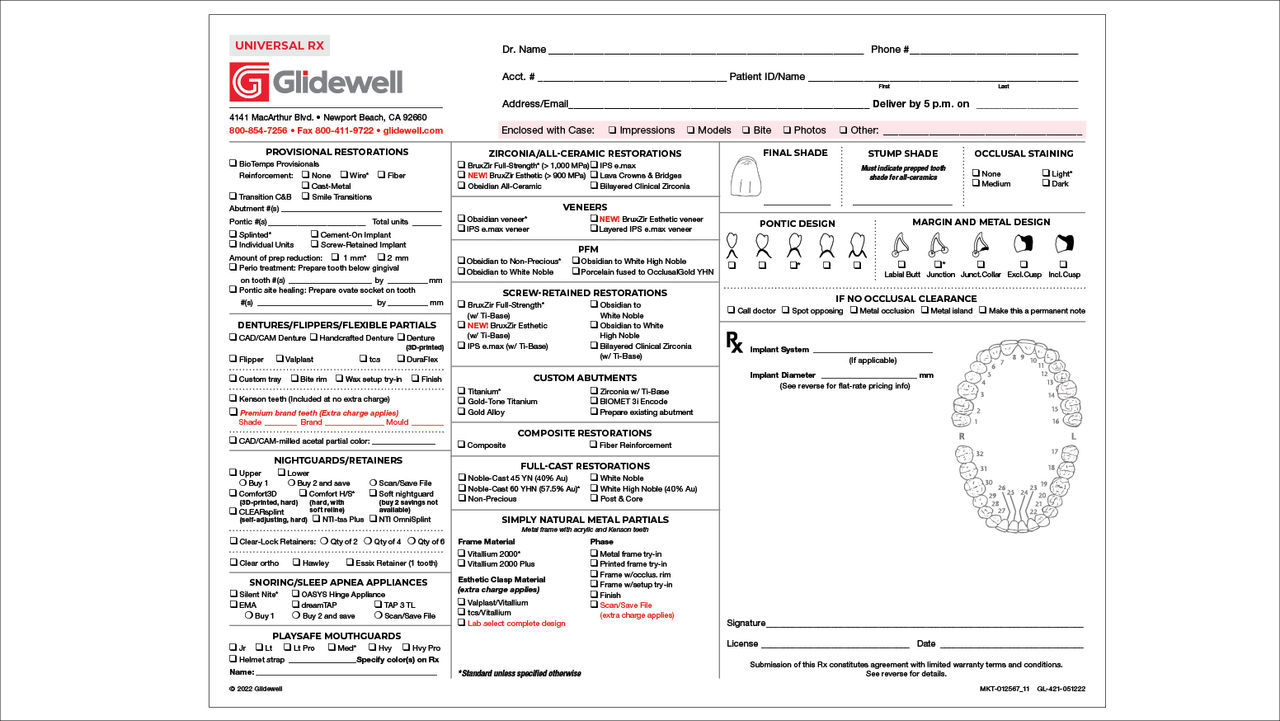
Filling out the top portion with your information as well as the patient’s is an important first step that should not be skipped. In the case of the example Rx (Figure 1), make sure you have included any additional materials — such as impressions, models, bite trays, or anything else that you find pertinent to the case — that the lab needs to take into account when fabricating the denture.

Figure 1: Glidewell universal Rx. Knowing what type of denture is needed is a crucial piece of information. Will the denture be permanent? Temporary? Screw-retained? Researching what products the lab offers can make this decision quicker and clearer.
Doing some research on the types of dentures your lab offers will help make the decision process easier, so that you know what to expect from your lab. Glidewell offers several denture options, such as CAD/CAM digital dentures, handcrafted, 3D-printed, immediate and provisional dentures, screw-retained implant dentures, and removable implant overdentures.
Because denture fabrication is such an exacting task, the more information you include with your case, the better. Measuring the vertical dimension of occlusion and including it on the Rx is a crucial step to ensuring a good fit. Submitting photos of your patient’s smile along with the desired shape and shade of the teeth can improve the results you get from the lab when you prescribe the denture. Providing all of the necessary information, including details like desired occlusion or adjustments to the wax rim, can go a long way and reduce the chance of poorly fitting dentures.
By ensuring the info is correct, knowing what product you are choosing, and including as much pertinent information as you can, you will decrease the chance of remakes and make fabricating dentures easier for you and your patient.
Ensuring the capture of accurate impressions can save you time in the long run. Whether taking traditional impressions or intraoral scans, the goal remains the same: delivering excellent-fitting dentures that your patients can wear for a long time to come.

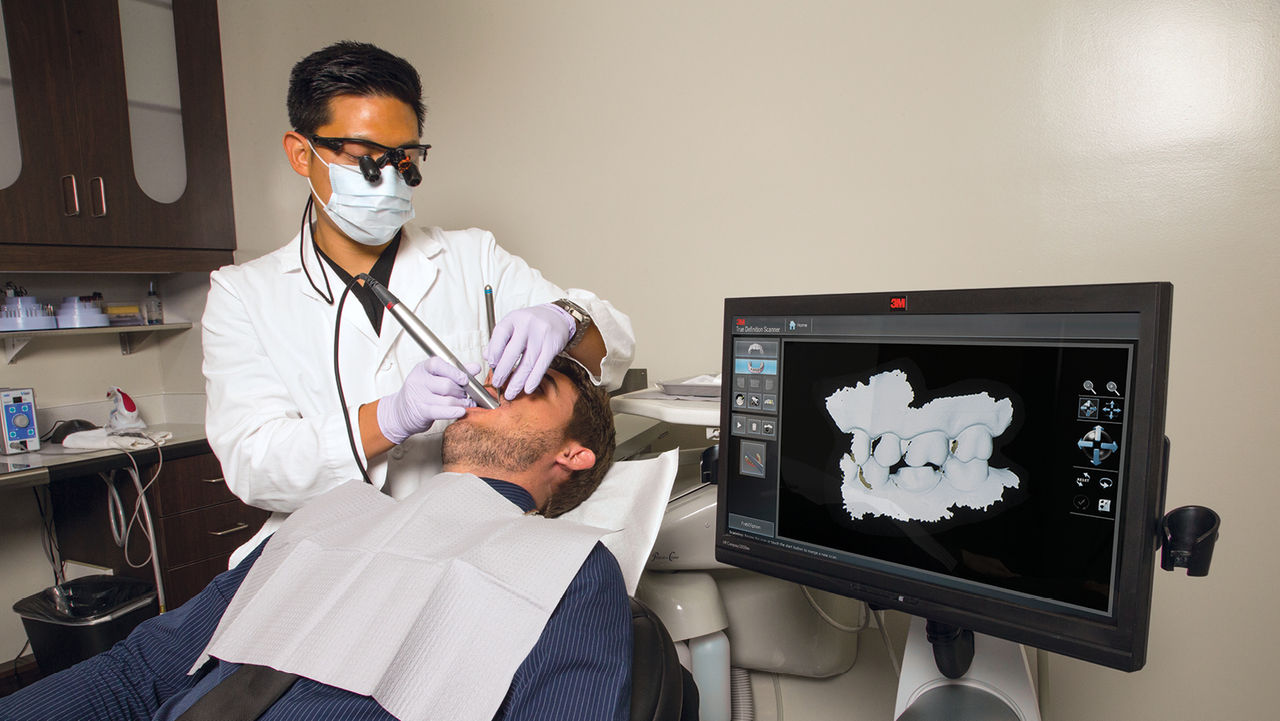
Using an intraoral scanner has many benefits when compared to physical impression-taking methods. It cuts out the outbound shipping phase, eliminates the need for VPS materials, and saves your patient from a mouth full of putty!
When performing physical impressions, it can be easier to use a custom tray, especially if the patient’s arch is on the larger side. For edentulous patients, maxillary impressions should cover the residual ridge, the full depth and width of the functional buccal and labial sulci, and the hard palate and anterior part of the soft palate. The mandibular impression should capture the residual ridge and retromolar pads, the full depth and width of the functional buccal and labial sulci, and the frena and external oblique ridges. These impressions should be captured with the mylohyoid contracted. Lastly, make sure the distolingual region is recorded.
If taking impressions via intraoral scanner, follow these tips to ensure the impressions come out clear and readable:
When you work with Glidewell, both physical and digital impressions are digitally saved. This means that if your patient loses their dentures or wants a backup, a new set can be fabricated without you having to resubmit impressions!
After receiving the dentures back from the lab, you’re closer to completing the process — but you’re not out of the woods just yet. When delivering patients’ dentures, you often need to address complaints regarding instability, sore spots or speech impairment.
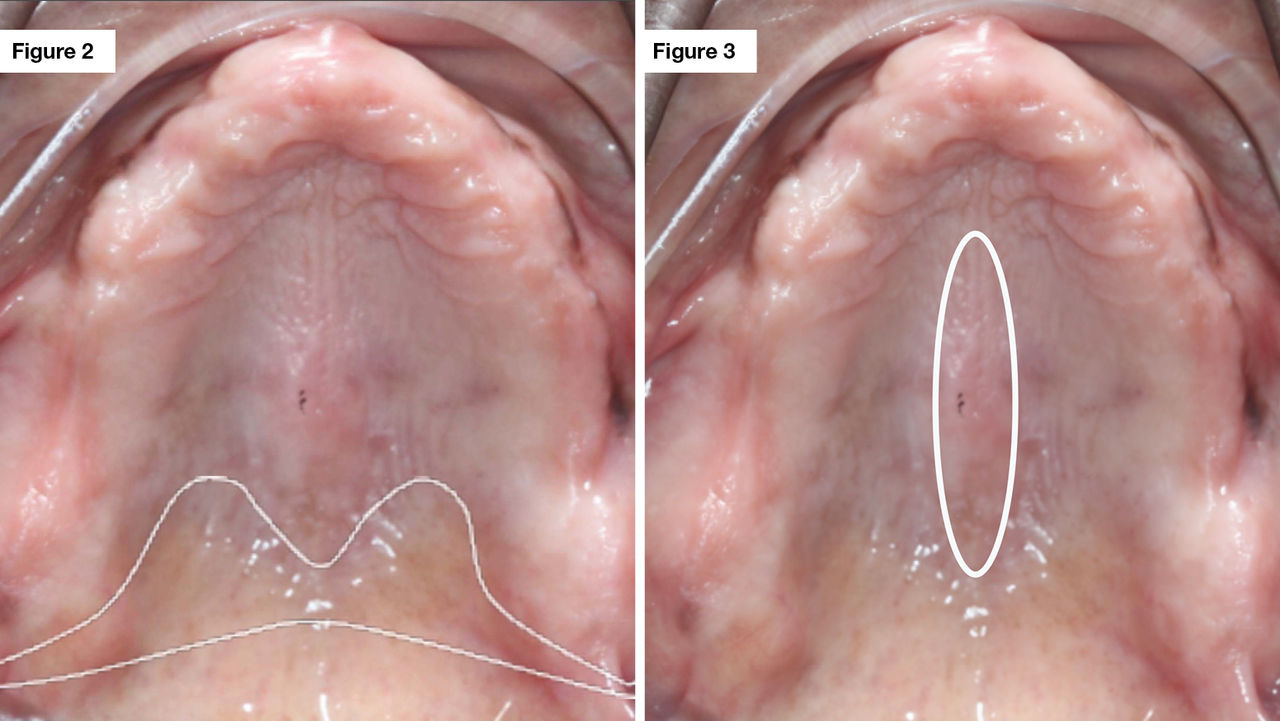
Instability may present itself during initial placement, when chewing or when occluding. If instability is experienced during initial placement, it may be due to overextended borders, an over-bulked posterior palatal seal, or a prominent median palatine suture. Your first steps would be to visually inspect the borders or place disclosing wax along the borders of the prosthesis, then have the patient perform the border-molding motion. You can evaluate whether the posterior seal is over-bulked by using a T-ball burnisher or a mirror to check how depressible the soft tissue is. In addition, you can check if there is a prominent median palatine suture, into which the denture may be extending. You can also use a pressure-indicating paste to determine if this is the problem.

Figure 2: Outline of the posterior palatal seal. Figure 3: Outline of the median palatine suture.
If the instability occurs when the patient is chewing, determine whether one of the following frequent culprits is responsible:
If instability occurs when occluding, it may be due to premature contacts, or the maximum intercuspation may not be in harmony with the patient’s centric relations. Check the dentures for even bilateral contacts using horseshoe-shaped articulating paper or a thinner paper such as AccuFilm®.
If your patient is complaining of sore spots, there are some possible reasons for this:
Speaking difficulties can indicate that adjustments are needed to improve the denture fit. If your patient whistles on the “S” sound, it may be due to an absence of sufficient space for the tongue between the upper bicuspids. If they lisp on the “S” sound, it may be the result of too much room for the tongue between the upper bicuspids. Lastly, if the “Th” and “T” sounds are indistinct, it may be caused by insufficient space for the tongue in the anterior region.
This list of patient complaints is not comprehensive. For more in-depth solutions to these complaints, check out Dr. Patricia Swanson’s article “Complete Dentures: Troubleshooting Common Complaints” in Chairside® magazine.
Dentures are an essential part of every office. By following the above tips from Rx submission to final prosthesis fitting, your next denture case will be easier for you and your patient!
Blog Posts
Related Videos
AccuFilm is a registered trademark of Parkell, Inc.
Send blog-related questions and suggestions to hello@glidewell.com.


