In this issue:
Restoring with BruxZir® Anterior in an Asymmetric Anterior Case – Case of the Week: Episode 178
Author
In the Case of the Week for Episode 178 of “Chairside Live,” I needed an exceptional restoration to solve a common clinical problem: to create the illusion of symmetry while restoring an asymmetric smile. I used BruxZir® Anterior on this anterior case to match the contralateral natural dentition of the patient. Read through the case to see why BruxZir Anterior is indicated for restorations requiring both superior esthetics and strength.
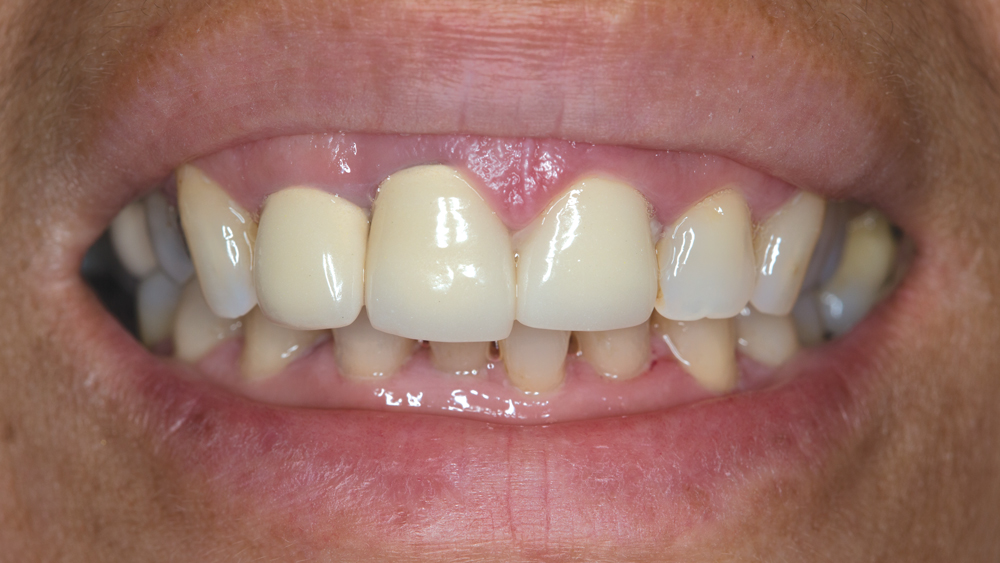
Figure 1: The patient presents with PFM crowns that have been in place for a few years. Note the gingival recession around tooth #8 and the low value around the margin. We can also see gingival inflammation, especially around tooth #9.
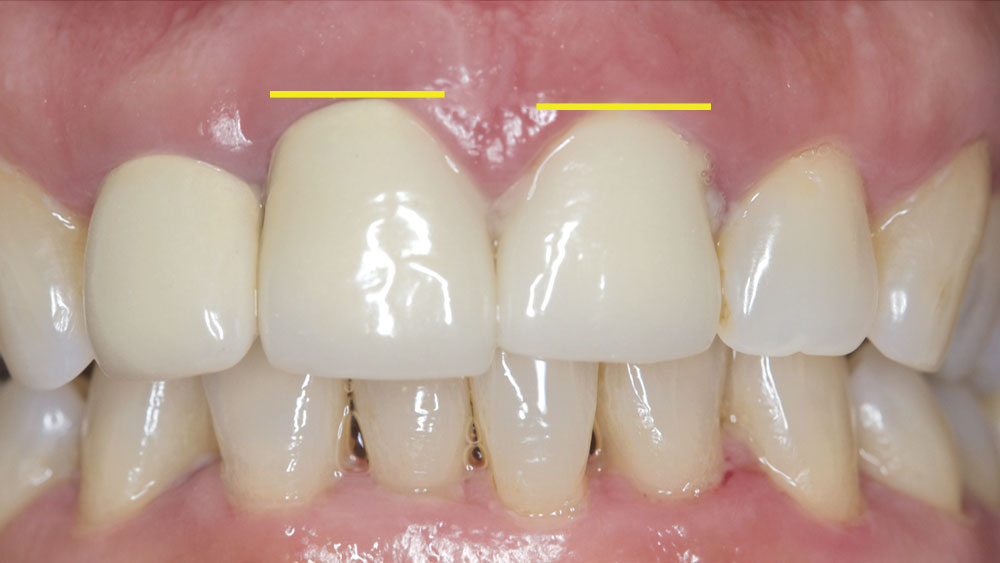
Figure 2: The gingival disharmony is an issue I will attempt to correct with a laser.
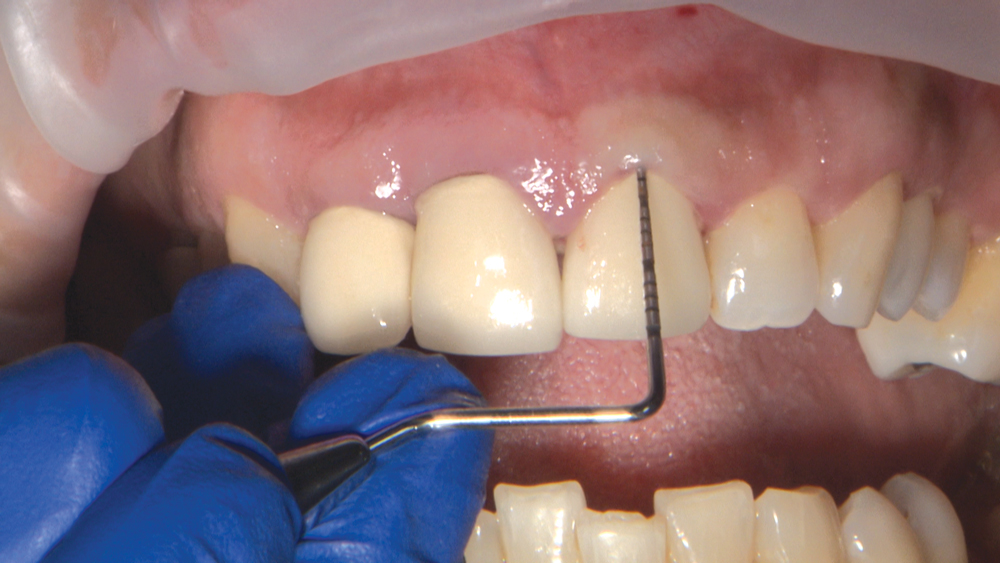
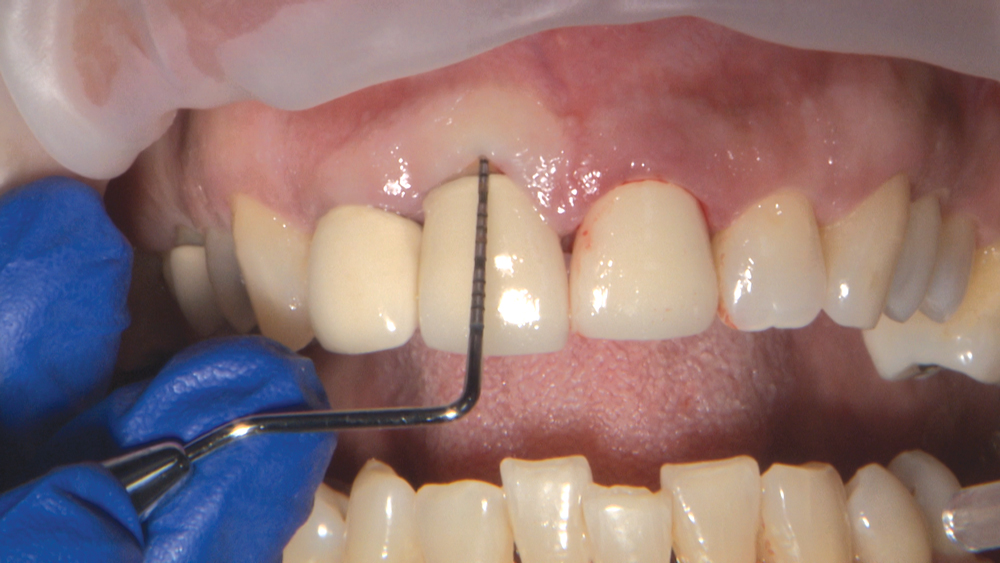
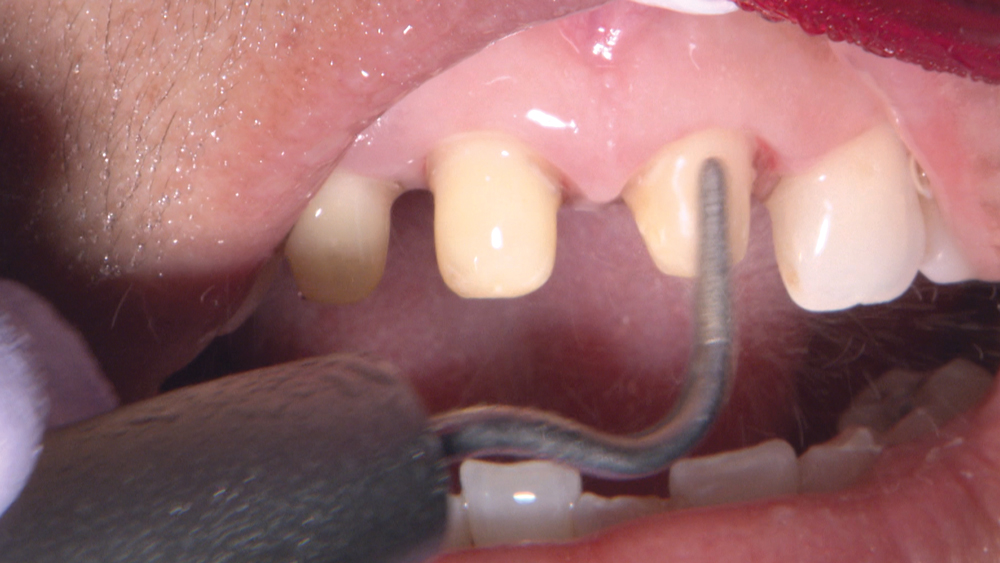
Figures 3a, 3b: I want to examine the patient’s gingival tissue thickness. A periodontal probe placed into the sulcus with no gingival show-through demonstrates that this patient has a thick gingival biotype.
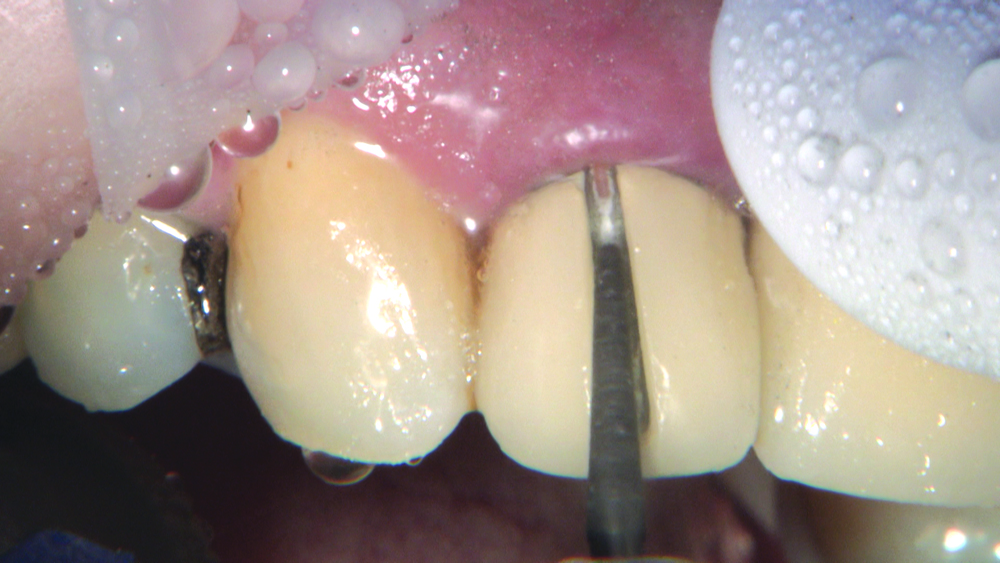
Figure 4: I cut off the crowns by making a vertical opening with a tapered ZIR-CUT™ bur from Kerr Dental (Orange, Calif.) and extend the opening from the gingival margin over the incisal edge and onto the lingual surface. I want to separate the metal all the way to the gingival margin, and care should be taken not to cut the gingiva. I can clearly see the cement interface, so there is less risk of damaging the tooth; to avoid damage to the gingiva, a retraction instrument can be used to protect the soft tissue.
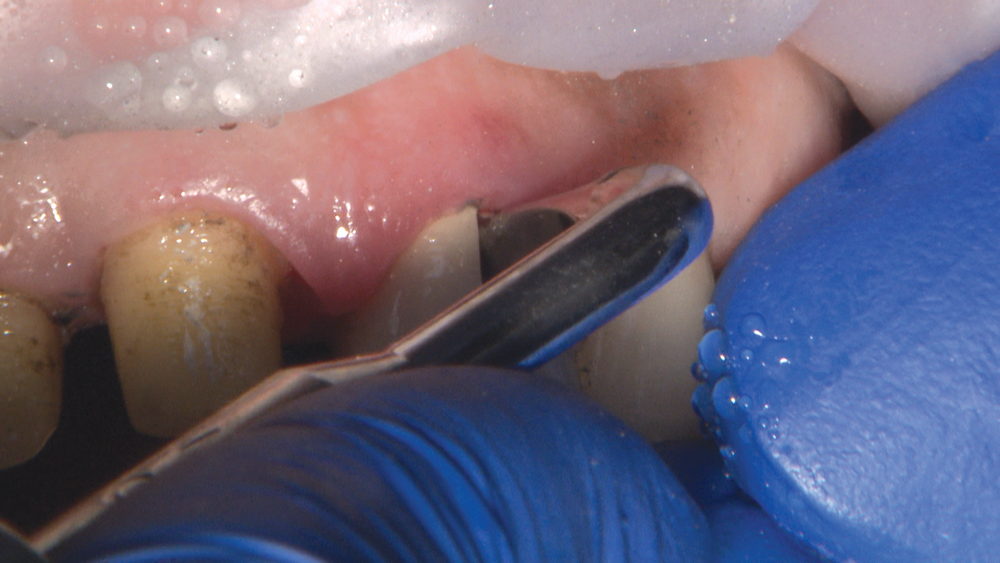
Figure 5: The crowns come off easily using the Christensen Crown Remover (Hu-Friedy; Chicago, Ill.) to expand the vertical opening.
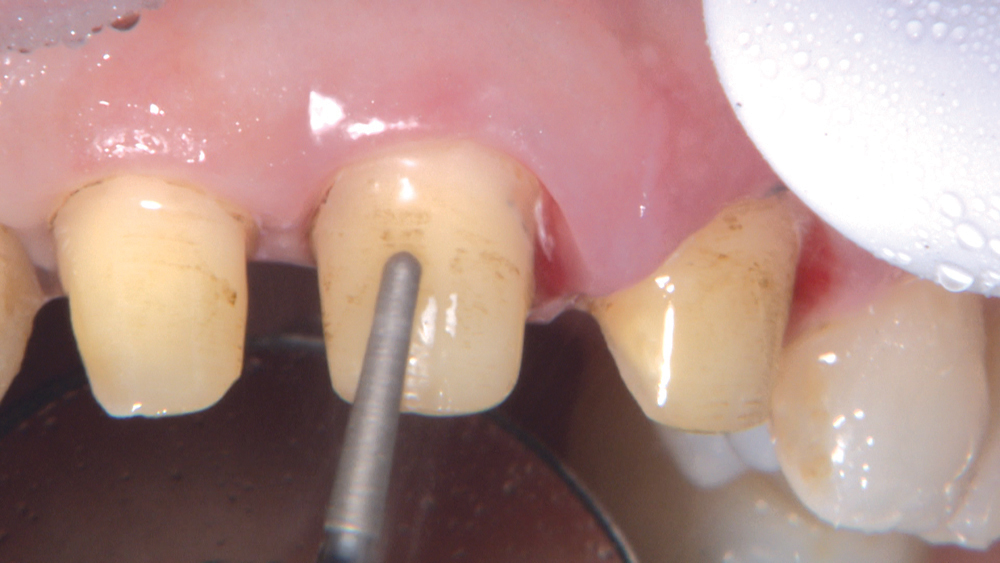
Figure 6: There is some staining on tooth #7 where there was an open margin, but a reasonable amount of tooth structure remains and there is no decay. Because the dentin color of these preps is not dark, I select BruxZir Anterior for the final restoration. The high light transmission value of BruxZir Anterior enables a lifelike, translucent look; however, very dark dentin discoloration may show through in some cases.
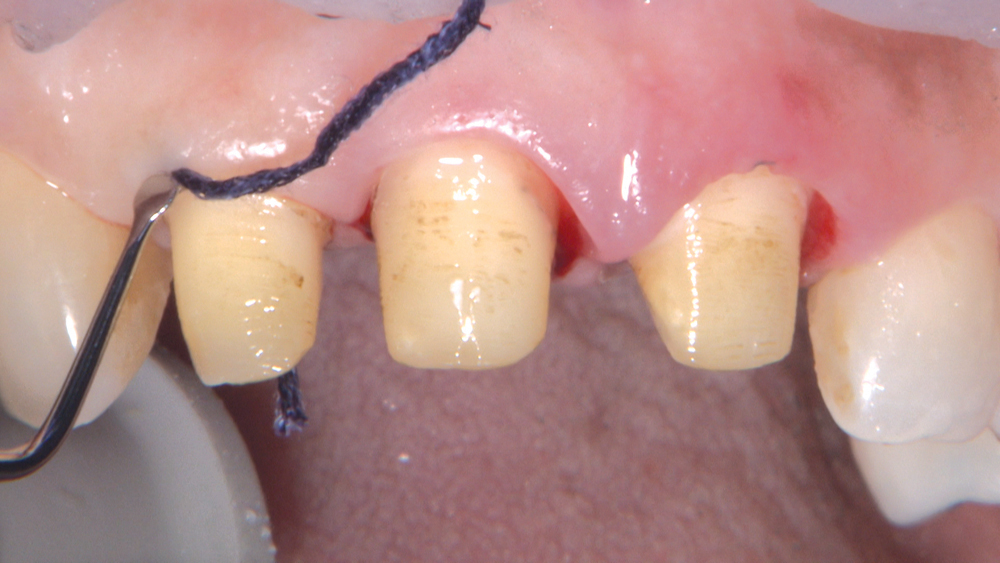
Figure 7: Packing Ultrapak® #00 cord from Ultradent (South Jordan, Utah).
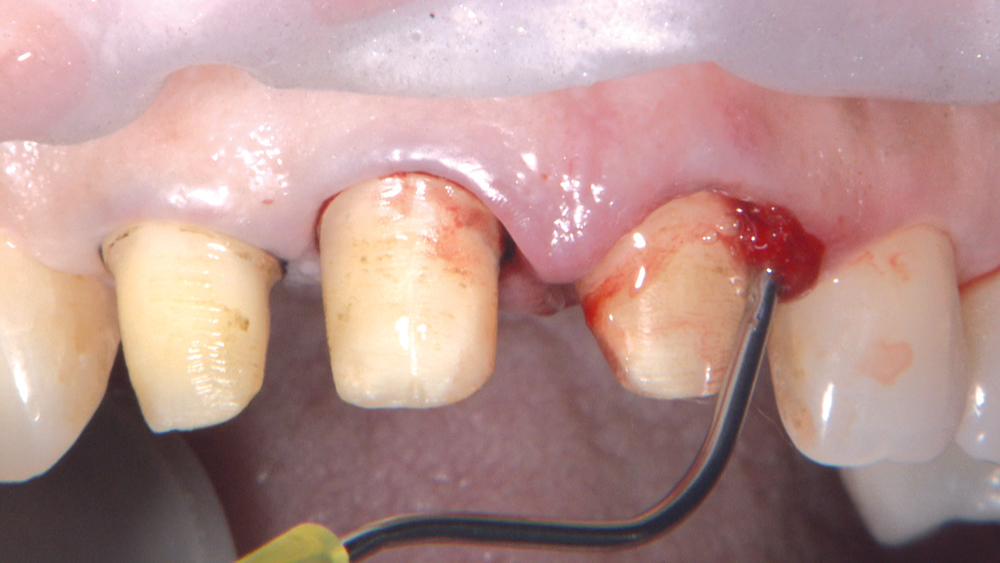
Figure 8: These margins were already more subgingival than I prefer, so I did not drop the margin further. The gingival laceration on tooth #9 will be addressed with laser treatment.


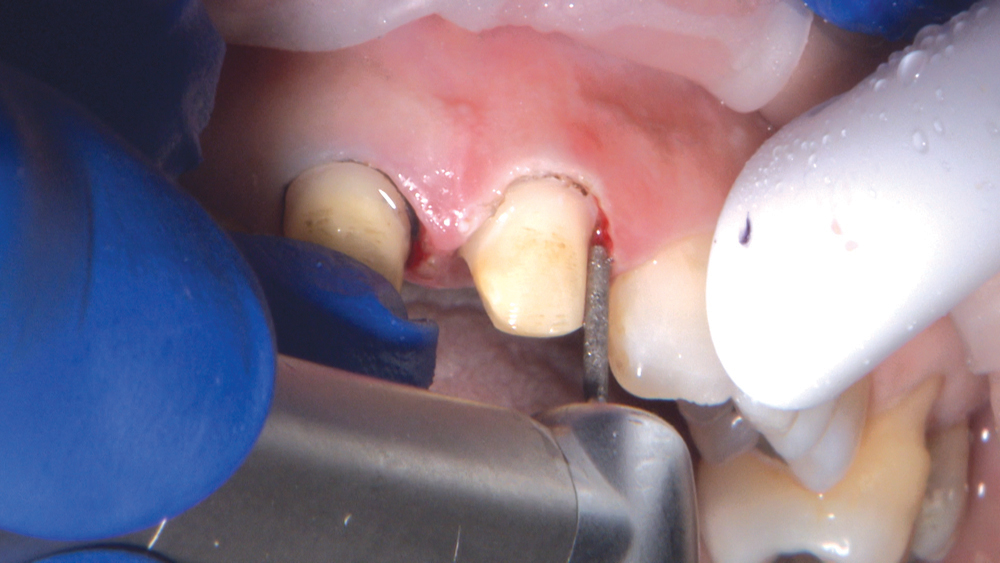
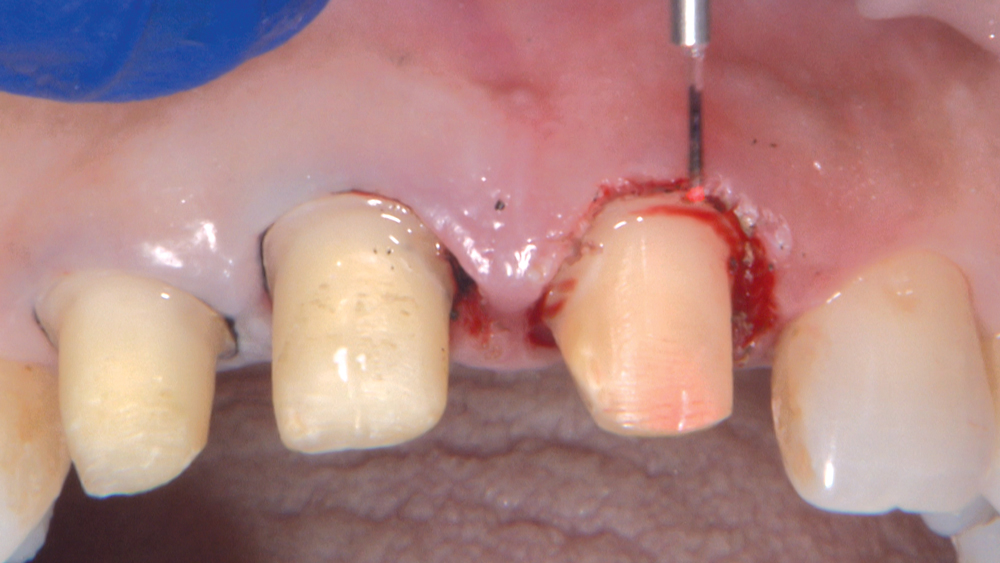
Figures 10a–10c: I employ a diamond bur from Axis Dental (Coppell, Texas) to smooth the margin, and then I use the laser to bevel the gingiva. Note how the lacerated tissue has been excised. I’m not going to make my impression at this time; rather, I will temporize and let the tissue heal for about two weeks.


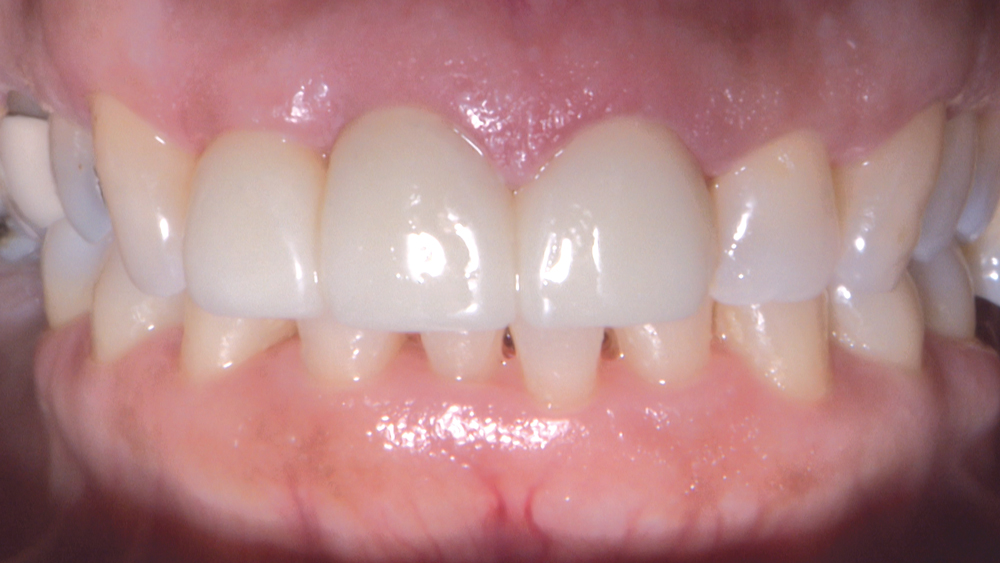
Figure 12: Here’s the result after the tissue has healed with the BioTemps in place for two weeks.


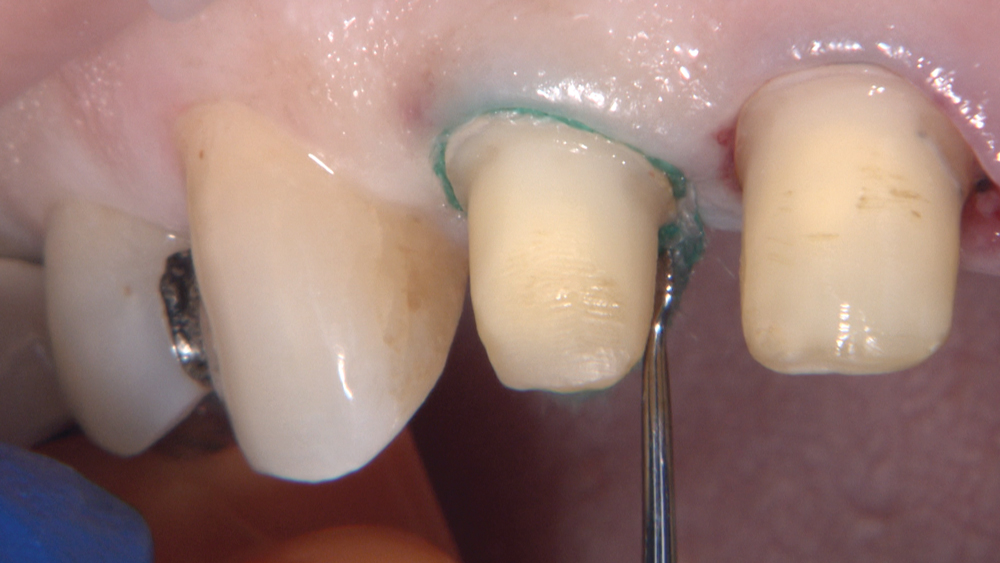
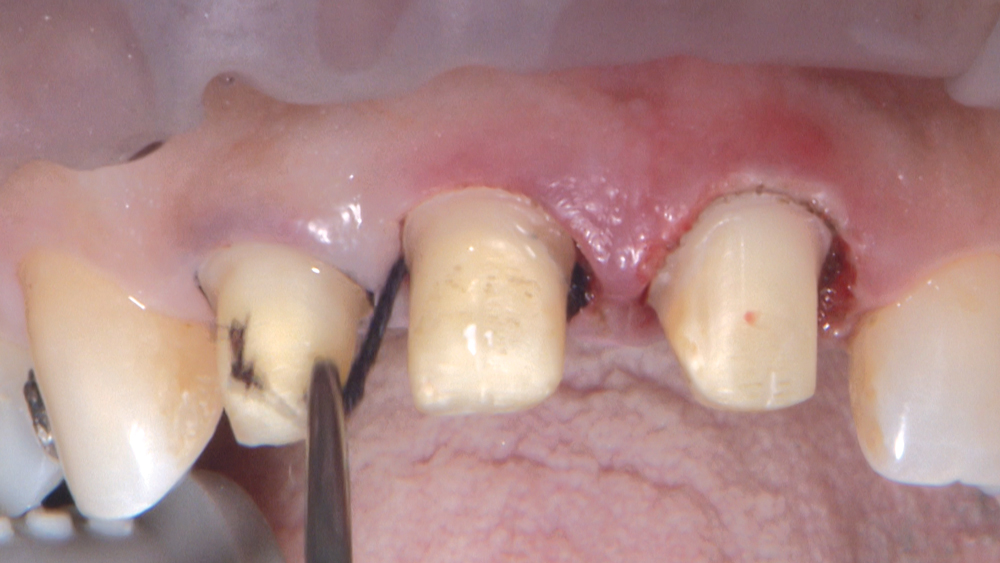
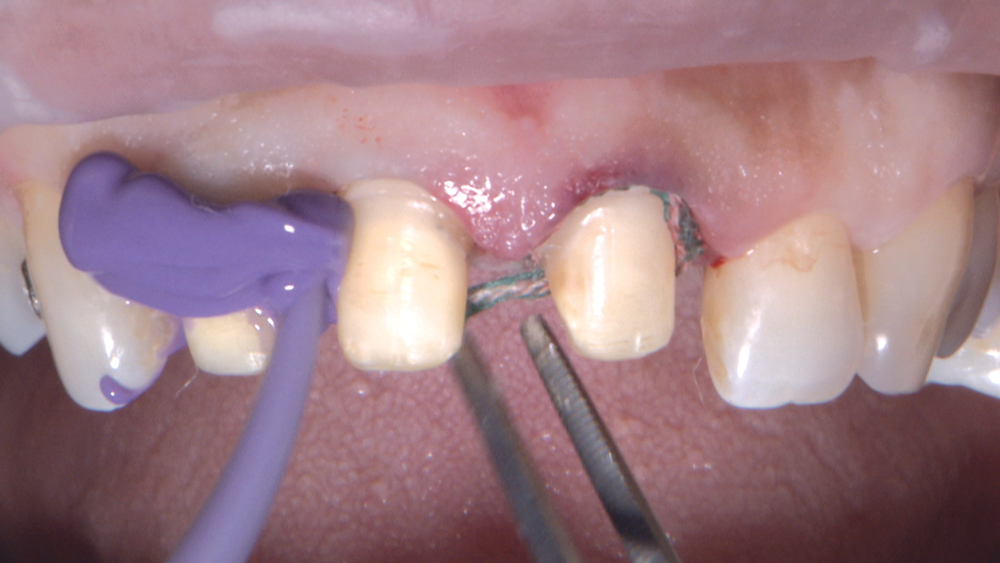
Figure 14: To achieve retraction, I prefer the double-cord technique. I first use an Ultrapak #00 cord, then a #2 cord.
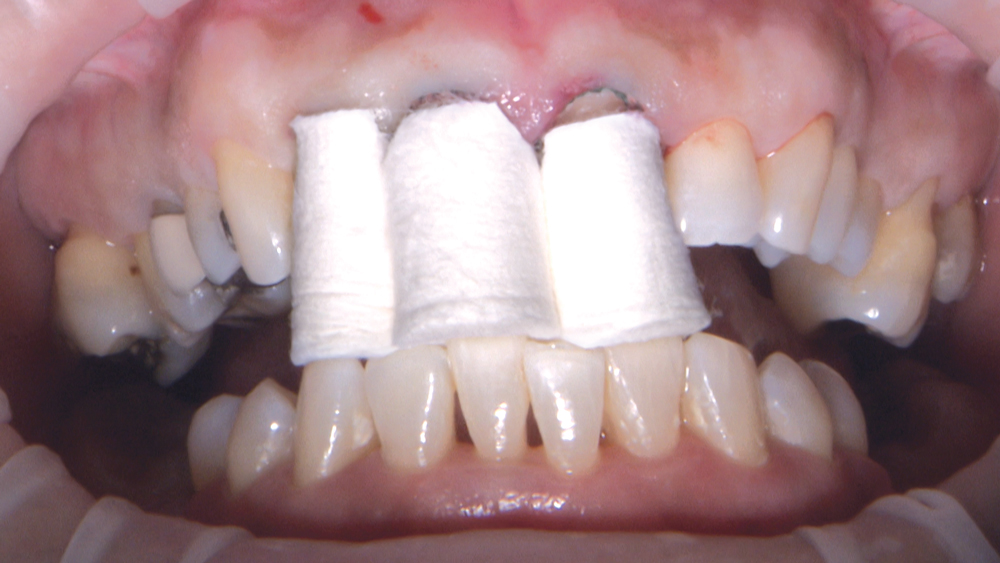
Figures 15a–15c: Using ROEKO Anatomical Comprecaps (Coltène/Whaledent Inc.; Cuyahoga Falls, Ohio), I’m able to keep the cord in place and dry — as well as provide pressure on the tissue. These compression caps are precut for mesial and distal areas to avoid excessive pressure on the papilla, and allow the cotton to reach the facial and palatal margins. I keep them in place for about seven minutes before removing the cord to take the final impression.
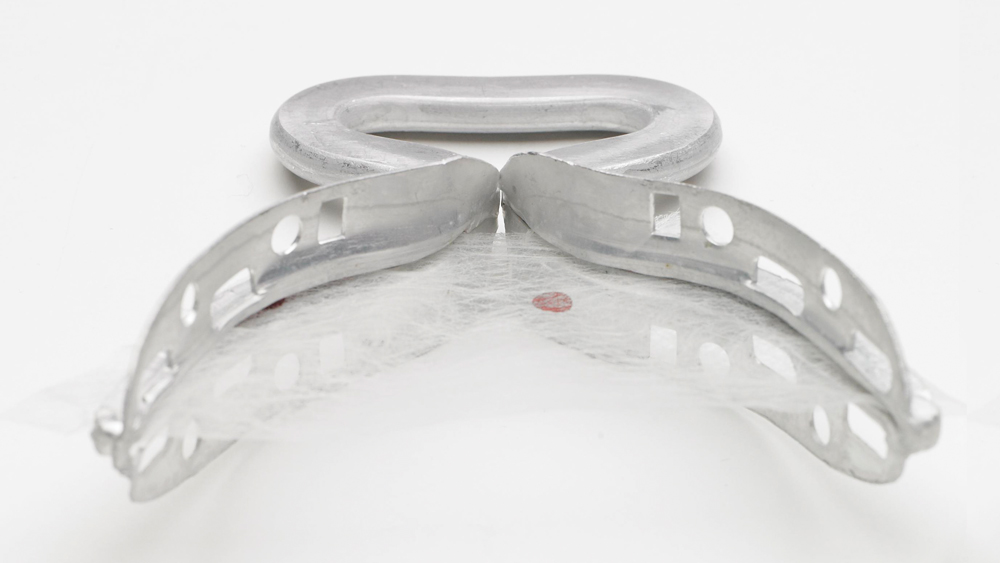
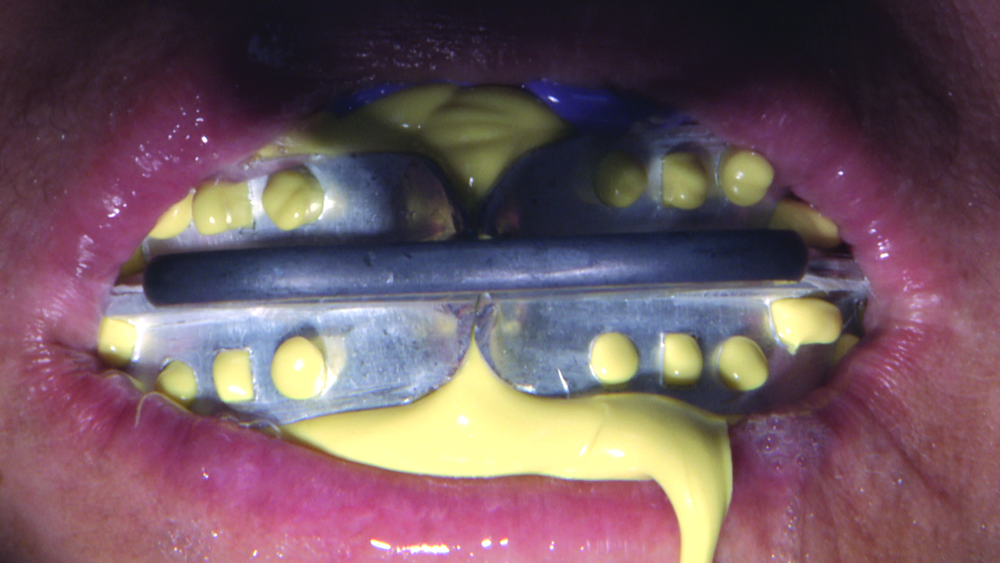
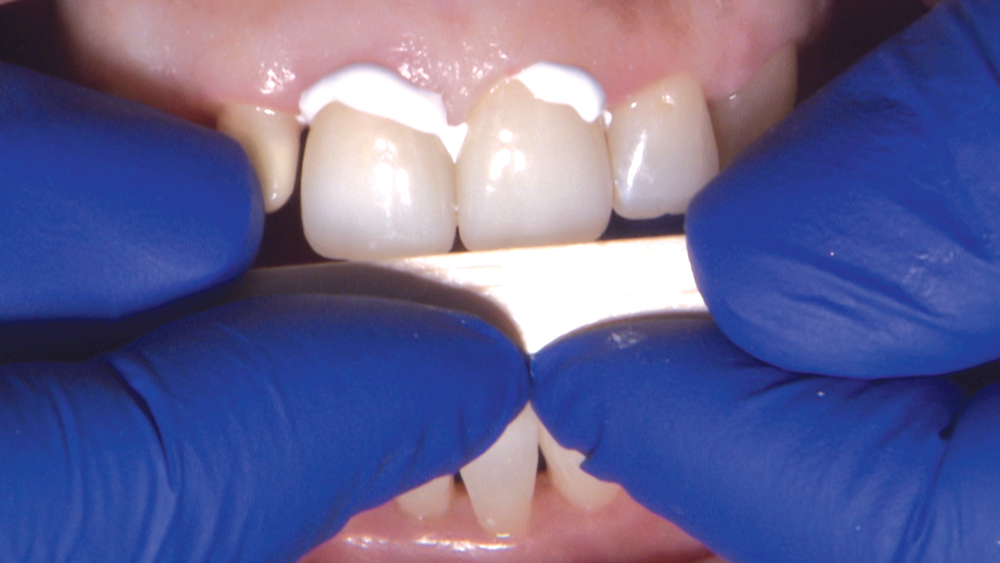
Figures 16a, 16b: The Anterior QUAD-TRAY® (Clinician’s Choice®; New Milford, Conn.) is my choice for an impression with no more than three units. The tray is rigid and has a thin web rather than a plastic mesh like other trays. The tray captures the occlusal registration without interfering with the patient closing comfortably. After I guide the patient into centric closed position, my assistant monitors the patient during full setting time to ensure proper position.
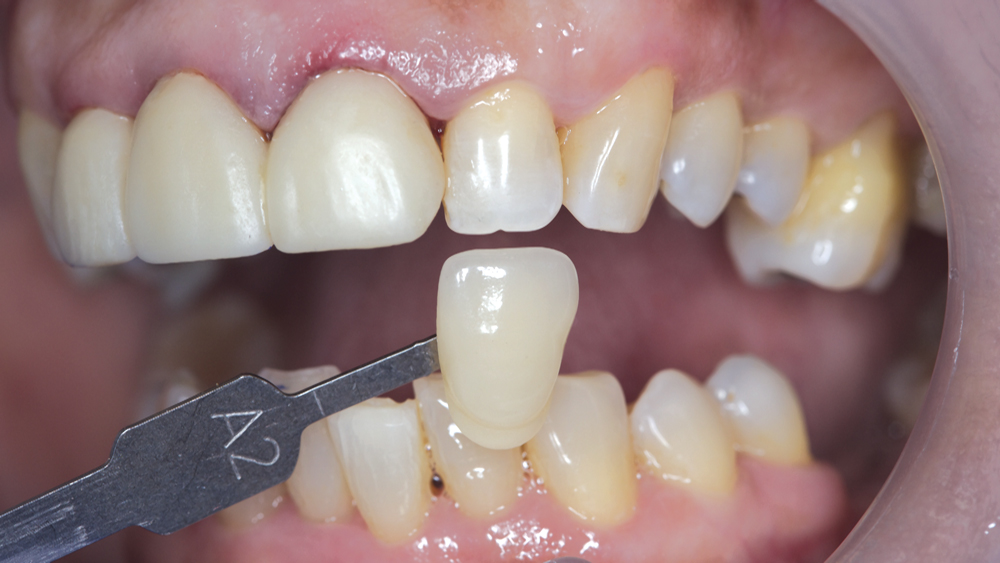
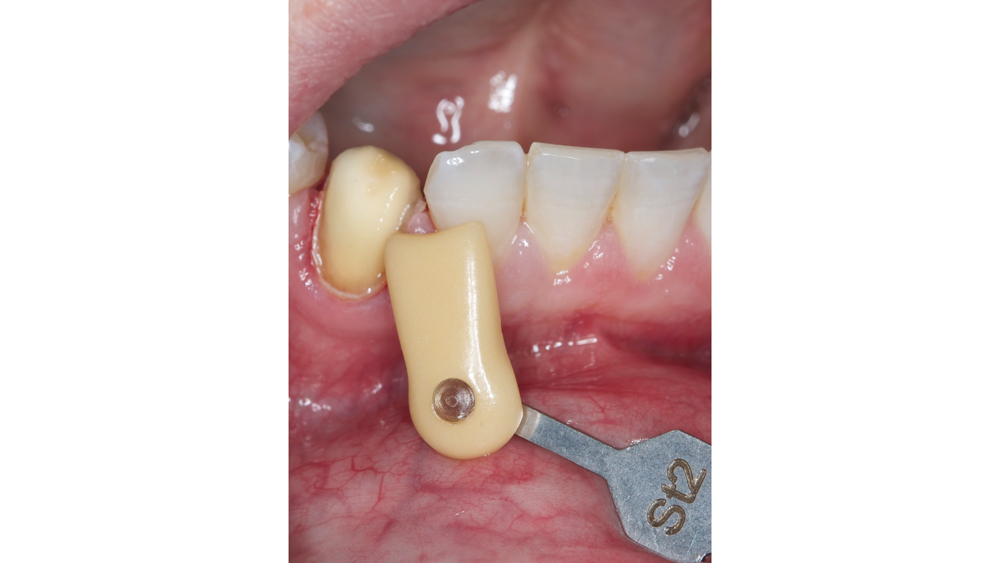
Figures 17a, 17b: In this case, because the underlying preparation is not sufficiently discolored to show through to the final restoration, I’m providing a shade of the surrounding dentition only. However, in cases that have severely discolored or dark preparations, such as the example in Fig. 17b, the clinician should provide a photograph of the area with a stump shade tab in place. This photograph helps the lab select the correct color of material to achieve a final result that blends with the surrounding dentition. Of course, if a prep is too dark or if there is a metal post, BruxZir Anterior would not be indicated.
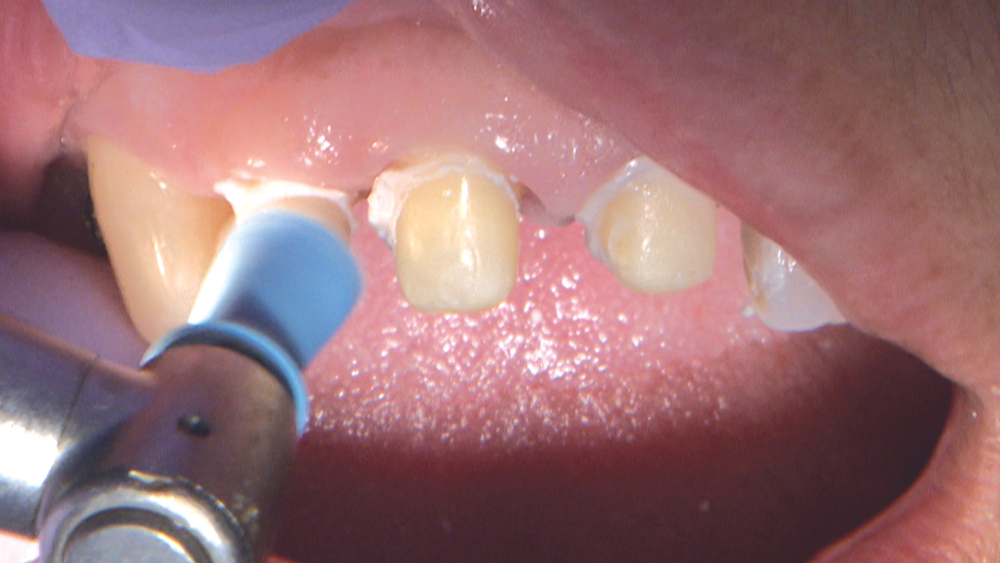
Figures 18a, 18b: At the final delivery appointment I remove the temporaries and clean the preps. BruxZir Anterior, which is available in all 16 VITA® Classical shades (VITA Zahnfabrik; Bad Säckingen, Germany), is ideal for this case because the color of the preps is similar to the dentin of the surrounding teeth.
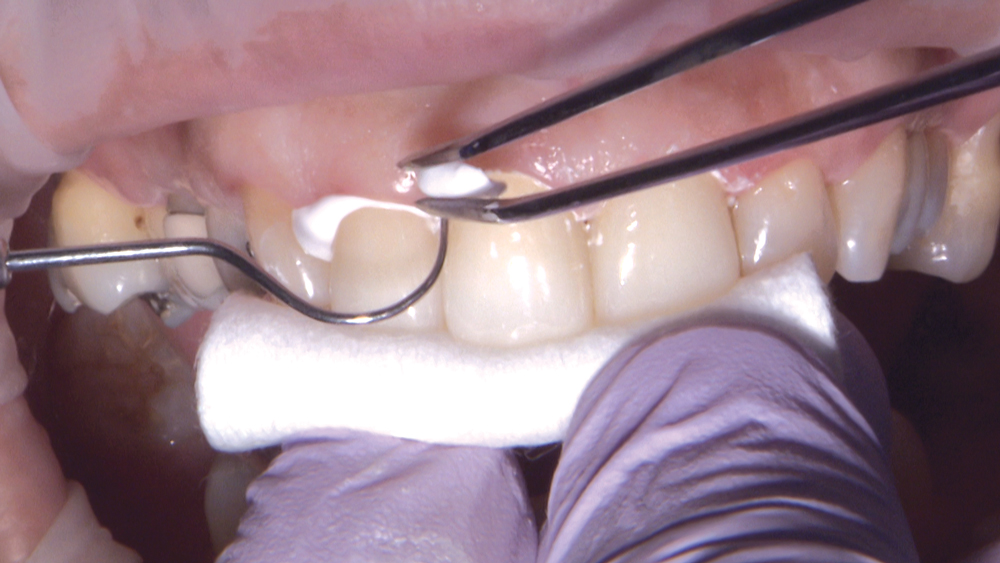
Figures 19a, 19b: I proceed with the cementation of the BruxZir Anterior crowns using Ceramir® cement from Doxa Dental Inc. (Chicago, Ill.). During the seating phase, it’s already apparent how these BruxZir Anterior crowns blend in with the surrounding dentition. I reconfirm the patient’s ability to make the “F” and “S” fricative speech sounds to ensure that the incisal edge is in the ideal position.
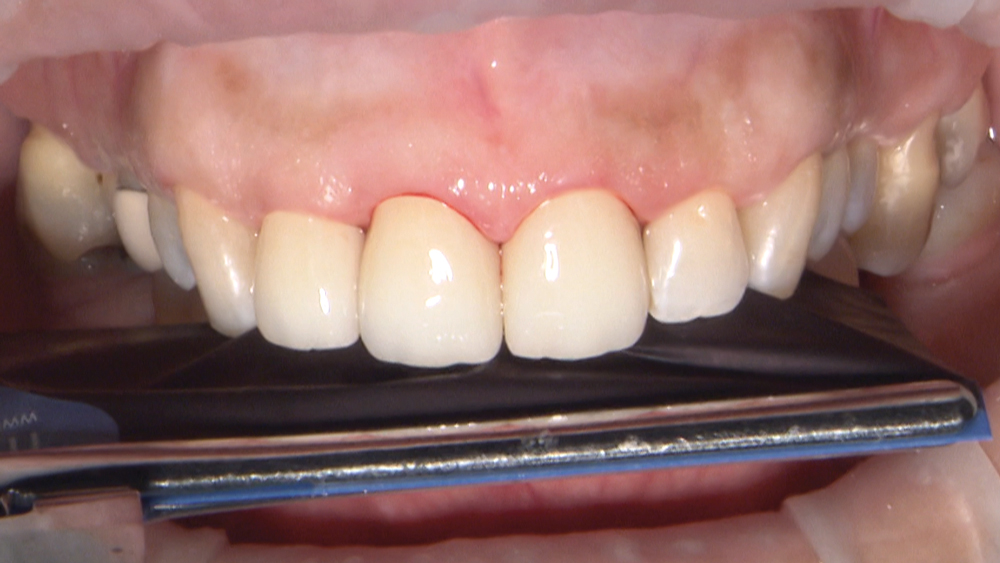
Figure 20: After removing the excess cement, I recheck the occlusion.
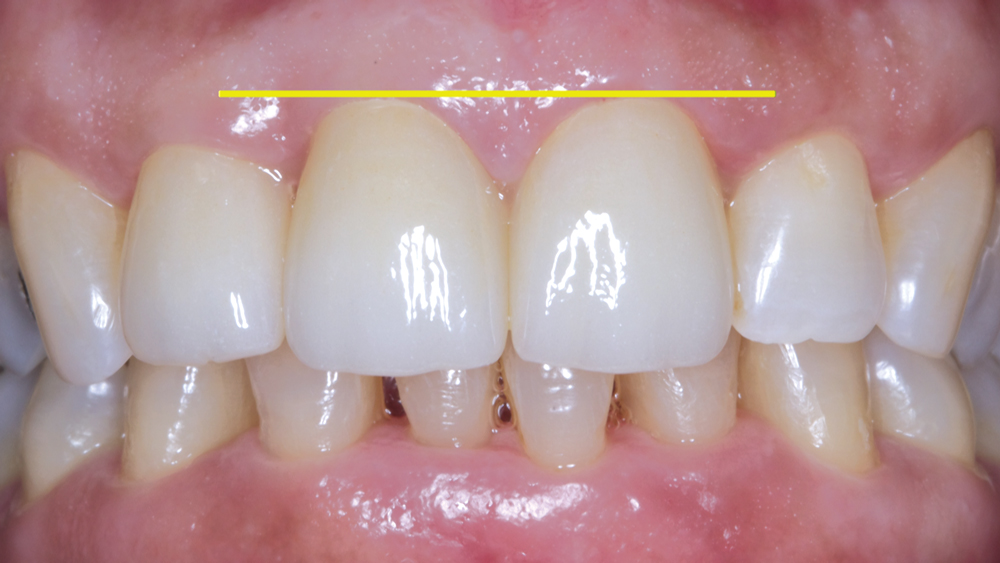
Figure 21: Post-cementation, we can see how the soft tissue now has an ideal symmetry. There is correct parallelism of the gingival line and the incisal edge position.
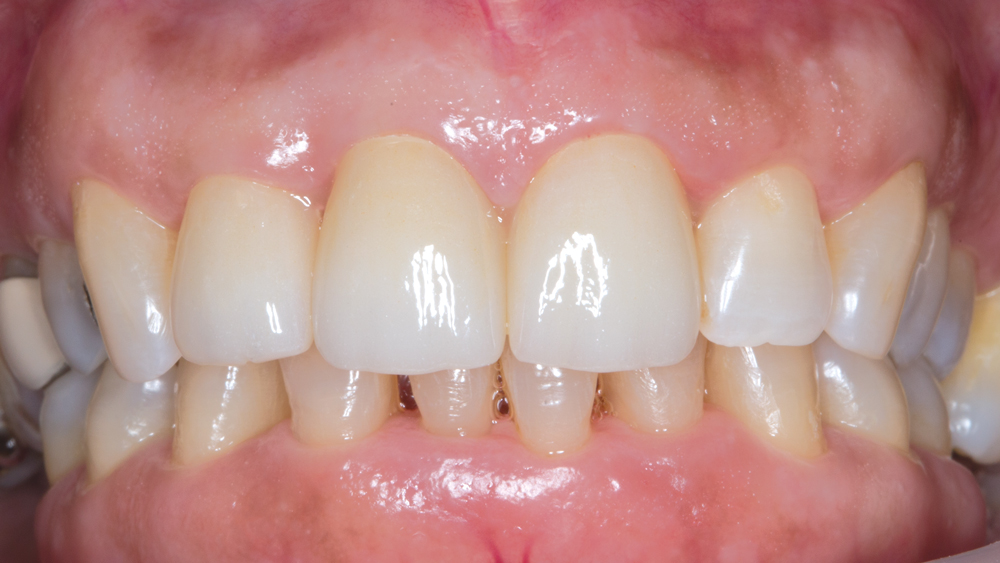
Figure 22: Looking at the gingiva post-cementation, the esthetics are much improved. Gingivectomy was completed with a laser and care was taken to not impinge on the biological width. The marginal accuracy of the BruxZir Anterior material contributed to the biological integration of the restorations into the gingival tissue.
Conclusion
Using BruxZir Anterior, I was able to place restorations that show increased translucency; the papillae and gingival margins now appear esthetic and pink — unlike with the previous metal-based restorations. In addition, BruxZir Anterior is milled using CAD/CAM technology and offers superior marginal fit. Cementation is done using the same process as a metal-based restoration, yet we avoid the risk of a metal margin appearing in the future if the patient experiences recession.