The State of Fixed Prosthodontic Impressions: Room for Improvement
I have had many opportunities to observe the fixed prosthodontic impressions made by my colleagues in dental laboratories, study clubs and clinical investigations, as well as during continuing education programs. Some of the problems I see are impressions with bubbles on the margins of the tooth preparation; tears in the impression material; partially set streaks of impression material; cords; cotton rolls or other debris impregnated in the impression material; release of the impression material from the tray; and lack of full representation of all of the necessary teeth in the impression.
Impression materials are among the most developed and reliable of all dental materials. Their accuracy is superb. To make impressions easier to execute, some manufacturers have formulated materials to be hydrophilic and become integrated with inadvertently remaining moisture. Impressions seldom tear on removal, which was a problem in the past. Their elastic recovery is excellent, allowing for removal from undercuts that previously were impossible to reproduce accurately.
Why is there a problem with fixed prosthodontic impressions? How can they be made with more predictability and adequacy? I will list several commonly occurring impression problems and their potential solutions, in the hope that fixed prosthodontic impressions can be improved.
Indistinct Margin Reproduction
In recent years, there has been a movement by some manufacturers encouraging elimination of tissue retraction with conventional cords. One technique suggests the use of a strong styptic agent in a puttylike mud to control bleeding and other moisture at the gingival margin level. If the margin of the restoration is placed supragingivally or only slightly apically to the gingiva, this technique can be excellent. When this technique is used for situations in which gingival margins are deeply subgingival, the likelihood of making an adequate impression of the margin is slim.
Use of electrosurgery units or lasers to clear gingival tooth preparation margins of excess gingival tissue can be highly effective. However, if the clinician is trying to preserve gingival tissue to avoid exposed margins on the subsequent crown, there often is no distinction on the impression between the margin of the tooth preparation and the gingiva. I see many impressions in which the gingival tissues and the tooth preparation margin blend, without a distinct demarcation between the tooth and the gingiva. It is interesting that clinicians often defend this type of impression as being adequate. This is one of the most frequent impression errors that laboratory technicians observe in fixed prosthodontic impressions. When technicians see such indistinct margins, they must “fake” the margins by guessing where the gingival extension of the crown should end and the soft tissue should begin. Most of the time, the result is an open or misfitting margin on the final restoration.
Prevention of this problem is simple: use cords adequately.1,2 The two-cord tissue management technique is simple, predictable and effective. When it is mastered an impression seldom is inadequate. Briefly, it includes placing a cord at the time the tooth preparation approaches the gingiva. The cord should be of a diameter that fills one-half of the gingival sulcus. The preparation is continued apically as close to the cord as possible without cutting or pulling it out. A second cord is placed for a few seconds, usually containing a styptic or vasoconstrictor solution. Final preparation of the tooth then is completed. The second cord is removed, leaving a distinct sulcus around the tooth preparation, while the first cord is left in place during the impression and removed after the provisional restoration is made. This simple technique will solve many impression challenges.
I suggest one major precaution that was stimulated by questions from clinicians who have experienced the following problem. When you plan to restore the prepared teeth with translucent restorations — such as all-ceramic crowns, polymer crowns or veneers — do not use ferrous liquids at the impression appointment or the seating appointment. The result of using iron-containing liquids is occasional gray discoloration that develops underneath the translucent restorations a few weeks after cementation. Correcting the discoloration requires that the restorations be remade. Use non-iron-containing styptic liquids for translucent all-ceramic or polymer restorations.
It is well-known, however, that iron-containing liquids are useful and acceptable for all-metal or porcelain fused to metal crowns, and most clinicians use these liquids successfully for these internally opaque restorations.
Incomplete Margin Representation
Similar to the previously described problem with impressions, incomplete margin representation is the lack of ability to see some or all of the margins on the tooth preparation. Recently, I have seen impressions sent to laboratories in which more than 50% of the preparation margins were not discernible. Sometimes laboratory owners refuse to fabricate restorations on dies made from incomplete impressions, but there is a tendency for laboratories to make restorations on inadequate dies to avoid irritating the dentist and losing business.
Proper use of cords, as described previously, and judicious use of electrosurgery or lasers can help clinicians avoid this problem. Additionally, magnification of the operating field, help from a well-educated assistant and excellent moisture control are prerequisites for adequate impressions.
Voids in the Impression of the Tooth Preparations
Usually, voids in the impression are the result of blood or other liquid left on the teeth or blood leakage stimulated while making the impression. Voids occur not only on the tooth preparations, but also on occlusal surfaces of surrounding teeth, thus eliminating the possibility of developing accurate occlusion.
One method that can be used to prevent blood flow and resultant voids can be incorporated into practice easily. Inform the front-desk staff members and the dental assistants that patients should receive a six-week supply of one of the many brands of 0.12% chlorhexidine gluconate at least two weeks before the preparation appointment. Patients should receive enough solution to provide two rinses per day, one in the morning after eating and one in the evening immediately before going to bed. The rinse is used for a total of six weeks: two weeks before the procedure, two weeks during the provisional restoration stage and two weeks after cementation of the restoration. The effect of the rinse on the gingival tissues is profound. Usually, the gingival tissues are pink and firm at the time the impression is made; thus, the blood flow frequently observed when the rinse is not used is prevented. Subsequently, the provisional restorations blend into the gingiva in a healthy manner, and the final restoration quickly loses the temporary magenta color commonly associated with new crowns.
In addition to the chlorhexidine gluconate rinse, other methods can be used to ensure complete impressions with no voids. The following technique can be highly effective if carried out meticulously. Medium viscosity impression material should be injected around tooth preparations that have been dried of visible moisture. A slight stream of air should be blown on the impression material, forcing it into the gingival sulcus and ensuring that the moisture also has been blown away from all areas of the tooth preparation. Subsequently, additional injections of impression material, followed by gentle streams of air, should be applied until the clinician is confident that all areas of the tooth preparation have been coated with the material. The tray containing additional impression material, preferably of heavy viscosity, should be placed over the previously placed unset material.
Occasionally, a drop of blood is observed emerging from the unset impression material as it is being injected. This challenge can be overcome by gently blowing a stream of air onto the impression material in the bloody area until the blood is not visible. If blood appears again, repeat the gentle blowing procedure, followed by injection of a small amount of impression material. Several repetitions may be necessary, but usually the slight stream of air and the somewhat viscous impression material stop the bleeding. The positive results of this technique will surprise you.
If the blood leakage is observed after removing cords and before the impression material has been injected, another technique is effective. Using a 30-gague needle and a cartridge of 1:50,000 epinephrine in 2% lidocaine, inject a drop or two of the solution into the gingival tissue about 2 millimeters from the bleeding site. Usually, the bleeding will stop immediately, and any debris can be blown away while the injection of the impression material continues. A pellet of cotton slightly moistened with a styptic solution also can be applied gently to the bleeding area for a few seconds immediately before the impression is made.
Voids or Bubbles on the Occlusal Surface of Adjacent Teeth
Dentists and staff members are observant of the tooth preparations and the immediately adjacent teeth. Frequently, however, large voids are present in the impression of teeth on other parts of the dental arch. These voids are caused by air bubbles allowed to remain in the impression while it is setting. Prevent them by first injecting the impression material onto the occlusal surfaces of the teeth all around the arch, then blowing a gentle stream of air onto the impression material. This will break the surface tension of the impression material and, thus, prevent air bubbles.
Cords Impregnated in the Impression
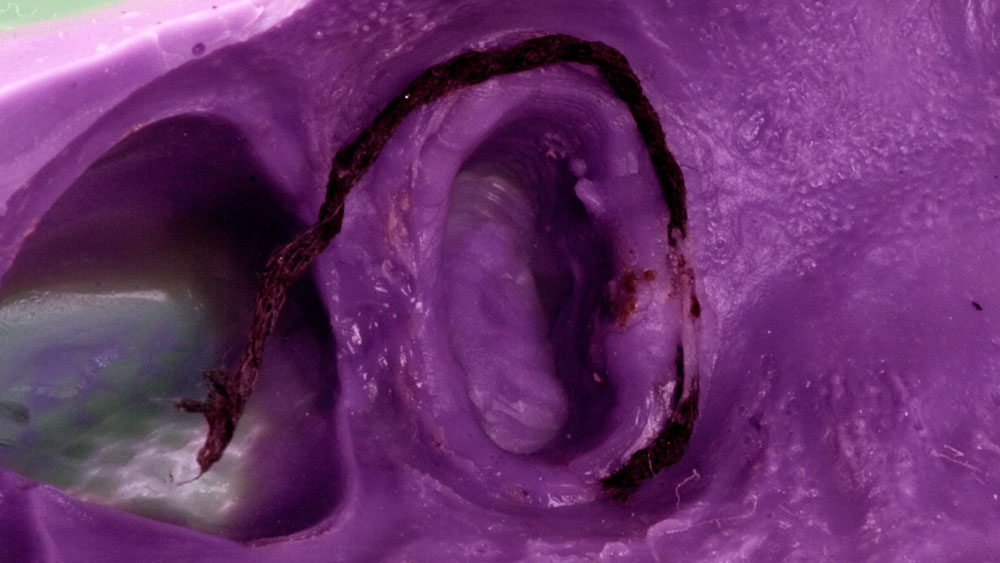
Pack gingival cords tightly and avoid leaving the ends of the cords sticking up from the gingival sulcus. In the event that the first cord is incorporated into the set impression material and the impression appears to be adequate otherwise, soak the impression in a cup of water to ensure that the cord is wet, and then gently dissect the cord from the impression. On removal of the impression from the mouth, if it is obvious that the cord will be impossible to remove, it is better and more predictable to make another impression because dehydration of the wet cord may distort the impression.
Debris in the Impression
It is easy to forget to rinse the mouth thoroughly before making an impression. The result can be the incorporation of amalgam or composite particles into the impression, often in vital areas such as tooth preparation margins, on the occlusal surfaces of the tooth preparation or on adjacent teeth. To avoid this problem, rinse the mouth with an alcohol-free mouthwash immediately before making the impression and then inspect it to be sure that the debris has been removed.
Impression Material Segregated from the Tray
Usually, the separation of material from the tray is caused by placing the adhesive on the impression tray too close to the impression time. Manufacturers suggest that when using vinyl polysiloxane, the clinician should place the adhesive on the tray at least 10 minutes before the impression is made. Placing the adhesive less than 10 minutes before making the impression often results in incompletely set adhesive and allows the impression material to pull away from the tray when it is removed from the mouth. When this occurs, distortion of the set impression is almost unavoidable.
When using polyether materials, the adhesive can be placed on the tray much closer to the time of the impression than when using vinyl polysiloxane. Polyether tray adhesive can be placed as late as 90 seconds before the impression is made.
Inadequately Fitting Crowns or Fixed Prostheses
After several decades of making impressions, I prefer using custom-made, light-curing trays for prostheses of three units or more. Using double-arch trays is acceptable for making impressions for one or two units.
Although the custom tray technique requires use of a diagnostic cast for tray fabrication and five to seven minutes of an assistant’s time to make the tray, the accuracy and stability of the impression almost always are excellent. Additionally, the tray requires far less impression material, because it fits the mouth well. An impression made in a custom try costs about one-half as much as one made in a stock tray with putty and wash.3
Summary
Impressions for crowns and fixed prostheses could be better. I have offered several suggestions to improve their quality. None of the suggestions is difficult or time-consuming. The result of making better impressions will be greater longevity for the resultant restorations and happier patients, dentists and laboratory technicians.
Dr. Christensen is cofounder and senior consultant, Clinical Research Associates, 3707 N. Canyon Road, Suite 3D, Provo, Utah 84604. The views expressed are those of the author and do not necessarily reflect the opinions or official policies of the American Dental Association.
- ^ Christensen GJ. Day-to-day fixed prosthodontics: a fast, easy, predictable approach. J Am Dent Assoc. 1992 Nov;123(11):91-2.
- ^ Christensen GJ. Have fixed-prosthodontic impressions become easier? J Am Dent Assoc. 2003 Aug;134(8):1121-3.
- ^ Christensen GJ. Now is the time to change to custom impression trays. J Am Dent Assoc. 1994 May;125(5):619-20.
Christensen GJ. The state of fixed prosthodontic impressions: room for improvement. J Am Dent Assoc. 2005 Mar;136(3):343-6. Copyright ©2005 American Dental Association. All rights reserved. Reprinted by permission.
Please note: All figures, pictures and captions were added by Glidewell, and did not appear in the original JADA article. The America Dental Association makes no representation and accepts no responsibility for the accuracy, timeliness or comprehensiveness of the figures, photos and captions.
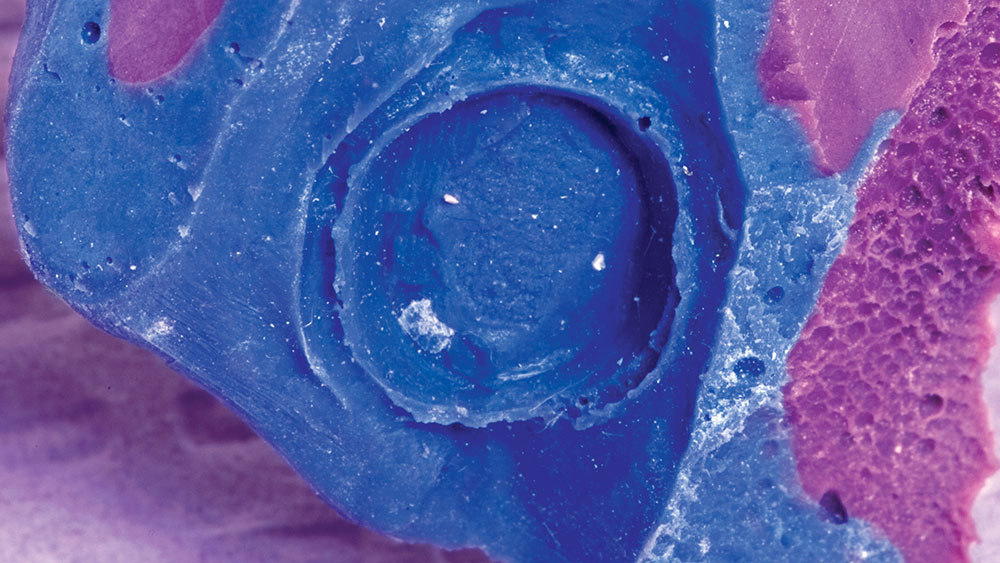
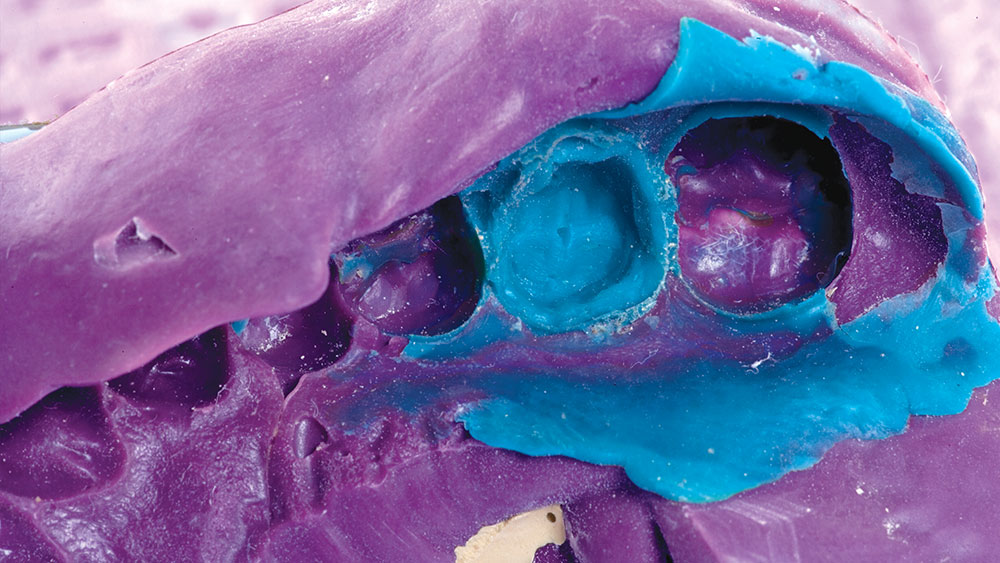
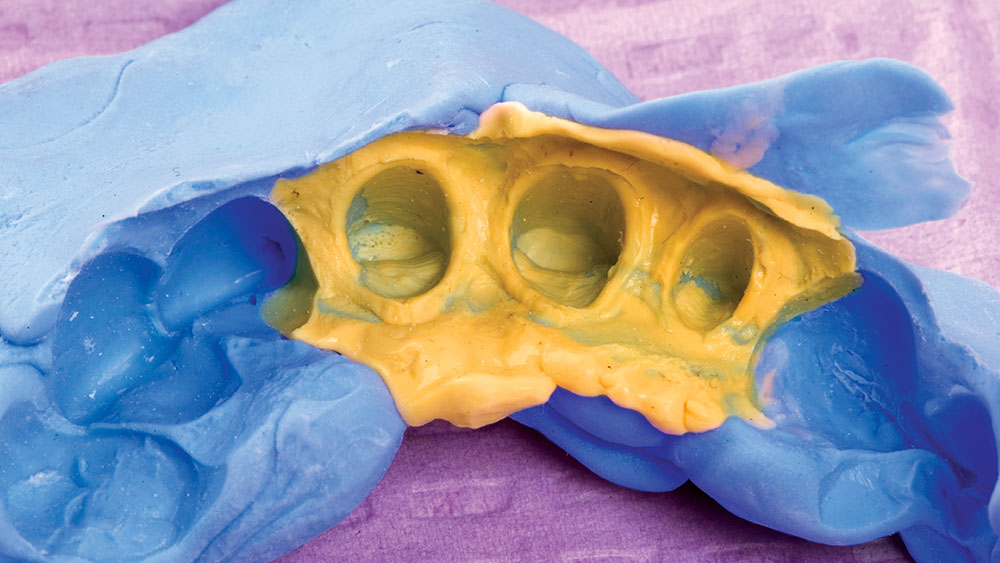
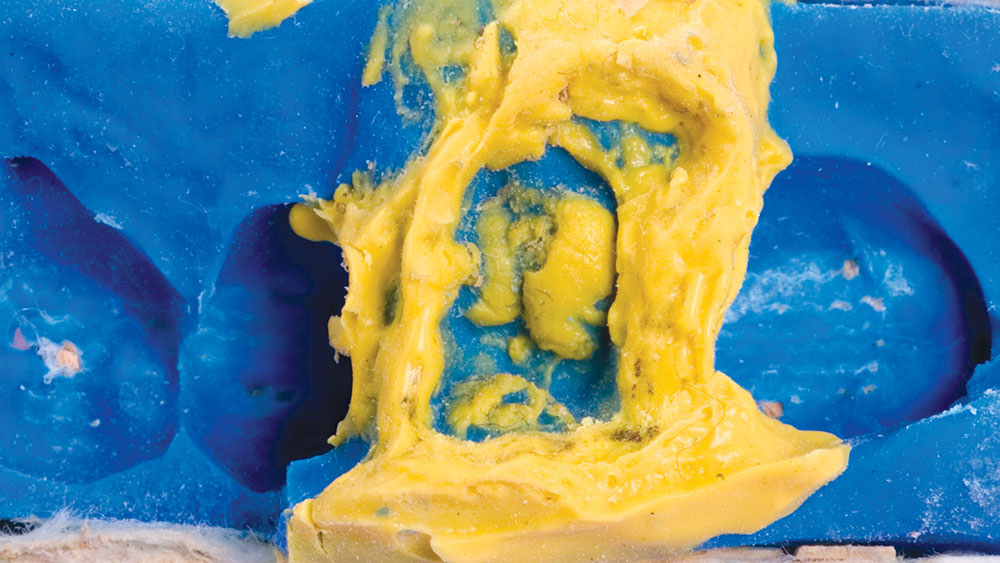
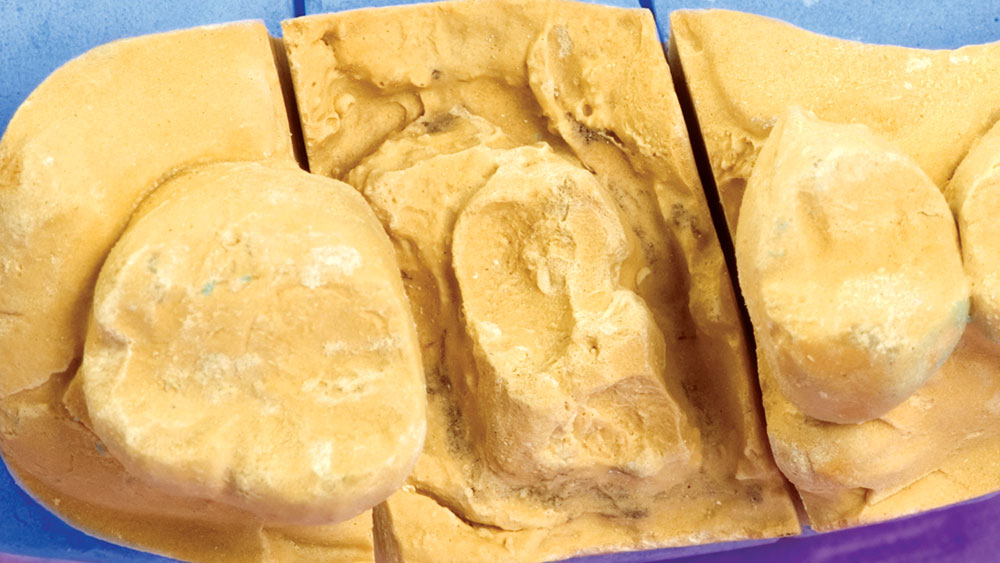
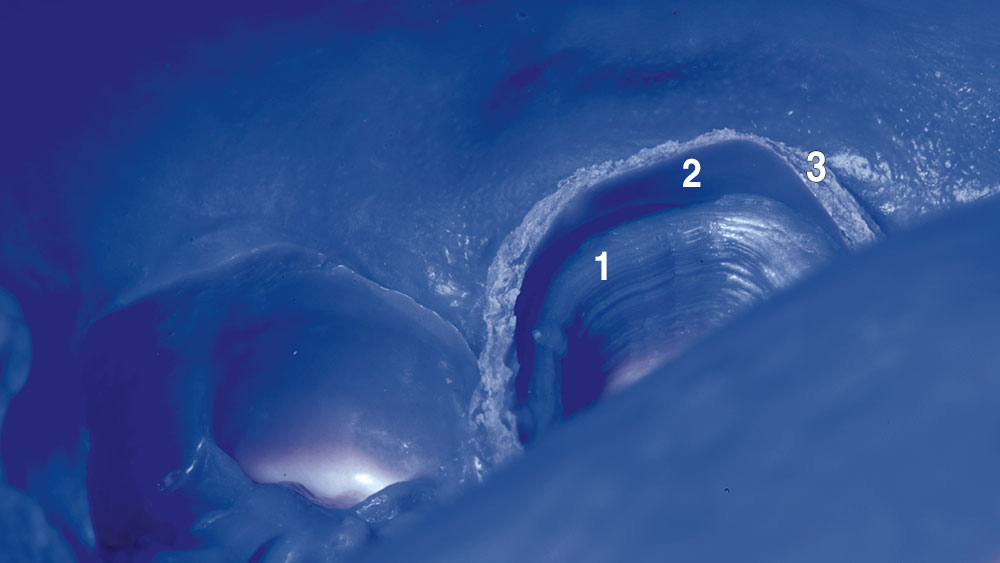
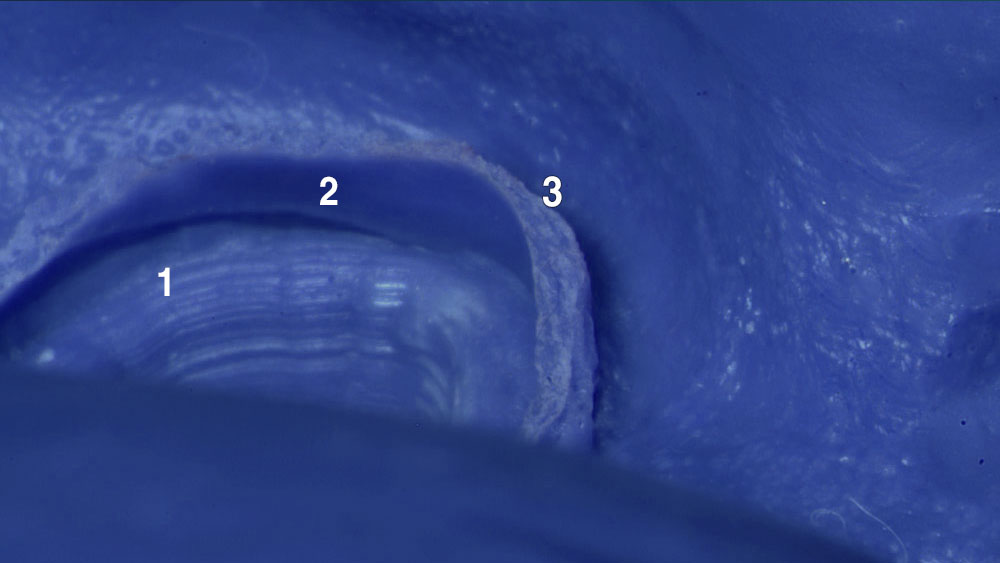
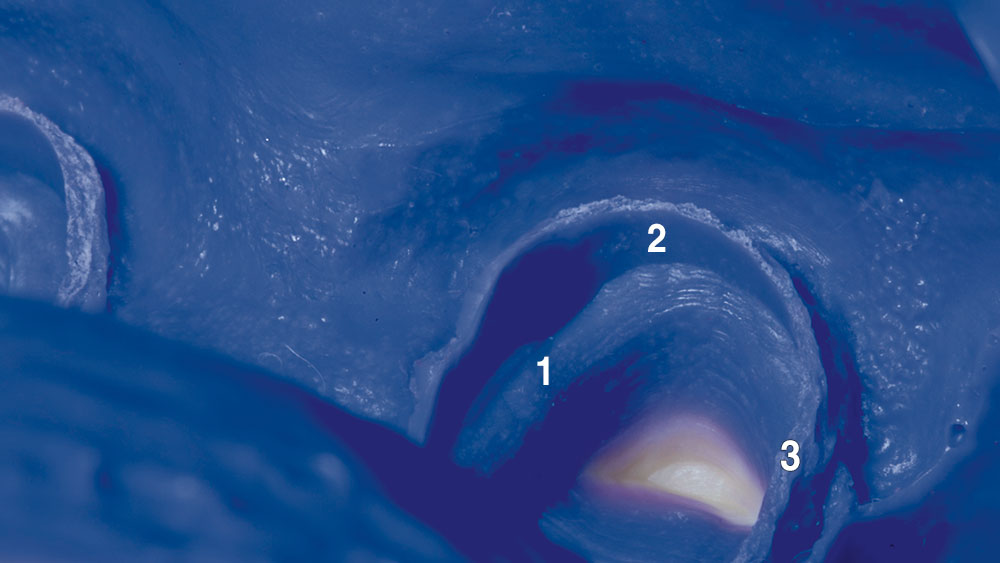
These three pictures illustrate the necessary characteristics for a highly acceptable impression
- The marginal area (indicated by the number 1) must be fully represented on an impression if you expect to have a restoration that will fit well and last for many years. Not only does the impression of the margin have to be void- and bubble-free, but it also needs to be well represented 360 degrees around the tooth. Furthermore, there needs to be some additional impression material clearly beyond the margin for the lab to know where to place the margin on the die and have it fit the tooth.
- When you use the recommended two-cord technique as seen on the Updated Reverse Preparation Technique DVD (and at glidewellce.com), you will always have an extension of impression material beyond the preparation margin (indicated by the number 2). This portion of the impression is critically important for the lab to be able to accurately know the width of the margin. Furthermore, this part of the impression is actually an impression of the root of the tooth. This is also critical information because it allows the lab to follow the emergence profile of the natural tooth and fabricate a crown that will be esthetically pleasing and not iatrogenic to the surrounding soft tissue architecture.
- The terminal area of the impression (indicated by the number 3) is much thicker with the two-cord impression technique than with typical one-cord impression techniques. The reasons for this are twofold. By leaving the 00 cord in during the impression, there is no bleeding when the top cord (the 2 cord) is removed; therefore, the edge of the impression material is not being pushed out by blood rising out of the sulcus. Also, because the impression material rests against the 00 cord, you are essentially getting an impression of that cord. This makes the terminal edge of the impression material much thicker than in a typical one-cord technique, and it deforms less when the impression is being poured with die stone.

