Holiday Hours Update: In observance of the upcoming holidays, our Contact Support Centers will be open on December 24 until 3:00pm. We will be closed on December 25 and January 1. Wishing you and yours a Merry Christmas and Happy New Year!

×

Photo Essay: Treatment Planning After Facial Trauma
June 24, 2016
 image
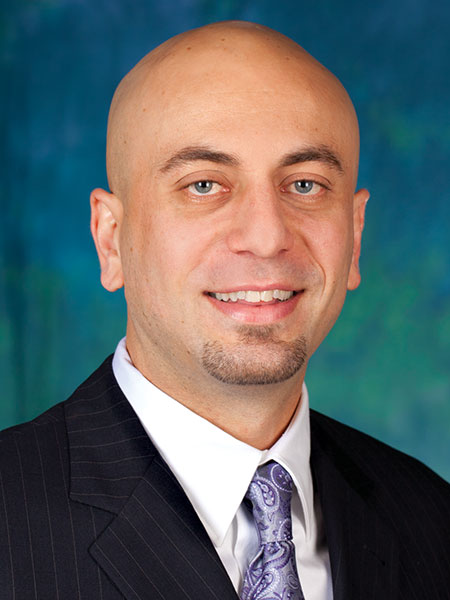
Siamak Abai, DDS, MMedSc
Photo Essay: Treatment Planning After Facial Trauma

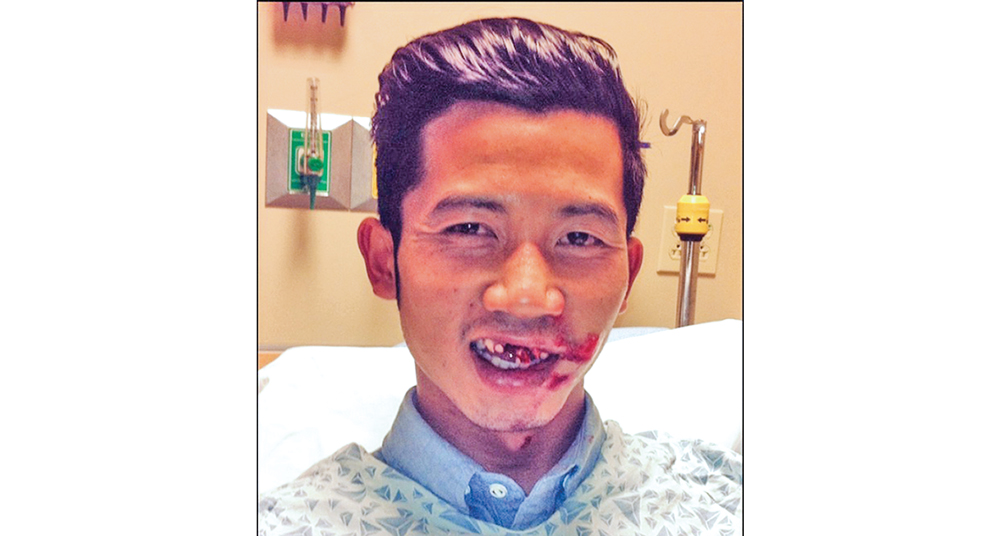
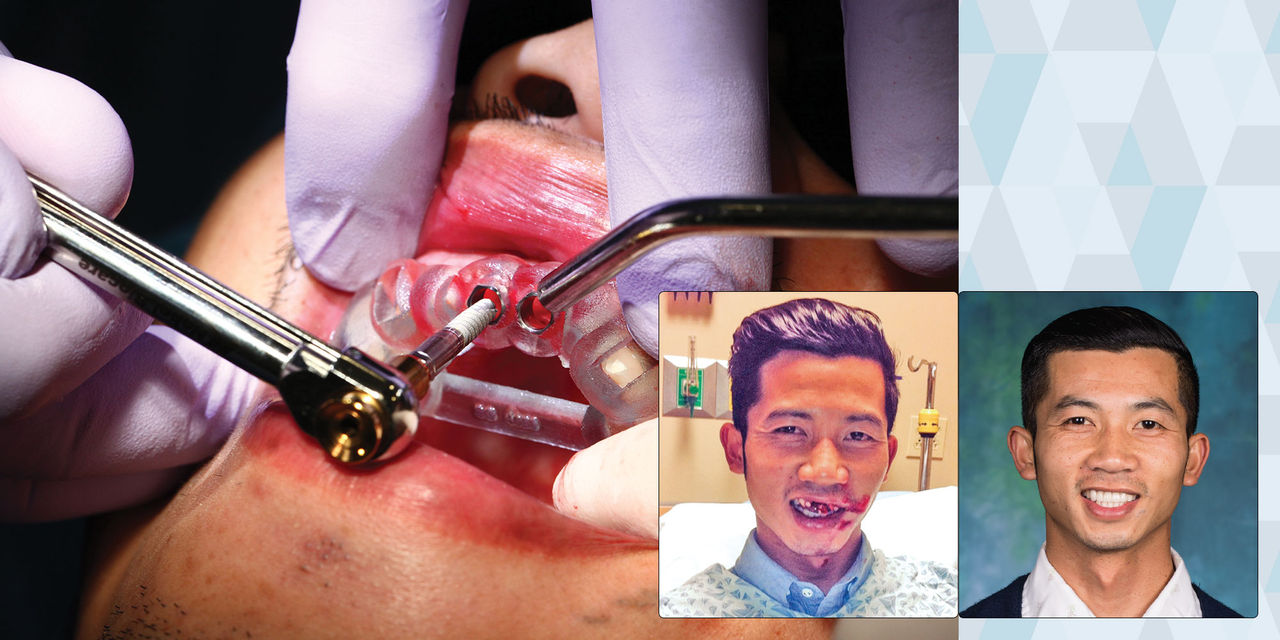
A Glidewell Laboratories dental technician was in a motorcycle accident and was taken by ambulance to the hospital. Fortunately, his injuries were not life-threatening; however, the trauma resulted in the loss of his maxillary central incisors as well as other facial injuries. Several months after being released from the hospital, he presented to the operatory to receive dental treatment. In the following case report, I used Obsidian® lithium silicate ceramic in conjunction with guided implant surgery to restore five anterior units.

Figure 1a
Figure 1b

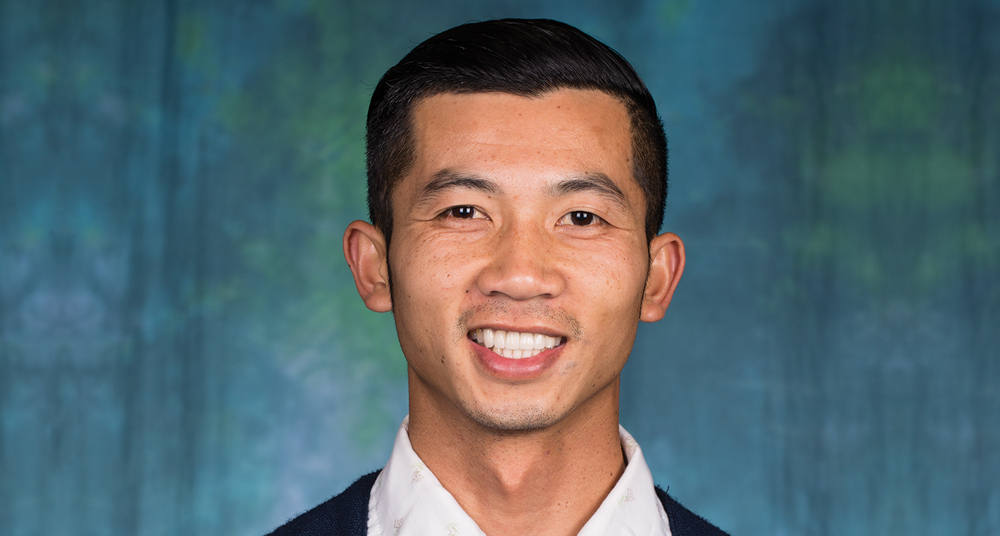
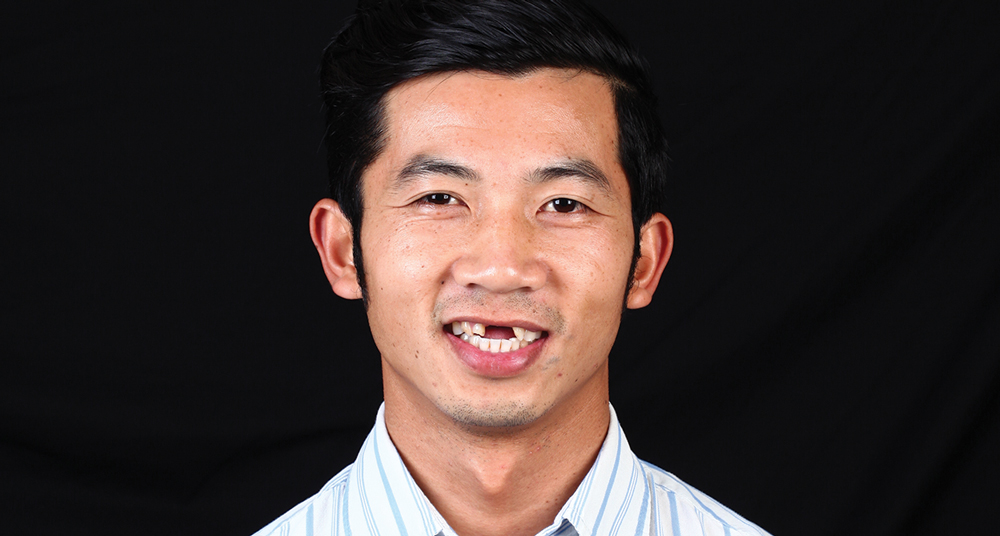
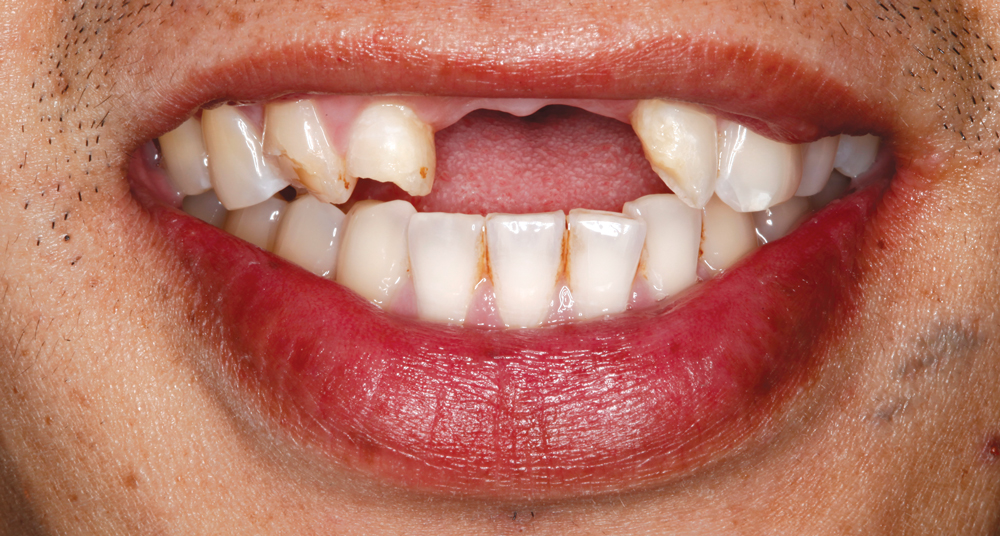
Figures 1a, 1b: At the time of the crash, the patient was wearing an open-face helmet, which failed to protect the lower third of his face from direct damage (Fig. 1a). It’s likely that had the patient been wearing a full helmet, he would not have received such injuries. Despite the trauma, Obsidian lithium silicate ceramic enabled the patient to be restored to full form and function (Fig. 1b).

Figure 2a
Figure 2b

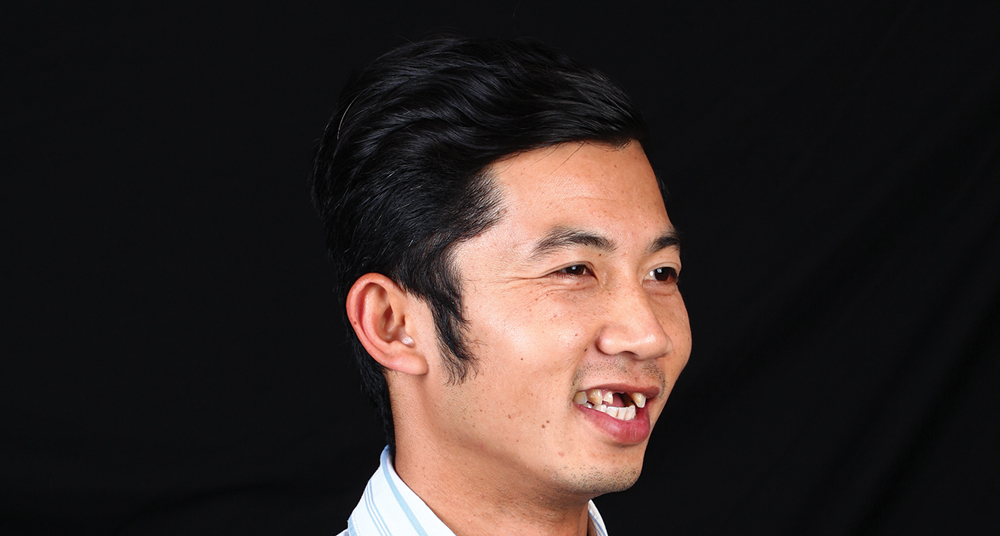
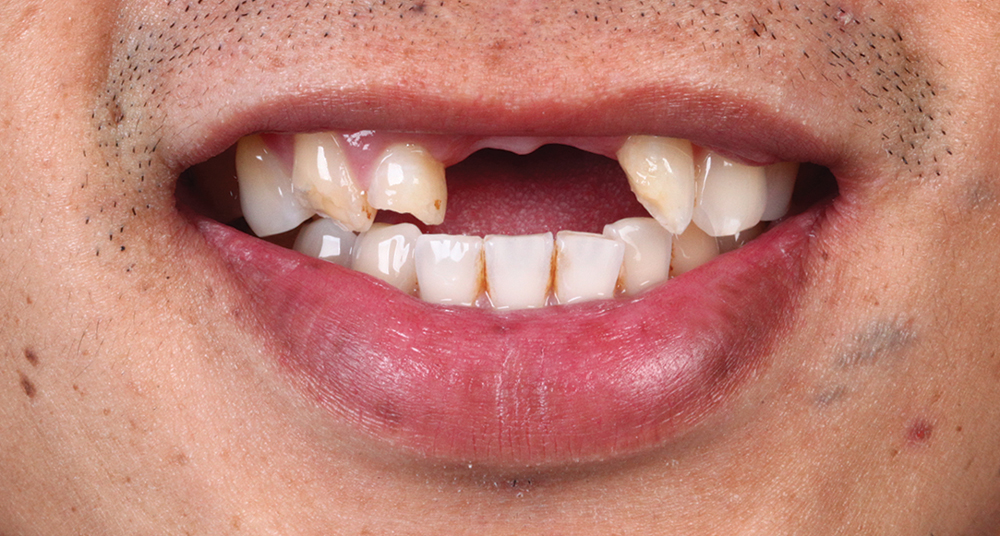
Figures 2a, 2b: During the initial patient examination, I approached the case by first observing the patient’s facial esthetics. Prior to examining his oral cavity, I considered the position of his smile line and how much of the gingiva showed as he smiled and spoke. To provide the best esthetic result, it is important to weigh the factors beyond the oral cavity in the treatment plan.

Figure 3a
Figure 3b
Figure 3c

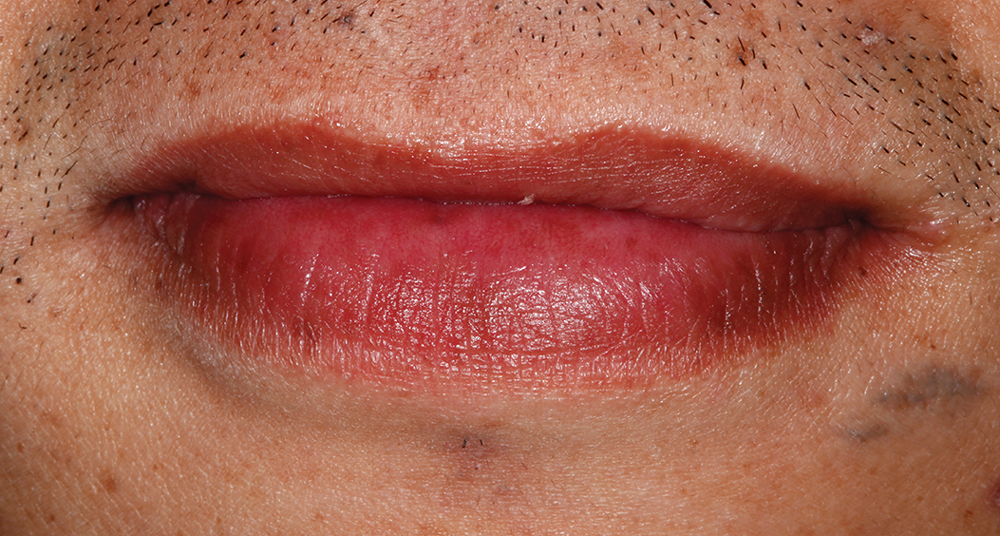
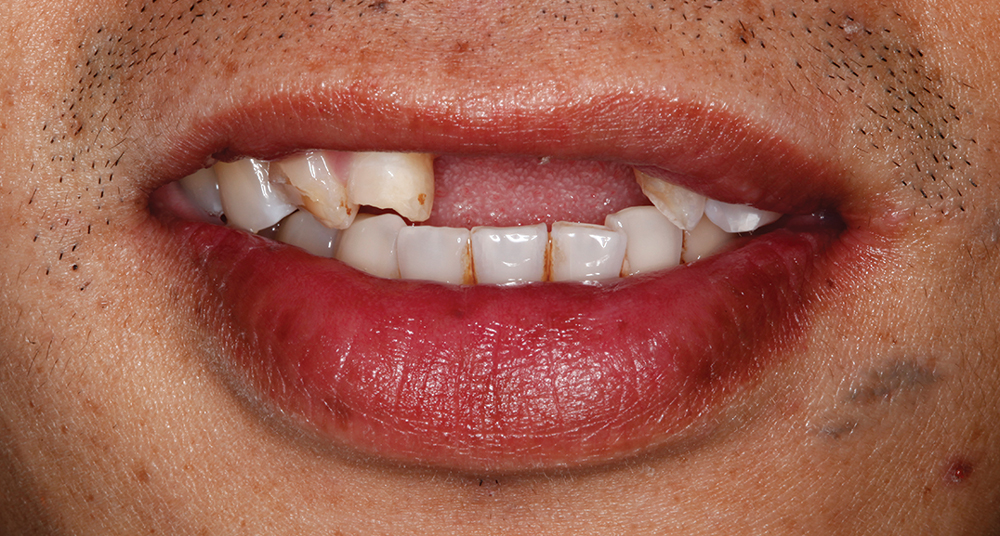
Figures 3a–3c: This series of images shows the progression of the patient’s smile from closed mouth, to rest position, to full smile. Note that when the patient is fully smiling, the maxillary gingiva is showing superior to tooth #7. Also, the papilla in the area of tooth #8 and #9 has receded significantly, which will greatly impact the treatment options available to achieve a highly esthetic result.

Figure 6
Figure 4b

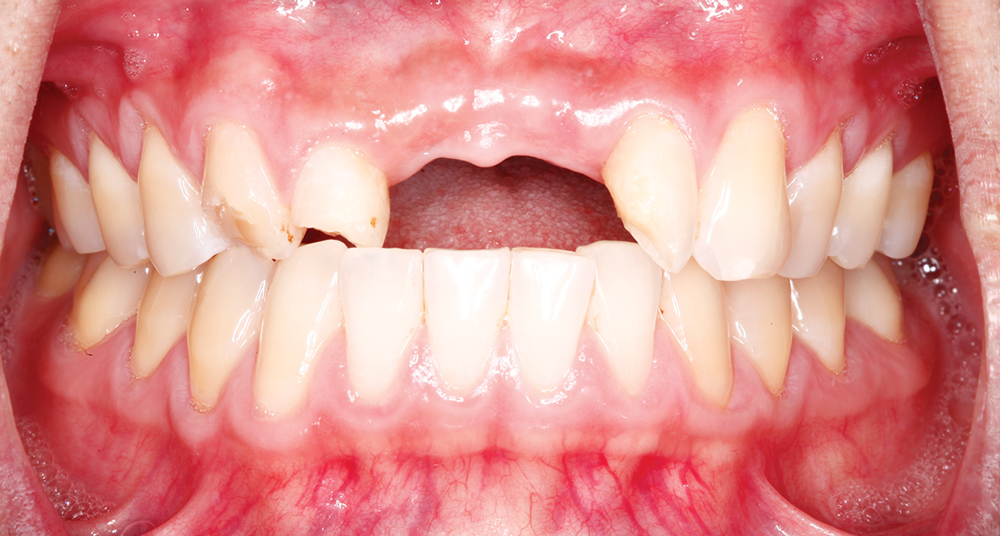
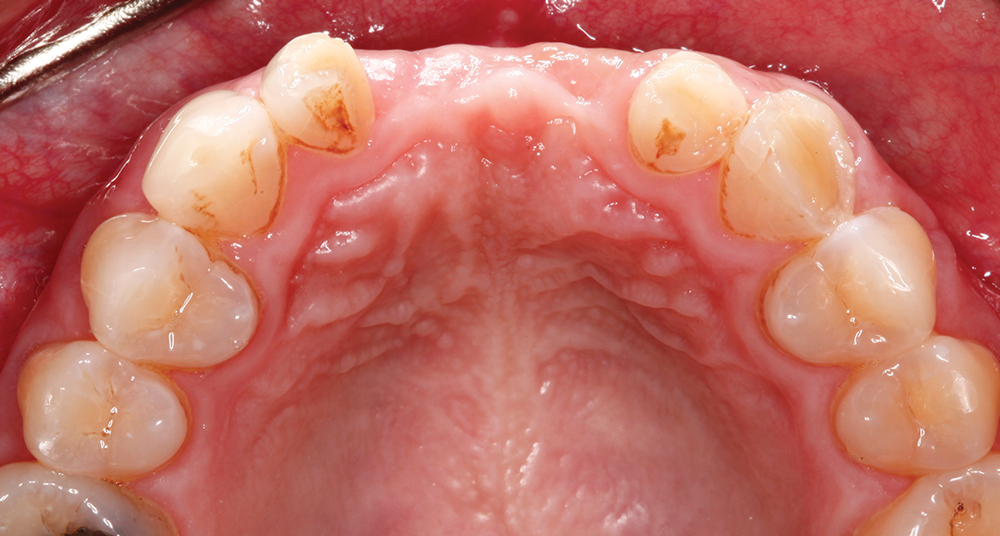
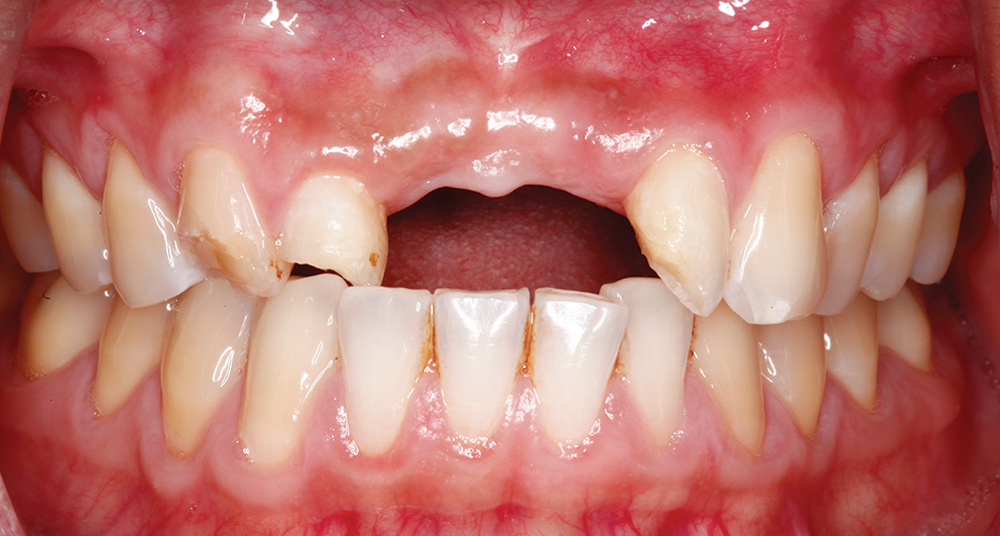
Figures 4a, 4b: The intraoral examination indicated that the patient was missing tooth #8 and #9, with tooth #6, #7 and #10 showing fractures that compromised esthetics and limited their function. Although tooth #11 had minor enamel damage, treatment would be performed at a later time.

Figure 5

Figure 5: Based on the intraoral and external examination, I formulated a treatment plan that included placing two implants in the area of tooth #8 and #9, and restoring the patient with a combination of fused-to-metal and all-ceramic restorations. Because the implants were to be placed in an area of prominent esthetics with little room for miscalculation, I elected to use a surgical guide to seat the implants based on the data created by a cone-beam computed tomography (CBCT) scan. Further, to ensure esthetic reshaping of the recessed papilla, the case would require several extended periods of temporization and healing.

Figure 4a

Figure 6: The patient received hygiene treatment prior to preparing the teeth.

Figure 7a
Figure 7b

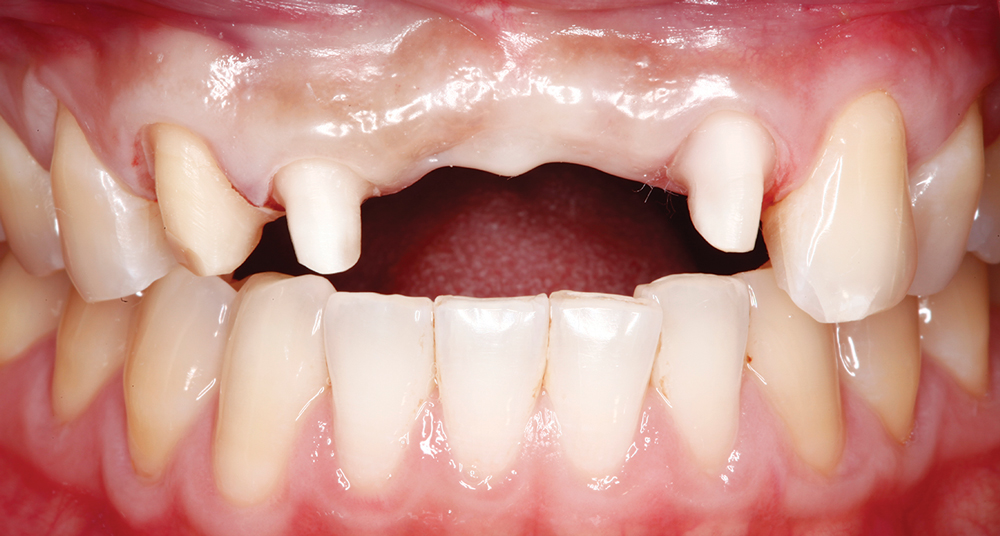
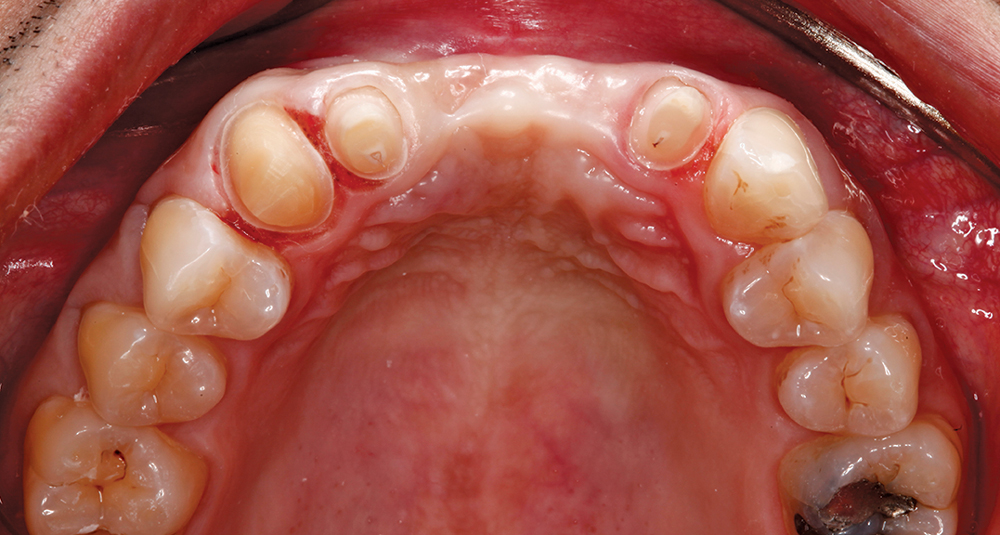
Figures 7a, 7b: The patient was anesthetized, and then tooth #6, #7 and #10 were prepared for all-ceramic restorations. Following tooth preparation, a CBCT scan and a digital impression were made for the creation of the surgical guide.

Figure 8a
Figure 8b

Figures 8a, 8b: For this case I used a BioTemps® Provisional bridge, with ovate pontics for #8 and #9. The BioTemps were fabricated based on the preoperative impressions with the intent of reshaping the gingival contours and creating ideal sites for the future implants. Technicians in the lab created the provisional by scanning the patient’s cast and reducing by a specified amount prior to digitally designing and milling the provisional. The teeth were prepared with ideal reduction and the BioTemps were seated. The provisional bridge was worn for a period of one month to effectively shape the soft tissue.

Figure 9a
Figure 9b
Figure 9c
Figure 9d

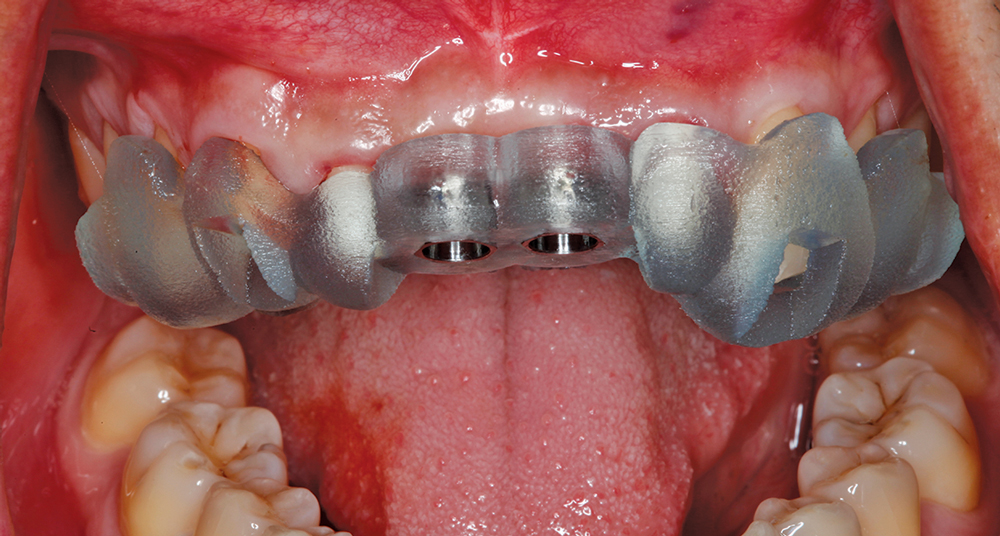
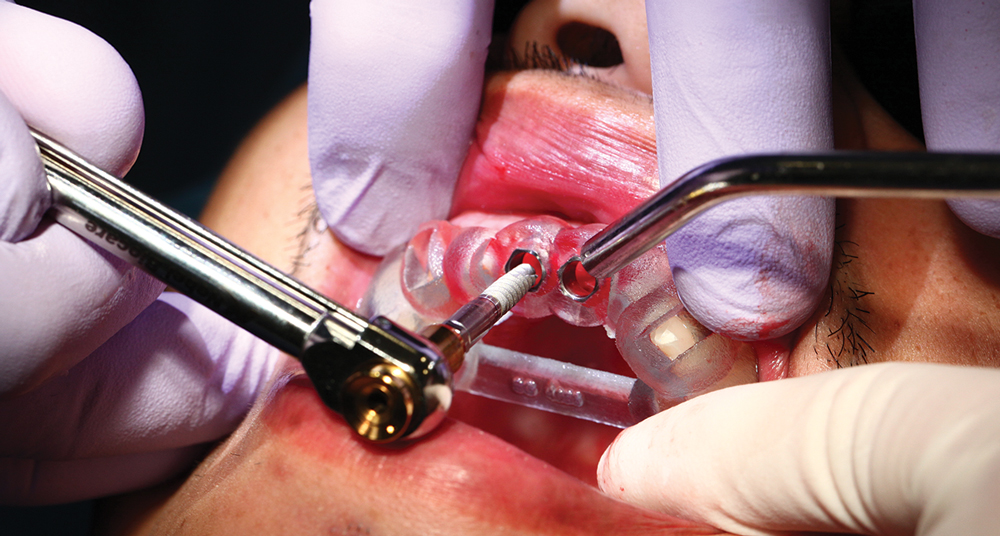
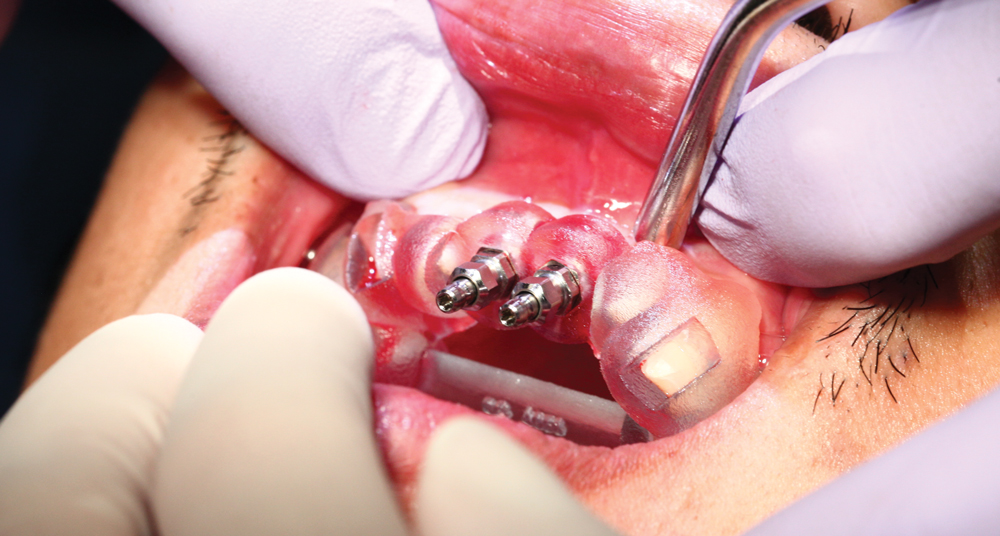
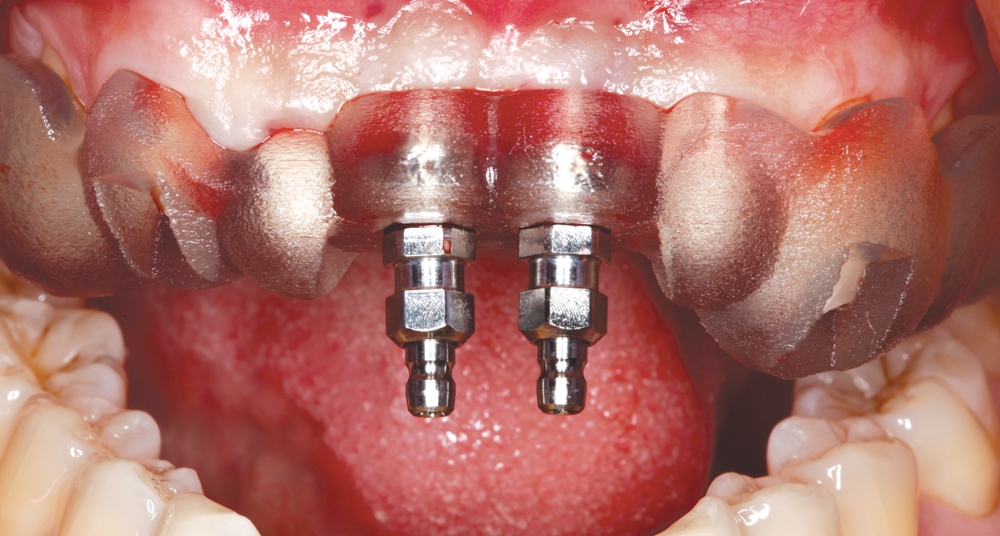
Figures 9a–9d: During the monthlong healing period, the provisional began the reshaping of the papilla between tooth #8 and #9, and created a natural-looking gingival profile for the implant sites. After removing the provisional, the tooth-supported surgical stent seated in place over the existing, adjacent dentition. Osteotomies were created, and then two 3.5 x 13 mm Hahn™ Tapered Implants were hand-torqued into place through the surgical guide with the aid of implant mounts.

Figure 10a
Figure 10b

Figures 10a, 10b: Short healing abutments were placed equigingival and out of contact with the ovate pontics of the reseated BioTemps bridge. The intaglio surface of the BioTemps was checked with FIT CHECKER™ (GC America, Inc.; Alsip, Ill.) and relieved as necessary, to ensure that no functional load was placed on the implants during the osseointegration period.

Figure 11

Figure 11: View of the intraoral condition approximately one week after implant placement.

Figure 12

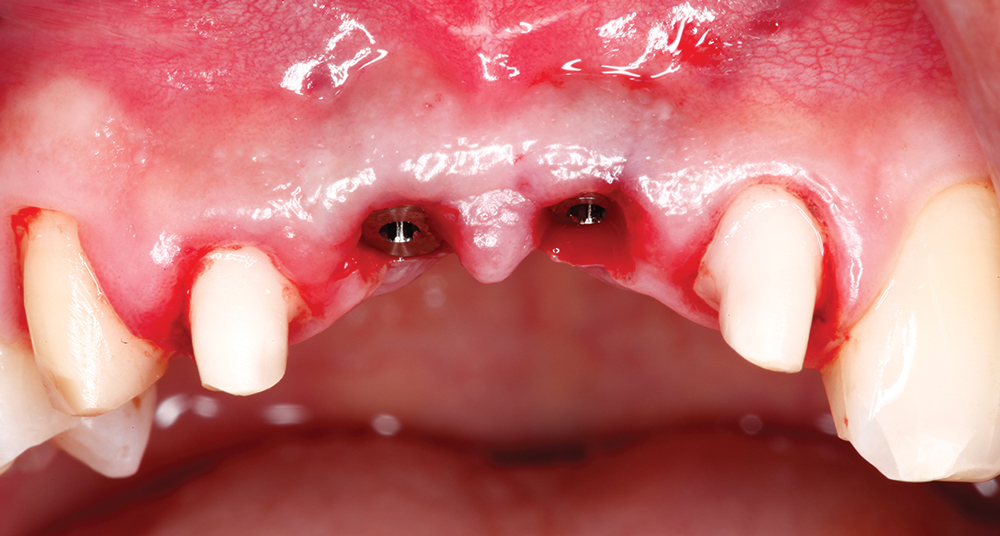
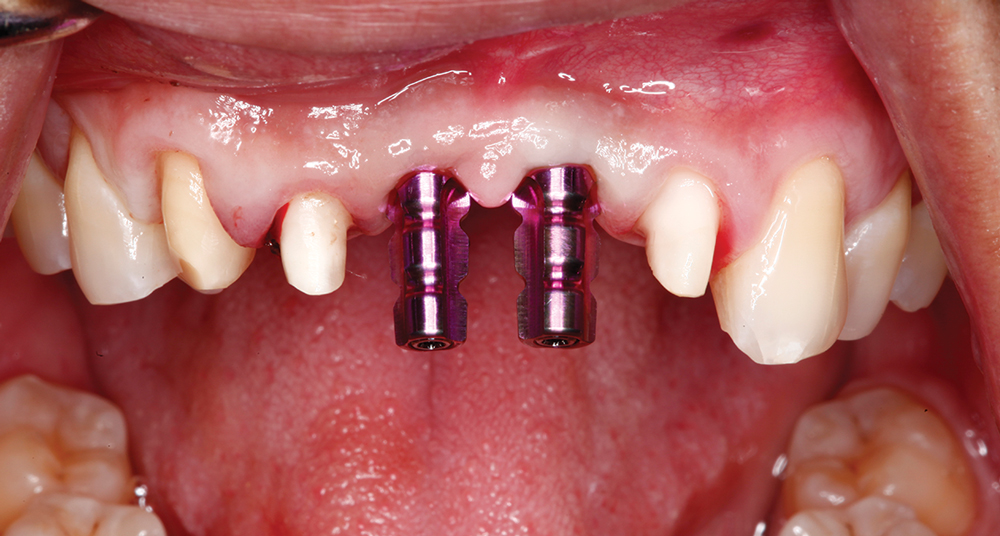
Figure 12: After four months of tissue healing and osseointegration, the patient returned for the final impression. The BioTemps bridge was removed and the soft tissue was evaluated. Impression copings were seated on the implants, retraction cord was placed in the margins of the natural-tooth preparations, and a traditional vinyl polysiloxane impression was made.

Figure 13

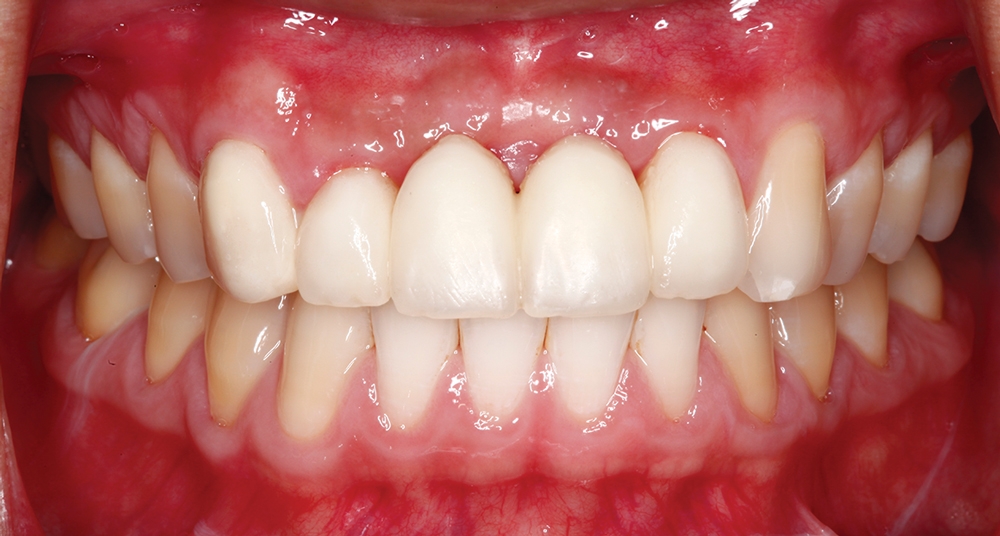
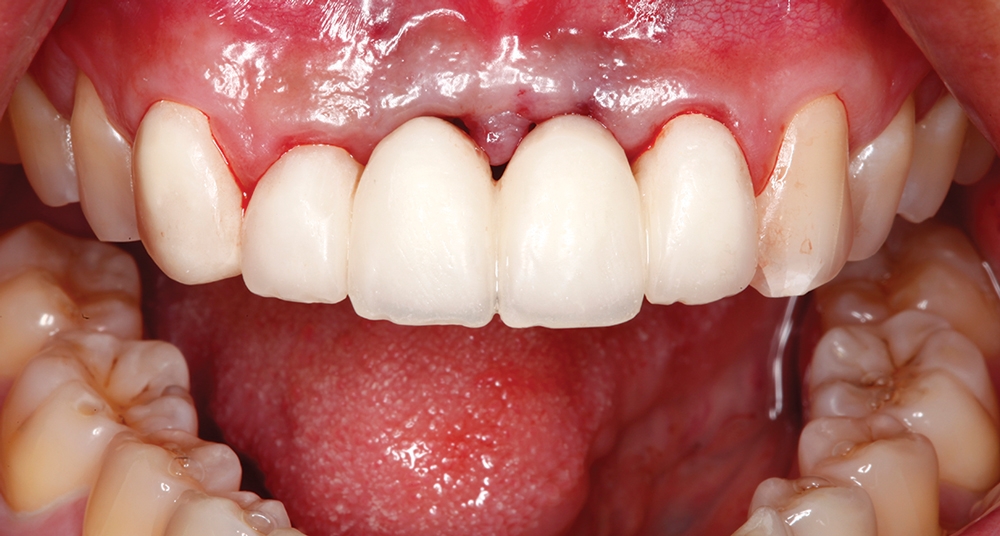
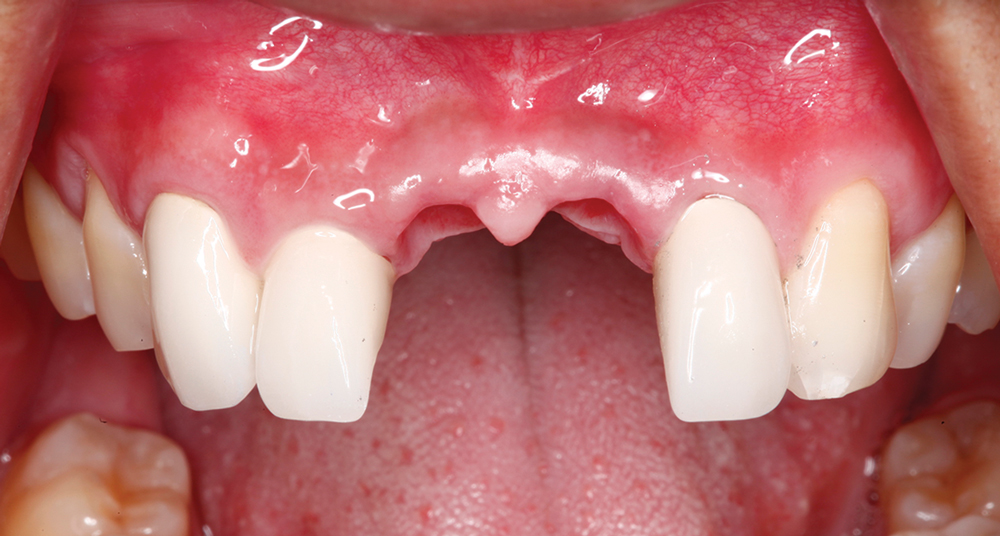
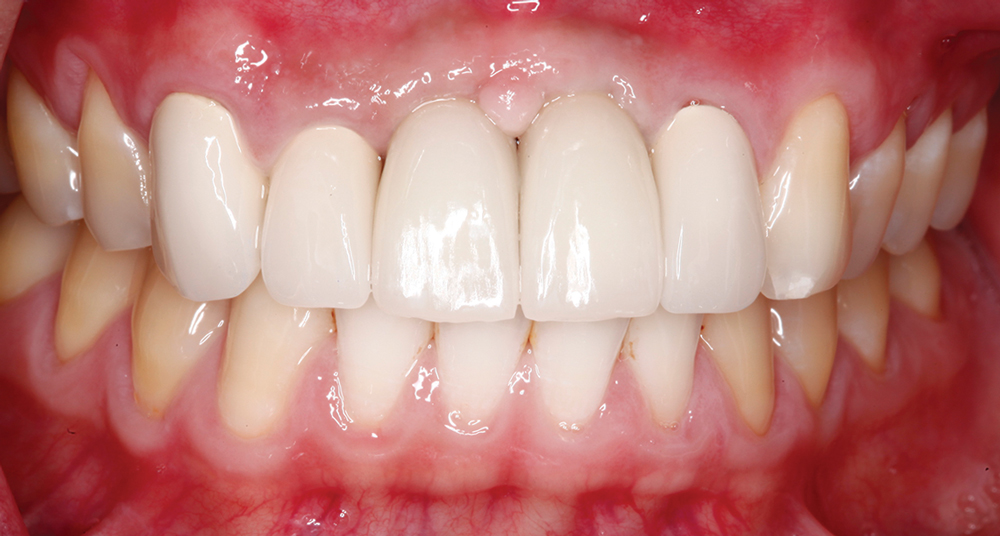
Figure 13: Once the final restorations had been fabricated and arrived at the operatory, I first seated the all-ceramic Obsidian restorations on tooth #6, #7 and #10. Compare the state of the papilla between #8 and #9 with how it appears in Figure 6. The extended healing phases, which allowed for tissue recontouring, resulted in a much more esthetic final result.

Figure 14

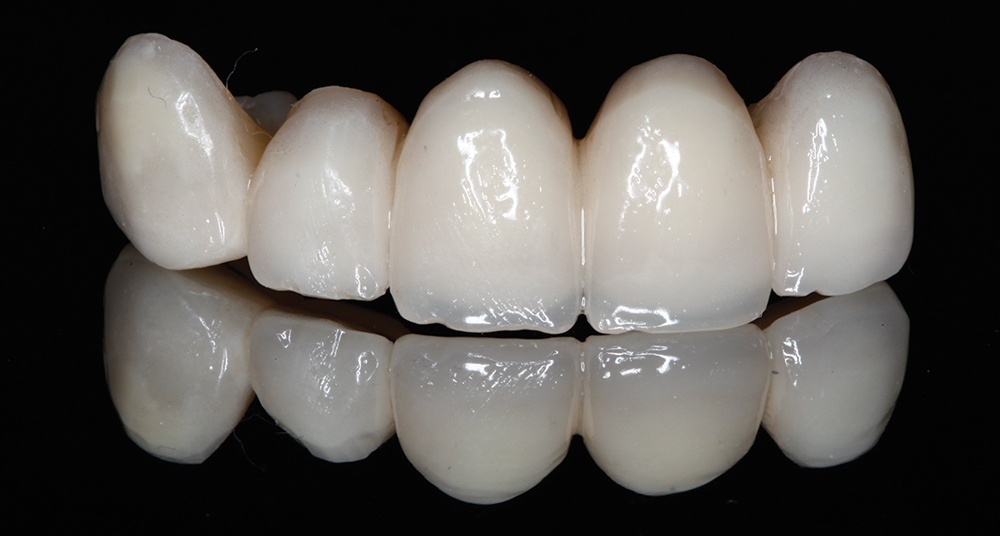
Figure 14: Next, I seated the screw-retained Obsidian crowns. The lithium silicate ceramic of these crowns is pressed to a metal understructure that is screwed directly on top of the implant, providing an added strength value. Even with the metal substructure, the esthetics of these two pressed to metal crowns closely match those of the adjacent all-ceramic crowns.

The intaglio surface of the BioTemps was checked with FIT CHECKER and relieved as necessary, to ensure that no functional load was placed on the implants during the osseointegration period.

Conclusion

This patient was able to have highly esthetic final results because of careful planning of the surgical and restorative phases, and extended tissue recontouring during the provisional period. Cases such as this require a more methodical, time-intensive approach to obtain the ideal final result. Patients who experience such extensive dental trauma are often eager to achieve final restorative results as quickly as possible, and a clinician must balance those desires with the requirements of the specific case. With the aid of Obsidian ceramic, which acted as an ideal solution for this case because it has the ability to match across a variety of restorative types, the patient was restored to the pre-accident function and an improved level of esthetics.

Figure 1b
Figure 15b

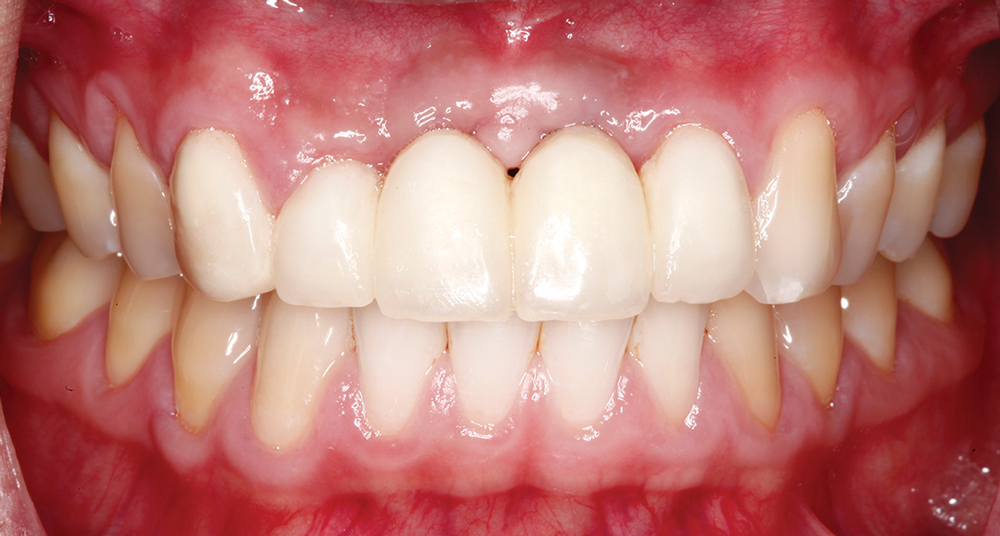
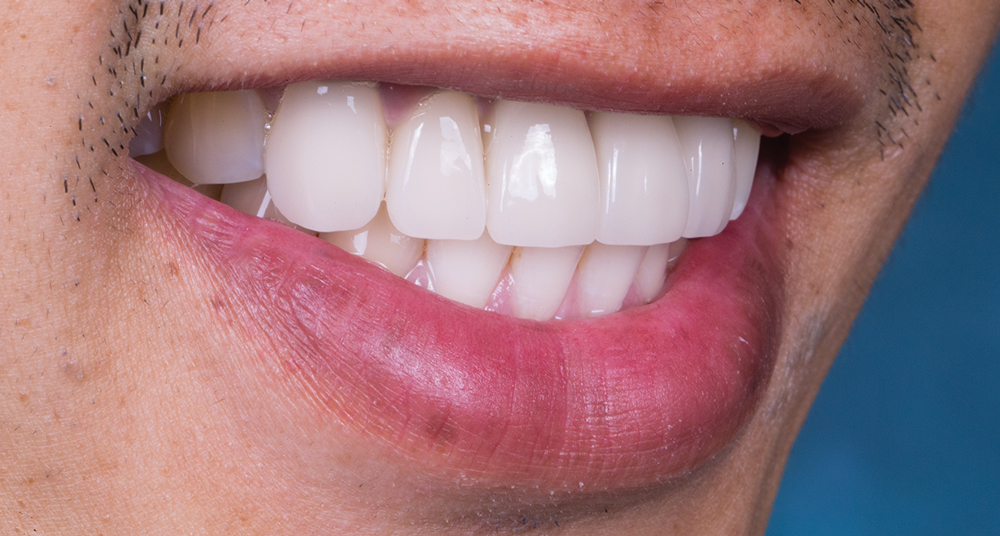
Figures 15a, 15b: Extraoral view of the final restorations. The new crowns effectively provided a natural-looking result.

This patient was able to have highly esthetic final results because of careful planning of the surgical and restorative phases, and extended tissue recontouring during the provisional period.