Implant Surgery: When Should You Use a Flapless Technique?
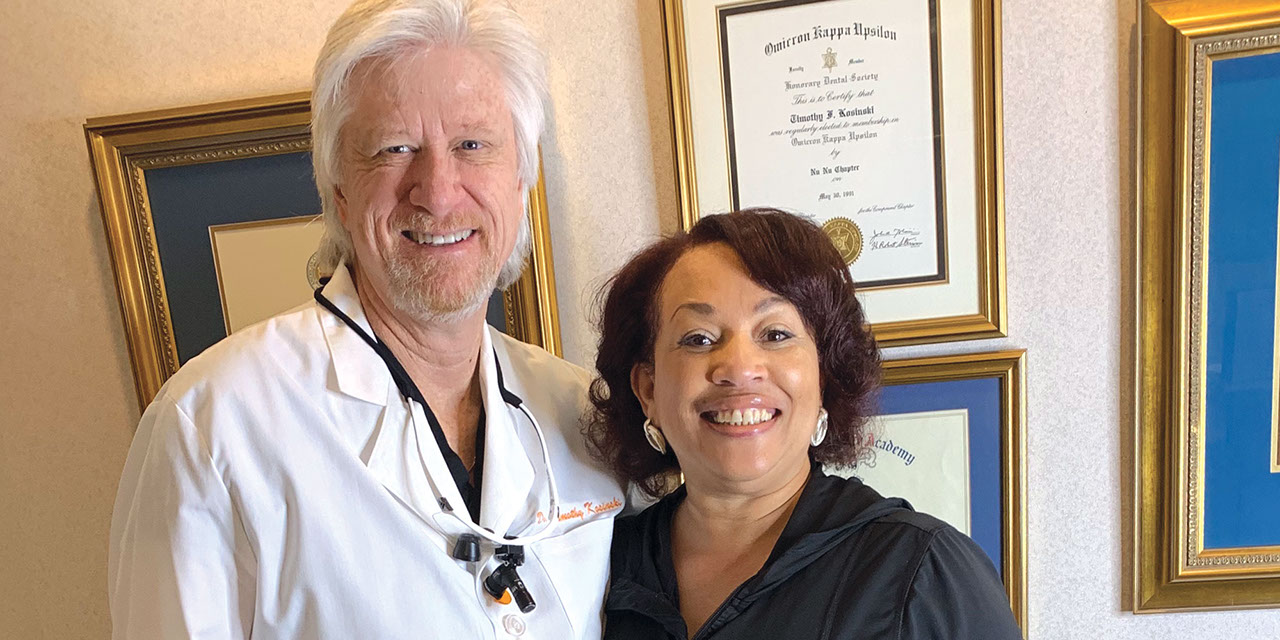
Note: The Hahn Tapered Implant System is now known as the Glidewell HT Implant System
Implant placement is becoming increasingly routine in the general practice, but with it comes a range of decisions that must be made as we evaluate the patient in advance of surgical intervention. When treatment planning a case, we must assess the available bone and quality of the soft tissue, and plan a restorative-driven surgical procedure. A key consideration involves determining which surgical technique to use to access the implant site.
After gaining a clear understanding of the available hard and soft tissue through intraoral evaluation, radiography and — when possible — CBCT scanning, the clinician can determine whether flap reflection or a flapless surgical procedure is ideal for the individual patient. Both of these surgical techniques offer advantages, and the approach should be determined based on the amount of attached tissue present at the implant site, as well as the volume of bone.
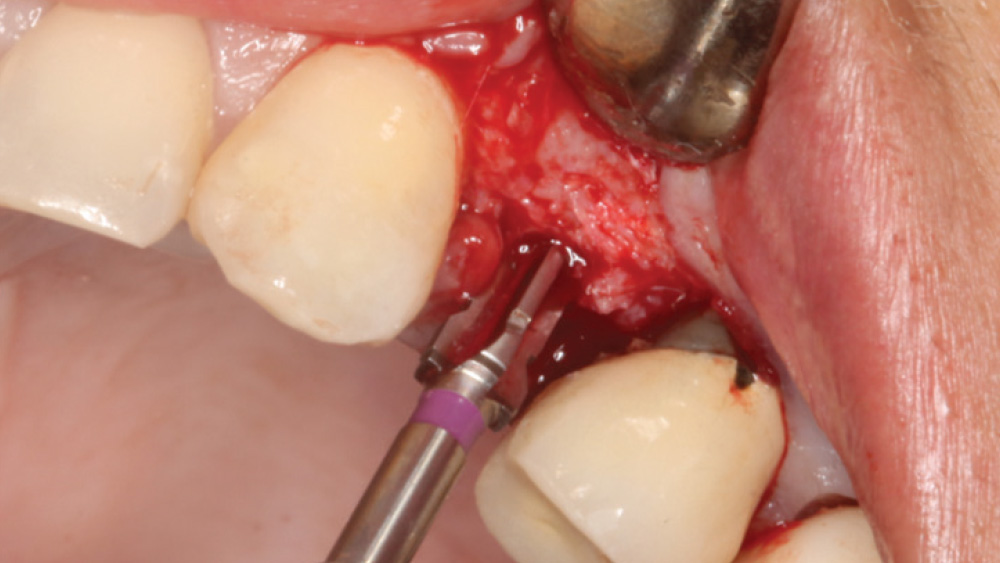
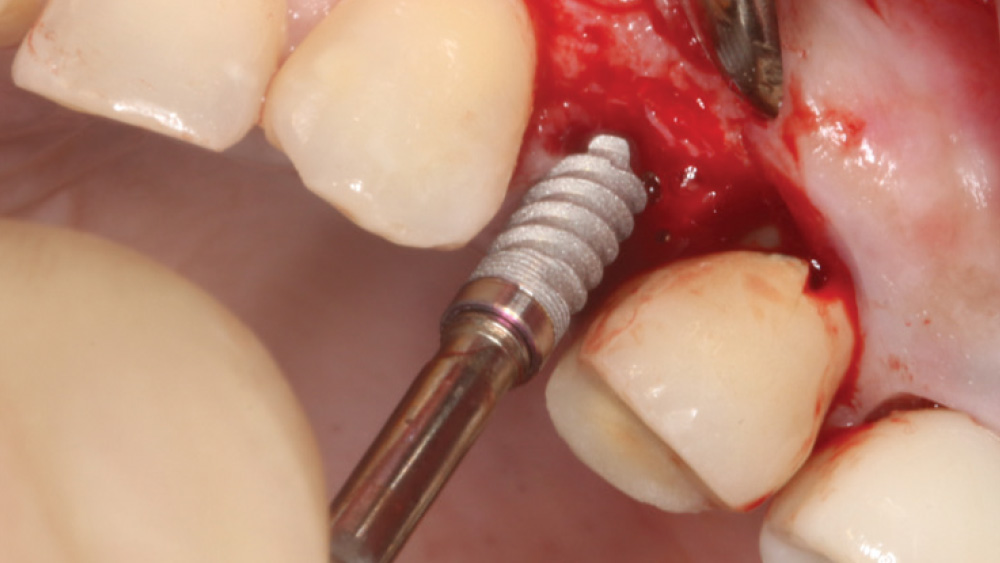
When the attached tissue is minimal, a flap procedure allows the surgeon to reposition the flap to create more attached gingiva and improve the interdental papillae at the implant site. Reflecting a gingival flap also enables the practitioner to more clearly see the final position of the implant at the crest of the bone. If it’s necessary to visualize the bone during the surgical procedure due to uncertain ridge width or height, flap reflection is the safest, most predictable approach.
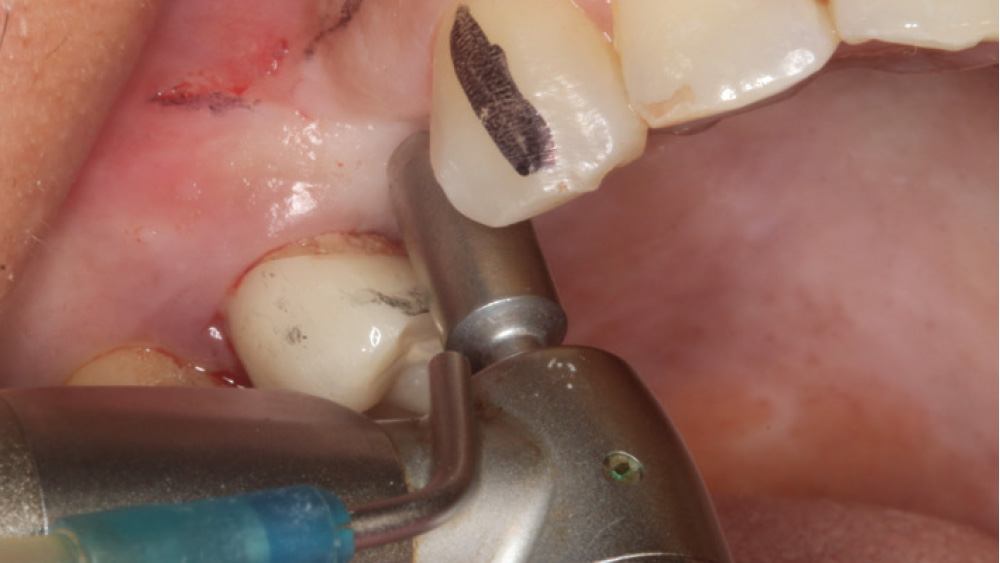
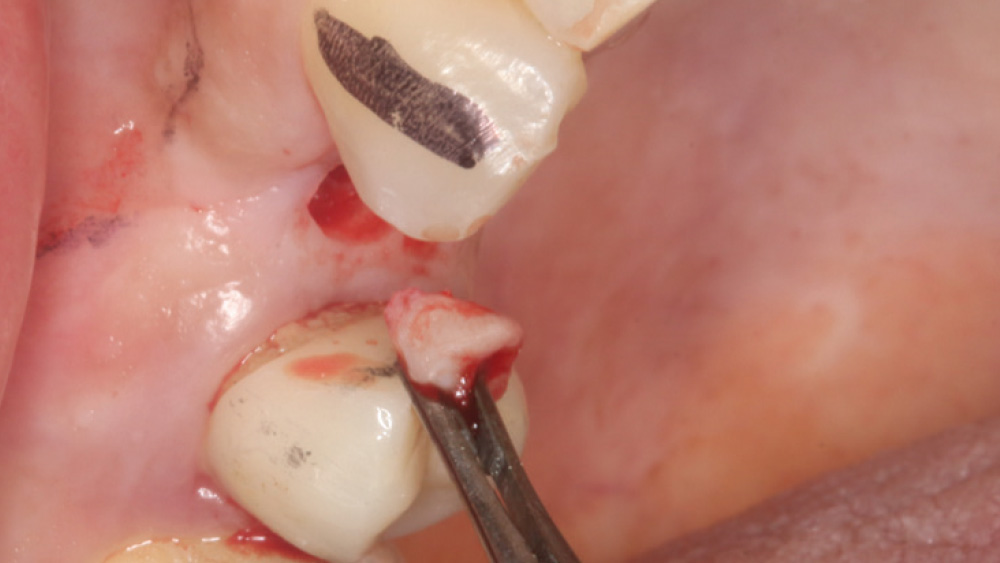
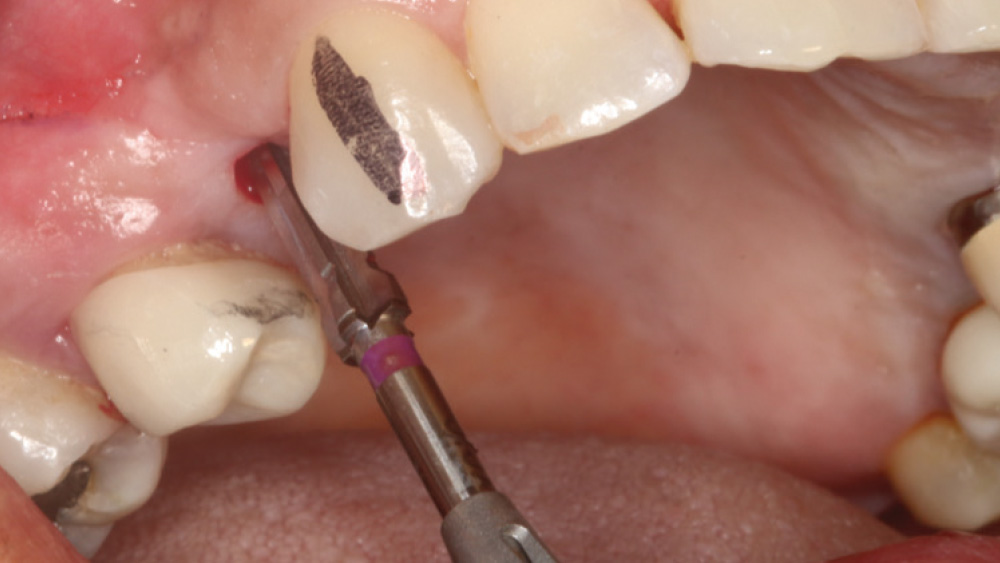
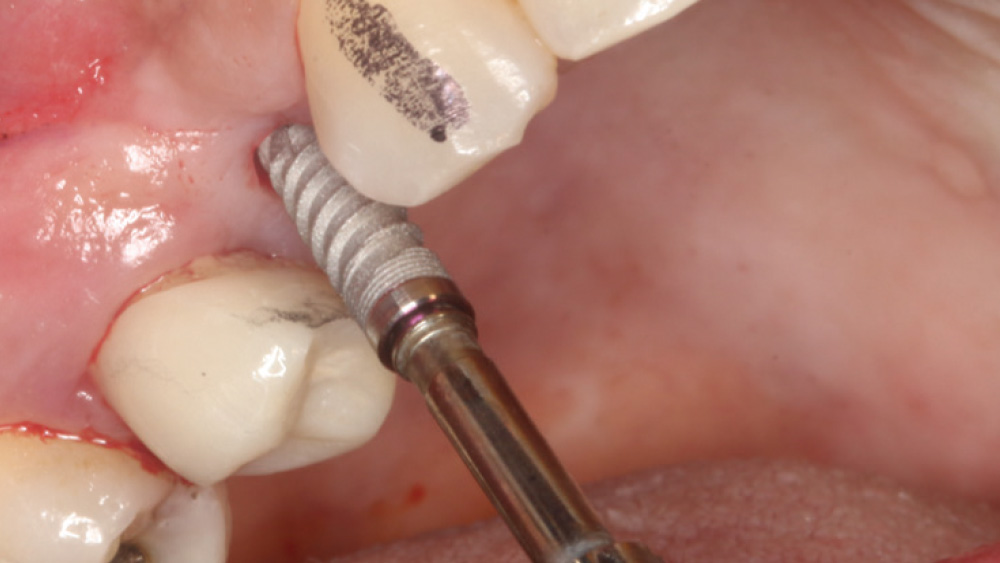
In contrast, with a flapless procedure, a tissue punch is used to gain access to the bone through the gingiva, minimizing postoperative discomfort by eliminating incisions in the mucosal tissue. Whenever mucosal tissue is incised, prostaglandin and histamine are released, resulting in potential postoperative swelling and pain. Therefore, when there is an adequate width of attached gingiva on the facial aspect of an implant site, a flapless procedure may be indicated, eliminating any suturing requirements.
Advantages of Flap Procedure
- Flap can be repositioned to create more attached gingiva
- Visualization of, and access to, the underlying bone
- The final positioning of the implant platform can be observed
Advantages of Flapless Procedure
- Simple, efficient access to the implant site
- Postoperative swelling and discomfort are minimized
- No suturing required
CASE REPORT
The following case, which I performed alongside Dr. Stephanie Tilley of Pensacola, Florida, illustrates the use of both surgical techniques for the same patient, who presented with edentulous spaces in the areas of both right and left maxillary first bicuspids. Due to varying soft-tissue volume on each side of the arch, implant surgery was performed using a flapless procedure for one site, while the attached gingiva was reflected to expose the available hard tissue for the other. As a result of proper site evaluation, treatment planning and restorative-driven implant placement, both surgical techniques led to successful outcomes for the patient.
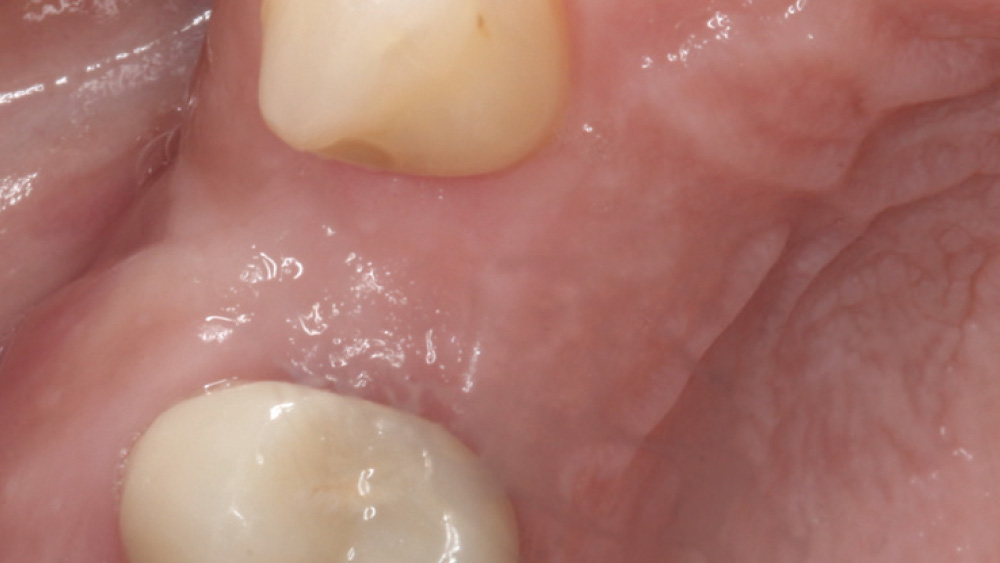
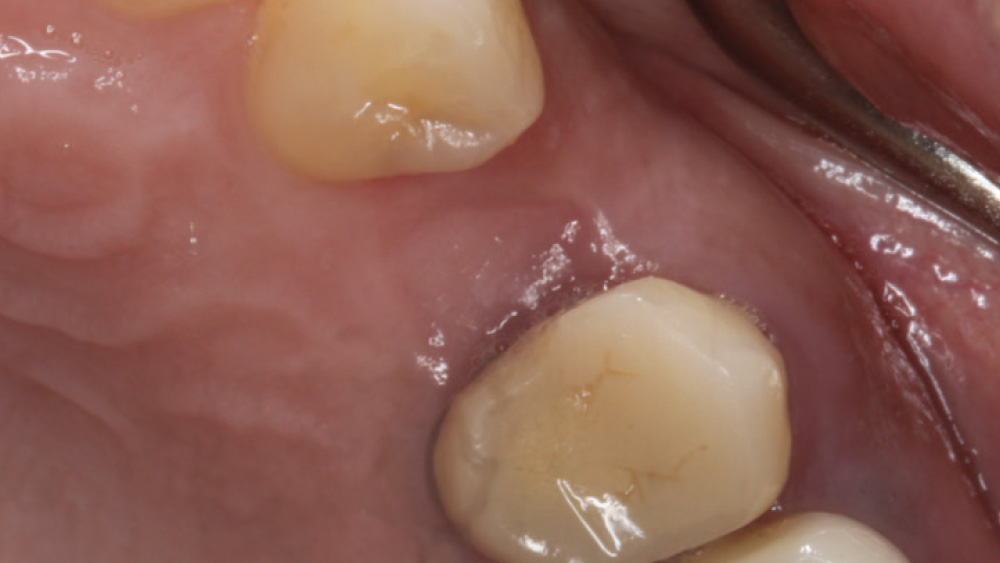
Figure 1a: The patient presented with two missing maxillary first bicuspids and expressed interest in implant treatment. After careful evaluation of the hard and soft tissue, we decided to place two Hahn™ Tapered Implants (Glidewell Direct; Irvine, Calif.). In the area of tooth #5, where ample attached gingiva was present, we opted for a flapless surgical procedure (1a). For tooth #12, where less attached gingiva was present, we chose to reflect the soft tissue to expose the available bone (1b).
Figure 1b: The patient presented with two missing maxillary first bicuspids and expressed interest in implant treatment. After careful evaluation of the hard and soft tissue, we decided to place two Hahn™ Tapered Implants (Glidewell Direct; Irvine, Calif.). In the area of tooth #5, where ample attached gingiva was present, we opted for a flapless surgical procedure (1a). For tooth #12, where less attached gingiva was present, we chose to reflect the soft tissue to expose the available bone (1b).
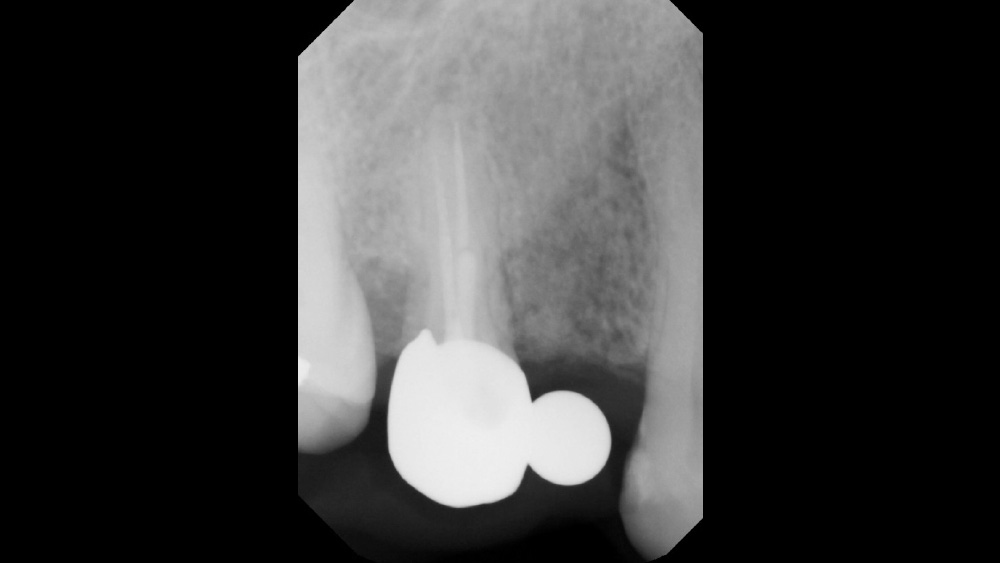
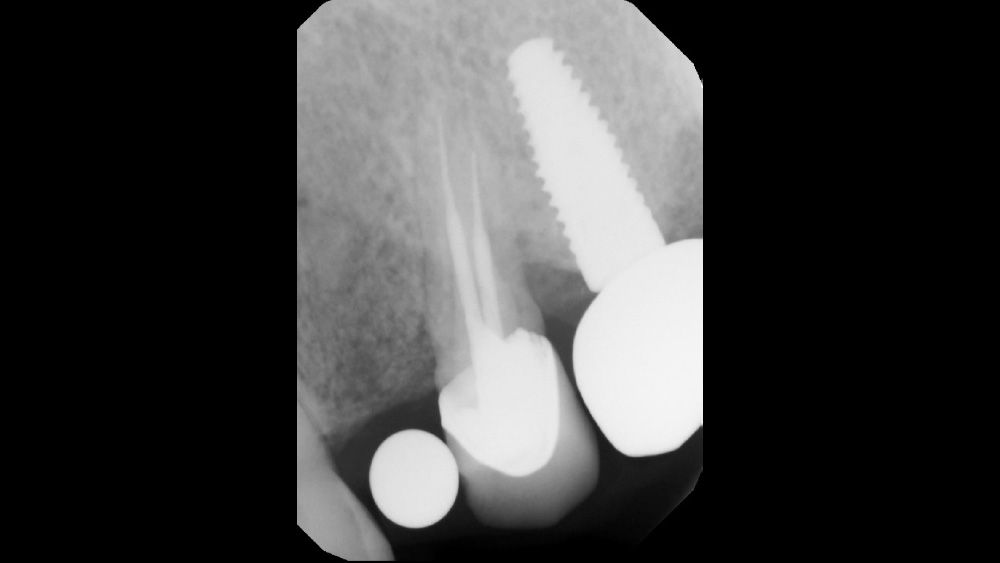
Figure 2a: Although CBCT analysis allows the practitioner to evaluate the edentulous sites in three dimensions, the ability to determine proper implant placement using digital two-dimensional radiography is helpful. A 5 mm ball bearing was placed over each edentulous area with orthodontic wax, and digital radiographs were made. This allowed a precise assessment of the available vertical bone, using the apices of the adjacent teeth as a safeguard for depth of the final implant. Mesial-distal distance between the adjacent teeth was also determined using this method, aiding the selection of implant diameter for each site.
Figure 2b: Although CBCT analysis allows the practitioner to evaluate the edentulous sites in three dimensions, the ability to determine proper implant placement using digital two-dimensional radiography is helpful. A 5 mm ball bearing was placed over each edentulous area with orthodontic wax, and digital radiographs were made. This allowed a precise assessment of the available vertical bone, using the apices of the adjacent teeth as a safeguard for depth of the final implant. Mesial-distal distance between the adjacent teeth was also determined using this method, aiding the selection of implant diameter for each site.
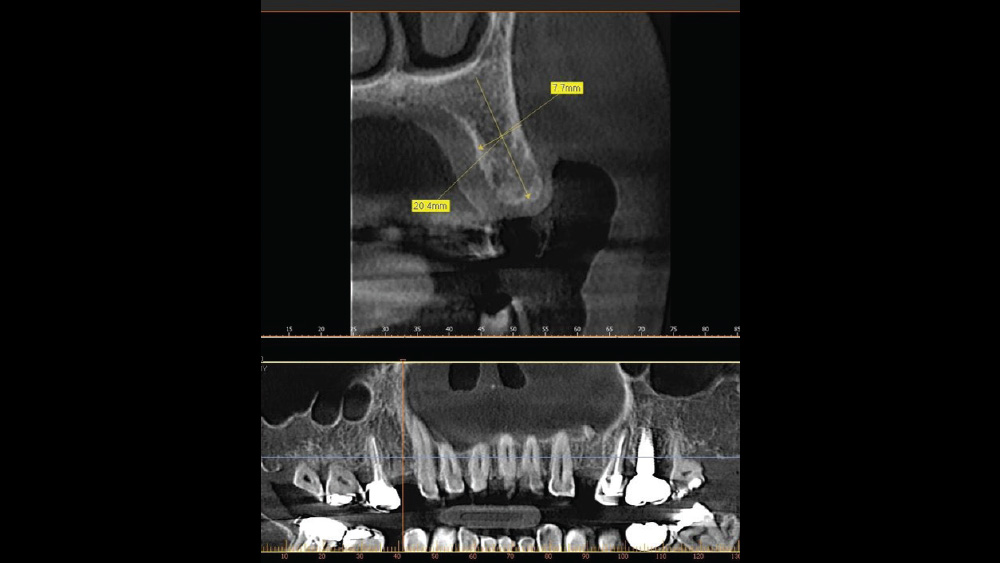
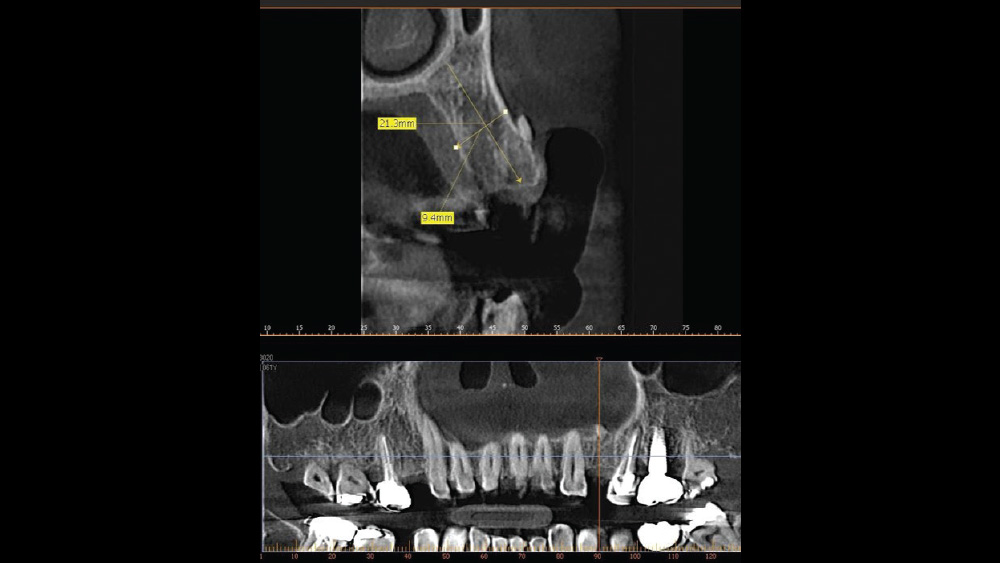
Figure 3a: CBCT analysis is a tool that allows the dentist to precisely visualize vital anatomy and bone contours as well as virtually place the implants in the edentulous sites.
Figure 3b: CBCT analysis is a tool that allows the dentist to precisely visualize vital anatomy and bone contours as well as virtually place the implants in the edentulous sites.
Figure 4a: The amount of available attached gingiva was verified during infiltration of local anesthesia, and the mucogingival line was assessed. A 2 mm band of attached gingiva is required on the facial aspect of each implant to ensure peri-implant health. When reflecting the facial tissue for the maxillary left bicuspid, an Orban knife was used to incise on the buccal aspect of the crest with great control (4b).
Figure 4b: The amount of available attached gingiva was verified during infiltration of local anesthesia, and the mucogingival line was assessed. A 2 mm band of attached gingiva is required on the facial aspect of each implant to ensure peri-implant health. When reflecting the facial tissue for the maxillary left bicuspid, an Orban knife was used to incise on the buccal aspect of the crest with great control (4b).
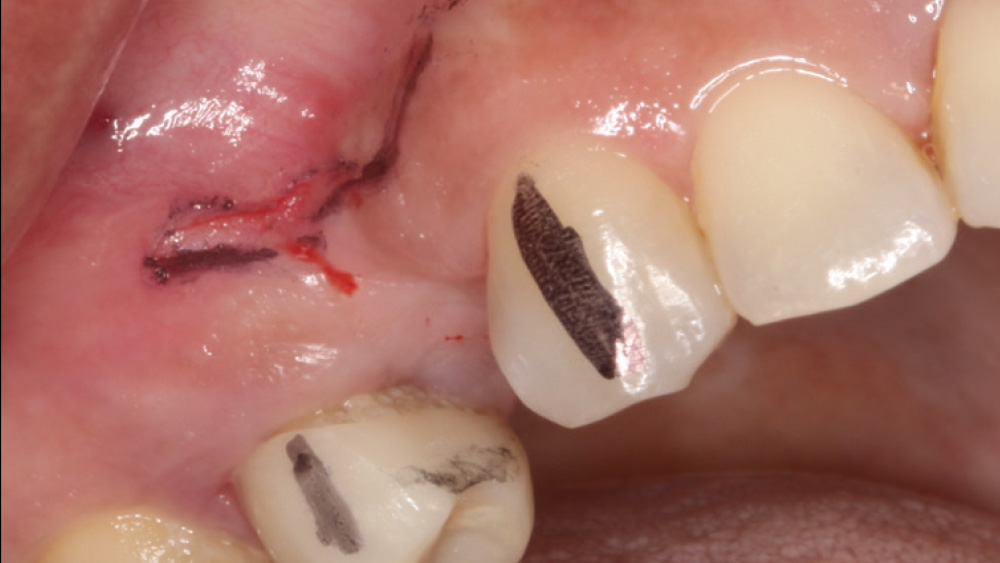
Figure 5: For the implant site in the area of tooth #12, an envelope flap was reflected with no vertical releasing incision into the mucosal tissue. The incision was made on the edentulous crest around the adjacent teeth, providing control of the flap while minimizing postoperative discomfort.
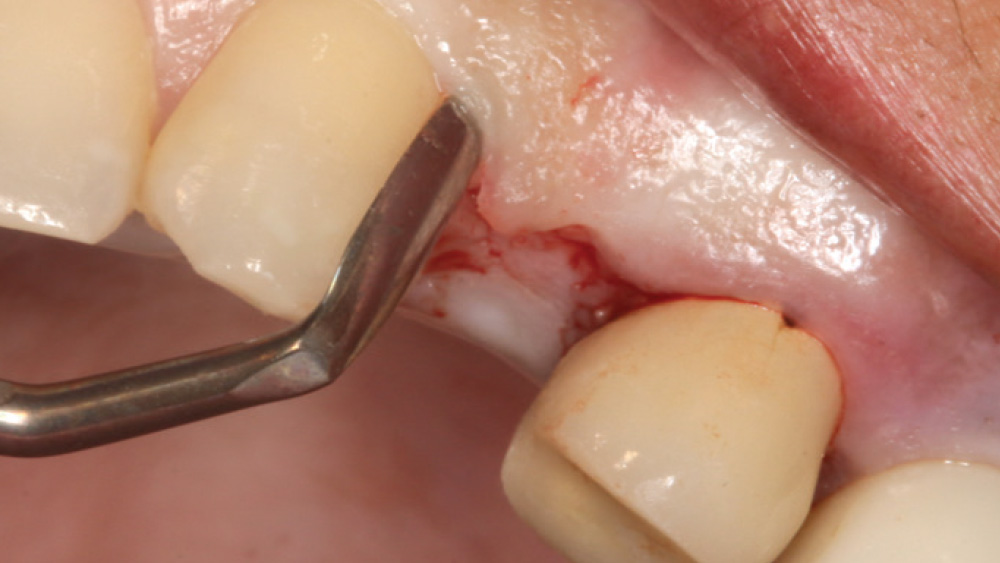
Figure 6a: A tissue punch was used to provide access to the maxillary right bicuspid site, facilitating the flapless procedure.
Figure 6b: A tissue punch was used to provide access to the maxillary right bicuspid site, facilitating the flapless procedure.
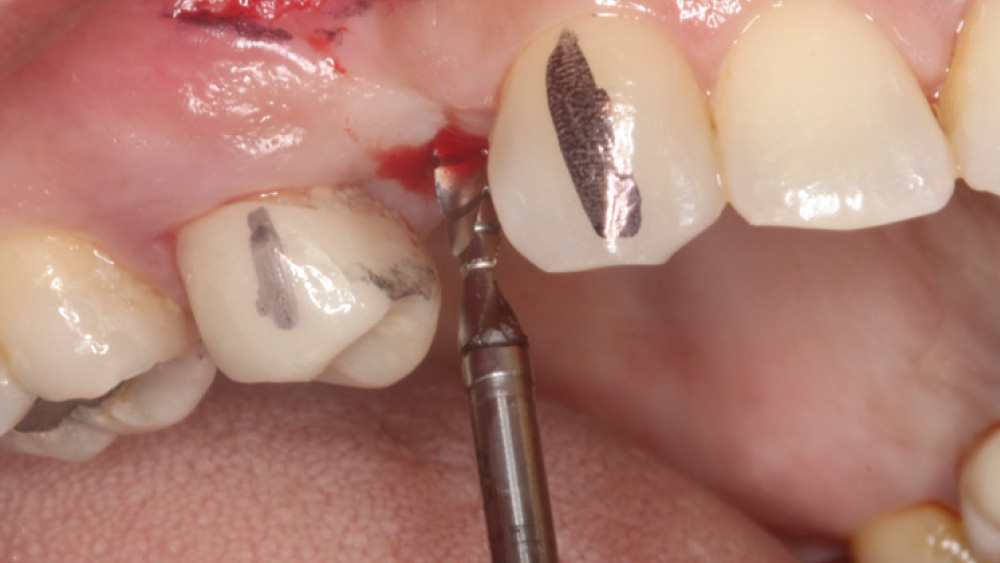
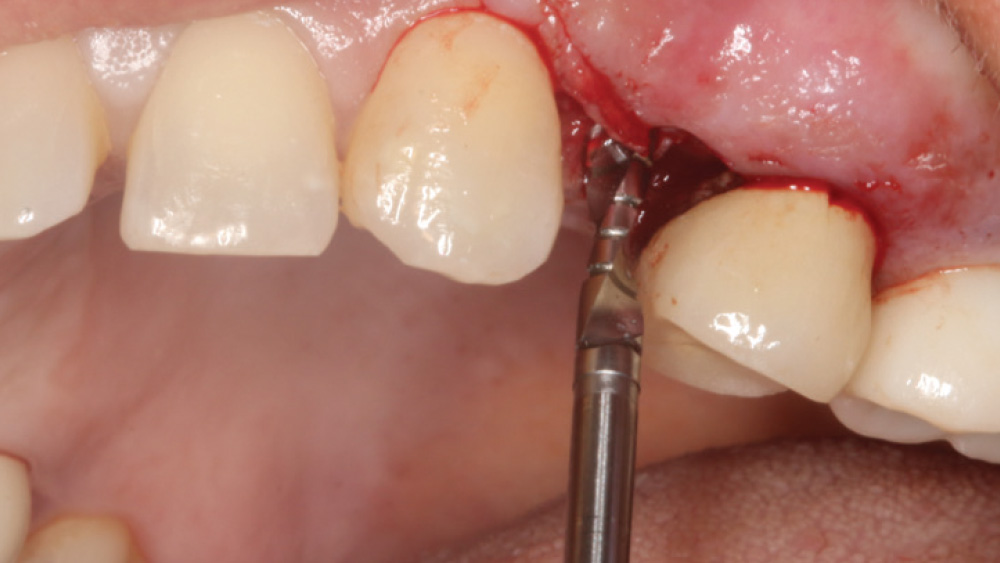
Figure 7a: The Hahn surgical kit contains a 2.4-mm-diameter pilot drill, which is used to establish proper depth and angulation of the implant osteotomy. Radiography was used to confirm proper positioning of the drills prior to continuing with the surgical procedure. The remaining drills in the sequence are length-specific, facilitating proper positioning of the osteotomy.
Figure 7b: The Hahn surgical kit contains a 2.4-mm-diameter pilot drill, which is used to establish proper depth and angulation of the implant osteotomy. Radiography was used to confirm proper positioning of the drills prior to continuing with the surgical procedure. The remaining drills in the sequence are length-specific, facilitating proper positioning of the osteotomy.
Figure 8a: Each osteotomy was widened using a straightforward series of shaping drills. These burs are marked to individual depths, which are readily evaluated radiographically. Finally, the osteotomies were widened using the final drill for the 3.5-mm-diameter Hahn implants selected for each site.
Figure 8b: Each osteotomy was widened using a straightforward series of shaping drills. These burs are marked to individual depths, which are readily evaluated radiographically. Finally, the osteotomies were widened using the final drill for the 3.5-mm-diameter Hahn implants selected for each site.
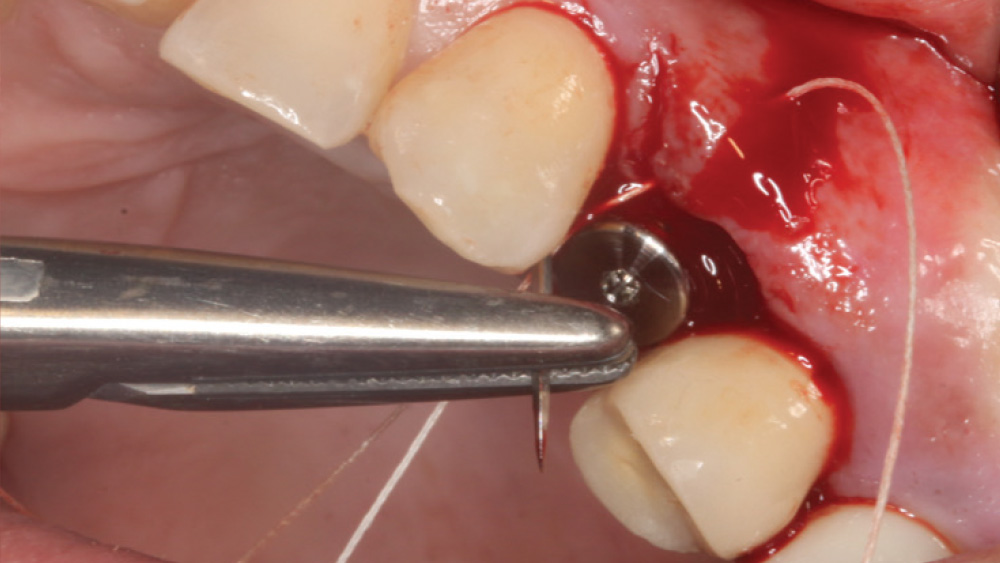
Figure 9a: The 3.5 mm Hahn implants were threaded into position. The tapered bodies of the implants feature prominent threads, which eased placement into the osteotomy sites and helped maximize initial stability. The implants were first inserted to the height of the soft tissue and then torqued to final position using a torque wrench. The advantage of flapped surgical placement is that the practitioner can clearly see the final position of the implant at the crest of the bone. When doing a flapless procedure, one must use radiographs to determine ideal crestal seating of the implant.
Figure 9b: The 3.5 mm Hahn implants were threaded into position. The tapered bodies of the implants feature prominent threads, which eased placement into the osteotomy sites and helped maximize initial stability. The implants were first inserted to the height of the soft tissue and then torqued to final position using a torque wrench. The advantage of flapped surgical placement is that the practitioner can clearly see the final position of the implant at the crest of the bone. When doing a flapless procedure, one must use radiographs to determine ideal crestal seating of the implant.
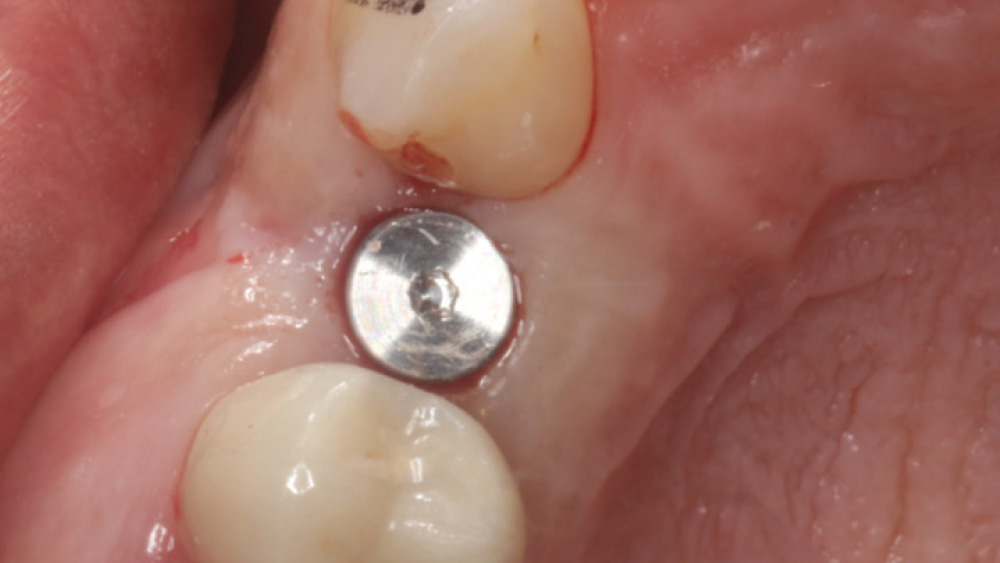
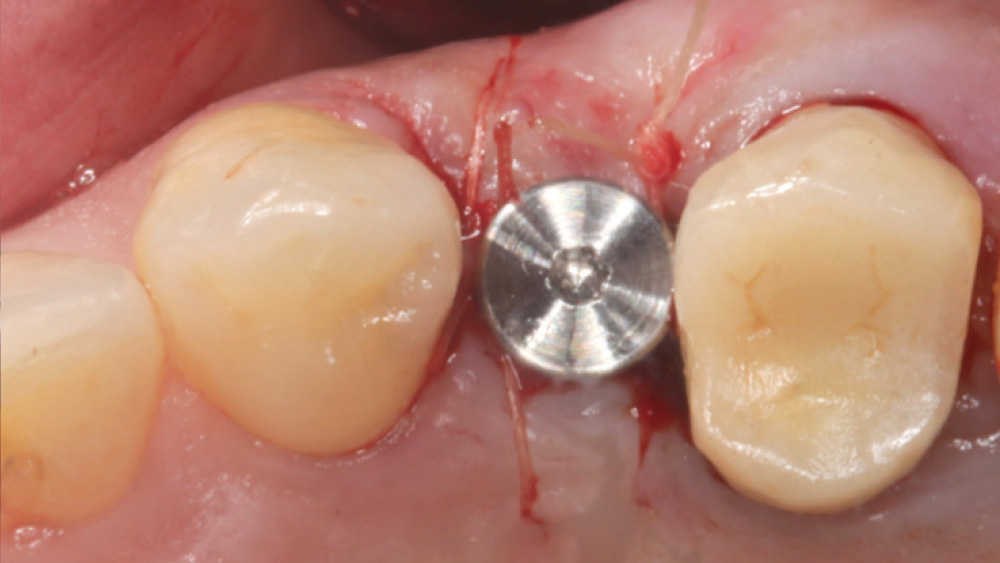
Figure 10a: High primary stability was achieved with the Hahn implants, so 3-mm-tall healing abutments were connected. This eliminates the need for second-stage surgery prior to final impressions of the implant sites. Note the minimal surgical trauma on the right side of the arch (10a) due to the flapless surgical technique, whereas in the case of flap reflection, suturing is required to achieve closure of the implant site (10b, 10c).
Figure 10b: High primary stability was achieved with the Hahn implants, so 3-mm-tall healing abutments were connected. This eliminates the need for second-stage surgery prior to final impressions of the implant sites. Note the minimal surgical trauma on the right side of the arch (10a) due to the flapless surgical technique, whereas in the case of flap reflection, suturing is required to achieve closure of the implant site (10b, 10c).
Figure 10c: High primary stability was achieved with the Hahn implants, so 3-mm-tall healing abutments were connected. This eliminates the need for second-stage surgery prior to final impressions of the implant sites. Note the minimal surgical trauma on the right side of the arch (10a) due to the flapless surgical technique, whereas in the case of flap reflection, suturing is required to achieve closure of the implant site (10b, 10c).
Figure 11: After four months, favorable tissue health was observed at both implant sites. Hahn scanning abutments were connected to the implants, and digital impressions were taken and sent to the lab for the fabrication of BruxZir® Full-Strength Zirconia screw-retained crowns .
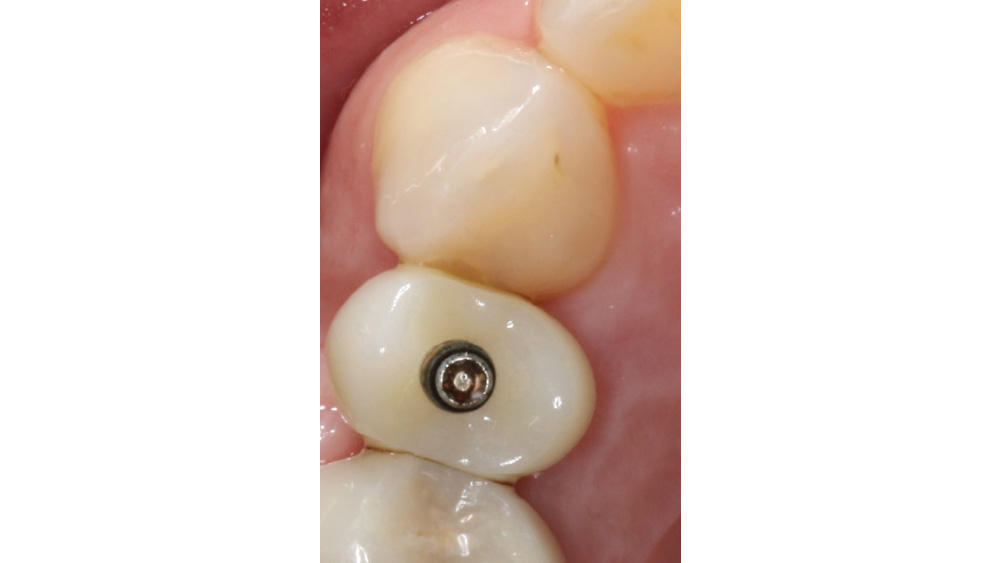
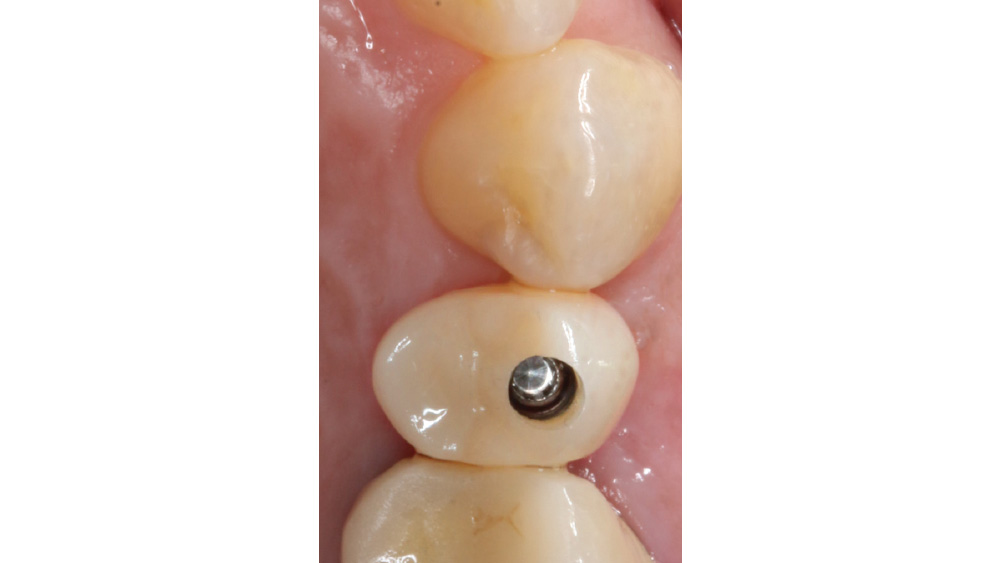
Figure 12a: Screw-retained crowns were designed and milled with CAD/CAM technology and conformed to the soft-tissue anatomy of the implant sites upon delivery. The screw-access channels were sealed with composite.
Figure 12b: Screw-retained crowns were designed and milled with CAD/CAM technology and conformed to the soft-tissue anatomy of the implant sites upon delivery. The screw-access channels were sealed with composite.
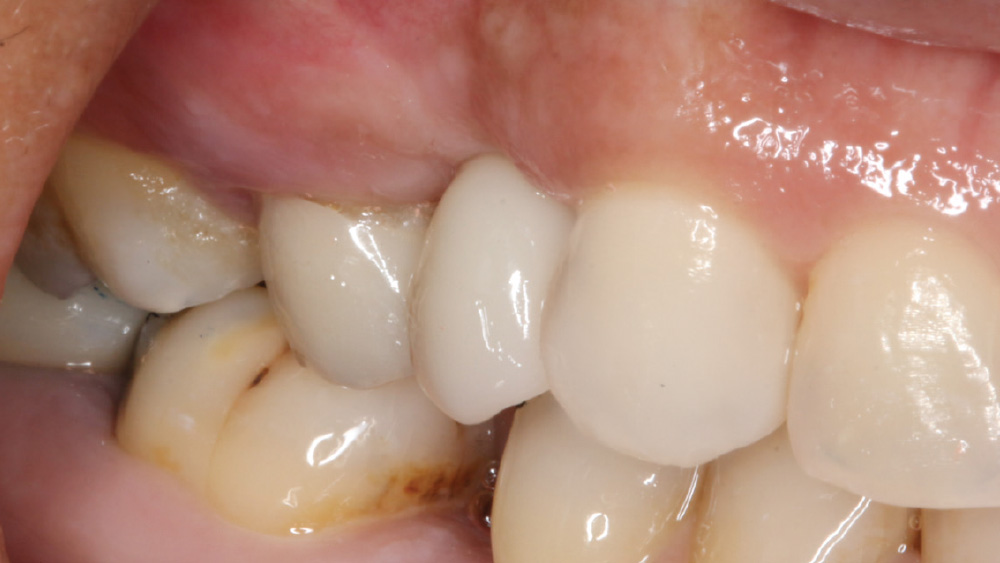
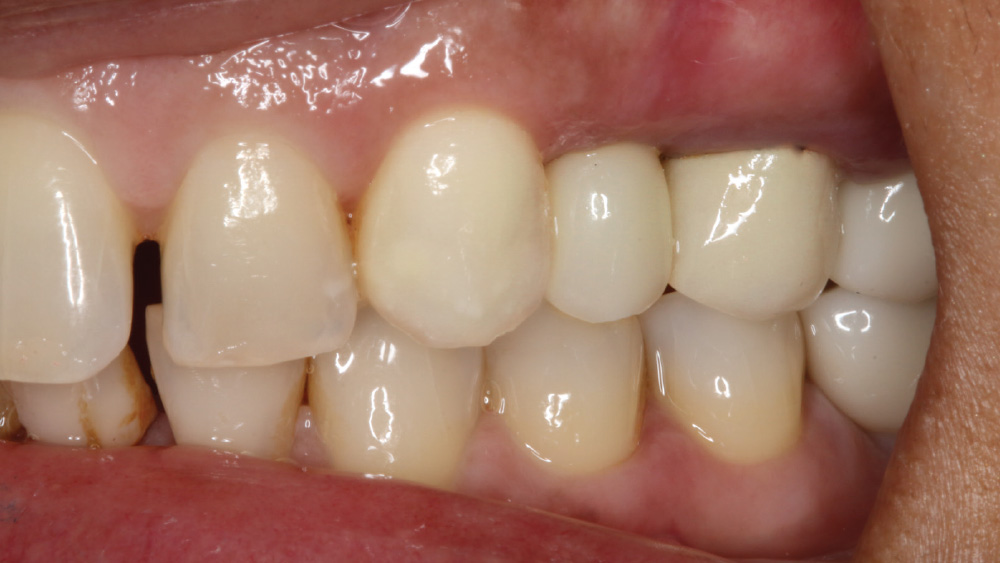
Figure 13a: The final delivery was a smooth and efficient process for each implant site, with excellent tissue health in the area of both restorations. The surgical procedure selected for each site facilitated a predictable outcome and an excellent long-term prognosis.
Figure 13b: The final delivery was a smooth and efficient process for each implant site, with excellent tissue health in the area of both restorations. The surgical procedure selected for each site facilitated a predictable outcome and an excellent long-term prognosis.
- 1
- 2
- 3
- 4
- 5
- 6
- 7
- 8
- 9
- 10
- 11
- 12
- 13
- 14
- 15
- 16
- 17
- 18
- 19
- 20
- 21
- 22
- 23
- 24
- 25