Holiday Hours Update: In observance of the upcoming holidays, our Contact Support Centers will be open on December 24 until 3:00pm. We will be closed on December 25 and January 1. Wishing you and yours a Merry Christmas and Happy New Year!

×

BioTemps® Tips and Tricks for Successful Seating – Case of the Week: Episode 66

January 16, 2014
 image
Michael DiTolla, DDS, FAGD

This issue’s featured Case of the Week from Episode 66 of "Chairside Live" provides some useful clinical techniques to help you successfully seat your next large BioTemps® Provisionals (Glidewell Laboratories; Newport Beach, Calif.) case. A dentist who regularly prescribes BioTemps called me seeking advice about this particular case when he had trouble seating it at the end of the prep appointment. His difficulties reminded me of the frustrations I have experienced at times over the last 12 years when working with lab-fabricated provisionals. I am a big advocate of BioTemps, but there are some challenges to keep in mind when dealing with any type of indirect temporary restoration.

Figure 1

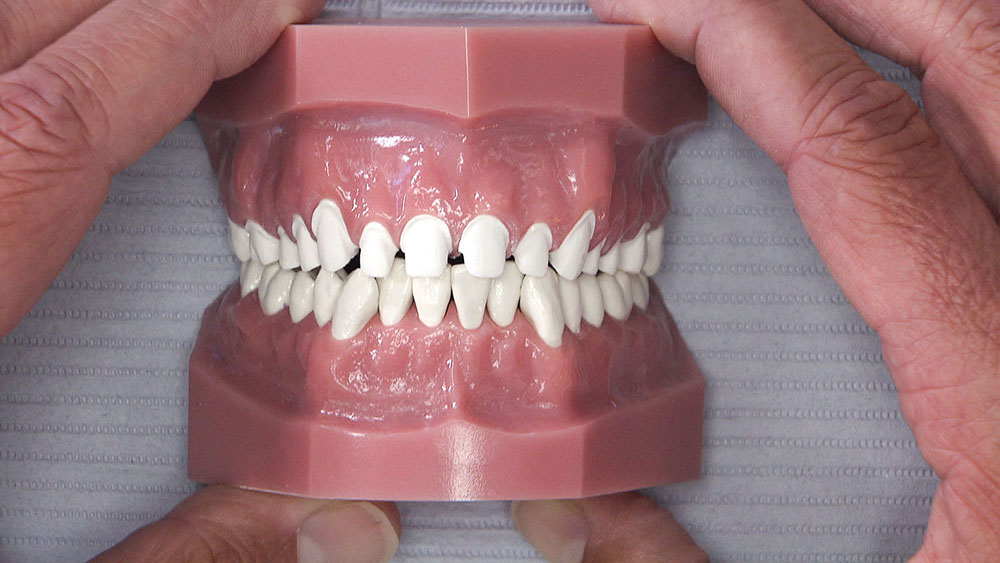
Figure 1: Looking at the prepared typodont, you can see that the case has been prepped from first molar to first molar. As with any large case like this, BioTemps are my preferred provisional treatment option.

Figure 2

Figure 2: In real life, the patient is probably missing a bicuspid on the right, one on the left and maybe a lateral, so BioTemps are a good choice because of the strength they provide during the temporary phase. Any time I’m prepping this many units, even if it’s just four full crowns, I will always opt for BioTemps — not just because I get them for free, but also because they look so good and can simplify the temporization process. There are times when chairside temporaries might make more sense, but for a case like this, BioTemps are generally easier and require less chair time.

Figure 3

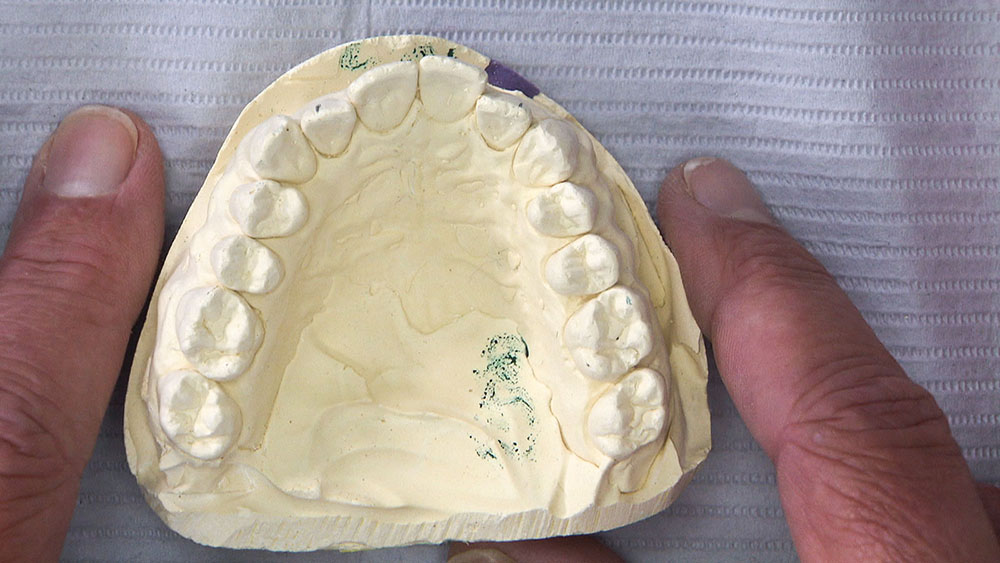
Figure 3: This model shows what the patient looked like when he came in for treatment. As you can see, he has some alignment issues. Teeth #3–14 will be prepared for crowns. Before preparing, however, the model is sent to Glidewell Laboratories with a prescription for a 12-unit splinted BioTemps Provisional.

Figure 4

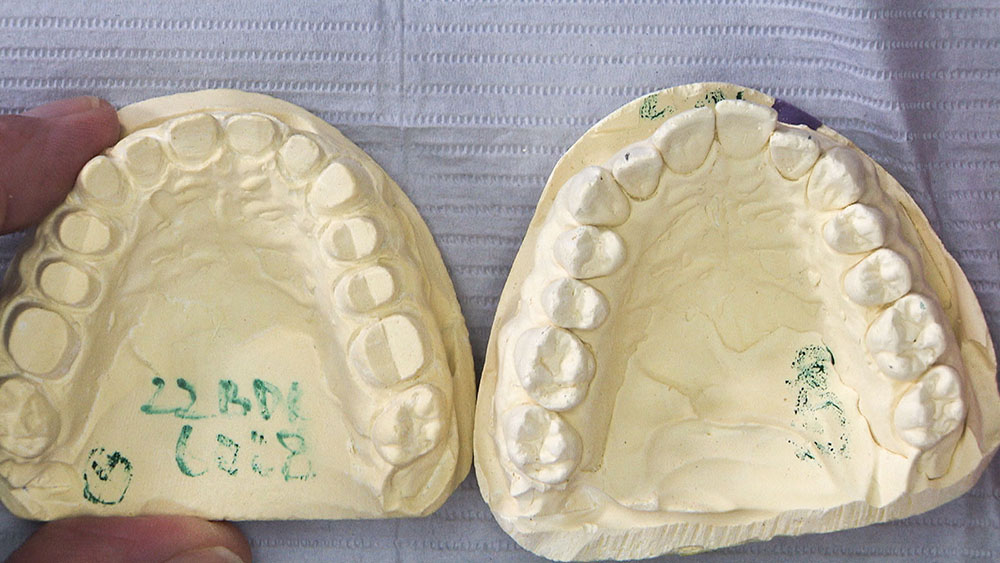
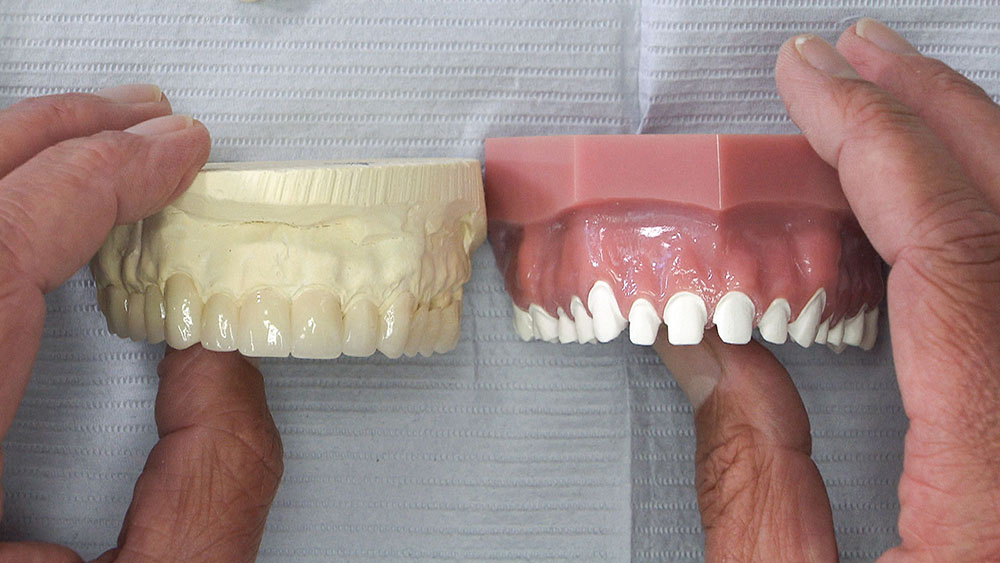
Figure 4: The model on the left is what it looks like when the lab’s technicians have prepped the patient’s model for BioTemps. Glidewell technicians are under strict direction not to remove more than a millimeter from any tooth surface.

Figure 5

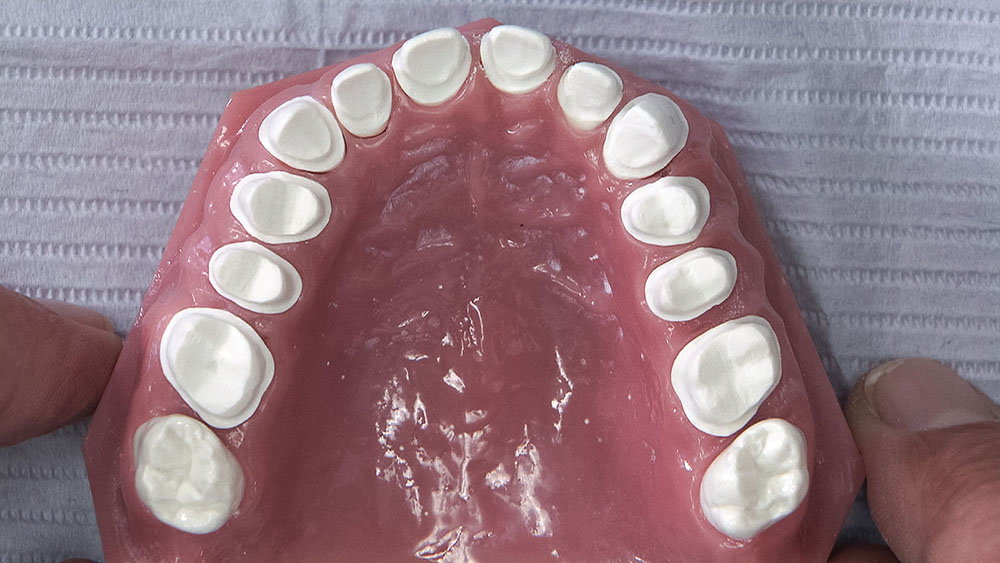
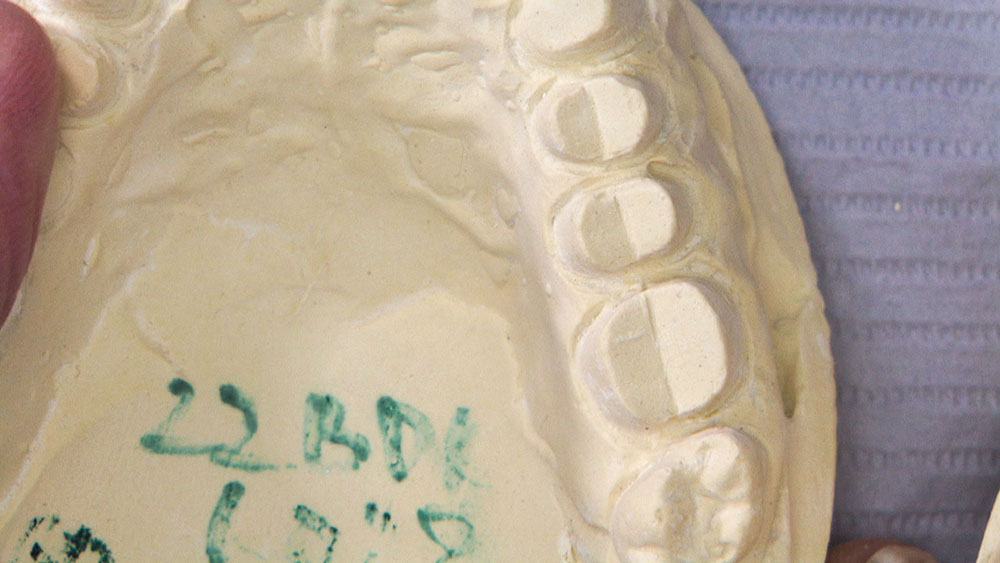
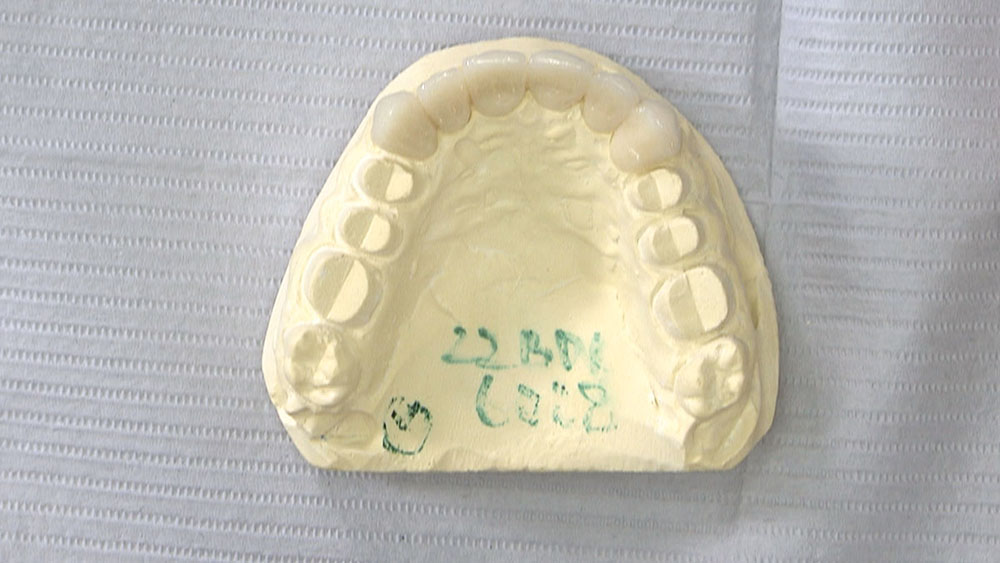
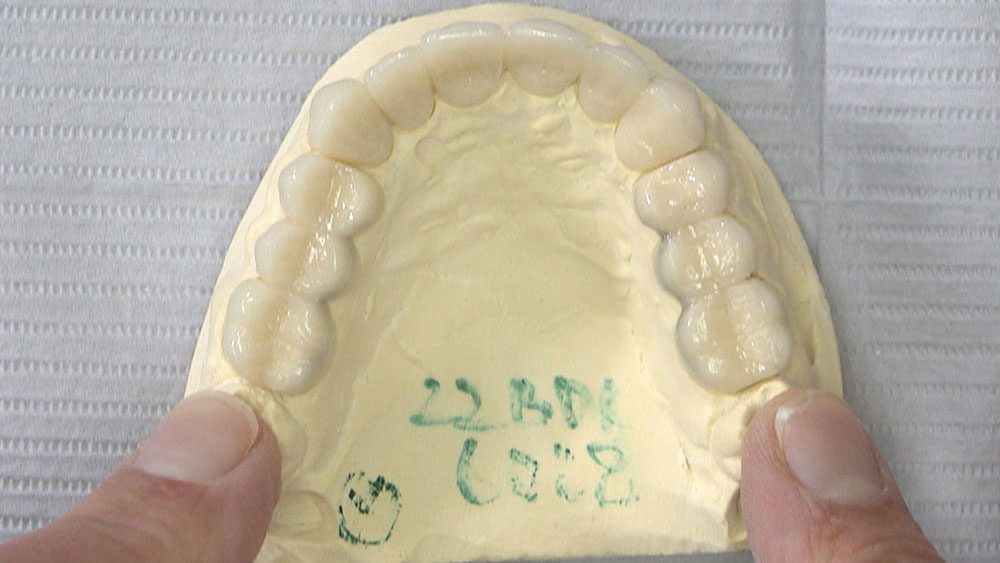
Figure 5: Taking a closer look at the prepped model, you can see the technician was conservative with his reduction. He did mimic the occlusal surface, which is sometimes why “table-top” preps don’t work, but it’s evident that he tried to be very minimal in his axial reduction and at the gingival margin. Our technicians try to eliminate undercuts from the preparations in an effort to make the BioTemps as thin as possible.

Figure 6

Figure 6: Here’s a BioTemps restoration as typically ordered by a dentist. It has wire reinforcement and, for this case, spans from teeth #3–14.

Figure 7a
Figure 7b
Figure 7c

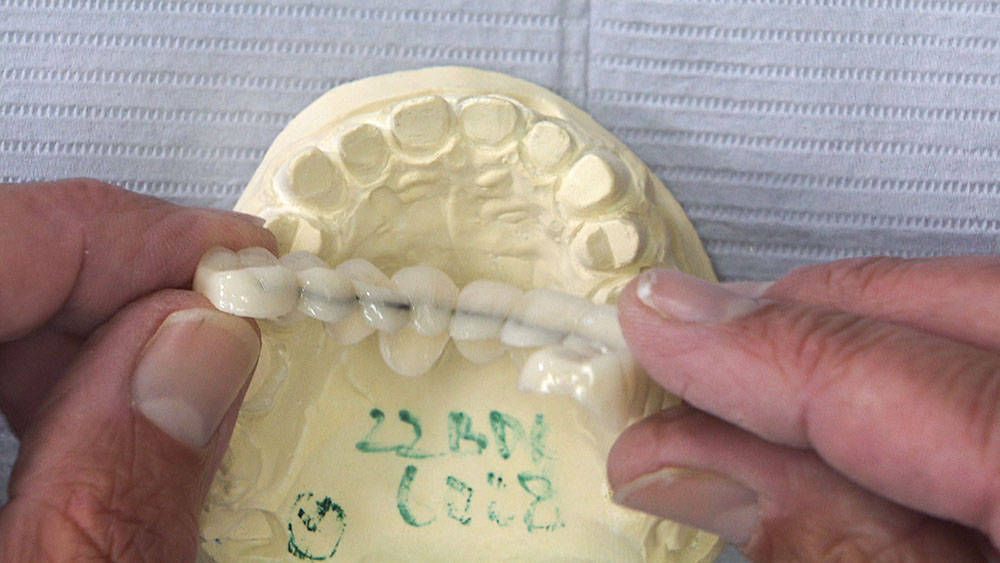
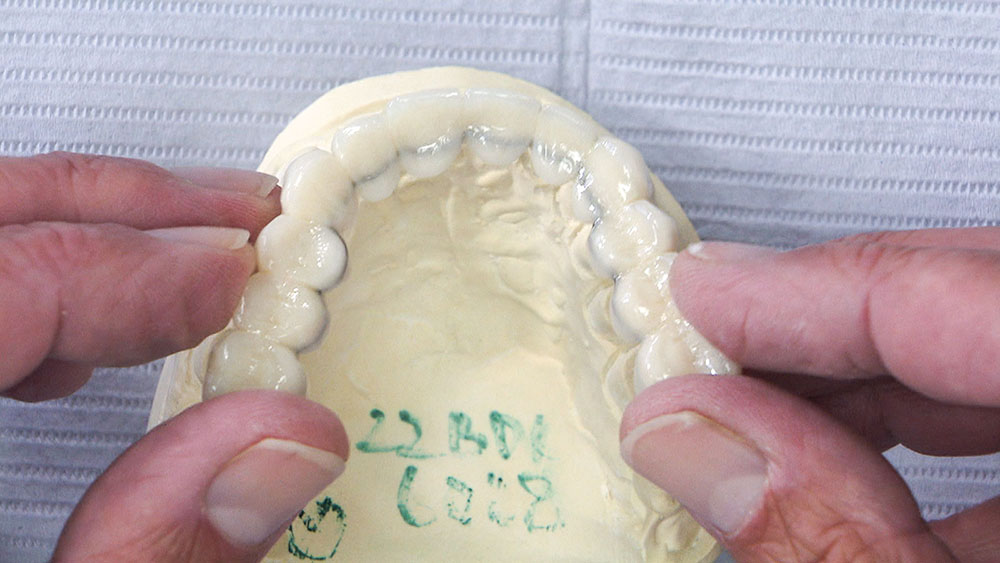
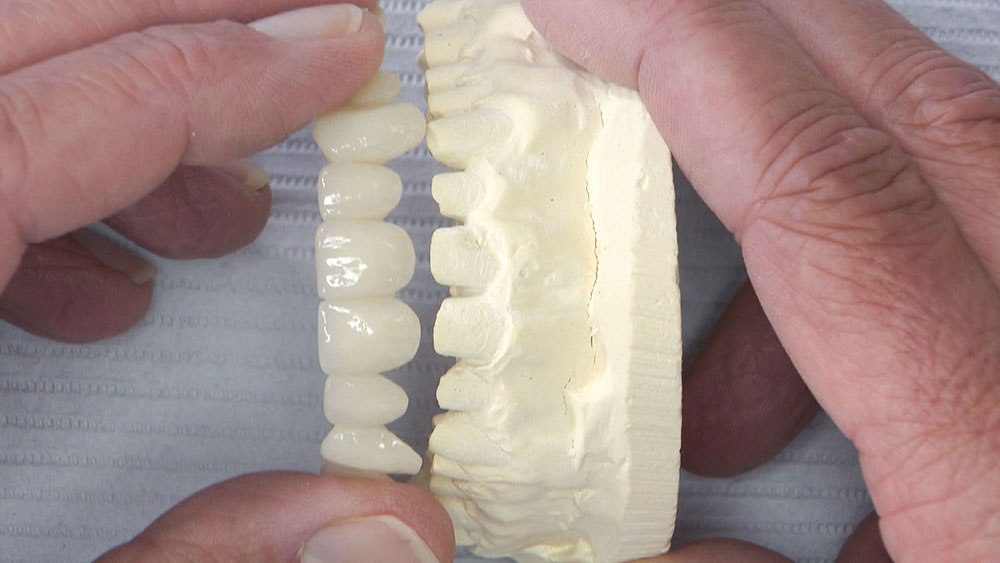
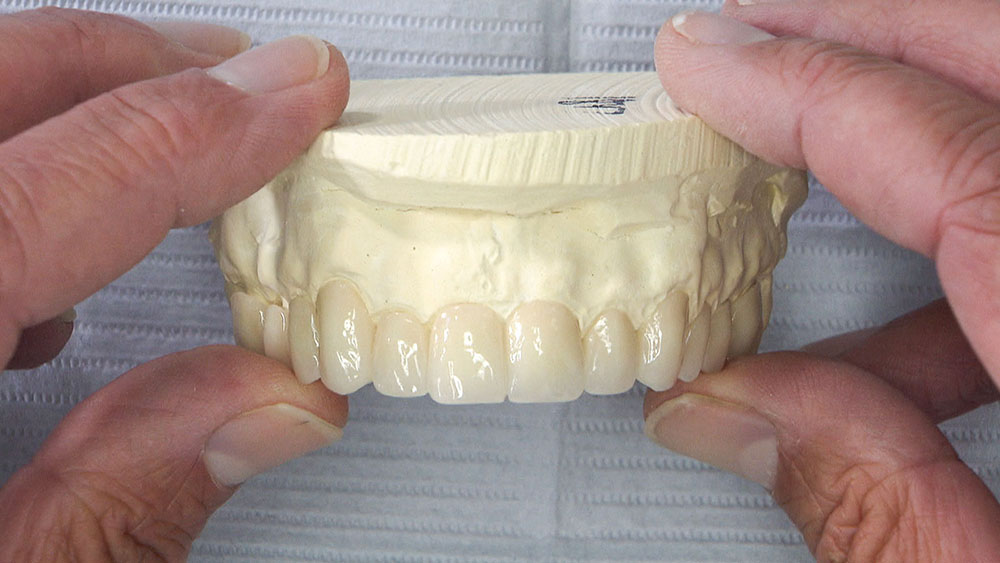
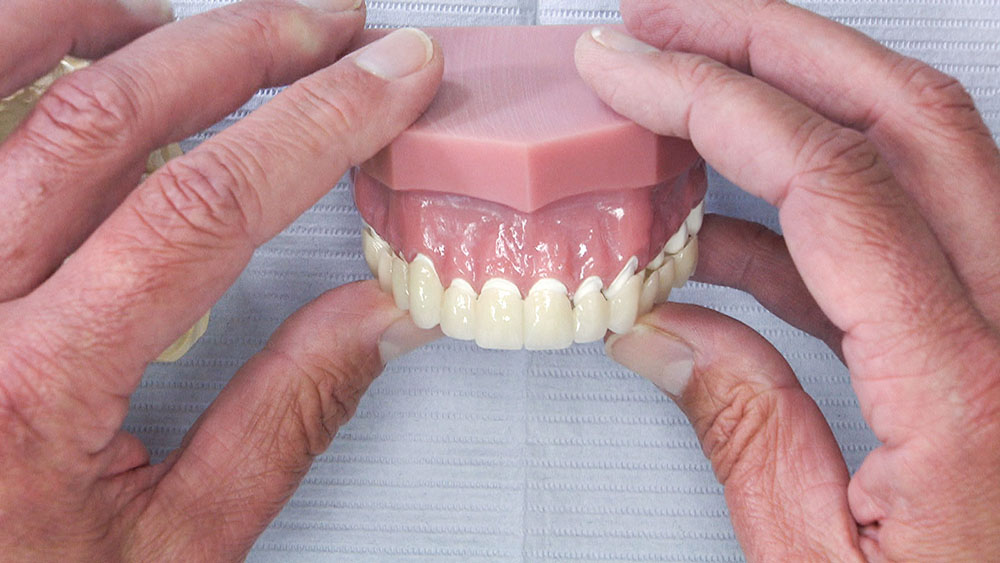
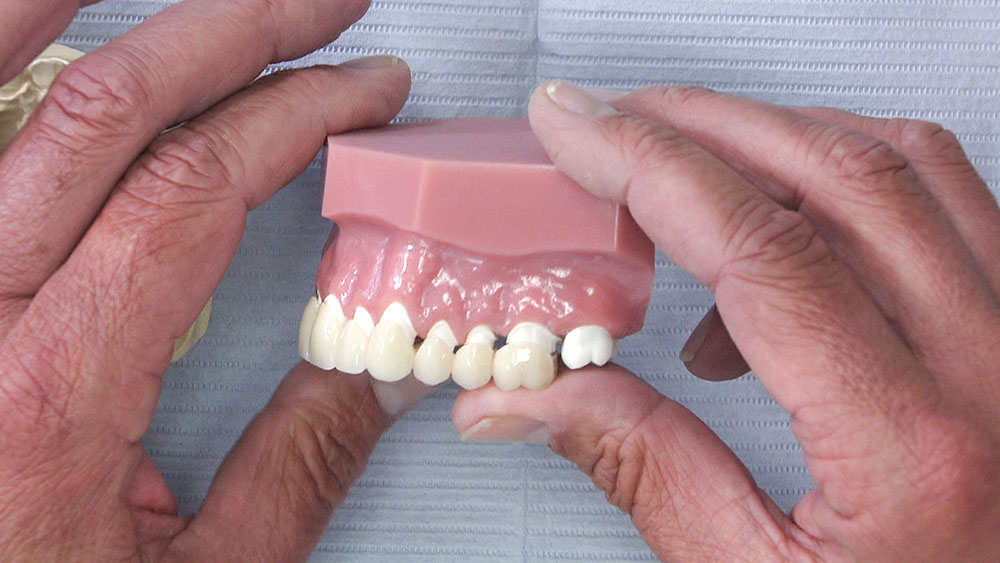
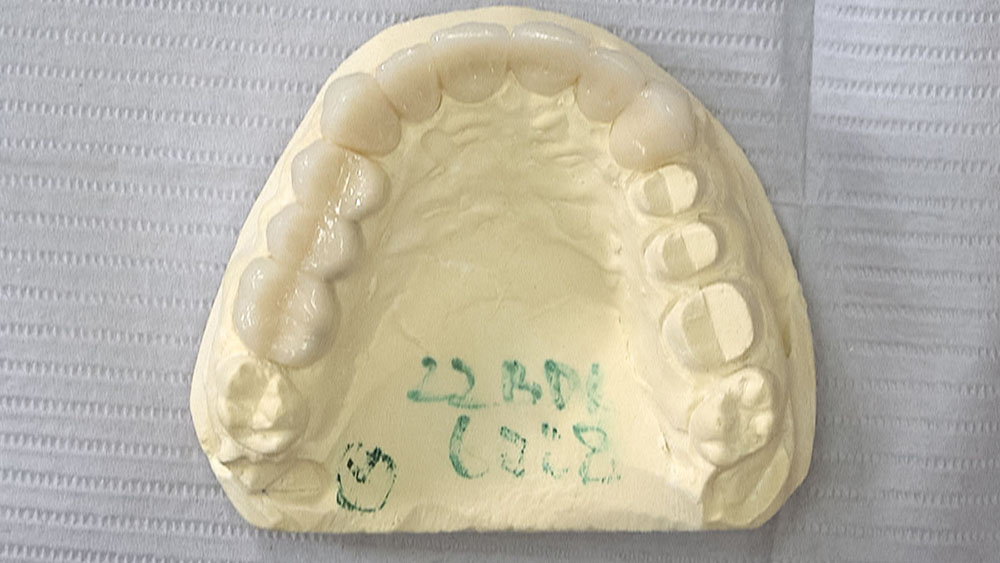
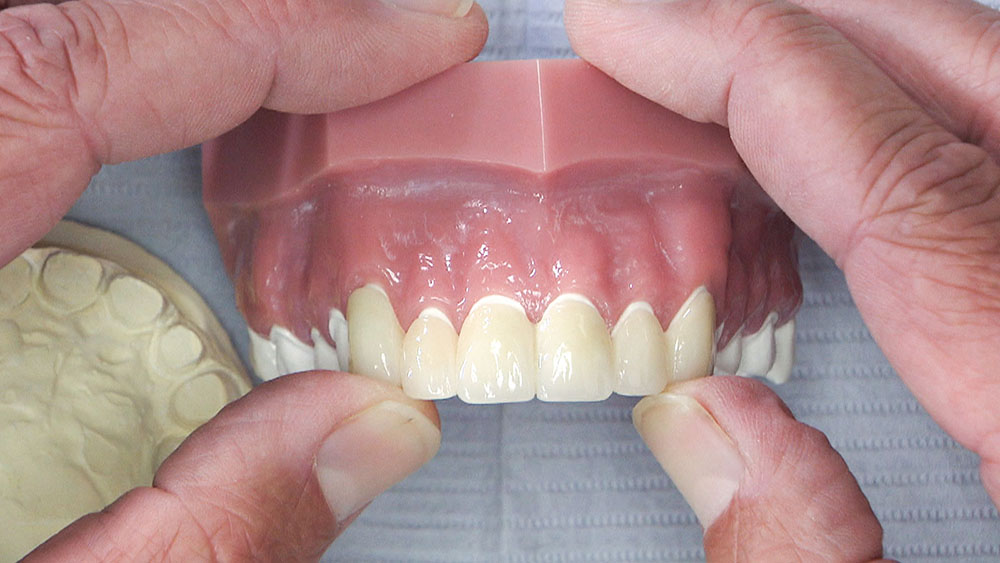
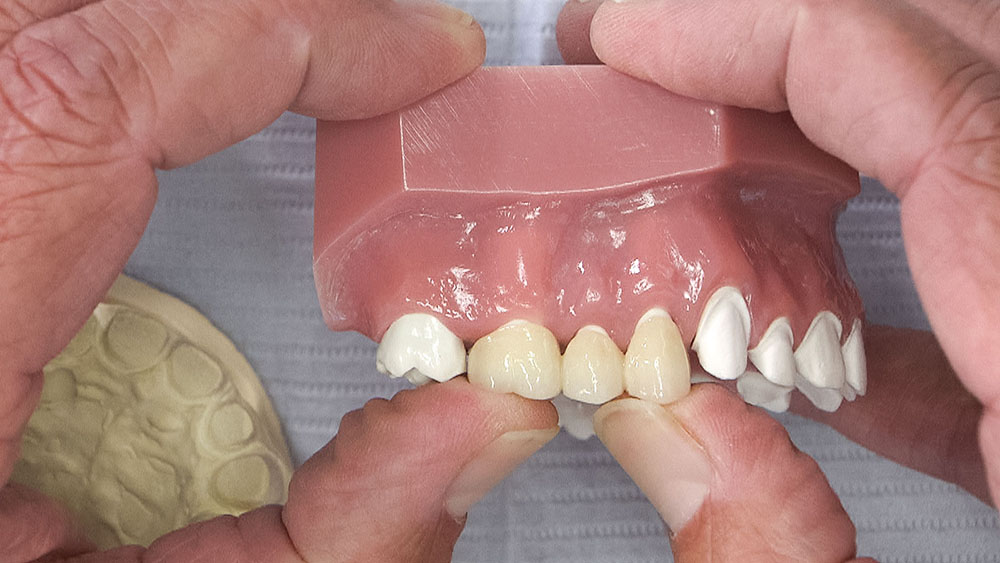
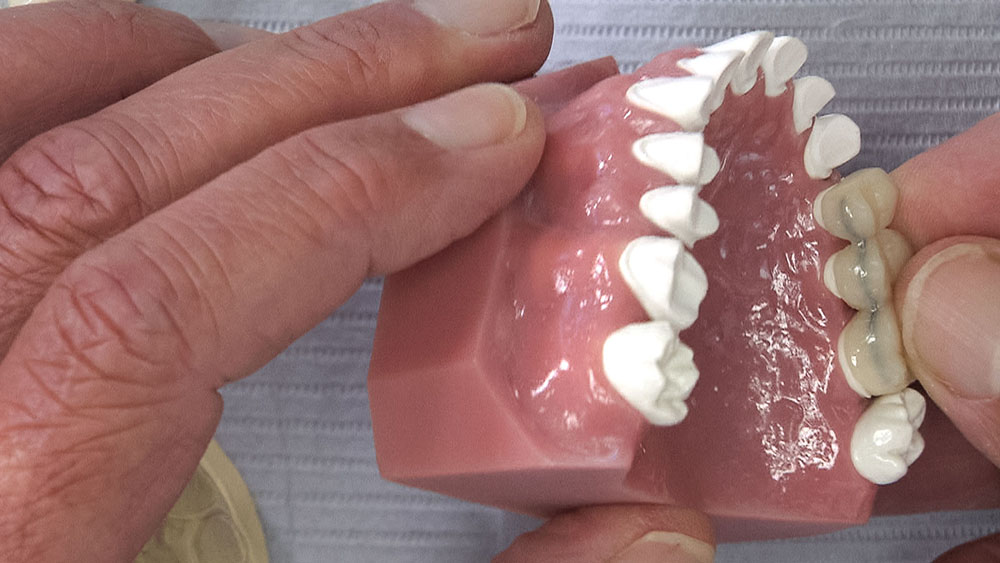
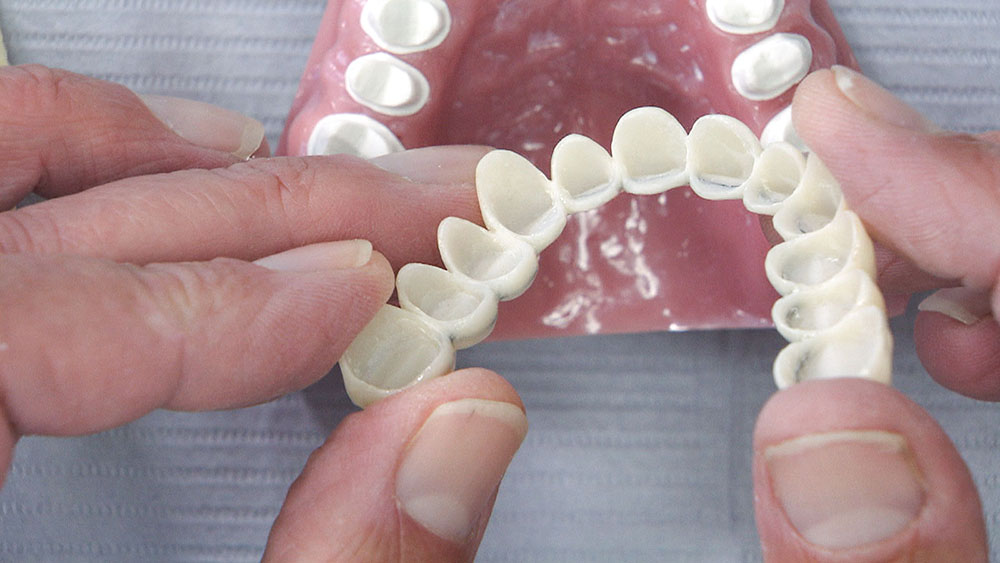
Figures 7a–7c: Even with the minimal amount of preparation that was done in this case, the shell of the BioTemps easily fits onto the prepped model, and there aren’t any undercut problems. When you show this to the patient, he or she will get very excited.

Figure 8

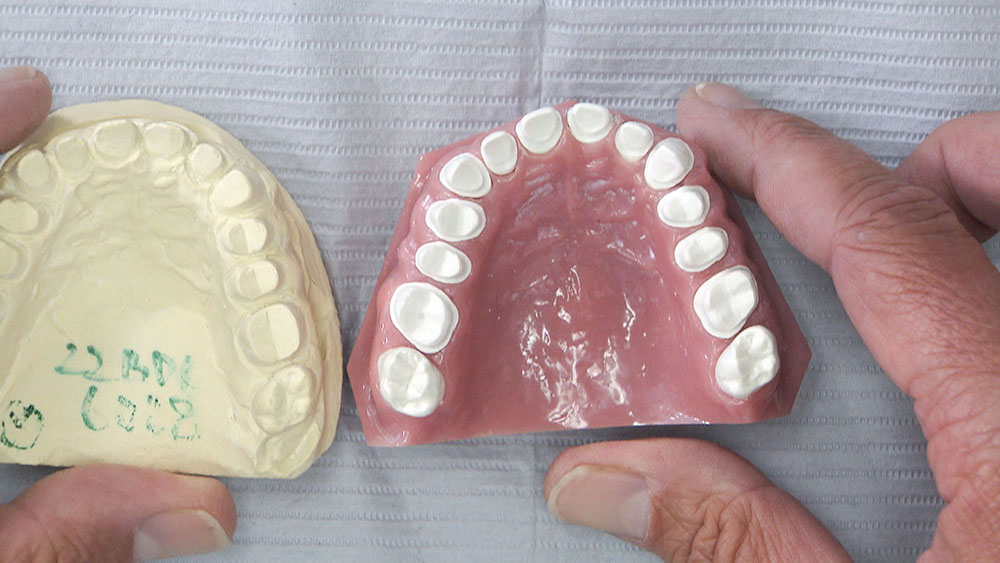
Figure 8: As the typodont illustrates, the patient is now prepped for IPS e.max® crowns (Ivoclar Vivadent; Amherst, N.Y.), which require more of a prep than was done on the original BioTemps prep model. Now we can see the margins all the way around, which means we have more reduction than we did on the prepped BioTemps model.

Figure 9a
Figure 9b

Figures 9a, 9b: When we try in the BioTemps, however, they don’t go down into place. I’ve seen this happen countless times. What we want is a passive fit; the BioTemps should seat all the way down on the preparations, sliding easily into place just like they did on the original, minimally prepped BioTemps model. Returning to our patient’s mouth, where we have prepped more tooth structure, and finding that the BioTemps won’t seat properly can be a big source of frustration.

Figure 10a
Figure 10b
Figure 10c

Figures 10a–10c: There are a couple ways around this issue. The first is to order the BioTemps in segments. I started doing this years ago, and it cleared up a lot of problems for me. For a case like this, I typically like to have one anterior segment from teeth #6–11, and then two posterior segments. If we were also treating the second molars, we would include them on the posterior segments. We will reline each of these segments individually, one segment at a time, anesthetizing and prepping as we go.

Figure 11

Figure 11: When we try the segmented BioTemps into the patient’s mouth, starting with the 6-unit anterior segment, we are now very close to having a complete passive fit. There’s just a little bit of margin area that will need to be picked up in the reline material, and that’s not a problem. The beauty of BioTemps is what you see on the incisal edge and the rest of the tooth. It’s fine if we have a little bis-acryl margin.

Figure 12a
Figure 12b

Figures 12a, 12b: We also see nice passive fits when we try in the posterior segments. So, while a BioTemps provisional is certainly easier to deal with as one big horseshoe unit, it can be difficult to get down into place. This used to confuse me because I had prepped the patient more than the technician had prepped the BioTemps model. I often wondered what was going on.

Figure 13

Figure 13: As it turns out, fit issues typically have to do with the mesial and distal surfaces on the preps themselves. In this case, the patient was prepped for 14 single units of IPS e.max. When the BioTemps technician prepped the model, the one thing he had in mind was that he needed to make all the preps draw, so the temporary bridge could be taken on and off without any issues. This wasn’t our concern when we were prepping the patient’s teeth for individual crowns. So the disconnect is that the patient was prepped for individual crowns, but the technician prepped the model for one big bridge.

Figure 14

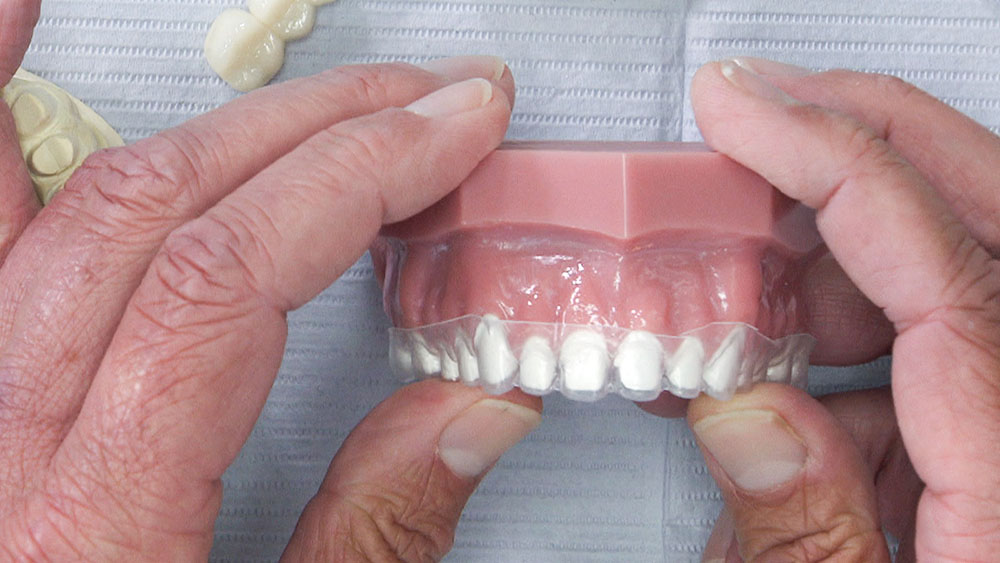
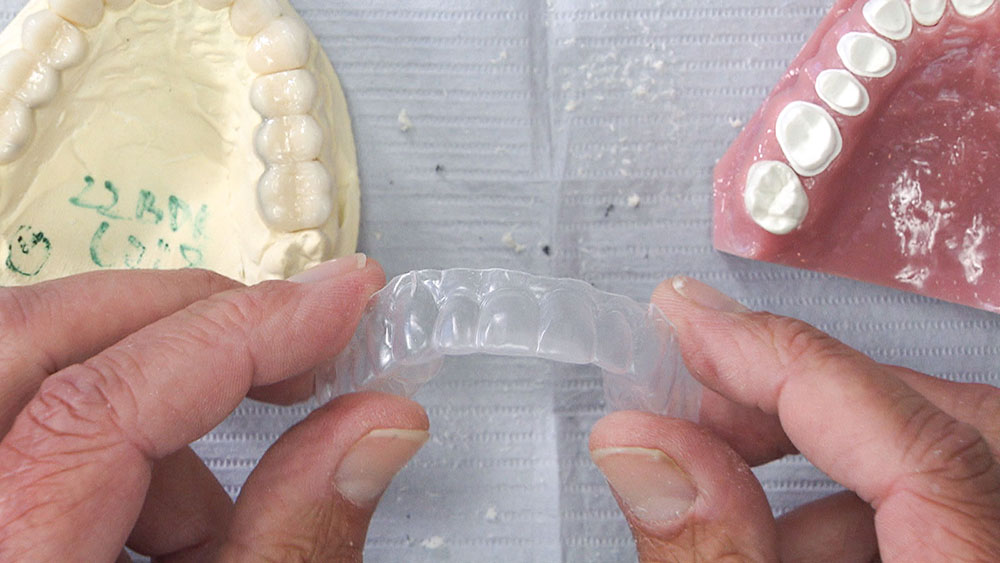
Figure 14: You may have already ordered your BioTemps in one single segment, however, and might be having trouble getting a passive fit. If this is the case, the first thing you can do is something I do for every BioTemps case: request a prep guide. A prep guide is a thermoformed splint that fits over the prepped BioTemps model.

Figure 15

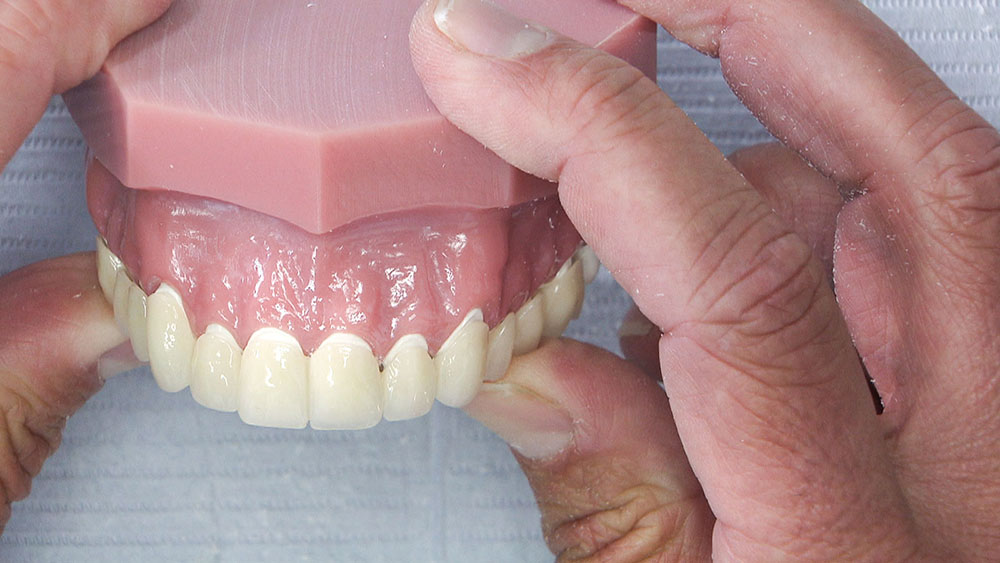
Figure 15: If I have a large BioTemps bridge that isn’t fitting, I’ll try the prep guide in the patient’s mouth to get an idea of where I haven’t prepped enough. In some cases it will fit correctly, but in others it will be touching the prepped teeth, showing me where I need to reduce more. Adjustments can then be made and the BioTemps bridge tried in again. (I don’t find that I under-reduce very often anymore since I started using the Reverse Preparation Technique, but under-reduction can happen interproximally with this technique because we don’t place depth cuts on the mesial and distal surfaces.)

Figure 16

Figure 16: When you try in the prep guide, however, you may find that you have reduced enough everywhere; you just don’t have draw between all of the teeth, which is preventing the bridge from seating properly. You now have three options: the first, and my preferred technique, is to blow out all of the interproximal areas on the bridge between the teeth. These interproximal margins aren’t really necessary and will be picked up in the reline; they just happen to be there because the bridge was made on the model.

Figure 17

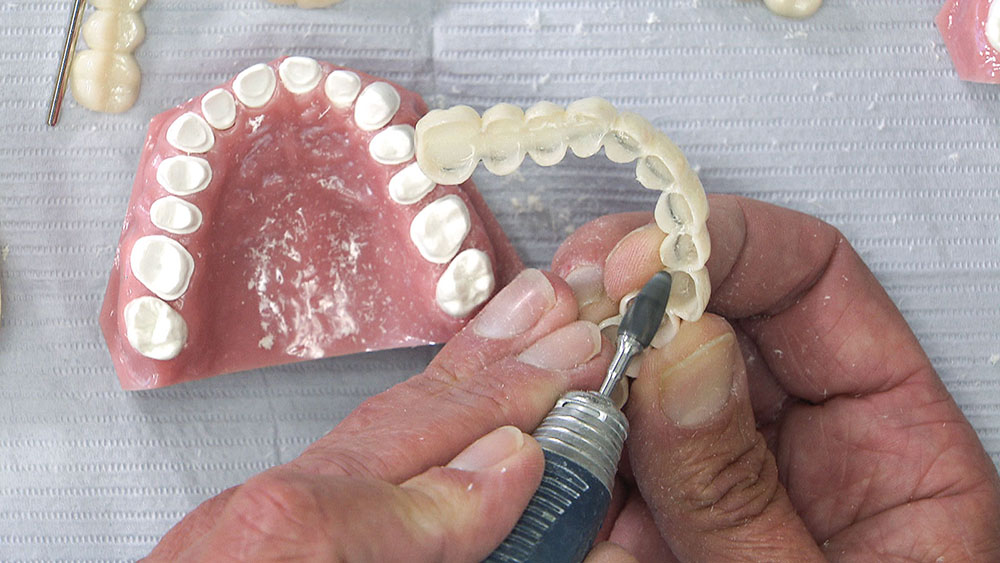
Figure 17: For this technique, I use a bur to blow out the interproximal connections, turning each tooth area into a “taco crown” with a facial, occlusal and lingual shell. As you get closer to the anterior, you may need to switch to a bur with a thinner tip than I’m using here to avoid breaking through to the facial. Again, when we reline the BioTemps on the teeth, we’re going to pick up all this interproximal information.

Figure 18

Figure 18: Once you’ve had the opportunity to cut through all the interproximal connections, you can go back to the patient’s mouth and try in the BioTemps bridge again to see if you now have a better fit. Here, you can see the fit is somewhat improved, but I didn’t break through the anterior connections, and this is where interproximal hang-ups often occur.

Figure 19

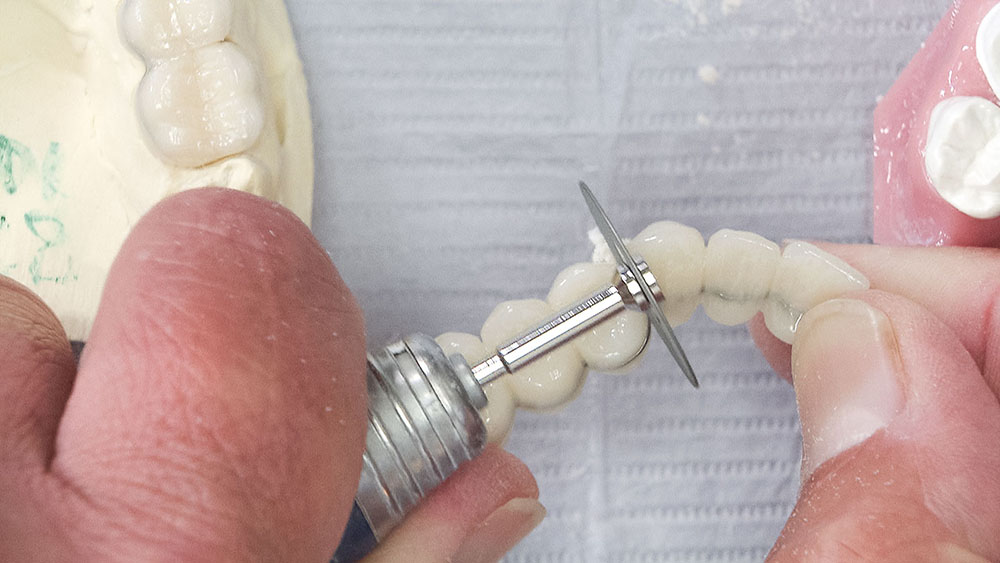
Figure 19: A second option is to take the BioTemps bridge and segment it using a diamond disc (remember, the BioTemps bridge is reinforced with wire that is about the thickness of a paper clip). This isn’t my preferred approach because it can lead to a diastema, but when you’ve paid $29 per unit for the BioTemps, and the patient is counting on having some really nice temporaries when he or she leaves your office, you want to find a way to use them! Using the diamond disc, I cut the bridge into three segments: two 3-unit posterior segments and one 6-unit anterior segment. Once I’ve segmented it, I’ll use a bur to polish the cut sides, making sure to smooth out any pointy wires.

Figure 20

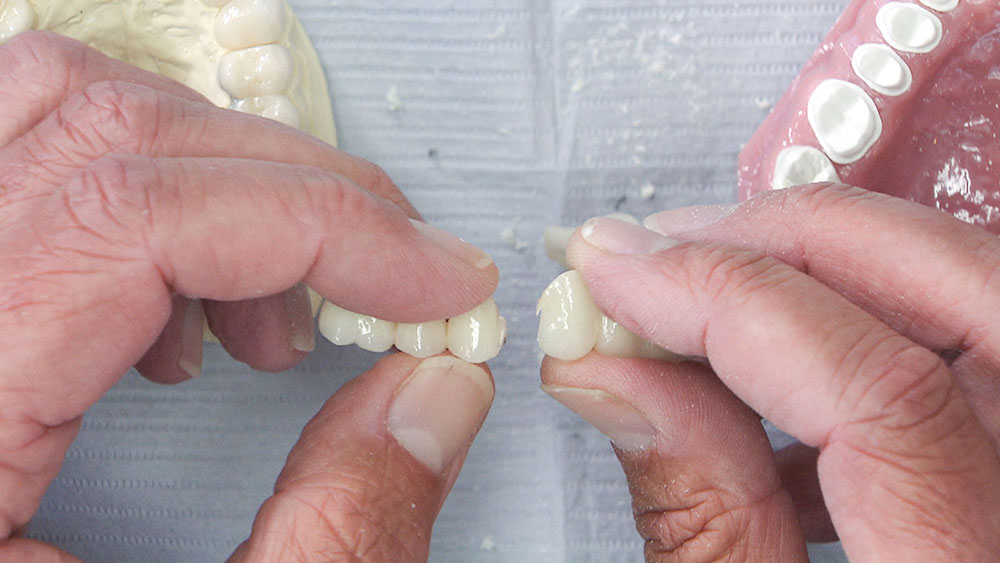
Figure 20: The downside of segmenting the bridge this way is that you almost always end up with open contacts between the teeth where you made your cuts. To fix this, I fill in the open contacts with some flowable composite after relining and then cure. I don’t want the patient getting food and plaque packed in the undercuts, nor do I want to have unesthetic spaces. The composite will adhere to the cut portions of the BioTemps because we removed the glaze from these areas during our cutting and reshaping.

Figure 21

Figure 21: If you try these techniques and the BioTemps bridge still won’t fit, there is one last bailout option: the second stent that I request for every BioTemps case. As I mentioned before, the first stent is the prep stent (Figure 14), a thermoformed stent that is made over the prep model. The second one is a thermoformed stent made over the BioTemps themselves. I call this the “bailout stent” or the “full-contour stent.” I take this stent and fill it with bis-acryl material (something like Luxatemp® from DMG America [Englewood, N.J.]) and then seat it down onto the preparations in the patient’s mouth to create a chairside temporary. Because it’s made out of bis-acryl material, it won’t be as strong, have the wire reinforcement or be glazed as nicely as the BioTemps, but at least it will match the BioTemps in size and shape, and the patient will leave with an esthetic improvement over when they walked in the door.

CONCLUSION

When seating a large BioTemps case, fit issues can occur because the dentist is prepping the patient for single units, but the BioTemps technician is prepping for a bridge that will draw. To avoid unnecessary frustration, I always recommend that dentists request the BioTemps be made in three segments. While this approach may seem like more of a hassle, I don’t think you’ll have any issue doing one posterior segment first, the other posterior segment next, and then prepping the anterior segment. Yes, sometimes you’ll have to adjust the contacts to get the BioTemps to seat completely; and because they have the tendency to rock faciolingually, you’ll want to be sure to have the patient bite together before you reline to avoid a Bucky Beaver look. (To counter this tendency, some dentists prefer to seat all three BioTemps segments at the same time using impression putty or the bailout splint and bis-acryl material.) But BioTemps Provisionals continue to be one of our best-selling products, and for good reason. These durable temporary restorations exhibit lifelike esthetics that rival natural teeth, allowing dentists to provide their patients with a beautiful smile as soon as they prepare their teeth. Our lab now also offers a "scan and save" program with the BioTemps product, where we digitally scan the BioTemps in the lab before sending them to you to try in the patient’s mouth. If you and your patient are pleased with how the BioTemps look at try-in, we can replicate their size, shape, length, contour and surface texture exactly in the final ceramic restorations using the stored digital data.

References

  1. Fondriest JF. Using provisional restorations to improve results in complex aesthetic restorative cases. Pract Proced Aesthet Dent. 2006 May;18(4):217-23.
  2. Zwetchkenbaum S, Weiner S, Dastane A, Vaidyanathan TK. Effects of relining on long-term marginal stability of provisional crowns. J Prosthet Dent. 1995 Jun;73(6):525-9.
  3. Bevilacqua L, Biasotto M, Cadenaro M, Di Lenarda R, Dorigo E. Reaction exothermia of 2 relining resins for temporary crowns. Minerva Stomatol. 2005 Jan-Feb;54(1-2):35-41.
  4. Roe P, Patel RD. Fabrication of a modified repositioning key for relining provisional restorations. J Prosthet Dent. 2010 Dec;104(6):401-2.