Confidence in Veneers: Choosing the Right Material to Eliminate Spaces and Outlast Clenching
Among the variety of services that I provide as a general dentist, cosmetic dentistry is a personal favorite. Every case represents exciting challenges and dynamic new skills to master.
Moreover, with proper planning comes dramatic results, as one phase of treatment complements the next. A smile improved with veneers might be further enhanced with lip augmentation, just as gingival recontouring can balance the new shape and dimensions of veneers.
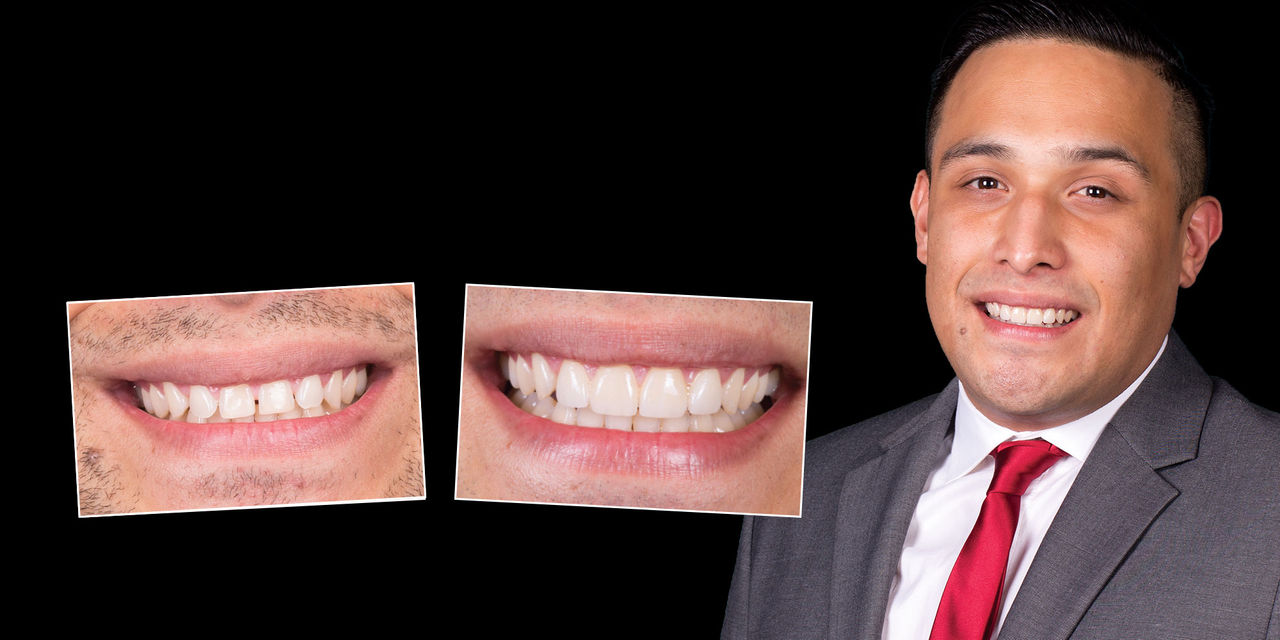
Meeting and exceeding the patient’s expectations depends upon your ability — and willingness — to listen to your patient’s concerns and desires. In the case highlighted here, Matthew, our patient, was self-conscious about the spaces between his maxillary anterior teeth, and he specifically wanted veneers. He had seen the results of a colleague’s veneer case and hoped to improve his own smile in similar fashion.
Initial diagnosis of Matthew’s oral health showed multiple wear facets, evidence of a clenching habit. In addition, there was enamel damage in the anterior, which had resulted from habitually chewing on lemon slices. Orthodontic treatment was considered, and elimination of the spaces between the maxillary anterior teeth could have been achieved with Invisalign® treatment (Align Technology, Inc.; San Jose, Calif.). However, an orthodontic treatment plan was not of interest to Matthew.
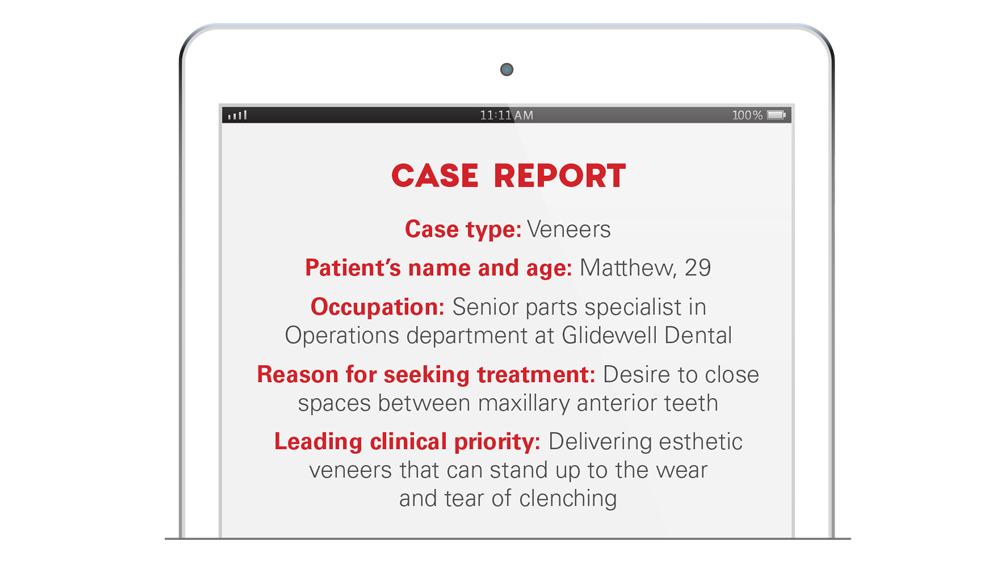
With veneers as Matthew’s chosen treatment, proper material selection was paramount to ensure the restorations would be both esthetic and strong enough to withstand clenching.
Fortunately, BruxZir® Anterior Solid Zirconia delivers more than just optimal translucency. Featuring high-performing strength that has been validated in numerous clinical studies, BruxZir zirconia is ideally suited for demanding cases like this one. From prescription to delivery, I was confident these BruxZir Anterior veneers would still be in service — and have day-one–type esthetics — years down the road, despite the patient’s parafunctional habits.
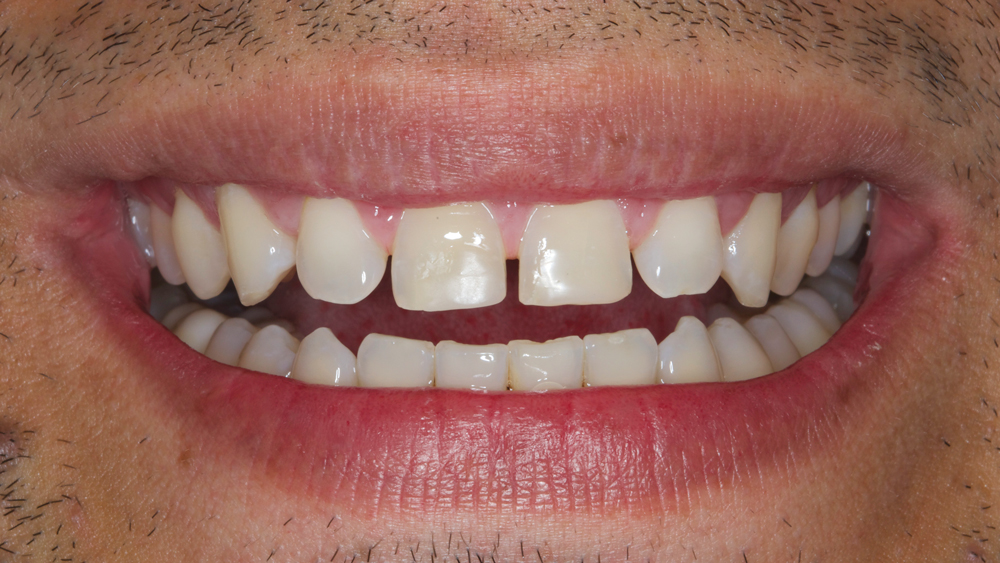
Figure 1: In seeking treatment, Matthew’s foremost desire is to close the spaces between his maxillary anterior teeth. He also feels self-conscious about discoloration of his anterior teeth due to enamel wear.
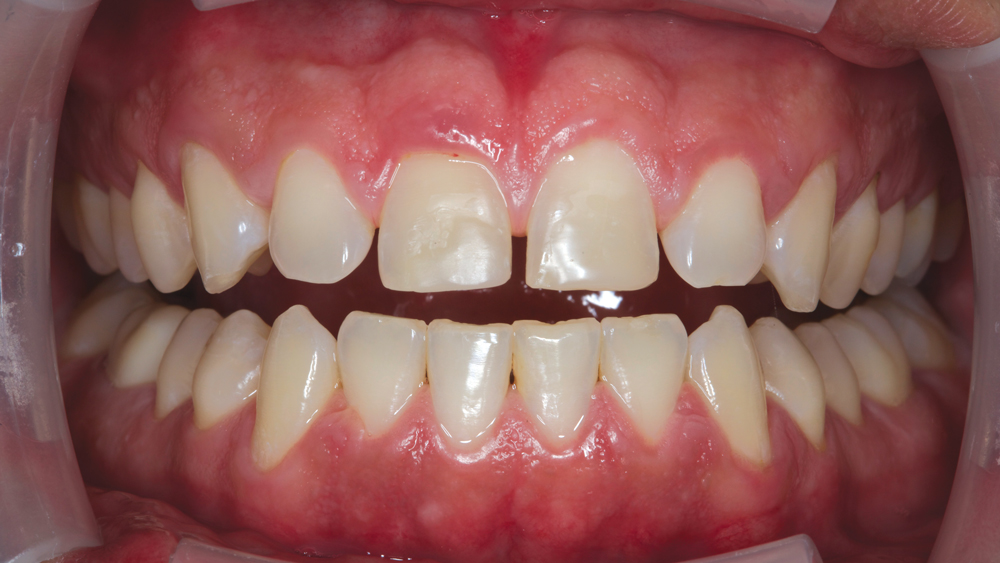
Figure 2: Matthew’s vital anterior teeth show ideal dentin color. Signs of habitual clenching include chipping of mandibular posterior teeth, interferences and multiple wear facets. Clenching contraindicates many veneer materials, but I know I can rely on the high-performing strength and beauty of BruxZir Anterior to provide durability and esthetics. With this game-changing material, I am going to deliver minimal-prep veneers on teeth #7–10.
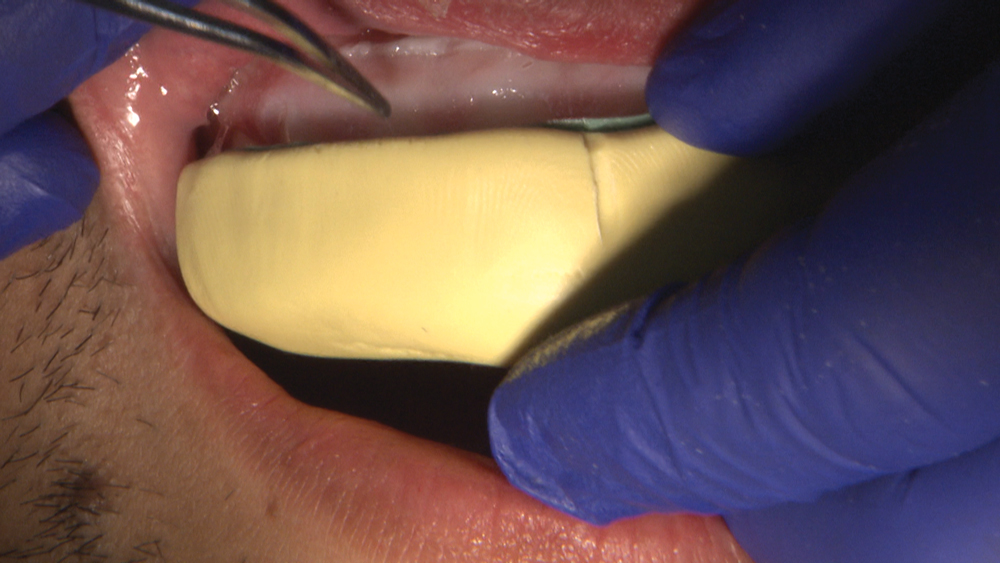
Figure 3: After sending preoperative impressions to the lab and ordering articulated diagnostic-cast models, I can assess the extent of preparations that will be needed and request a diagnostic wax-up and the putty-wash matrix from the lab. Here, with the midline marked and the matrix filled with Luxatemp® Ultra (DMG America; Englewood, N.J.), I am seating the filled matrix in Matthew’s mouth.
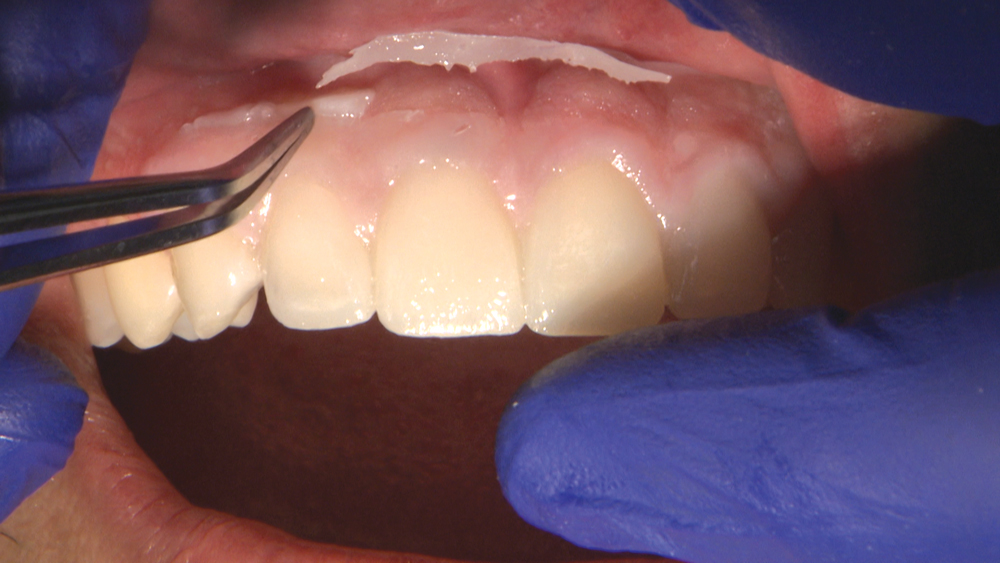
Figure 4: The acrylic mock-up is nearly ready. To procure a more realistic representation of Matthew’s new smile, I trim the excess acrylic.
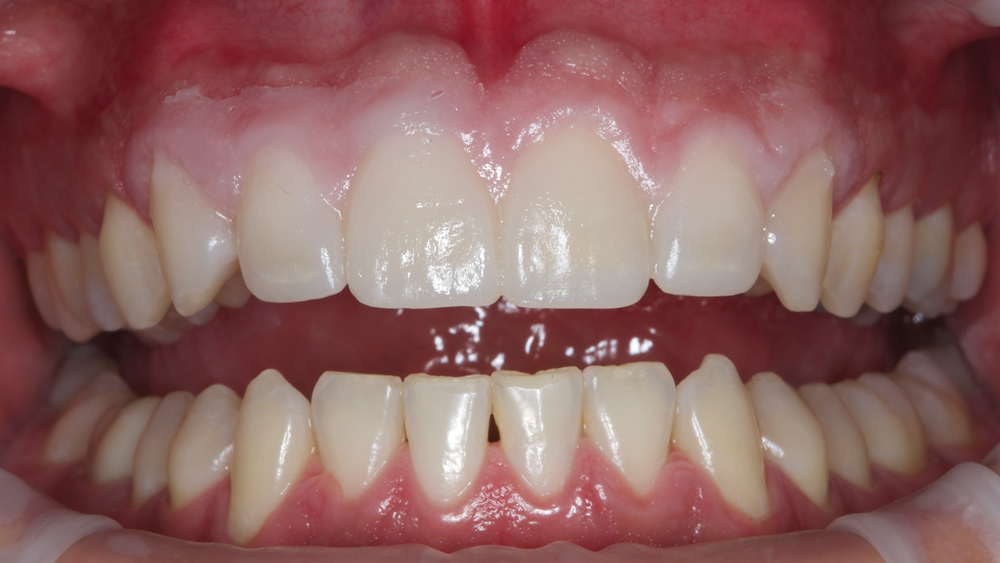
Figure 5: The completed acrylic mock-up allows me to assess the size, lengths and shapes of the proposed veneers. Looking at this acrylic replica of the diagnostic wax-up, I am very pleased with the results and, upon review, Matthew approves of the mock-up as well.
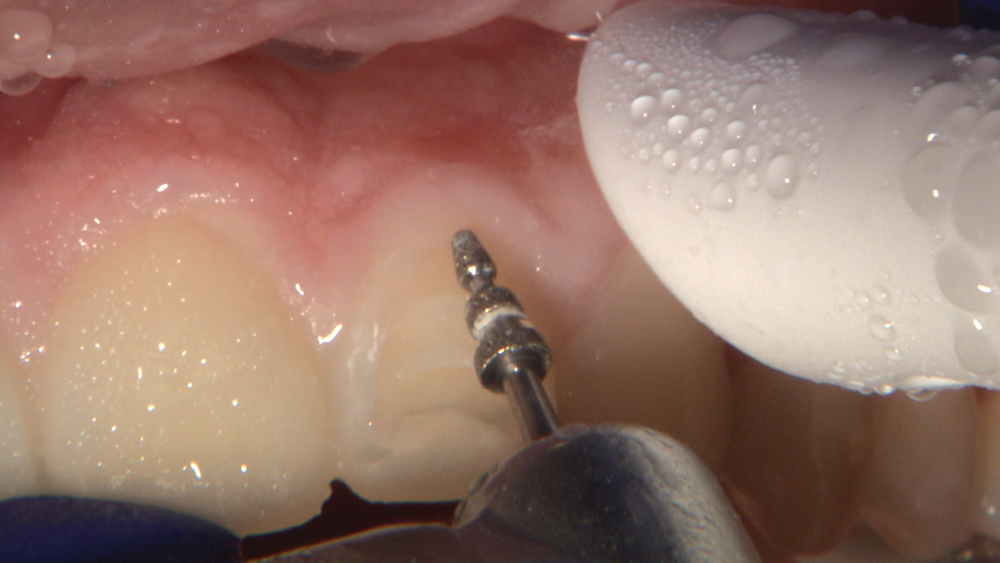 Figure 6a
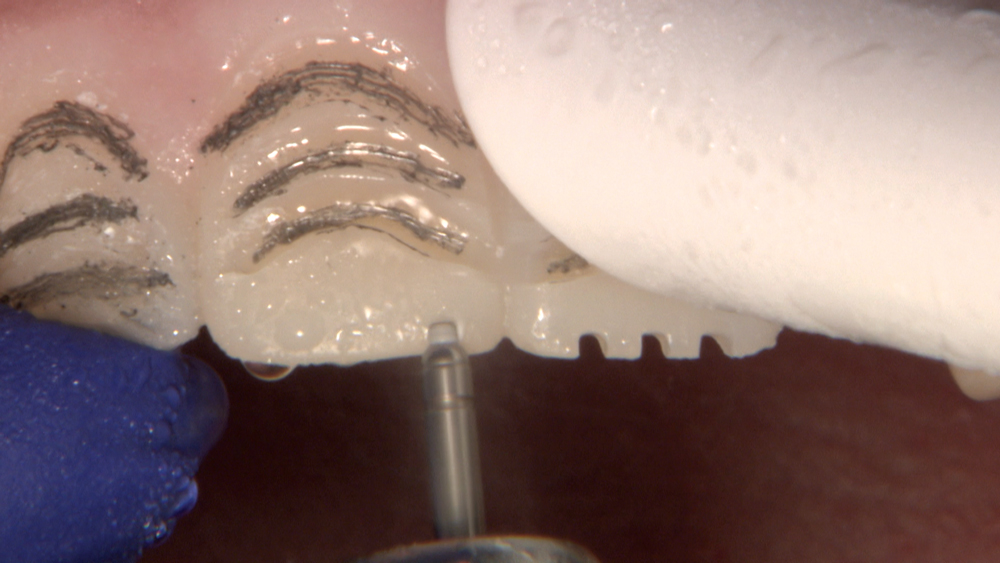 Figure 6b
Figures 6a, 6b: Next, the approved diagnostic wax-up can remain in place to act as a template for reduction. First, I use an RWMIN FG Mini Depth Cutting Diamond (868C.31.026), which is part of a preparation kit developed by Dr. Robert Winter for Brasseler USA (Savannah, Ga.) (6a). Next, I utilize a 1-mm calibrated depth marker from Kerr Corporation (Orange, Calif.) to establish depth cuts (6b). With the margin initially created by the tip of the RWMIN bur, I’ll also refine the small chamfer margin with a fine bur.
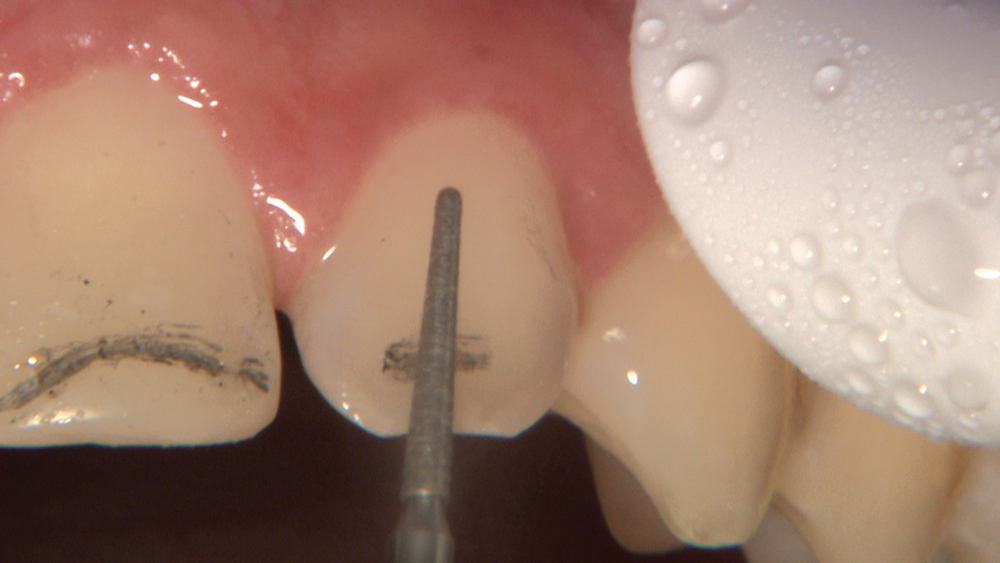
Figure 7: Using an 856-012 round-ended diamond bur (Brasseler USA), I reduce according to the depth cuts and finish the preparations. I prefer minimal-prep veneers due to the better long-term prognosis. Minimal-prep veneers, such as BruxZir Anterior veneers, are bonded in enamel, resulting in stronger adhesion and reducing the risk of overcontouring issues that no-prep veneers can face.
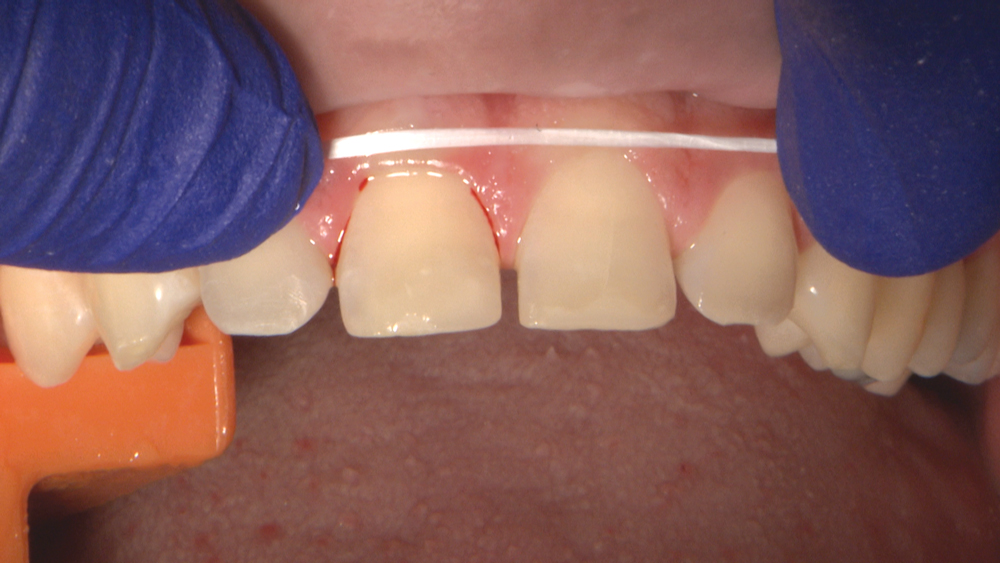 Figure 8a
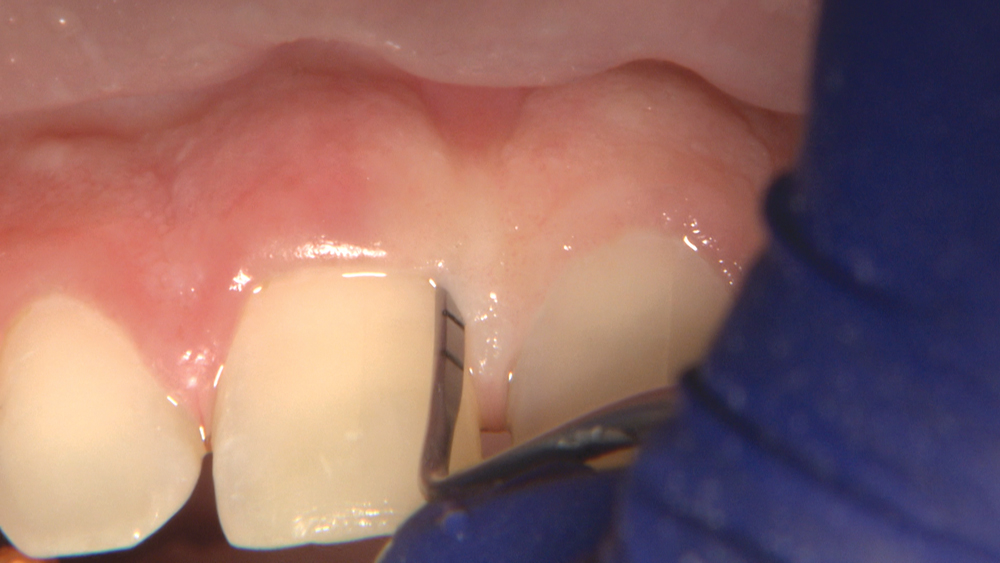 Figure 8b
Figures 8a, 8b: My next objective is to create gingival harmony by evening up the gingival contours of Matthew’s maxillary central incisors, as the gingival line at tooth #8 is lower and boxier than #9 (8a). After administering local anesthetic, I use a sounding gauge to determine the bone level (8b).
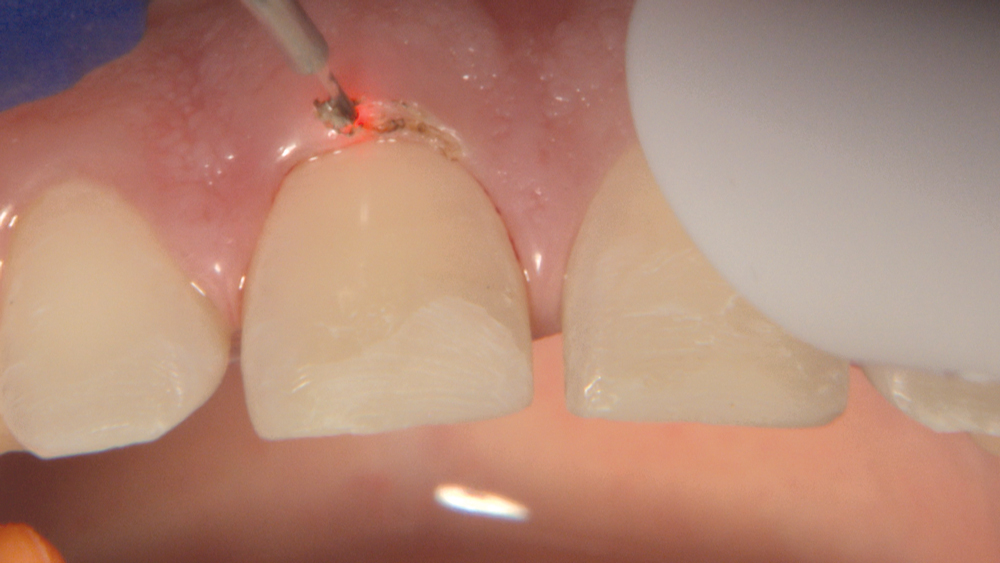
Figure 9: Proceeding with the gingivectomy, I accomplish the necessary contouring with a Picasso Lite+® dental laser (AMD Group LLC; Indianapolis, Ind.), using an initiated tip and 1.8-watt Continuous Wave setting. I find this tool to be indispensable, as the laser provides full clinical control and minimal bleeding.
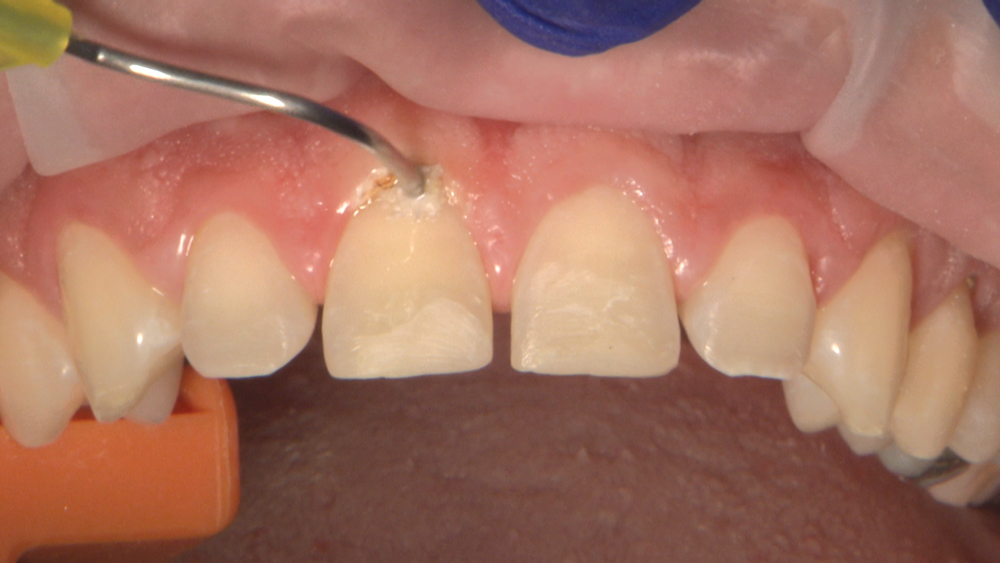
Figure 10: Post-gingivectomy, teeth #8 and #9 show more symmetrical gingival contours. Hydrogen peroxide is applied with a soft brush to remove debris and clean the treated area.
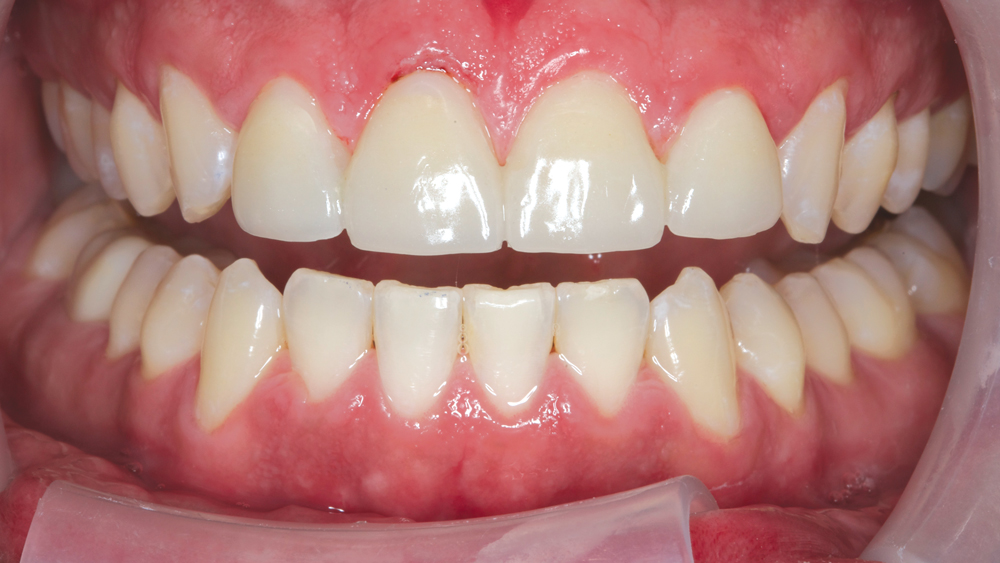
Figure 11: Next, I seat four BioTemps® Provisionals veneers (Glidewell Laboratories; Newport Beach, Calif.), which the lab fabricated with CAD/CAM technology by using the approved diagnostic wax-up as a reference. A final appointment is scheduled after four weeks of healing time.
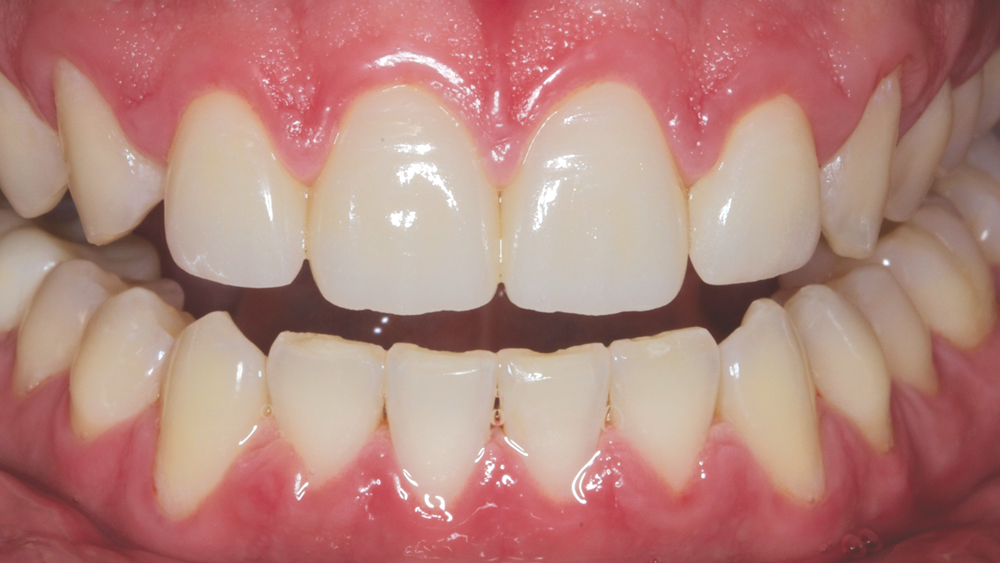
Figure 12: When Matthew returns for his final appointment, the BruxZir Anterior veneers exhibit exemplary fit and esthetically close the spaces between teeth #7–10. Assessment of phonetics affirms the suitability of the veneers.
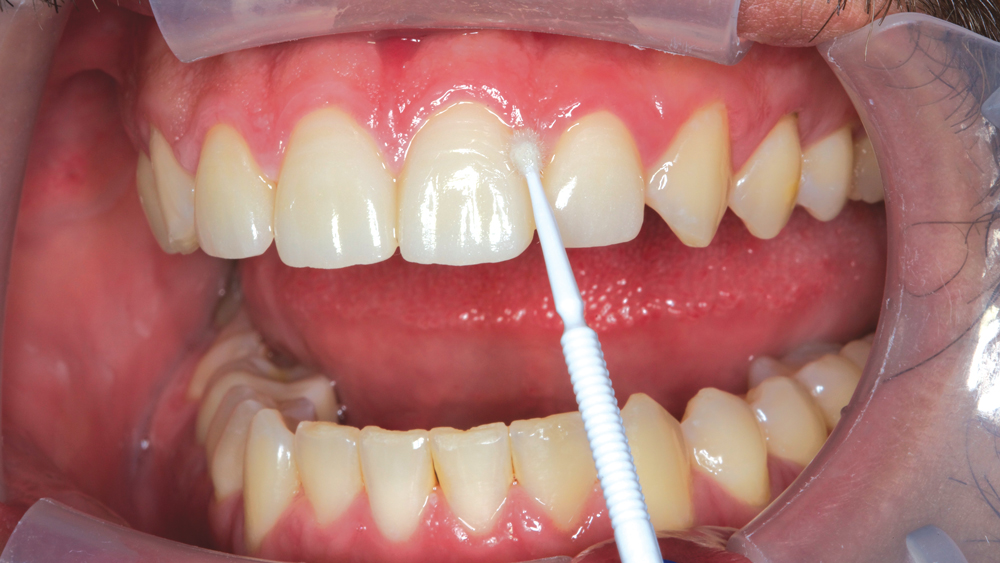
Figure 13: For veneer cases, I favor the use of fluoride varnish every six months as a preventive measure. The treatment strengthens the tooth structure and reduces the likelihood of bacterial microleakage underneath the veneer. Here, as I apply Fluor Protector (Ivoclar Vivadent; Amherst, N.Y.), I’m taking special care to ensure all marginal interface areas are reached. My treatment plan for Matthew also includes a prescription for a Comfort H/S™ Bite Splint. A custom-made bite splint is prudent for any patient who receives veneers — and, of course, even more so when clenching is a concern.
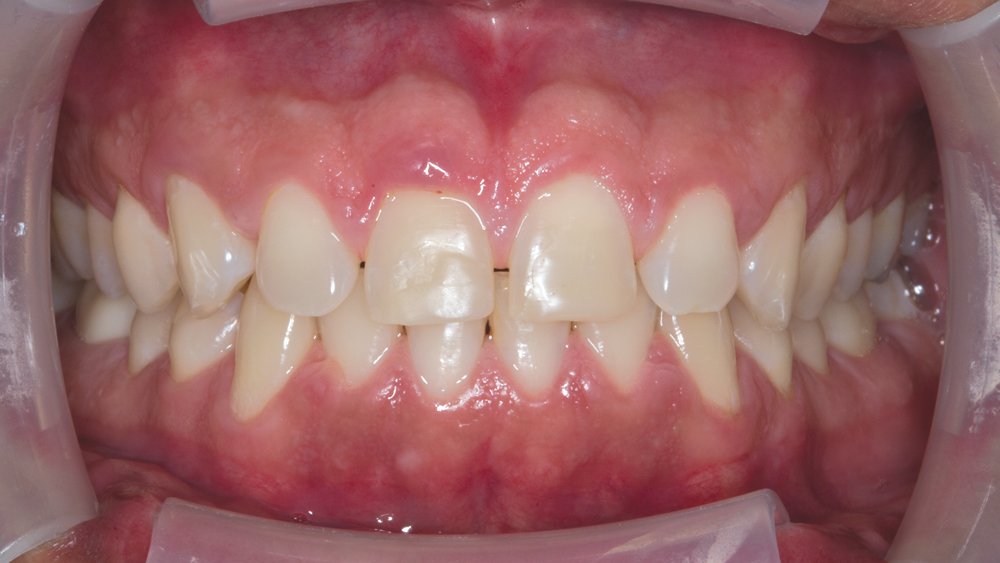 Figure 14a
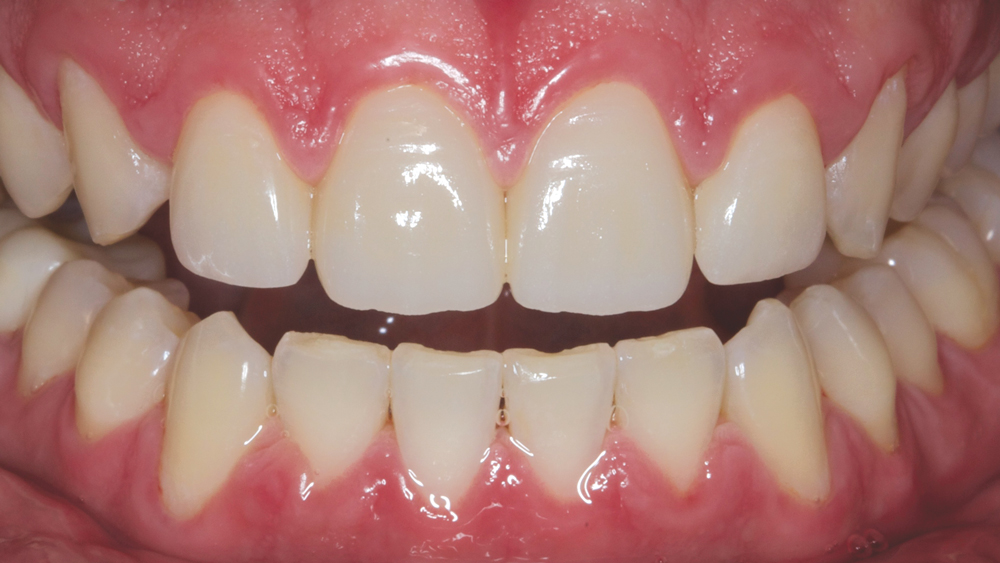 Figure 14b
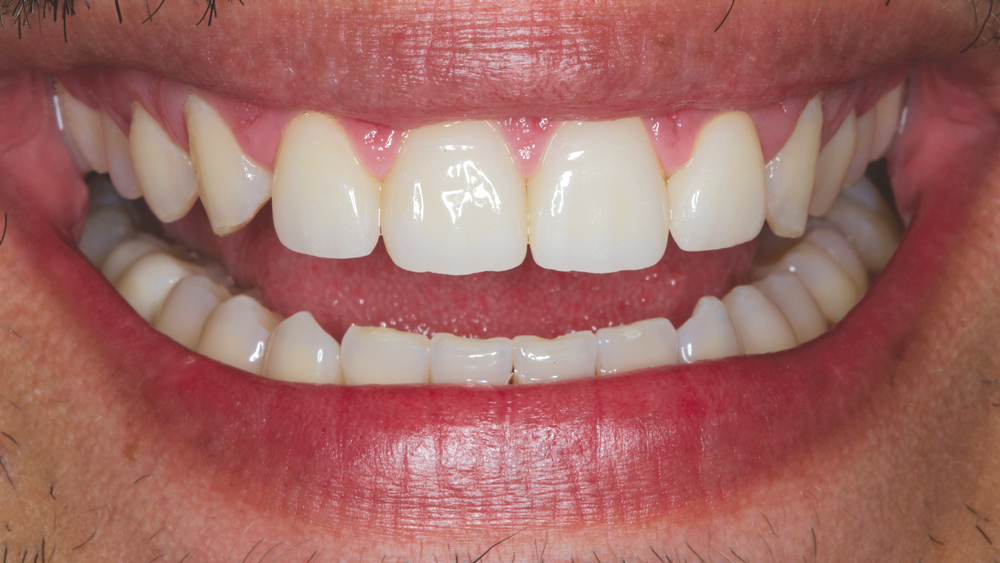 Figure 14c
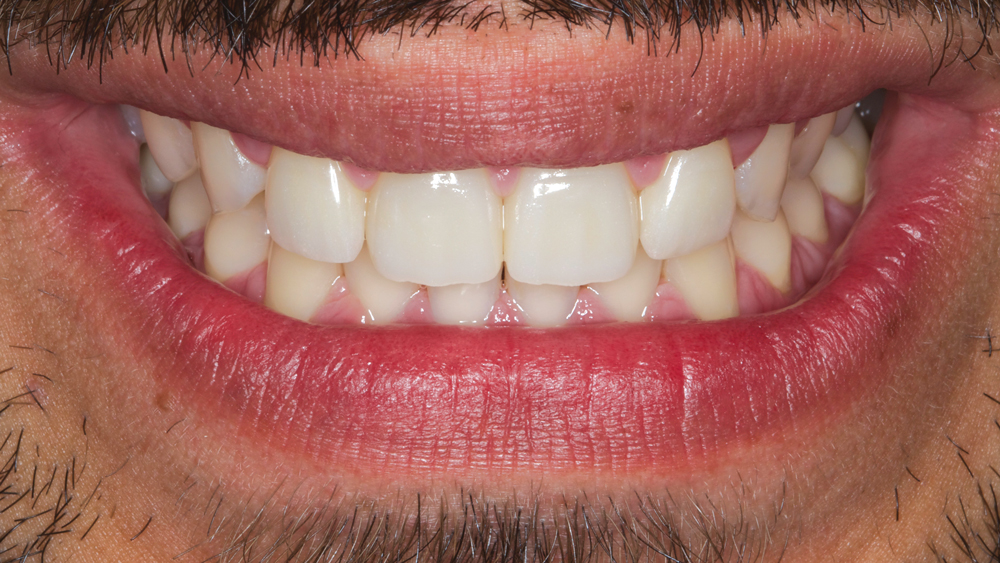 Figure 14d
Figures 14a–14d: The spaces and gingival asymmetry in Matthew’s pretreatment smile (14a) are now corrected. Upon seeing his new smile, Matthew is impressed with the results, happily noting that he cannot stop grinning. The final BruxZir Anterior veneers look natural, and I can rest easy knowing these esthetic restorations are strong enough to withstand the rigors of clenching.
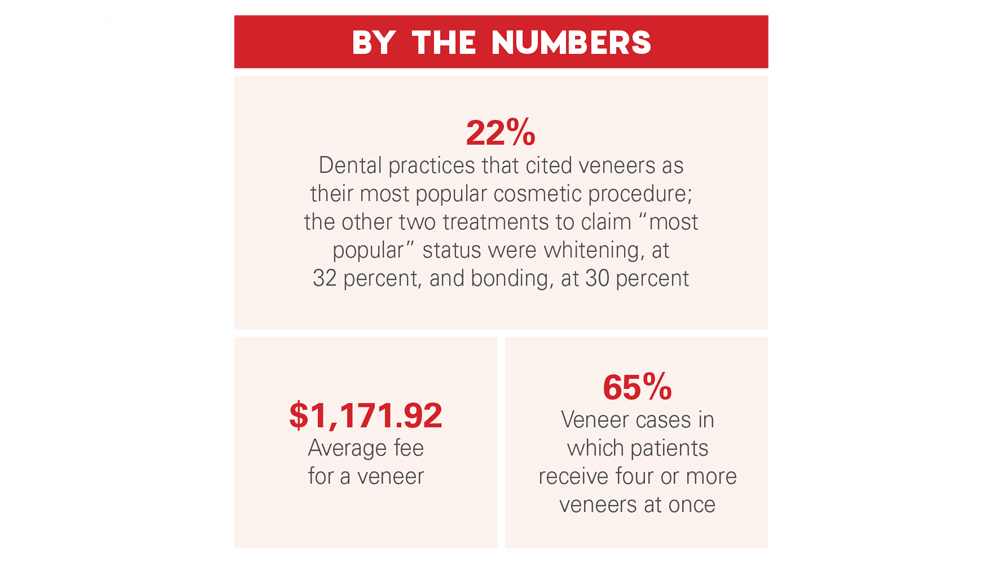
Source: American Academy of Cosmetic Dentistry (AACD). AACD State of the Cosmetic Dentistry Industry 2015. Available from: https://www.aacd.com/proxy/files/Publications and Resources/AACD State of the Cosmetic Dentistry Industry 2015.pdf

