In this issue:
In-Office Milling vs. Lab Fabrication: Making Case Decisions
Author
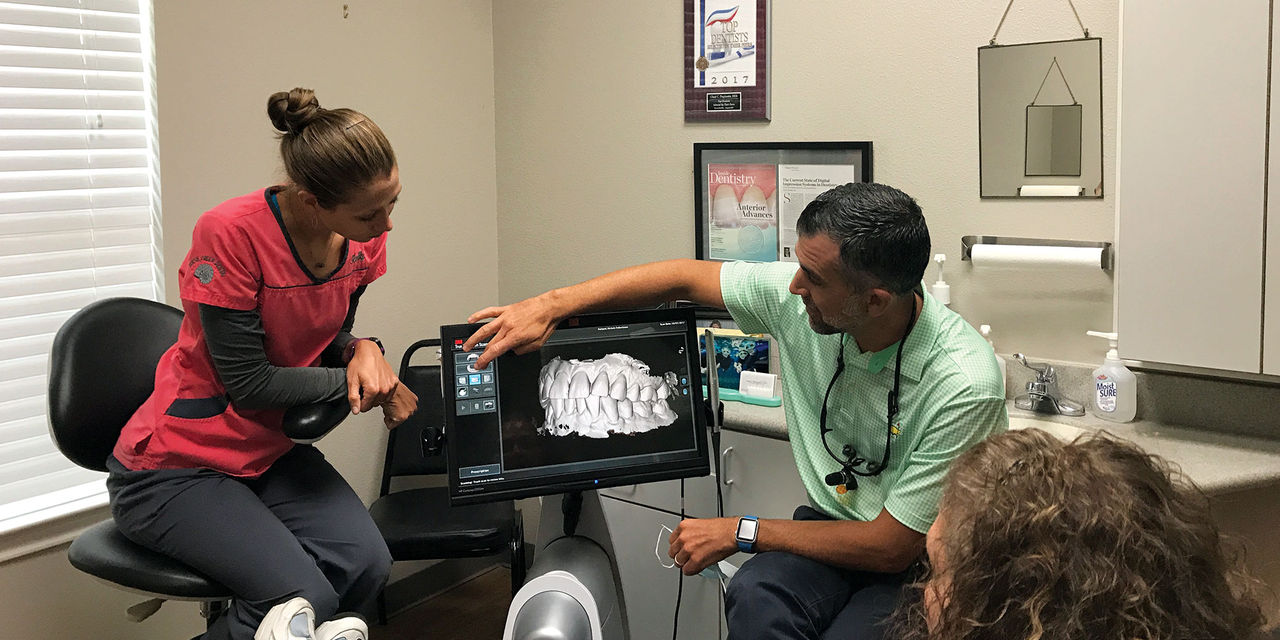
The incorporation of intraoral scanning in the modern dental practice offers numerous benefits, including improved accuracy, reduced chair time, and a more comfortable patient experience, as well as a faster turnaround time and more precise fit for the restoration.1,2,3 To further shorten the restorative timeline, in-office mills allow practitioners to produce crowns and other indirect restorations, such as inlays and onlays, within their offices. Dentists can now offer same-day dentistry, which is highly appealing to patients, who value the opportunity to receive a restoration in a single visit.
Inevitably, dentists who have added these technologies to their practice are faced with a decision: Which cases should be milled in-office, and which should instead be submitted to the lab for design and fabrication? In cases where the diseased or damaged portion of the tooth allows for a conservative preparation to support an inlay or onlay, in-office milling is almost always the best option. For patients who require a crown, each case must be evaluated individually to determine the optimal means of fabrication.
Dentists who have added these technologies to their practice are faced with a decision: Which cases should be milled in-office, and which should instead be submitted to the lab for design and fabrication?
FIVE CRITERIA FOR DECIDING BETWEEN IN-OFFICE MILLING AND LAB FABRICATION
1. Location in the Mouth — When the tooth is in the esthetic zone, the digital impression is usually submitted to a dental lab for fine-tuning of the crown contours and shade to meet the esthetic needs of the case.
2. Opposing Dentition and Previous Restorations in Vicinity — The characterization of surrounding teeth may make it challenging to mill a crown in-office that blends well with the neighboring dentition. If there are existing crowns in the area of the tooth in question, the dental lab should fabricate the new restoration to ensure as close a match as possible.
3. Parafunctional Habits — Patients who exhibit bruxism or other parafunctional habits require the most durable restoration possible. When there is evidence of bruxing, grinding or a heavy bite, a lab-fabricated maximum-strength crown, such as BruxZir® Full-Strength Solid Zirconia or full-cast metal, may be needed to ensure a long-lasting restoration.
4. Stump Shade — The shade of the tooth can determine which material is ideal for the restoration. In cases where the stump shade is dark, a lab-fabricated crown produced from BruxZir Solid Zirconia or a layered material is often needed to mask the underlying tooth structure. If the stump of the tooth is a natural dentin shade, an in-office mill can be used to fabricate a lifelike restoration from a glass ceramic like Obsidian® lithium silicate (Glidewell Direct; Irvine, Calif.).
5. Time Requirement — For in-office milling, there must be time allotted in the patient’s and the practice’s schedule to fabricate, prep and deliver the restoration. From the time the patient arrives at the office, it typically takes 90–120 minutes to deliver a crown milled in-office. For an inlay or onlay, 70–90 minutes are required. If either the doctor or patient cannot accommodate this schedule, lab fabrication is more efficient. Further, when multiple restorations are needed, the time required to mill in-office is often prohibitive.
The decision-making process for in-office milling vs. lab fabrication is best explained by presenting an example of each. The following cases illustrate both how this determination is made and the step-by-step restorative workflow involved in these two approaches to digital dentistry.
CASE REPORT NO. 1: LAB FABRICATION
The patient visited my office after receiving endodontic treatment for tooth #20 that necessitated crown replacement. A lab-fabricated restoration was chosen, as I was concerned about the dark shade of the underlying tooth and wanted a restoration with a more opaque substructure. There was also color variation on the adjacent tooth, requiring customization better-suited to the skills of a lab technician. After removing the patient’s existing crown, the tooth was prepared, and the impression was made with an intraoral scanner. The case was digitally submitted to the lab, and a crown was fabricated with a zirconia core and overlying porcelain. The final esthetics of the restoration were very pleasing and matched the color and characterization of the neighboring teeth quite well.
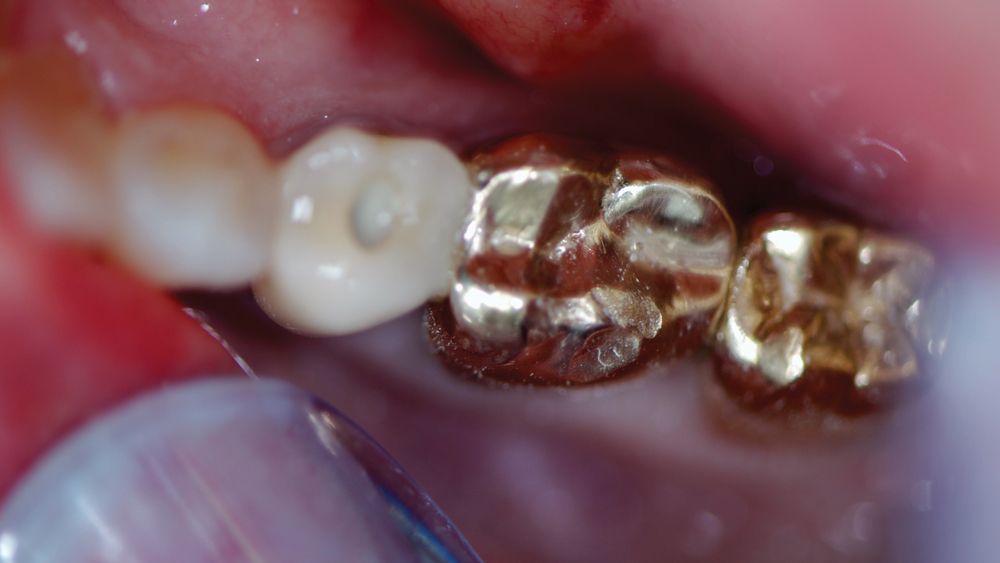
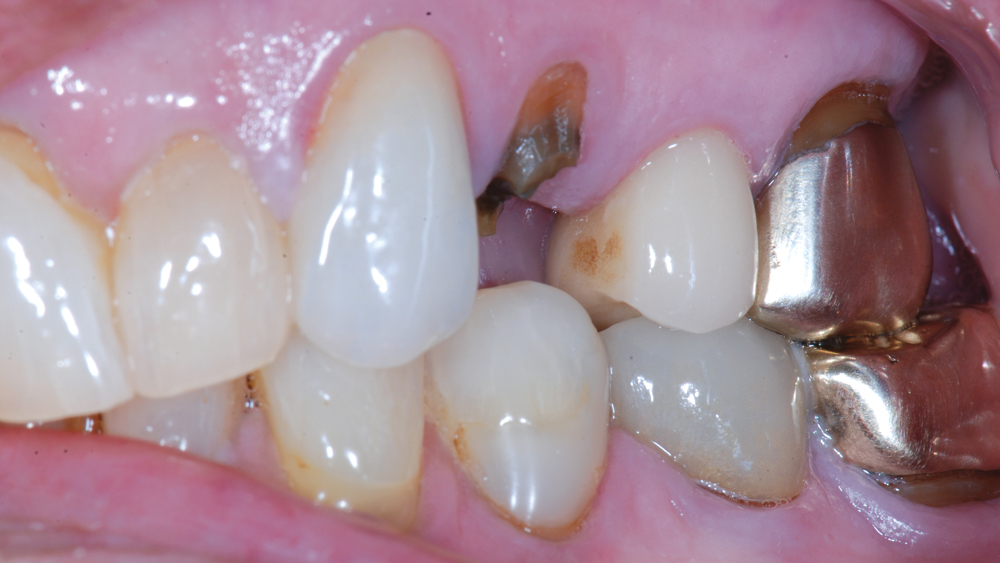
Figure 1: The patient visited my office for a new crown on tooth #20 after receiving root-canal treatment. There was concern with the dark color of the tooth structure resulting from prior endodontic treatment, and the neighboring and opposing teeth exhibited substantial shade variation. Thus, the esthetic requirements of the case called for a lab-fabricated restoration.
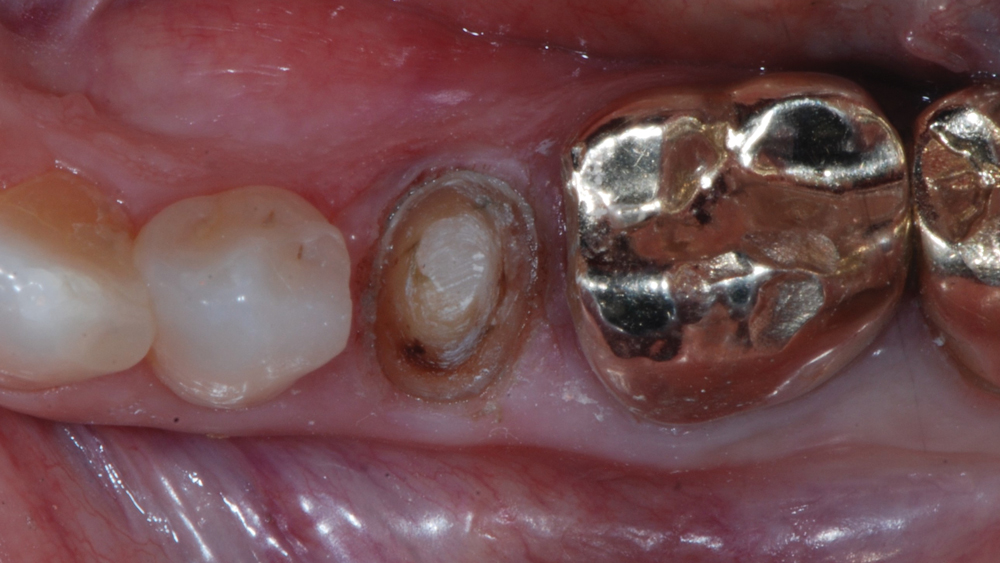
Figure 2: The tooth was prepared with a well-defined margin, which is essential whether an in-office or lab-fabricated crown is indicated. Retraction cord was placed around the circumference of the tooth to provide for clear visualization of the margin during intraoral scanning.
 Case 1 - Figure 3a
 Case 1 - Figure 3b
 Case 1 - Figure 3c
Figures 3a–3c: In preparation for the digital impression, scanning spray was applied to the areas of the prep, the opposing and the bite.
 Case 1 - Figure 4a
 Case 1 - Figure 4b
 Case 1 - Figure 4c
Figures 4a–4c: The 3M™ True Definition Intraoral Scanner (3M™ ESPE™; St. Paul, Minn.), which offers rapid, highly accurate scanning and a small wand size at a very reasonable price point, was used to create a digital impression. Here, the scan of the prep quadrant and digital models of the prep and bite are shown. The digital impression was submitted to the lab for fabrication.
 Case 1 - Figure 5a
 Case 1 - Figure 5b
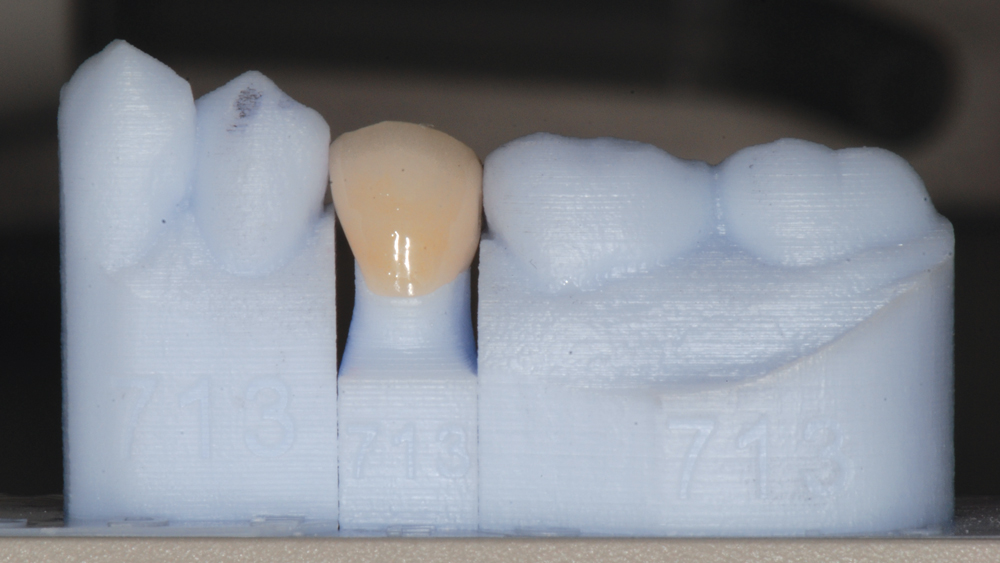
Figures 5a, 5b: Occlusal and buccal views of the final restoration on a digitally fabricated SLA (stereolithography) model.
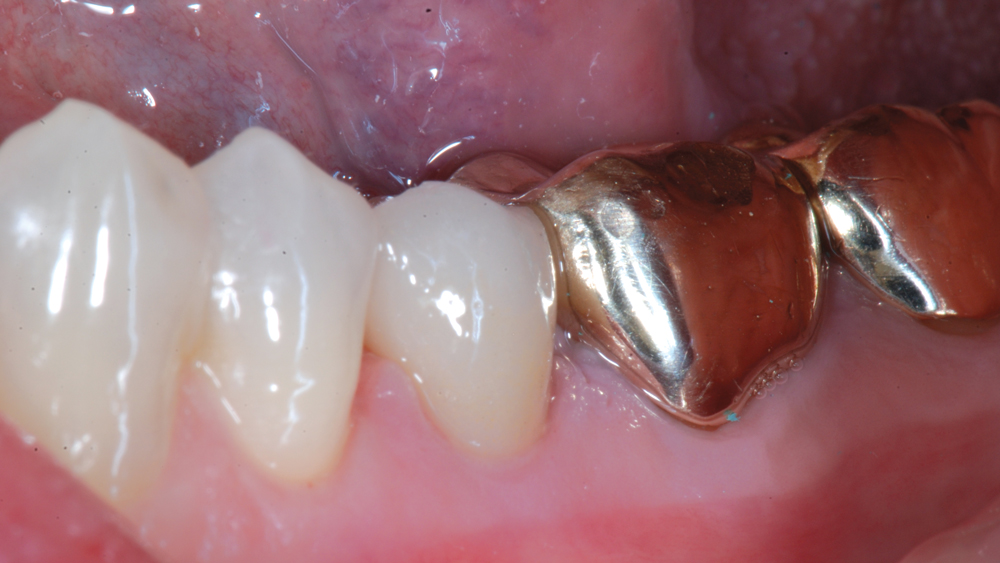
Figure 6: The crown for tooth #20 dropped right into place, and only minimal adjustments were necessary. The restoration was cemented to the prepared tooth using 3M RelyX™ Unicem 2 Self-Adhesive Resin Cement (3M ESPE).
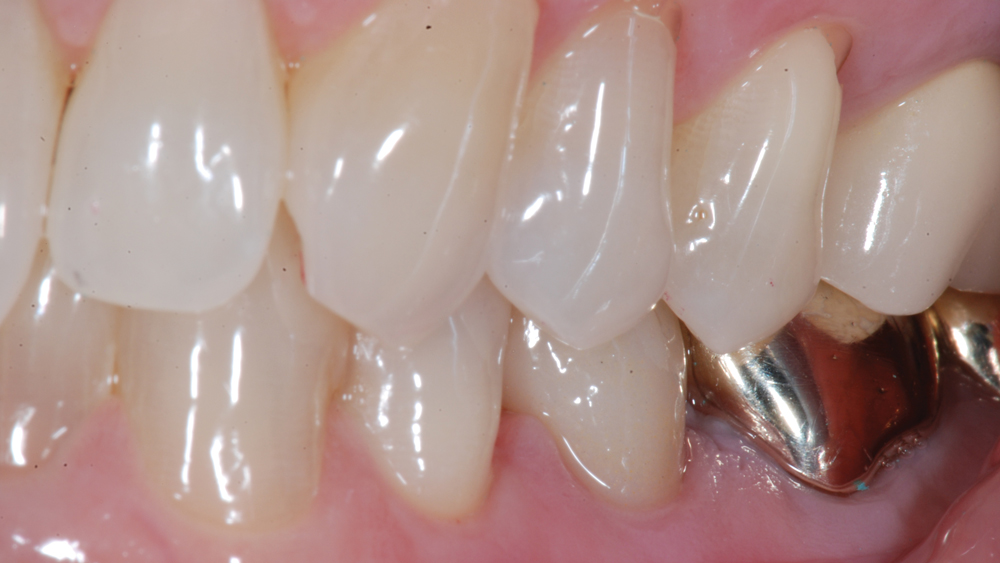
Figure 7: Occluded view of final restoration for tooth #20 illustrates the excellent match between the color and shade of the final crown and the surrounding dentition, which would have been difficult to achieve with a crown fabricated in-office. The digital lab workflow used to complete the case reduced the time and cost required to deliver the restoration.
CASE REPORT NO. 2: IN-OFFICE MILLING
The patient sought treatment for a broken crown on her maxillary left first premolar. The previous restoration and a majority of the core buildup were missing, and the patient desired same-day crown replacement. Producing the crown in-office was also ideal because it would have been challenging to create a temporary restoration without fabricating a matrix from the existing crown. In addition, there was minimal tooth structure, and by bonding an Obsidian lithium silicate restoration to the preparation, excellent bond strength could be achieved.
The tooth was a shade A3, and did not require extensive characterization. The tooth was prepped, a digital impression was taken, and an Obsidian restoration was fabricated using the TS150™ in-office mill (Glidewell Dental; Irvine, Calif.). The crown was delivered less than an hour after intraoral scanning was performed, and the patient was extremely happy with the final result.
Dentists who have added these technologies to their practice are faced with a decision: Which cases should be milled in-office, and which should instead be submitted to the lab for design and fabrication?
 Case 2 - Figure 1a
 Case 2 - Figure 1b
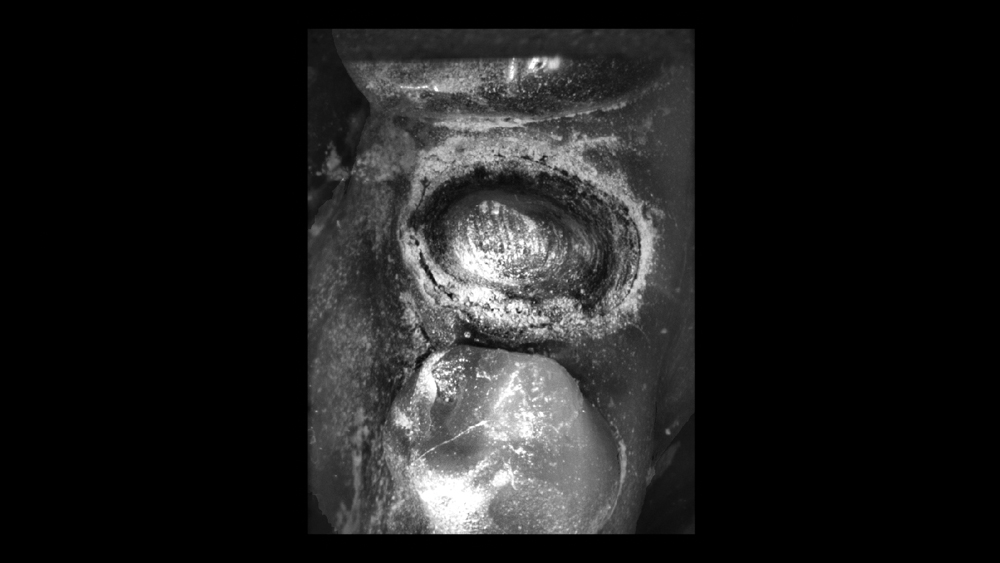
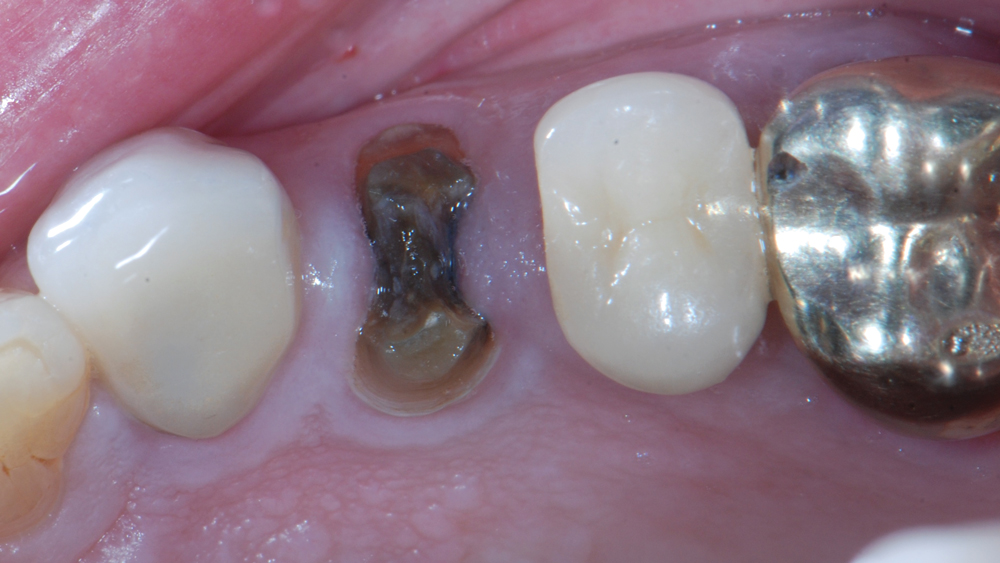
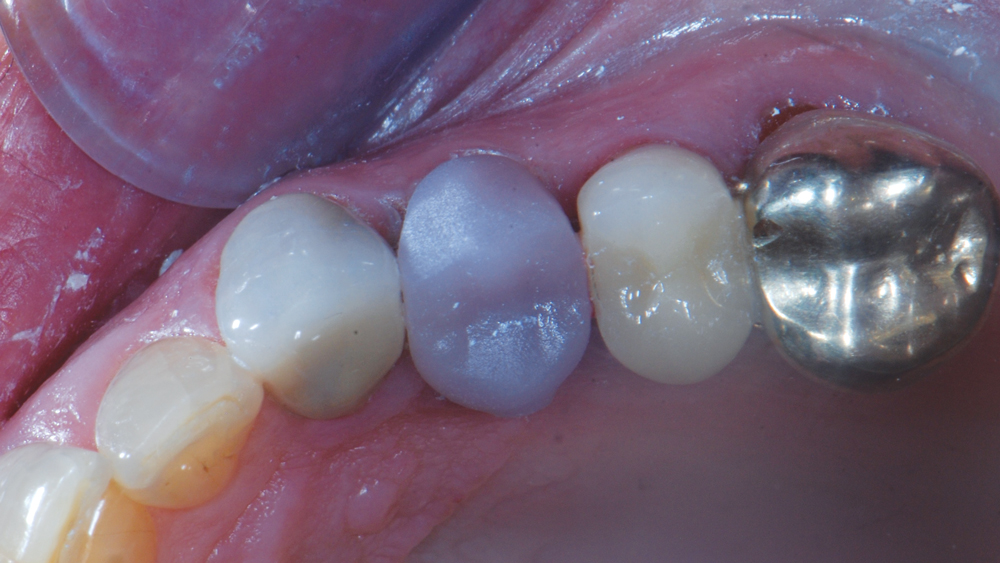
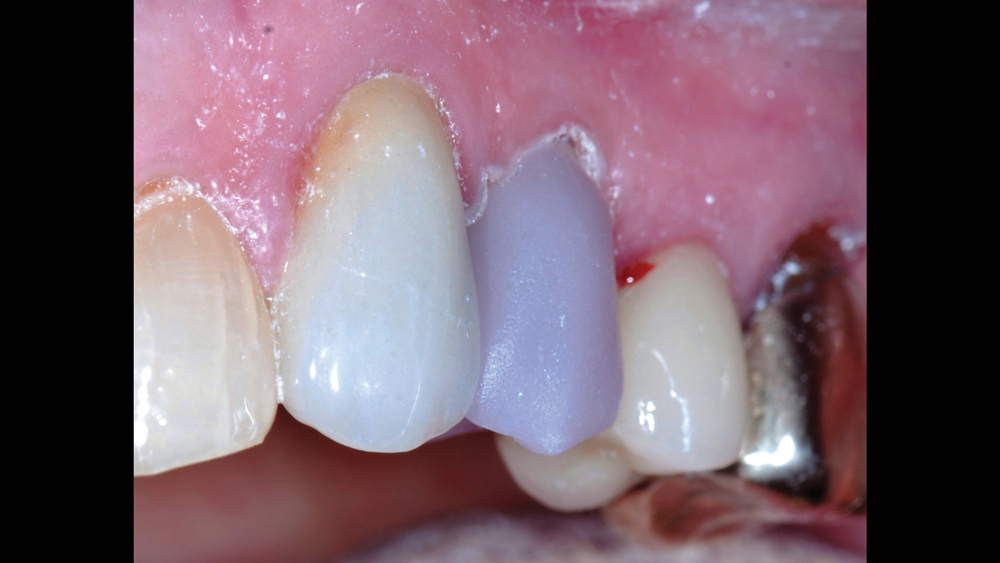
Figures 1a, 1b: Buccal and occlusal presentation of fractured tooth #12. The patient had lost her previous crown while on vacation and requested a same-day restoration. A chairside-milled Obsidian crown was selected, as the lithium silicate material met the esthetic requirements of the case and allowed for a high-strength bond for the restoration. Additionally, both the patient and the doctor had sufficient time allotted for in-office fabrication. Although the underlying substructure was quite dark, there was no concern with the prep showing through the crown because the restoration would be thick enough to mask the small underlying tooth structure.
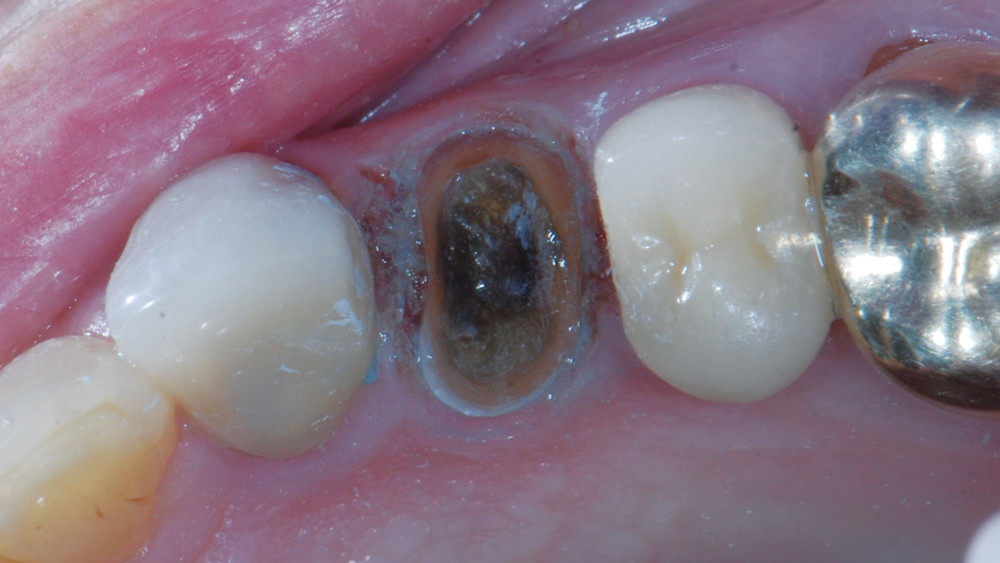
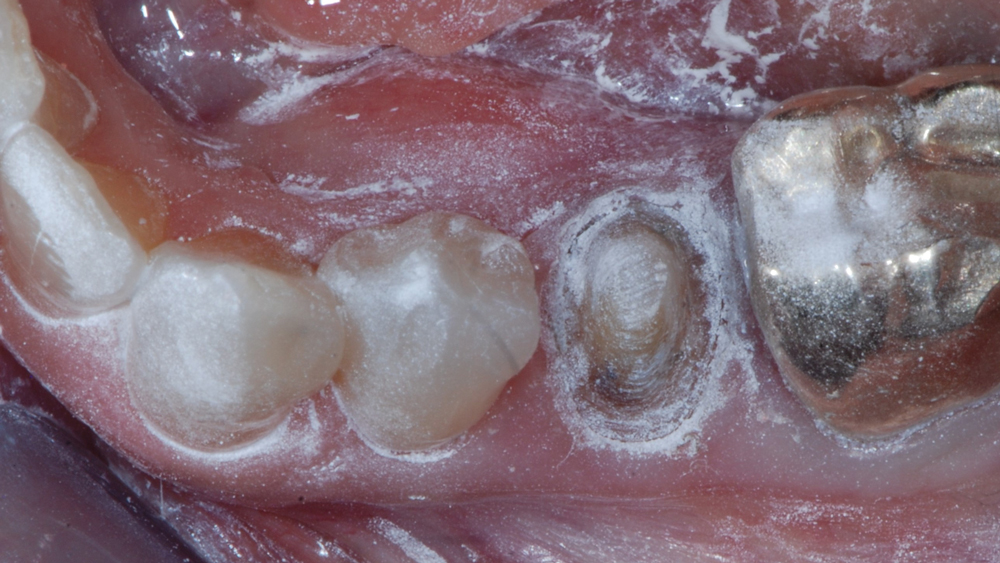
Figure 2: The tooth was prepared, and a diode laser was used to remove the excess gingival tissue and expose the margins.
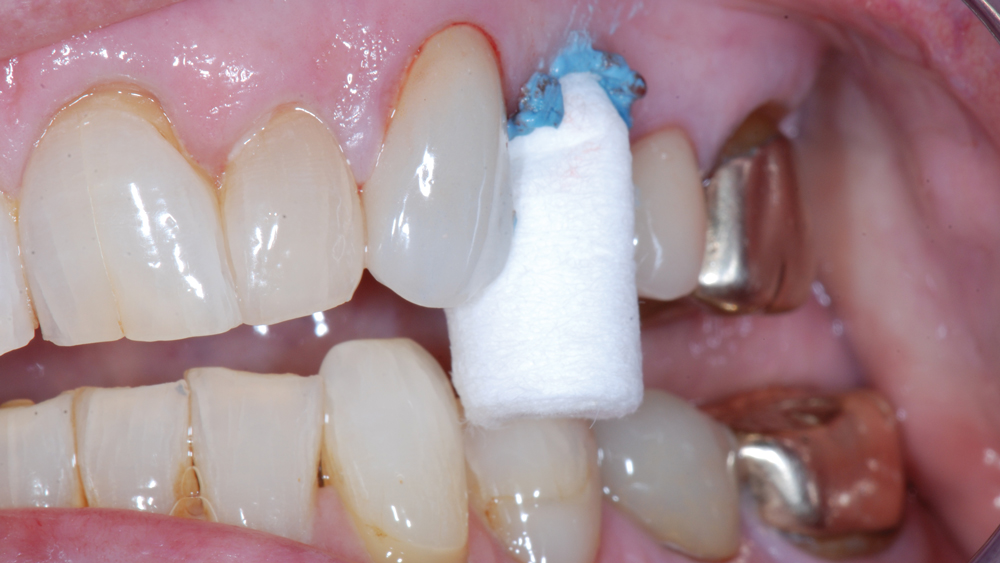
Figure 3: Retraction paste was applied with a compression cap to create a clear gingival margin for the digital impression.
 Case 2 - Figure 4a
 Case 2 - Figure 4b
 Case 2 - Figure 4c
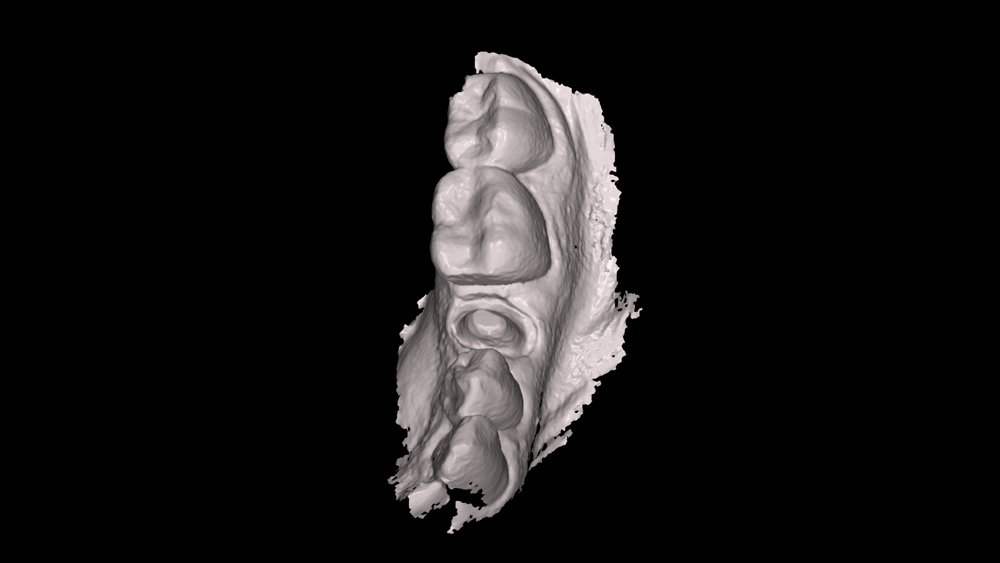
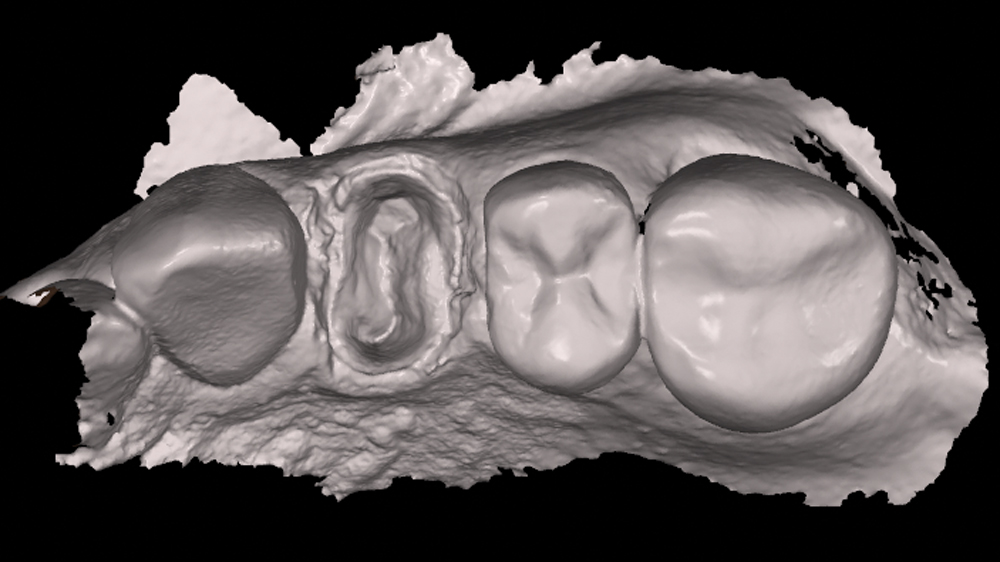
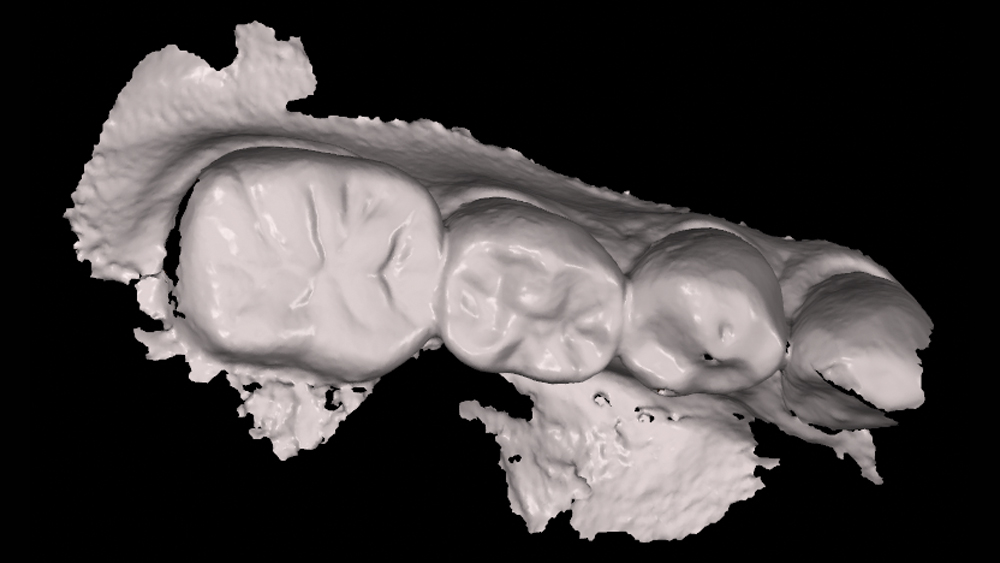
Figures 4a–4c: Intraoral scans of prep, opposing and bite. My patients have remarked that intraoral scanning is easier and more comfortable than conventional impressions. The small wand size offered by modern scanners like the 3M True Definition is especially beneficial for patients with sensitive gag reflexes, or those who have a limited opening or an intolerance of vinyl polysiloxane (VPS) impressions. Using the scanner’s computer interface, the digital prescription was completed and the impression was sent to the design software of the TS150 chairside mill. As with lab-fabricated restorations created from intraoral scans, transmission of the impression is virtually instantaneous.
 Case 2 - Figure 5a
 Case 2 - Figure 5b
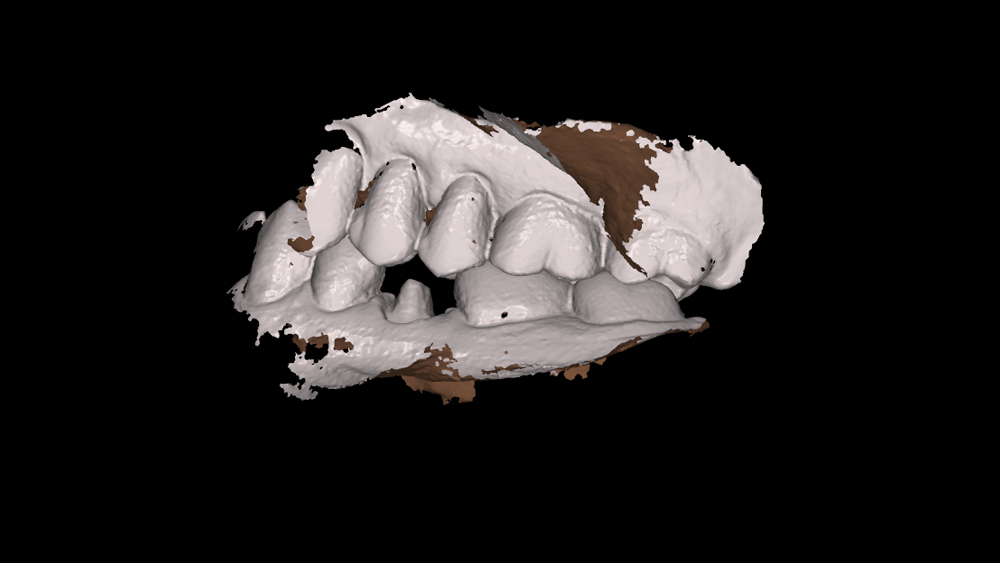
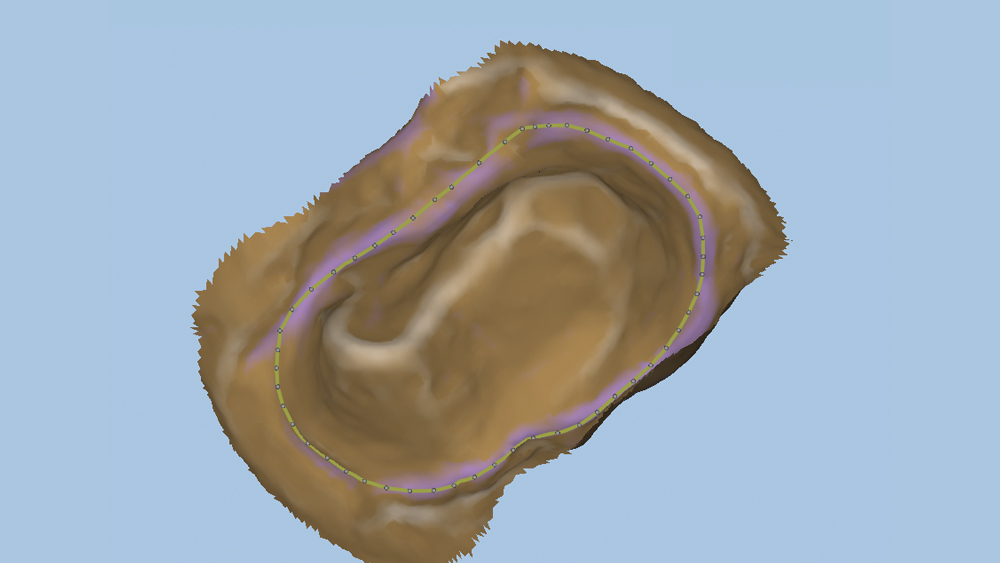
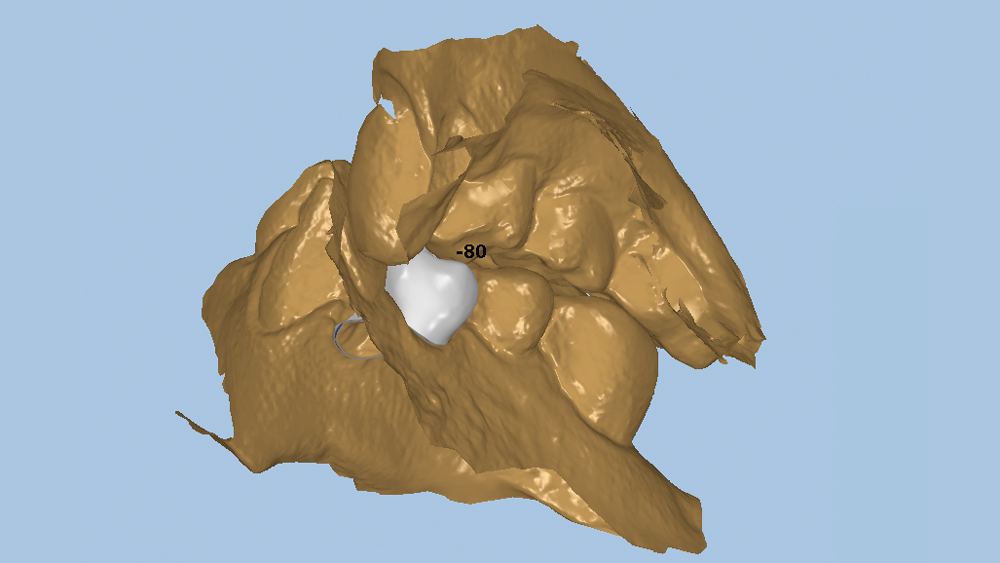
Figures 5a, 5b: FastDesign™ software (Glidewell Dental) was then used to mark the margins and identify the prep type, restoration material, and occlusal and buccal orientations. The FastDesign software is very user-friendly and generates crown proposals from a comprehensive, proprietary digital library of tooth morphology and occlusal characteristics. Note that the crown design process usually takes 3–5 minutes.
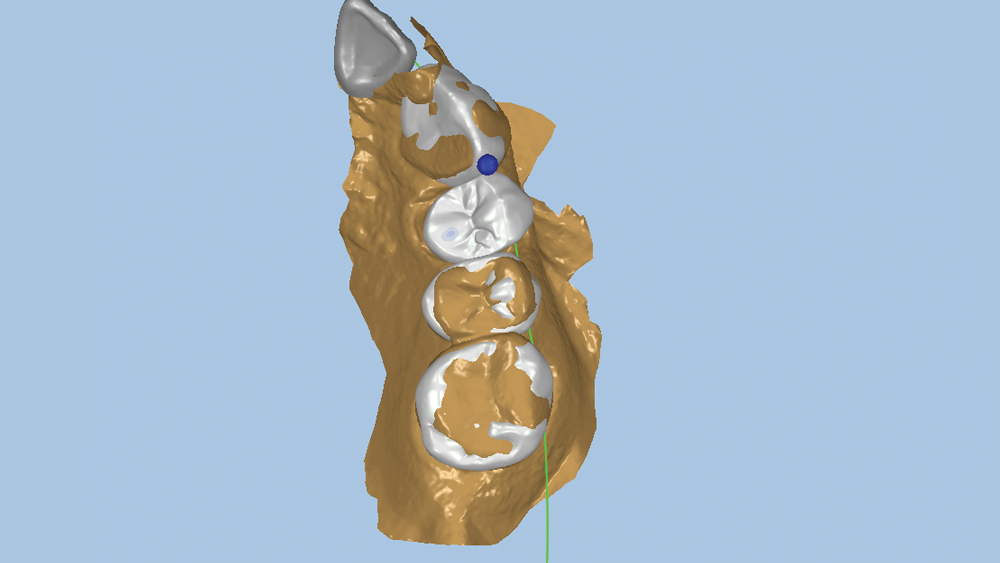
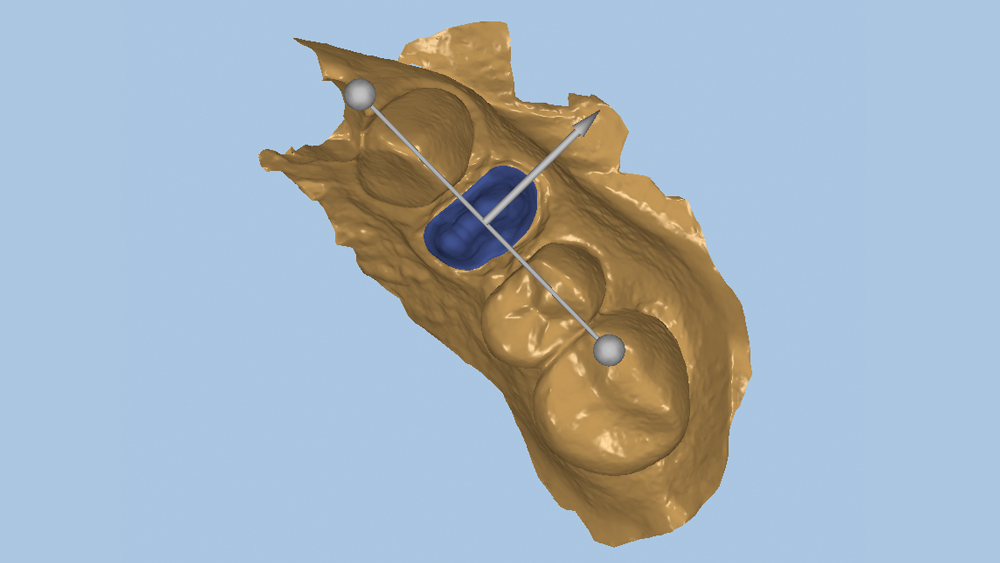
Figure 6: Proposed arch position for the crown generated by the FastDesign software.
 Case 2 - Figure 7a
 Case 2 - Figure 7b
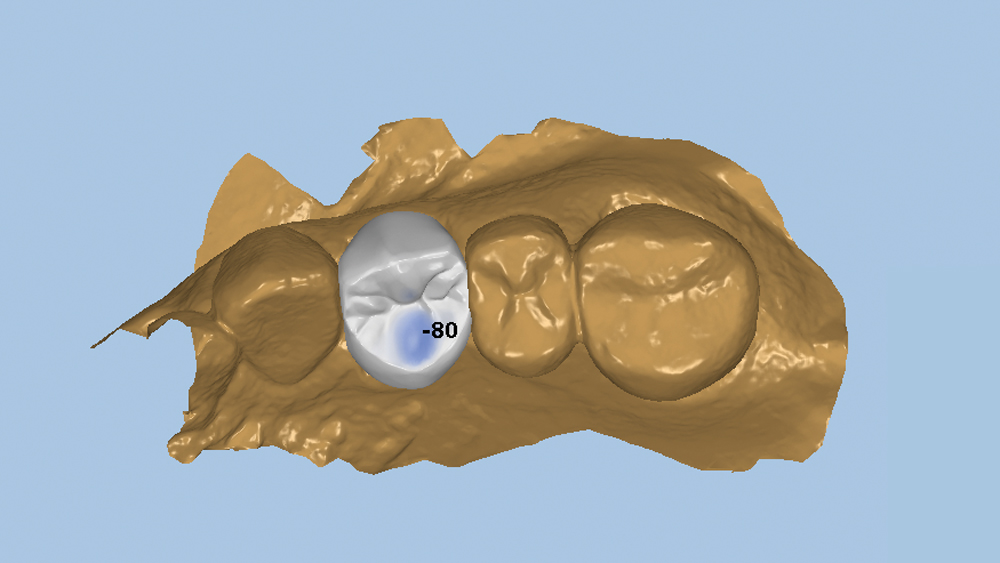
Figures 7a, 7b: Evaluation of the proposed crown design, including occluded, inverted lingual orientation of the palatal cusp and occlusal contact. Note that the crown proposal generated by the FastDesign software was well-suited to the case and did not require any occlusal adjustments.
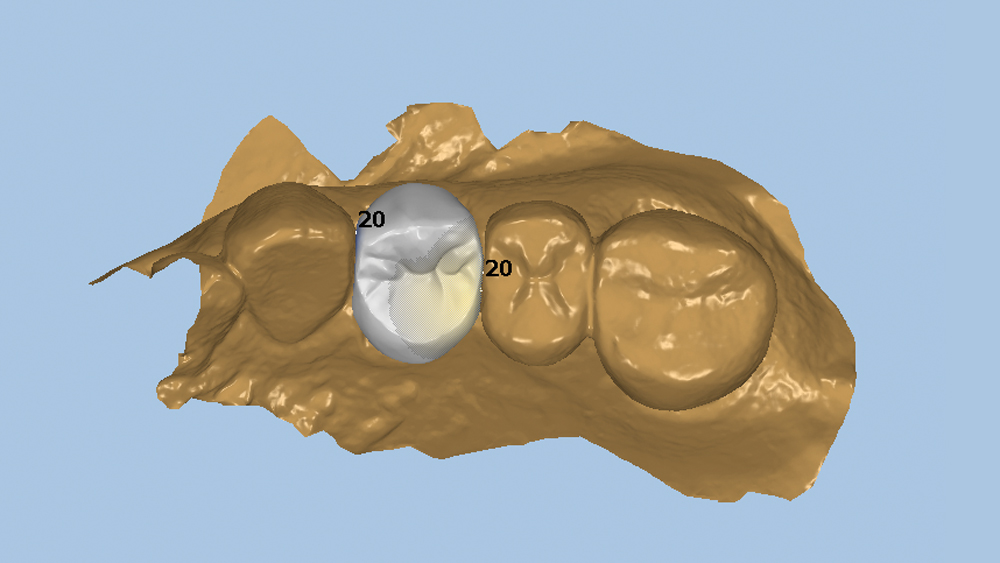
Figure 8: The only changes made to the proposed crown design were slight alterations to the interproximal contacts. The restoration design was approved and sent to the chairside mill for fabrication.
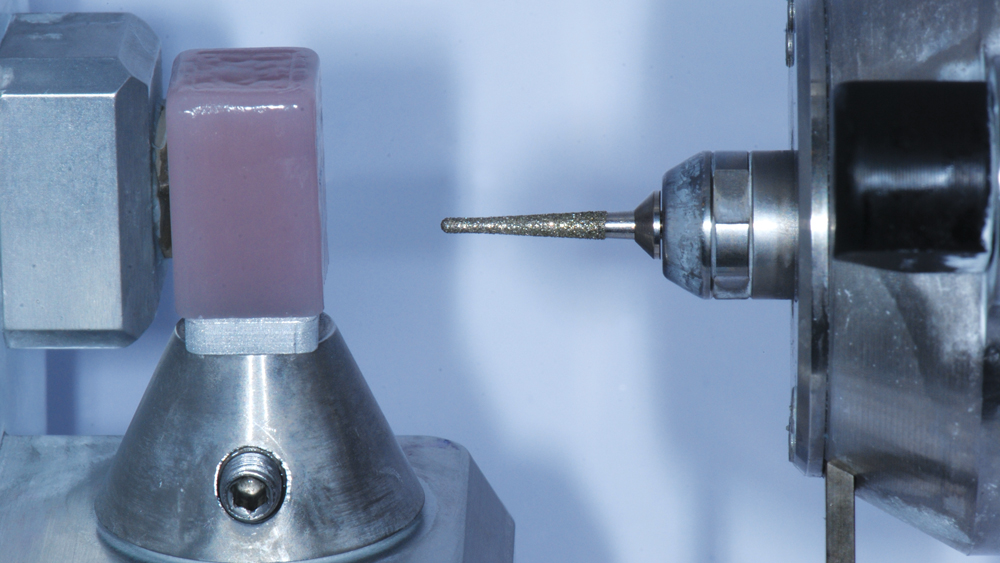
Figure 9: The chosen shade of Obsidian lithium silicate was inserted into the TS150 in-office mill.
 Case 2 - Figure 10a
 Case 2 - Figure 10b
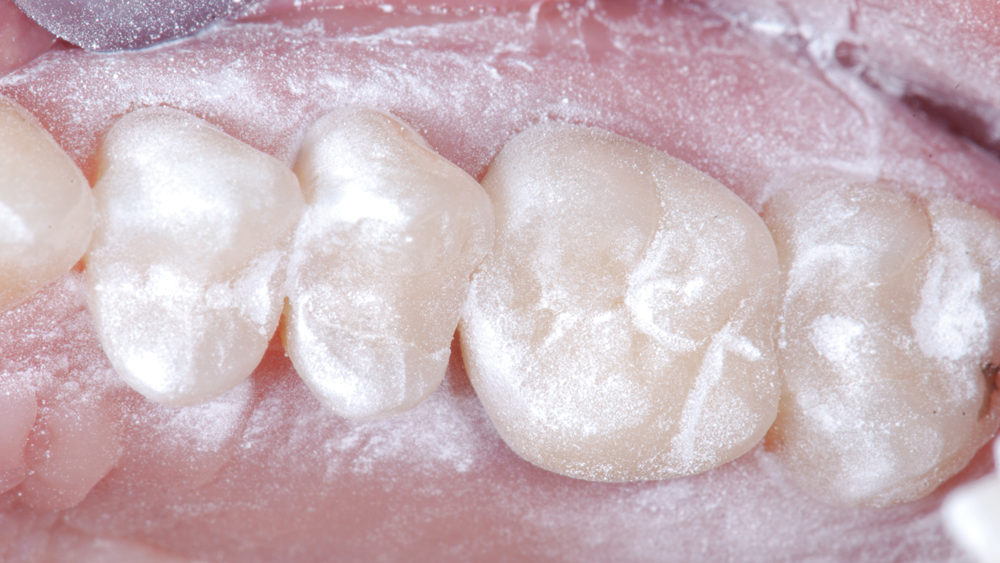
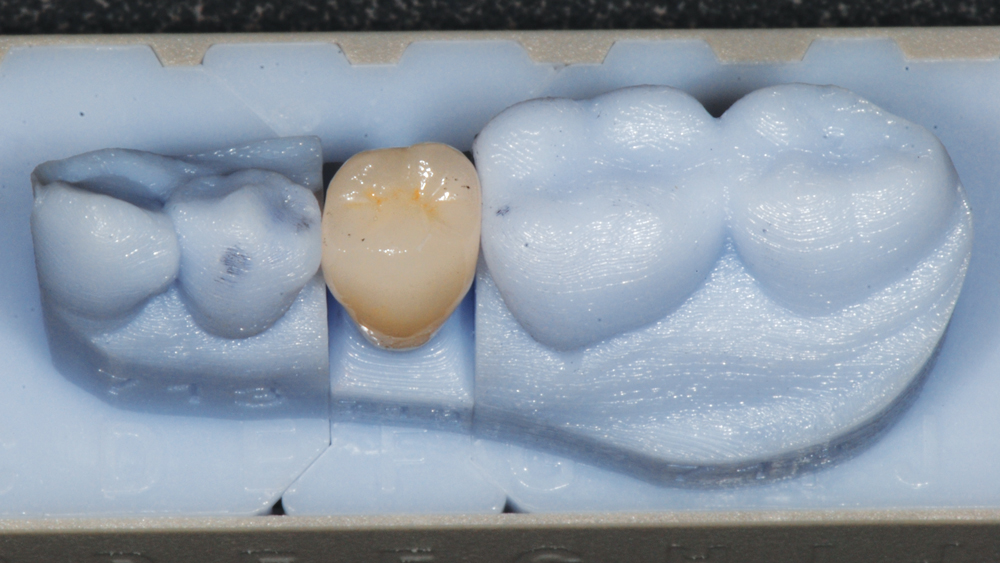
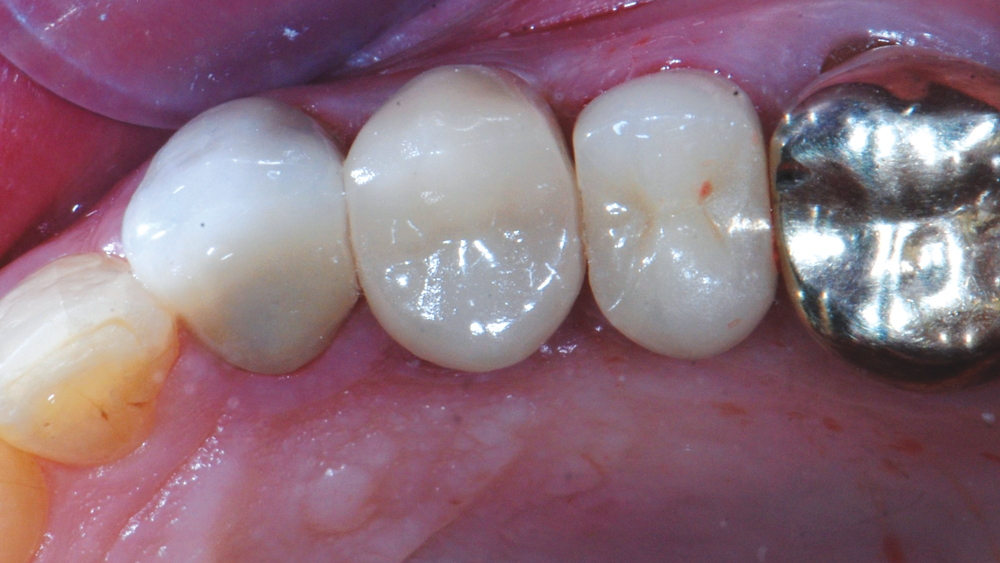
Figures 10a, 10b: Occlusal and buccal views of the milled restoration seated, prior to crystallization. The fit, form and function of the crown were excellent, so the crown was removed for completion of the fabrication process. Note that no characterization or color modifications were needed for the final crown.
 Case 2 - Figure 11a
 Case 2 - Figure 11b
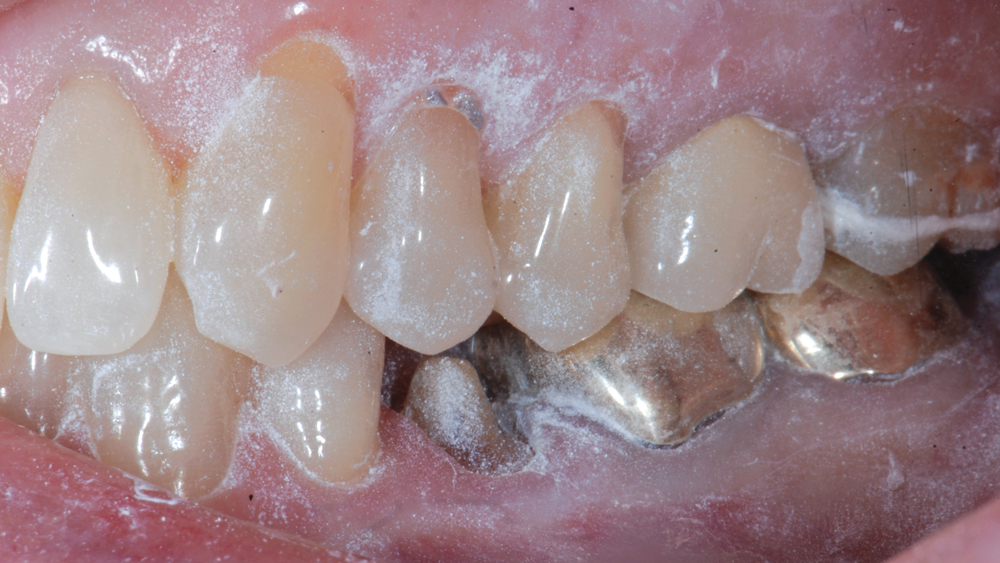
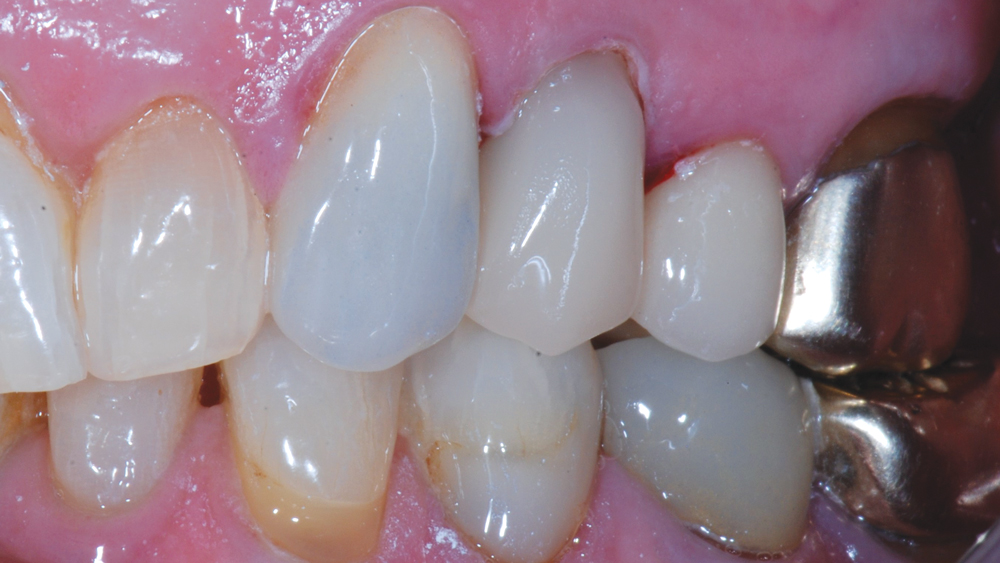
Figures 11a, 11b: Following milling, the restoration was crystallized using the VITA VACUMAT® 6000 M furnace (VITA North America; Yorba Linda, Calif.). The crown was polished and then bonded using Scotchbond™ Universal Adhesive (3M ESPE) and RelyX Ultimate Adhesive Resin Cement according to manufacturer recommendations. Chairside milling allowed the patient to receive a high-quality restoration on the same day she sought treatment.
CONCLUSION
Whether the restoration is produced by the lab or milled in-office, intraoral scanning offers improved efficiency compared to traditional impression-taking. It has been proven that digital impressions reduce or eliminate issues with fit, margins and occlusion.4 In addition to delivering a predictable, highly accurate restoration to the patient in less time, the return on investment for these technologies is substantial due to cost savings on the fabrication of indirect restorations. By following some straightforward criteria, practitioners who choose to embrace these digital tools can determine the correct method of fabrication with confidence, while enjoying the tremendous marketing opportunity offered by same-day dentistry.
The crown proposal generated by the FastDesign software was well-suited to the case and did not require any occlusal adjustments.
References
- ^Ng J, Ruse D, Wyatt C. A comparison of the marginal fit of crowns fabricated with digital and conventional methods. J Prosthet Dent. 2014 Sep;112(3):555-60.
- ^Zarauz C, Valverde A, Martinez-Rus F, Hassan B, Pradies G. Clinical evaluation comparing the fit of all-ceramic crowns obtained from silicone and digital intraoral impressions. Clin Oral Investig. 2016 May;20(4):799-806.
- ^Yuzbasioglu E, Kurt H, Turunc R, Bilir H. Comparison of digital and conventional impression techniques: evaluation of patients’ perception, treatment comfort, effectiveness and clinical outcomes. BMC Oral Health. 2014 Jan 30;14:10.
- ^Pradíes G, Zarauz C, Valverde A, Ferreiroa A, Martínez-Rus F. Clinical evaluation comparing the fit of all-ceramic crowns obtained from silicone and digital intraoral impressions based on wavefront sampling technology. J Dent. 2015 Feb;43(2):201-8.