Replacing a Single Posterior Crown in One Appointment
October 6, 2025
 image
Jinny Bender, DMD
Replacing a Single Posterior Crown in One Appointment

Even though she is a dental hygienist, Nikole decided to wait it out when she was told her crown on tooth #15 had an open margin. But over time, she noticed the area started to shred her floss. That’s when she decided it was time for the crown to be replaced.

Because the patient had high expectations for her restoration, I selected a BruxZir® Esthetic NOW Posterior Milling Block for its combination of esthetics and strength. Though BruxZir Esthetic was originally developed with the anterior in mind, with a yttria content that enhances the overall translucency and color, the material still maintains an excellent flexural strength of 870 MPa, meaning it is sufficiently strong enough to be used anywhere in the arch.

CASE REPORT

The patient’s chief concern was an open mesial margin of the crown on tooth #15

Figure 1: The patient’s chief concern was an open mesial margin of the crown on tooth #15, which was causing gingival inflammation and shredding her dental floss.

The crown was a 20-year-old Captek™ PFG high-noble bilayered restoration

Figure 2: The crown was a 20-year-old Captek PFG high-noble bilayered restoration.

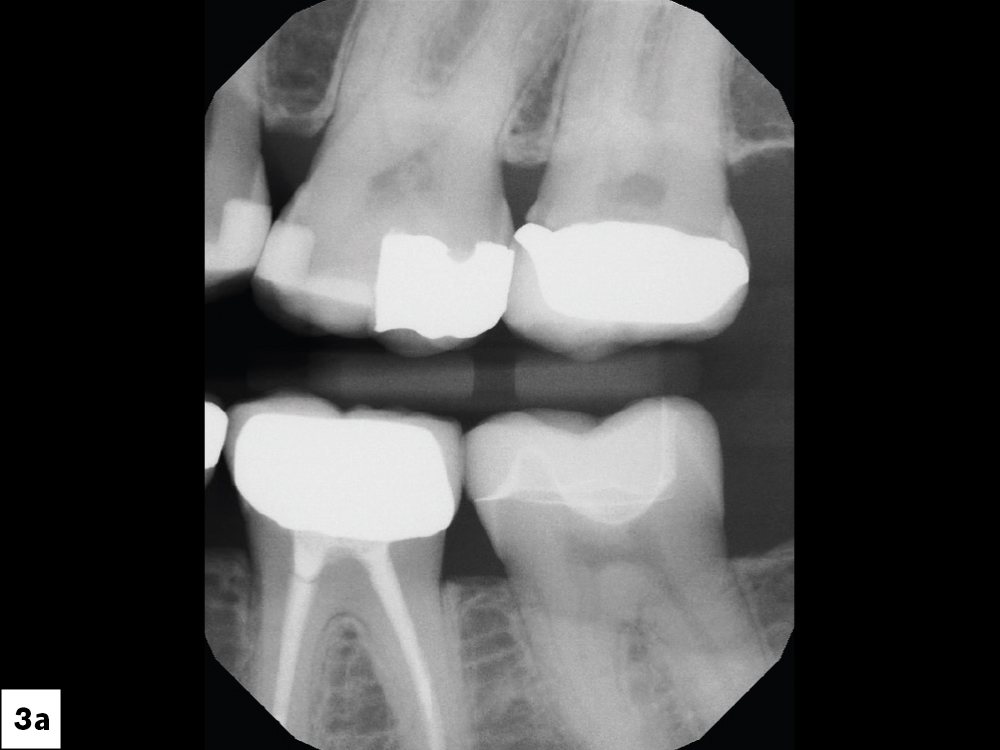
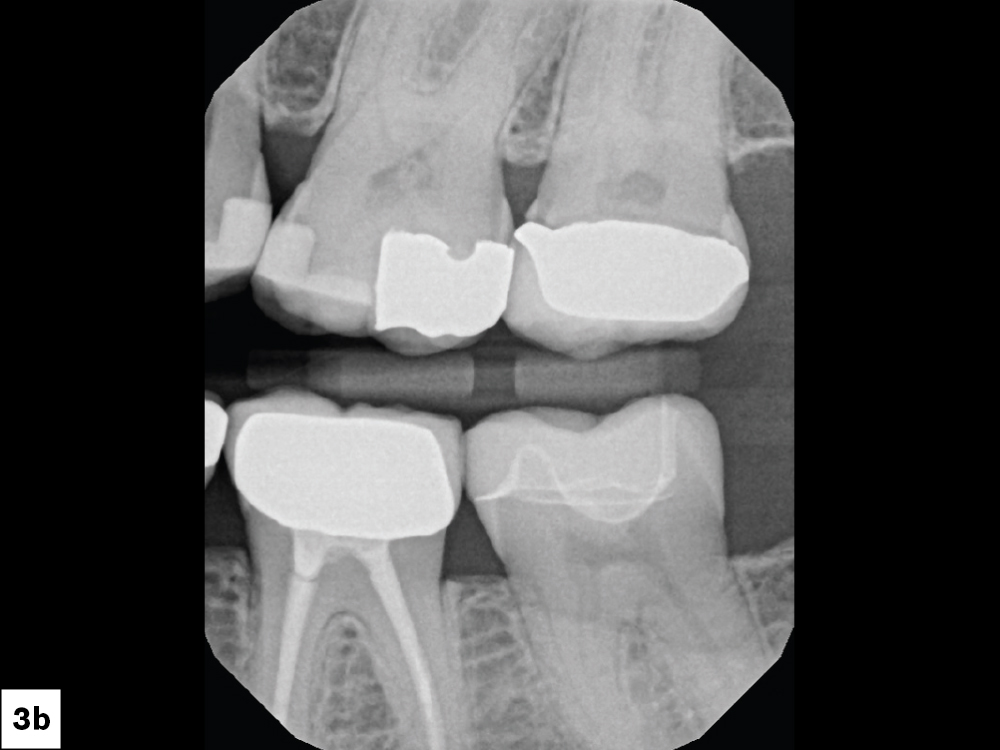
the treatment plan called for restoration of the tooth
Radiographs verified the open margin

Figures 3a, 3b: Radiographs verified the open margin, and the treatment plan called for restoration of the tooth with a same-day BruxZir® Esthetic NOW Posterior crown.

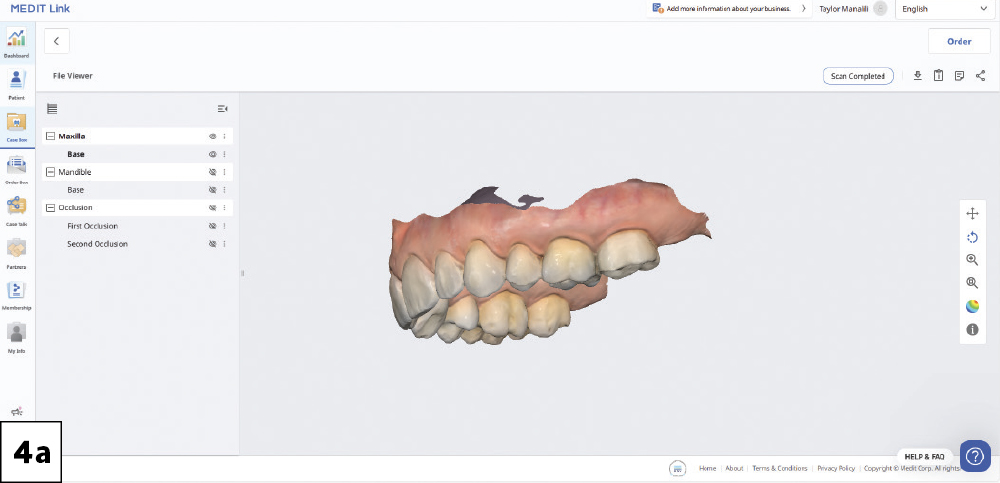
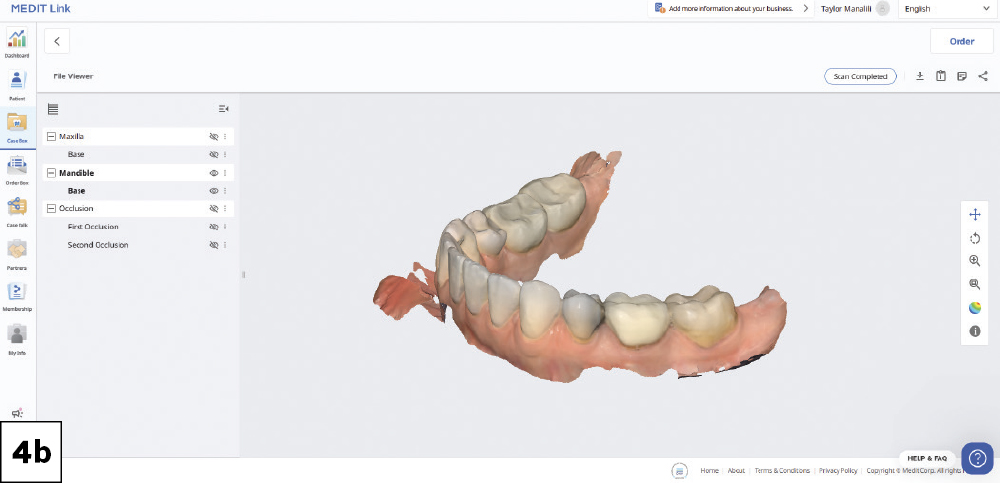
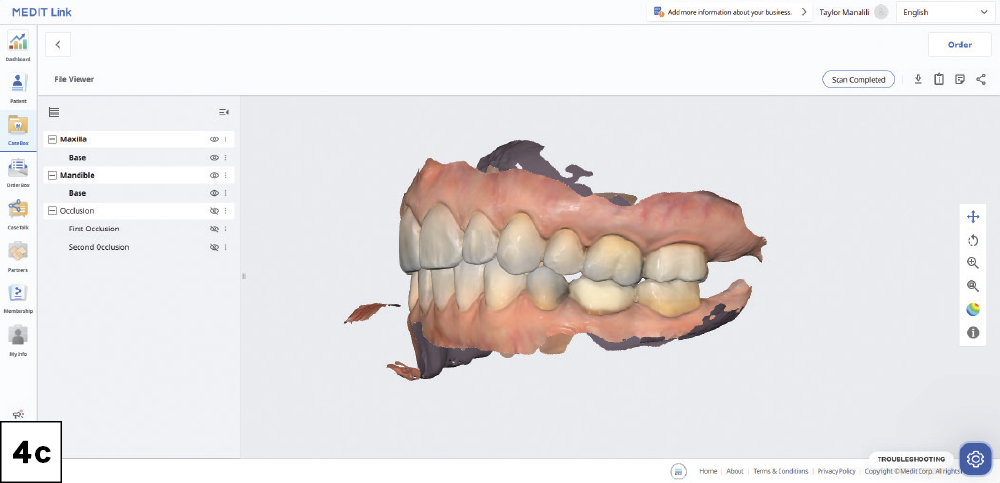
A pretreatment scan of the maxillary and mandibular arches and bite was done prior to delivery of local anesthetic-1
A pretreatment scan of the maxillary and mandibular arches and bite was done prior to delivery of local anesthetic-2
A pretreatment scan of the maxillary and mandibular arches and bite was done prior to delivery of local anesthetic-3

Figures 4a–4c: A pretreatment scan of the maxillary and mandibular arches and bite was done prior to delivery of local anesthetic.

There were some recurrent caries on the mesial of #15 where the margin was open

Figure 5: There were some recurrent caries on the mesial of #15 where the margin was open.

After refinement of the tooth preparation, the margin was exposed using the two-cord technique

Figure 6: After refinement of the tooth preparation, the margin was ex­posed using the two-cord technique. For apical compression, I used Premier’s Knit-Pak #00 as the first cord. For lateral deflection of the tissue, I placed a #2 cord presoaked in Hemodent® hemostatic liquid over the first cord. The patient bit down on Roeko Comprecap compres­sion caps (Coltène/Whaledent GmbH + Co KG; Langenau, Germany) for five minutes for continued compression. The second cord was gently removed to expose the margin, allowing for a high-quality digital scan.

Clinical evaluation of the occlusal reduction ensured there was adequate space for the restorative material

Figure 7: Clinical evaluation of the occlusal reduction ensured there was adequate space for the restorative material. For BruxZir Esthetic NOW Posterior, the minimum required thickness is 0.7 mm. I typical­ly remove around 2 mm for the occlusal and 1 mm for axial reduction. I also made sure that there were at least two or three plane reductions and all transitions were smooth and rounded for ideal milling of the chair­side CAD/CAM crown.

The final scan shows well-exposed margins

Figure 8: The final scan shows well-exposed margins. I used the Medit® i900® scanner, which pairs seamlessly with the fastdesign.io system. With just a click, the scan was sent to the fastdesign.io software.

MarginAI™ software, which is part of the fastdesign.io software suite, detected most of the margin

Figure 9: The MarginAI software, which is part of the fastdesign.io software suite, detected most of the margin, which I rechecked and confirmed.

CrownAI™ generated a design to fit the space

Figure 10: With a click of the mouse, CrownAI generated a design to fit the space. I rechecked my preferred contact parameters.

 use the milling and insertion tool

Figure 11: Before sending the design to the mill, it’s important to use the milling and insertion tool to verify that the restoration has an ade­quate path of insertion. A green line indicates it is okay to proceed, while a red line signals an issue. I completed the design in under five minutes and sent it to the fastmill.io In-Office Mill for fabrication.

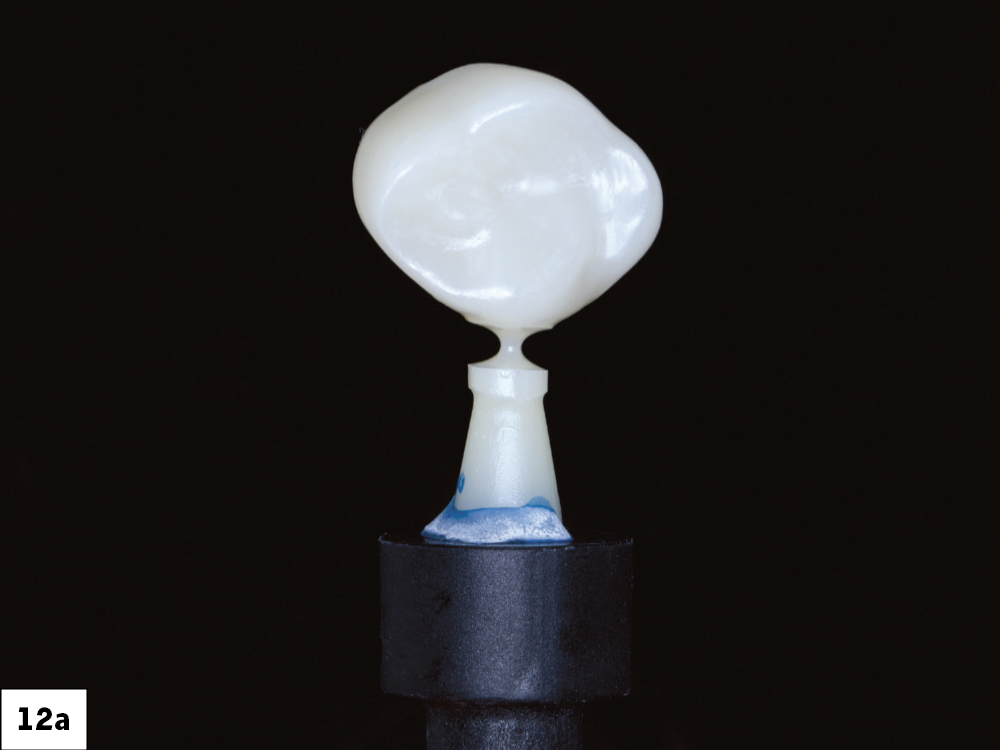
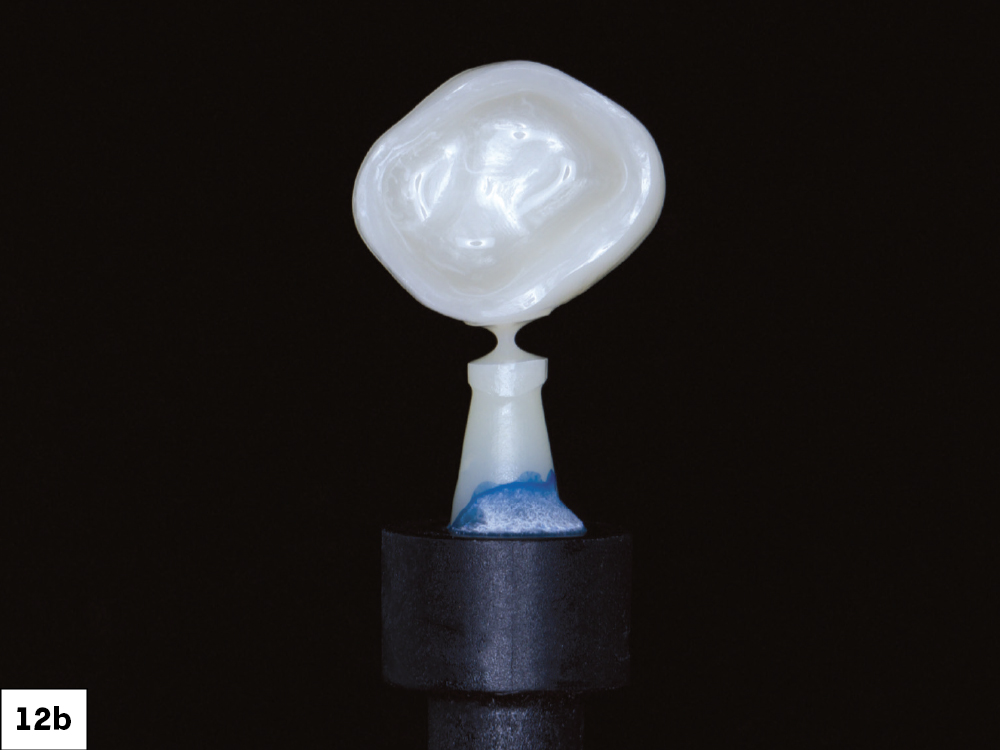
The fastmill.io milled a beautiful and translucent BruxZir Esthetic NOW Posterior crown-2
The fastmill.io milled a beautiful and translucent BruxZir Esthetic NOW Posterior crown-1

Figures 12a, 12b: The fastmill.io milled a beautiful and translucent BruxZir Esthetic NOW Posterior crown in approximately 40 minutes.

Before final seating

Figure 13: Before final seating, I like to use try-in paste and take a bite­wing radiograph to verify the fit.

The crown was a 20-year-old Captek™ PFG high-noble bilayered restoration

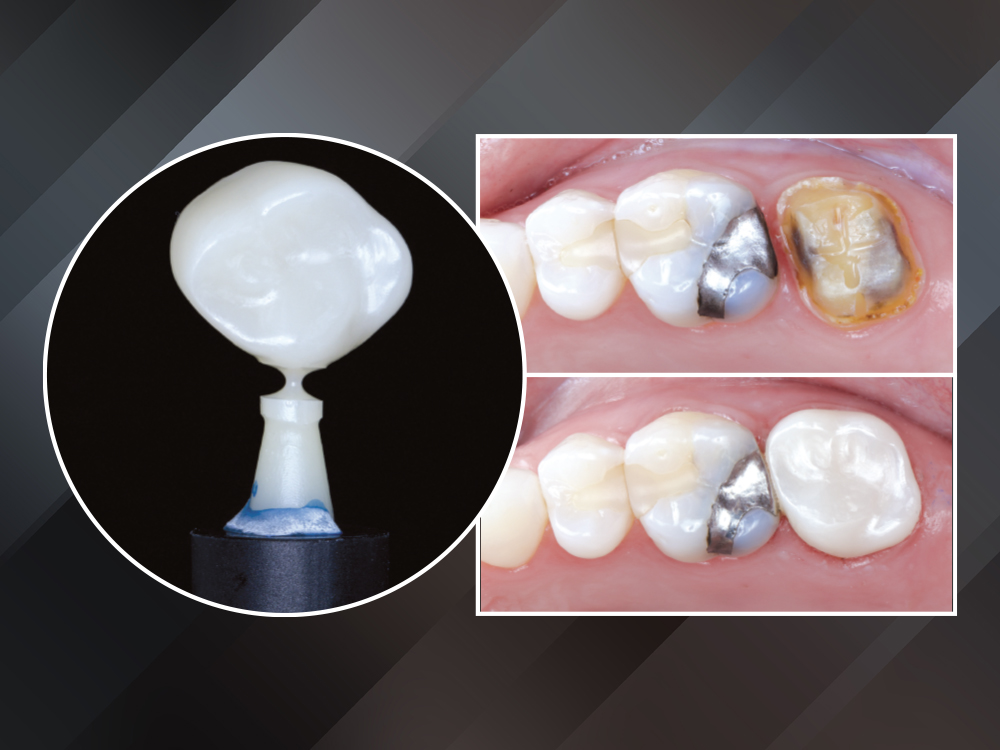
Figure 14: This image shows the final delivery of the BruxZir Esthetic NOW Posterior crown #15. I used BruxZirDual Cure Resin Cement (Glidewell Direct; Irvine, Calif.), which is a self-adhesive translucent white shade, ideal for zirconia crowns.

CONCLUSION

I enjoy using the glidewell.io system because I can provide a high-quality, same-day restoration. I’m in control of the contacts, shape, color and fit. The crown fits with minimal adjustments needed.

This was Nikole’s first experience with same-day dentistry, and she summed it up best: “I’m a fan! The new crown fit perfectly, with no return visit, no second round of anesthesia and barely any adjustments. The contacts are spot on, and flossing feels smooth.”

All third-party trademarks are property of their respective owners.