A Long-Delayed Full-Mouth Restoration (1 CEU)
April 29, 2024
Roger V. Pham, DDS image
Roger Pham, DDS
A Long-Delayed Full-Mouth Restoration

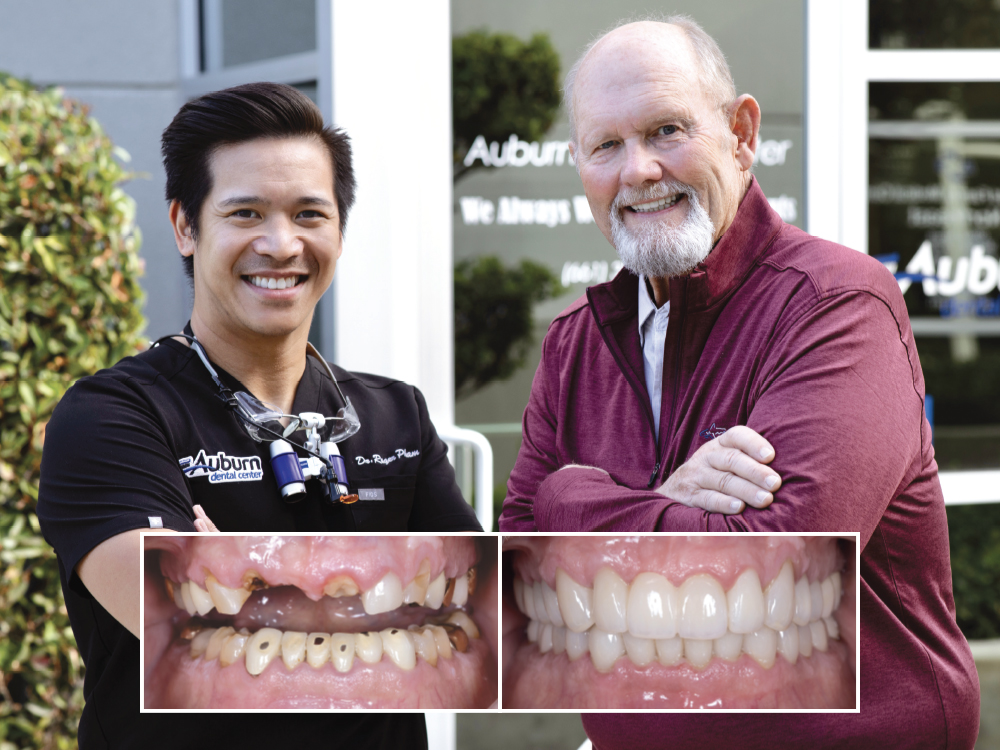
Tim is a recently retired schoolteacher who came to my practice looking for help. For decades, he had focused his attention on his students, ensuring that they had the scholastic tools for success. But, in his retirement, Tim realized he had been putting off addressing his worsening oral health. When Tim’s anterior bridge came off, he realized additional patchwork would not solve his dental concerns.

I discussed with Tim the possibility of a comprehensive and definitive full-mouth restorative solution. With more time and improved financial resources in retirement, he agreed.

CASE REPORT

Figure 1

Figure 1: A panoramic radiograph showed that Tim had a long history of dental treatment — with varying levels of success. The radiograph also showed occlusal problems including minimized joint spaces and a flattened articular eminence as a result of clenching and grinding.

Figure 2

Figure 2: Pretreatment, Tim’s muscles were tight and pulling the mandible asymmetrically, resulting in a lower jaw deviation. I addressed this by having him wear a deprogramming appliance to keep the anterior teeth apart and relax the muscles of mastication. This allowed me to proceed with the restoration with the bite in a more functional and less destructive position. After one month his muscles were significantly more relaxed, though a slight deviation remained.

Figure 3a
Figure 3b
Figure 3c

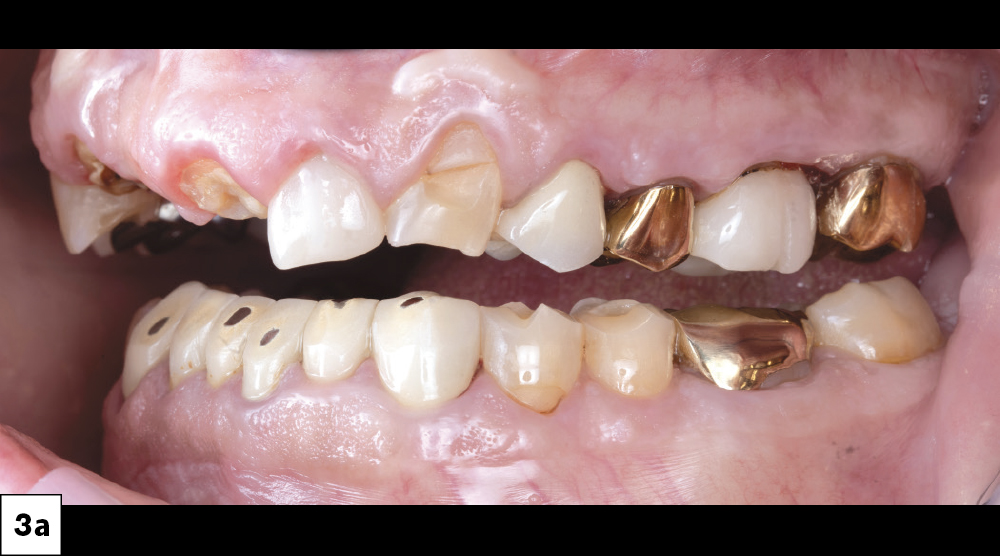
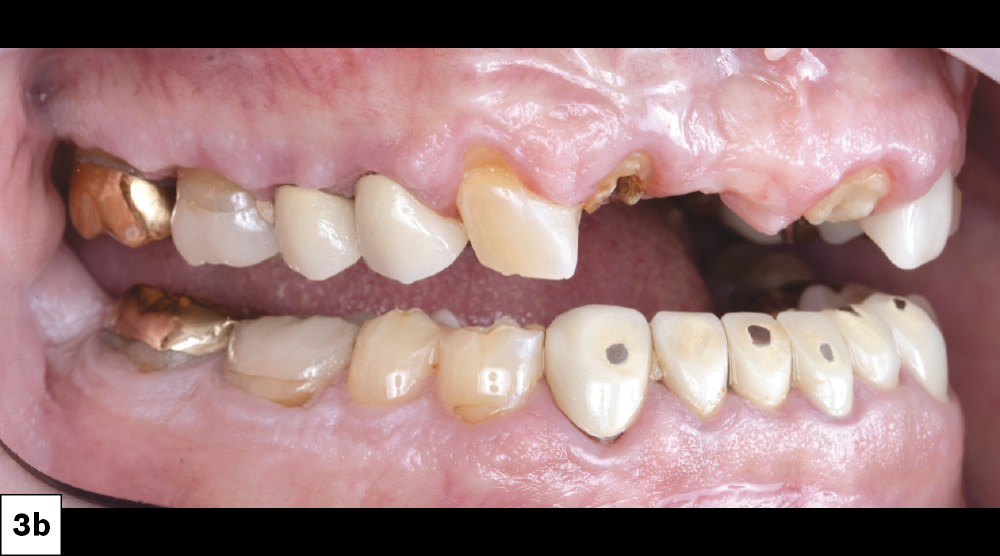
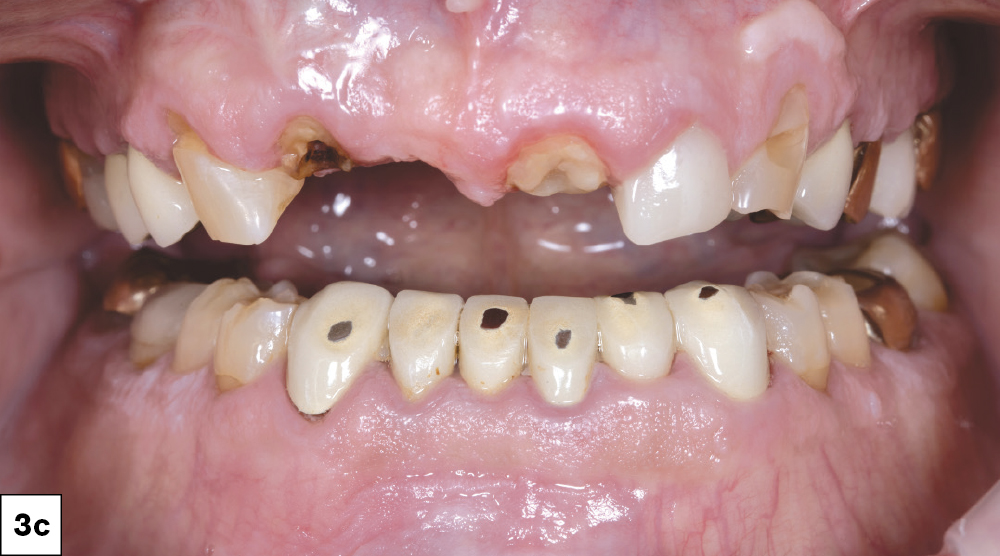
Figures 3a–3c: The patient’s bruxism over the years led to significant damage of his anterior PFM crowns. The crowns had been abraded by the opposing dentition, exposing the metal substructures.

Figure 4a
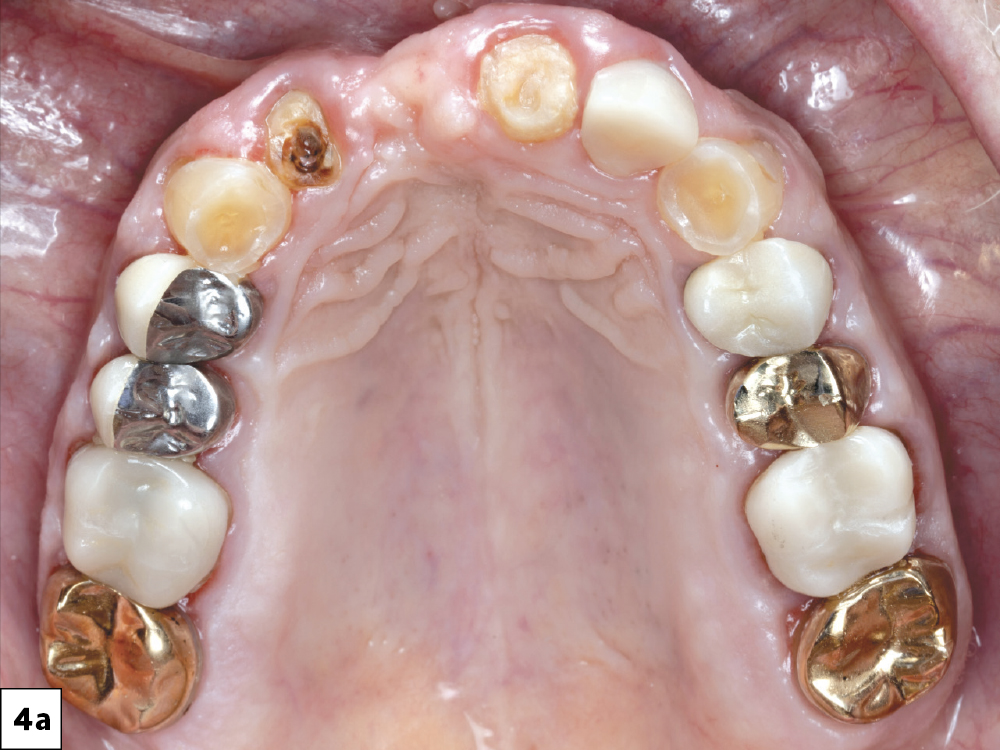
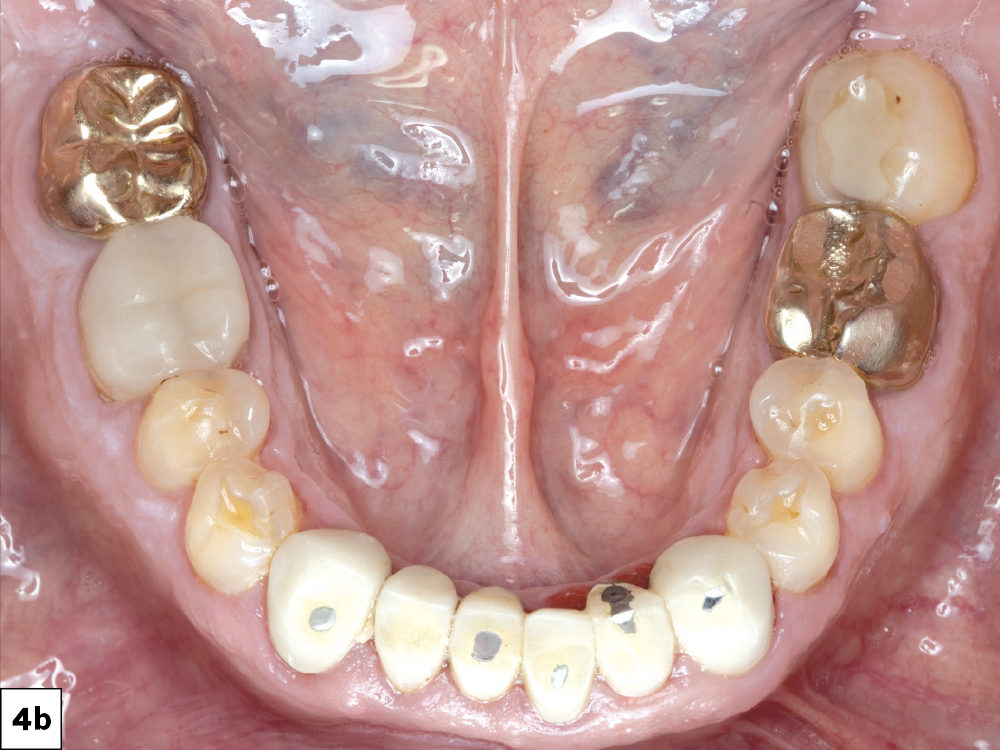
Figure 4b

Figures 4a, 4b: Tim’s upper and lower arches displayed a variety of restorations. The patient and I concluded that a definitive, full-mouth restoration would provide a more satisfactory solution.

Figure 5

Figure 5: To show the patient what his final restoration could look like, Glidewell created this Diagnostic Wax-Up model, featuring the exact proportions and contours of the final restoration. Tim was thrilled and agreed to move forward.

Figure 6a
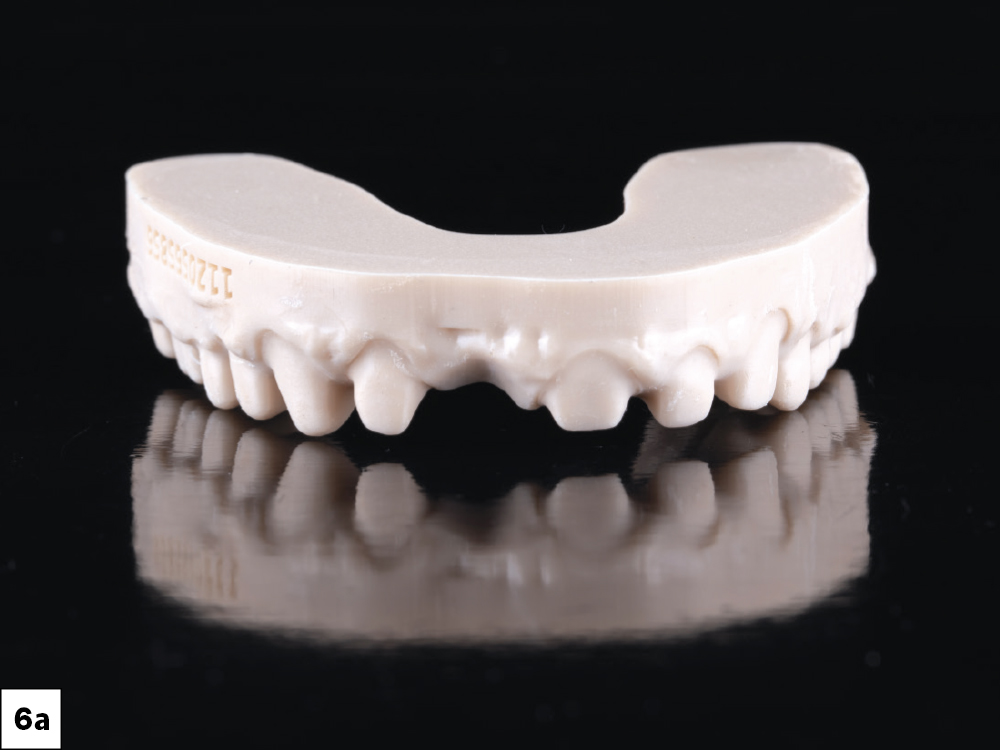
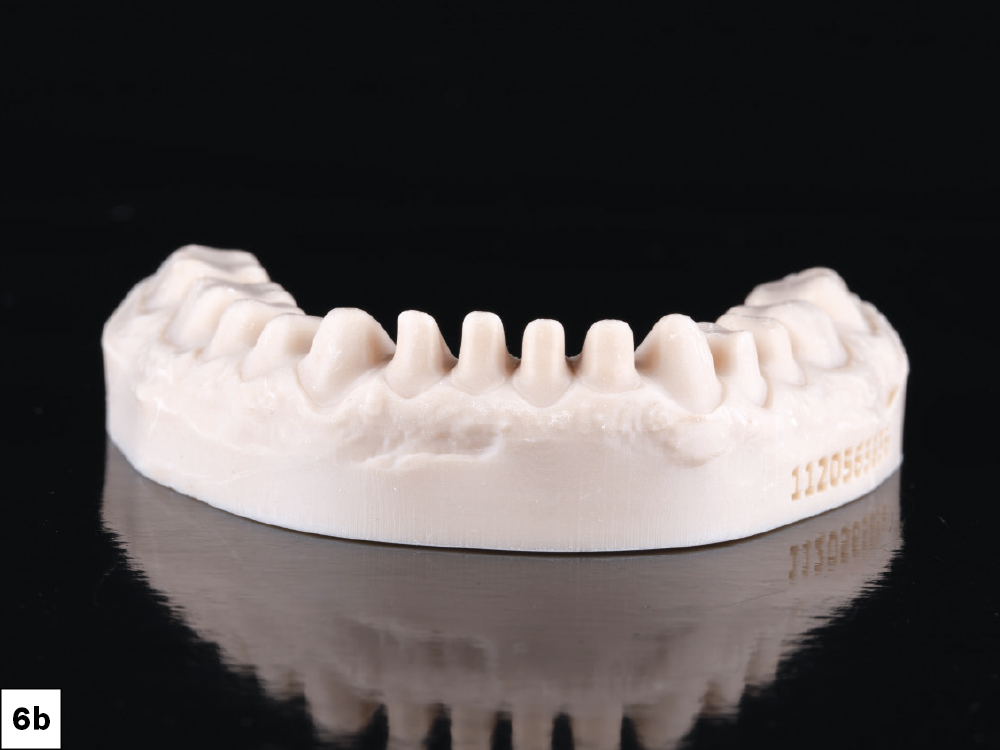
Figure 6b

Figures 6a, 6b: As part of the diagnostic wax-up service, the lab provided a tooth preparation model showing the ideal amount of reduction required. Using this model, the lab also created a thermoformed template that served as a chairside preparation guide.

Figure 7

Figure 7: Many of Tim’s natural teeth were already too short due to his habitual bruxing and his preexisting restorations, so I used the reduction guides as a buildup template to achieve ideal preparations. These tooth preparation guides also helped eliminate unnecessary tooth reduction while assuring that there was space for the restorative material as well as adequate height for retention.

Figure 8a
Figure 8b

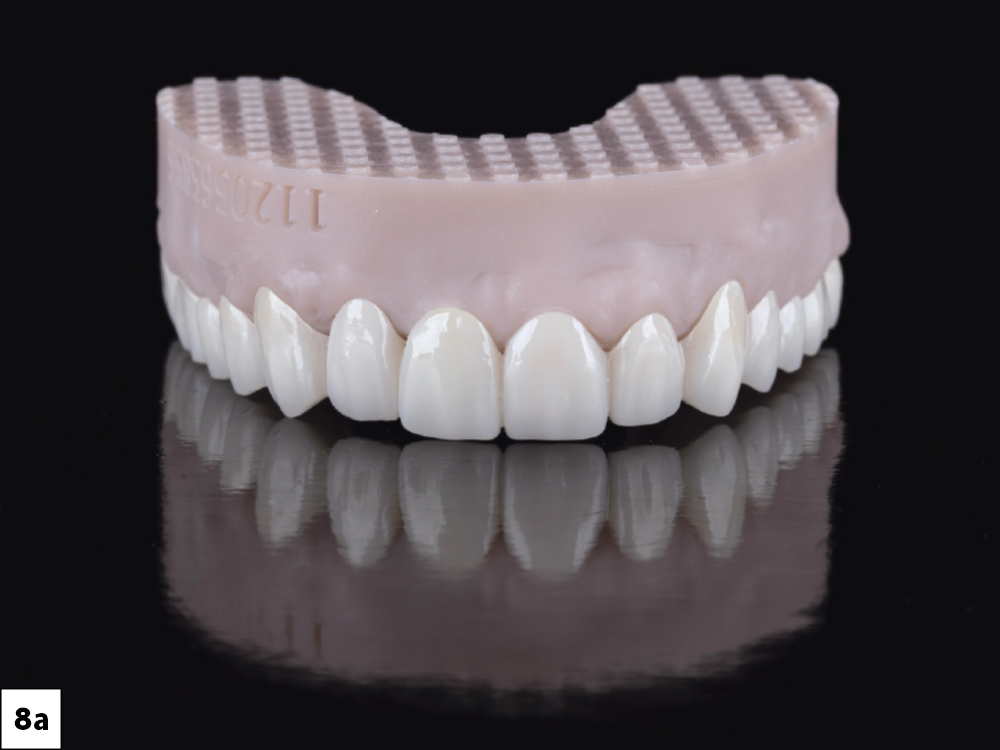
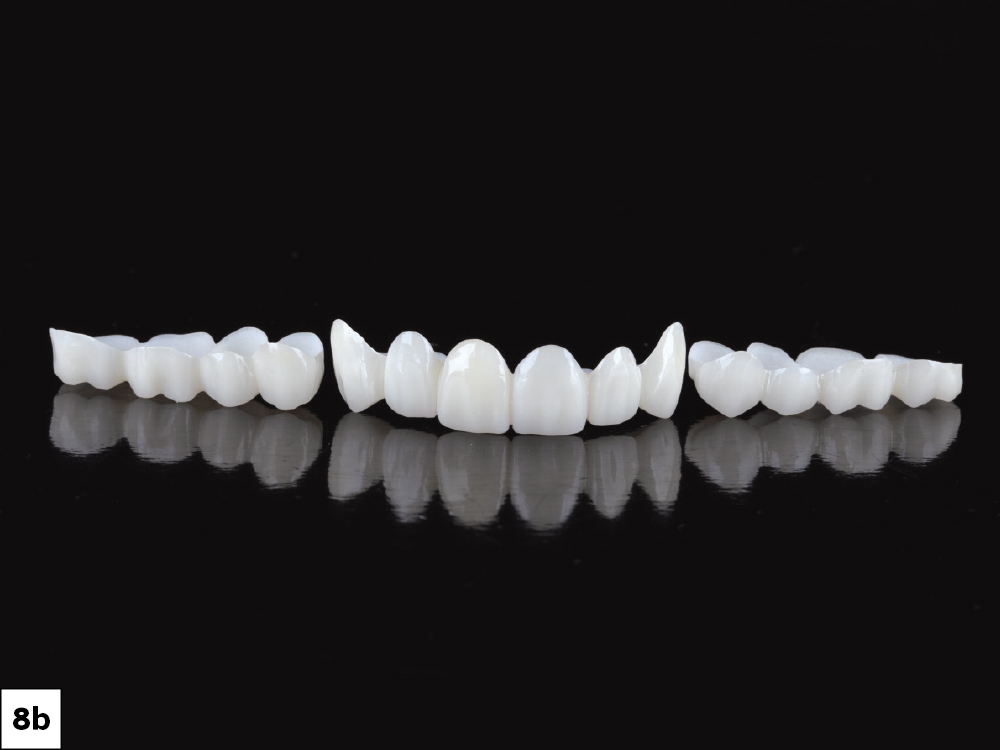
Figures 8a, 8b: After Tim approved the diagnostic wax-up, the lab moved forward with the creation of the BioTemps® Provisionals (Glidewell; Newport Beach, Calif.).

Figure 9

Figure 9: I began tooth preparation by removing all the crowns, cement and old buildups. Using the tooth preparation guides, I created the new buildups and completed the reduction.

Figure 10a
Figure 10b

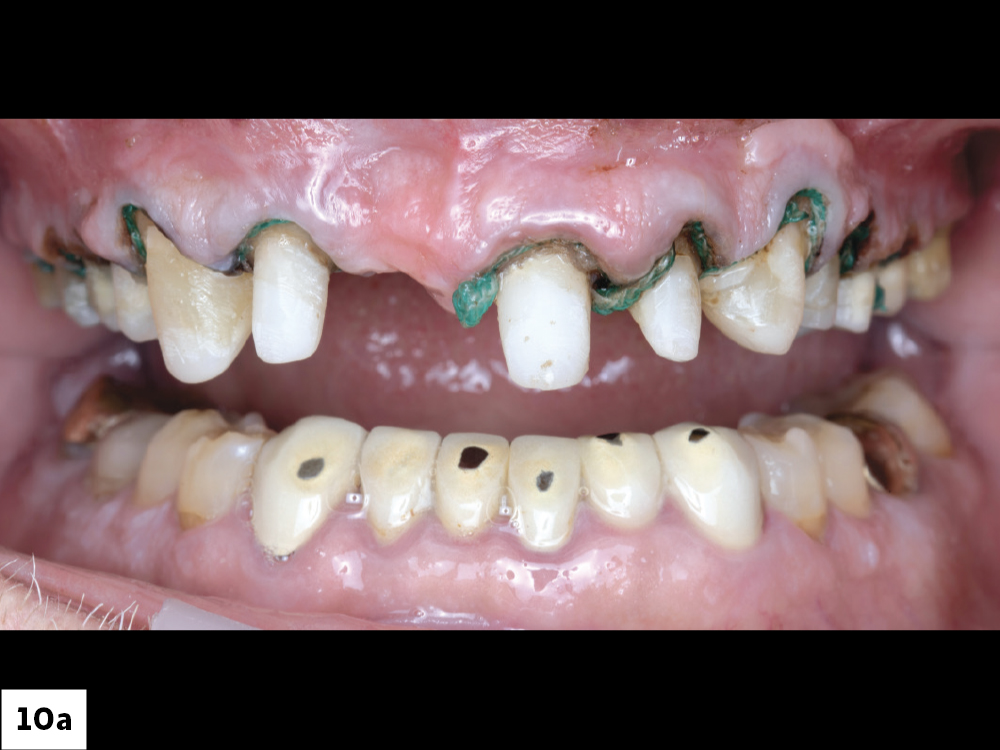
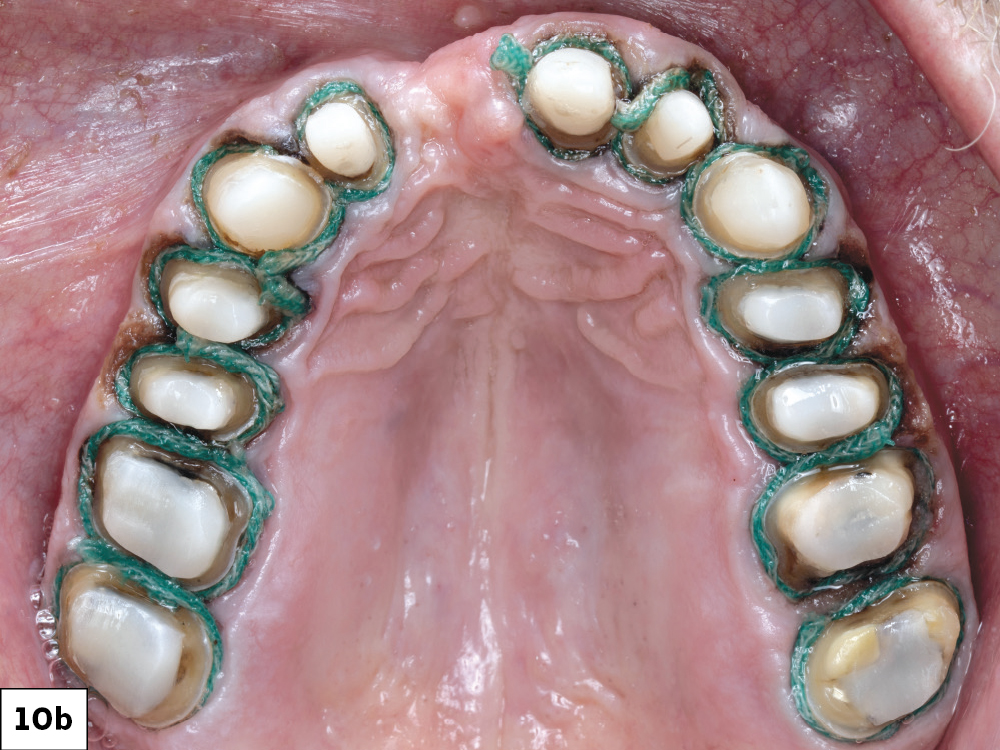
Figures 10a, 10b: After creating distinct and refined margins, I packed gingival retraction cord sizes 00 and 01 so that the margins could be clearly accessed in the digital impression procedure.

Figure 11

Figure 11: I prepared the lower arch using the same techniques. Shoulder preparations were made on each tooth. Most of the patient’s teeth featured preexisting shoulder preparations under previous crowns. For these teeth, I refined the margins down to the papilla to avoid unnecessarily removing more tooth structure. I also made chamfer preparations on the few teeth that didn’t already have crowns and performed a laser gingivectomy to reduce soft tissue impingement of the margins and level out horizontal discrepancies in the level of the gingival margins.

Figure 12a
Figure 12b

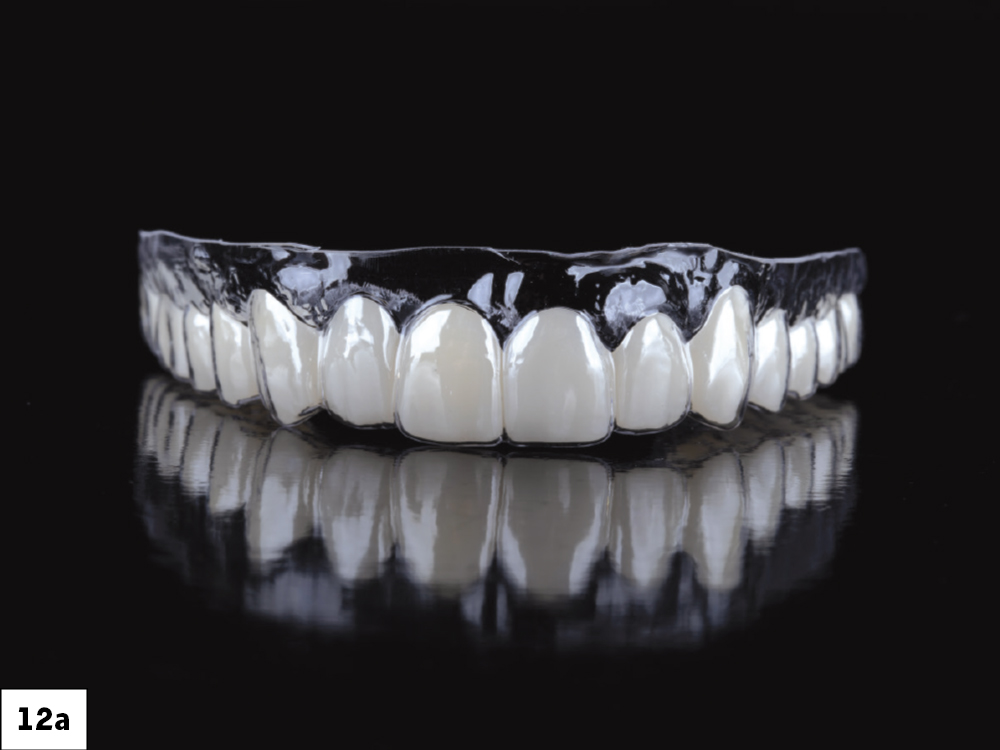
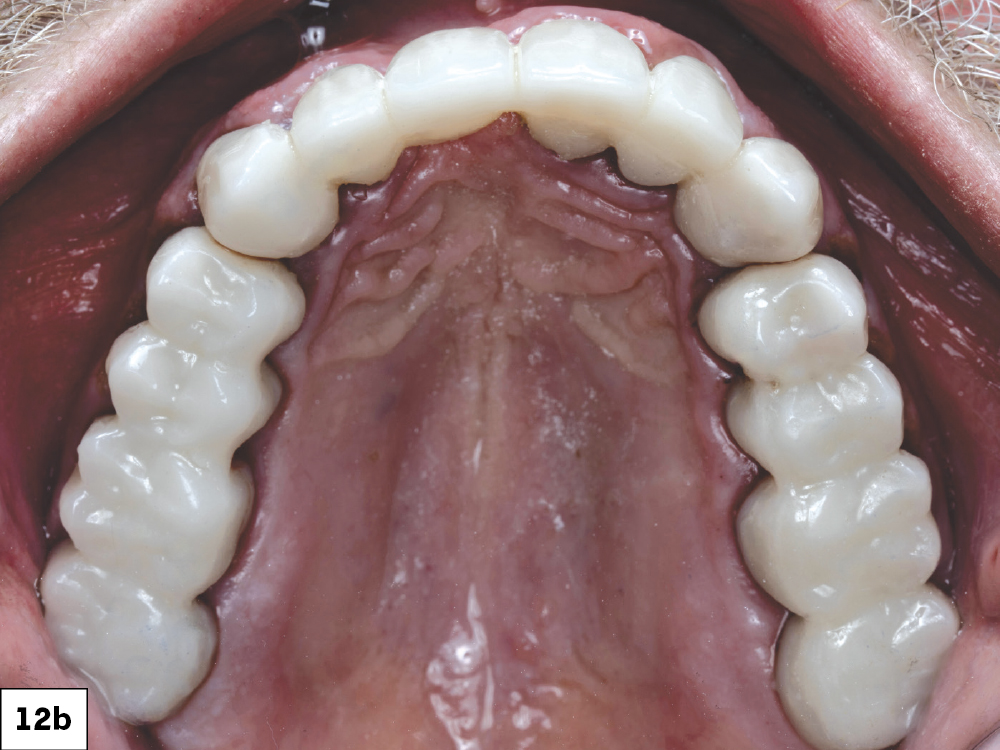
Figures 12a, 12b: This thermoformed guide was supplied alongside the BioTemps Provisionals to use as a seating guide.

Figure 13a
Figure 13b
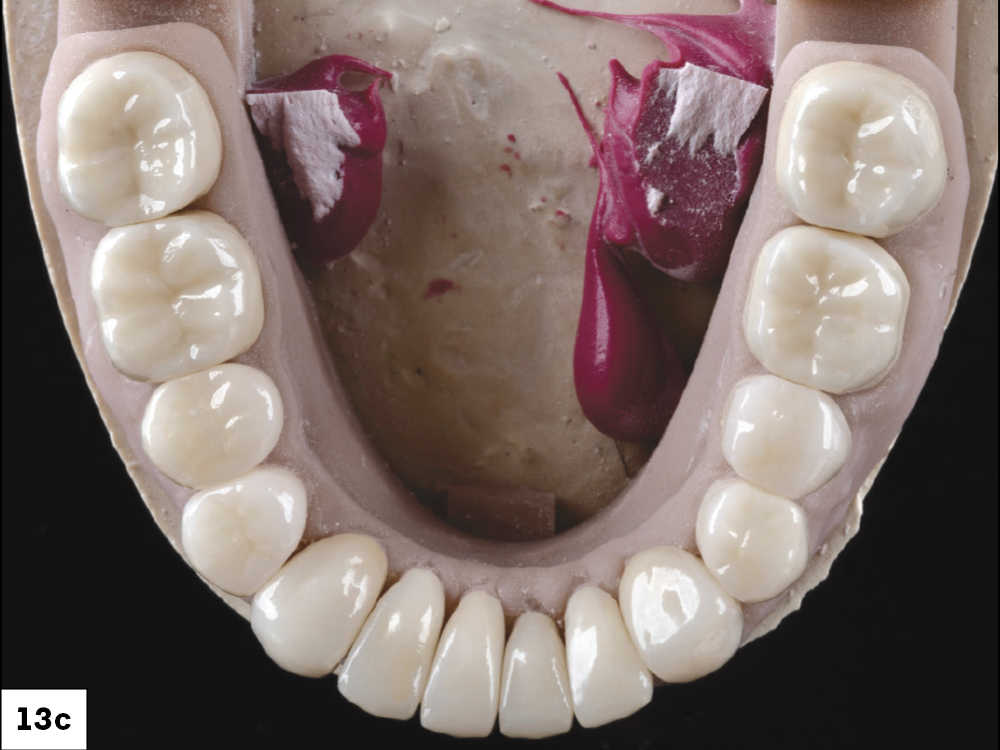
Figure 13c

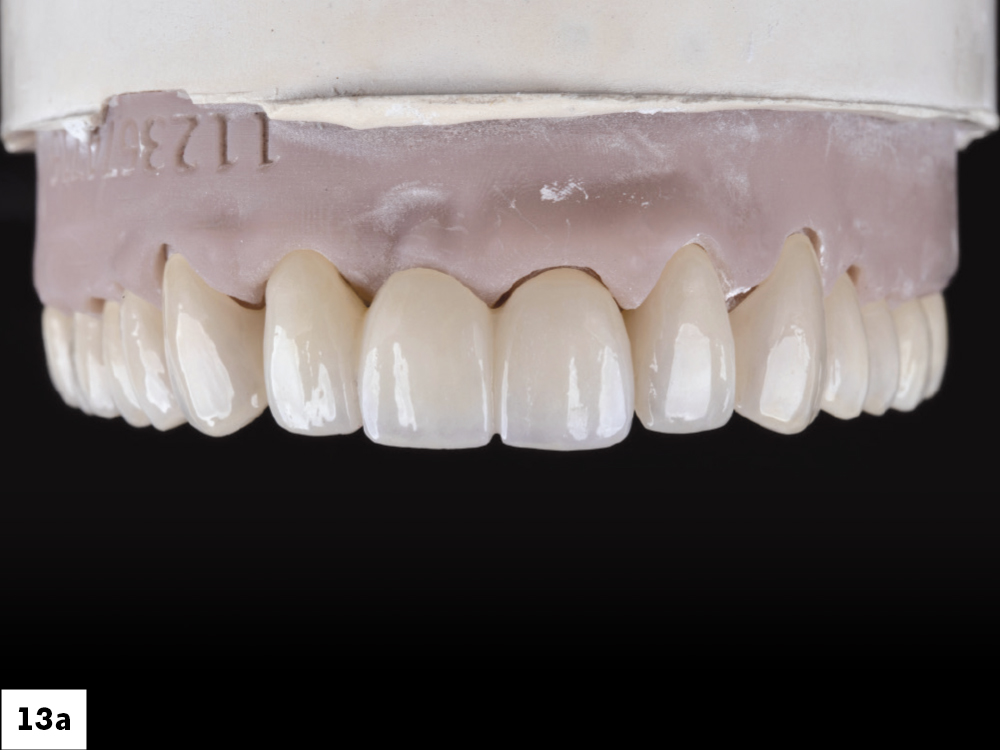
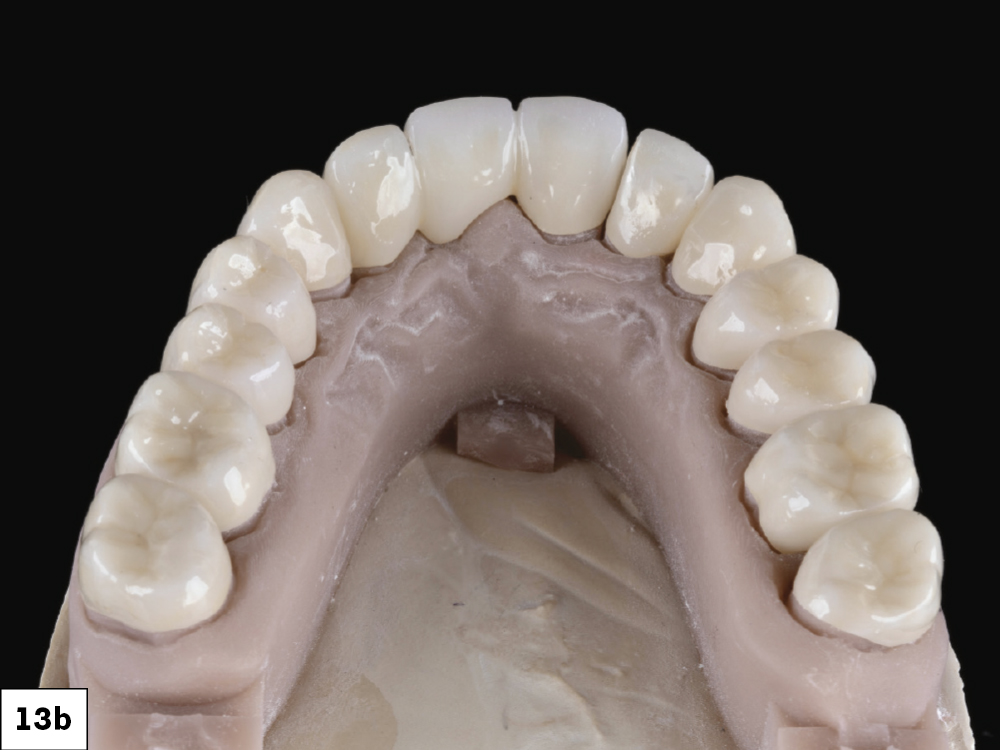
Figures 13a–13c: These images show the final BruxZir® Esthetic Zirconia restorations ready to be seated.

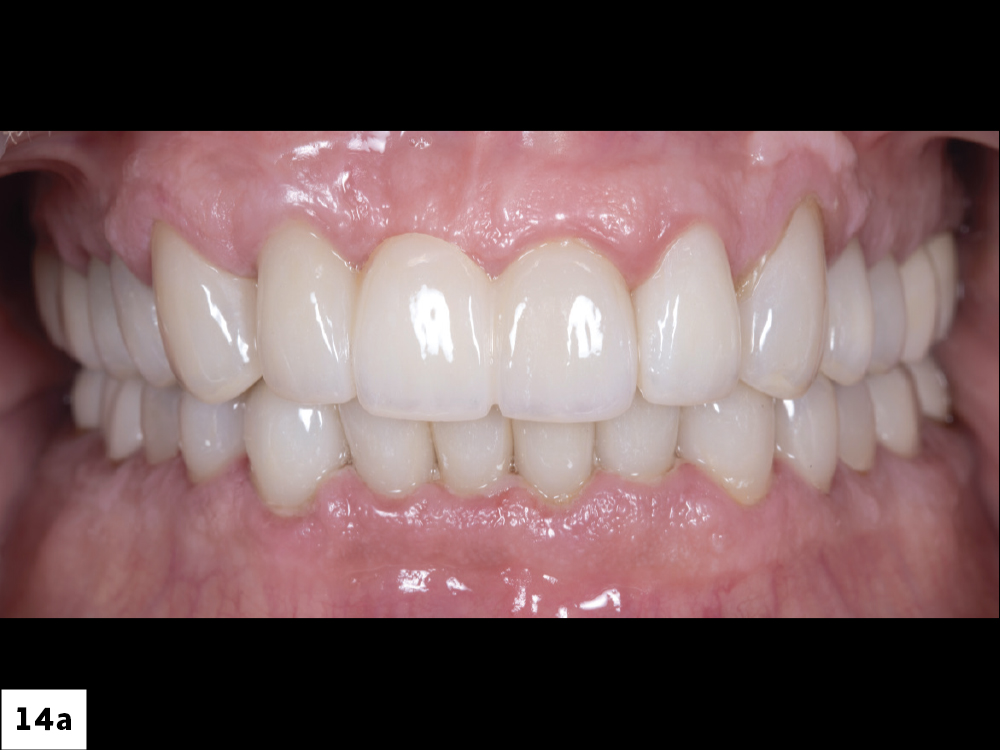
Figure 14a
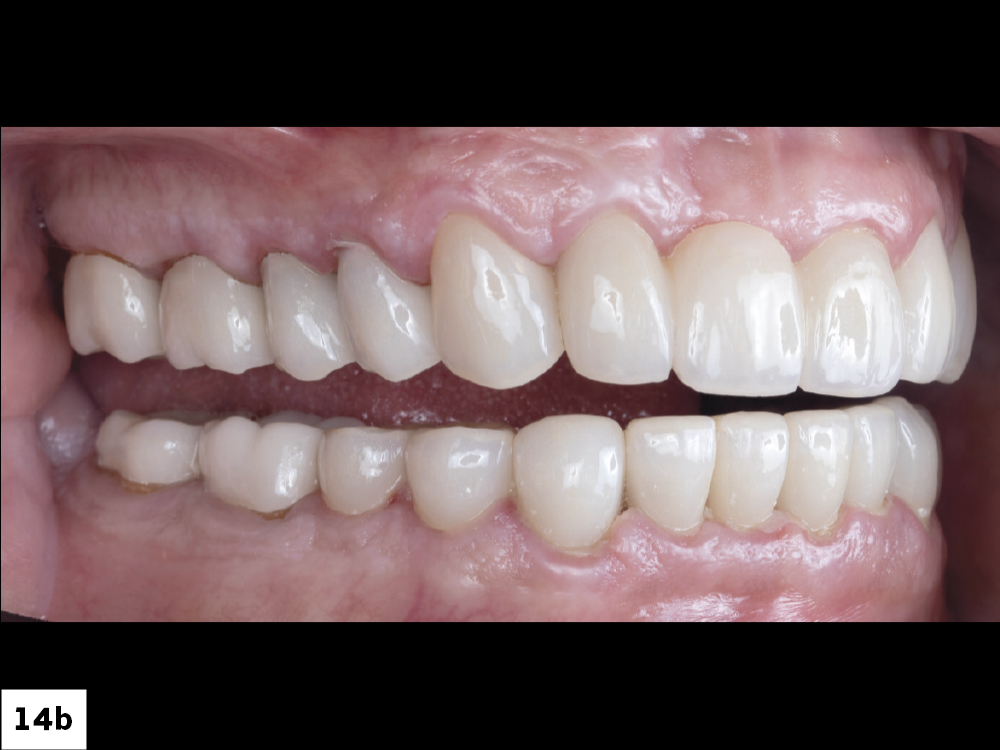
Figure 14b
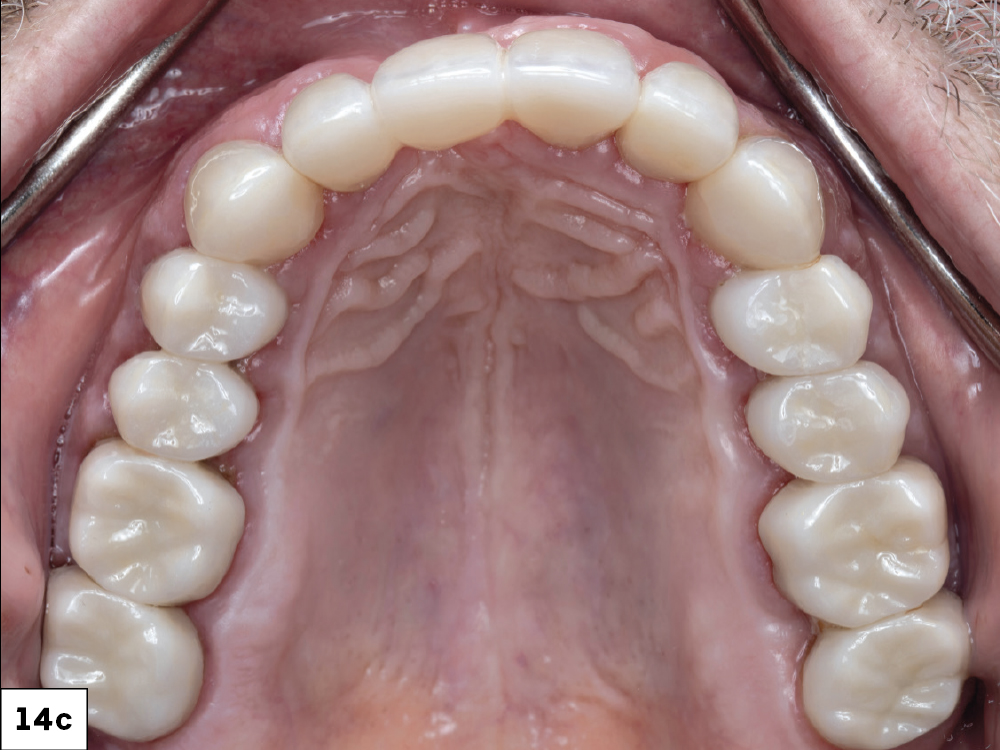
Figure 14c
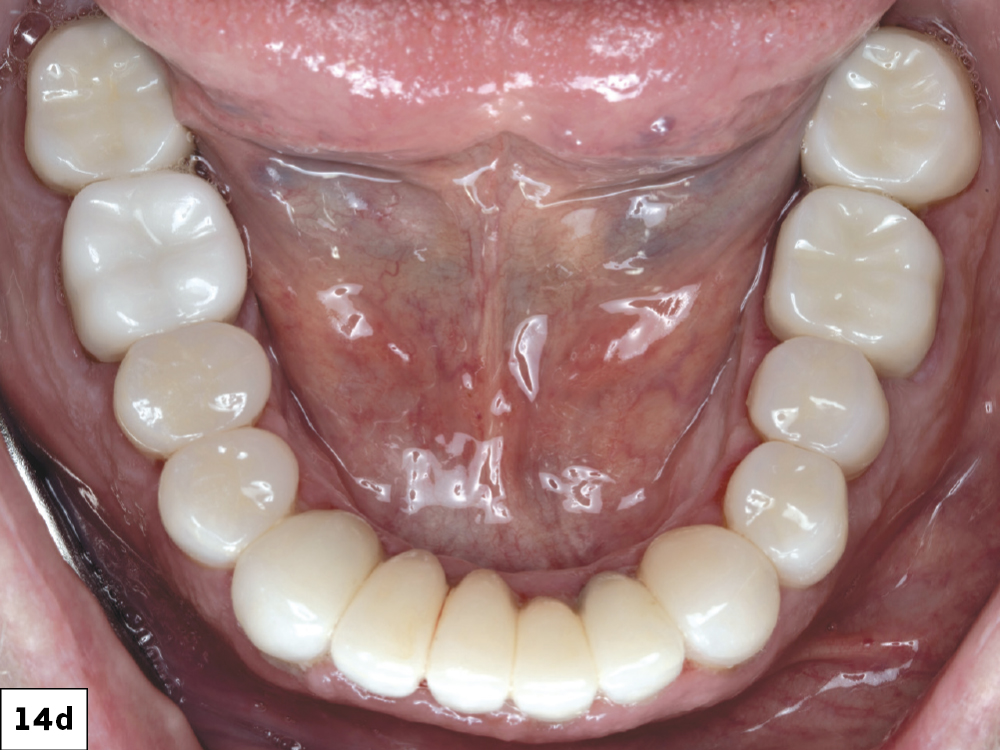
Figure 14d

Figures 14a–14d: A closer look at the patient’s final restorations show how well they suit his smile.

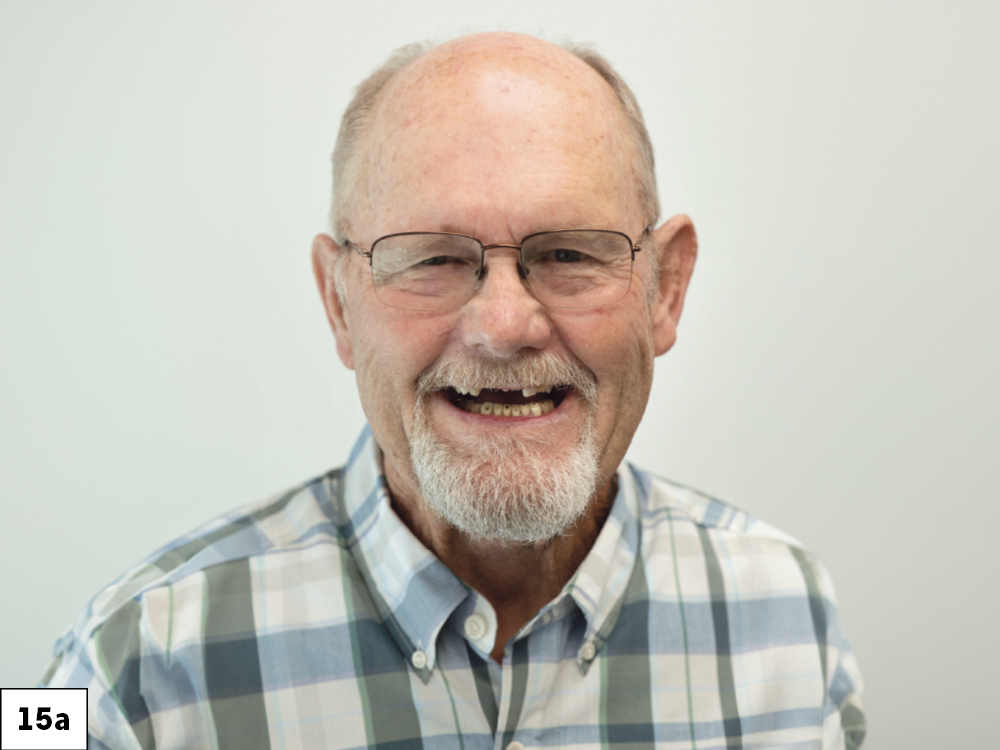
Figure 15a
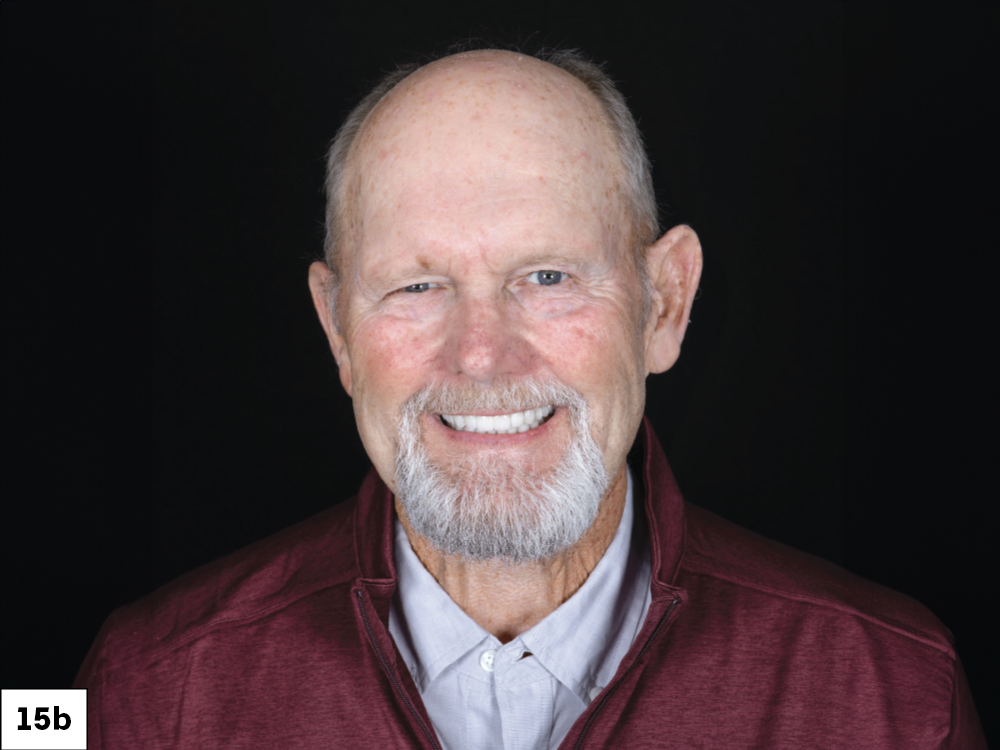
Figure 15b
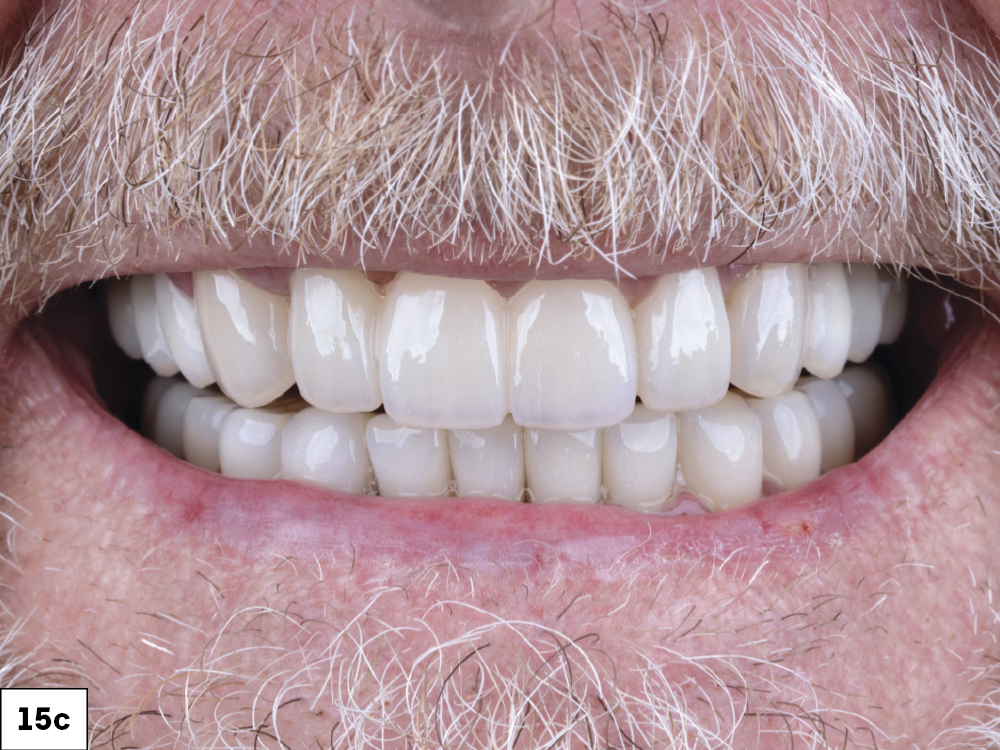
Figure 15c

Figures 15a–15c: Tim’s before-and-after photos showcase his stunning transformation.

CONCLUSION

Tim was extremely pleased with the functional and esthetic results achieved. For a variety of reasons, patients often put off finding a definitive solution for their dental challenges. The valuable lesson here is that dental patchwork has limitations, and that by discussing treatment options with your patients you will find that they will often approach you when they’re ready.