Using Technology to Improve Patient Communication and Case Acceptance
April 29, 2024
Rebekah Browder, DDS image
Rebekah Browder, DDS
Using Technology to Improve Patient Communication and Case Acceptance

Recently, when a patient came in for a “filling” that ended up requiring more extensive treatment, I was reminded of why digital technology is an invaluable tool for improving communication. By explaining my decisions at every step, I was able to give this patient an objective view of my treatment plan and guide her toward making an investment in her oral health.

CASE REPORT

Figure 1a
Figure 1b

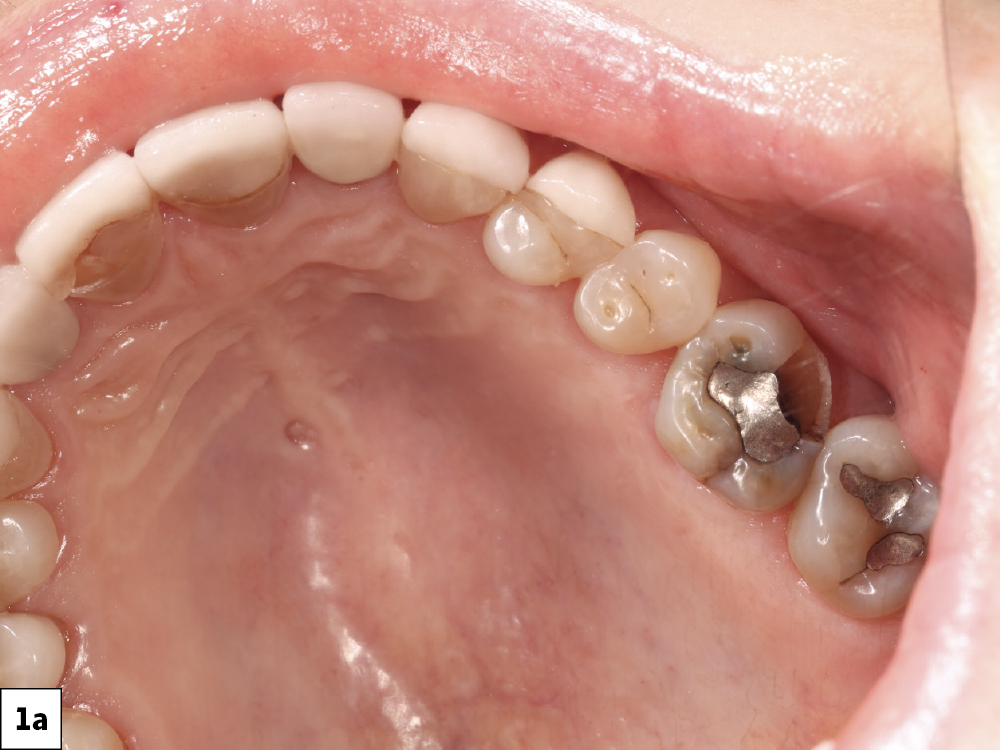
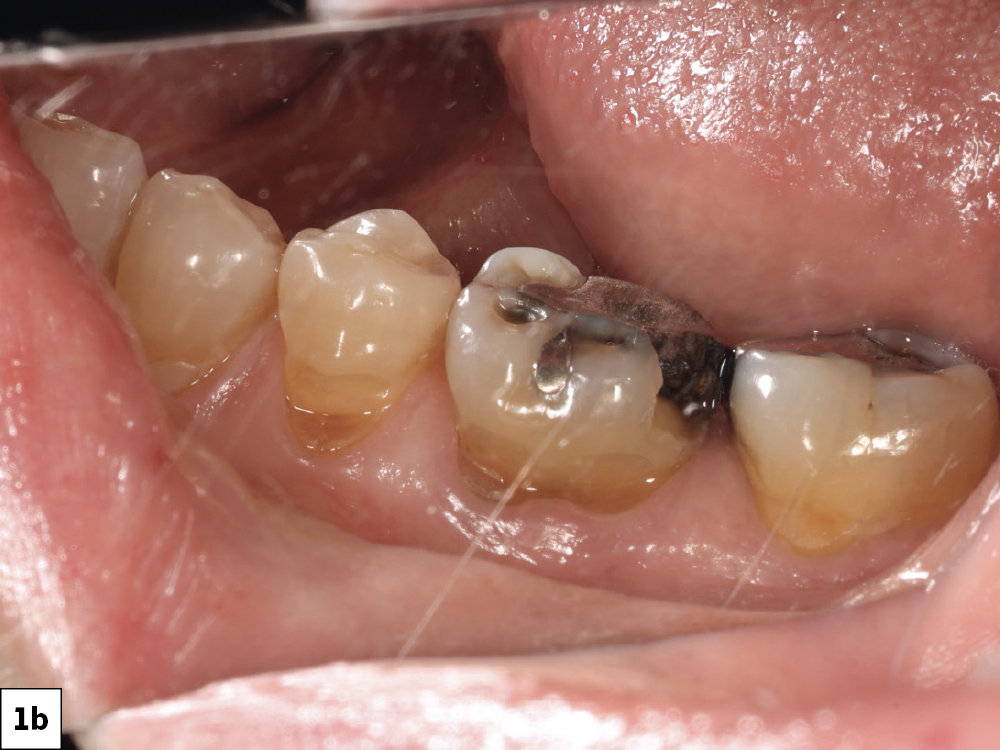
Figures 1a, 1b: The patient presented with amalgam restorations on several teeth, and cuspal fractures on teeth #14 & #19. At first glance, this seemed like a straightforward indication for composite fillings. But after capturing these images, the case appeared to be more demanding. I reviewed them with the patient, drawing attention to the wear facets on the mesiobuccal cusp, fracture on the lingual side, minor fractures toward the mesial, staining underneath the amalgam and broken buccal cusp. These images helped the patient see her teeth from a clinical perspective and understand why her case needed more treatment than she had anticipated.

Figure 2

Figure 2: I noted discoloration on the distal of tooth #19 and used Overjet (Overjet Inc.; Claymont, Del.), a software that analyzes X-rays for areas of concern, to take a closer look. The program also detected recurrent decay on teeth #14 & #19. This is a great tool to show patients objective results in an interactive, visual way that supports treatment recommendations with quantifiable data. Black-and-white X-rays can be challenging for the patient to interpret, but the color-coded interface of Overjet makes the results easier to understand. I used this chart to explain why I wanted to remove the existing decay and deliver onlays to minimize the risk of needing more expensive treatment in the future.

Figure 3a
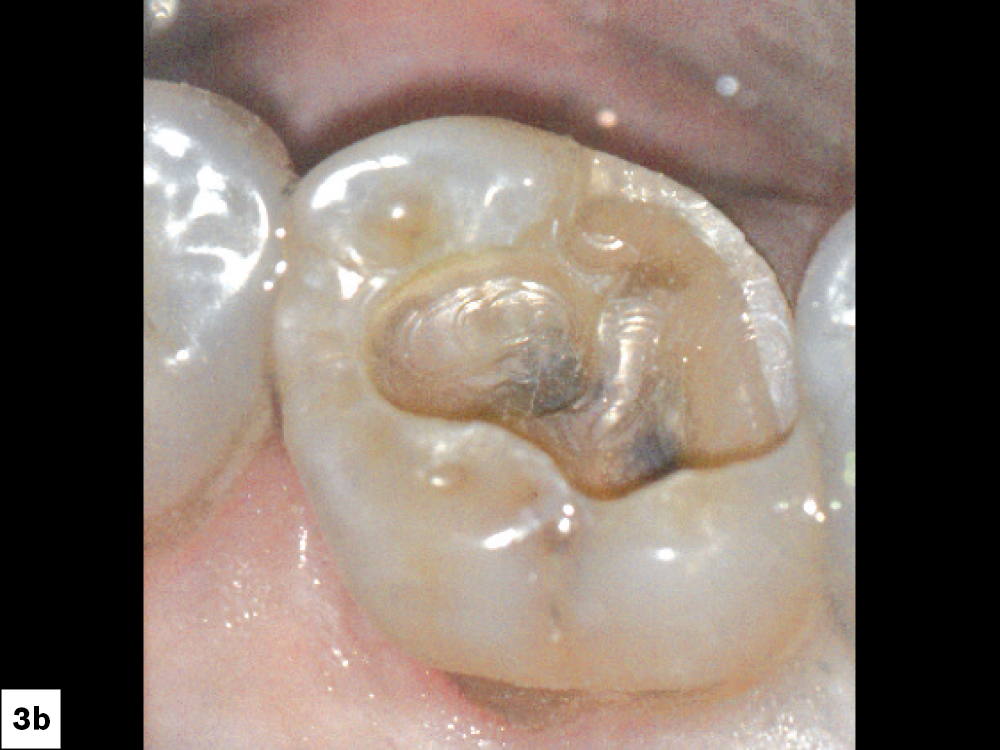
Figure 3b

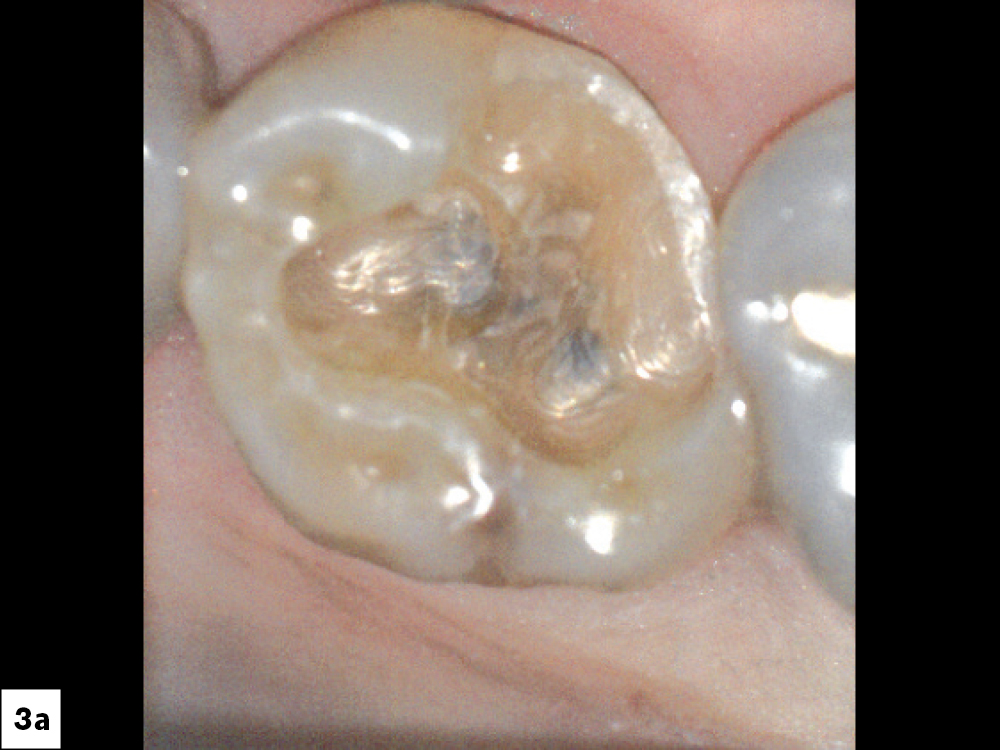
Figures 3a, 3b: On tooth #14, after removing the restoration, the mesiolingual cusp showed a horizontal fracture.

Figure 4

Figure 4: The caries detector solution highlighted a horizontal fracture on the mesiobuccal cusp and a vertical fracture on the lingual. I removed the cusp and dentin of the peripheral zone 3 mm from the dentinoenamel junction. I showed these images from the scanner to the patient to clarify the more complex restorative need.

Figure 5a
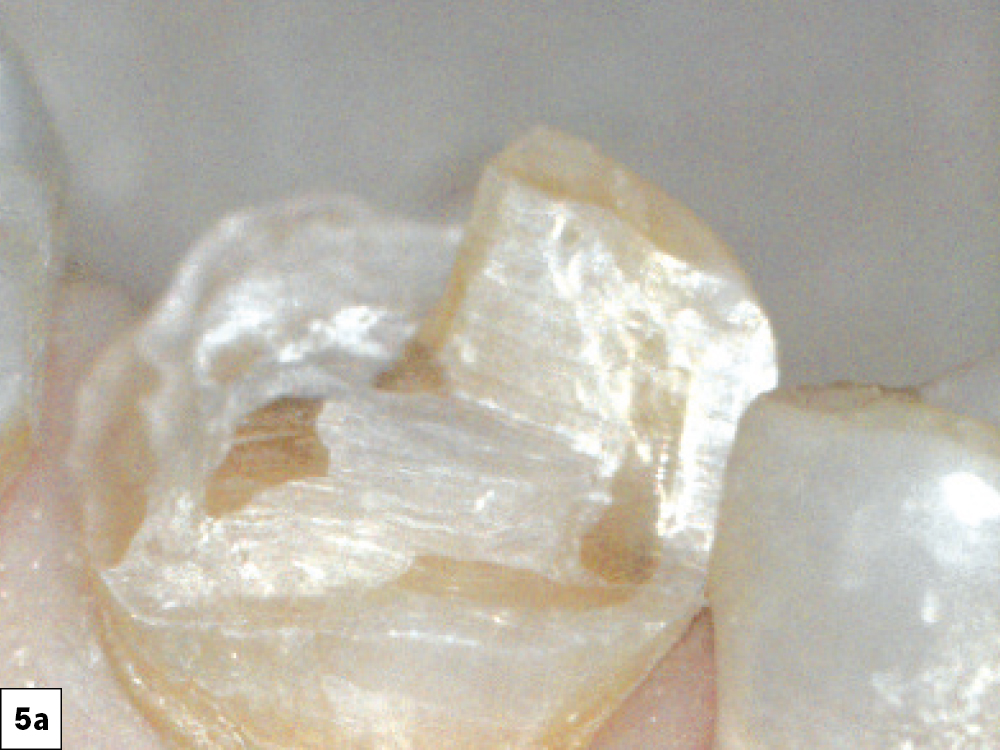
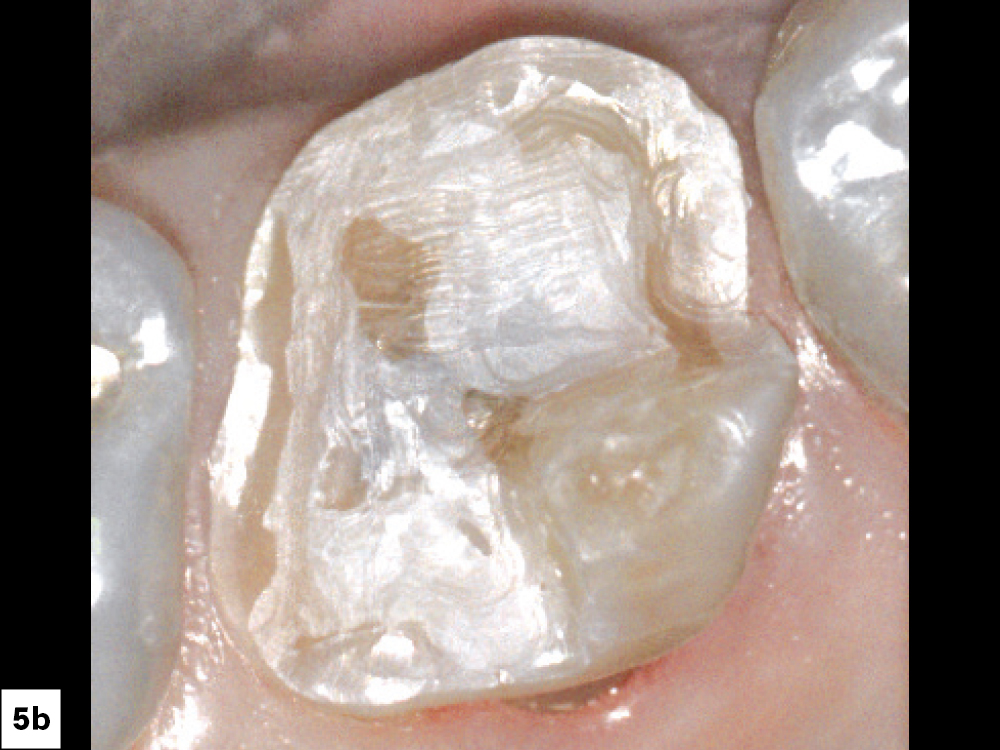
Figure 5b

Figures 5a, 5b: To prepare the tooth, I kept the working palatal cusp, as it was greater than 3 mm wide. I also explained to the patient that I would preserve as much healthy tooth structure as possible. Although patients may not always understand our clinical process, talking them through it allows them a more participatory role and more confidence in the restorative decisions.

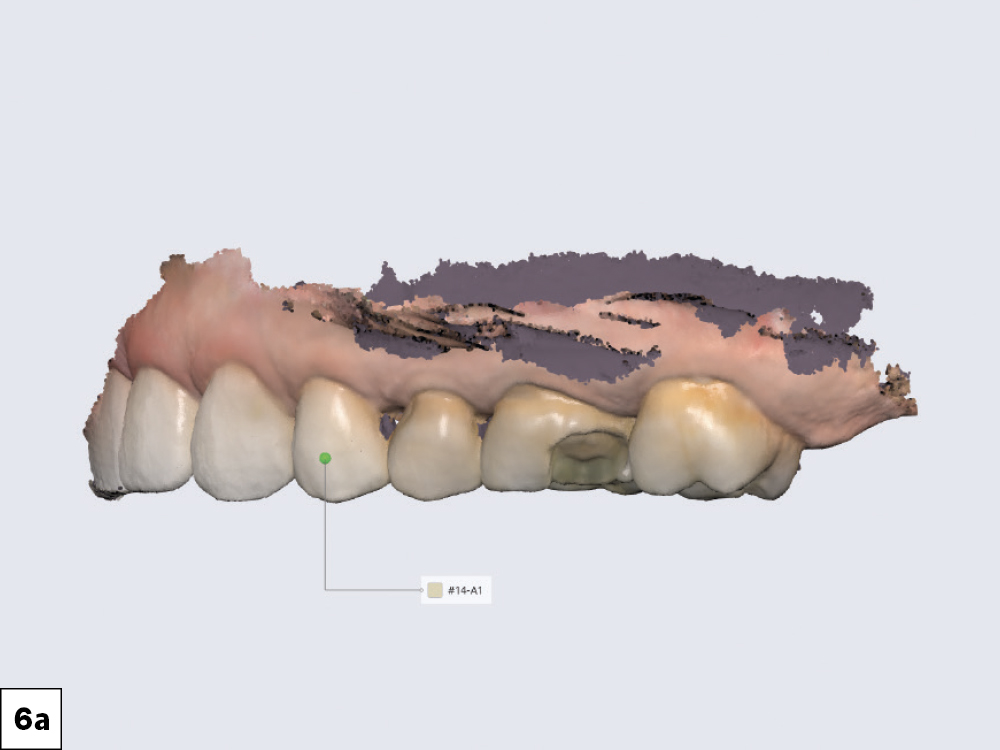
Figure 6a
Figure 6b

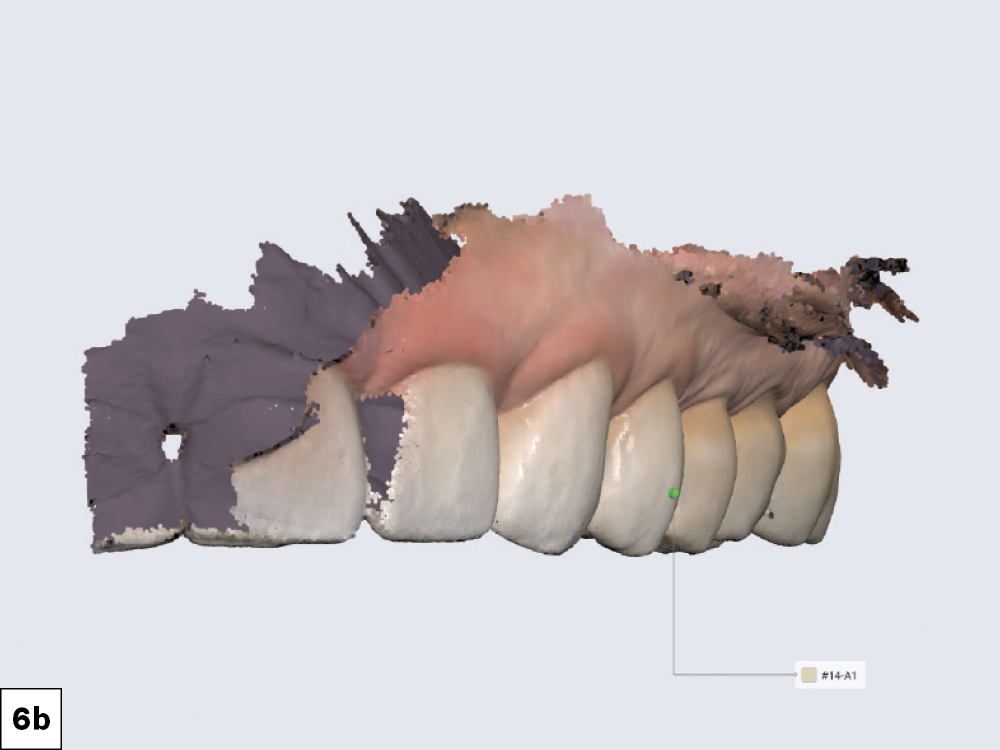
Figures 6a, 6b: The fastdesign.io™ Software and Design Station is a great tool for explaining the digital aspects of our treatment planning. We also reviewed the shade guide together. This step helped the patient feel more involved in the procedure.

Figure 7a
Figure 7b
Figure 7c

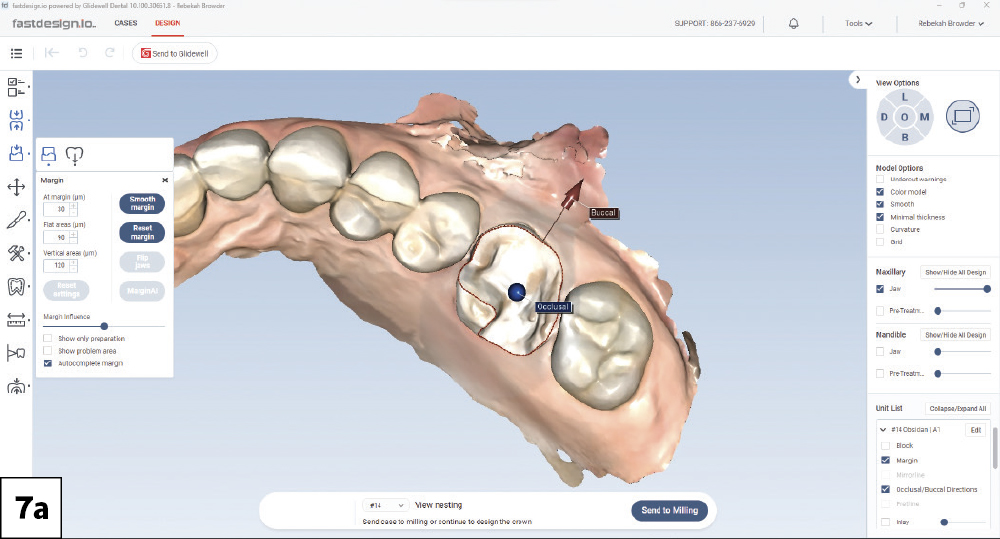
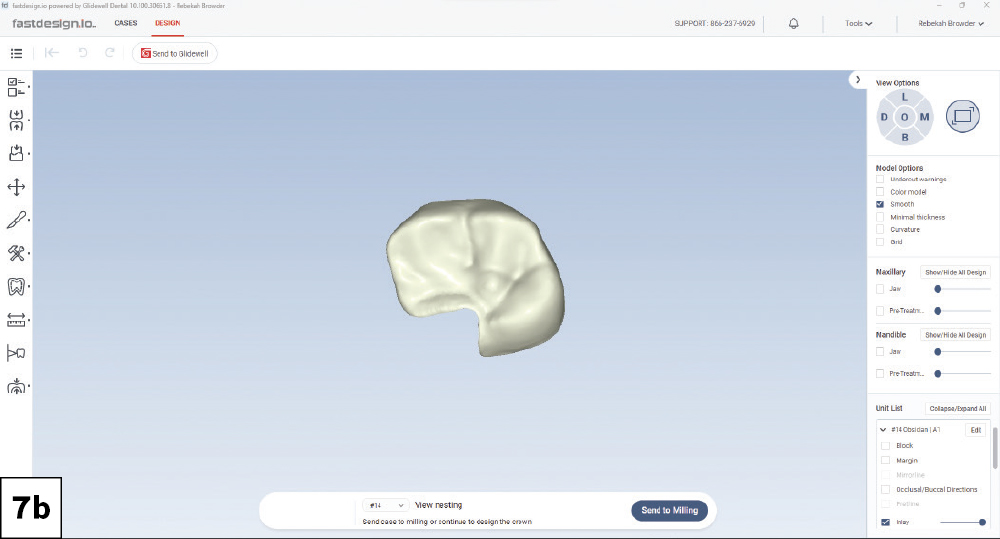
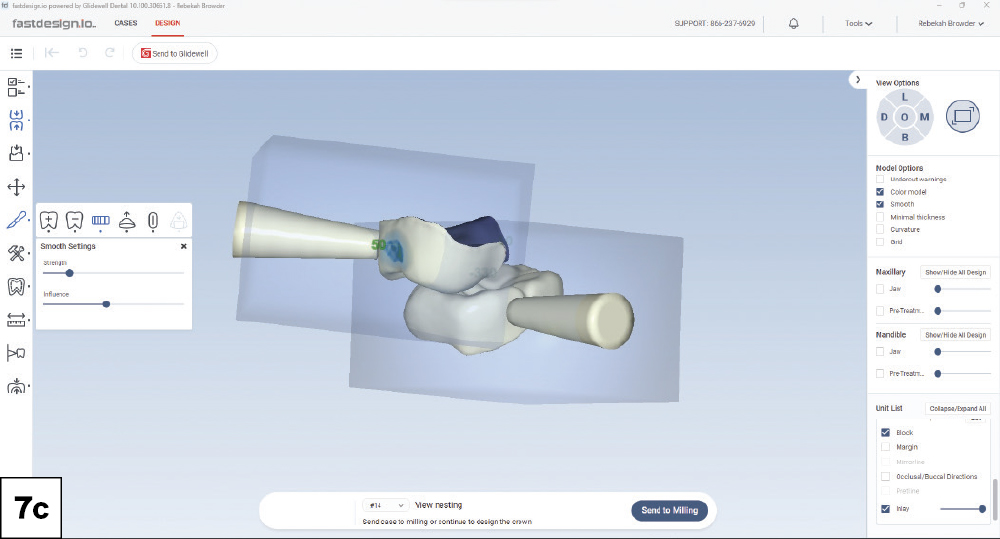
Figures 7a–7c: I received a crown proposal with just a few clicks and made only a minor adjustment to the design. I then used my fastmill.io™ In-Office Mill to fabricate a restoration chairside in just a few minutes. I chose Obsidian® milling blocks (Glidewell Direct; Irvine, Calif.) for their reliable bonding abilities, and excellent combination of strength and esthetics.

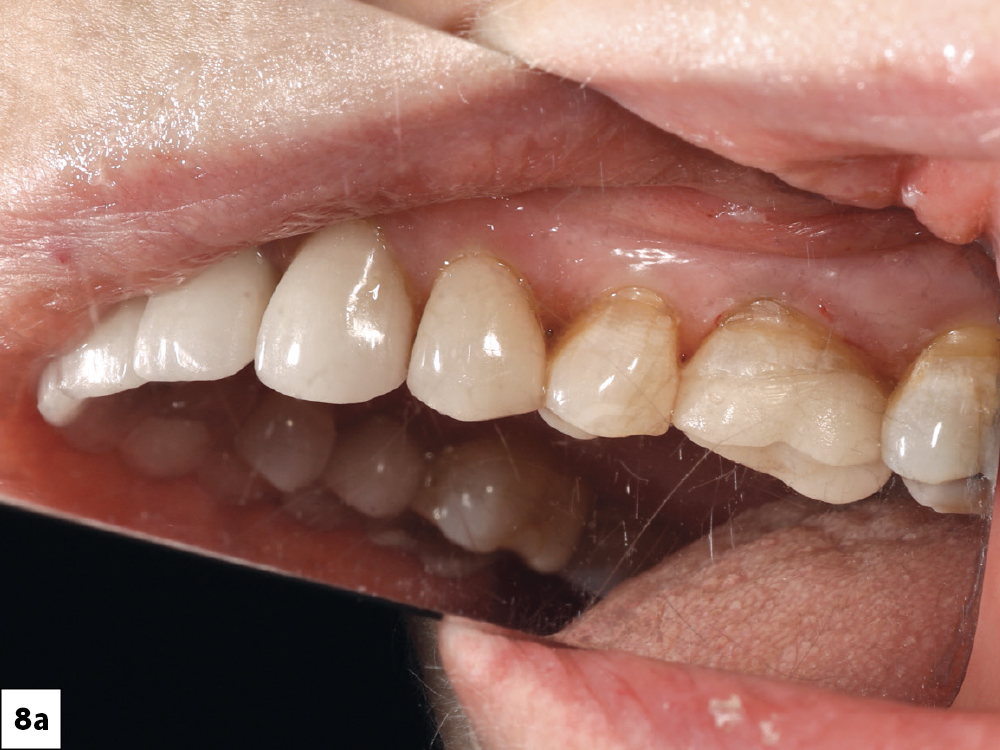
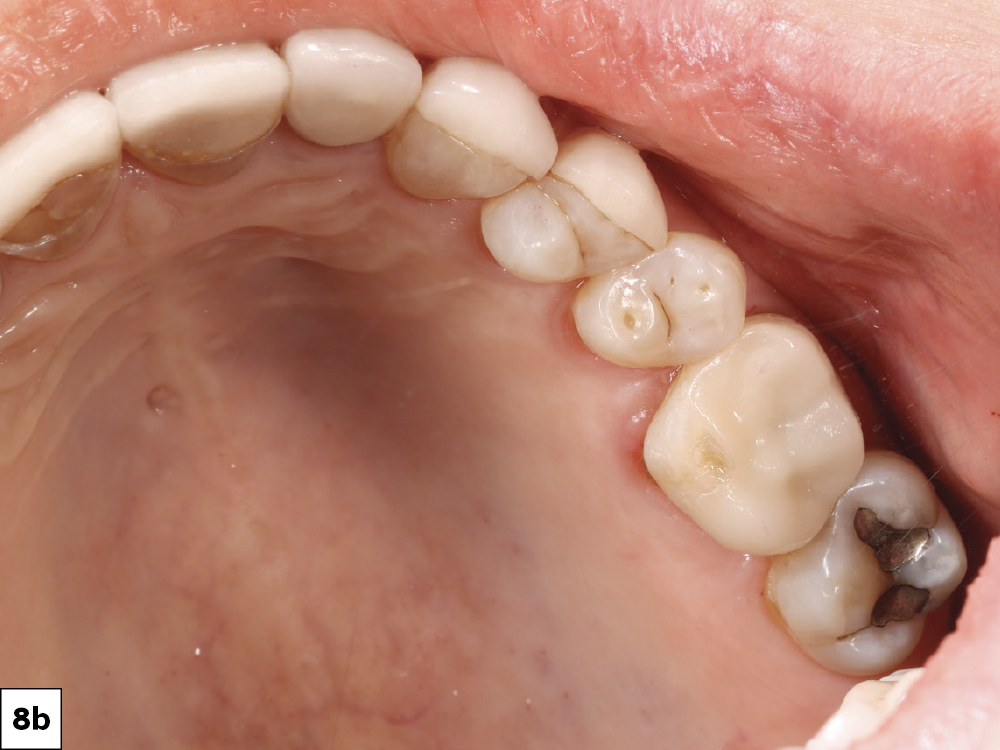
Figure 8a
Figure 8b

Figures 8a, 8b: These images demonstrate how seamlessly the onlay blended with the surrounding teeth. Some patients might not be concerned about the color of a tooth in the posterior region, but they appreciate how much it matters to me. I also explained the steps of the bonding process, such as air abrasion, immediate dential sealing, resin coat application and composite sealing.

Figure 9

Figure 9: Next, I assessed tooth #19. One of the cusps had been replaced with amalgam, and I noted cusp fracture, discoloration, leakage and wear facets. Most patients aren’t in the habit of inspecting their posterior teeth, so it’s easy for them to think that there is nothing wrong in the absence of pain or discomfort. The above images helped the patient understand the importance of taking a proactive treatment approach to prevent further complications.

Figure 10

Figure 10: I delivered an onlay on tooth #19 milled from an Obsidian milling block. The material is barely noticeable and created an easy transition to the tooth structure.

Figure 11

Figure 11: Before sending the patient home, I showed her this image from the occlusal view for a better perspective of the results. Even though tooth #18 did not require immediate treatment, the contrast with tooth #19 is a reminder of what I can accomplish if she decides to pursue more treatment in the future.

CONCLUSION

Digital tools play a crucial part in empowering patients to take an active role in their treatment and enhancing their understanding of clinical recommendations. By presenting them with an objective view, patients are more likely to accept treatment and leave my office knowing that they made a great investment in their oral health.