Holiday Hours Update: In observance of the upcoming holidays, our Contact Support Centers will be open on December 24 until 3:00pm. We will be closed on December 25 and January 1. Wishing you and yours a Merry Christmas and Happy New Year!

×

Using a Ceramic-Filled Nanohybrid Resin Composite for Same-Visit Restorations
April 29, 2024
Eugene Lee, DDS image
Eugene Lee, DDS
Using a Ceramic-Filled Nanohybrid Resin Composite for Same-Visit Restorations

The patient presented with a large carious lesion on the distal of tooth #3, requesting a same-visit solution. I determined that the glidewell.io™ In-Office Solution — including the fastscan.io™, fastdesign.io™ and fastmill.io™ workflows — would enable me to plan, design and mill a restoration that would meet these needs and exceed the patient’s expectations. I chose the CAMouflage® NOW resin milling block to create the restoration because the material can be milled quickly, while the well-documented and reliable bonding procedure provides much needed structural support for the remaining tooth structure.

CASE REPORT

Figure 1: X-ray revealed extensive caries on the distal of #3

Figure 1: The X-ray revealed extensive caries on the distal of #3. 

Figure 2: large carious lesion was visible intraorally

Figure 2: The large carious lesion was visible intraorally as shadowing below the distal marginal ridge.

Figure 3

Figure 3: I started the initial preparation to gain access to the lesion. 

Figure 4a
Figure 4b

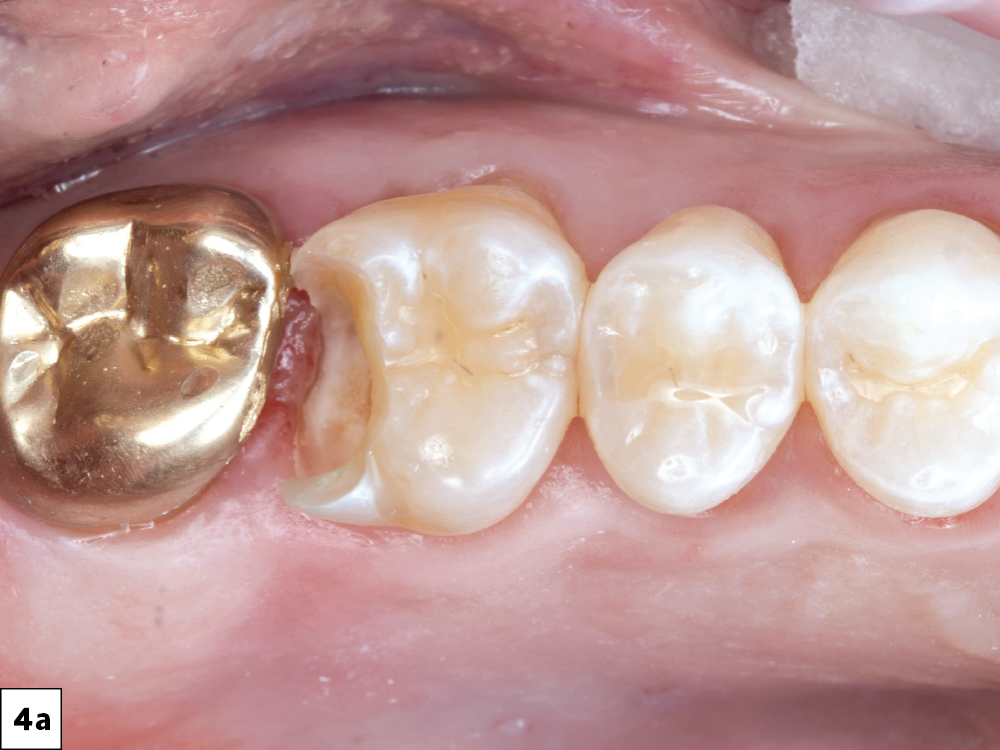
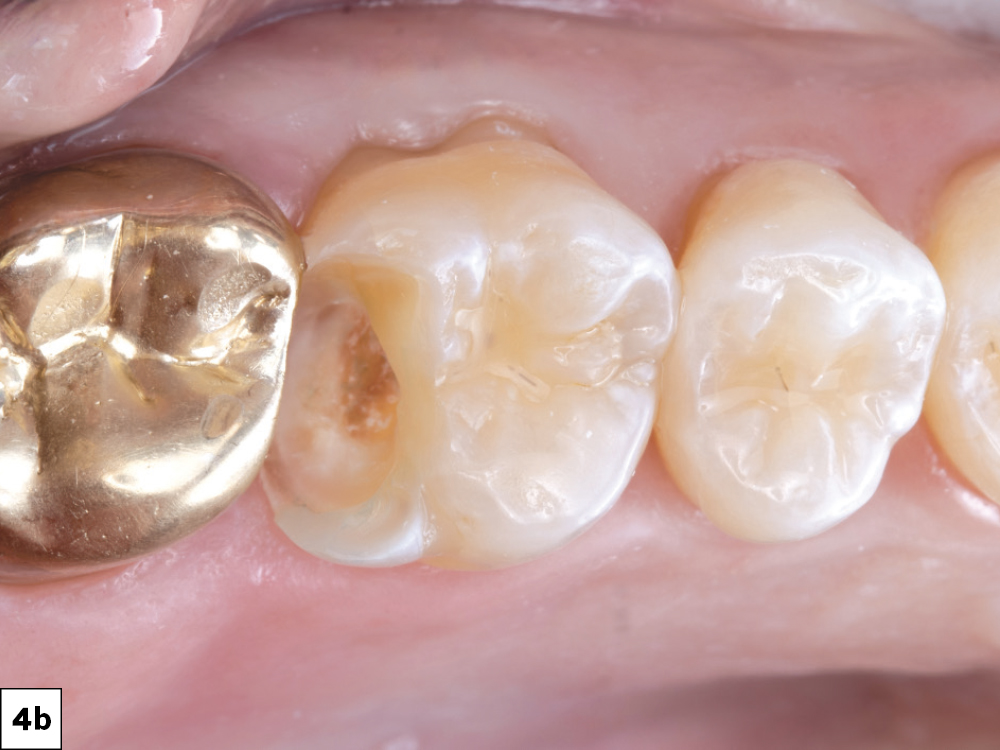
Figures 4a, 4b: I carefully and incrementally removed the caries. 

Figure 5: 3M™ Vitrebond™ Light Cure Glass Ionomer Liner is placed for protection

Figure 5: I utilized an Exposé® Disposable Caries Indicator (Centrix; Shelton, Conn.) to ensure that all diseased tissue was excavated without removing more tooth structure than necessary. After caries removal, I placed 3M™ Vitrebond™ Light Cure Glass Ionomer Liner (3M; St. Paul, Minn.) to protect the pulp. This was the final step before taking digital scans.

Figure 6: digital scan

Figure 6: The digital scan allowed me to assess the preparation and plan the restoration.

Figure 7: fastdesign.io™ software

Figure 7: I designed the onlay with the assistance of the AI-enabled fastdesign.io™ software.

Figure 8: virtual milling block

Figure 8: After completing the design, I nested it in a virtual milling block to be milled using the fastmill.io™ In-Office Mill.

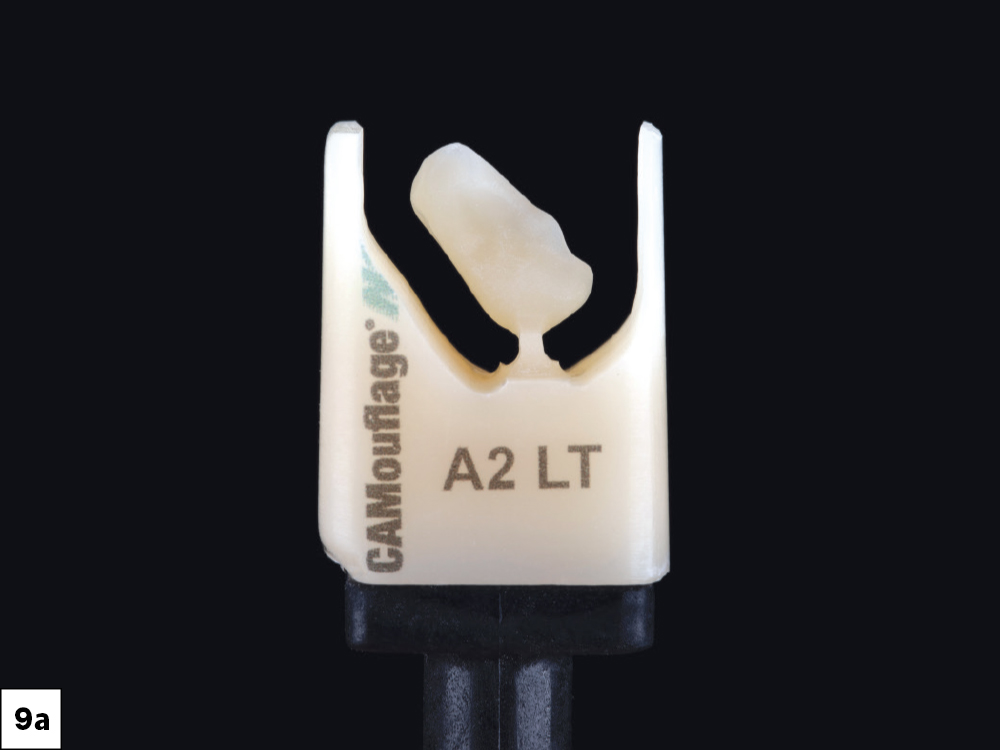
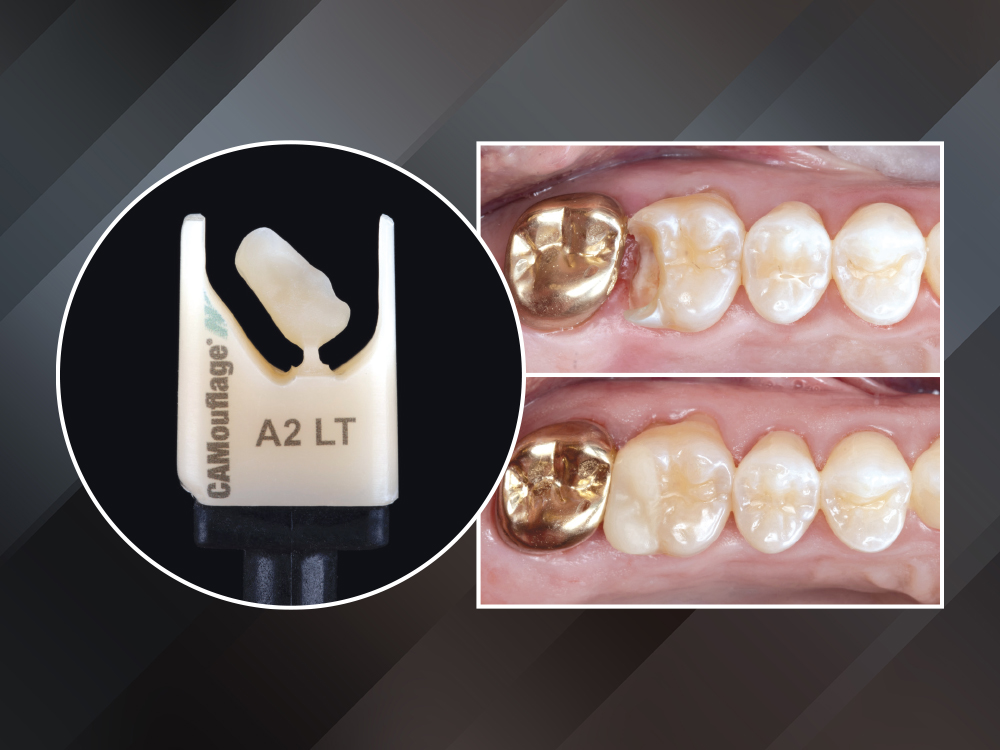
Figure 9a: CAMouflage® NOW block, shade A2
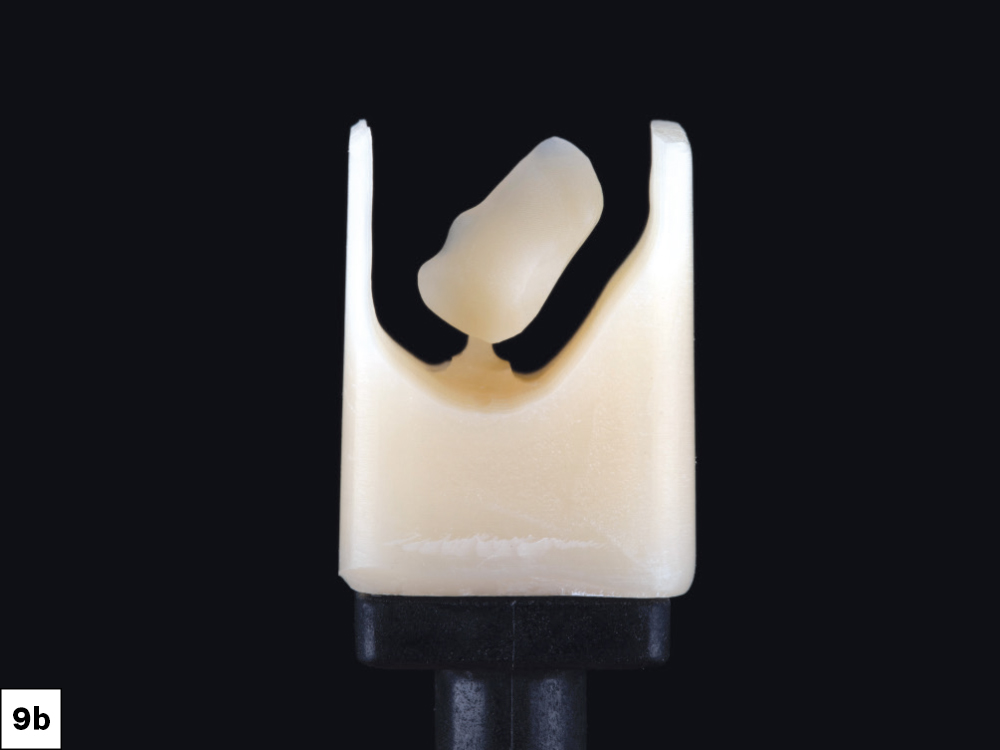
Figure 9b: CAMouflage® NOW block, shade A2 back

Figures 9a, 9b: The restoration was milled from a CAMouflage® NOW block, shade A2. I chose the CAMouflage NOW resin milling block due to the material’s quick milling time in addition to its well-documented and reliable bonding procedure, which will provide much needed structural support for the remaining tooth structure. Per the patient’s preference, this allowed the restoration to be accomplished in one visit.

Figure 10: before cementation

Figure 10: Before cementation, I checked the fit, occlusion and proximal contacts of the restoration.

Figure 11: 3M RelyX™ Ultimate Adhesive Resin Cement used

Figure 11: The onlay restoration was cemented in place using 3M RelyX™ Ultimate Adhesive Resin Cement (3M).

Figure 12: The post-treatment radiograph

Figure 12: The post-treatment radiograph shows the restoration of the large carious lesion. While the patient had no symptoms after the procedure, as a precaution, he was informed that an endodontic procedure may be required at some point.

CONCLUSION

This case shows the restoration of a relatively large carious lesion with a conservative restorative strategy. Thanks to the digital workflow and my in-office mill, the patient left the chair with most of his remaining tooth structure intact. Most importantly, the patient was pleased with the result and the speed with which it was achieved.