A Systematic Approach for Cementing Zirconia and Lithium Disilicate Restorations (1 CEU)

As a clinician who worked in private practice for 27 years prior to joining the Glidewell team, I know firsthand that delivery day for crowns & bridges can be challenging. While recent advancements in dental materials and adhesives have unquestionably benefited the practitioner, the added considerations and techniques associated with these advancements can add a level of complexity to the process.
In this article, I will outline a simple, proven method for determining the optimal cementation protocol based on research conducted by our Research & Development department at Glidewell (Fig. 1).
CEMENT CHOICES
There are three relevant cement options for zirconia and lithium disilicate restorations — self-adhesive resin cements (SARC), adhesive resin cements and conventional resin-modified glass-ionomer cements (RMGI) (Fig. 2).
RMGI cements rely upon mechanical retention to secure the restoration to the preparation. They require fewer chairside steps compared to the other two categories and allow for easy cleanup, but offer limited adhesive properties for non-retentive preparations. These cements are ideal for zirconia cases with retentive preparations.
Adhesive resin cements require a separate coupling agent to chemically bond the restoration to the preparation. Of the three options, they provide the strongest retention but are also the most technique-sensitive. Additionally, they are color-stable and available in light-cure options, allowing for greater control of the finished esthetic result. Adhesive cements are ideal for veneer cases, lithium disilicate restorations and non-retentive zirconia restorations.
Self-adhesive resin cements essentially split the difference between the two other options. They are easy to use and offer extra strength, without needing the extra steps of etching, priming and bonding.
THE SYSTEMATIC APPROACH FOR ZIRCONIA RESTORATIONS
With monolithic zirconia restorations like BruxZir® Zirconia, practitioners have the option to either cement or bond. To determine which method is appropriate for your case, you can apply this simple logic based on the quality of the preparation: If the prep is retentive, use the cementing protocol. If the prep is non-retentive, use the bonding protocol (Fig. 3).
Preparations with an axial height greater than 3 mm with minimal taper are considered retentive. Preparations with less than 3 mm of height or excessive taper are considered non-retentive (Fig. 4).
BEFORE CROWN TRY-IN
Regardless of whether your preparation dictates the bonding or cementing protocol, all zirconia restorations must first be air-abraded prior to try-in (Fig. 5). The air-abrasion process enhances the micro-mechanical properties of the intaglio surfaces of the zirconia restorations, ultimately increasing the amount of surface area for the cement and boosting the quality of the connection. If you prescribe BruxZir restorations from Glidewell, the lab air-abrades all zirconia restorations before returning them to your office — saving you the need to do this yourself. Should you choose another lab, I encourage you to verify that they’ve been properly prepared.
CEMENTING ZIRCONIA
Zirconia restorations have been a great benefit to dentistry. However, there are characteristics of the material that necessitate added steps to achieve the optimal outcome. If you follow the cementing workflow that’s outlined below, achieving long-term success is straightforward (Fig. 6).
When cementing a zirconia restoration, once you’ve received your restoration from the lab and ensured that the intaglio surface has been air-abraded, you’re ready to move on to the try-in phase. During try-in, I always take a bite-wing radiograph to ensure complete seating of the crown.
During try-in, salivary phosphate groups will contaminate the intaglio surface of the restoration, greatly decreasing the adhesive bond. So care must be taken to fully decontaminate the restoration after try-in, removing these salivary phosphates by either air-abrasion, alcohol, ultrasonic cleaner, specially designed zirconia cleaners such as Ivoclean® (Ivoclar Vivadent; Amherst, N.Y.), or a 1% sodium hypochlorite solution (Fig. 7).1 It is also important to note that phosphoric acid should never be used to clean zirconia, because in effect you’re adding more phosphate groups to the restoration instead of removing them.
Once you’re satisfied with the fit of the restoration and have decontaminated it, you can go back to the mouth and clean, rinse and dry the preparation, taking care not to desiccate the tooth. Then, I recommend an application of a chemical desensitizer, like Gluma® Desensitizer (Kulzer GmbH; Hanau, Germany), to reduce the chance of postoperative sensitivity.
With these steps completed, you’re ready to cement the restoration. Simply follow the manufacturer’s instructions to apply your chosen RMGIs or self-adhesive cement.
Cementing zirconia crowns on retentive preparations is very straightforward, with success virtually guaranteed when carefully adhering to these recommendations. For retentive preparations, I recommend the use of RMGI due to the simple cleanup and straightforward protocol.
BONDING ZIRCONIA
Just like the cementing protocol, bonding nets great results so long as you follow all the proper steps (Fig. 8). While I recommend bonding only for non-retentive zirconia crowns due to the added chairside requirements, it is possible to bond all zirconia restorations should the dentist choose to do so.
On the restoration itself, the initial bonding steps are identical to those of the cementing workflow: Confirm the restoration is air-abraded, evaluate the fit via try-in and bite-wing radiograph, and then decontaminate using the phosphate-removing methods described in Figure 6. Thereafter, the bonding protocol deviates from the cementing protocol.
Bonding a zirconia crown requires the use of a primer containing 10-methacryloxydecyl dihydrogen phosphate (MDP). There are numerous brands available to clinicians today, including Clearfil™ Ceramic Primer Plus, Clearfil SE Bond Primer, 3M™ ESPE Single Bond Universal Adhesive, Z-Prime™ Plus and Monobond® Plus. The application of an MDP-containing primer is critical because it has been shown to greatly improve the bond strength for zirconia restorations.2–4 Each of these MDP solutions has a different application protocol, so be sure to follow the manufacturer’s provided instructions.
On the preparation, the tooth must be acid-etched to maximize bond strength. Then the tooth must be cleaned, rinsed and dried, again taking care to not desiccate the tooth. As with the cementing protocol, I would also recommend the application of a desensitizing agent before the bonding resin is applied.
With those steps completed, the adhesive cement can be applied following the manufacturer’s guidelines. The resulting strength of a bonded zirconia restoration makes it especially suited for non-retentive cases and veneers.
THE SYSTEMATIC APPROACH FOR LITHIUM DISILICATE RESTORATIONS
Lithium disilicate restorations, such as IPS e.max® (Ivoclar Vivadent), and lithium silicate restorations, such as Obsidian® All-Ceramic, are used widely in dentistry, especially for cases in the esthetic zone. When compared to monolithic zirconia, these glass ceramic materials typically offer enhanced translucency and coloration with lower overall strength and toughness — though they’re still much stronger than the ceramic materials commonly used by dentists prior to the early 2000s.
The translucency and strength characteristics of lithium disilicate and lithium silicate restorations, regardless of whether the preparation is non-retentive or retentive, mean that they are best delivered with adhesive cements that require a bonding protocol. This is primarily because adhesive cements are color-stable, don’t bleed through translucent restorations, and offer exceptional connective strength.
BEFORE TRY-IN
Prior to trying in the restoration, lithium disilicate and lithium silicate restorations should be acid-etched on the intaglio surface. At Glidewell, the lab does this step prior to sending the restoration to your dental practice. If you choose to use a lab that does not complete this step, you must acid-etch the restoration yourself, using a 5% hydrofluoric acid for about 10 seconds. Then, after try-in, cleaning and drying the restoration, silane is applied for 60 seconds and dried to create the chemical bond (Fig. 9). Similar to the pre-try-in air abrasion used for monolithic zirconia, this intaglio acid-etch step heightens the micro-mechanical retention capabilities of the material and enhances the overall bond strength.5
BONDING LITHIUM DISILICATE
Bonding lithium disilicate restorations yields predictable results so long as you follow the workflow shown below (Fig. 10). These restorations require an acid-etch procedure on both the restoration itself and the tooth preparation, to ensure the overall best retention quality.
After the restoration has been acid-etched, you can proceed to the try-in phase. Again, verify the fit with a bite-wing radiograph. Once you’ve approved the fit, contacts and occlusion, you must then apply a silane-containing primer to the intaglio surface to enhance the retention properties by acting as the chemical coupling agent for your adhesive cement of choice.
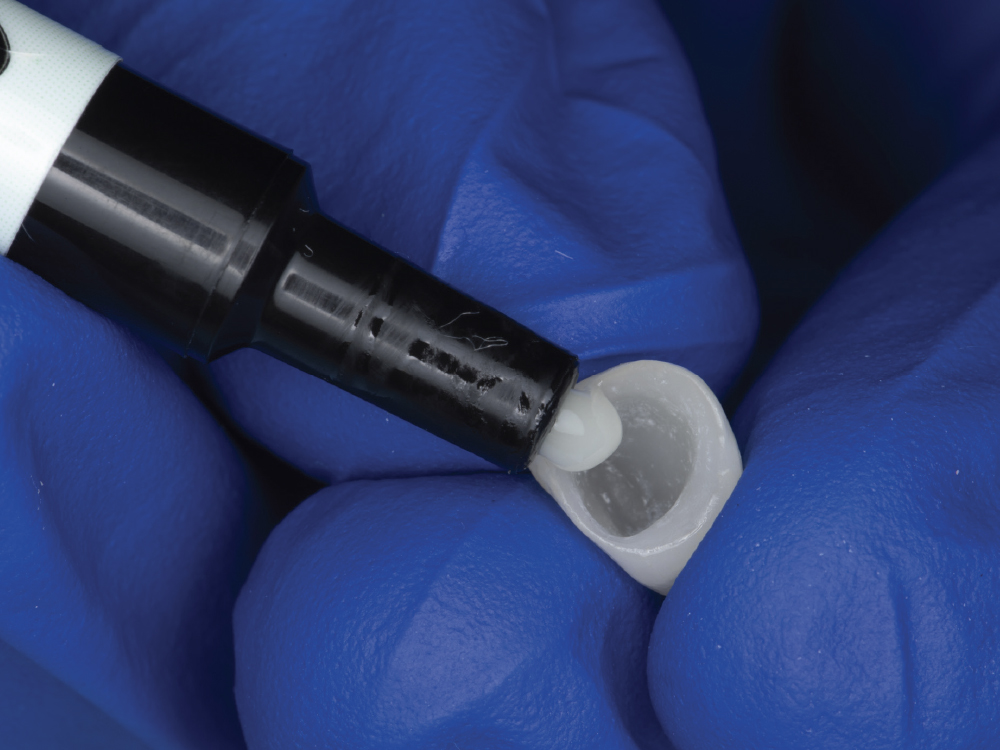
Moving to the mouth, the tooth preparation must also be acid-etched, then cleaned, rinsed and dried. Once more, I recommend that a desensitizer be applied to reduce the incidence of postoperative sensitivity. Having completed those steps, you can finally apply the bonding agent to the preparation (Fig. 11) and then the adhesive cement to the restoration (Fig. 12), following the manufacturer’s instructions.
CONCLUSION
With monolithic zirconia, you can achieve great results when cementing to retentive preparations or when bonding to non-retentive preparations. Lithium disilicate restorations should always be bonded. Following the preparation-based decision matrix and step-by-step guides described in this article will greatly enhance your chairside experience.
All third-party trademarks are property of their respective owners.
Available CE Courses
References
1. ^Kim DH, Son JS, Jeong SH, Kim YK, Kim KH, Kwon TY. Efficacy of various cleaning solutions on saliva-contaminated zirconia for improved resin bonding. J Adv Prosthodont. 2015 Apr;7(2):85-92.
2. ^Ahn JS, Yi YA, Lee Y, Seo DG. Shear bond strength of MDP-containing self-adhesive resin cement and Y-TZP ceramics: effect of phosphate monomer-containing primers. Biomed Res Int. 2015;2015:389234.
3. ^Komine F, Fushiki R, Koizuka M, Taguchi K, Kamio S, Matsumura H. Effect of surface treatment on bond strength between an indirect composite material and a zirconia framework. J Oral Sci. 2012;54:39–46.
4. ^Zandparsa R, Talua NA, Finkelman MD, Schaus SE. An in vitro comparison of shear bond strength of zirconia to enamel using different surface treatments. J Prosthodont. 2014;23:117–123.
5. ^Maruo Y, Nishigawa G, Irie M, Yoshihara K, Matsumoto T, Minagi S. Does acid etching morphologically and chemically affect lithium disilicate glass ceramic surfaces? J Appl Biomater Funct Mater. 2017;15(1):e93-e100.


