Renewing a Smile with the glidewell.io™ In-Office Solution

October 1, 2024
Jonathan Vo image
Jonathan Vo, DMD
Renewing a Smile with the glidewell.io™ In-Office Solution

The introduction of in-office milling was a rewarding experience for my practice. I began with posterior cases and enjoyed the ability to offer same-day crowns while controlling the quality of the restoration.
After about a year, I was ready to take the next step and begin milling anterior cases. To this end, I took Dr. Justin Chi’s hands-on advanced anterior course at Glidewell. The course covered the finer points of crown design and characterization, which served me well when this patient sought a remake of his smile.

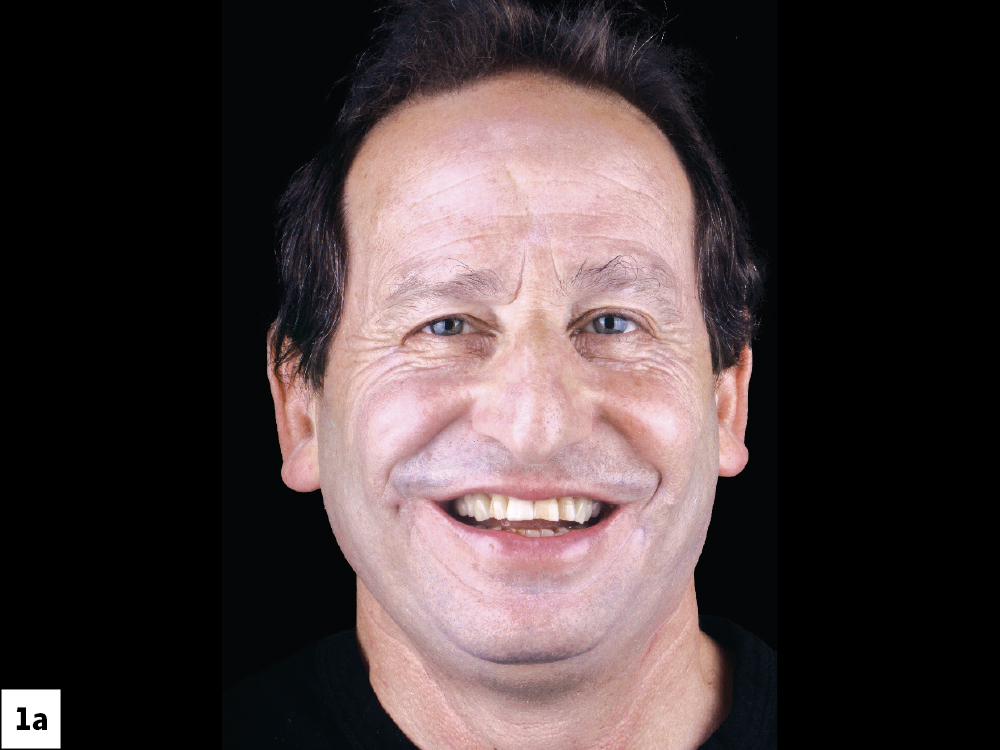
Figure 1a
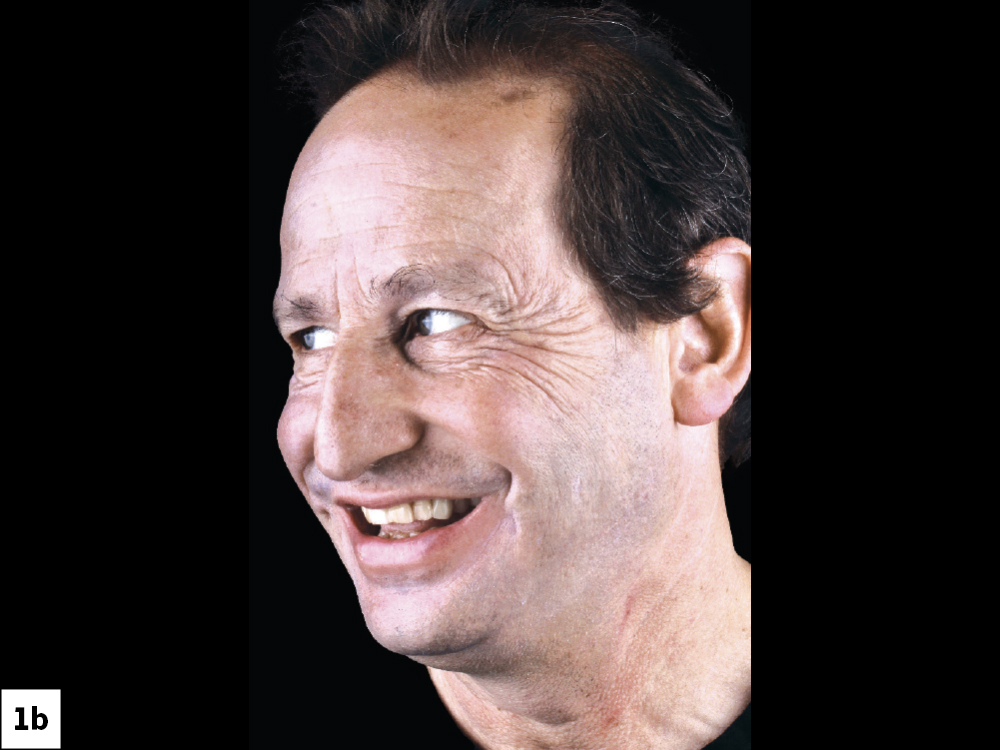
Figure 1b
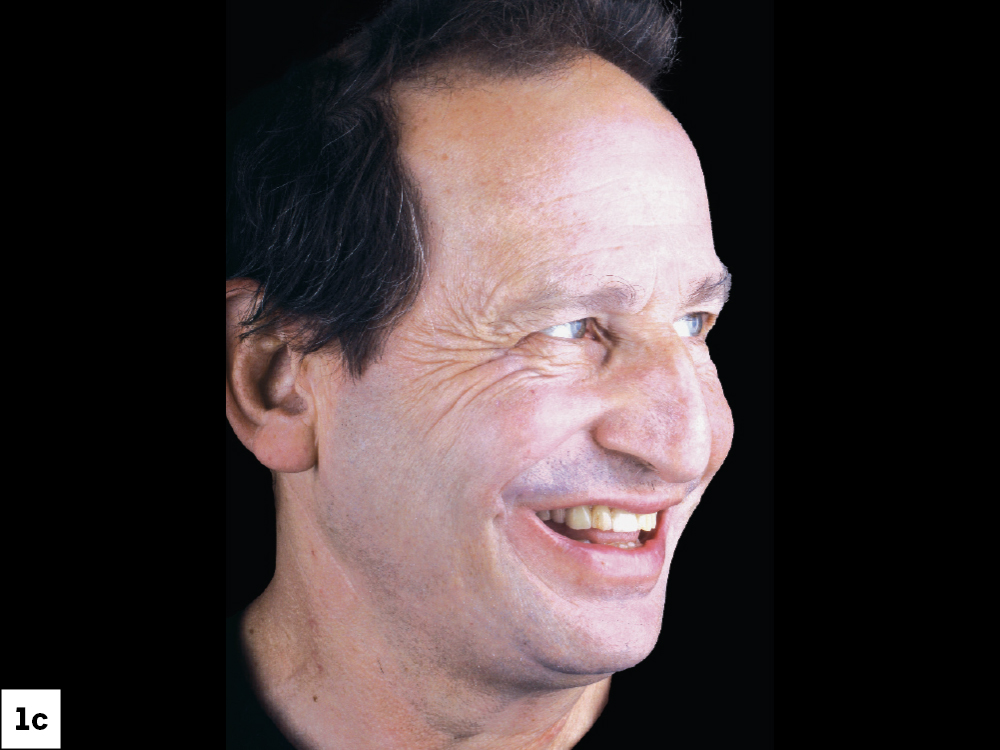
Figure 1c

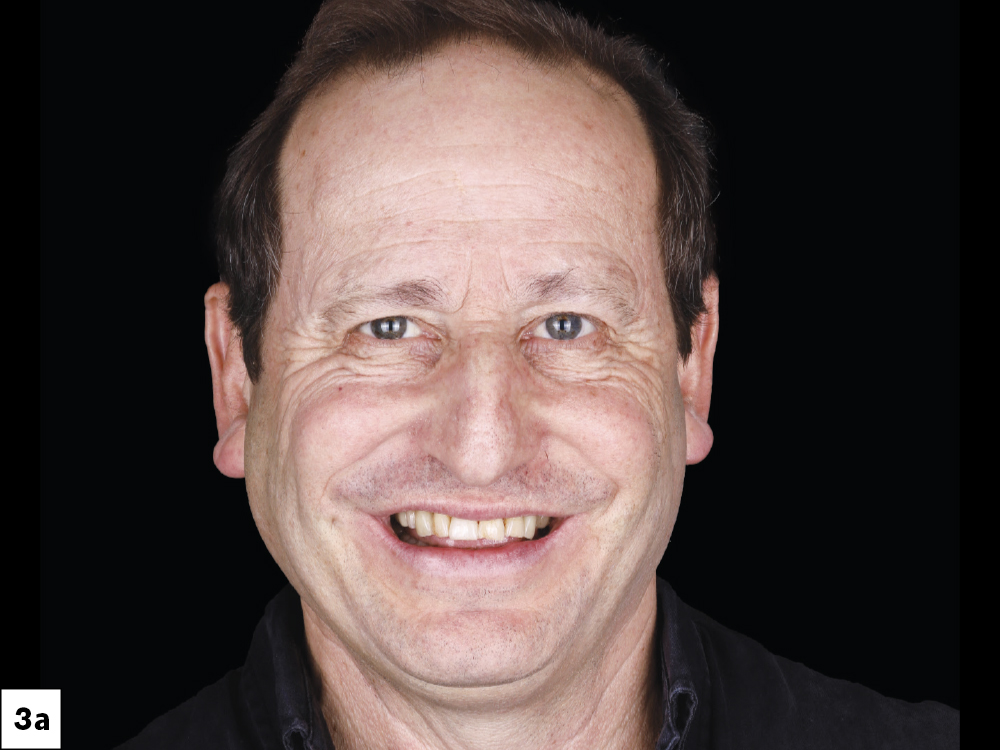
Figures 1a–1c: The patient came to my practice to address the shade and alignment of his teeth.

Figure 2a
Figure 2b
Figure 2c

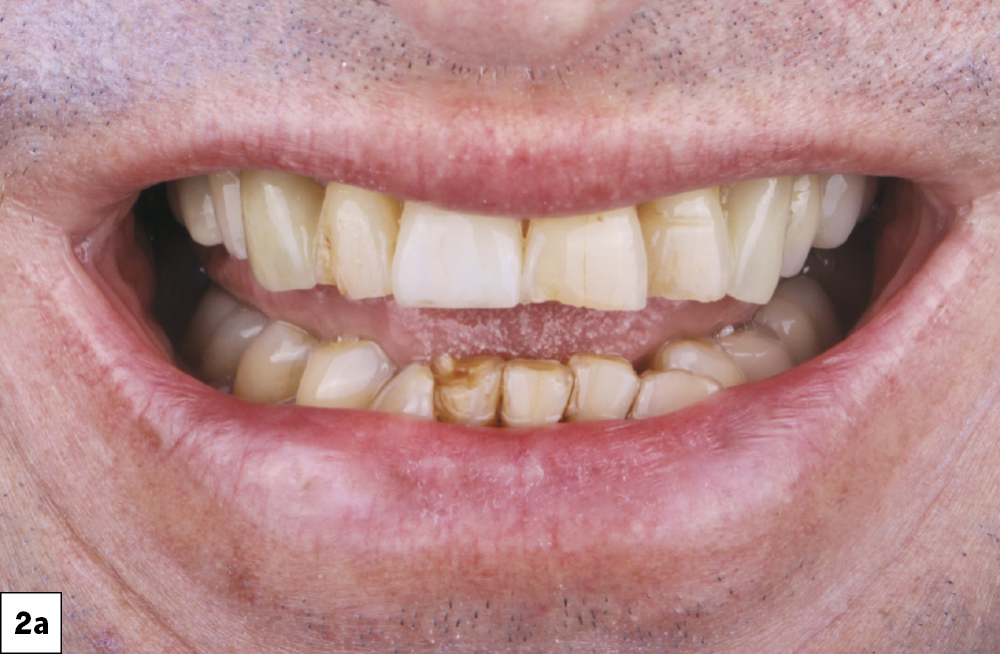
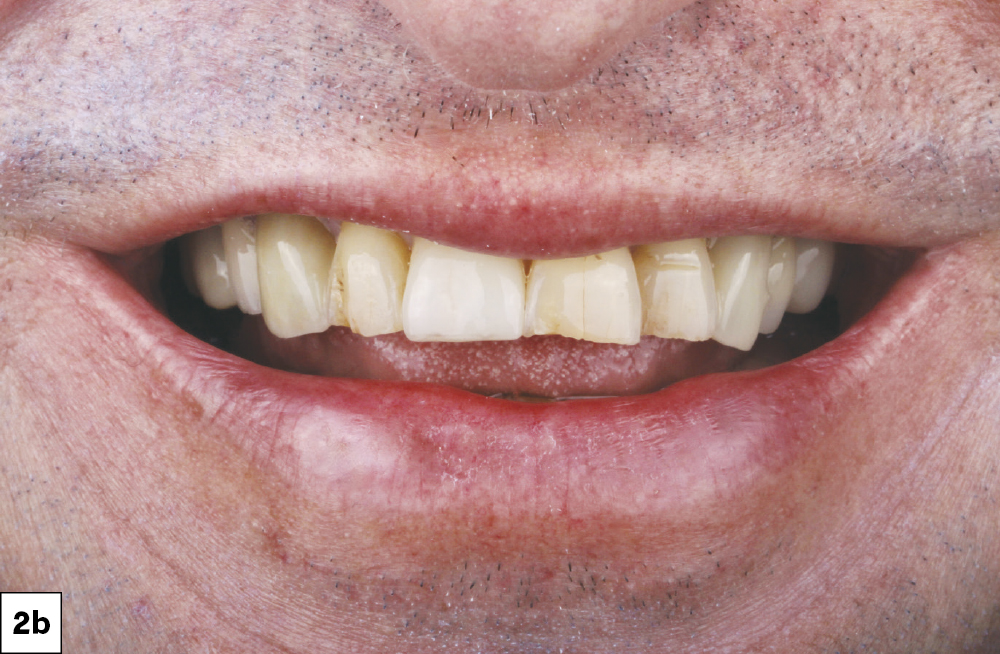
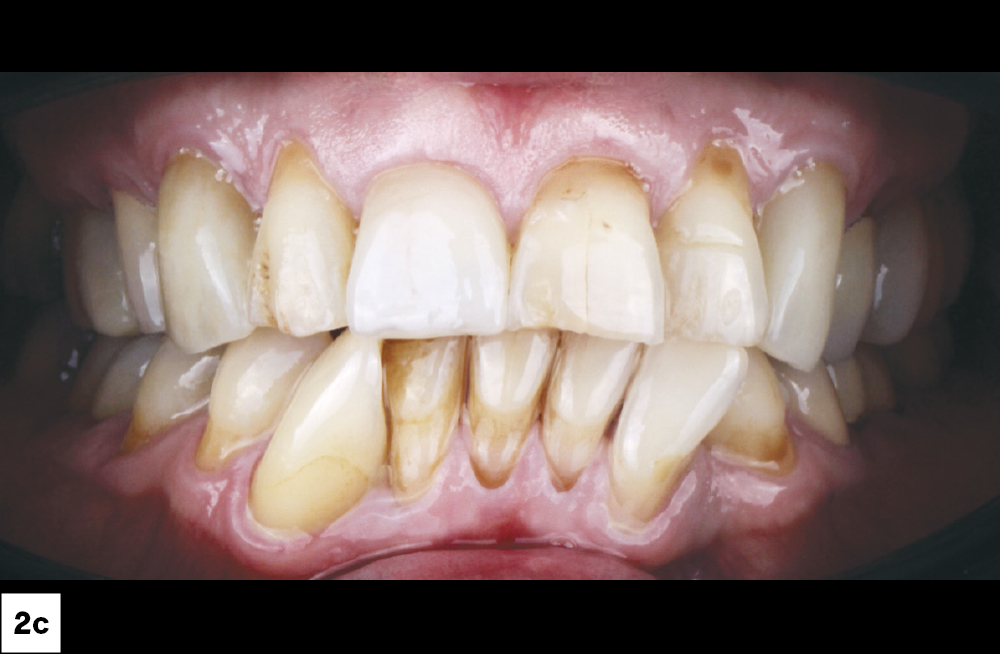
Figures 2a–2c: Because the patient had crowding that needed to be addressed before restorative treatment, we initiated aligner therapy, which lasted for two years.

Figure 3a
Figure 3b
Figure 3c
Figure 3d

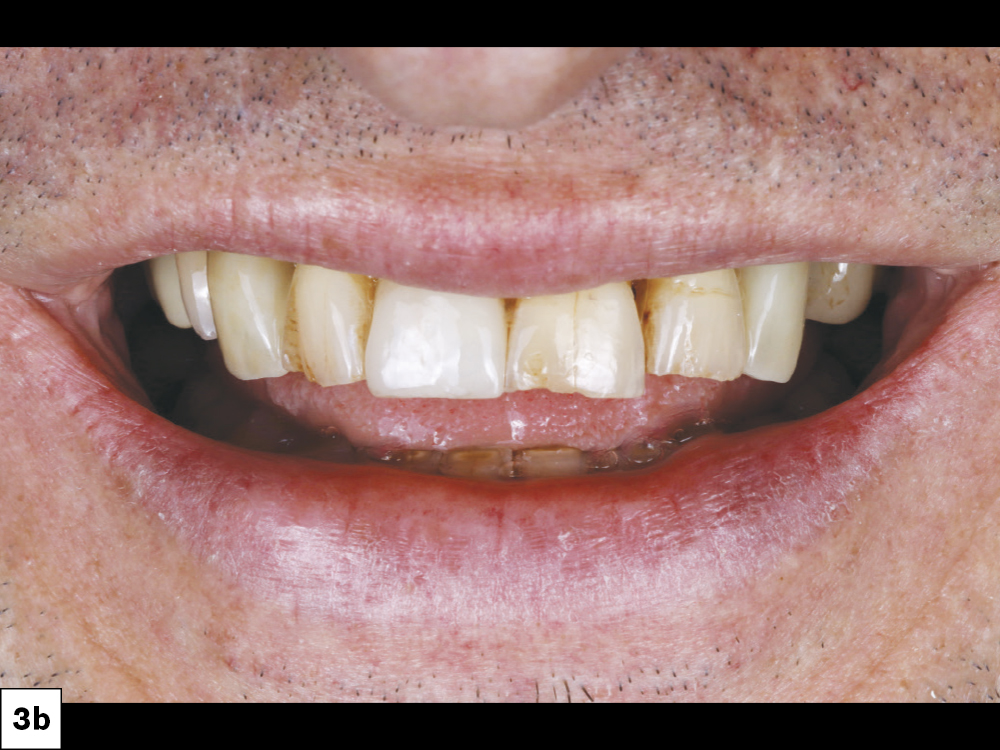
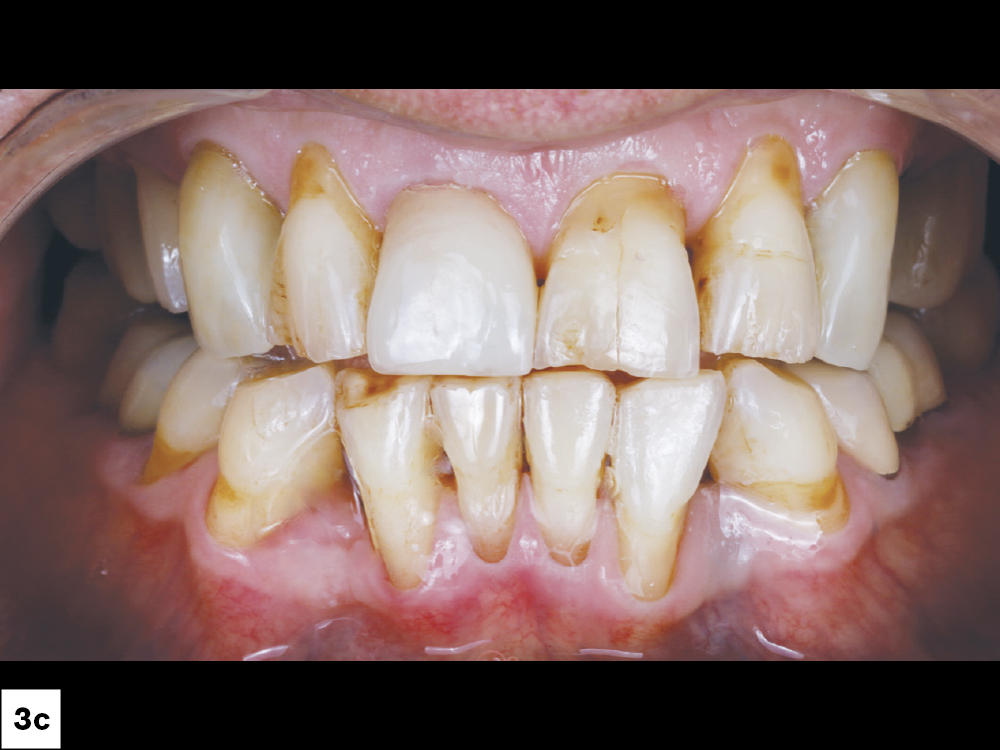
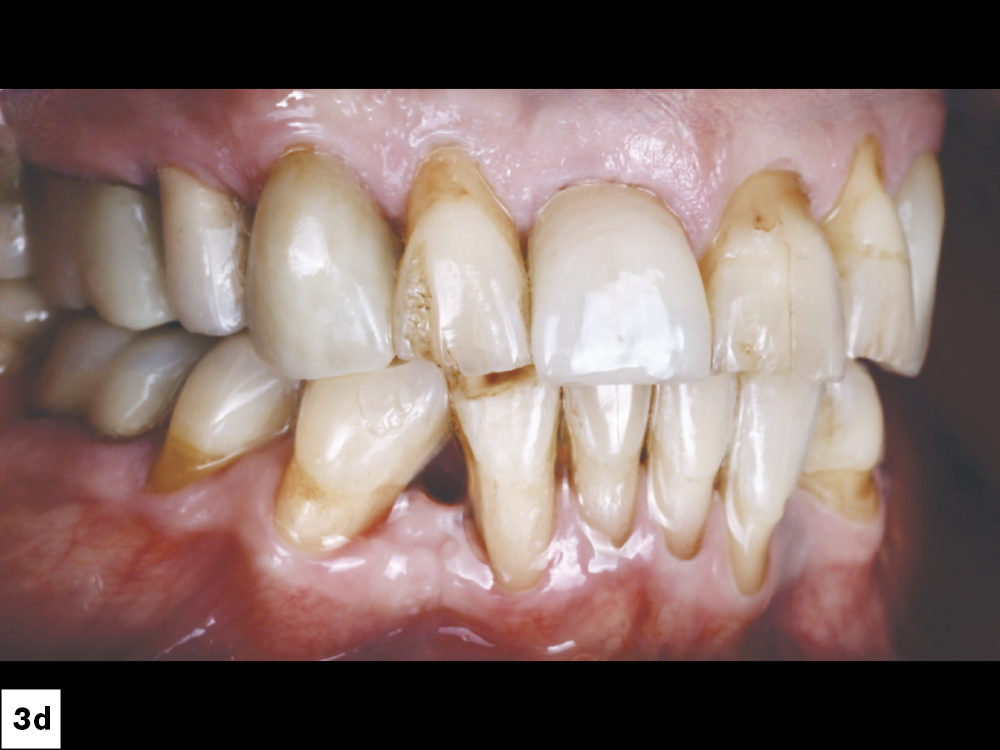
Figures 3a–3d: Aligner therapy alleviated the crowding and improved the tooth positioning for the planned veneers and crowns. During aligner therapy I extracted teeth #12 and #15 due to endododontic infections. I placed two implants that integrated during the orthodontic treatment.

Figure 4a
Figure 4b
Figure 4c

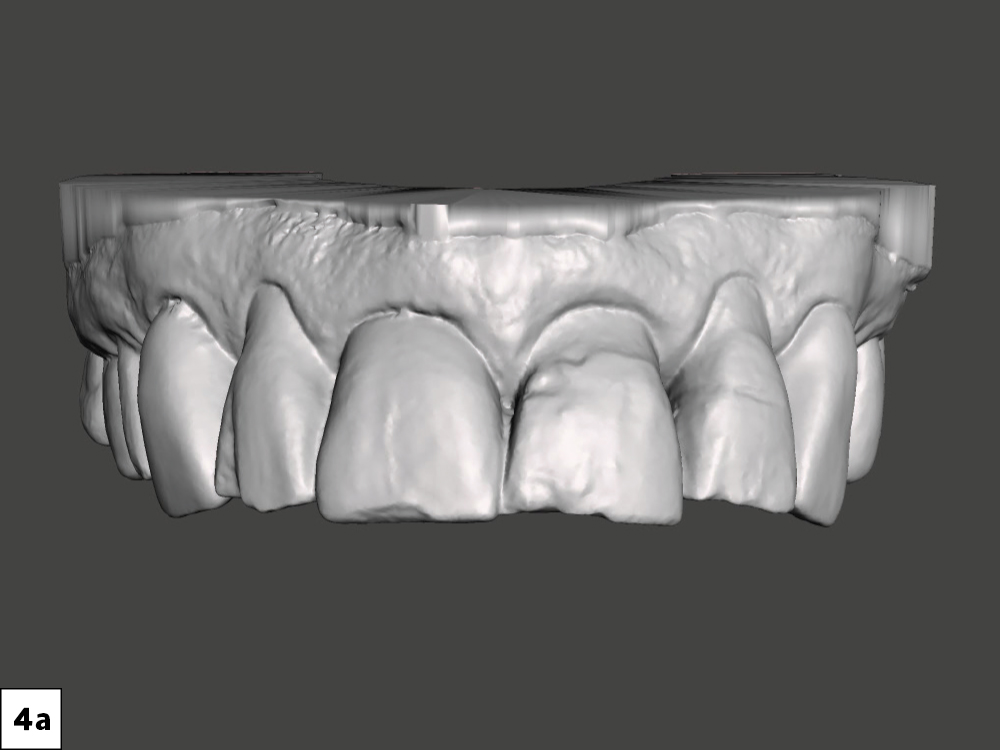
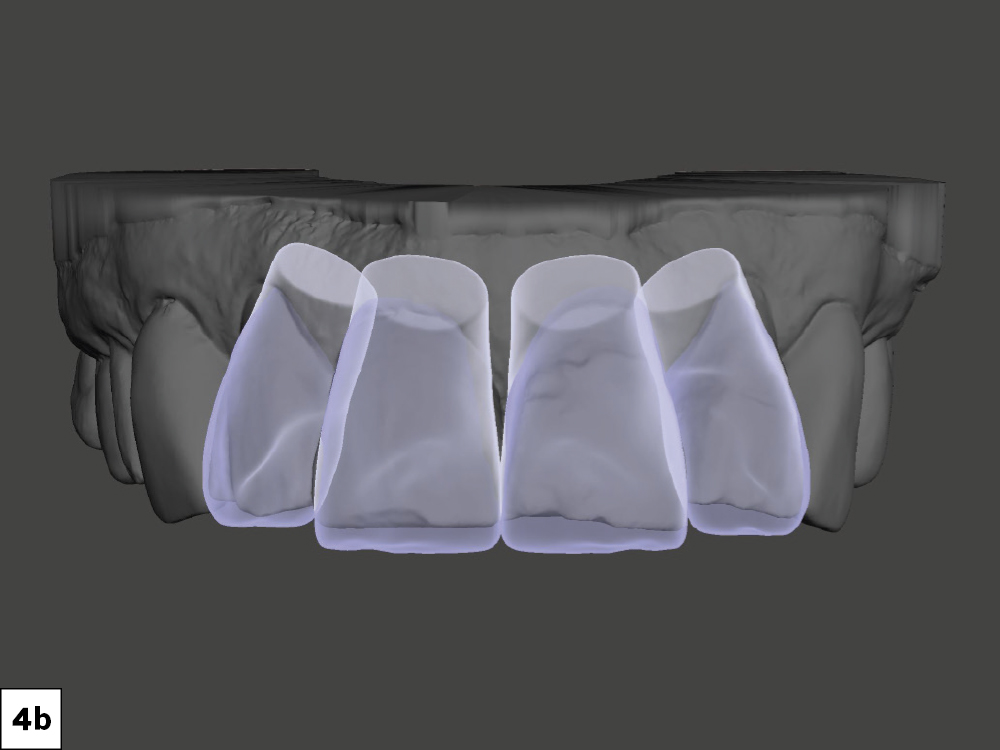
Figures 4a–4c: A pre-op scan is shown in Figure 4a. Figure 4b shows a screenshot of a digital wax-up for #7–10, and Figure 4c depicts an overlay of the digital wax-up. This digital wax-up was completely additive, allowing me to be conservative with the preparations. Using a 3D-printed model of the digital wax-up, I made a PVS matrix for #6–11 provisionals. Using Luxatemp® Ultra temporary crown and bridge material (DMG America; Ridgefield Park, NJ) in the PVS matrix, I fabricated the provisionals intraorally.

Figure 5a
Figure 5b
Figure 5c

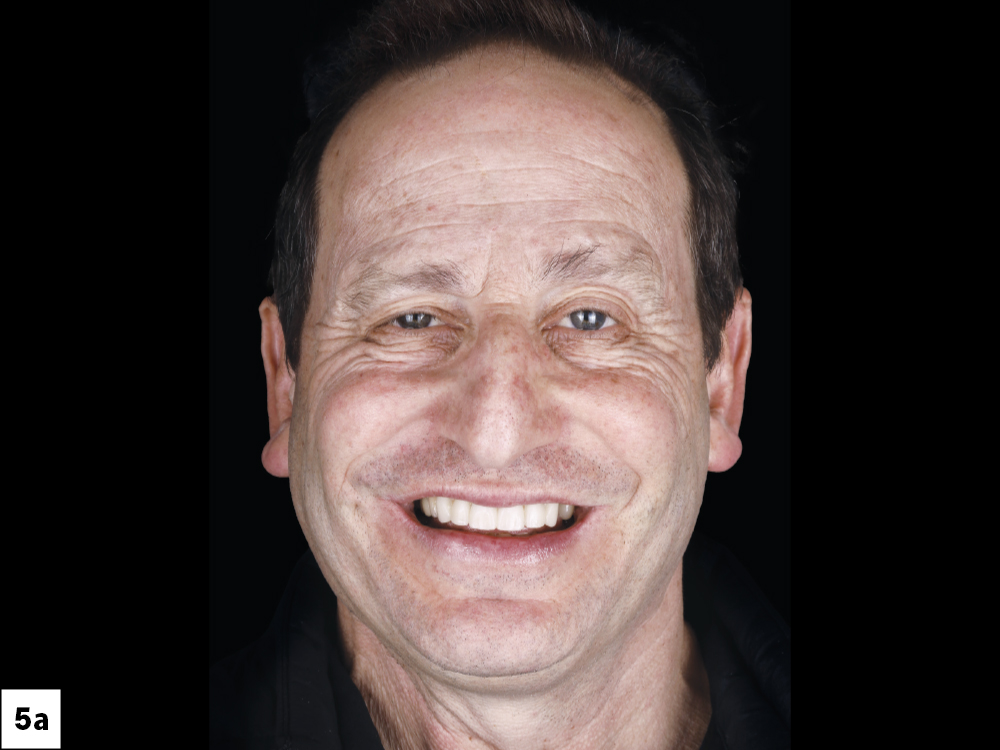
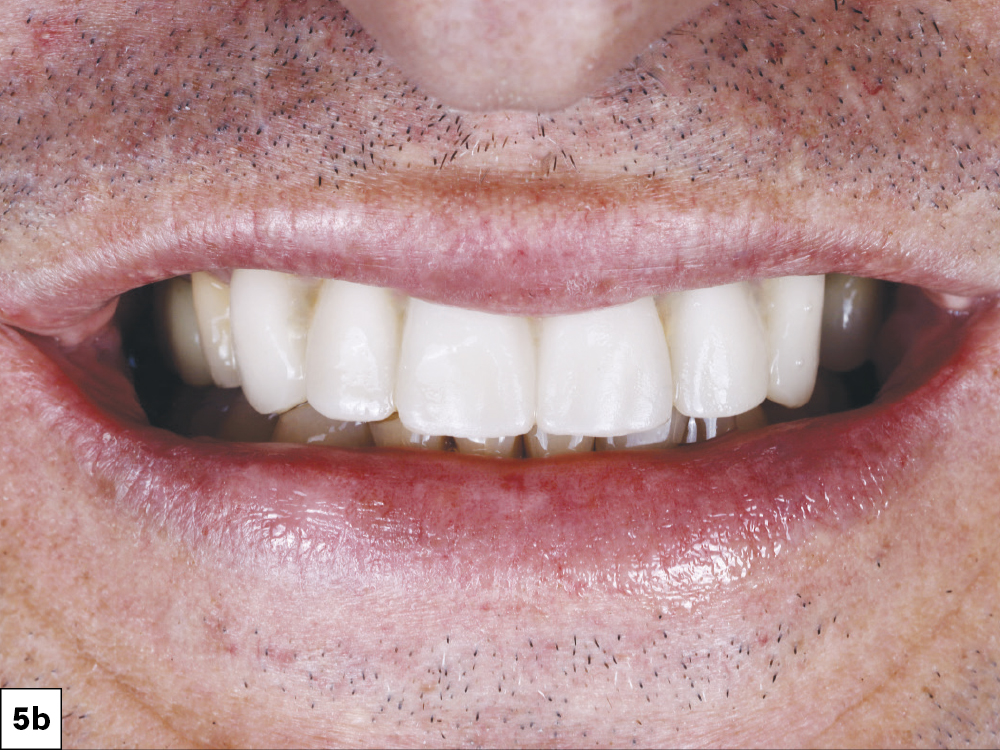
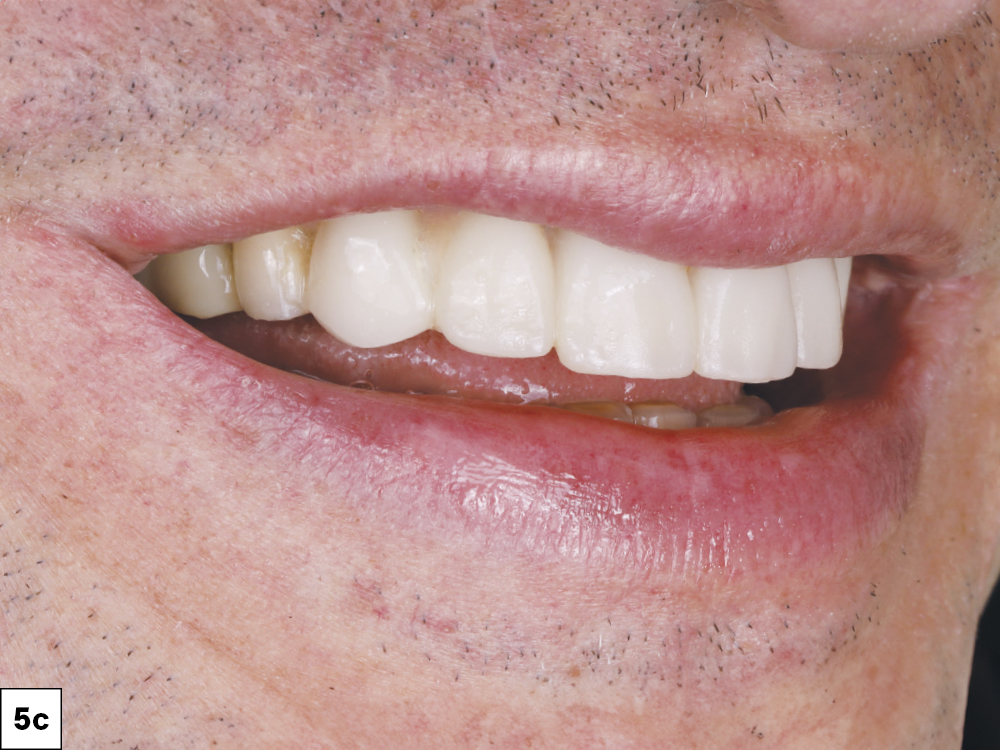
Figures 5a–5c: The patient is shown in provisionals a week after placement. I give patients several days to live in their provisionals so they can decide if they approve the design. At follow-up appointments, I solicited the patient’s feedback on the provisionals. We then selected the final shades and made any requested changes.

Figure 6a
Figure 6b

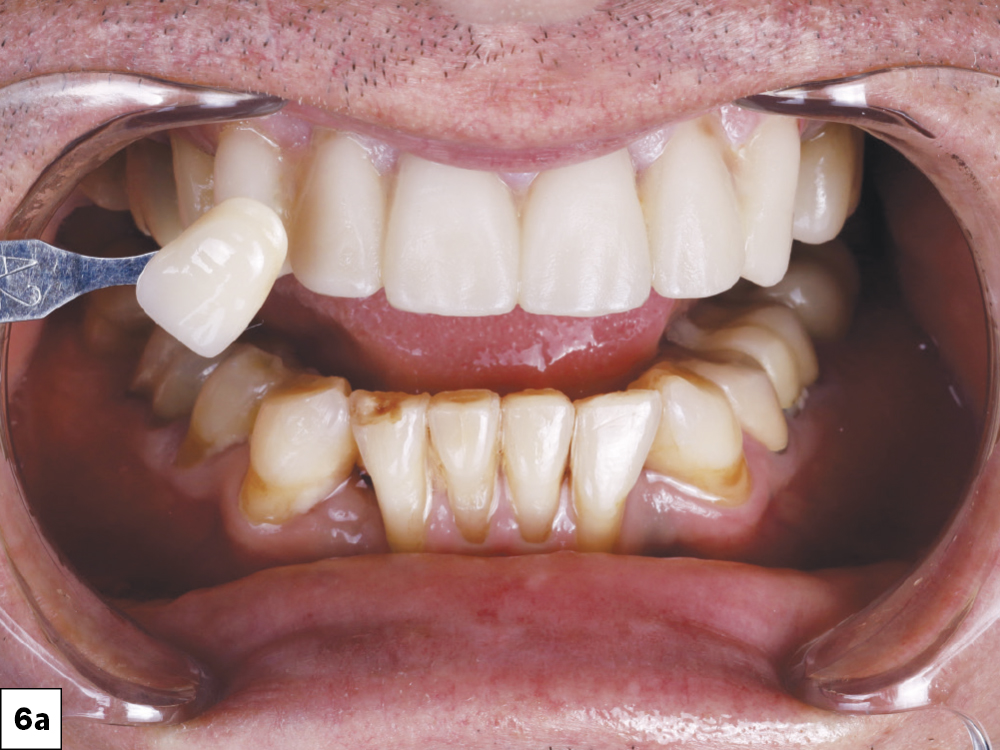
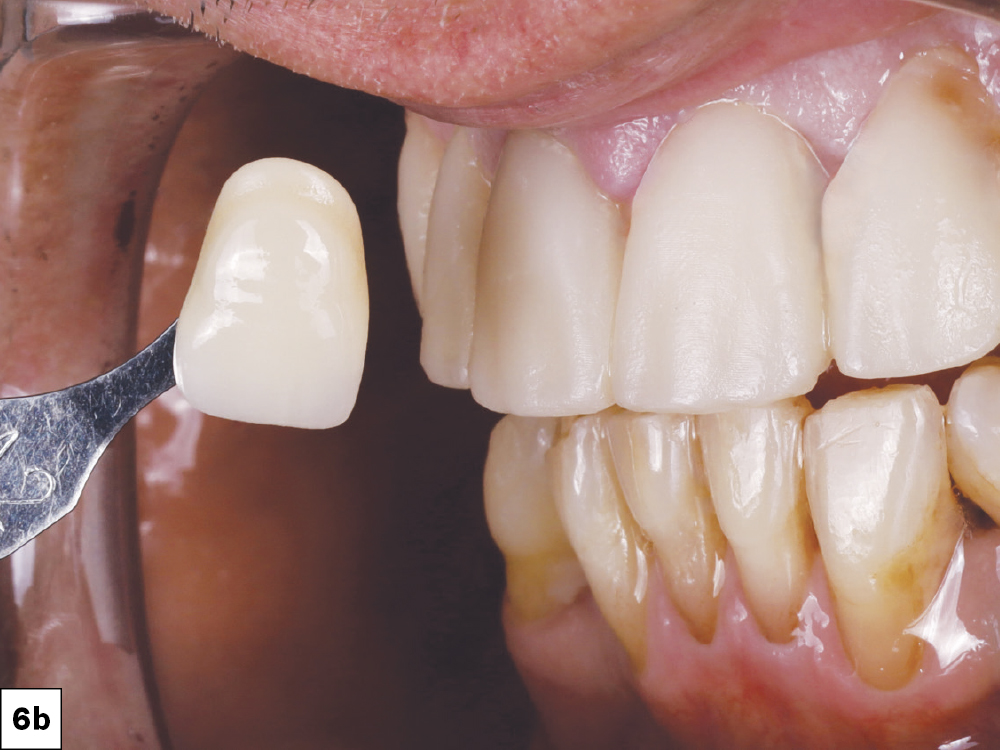
Figures 6a, 6b: I reviewed shading with the patient before choosing an A2 shade.

Figure 7a
Figure 7b
Figure 7c

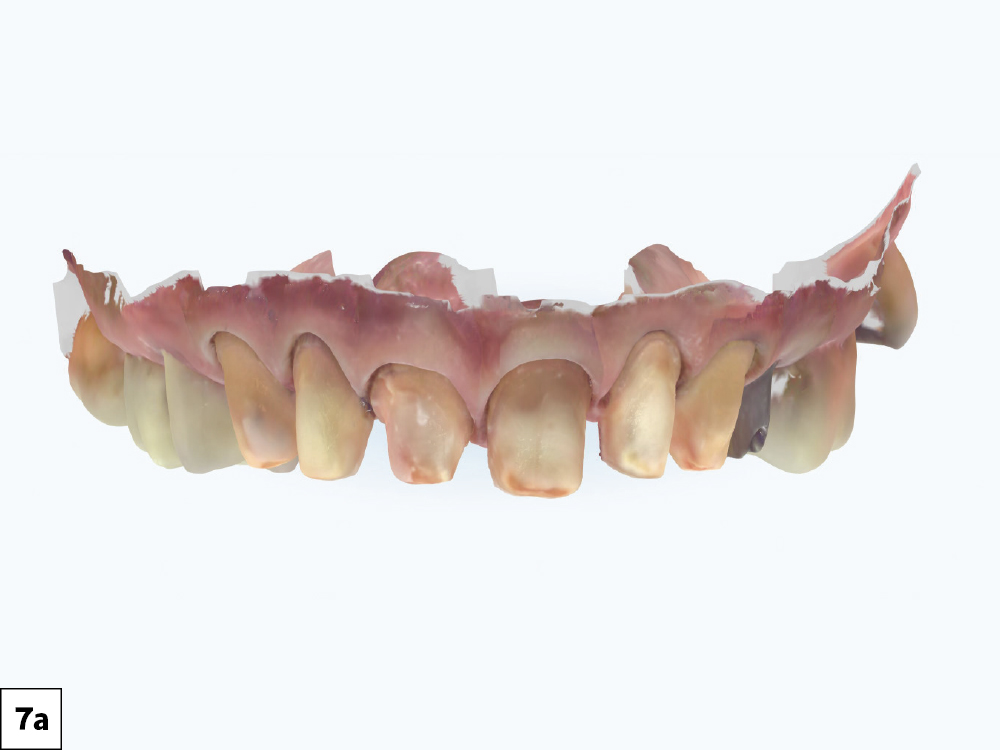
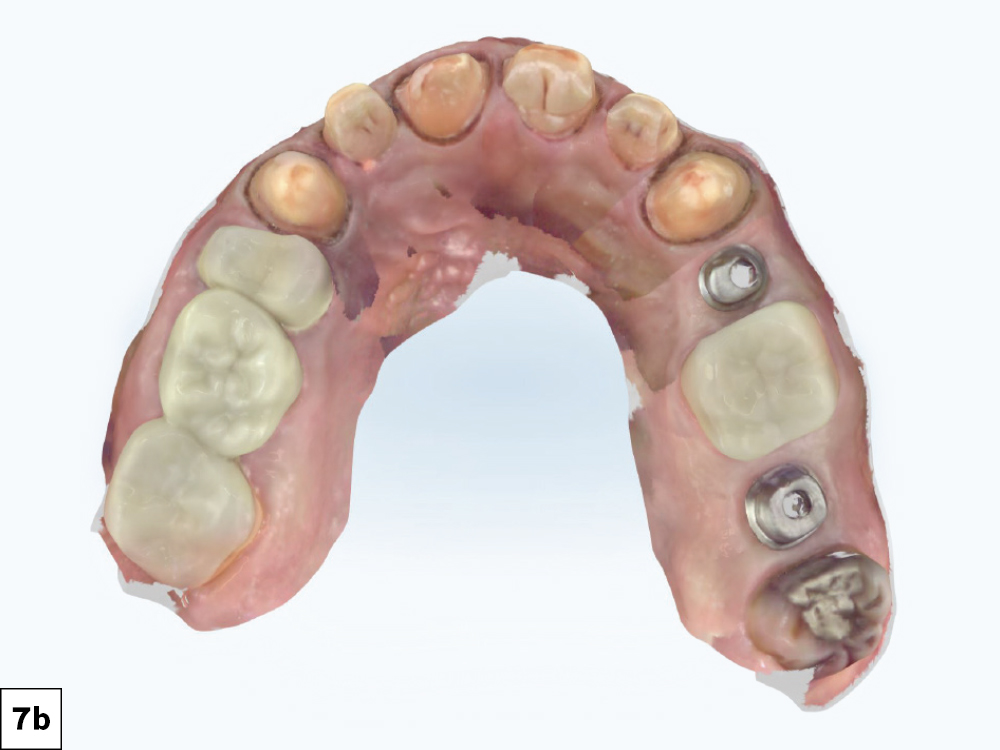
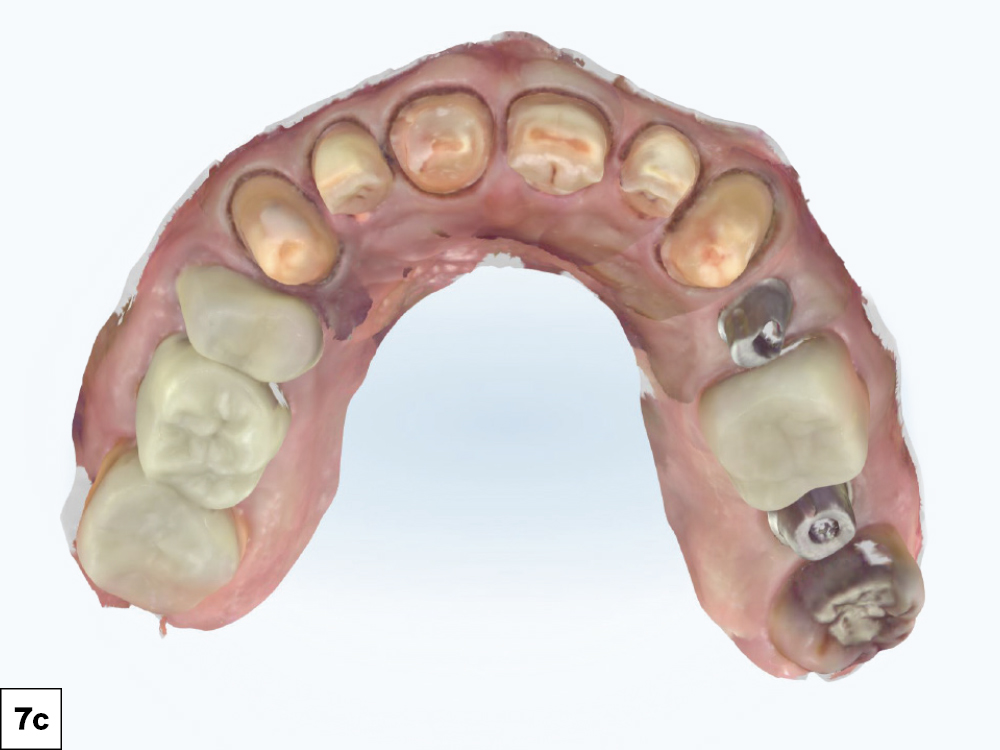
Figures 7a–7c: Following tooth preparation, I scanned with an iTero Element 5D imaging system and imported directly to the Glidewell fastdesign.io Software and Design Station. Teeth #6, #8 and #11 are crowns, while #7, #9 and #10 are veneer preps. Note that #12 and #15 have custom implant abutments already seated.

Figure 8a
Figure 8b
Figure 8c

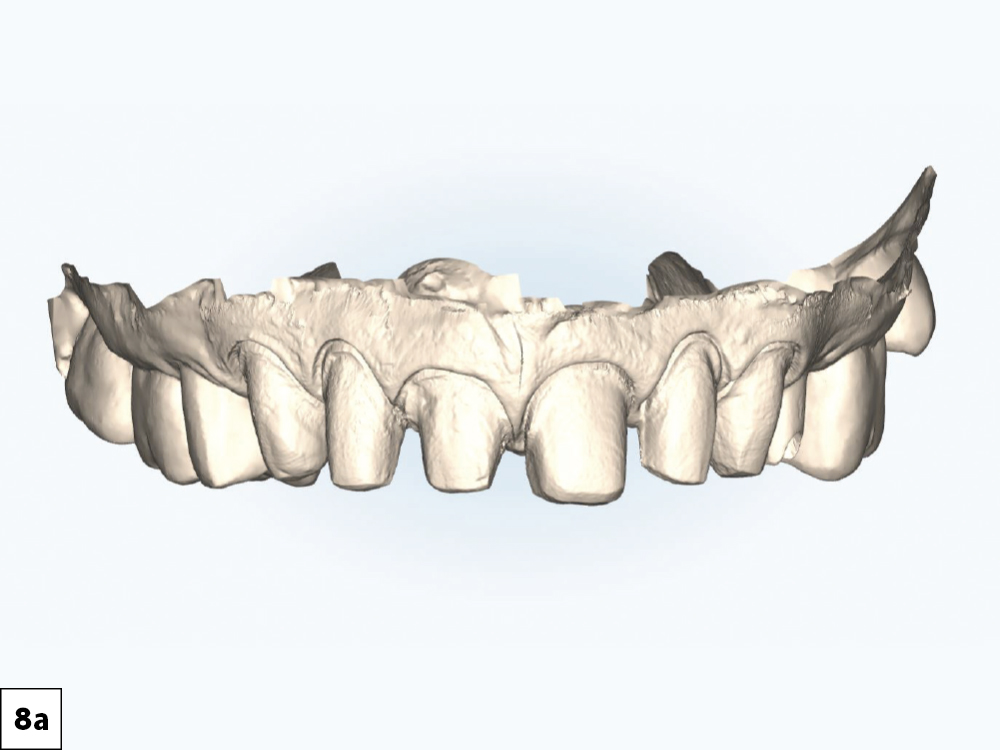
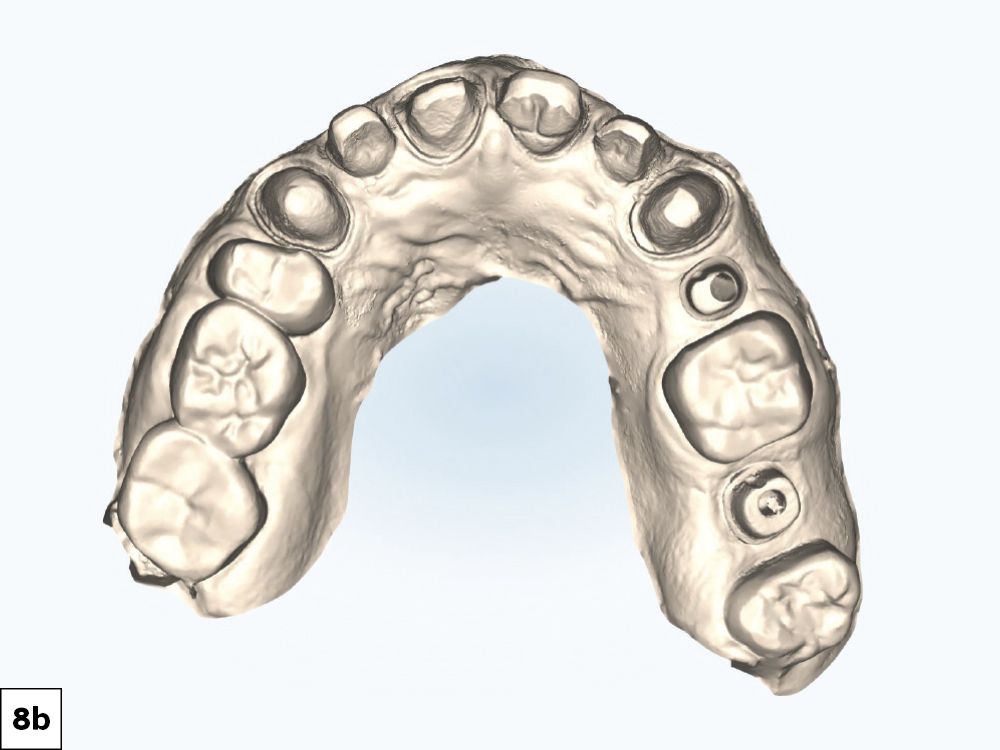
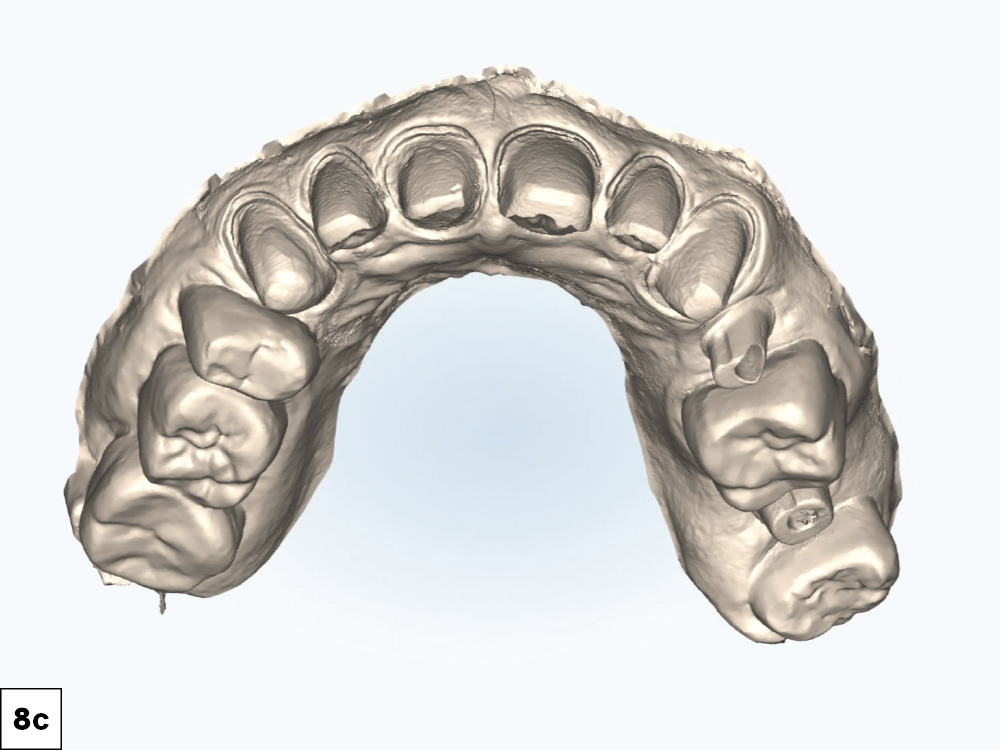
Figures 8a–8c: Here is the model view from the same scans shown in Figures 7a–7c.

Figure 9a
Figure 9b
Figure 9c
Figure 9d

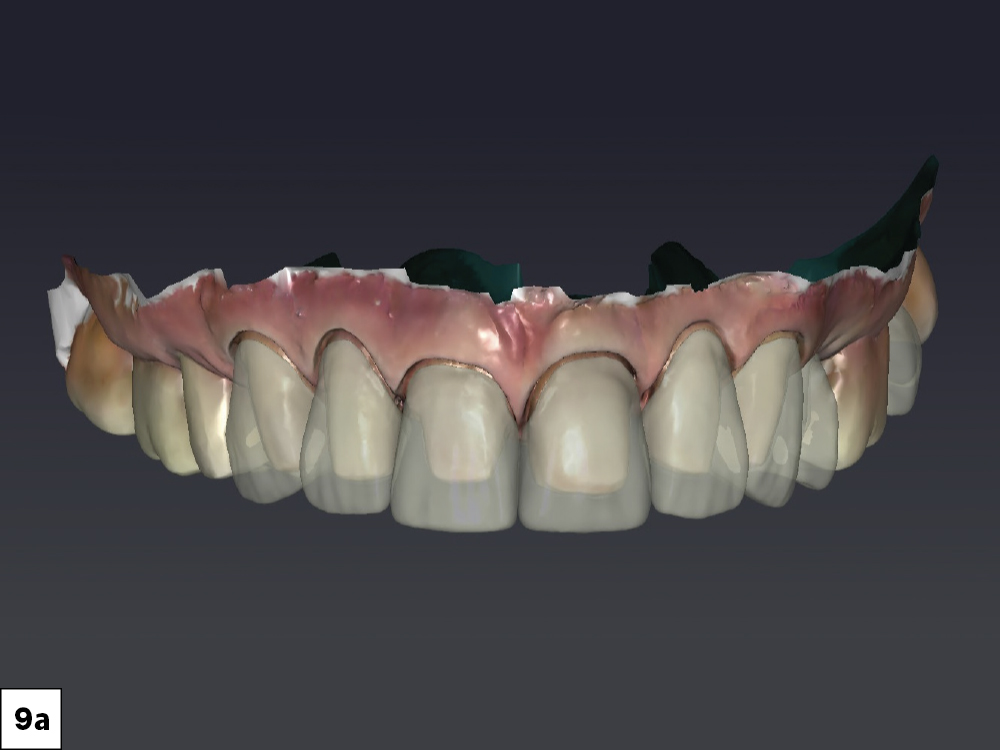
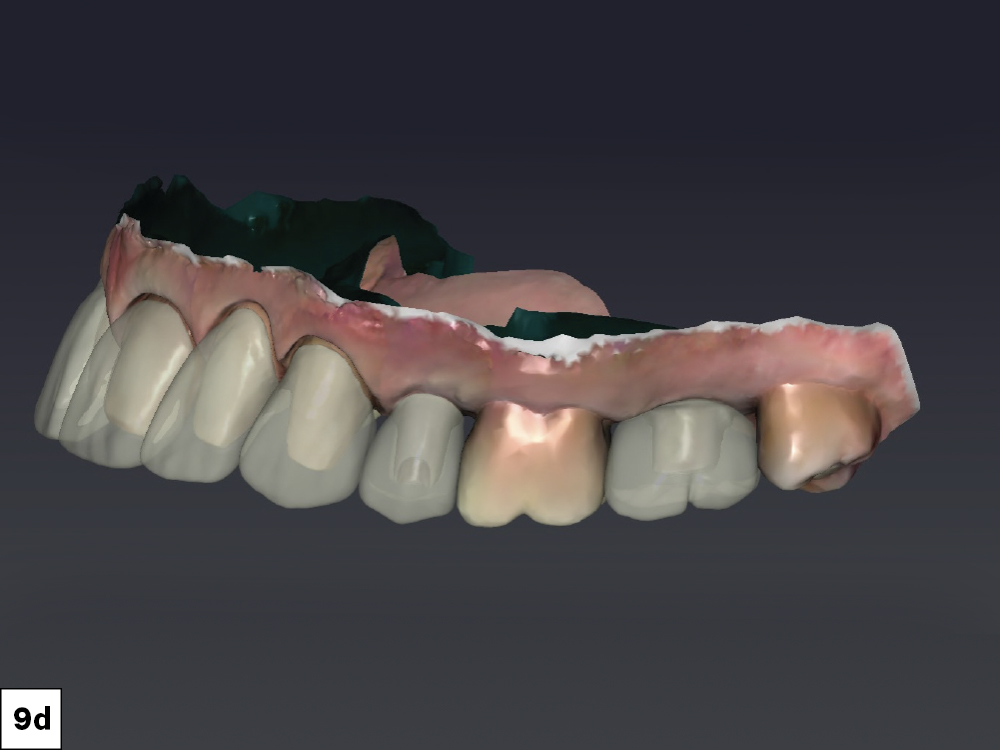
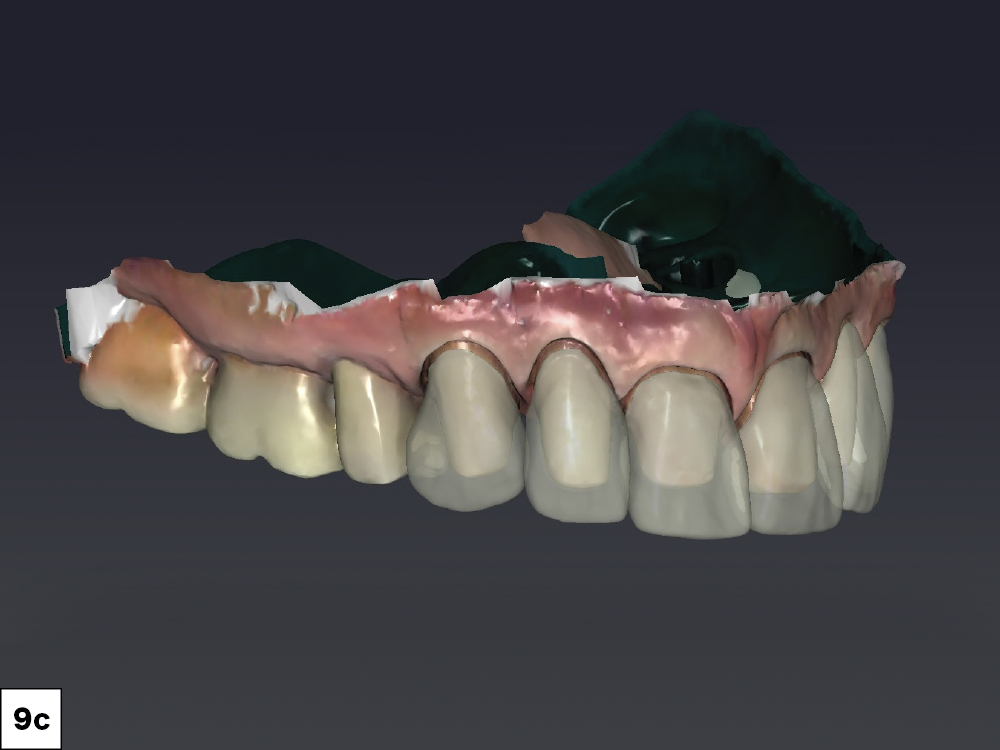
Figures 9a–9d: The preparations are shown beneath the designed crowns and veneers. I used the fastdesign.io software’s design as a service function to get assistance with the design process from the glidewell.io support team. This was very helpful, as I was able to use the scans of the provisionals as a guide for the final crown design.

Figure 10a
Figure 10b

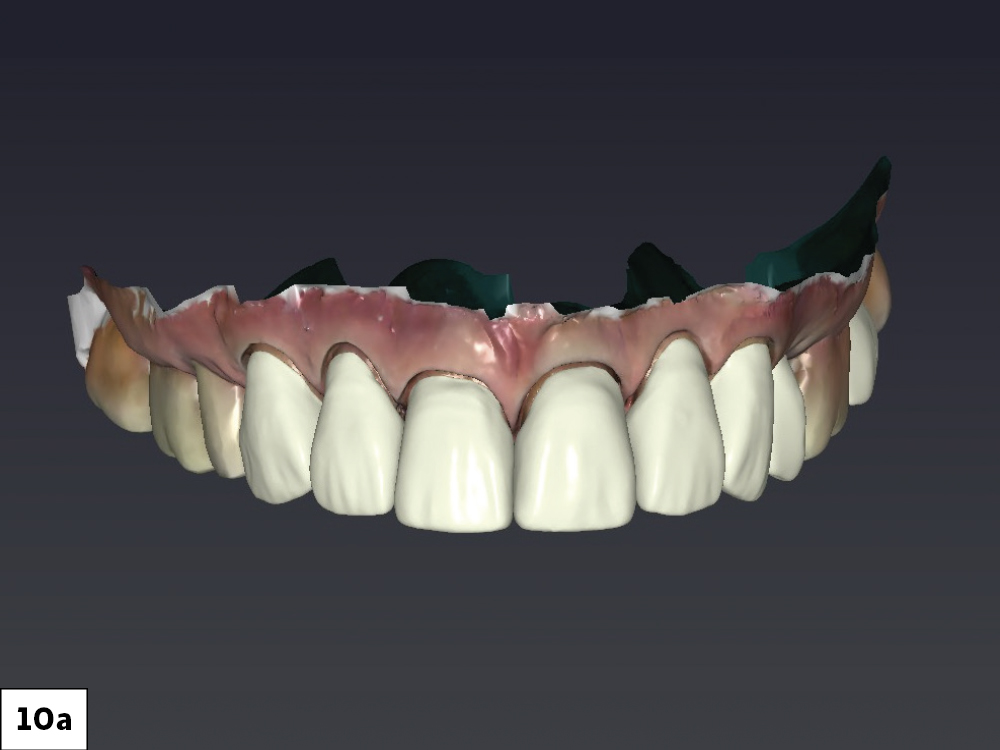
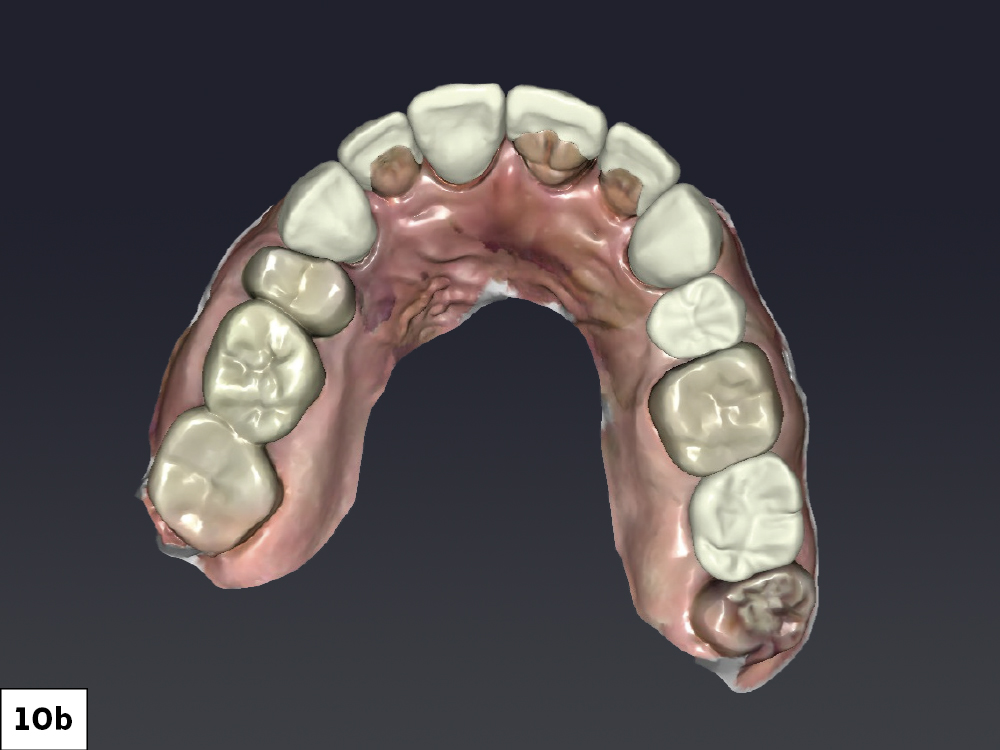
Figures 10a, 10b: The support team at Glidewell provided the final design of the restorations, as shown here. I was pleased that it closely mirrored the provisionals. The new restorative design arrived overnight, ready for me to mill in my office.
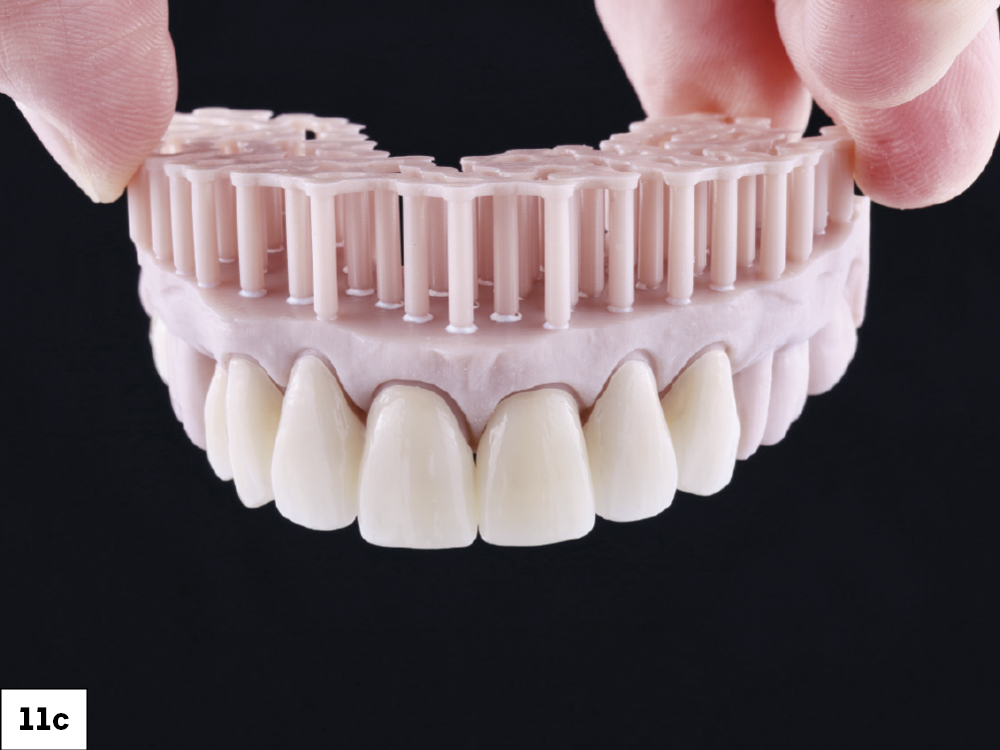
Figure 11a
Figure 11b
Figure 11c

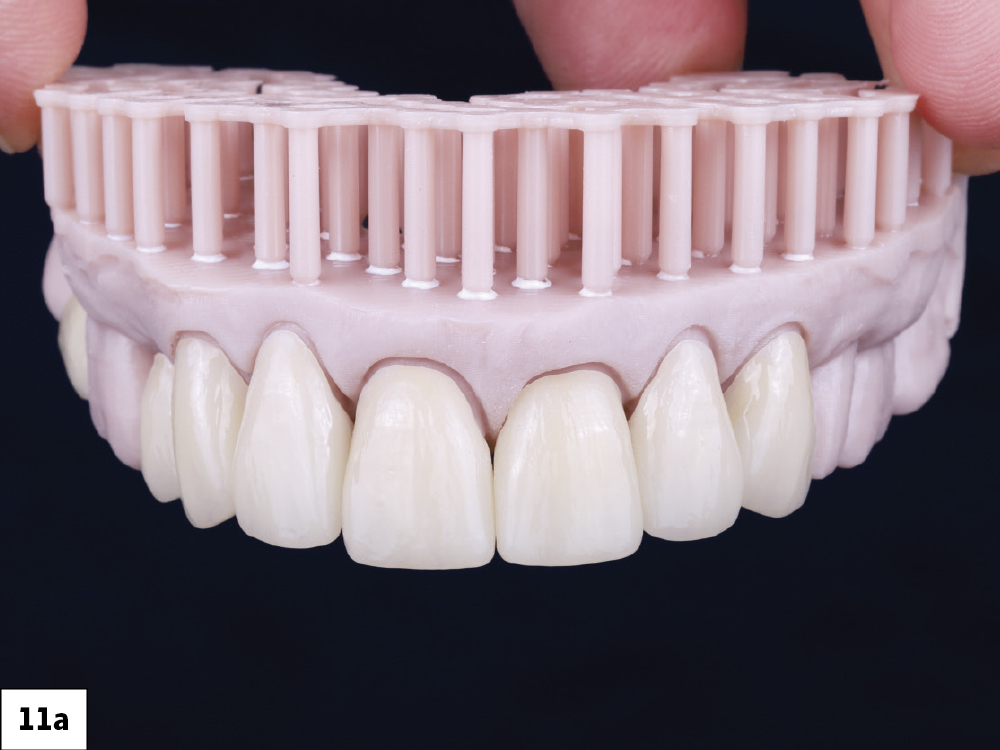
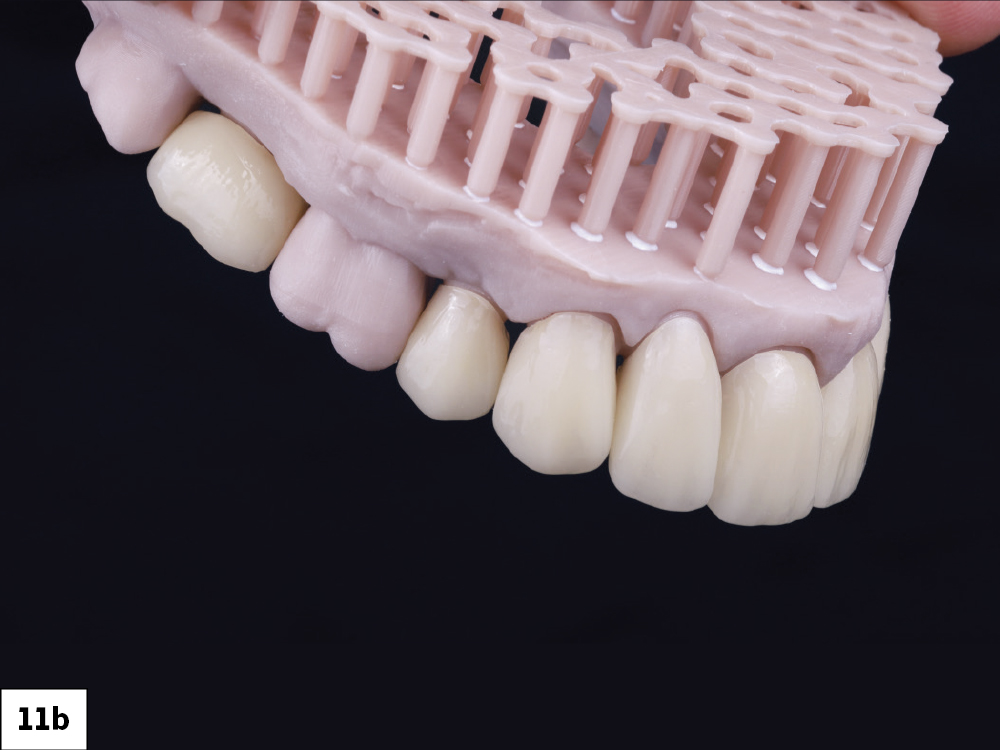
Figures 11a–11c: I used Obsidian® Milling Blocks, which I like for the natural esthetics. Obsidian restorations bond well to the teeth and are easily monitored with radiographs. I 3D-printed the final scan of the preparations. A solid model worked well for adjusting contacts as needed.

Figure 12

Figure 12: I milled crowns #12 and #15, with plans for screw-retained final restorations. I drilled holes on the occlusals of the implant crowns and cemented them extraorally, allowing me to thoroughly polish and contour the margins.

Figure 13a
Figure 13b
Figure 13c

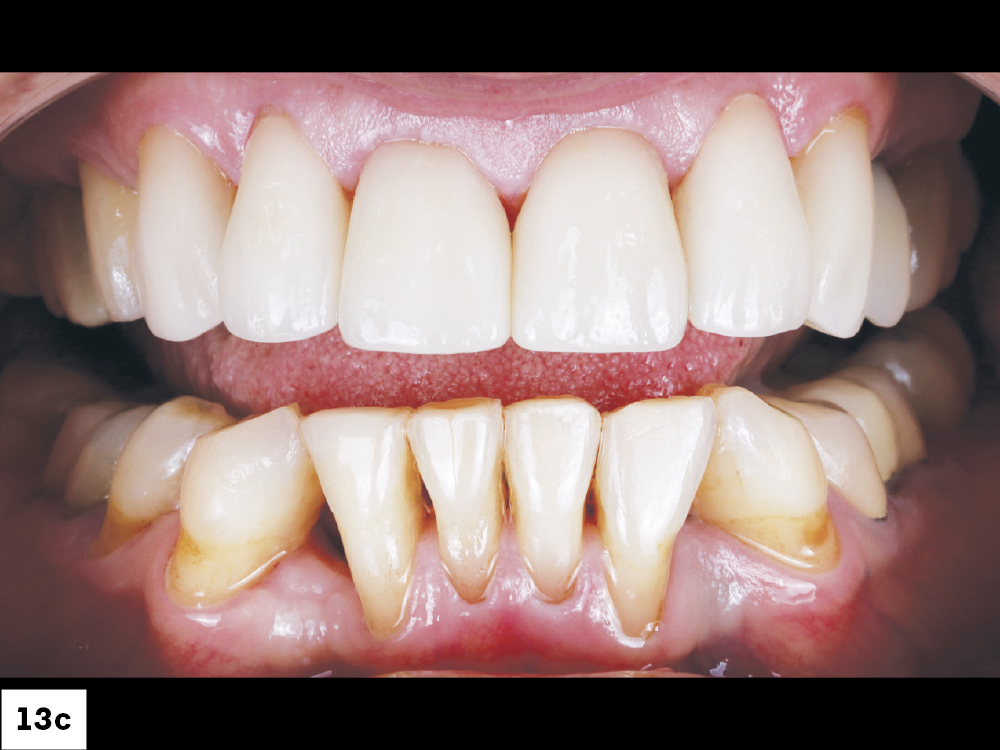
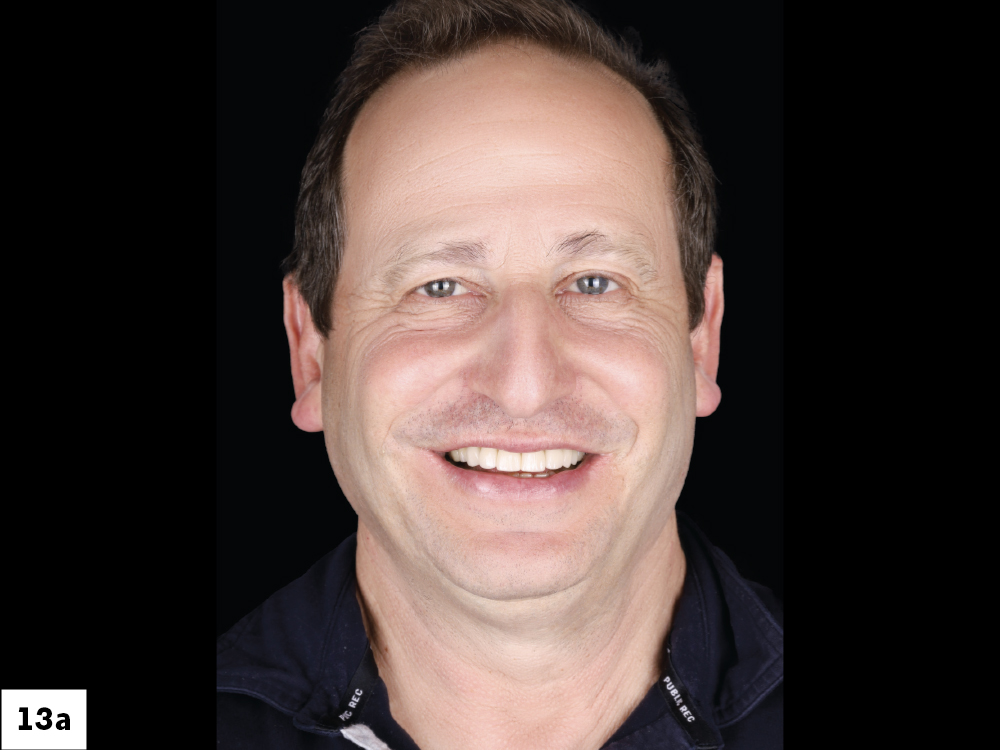
Figures 13a–13c: The patient was happy with the results. At two days post-cementation, the gingiva was healing nicely. Our next phase of treatment will be the mandibular arch.

Figure 14a
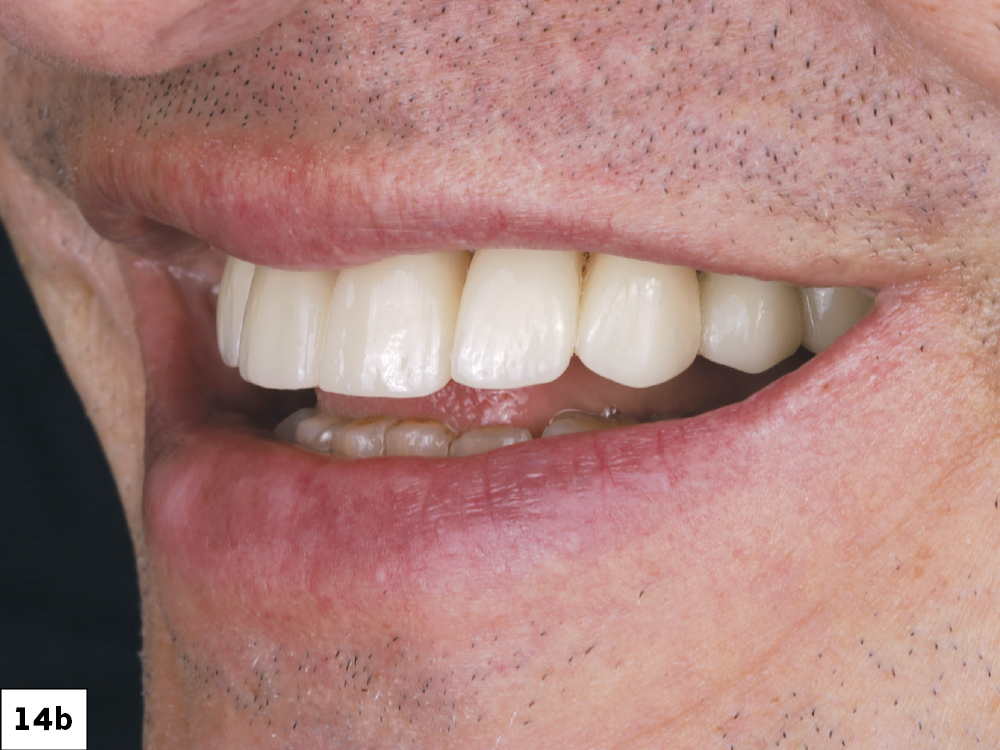
Figure 14b

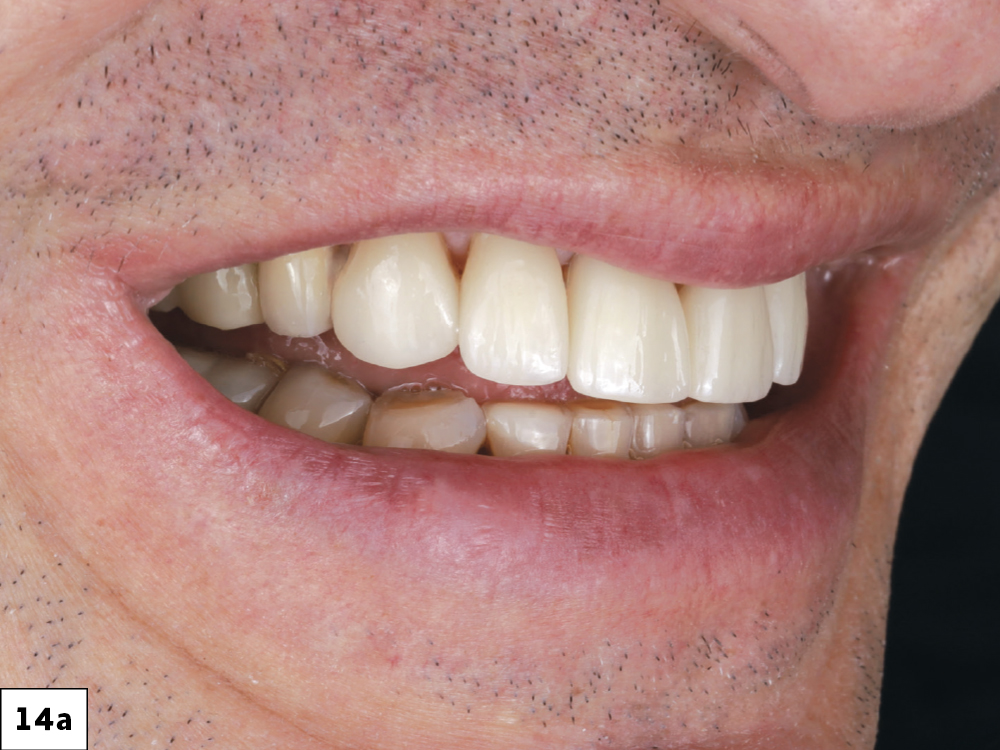
Figures 14a, 14b: I was pleased with how the surface anatomy and texture of the restorations provided a natural look.

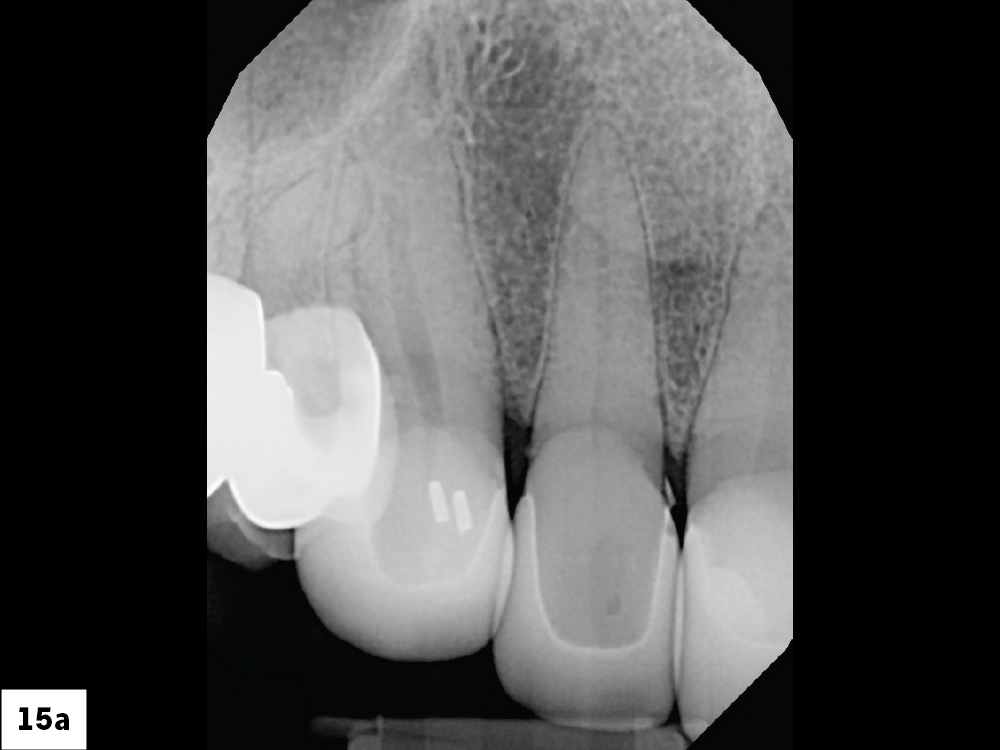
Figure 15a
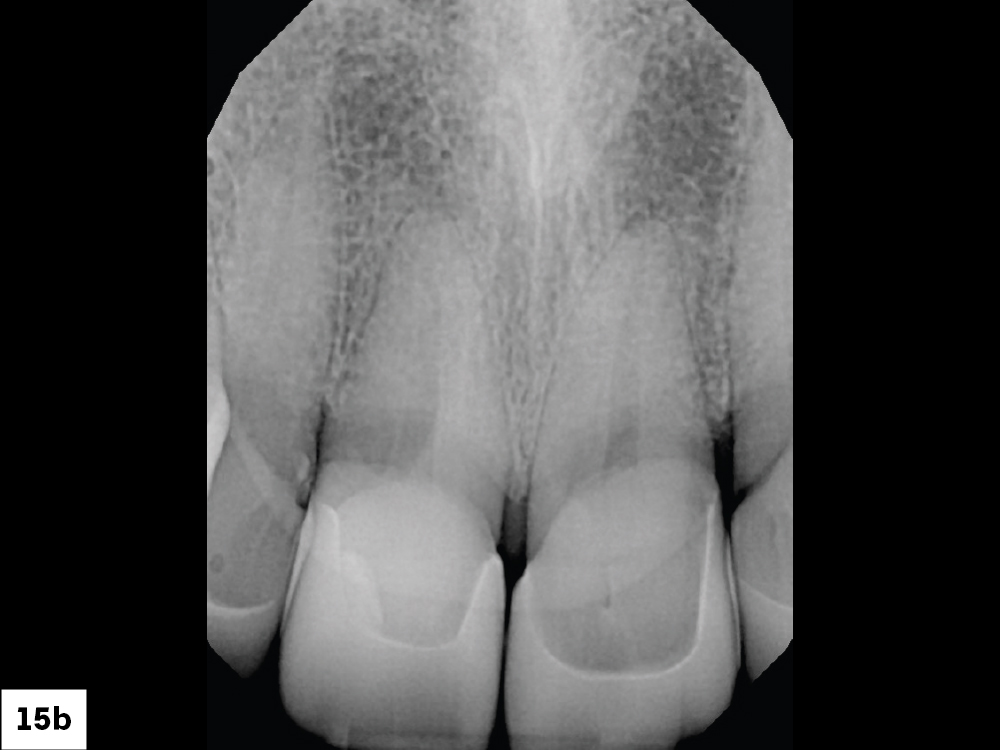
Figure 15b
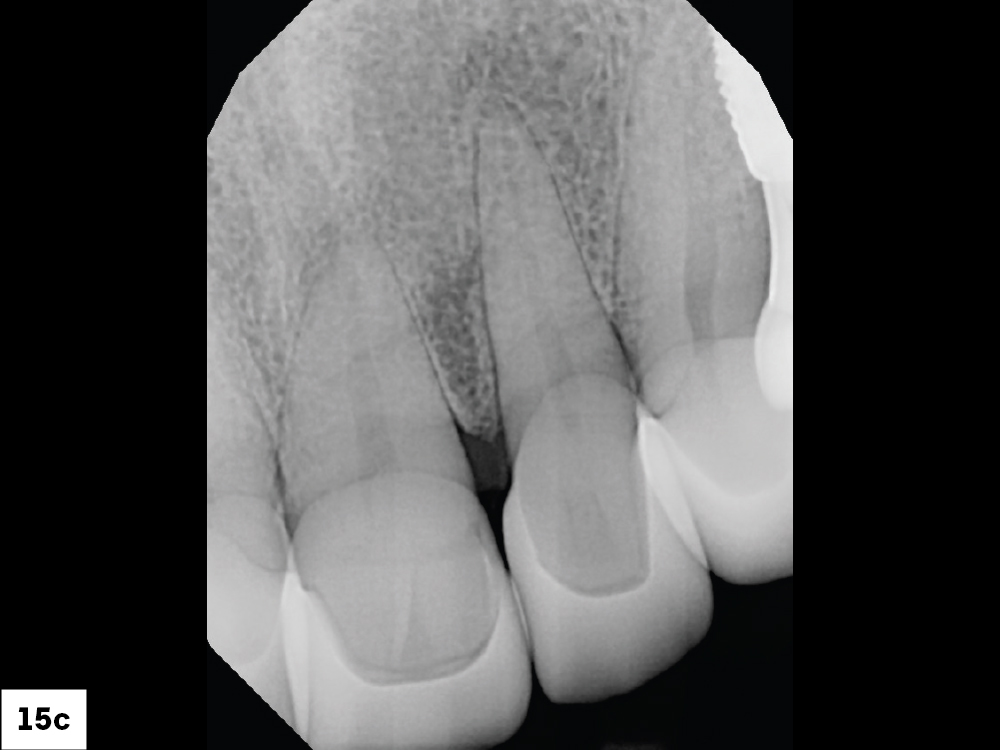
Figure 15c
Figure 15d
Figure 15e
Figure 15f
Figure 15g

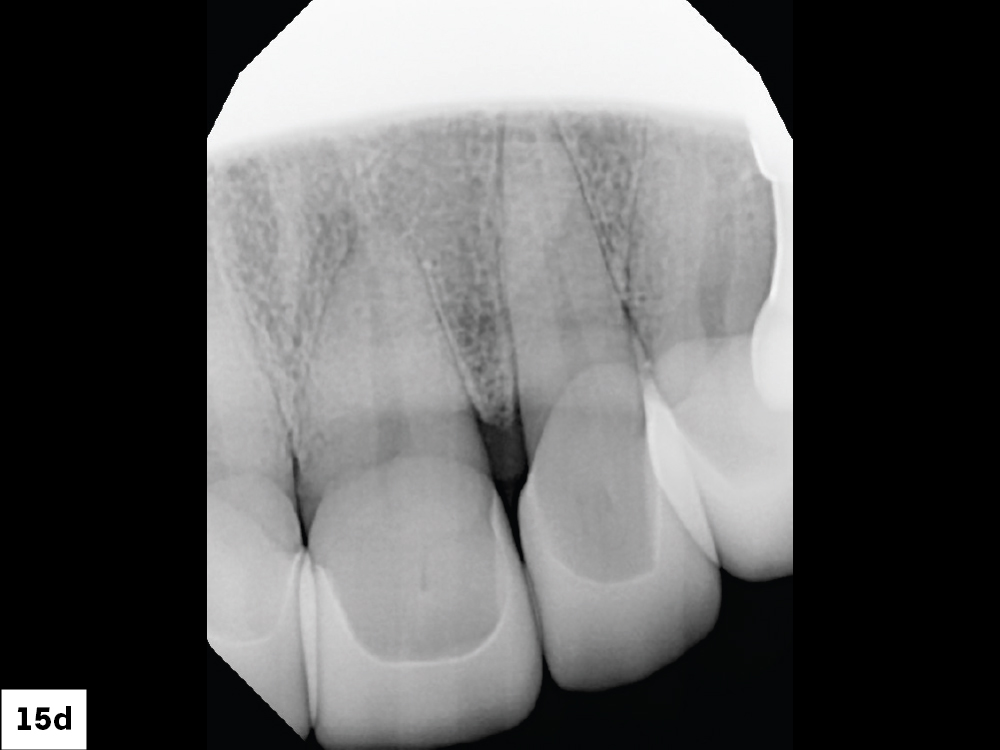
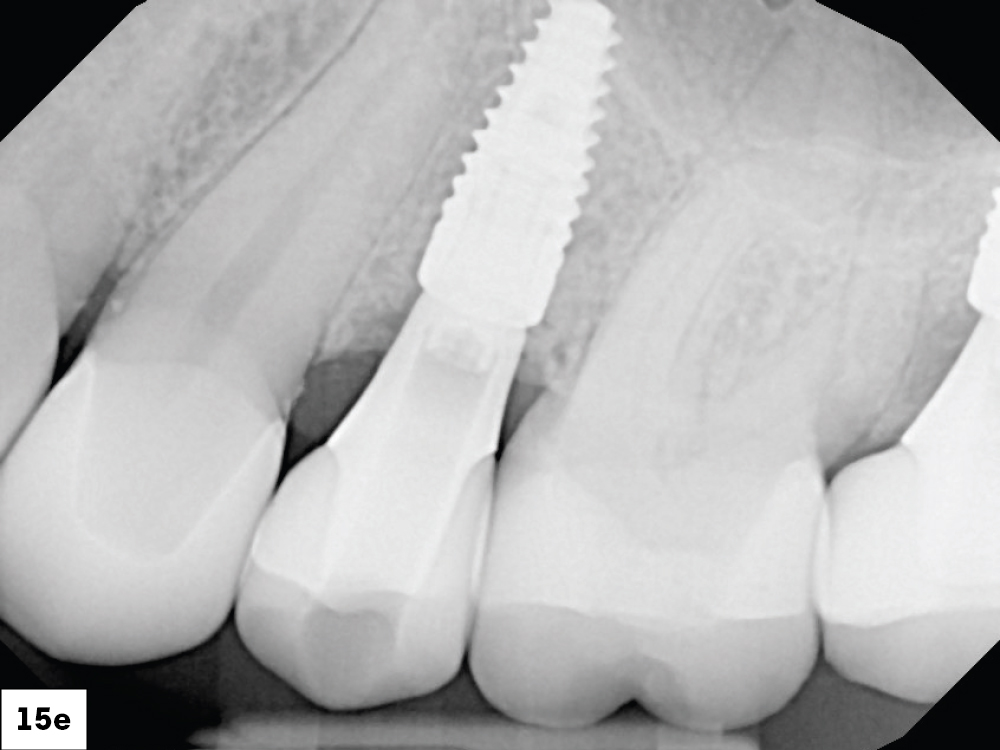
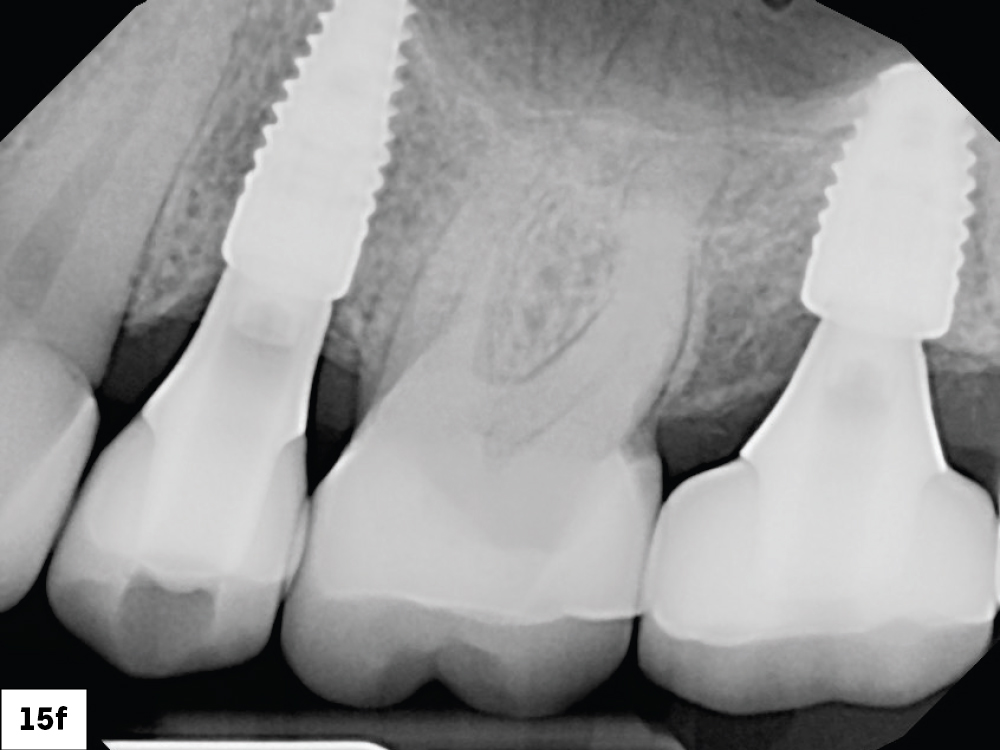
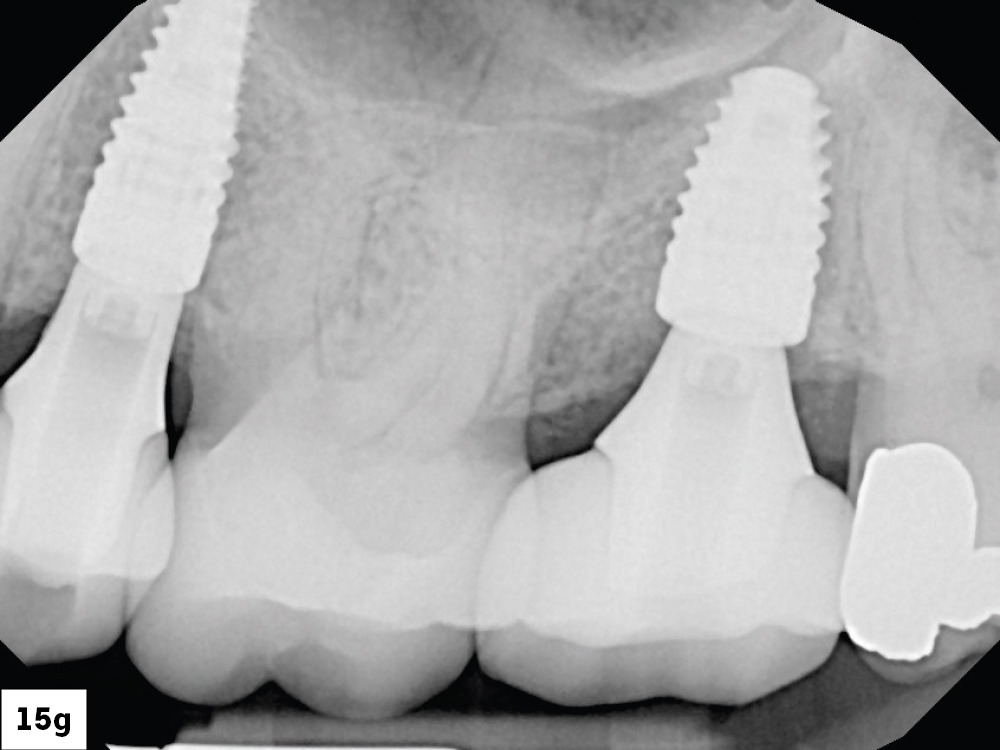
Figures 15a–15g: Here are the post-op X-rays. I am pleased with the accuracy and marginal adaptation coming out of the fastmill.io In-Office Mill.

CONCLUSION

The glidewell.io system helped me turn around a case efficiently and to a standard that satisfied me and the patient. The design process and milling were completed in a day, even with a full clinical schedule. I was able to stain and glaze the crowns between patients while my assistants helped with milling. I was especially pleased with the surface anatomy and texture, which gave the restorations a natural look.
Adding the skills necessary to provide anterior restorations with my mill made a rewarding experience even more gratifying, as I could provide the patient with a high-quality result in a timely manner. Whether you want to start doing anterior cases or stay with the more straightforward posteriors, I recommend glidewell.io In-Office Solution milling to any dentist looking to add another dimension to their practice.