Replacing a Single Central Incisor
June 20, 2025
 image
Taylor Manalili, DDS
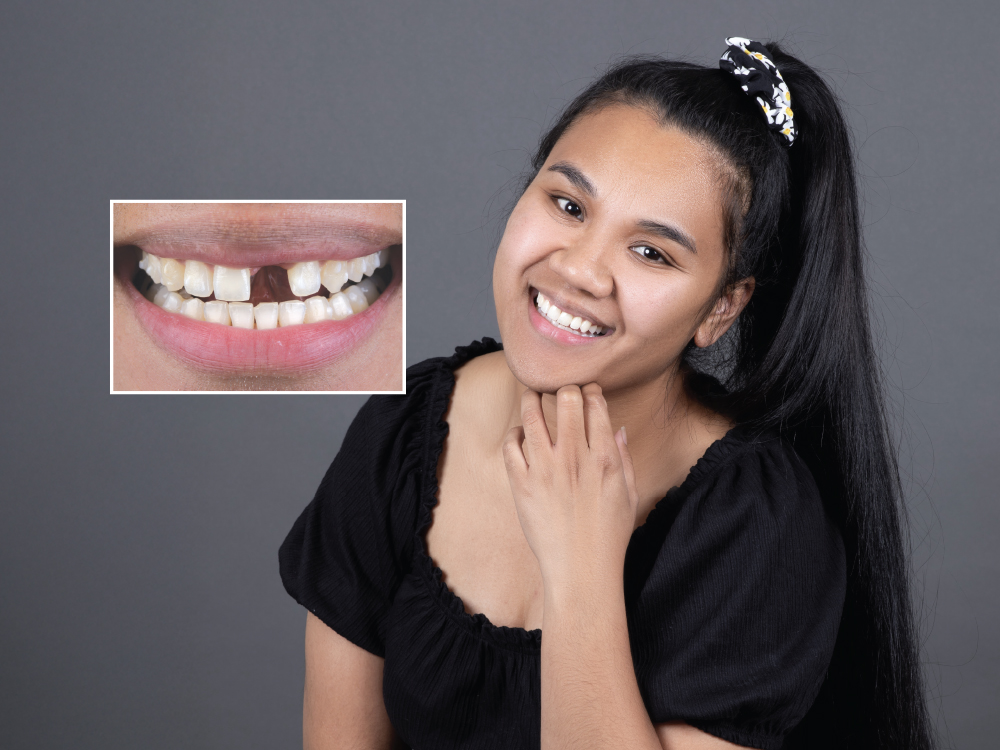
Close-up of missing front tooth

Several years ago, Raquel suffered a traumatic injury that caused the loss of her front tooth. Over time, she noticed that her teeth were beginning to shift, and her dentist initiated aligner therapy with the intent that she would receive a definitive replacement for tooth #9 upon completion.

When I met with Raquel, she had just completed aligner therapy. We discussed the space discrepancy between tooth #8 and the site for #9, and we agreed that the best solution was a partial coverage composite to reshape #8 and an implant-supported restoration to replace tooth #9.

A Glidewell HT™ Implant (Glidewell Direct; Irvine, Calif.) was chosen because it offers excellent primary stability, a clinically proven success rate and a simple surgical protocol. BruxZir® Esthetic Zirconia was chosen for the final crown because of its combination of strength and lifelike esthetics.

CASE REPORT

Close-up of missing front tooth

Figure 1: The patient presented post aligner treatment with tooth #9 missing. I noted that there was a lack of hard and soft tissue on the facial of the implant site that would require hard and soft tissue grafting.

Close-up of gum inflammation and missing tooth
Close-up of dental gum injury
Close-up of missing front tooth and gums

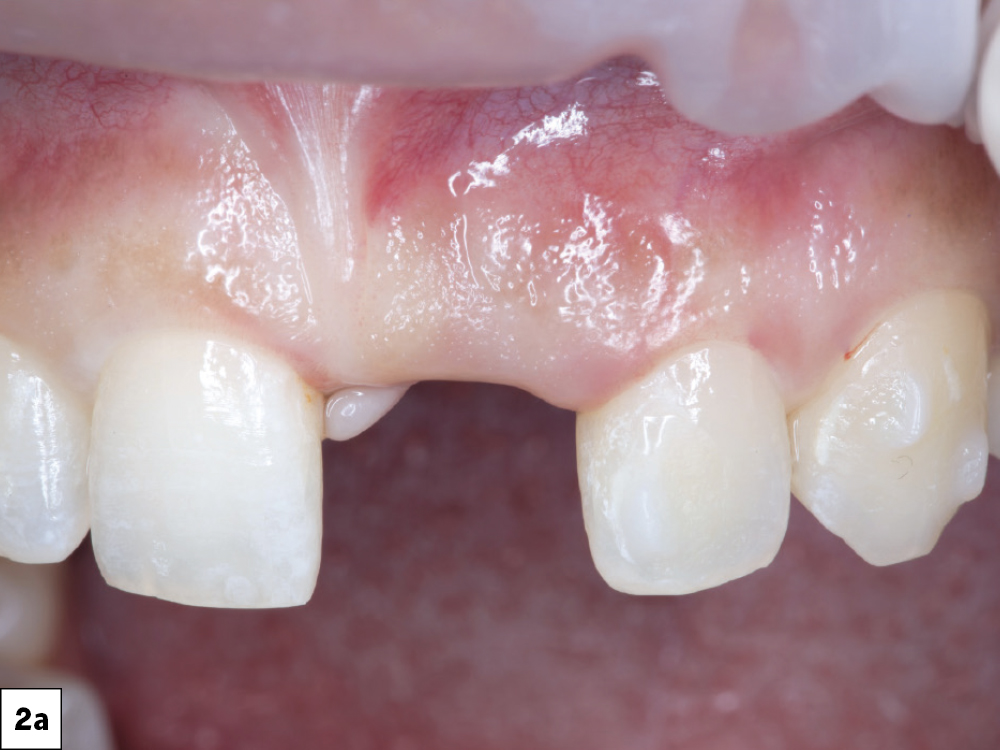
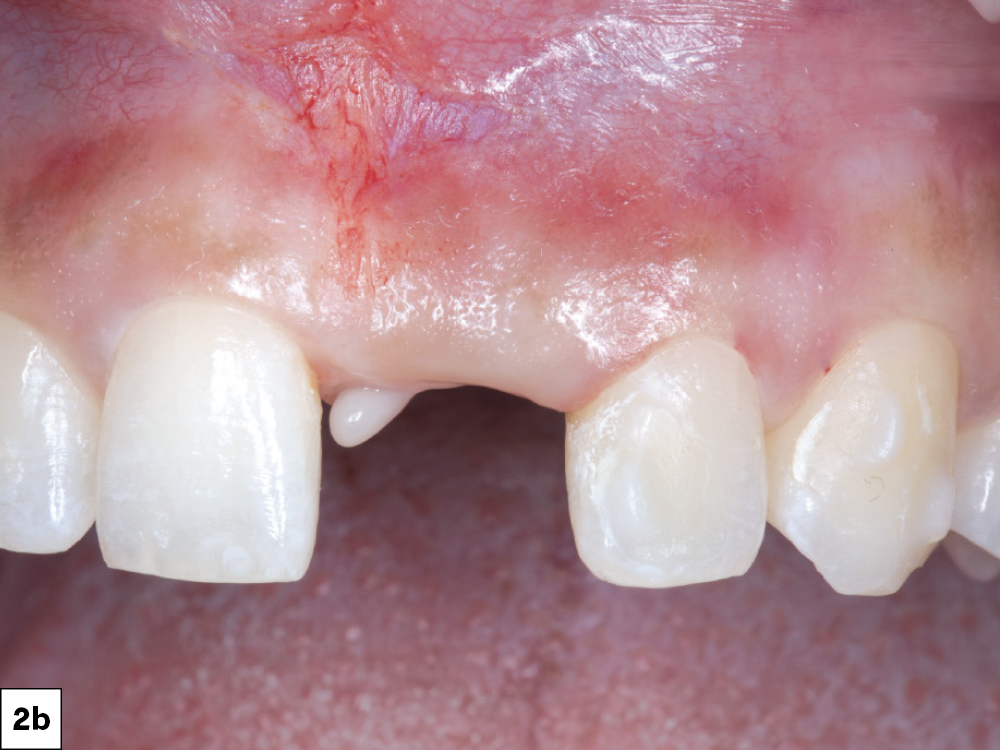
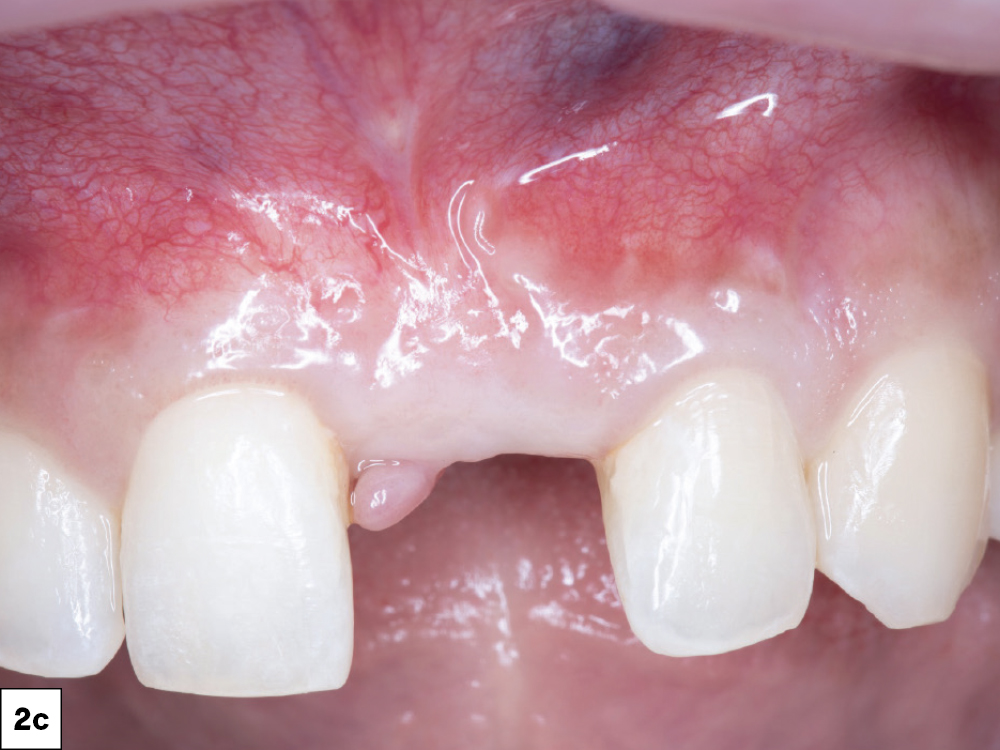
Figures 2a–2c: To prevent the frenum from pulling on the soft tissue and potentially interfering with a graft healing, I performed a frenectomy using a Waterlase iPlus Premier Edition™ laser system (BIOLASE, Inc.; Foothill Ranch, Calif.).

Close-up of dental arch with oral appliance

Figure 3: The buccal plate had resorbed and required hard and soft tissue grafting prior to implant placement.

Soft tissue grafting

Figure 4: Soft tissue grafting was performed with AlloDerm® allograft (LifeCell Corporation; Branchburg, N.J.). The goal was to generate adequate tissue contour for bone grafting six months later.

Tenting screws 2
Tenting screws 1

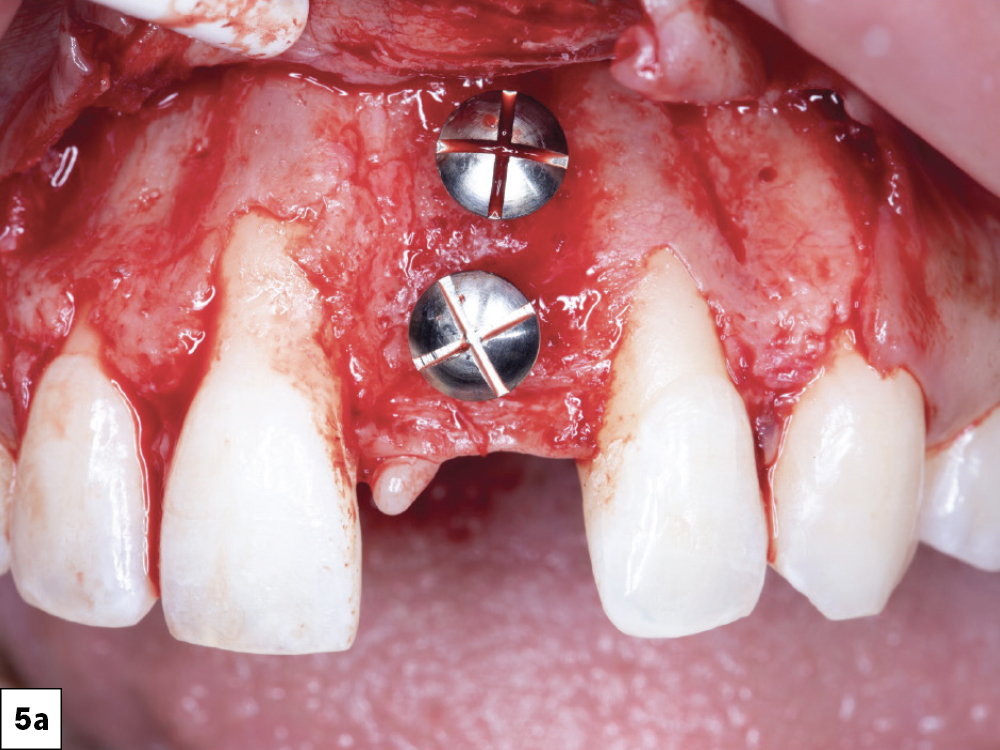
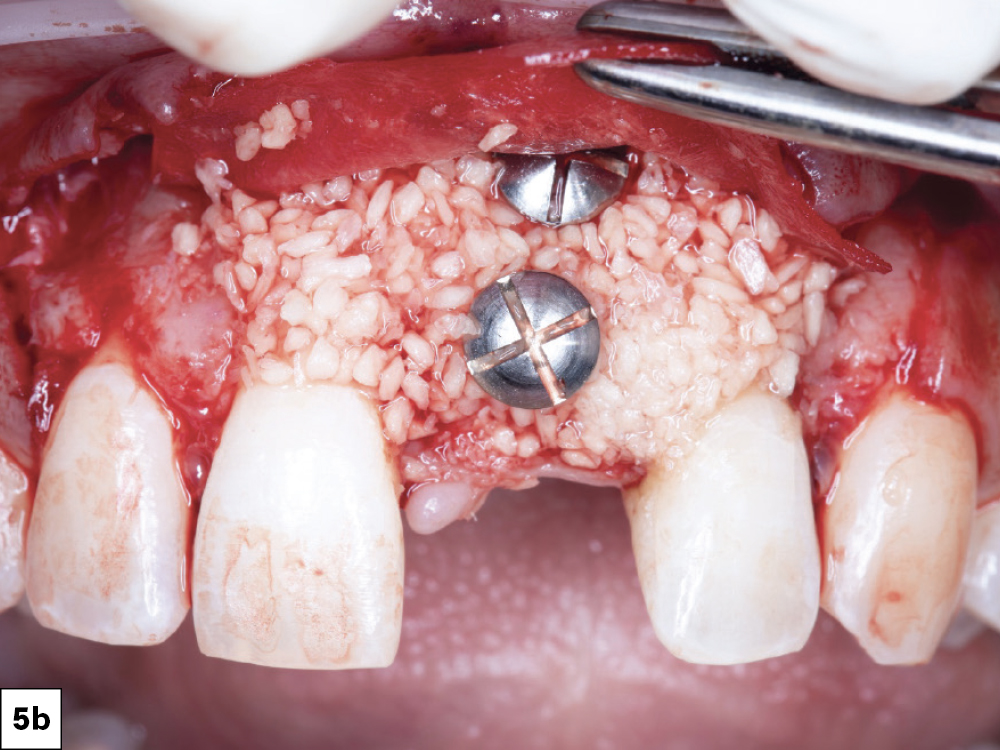
Figures 5a, 5b: The tenting screws acted as a scaffold for Newport Biologics™ Mineralized Cortico/Cancellous Allograft Blend (Glidewell Direct). Before placement, I hydrated the allograft with sterile saline and then covered it with a Newport Biologics Resorbable Collagen Membrane 4-6 (Glidewell Direct).

Tacking screws 2
Tacking screws

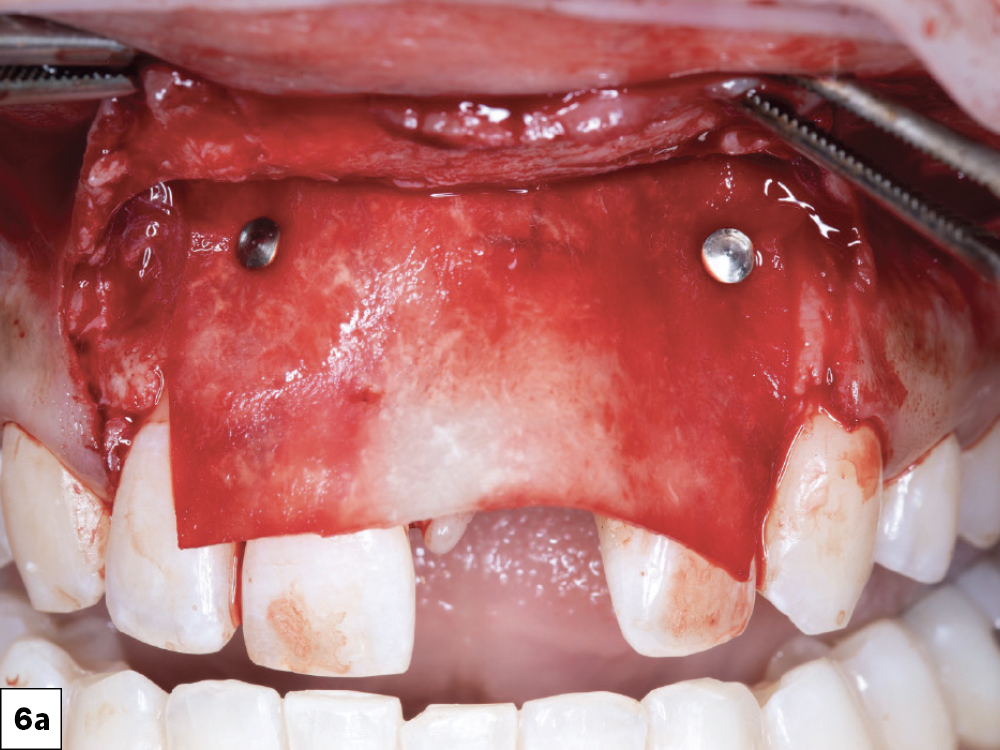
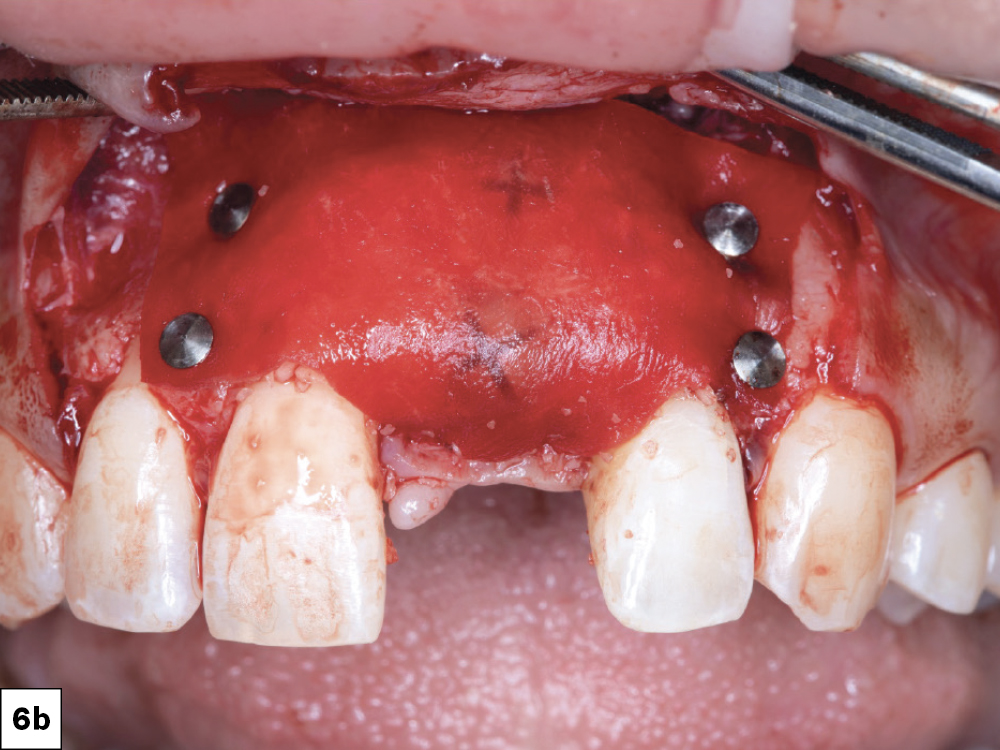
Figures 6a, 6b: Tacking screws were used to help hold the membrane in place.

Close-up of dental surgery stitches

Figure 7: I then placed Biotex™ PTFE sutures (available through Glidewell Direct) and used a diode laser to touch up the frenectomy.

Dental X-ray with measurement overlays

Figure 8: After four months of healing after bone grafting, I took a CBCT scan to evaluate if the patient had enough bone to proceed. Satisfied with the scan results, I moved to the implant placement phase. Based on the virtual wax-up and implant plan, it was determined that the final restoration would be a cement-retained restoration.

Implant placement 2
Implant placement 1

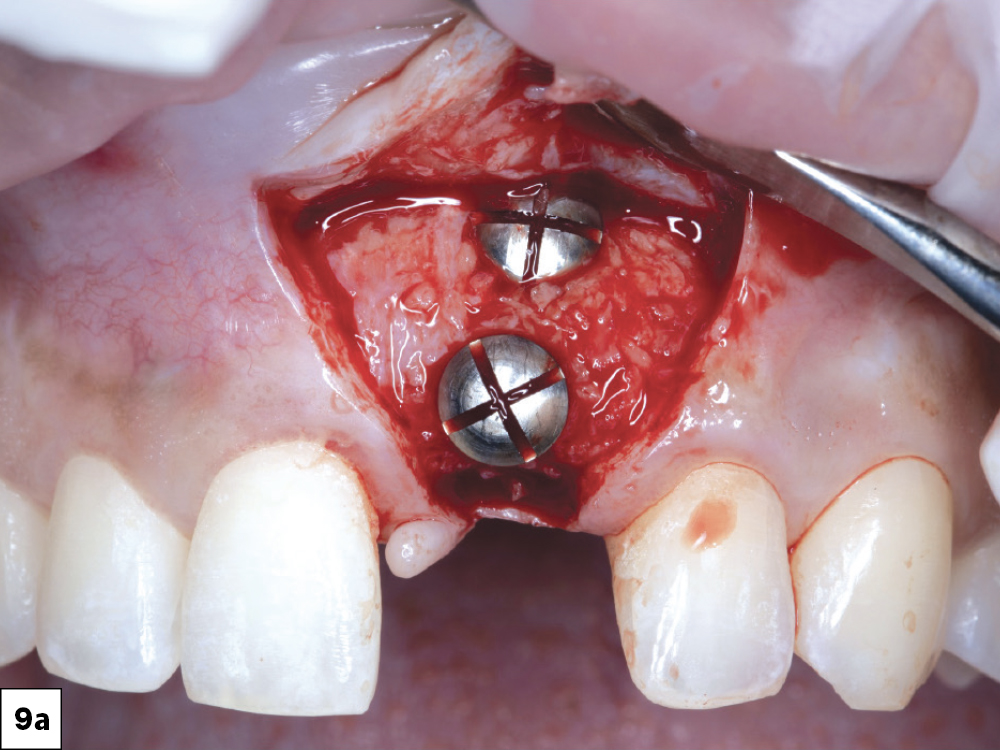
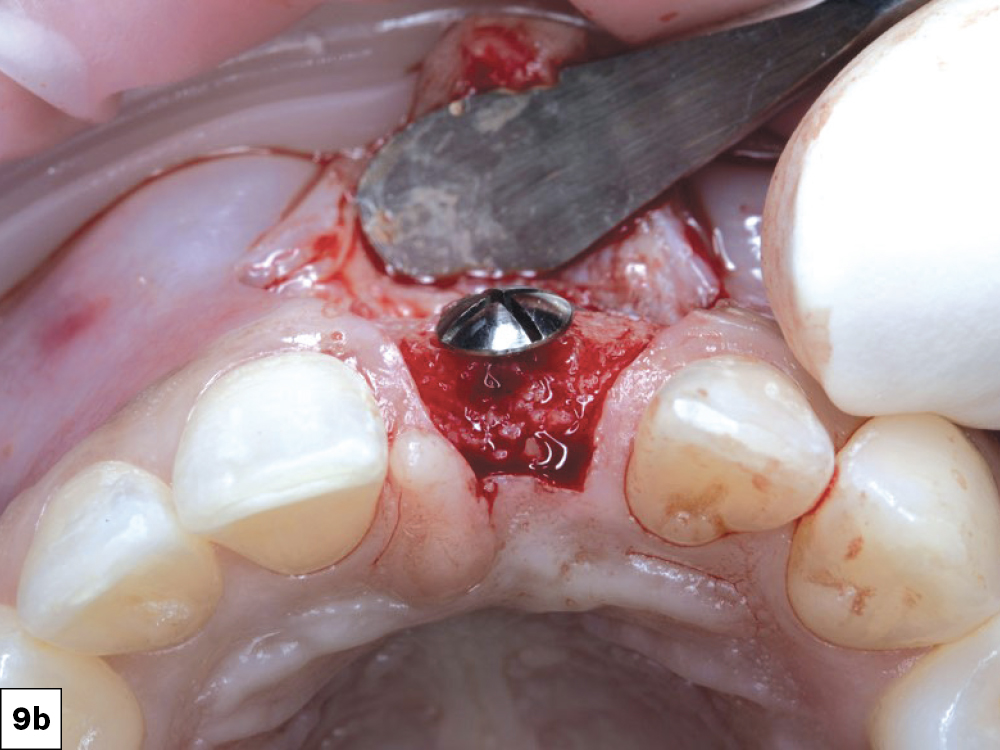
Figures 9a, 9b: On the day of implant placement, using a papilla-sparing incision design, I performed a full-thickness flap and removed the tenting screws, which backed out easily. I was pleased to observe the quality and quantity of bone.

Teeth With Surgical Guide
Folded back gums with placement torque

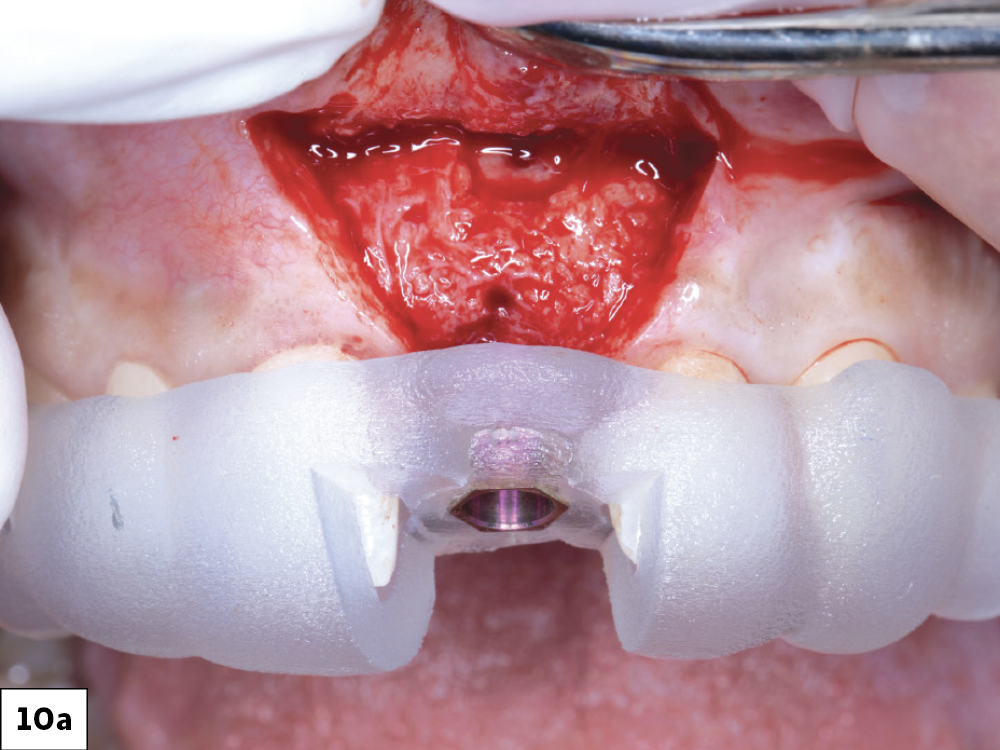
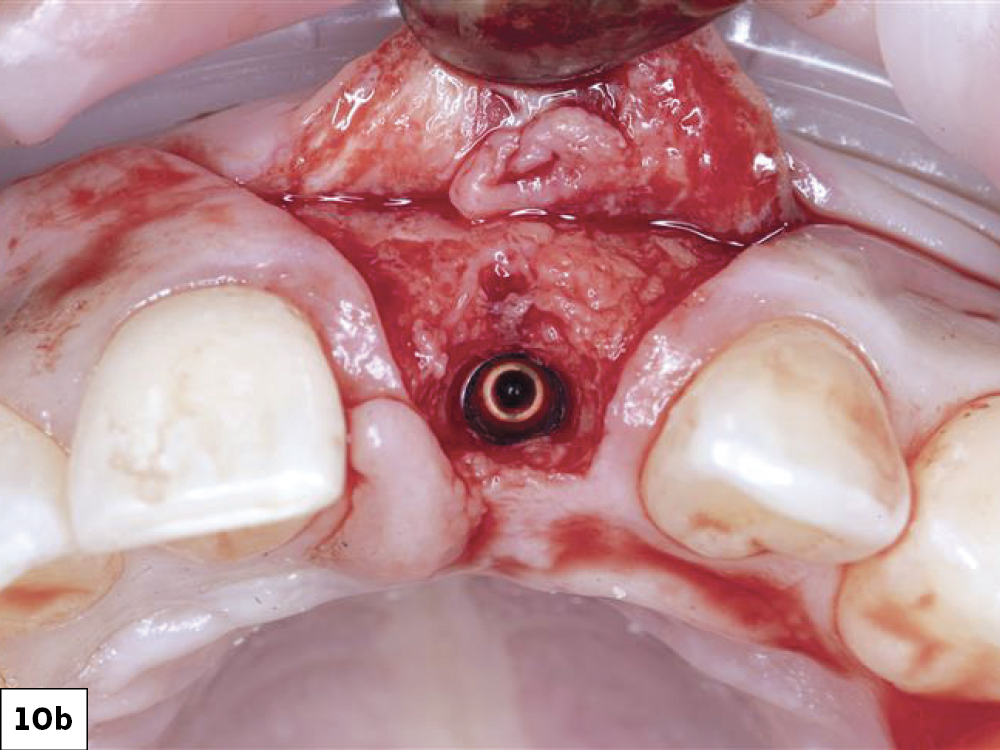
Figures 10a, 10b: I positioned the tooth-supported surgical guide and placed the 3.5 x 13 Glidewell HT Implant, with a final placement torque of 45 Ncm.

Provisional Restorations

Figure 11: Immediate provisional restorations are for esthetics more than function, and this step helped establish the patient’s soft tissue profile. I torqued the BioTemps® provisional crown (Glidewell; Newport Beach, Calif.) to 35 Ncm.

Close-up of teeth with dental focus
Close-up of human teeth and gums

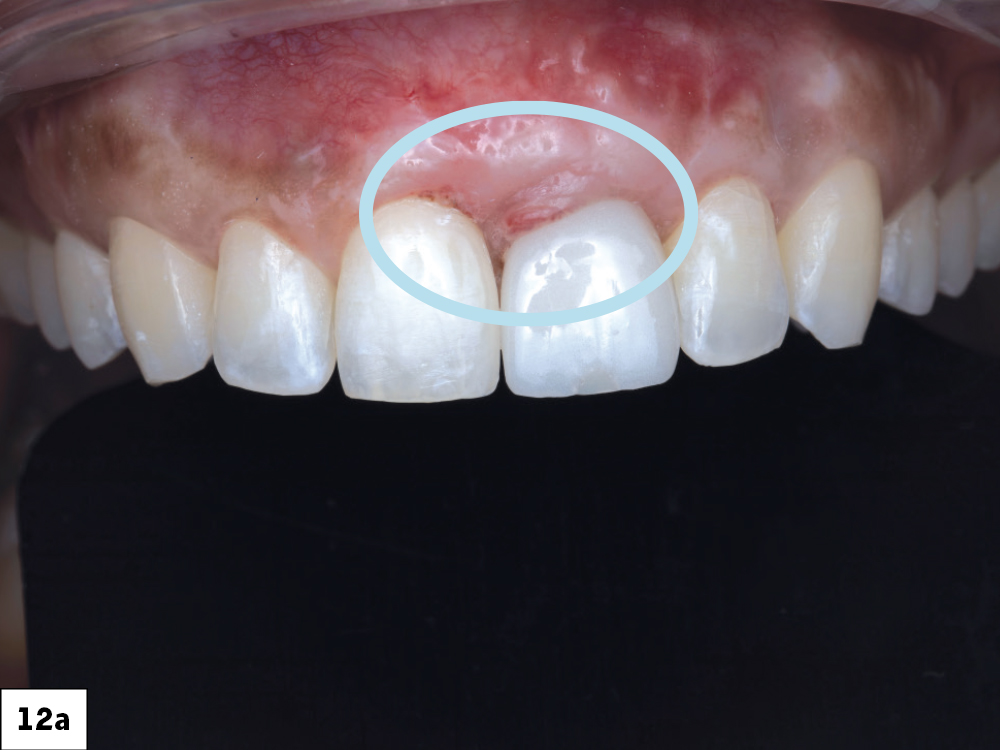
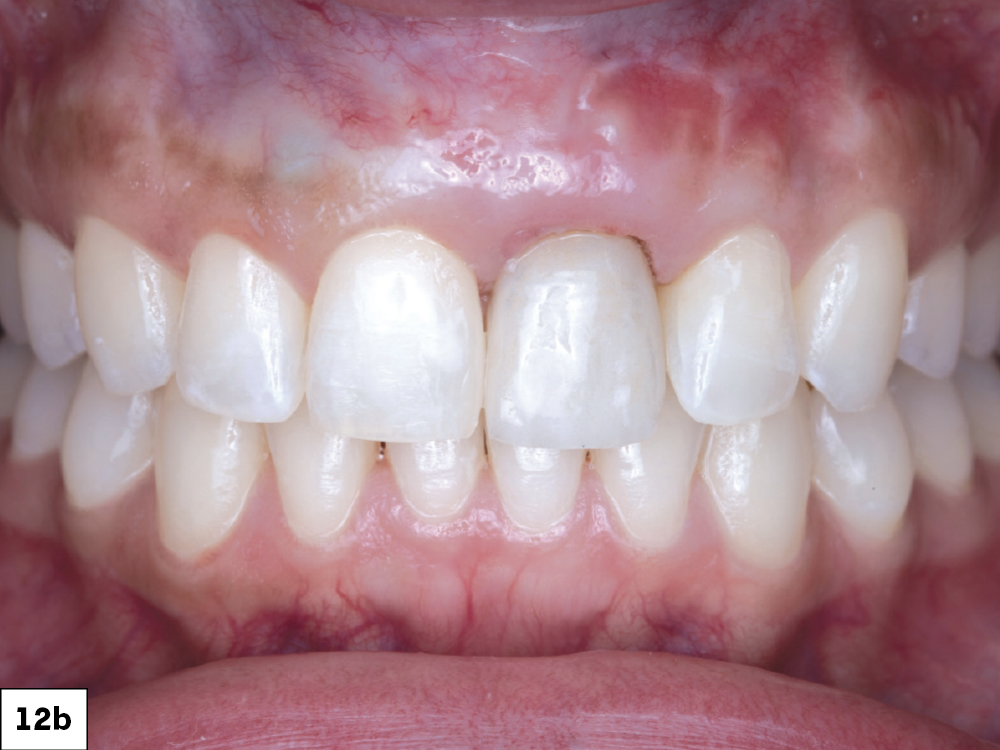
Figures 12a, 12b: At the two-week post-op appointment, the patient still had a defect in the tissue, so #8 was recontoured with composite resin. Recontouring the provisional and the soft tissue gave the patient a natural look.

Dental implant close-up with missing tooth
Dental X-ray showing implant and teeth
Dental model showcasing teeth alignment

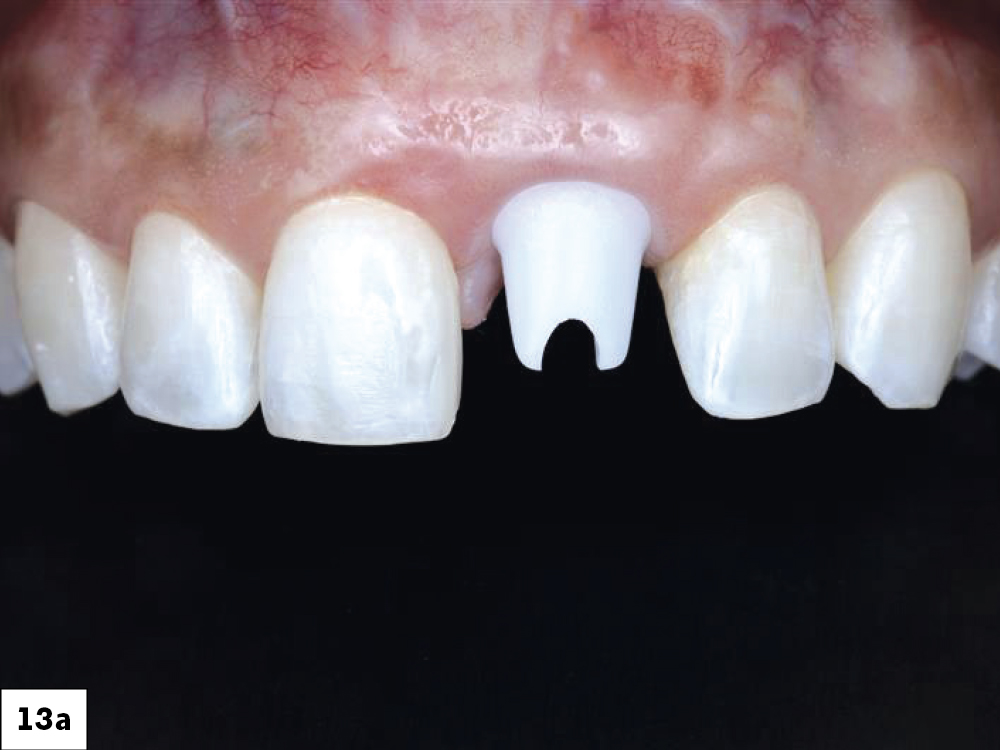
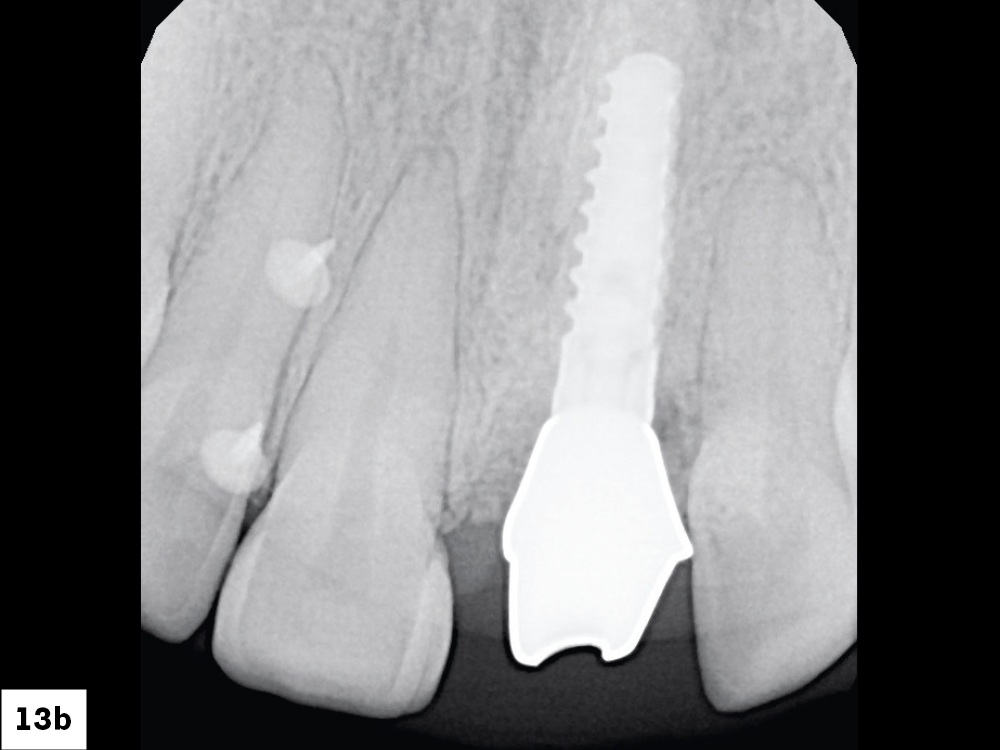
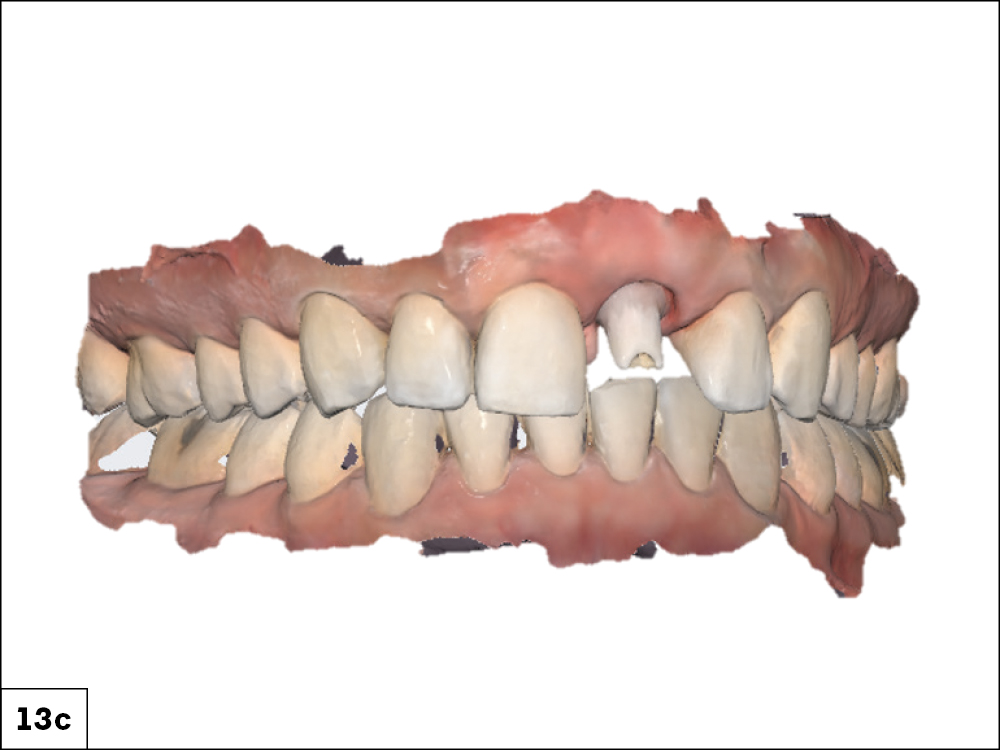
Figures 13a–13c: After placing the custom hybrid abutment, a radiograph was taken to confirm seating. That was followed with an intraoral scan, and then an order for a BruxZir Esthetic crown was sent to the lab. A hybrid implant abutment, often referred to as a zirconia abutment on a titanium base, combines the best of both worlds: esthetics from zirconia and strength from titanium. It provides an esthetic base under the crown material and has a reliable titanium connection to the implant as well as a customizable emergence profile. The subgingival contour is polished zirconia for favorable biocompatibility that supports peri-implant soft tissues.

Close-up of human teeth and gums

Figure 14: I chose a BruxZir Esthetic cement-retained crown for the permanent restoration. Achieving lifelike contouring and shaping is crucial for ensuring the ideal esthetic result, particularly with a central incisor. This zirconia material offers esthetics that mimic the anterior translucency, while the strength outperforms traditional layered ceramics. It also has a great soft-tissue response, which is crucial for long-term esthetics in the anterior.

lose-up of a smiling mouth with teeth
Woman with black hair and patterned scrunchie

CONCLUSION

Raquel was overjoyed with the results, as she regained both the natural vibrancy of her smile and full functionality. The placement of her Glidewell HT Implant and BruxZir Esthetic crown marked the culmination of a lengthy journey of more than six years since her injury. This case required meticulous planning to ensure an adequate volume of soft tissue and bone, allowing for the desired esthetic outcome that will last Raquel for many years.

All third-party trademarks are property of their respective owners.