Immediate Implant Placement in the Anterior: A Case Study (1 CEU)

November 1, 2024
 image
Taylor Manalili, DDS
Immediate Implant Placement in the Anterior: A Case Study

In this case study, the immediate placement of an implant after extraction is demonstrated as a technique for maintaining soft tissue contours. The case study outlines the criteria for immediate loading as well as the methods and tools used for treatment planning with a restorative-driven approach.

Upon first glance, the soft tissue and the teeth look acceptable.

Figure 1: Upon first glance, the soft tissue and the teeth look acceptable. However, the radiograph tells a different story (Fig 2). The patient stated that she had suffered facial trauma about seven years ago. Over time, the mobility of the upper left lateral incisor has increased.

The radiograph shows what we cannot see clinically.

Figure 2: The radiograph shows what we cannot see clinically. The trauma the patient described most likely caused the horizontal fracture to tooth #10. As a result, over time the tooth became ankylosed. Treatment options were discussed with the patient and ultimately the patient elected to have the tooth removed and an implant placed.

This case was esthetically challenging due to the patient’s high smile line. Discussing the risks and managing expectations with the patient is important during the treatment planning phase.

Figure 3: This case was esthetically challenging due to the patient’s high smile line. Discussing the risks and managing expectations with the patient is important during the treatment planning phase.

In the esthetic zone, assessing the gingival biotype helps identify the challenges associated with managing soft tissue.

Figure 4: In the esthetic zone, assessing the gingival biotype helps identify the challenges associated with managing soft tissue. As shown here, using a Colorvue® periodontal probe (Hu-Friedy MFG. CO., LLC; Chicago, IL) and observing the transparency of the soft tissue is an effective method for determining soft-tissue thickness. Thicker biotypes are typically more resistant to recession.  Fortunately, this patient had a thick gingival biotype, favoring the maintenance of the gingival architecture.

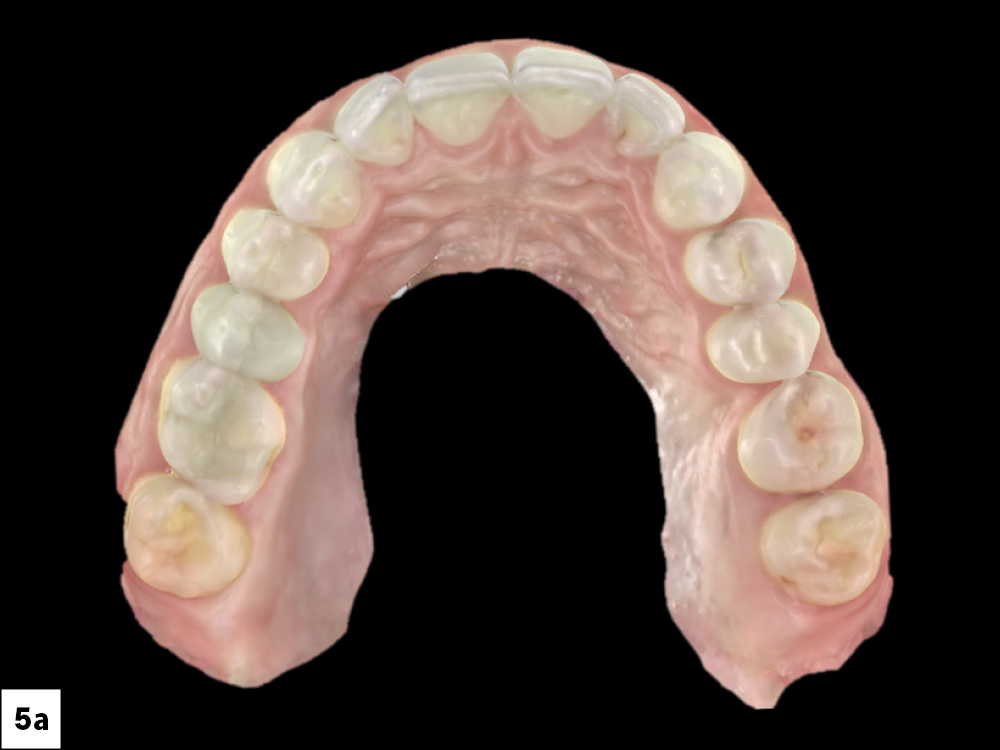
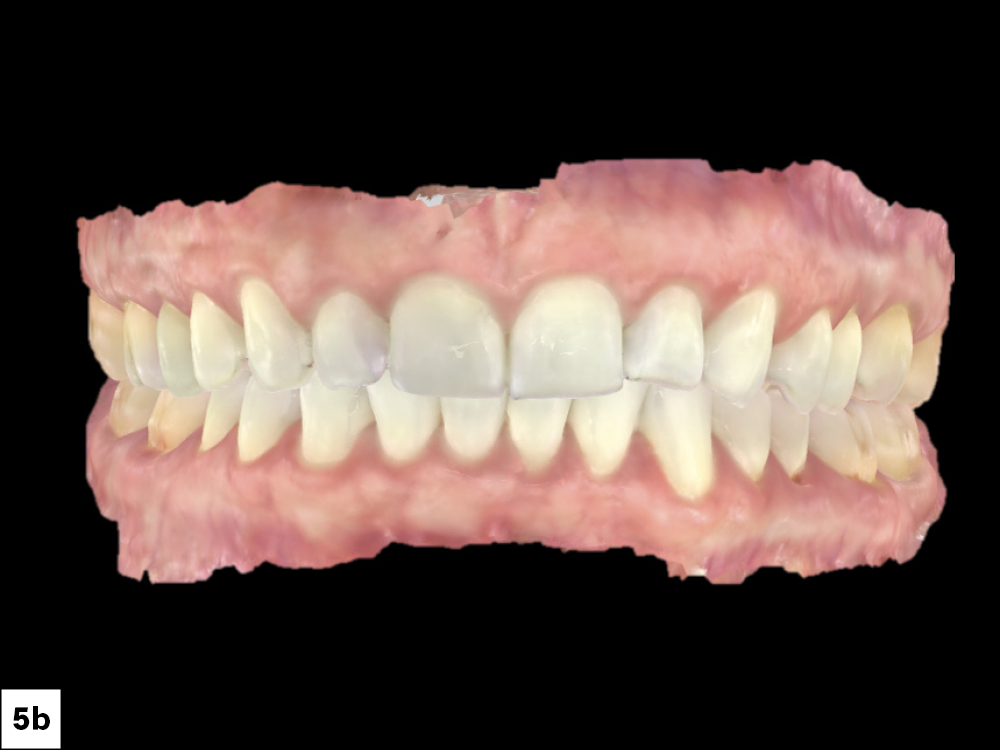
An intraoral scan of the patient’s mouth was taken using the fastscan.io™ Scanning Solution. This scan aids in visualizing the treatment plan and facilitates co-diagnosis with the patient. This same scan can then be used for implant planning and fabricating a surgical guide.

Figures 5a, 5b: An intraoral scan of the patient’s mouth was taken using the fastscan.io Scanning Solution. This scan aids in visualizing the treatment plan and facilitates co-diagnosis with the patient. This same scan can then be used for implant planning and fabricating a surgical guide.

A CBCT scan was taken to evaluate the quantity and quality of the surrounding bone.

Figure 6: A CBCT scan was taken to evaluate the quantity and quality of the surrounding bone. When placing an immediate implant, the goal is to secure it within native bone to promote primary stability. Ideally, there should be at least 1.5–2 mm of bone thickness on the lingual side. The implant must be positioned deep enough to allow for the proper emergence profile when creating the final tooth, while also avoiding excessive depth that could lead to horizontal bone loss and soft-tissue resorption. Achieving this delicate balance can be challenging, especially when performed freehand. This image shows the overlay of the pre-determined implant position. Although a screw-retained restoration was initially preferred, without additional grafting to alter the implant angulation, a cement-retained restoration was determined to be the more feasible option.

Glidewell’s Digital Treatment Planning (DTP) department fabricated a surgical guide and immediate provisional restoration using the CBCT images and intraoral scan.
screw-retained restoration was chosen to eliminate the risk of cement contamination on the day of surgery. Providing an immediate provisional achieves several objectives

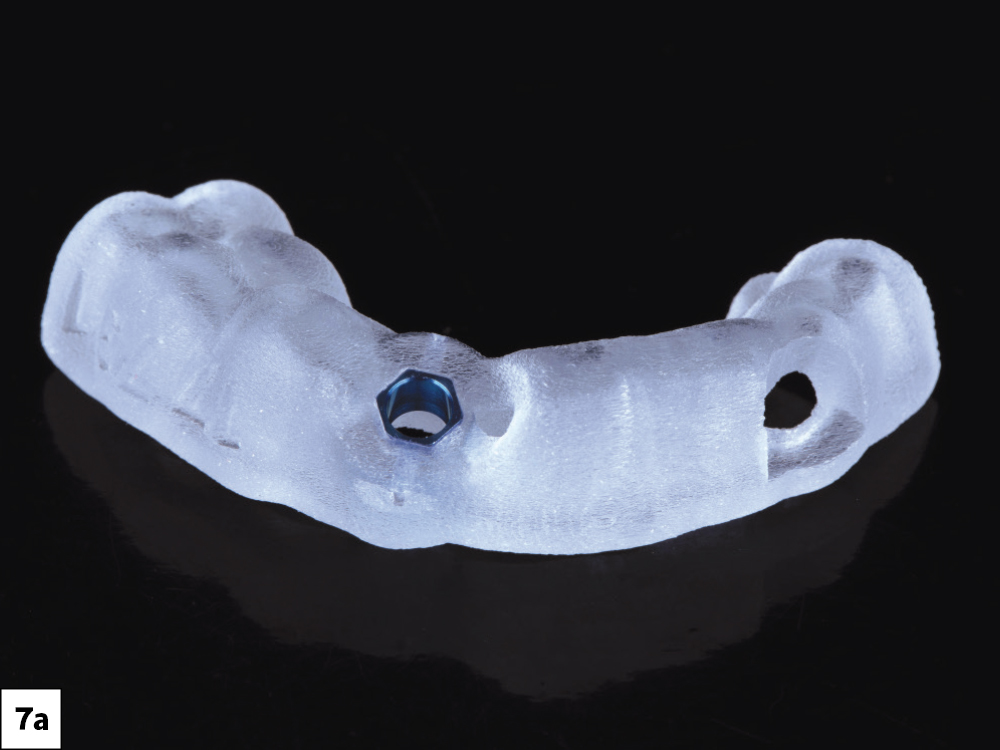
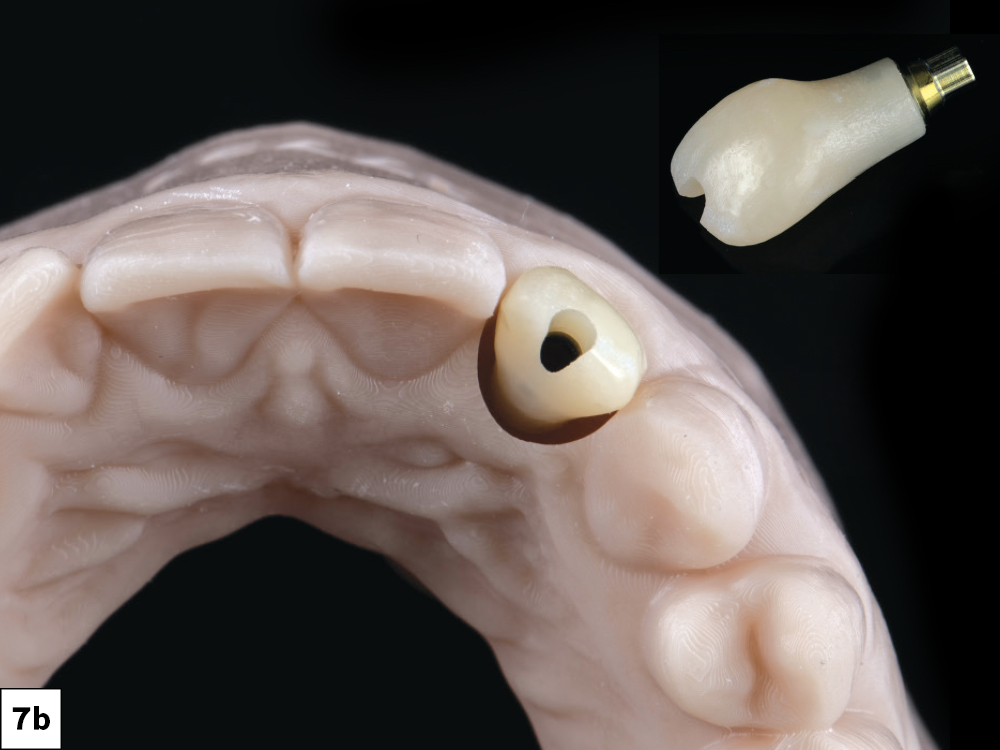
Figures 7a, 7b: Glidewell’s Digital Treatment Planning (DTP) department fabricated a surgical guide and immediate provisional restoration using the CBCT images and intraoral scan. When fabricating any surgical guide, it is important to have recent intraoral and CBCT scans. Otherwise, there is a risk that the surgical guide may not fit properly, as hard- and soft-tissue anatomy can change over time.  The surgical guide and an immediate screw-retained provisional restoration were fabricated based on the approved implant position. A screw-retained restoration was chosen to eliminate the risk of cement contamination on the day of surgery. Providing an immediate provisional achieves several objectives: it guides soft-tissue healing, enhances predictability for the final restoration, and offers the patient an esthetic and functional temporary solution throughout the healing process.

A bur was used to remove proximal tooth structure, creating space to comfortably utilize periotomes without damaging the adjacent teeth.

Figure 8: A bur was used to remove proximal tooth structure, creating space to comfortably utilize periotomes without damaging the adjacent teeth.

The tooth was removed as atraumatically as possible. Due to its ankylosed condition, portions of the root needed to be removed with a surgical carbide bur.

Figure 9: The tooth was removed as atraumatically as possible. Due to its ankylosed condition, portions of the root needed to be removed with a surgical carbide bur.

After extracting the tooth, the surgical guide was tried in. Once it was confirmed that the guide was fully seated, the osteotomy was performed.

Figure 10: After extracting the tooth, the surgical guide was tried in. Once it was confirmed that the guide was fully seated, the osteotomy was performed.

An Implant Stability Quotient (ISQ) can help assess whether the implant is suitable for immediate loading. The Glidewell HT™ Implant System (Glidewell Direct; Irvine, Calif.), formerly known as the Hahn™ Tapered Implant System

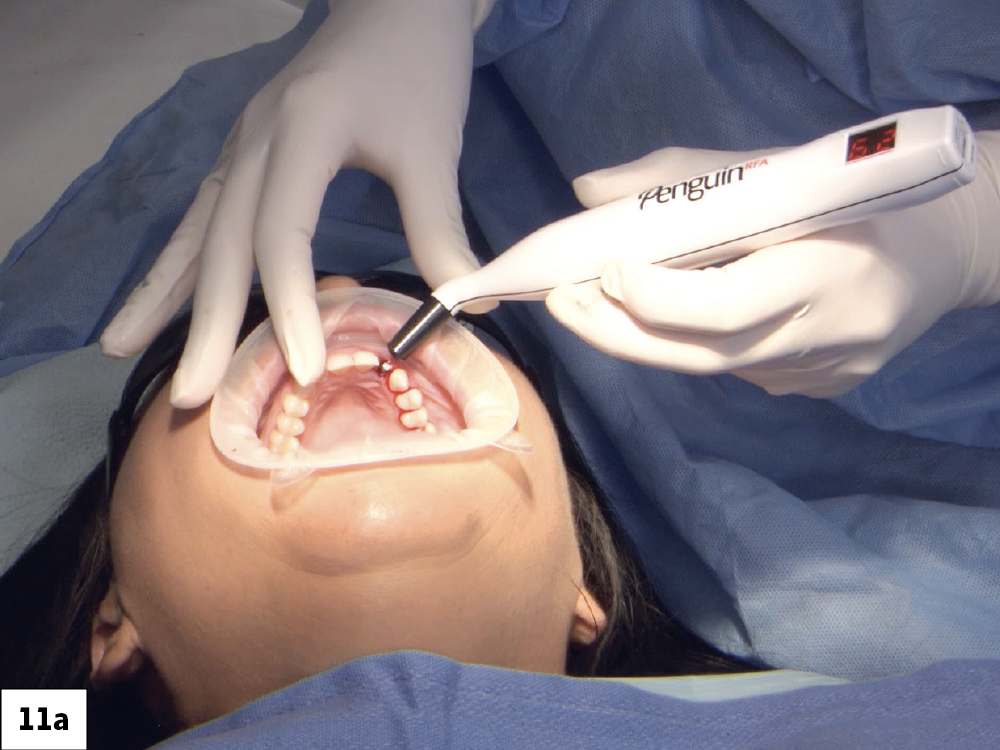
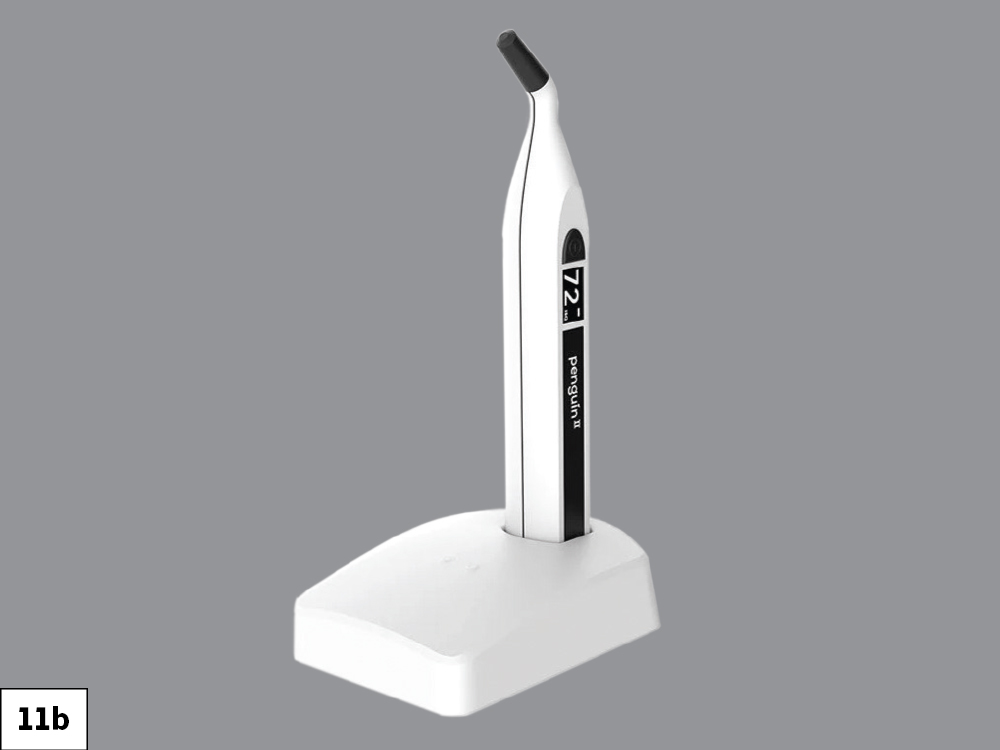
Figures 11a,11b: Delivering an immediate implant carries the risk of reduced primary stability compared to a healed site. Primary stability is associated with the mechanical engagement of the implant with the surrounding bone, while biological factors such as bone regeneration and remodeling determine secondary stability. This crucial predictor of implant success can be measured using an implant stability meter. An Implant Stability Quotient (ISQ) can help assess whether the implant is suitable for immediate loading. The Glidewell HT Implant System (Glidewell Direct; Irvine, Calif.), formerly known as the Hahn Tapered Implant System, was chosen for its aggressive thread pattern, buttress threads, and tapered shape, which support the primary stability needed for immediate loading. After the implant was placed, the Penguin II implant stability meter (Integration Diagnostics Sweden AB; Gothenburg, Sweden) recorded an ISQ value of 65. Although this value indicates a relatively high level of stability, an ISQ value of 70 or above is my personal clinical judgement for immediate loading.

COVER SCREW, HEALING ABUTMENT, OR PROVISIONAL?

Three essential options are available at the time of implant placement. The following chart outlines the criteria used to select the most suitable option for the patient.

Three essential options are available at the time of implant placement.
Despite the absence of parafunctional habits and the anterior location, primary stability was not optimal. Therefore, instead of delivering the provisional restoration as initially planned, it was converted into a custom healing abutment. This approach aimed to sculpt and support the soft tissue through the contours of the provisional’s emergence profile.

Figure 12: Despite the absence of parafunctional habits and the anterior location, primary stability was not optimal. Therefore, instead of delivering the provisional restoration as initially planned, it was converted into a custom healing abutment. This approach aimed to sculpt and support the soft tissue through the contours of the provisional’s emergence profile.

The emergence profile created by the custom healing abutment is crucial for maintaining the gingival architecture, ensuring proper alignment of the papilla, margins, and soft tissue. The healing abutment helps retain the patient’s natural tooth appearance as closely as possible throughout the healing process.

Figures 13a, 13b: The emergence profile created by the custom healing abutment is crucial for maintaining the gingival architecture, ensuring proper alignment of the papilla, margins, and soft tissue. The healing abutment helps retain the patient’s natural tooth appearance as closely as possible throughout the healing process.

This radiograph shows the Glidewell HT 3.0 implant with the seated custom healing abutment.

Figure 14: This radiograph shows the Glidewell HT 3.0 implant with the seated custom healing abutment.

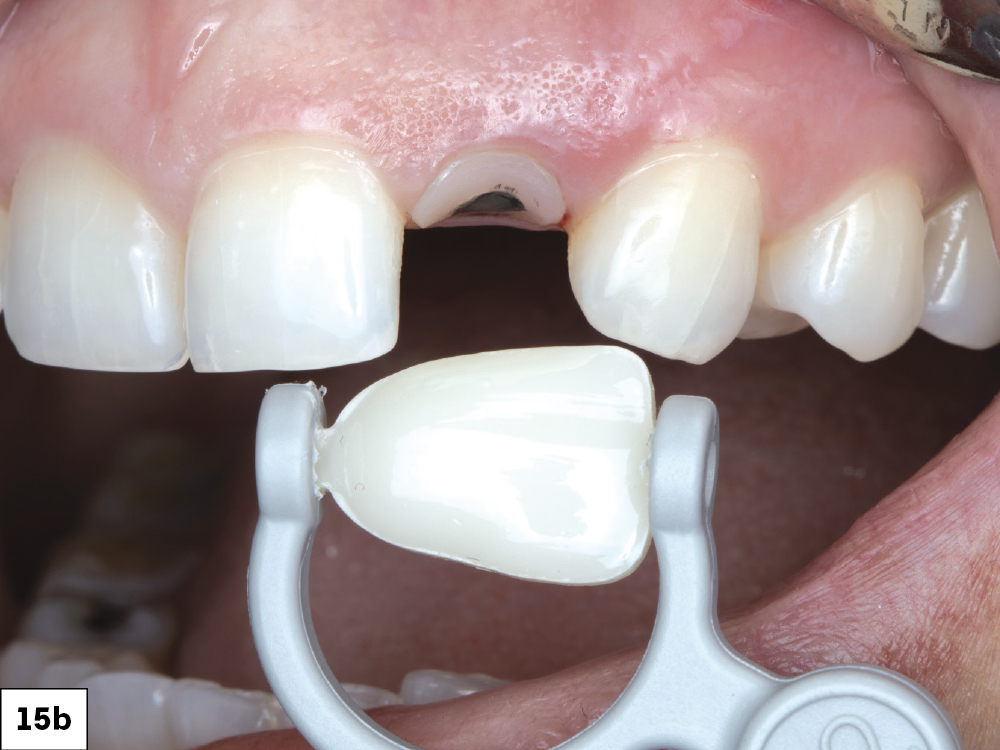
The patient returned three months later for an evaluation. The gingival architecture was observed to be well-maintained and healed effectively. A shade map of the tooth was created and documented.

Figures 15a, 15b: The patient returned three months later for an evaluation. The gingival architecture was observed to be well-maintained and healed effectively. A shade map of the tooth was created and documented.

Before removing the healing abutment, intraoral scans of the maxillary and mandibular arches were acquired.

Figure 16: Before removing the healing abutment, intraoral scans of the maxillary and mandibular arches were acquired. The scans were then evaluated to ensure that all necessary data was clearly captured, including adjacent contacts, and that the bite alignment was accurate. The healing abutment was subsequently removed, and the soft tissue emergence profile was scanned. This step can be challenging due to the risk of soft-tissue collapse. Once captured, this section of the scan was locked to preserve the soft-tissue contours before continuing with the rest of the scan.

Once the soft tissue was scanned, the scan body was seated and hand tightened.

Figure 17: Once the soft tissue was scanned, the scan body was seated and hand tightened.

I took a vertical bite wing to verify complete seating of the scan body. Once I confirmed no hard or soft tissue was interfering, I knew my scan would capture an accurate record for the lab.

Figure 18: I took a vertical bite wing to verify complete seating of the scan body. Once I confirmed no hard or soft tissue was interfering, I knew my scan would capture an accurate record for the lab.

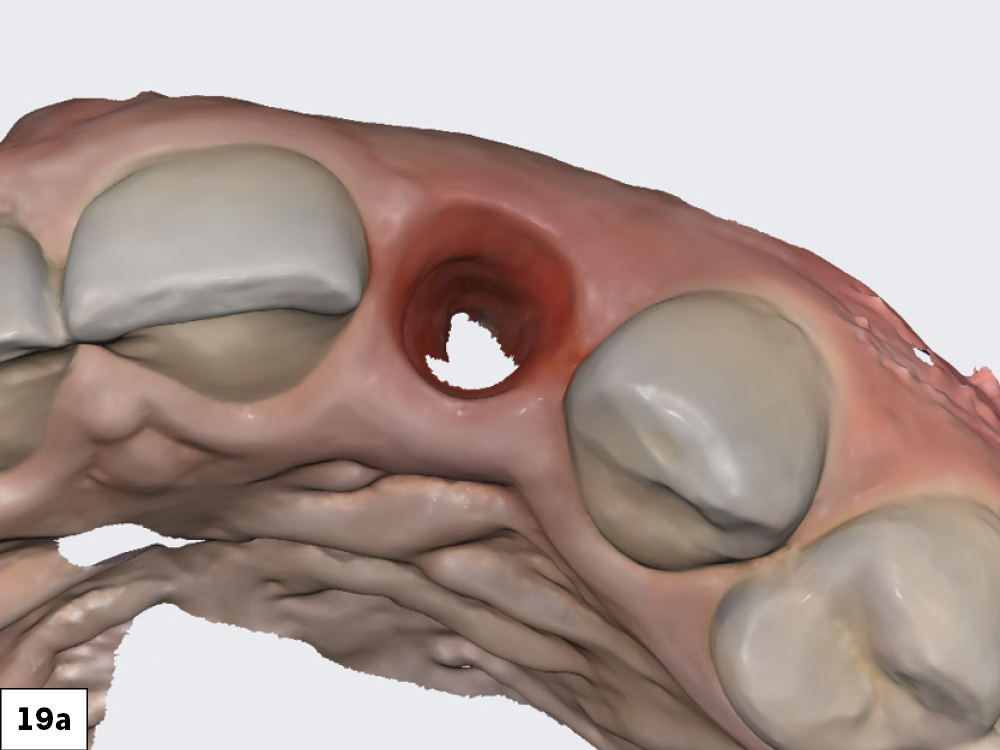
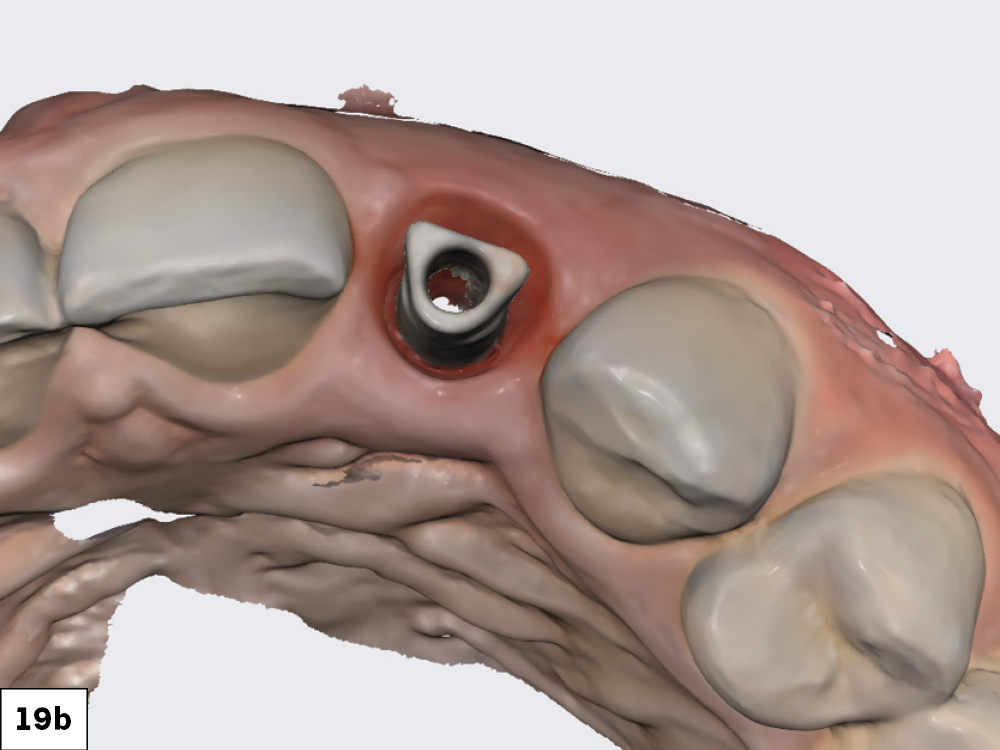
The scan body was then registered with the IOS. With the soft tissue previously scanned and locked in place, there was no concern about the soft tissue collapsing while the scan body was being radiographed and its position captured.

Figures 19a, 19b: The scan body was then registered with the IOS. With the soft tissue previously scanned and locked in place, there was no concern about the soft tissue collapsing while the scan body was being radiographed and its position captured.

As determined from the digital treatment plan prior to extraction and implant placement, a custom hybrid abutment and a cement-retained BruxZir® Esthetic crown were fabricated.

Figure 20: As determined from the digital treatment plan prior to extraction and implant placement, a custom hybrid abutment and a cement-retained BruxZir® Esthetic crown were fabricated.

The abutment was tried in to verify the marginal position and then hand-tightened into place. An X-ray was then taken to ensure the abutment was fully seated. Because a 3.0 mm Glidewell HT implant was placed, the abutment was torqued to 15 Ncm.

Figures 21a, 21b: The abutment was tried in to verify the marginal position and then hand-tightened into place. An X-ray was then taken to ensure the abutment was fully seated. Because a 3.0 mm Glidewell HT implant was placed, the abutment was torqued to 15 Ncm.

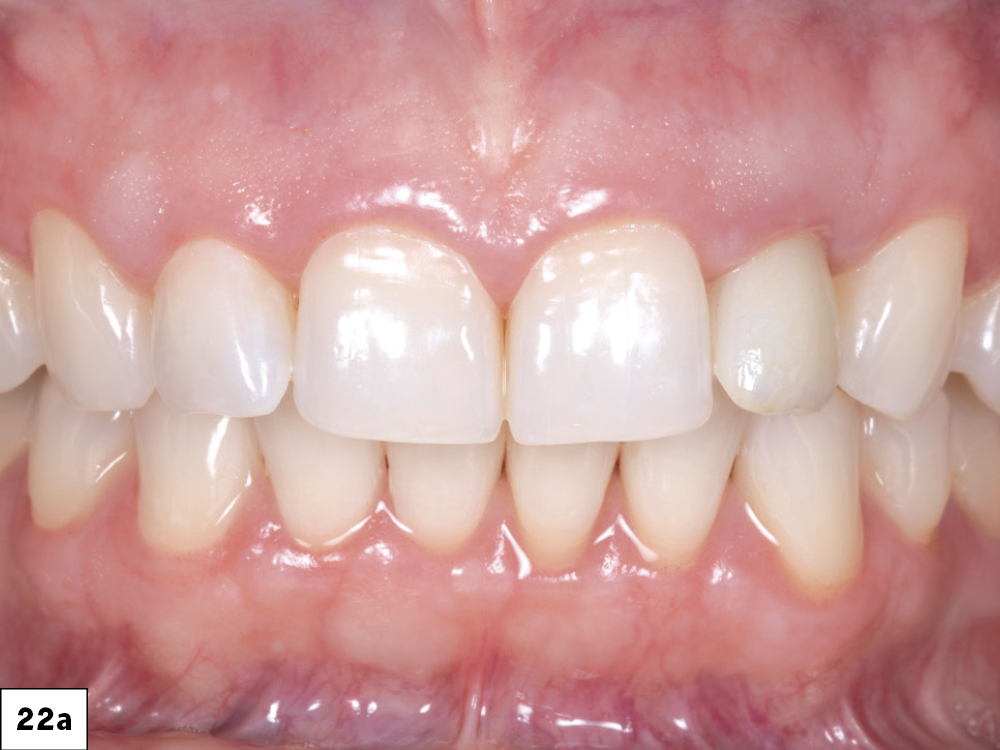
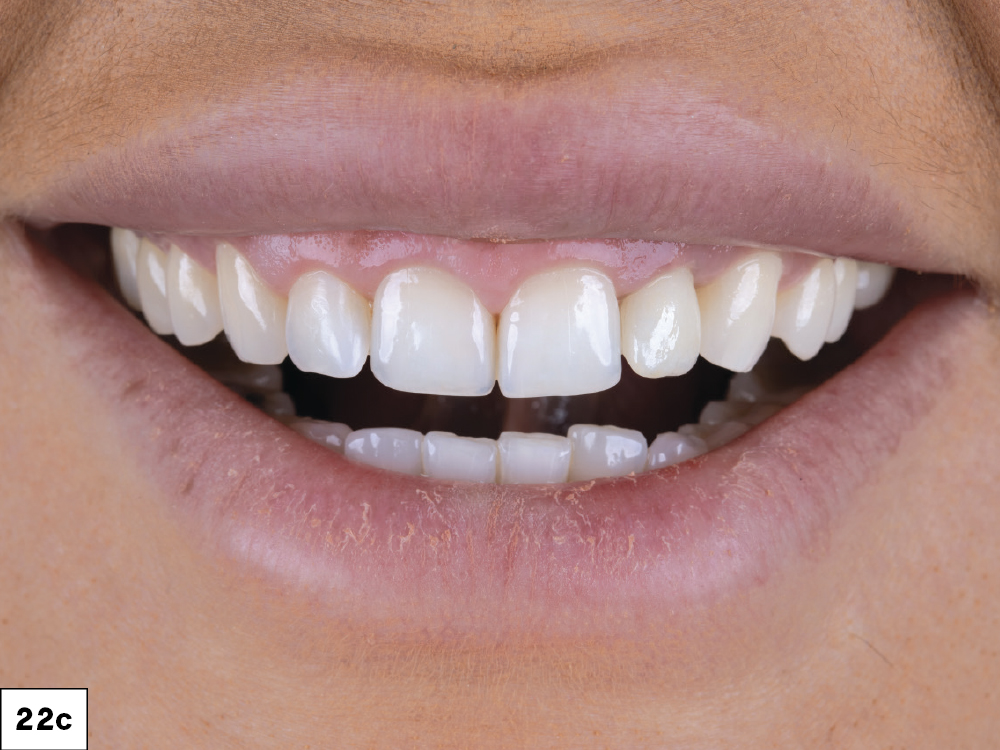
The Glidewell HT implant, custom hybrid abutment, and BruxZir Esthetic cement-retained restoration were successfully delivered without compromising the hard-or soft-tissue contours.
To protect against further damage to the teeth and the newly placed implant, an occlusal guard was prescribed.

Figures 22a–22c: The Glidewell HT implant, custom hybrid abutment, and BruxZir Esthetic cement-retained restoration were successfully delivered without compromising the hard- or soft-tissue contours. To protect against further damage to the teeth and the newly placed implant, an occlusal guard was prescribed.

CONCLUSION

Treatment does not always unfold as expected. In this case, the implant’s primary stability was insufficient to support the planned immediate load provisional restoration. This common challenge highlights that reality may not always align with desired expectations. The scenario underscores the importance of co-diagnosis, careful planning, and avoiding the rush to finish. Adhering to these principles enabled the maintenance of the patient’s gingival contours and the delivery of an esthetic result.