
In this issue:
7 Steps for Treating Fenestrations Within Implant Sites
Author

Note: The Hahn Tapered Implant System is now known as the Glidewell HT Implant System
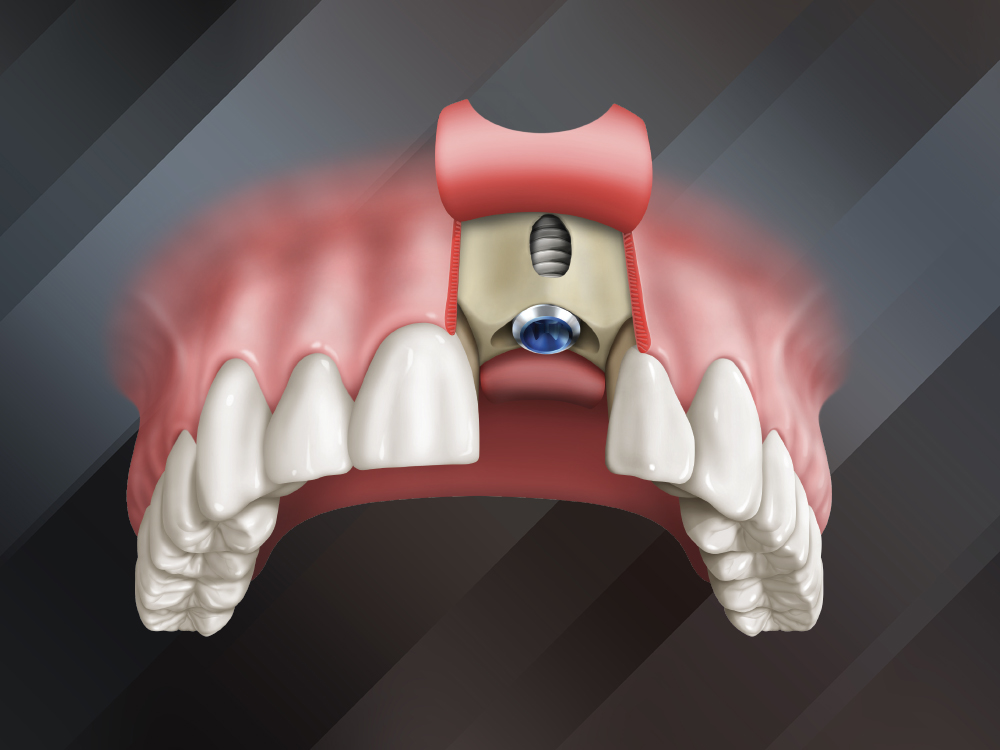
Fenestrations are bony defects that are often found on the facial aspect of potential implant sites. A fenestration typically appears as an opening, or “window,” near the apex of the tooth root, though the defect can extend to the bony crest. These defects are most common in areas where the buccal plate is thin, such as the maxillary anterior, or at sites where the root of the tooth is close to the buccal plate. Fenestrations may also be associated with previous infection, fistula tracts, failed root canals or dental trauma. Although these bony defects present a clinical challenge, through careful site evaluation and the proper application of bone grafting and surgical principles, the path to a predictable outcome is straightforward.
In this article, we will outline seven essential steps to immediate implant placement when a fenestration is present. In some situations, clinicians may elect to treat the defect with a bone graft and delay implant placement until osseous healing is complete. For detailed guidance on other types of grafting procedures prior to implant placement, please refer to Dr. Randolph Resnik’s article, “Guided Bone Regeneration: 8 Steps to Successful Ridge Augmentation,” in Vol. 15, Iss. 2 of Chairside® magazine.
Step 1: Preoperative Implant Site Evaluation
Step 2: Atraumatic Tooth Extraction
Step 3: Socket Debridement
Step 4: Visually Evaluate the Defect
Step 5: Immediate Implant Placement and Bone Grafting
Step 6: Surgical Site Closure
Step 7: Deliver the Implant Restoration
STEP 1: PREOPERATIVE IMPLANT SITE EVALUATION
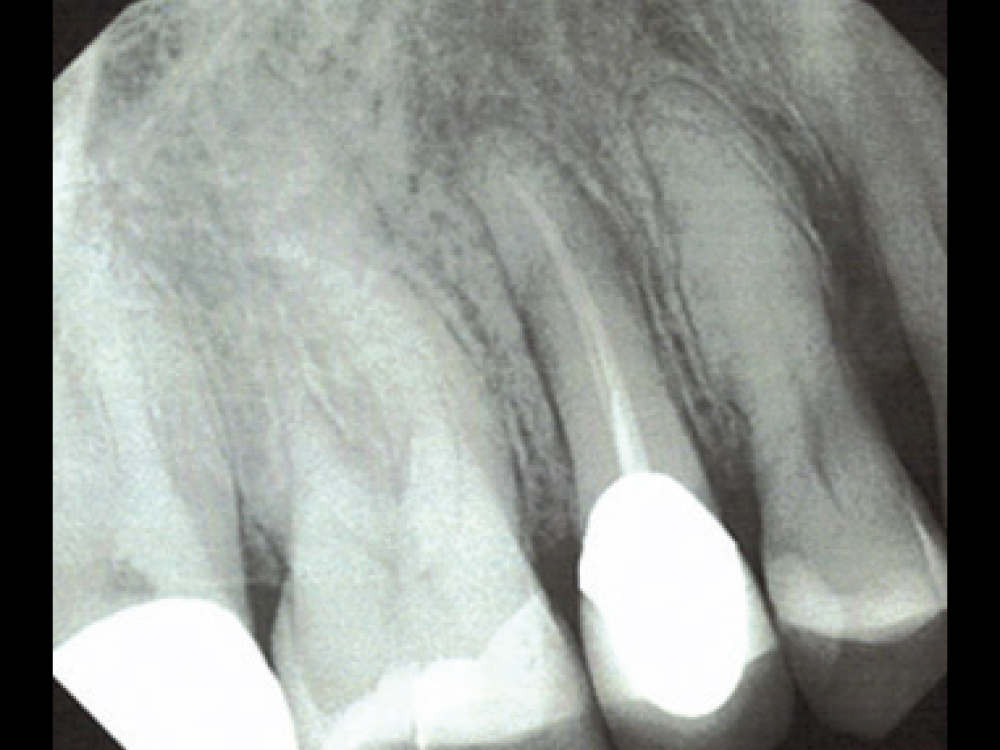
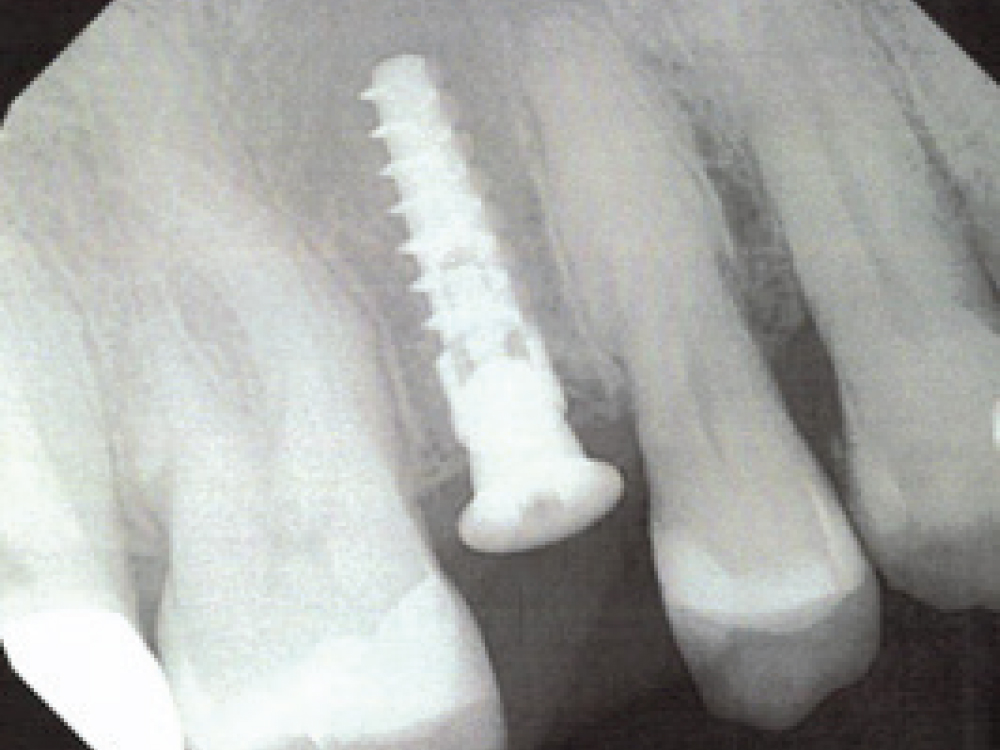
The initial evaluation of the patient should include screening for bony defects in sites considered for implant placement. During intraoral examination, you may be able to identify a “soft spot” on the facial or buccal plate while palpating the soft tissue adjacent to the roots of the tooth. When reviewing the patient’s periapical radiograph, examine the apices of the tooth’s roots. If a radiolucency is present, then the site should be evaluated for a possible bone fenestration.
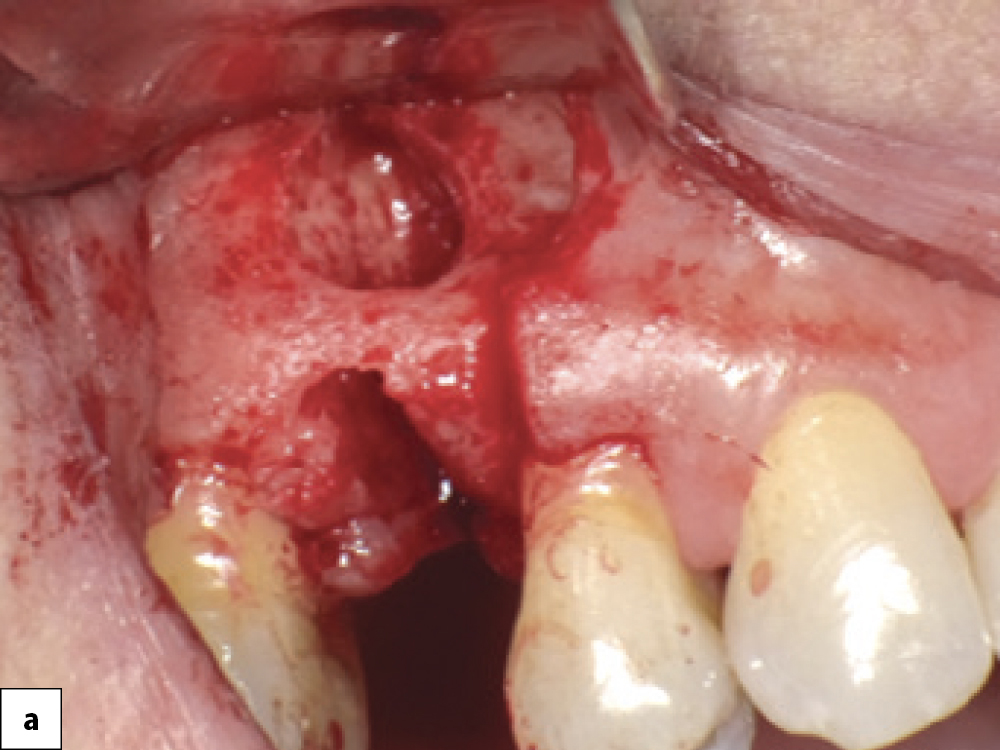
If a fenestration is suspected, it is imperative to complete a preoperative CBCT evaluation. CBCT scanning is a valuable tool for determining the thickness of the buccal plate. In particular, a series of cross-sectional CBCT images should be evaluated to determine the extent of the fenestration and whether the pathology extends through the buccal plate. These images are also useful in determining if there is sufficient bone to immediately place the implant at the time of extraction or, if instead, the site should be grafted and treated following a delayed implant placement protocol.
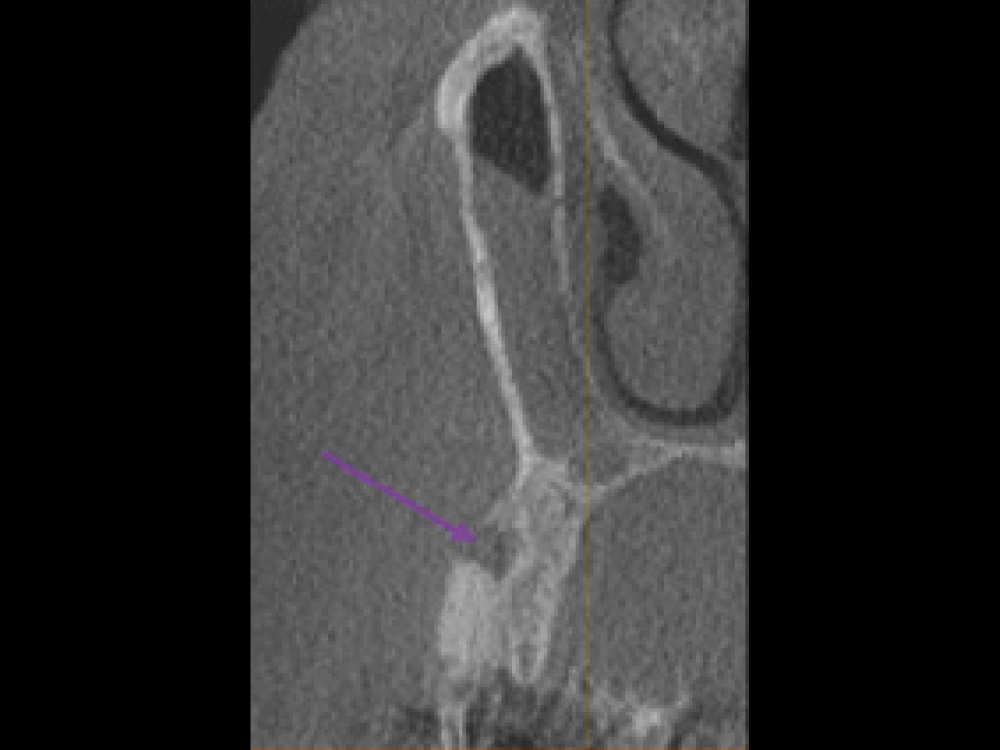

Preoperative cross-sectional CBCT scan confirming fenestration at the site of a premolar requiring extraction, and buccal view of the exposed defect following flap reflection.
STEP 2: ATRAUMATIC TOOTH EXTRACTION
When a fenestration is present in the area of a tooth to be extracted, it is critical that the tooth is removed atraumatically to avoid causing any further damage to the buccal plate, which would complicate repair of the defect. An atraumatic extraction will also increase the success of socket grafting and the dental implant, and is accomplished by using the correct techniques and instrumentation, including a surgical blade, periotomes or an elevator, and forceps. In multi-rooted teeth, a surgical handpiece with a surgical bur is recommended to section the roots, especially if they are divergent.
ATRAUMATIC EXTRACTION IN 4 SIMPLE STEPS:
- Sever the connective-tissue fibers around the tooth.
- Sever the periodontal ligament (PDL).
- Section the tooth, if necessary, from the mesial or distal aspect, so as to avoid damaging the buccal plate.
- Grip the tooth as apically as possible and use rotation to elevate the tooth from the socket.
For in-depth instructions on tooth extraction, see Dr. Randolph Resnik’s article, “Extraction and Socket Grafting: Part 1 — Atraumatic Extraction,” from Vol. 14, Iss. 1 of Chairside magazine.

Atraumatic extraction technique: (a) Severing the periodontal ligament fibers, which results in mobilty of the tooth; (b) Multi-rooted teeth should always be sectioned prior to removal to avoid damaging the socket walls.
STEP 3: SOCKET DEBRIDEMENT
After atraumatically removing the tooth, the extraction socket should be evaluated for the number of bony walls remaining and the presence of soft tissue or infection. Various sizes of serrated curettes should be used to remove all granulation tissue and infection. Ideally, decortication of the socket walls is performed to stimulate bleeding, which accelerates the healing process by initiating the regional acceleratory phenomenon (RAP). Care should be exercised in curetting extraction sockets in close proximity to vital structures, such as the mandibular canal and maxillary sinus. The Newport Surgical™ Implant and Bone Grafting Instrument Kit (Glidewell Direct; Irvine, Calif.) offers a simplified set of instruments for performing this procedure, as well as a majority of the bone grafting applications completed in the general practice. When curettage is complete, irrigate the socket with a sterile saline (0.9% NaCl) solution.
In cases where prior infection is present, it is imperative to remove all diseased tissue. If complete removal of the affected tissue cannot be confirmed, then immediate implant placement is contraindicated, as an implant should never be placed into a site with active infection.
It is well documented in the current literature that implants can be successfully placed immediately into sites where endodontic or periodontal lesions are present as long as complete debridement has been accomplished.1,2 In these cases, it is important that the clinician fully documents that all signs of infection have been removed from the extraction site.
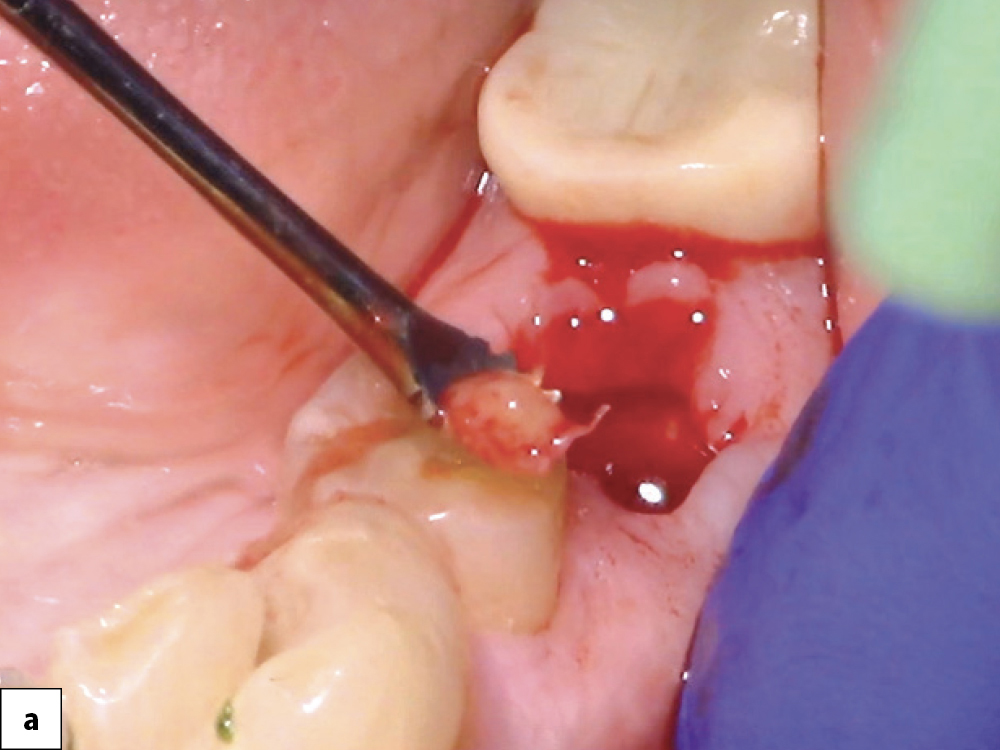
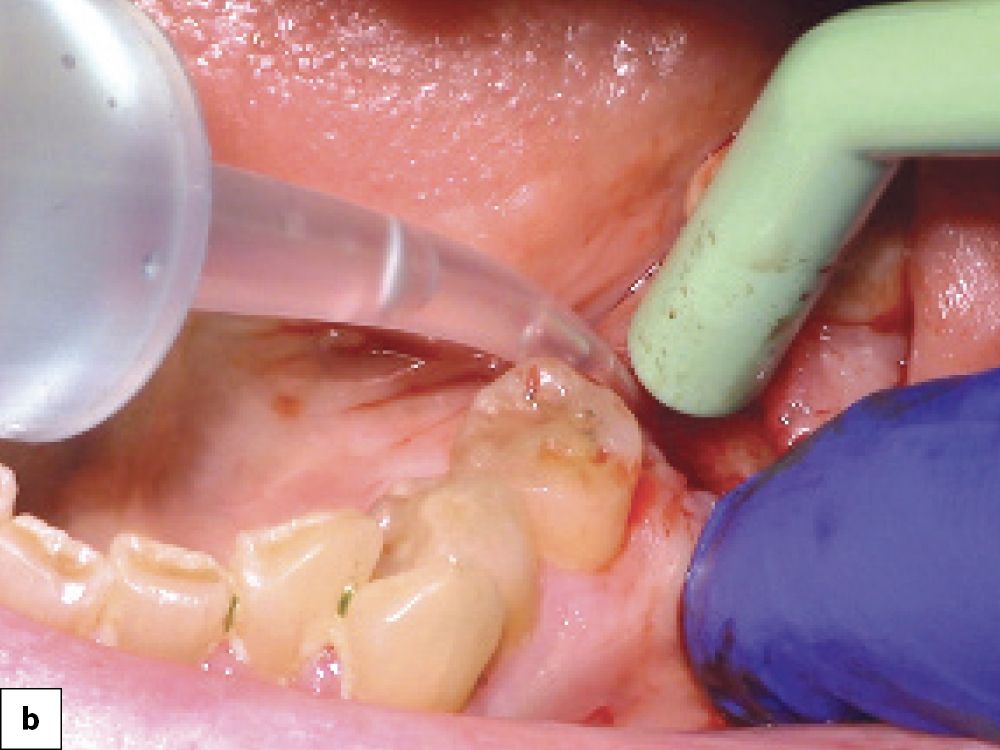

Socket debridement: (a) Granulation tissue is completely removed from the socket using a serrated curette to facilitate successful bone healing and repair of the defect; (b) Irrigate socket with sterile saline; (c) To stimulate bone growth factors, the socket may be decorticated to initiate bleeding.
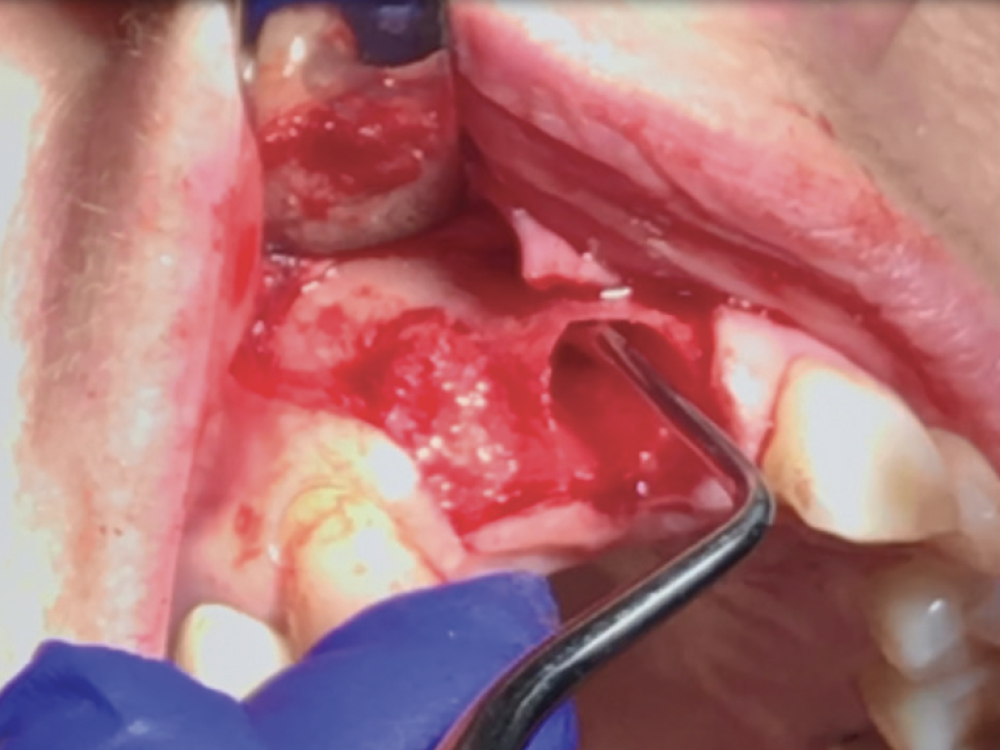
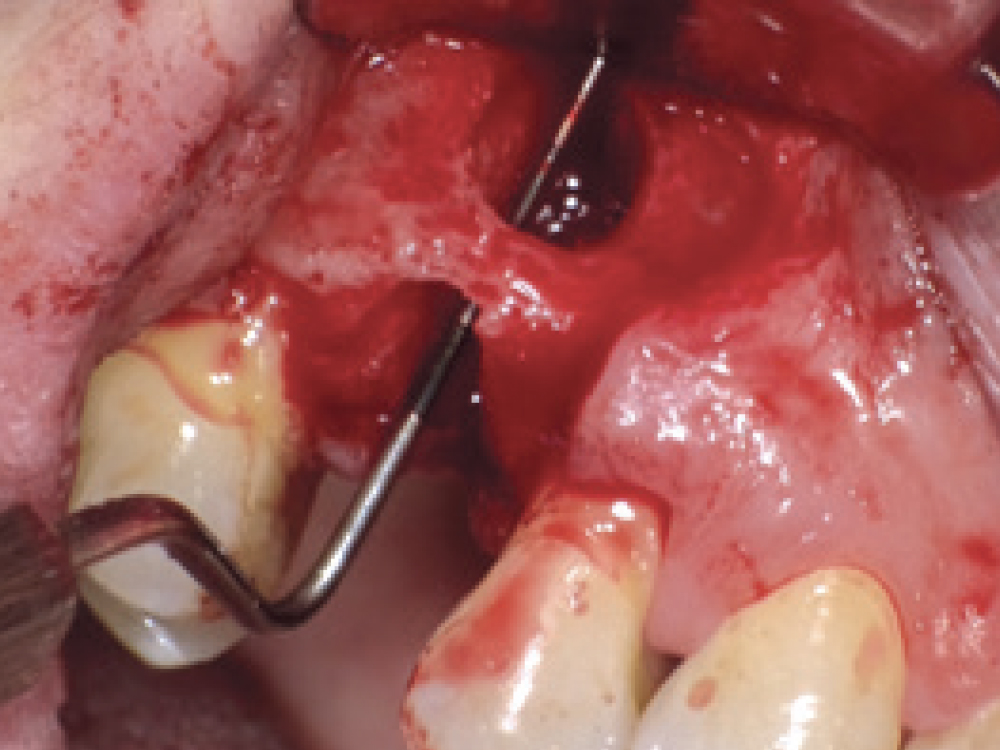
STEP 4: VISUALLY EVALUATE THE DEFECT
In most cases of bony fenestrations, the defect will have to be completely evaluated after reflecting a soft-tissue flap. The flap design should be conservative and broad-based, taking care to preserve blood flow while allowing for tension-free closure. If possible, papilla-sparing incisions should be utilized. After soft-tissue reflection, the clinician can inspect the location, size and magnitude of the bony defect.
If the defect can be repaired without negatively impacting the implant positioning and there is adequate bone for primary stability, the implant can be placed immediately. Note that immediate implant placement in extraction sites is just as predictable as delayed placement when the proper protocol is followed, and this procedure benefits the patient and practice by reducing the number of surgical appointments.3
If there is inadequate bone quantity for implant stability, a delayed approach to implant placement should be followed. This entails grafting the extraction site using a technique similar to a four-walled socket graft and delayed implant placement after allowing four to six months for hard- and soft-tissue healing.
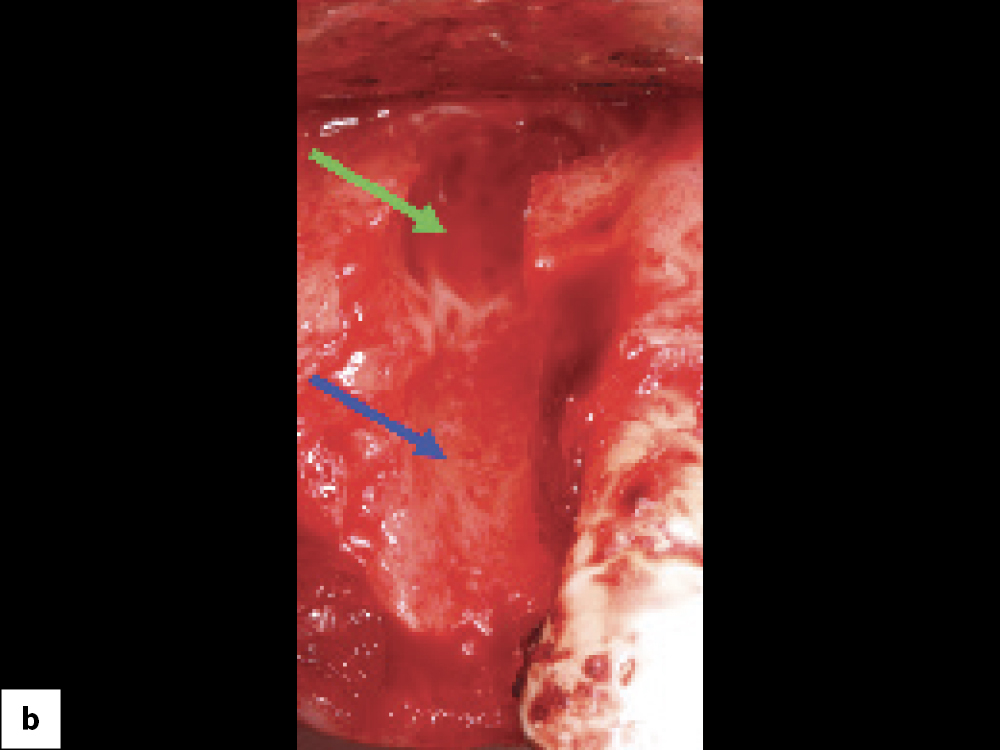
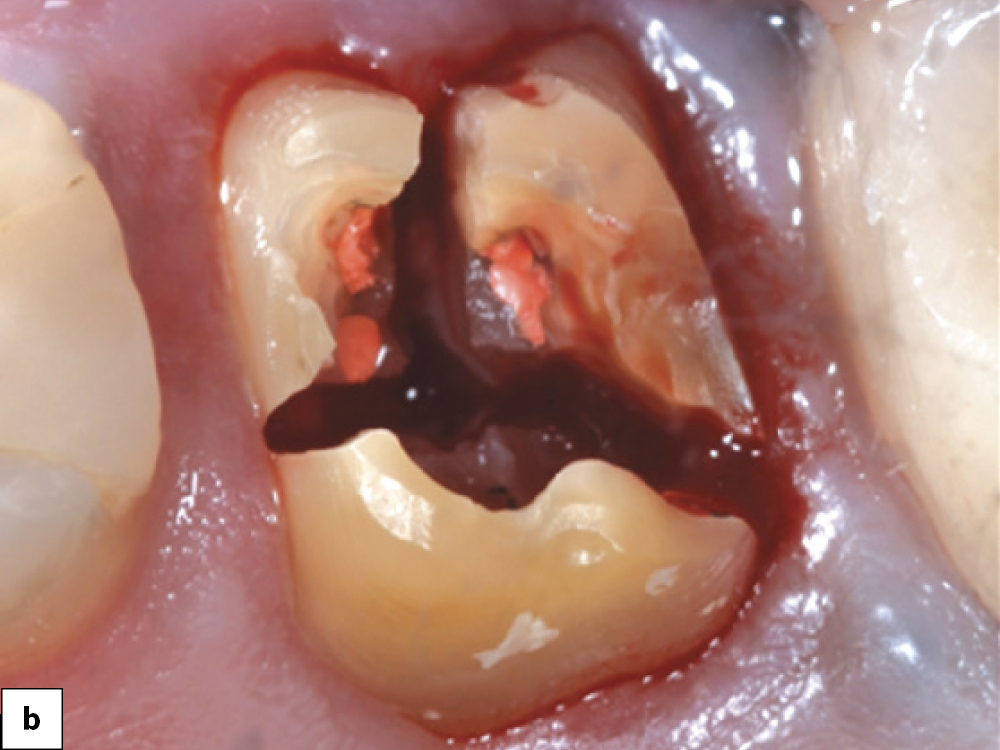
Bony defect evaluation: (a) Flap reflection allows the clinician to visually evaluate the size and location of the fenestration to determine whether the defect will compromise implant positioning or primary stability when immediate implant placement is desired; (b) Examples of a large fenestration (green arrow) and loss of the buccal plate (blue arrow), either of which would contraindicate immediate implant placement due to the inability to obtain primary stability; (c) Additional example of flap reflection to show the fenestration.
STEP 5: IMMEDIATE IMPLANT PLACEMENT AND BONE GRAFTING
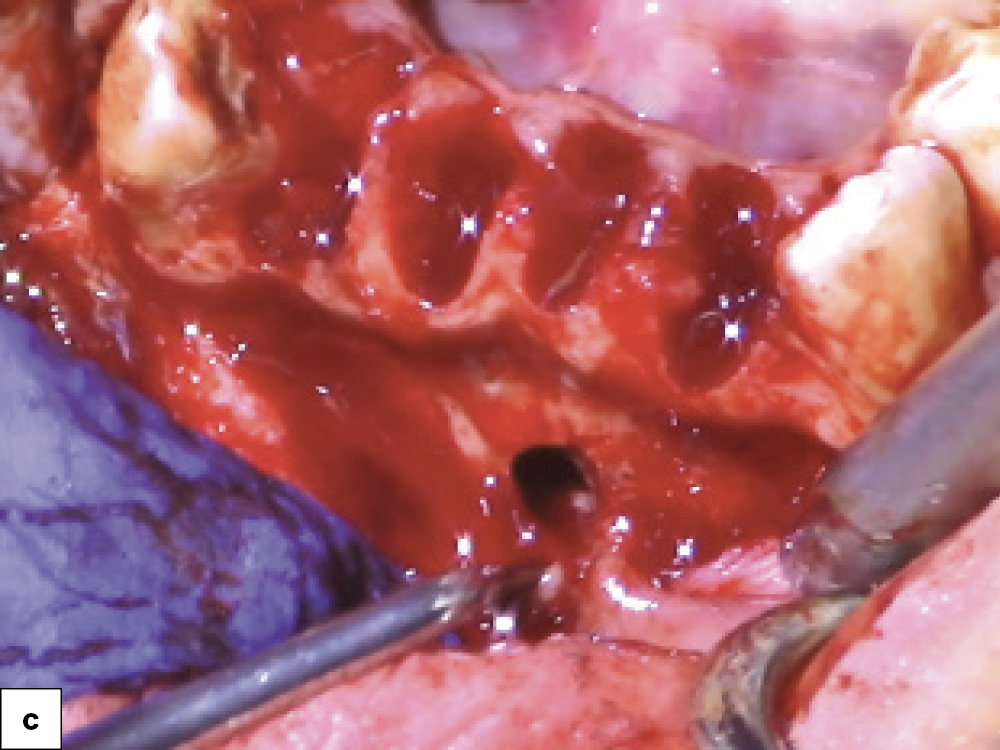
When immediately placing an implant into an extraction site, the implant is placed prior to the bone grafting procedure. When positioning the implant, it is important to allow for a “jumping gap” between the implant and the buccal plate to facilitate grafting and maintenance of the area, especially in the maxillary anterior. A common complication can occur if the implant is not positioned against the lingual plate of the extraction socket, as a buccal-oriented trajectory will result in esthetic and bone-loss issues.
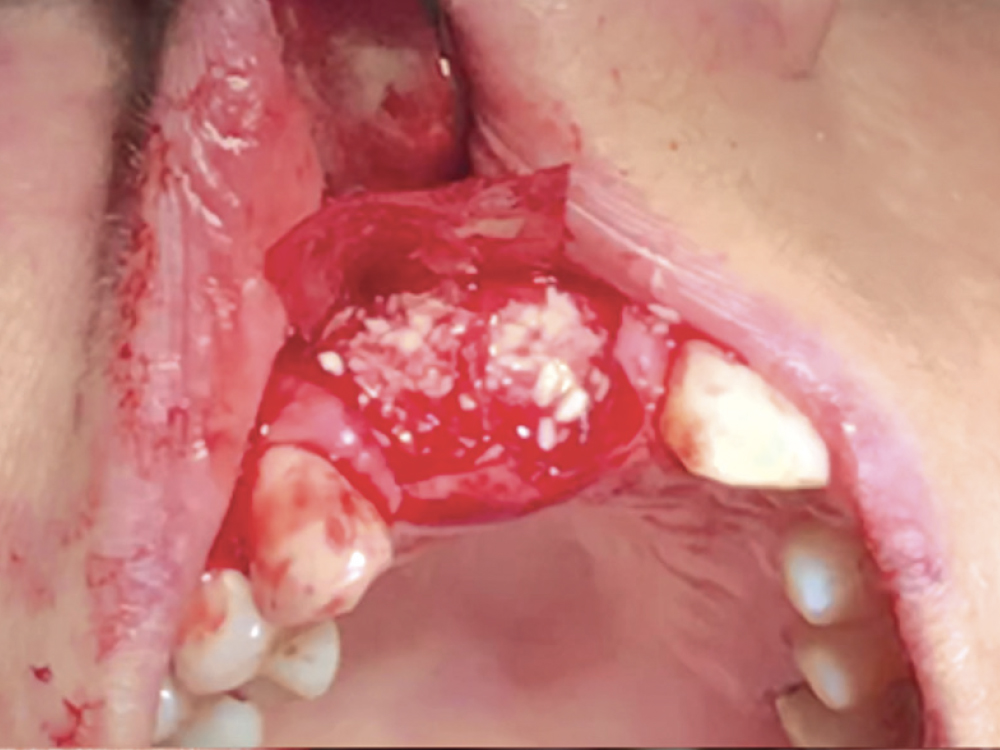
Provided that sufficient primary stability and proper positioning can be achieved, placing an implant during the same appointment the defect is grafted reduces the number of surgical appointments. Here, a Hahn Tapered Implant was placed freehand into an extraction socket with a bony defect. The sharp, pronounced threads of the implant helped keep the implant engaged with the lingual bone, which is essential in avoiding any further damage to the buccal plate. After positioning a Newport Biologics™ Resorbable Collagen Membrane 4–6 (Glidewell Direct), the gaps between the bone and implant were filled with allograft. The surface of the buccal plate was also grafted prior to suturing.
Selecting an implant with an aggressive thread design, like the Hahn™ Tapered Implant (Glidewell Direct), can help prevent the implant from being “bumped” toward the buccal during insertion. The Hahn implant also excels in these situations because the thread design and tapered shape maximize primary stability, and the machined collar and platform-switching nature of the prosthetic connection decrease bone loss.
Once the implant is in final position and the cover screw is placed, the space between the bone and the implant as well as the fenestration are grafted. Ideally, an allograft, such as Newport Biologics Cortico/Cancellous Allograft Blend, should be used. The mineralized cortical and cancellous nature of this bone substitute allows for ideal space maintenance while exhibiting excellent regenerative properties.
When bone grafting is completed, a barrier membrane is required to contain the graft and prevent migration of soft tissue into the site. A collagen resorbable membrane is recommended as it avoids the need for an additional surgery for removal. An extended collagen membrane, such as the Newport Biologics Resorbable Collagen Membrane 4–6, may be used. After cutting and trimming the membrane to the appropriate size, place the membrane adjacent to the defect, making sure the edges do not protrude beyond the flap design.
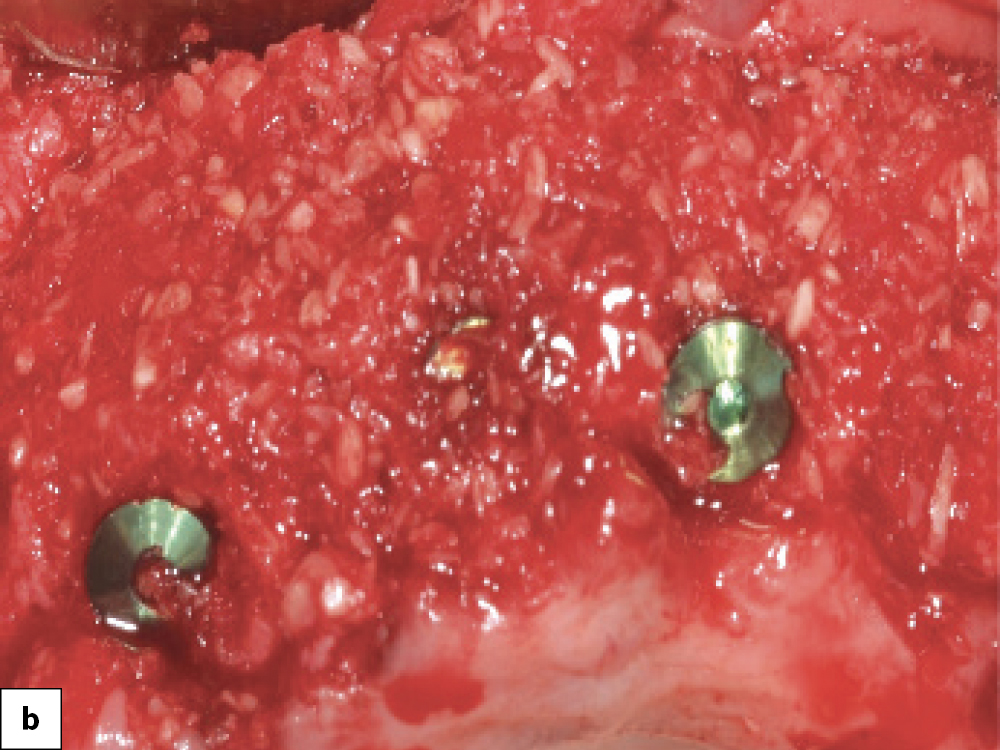
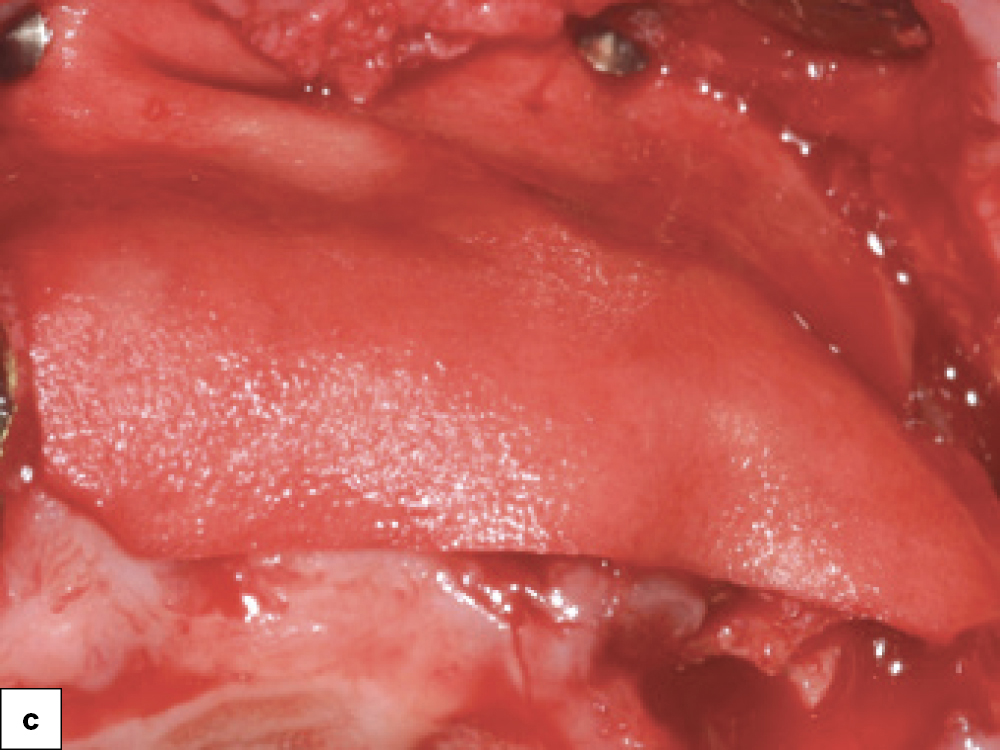
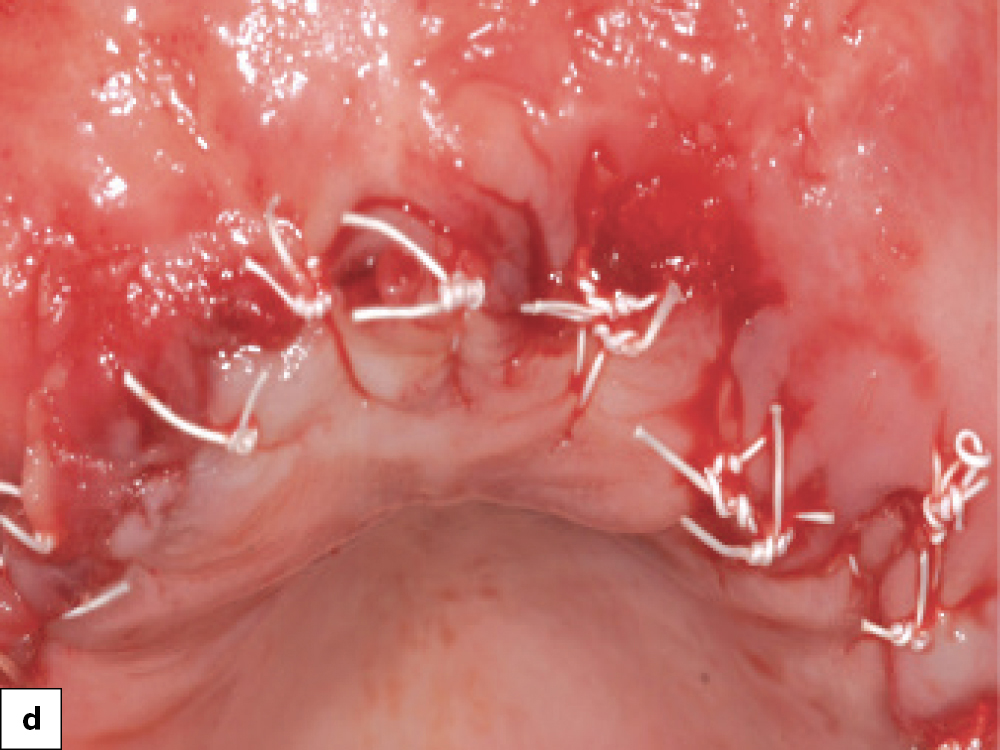
Immediate implant placement and defect grafting: (a) Implant placement in areas where bony defects are present; (b) Newport Biologics Cortico/Cancellous Allograft Blend is placed into the defects and condensed with a bone packer; (c) A Newport Biologics Resorbable Collagen Membrane 4–6 is placed over the grafted area to contain graft material and prevent the migration of soft tissue into the fenestration during healing; (d) Final closure.
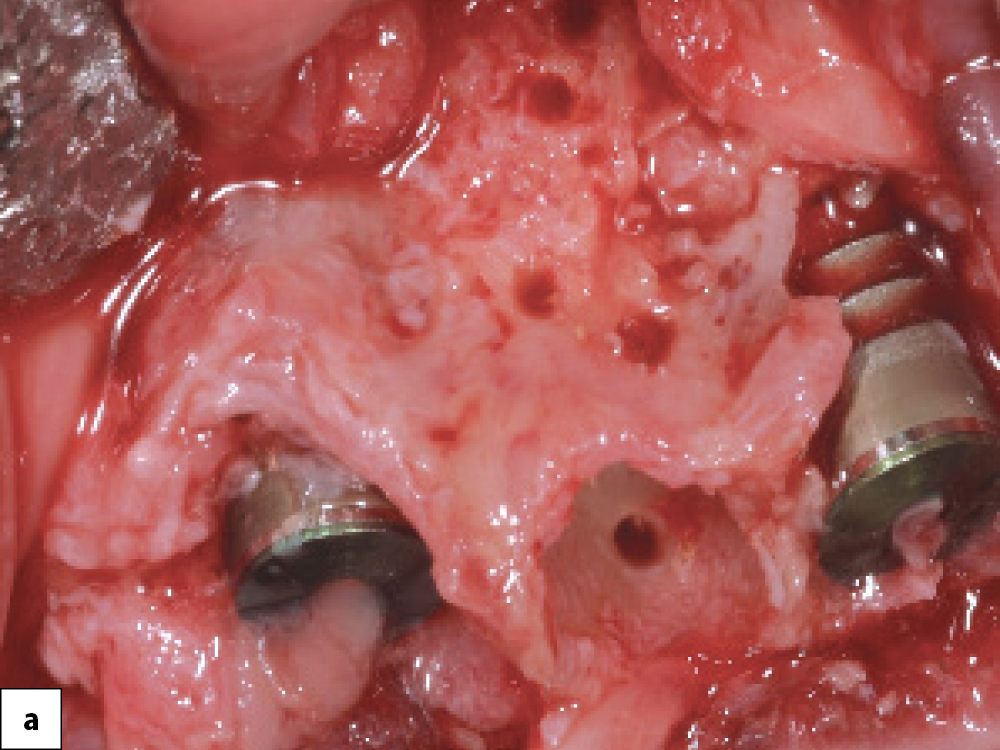
STEP 6: SURGICAL SITE CLOSURE
After implant placement and grafting, the clinician has three possible options for the closure phase of treatment.
Option 1 — “Bury” the Implant (Two-Stage): In this option, a cover screw is connected to the implant to allow for atraumatic healing. This technique is recommended in situations where it’s necessary to minimize forces on the implant, such as when extensive grafting is necessary, the implant insertion torque is below 35 Ncm, high force factors exist, or poor bone quality is present.
Option 2 — Place a Healing Abutment (One-Stage): If primary stability above 35 Ncm is achieved and there are minimal-to-no force factors, a healing abutment can be connected to the implant. The healing abutment eliminates the need for a second surgical procedure to uncover the implant and allows for the development of an emergence profile and better soft-tissue healing.
Option 3 — Immediate Provisionalization: If insertion torque of greater than 35 Ncm is achieved and there are minimal force factors and no occlusion-related concerns, an immediate provisional can be delivered. Providing a provisional restoration at the surgical appointment helps form an emergence profile and develop the soft-tissue drape around the restoration. Note that when delivering a provisional restoration, care must be taken to maintain the prosthesis completely out of occlusion and avoid over-contouring the provisional restoration.
Multiple options are available for immediate provisionals, from using the patient’s existing tooth with a temporary cylinder, to fabricating a provisional chairside with a stent and bisacrylic material, to lab-fabricated temporaries like BioTemps® Provisionals.
The final step of the surgical procedure is closure of the soft-tissue flap. Ideally, a polyglycolic acid (PGA) suture material should be used as it is advantageous in its resorbable nature and high tensile strength. An excellent option is the REDISORB® PRO PGA Suture (available through Newport Surgical).


Surgical site closure options: (a) Two-stage technique, in which a cover screw is connected to the implant before suturing the soft-tissue flap; (b) One-stage technique, in which a healing abutment is placed; (c) Immediate provisionalization with a temporary crown.
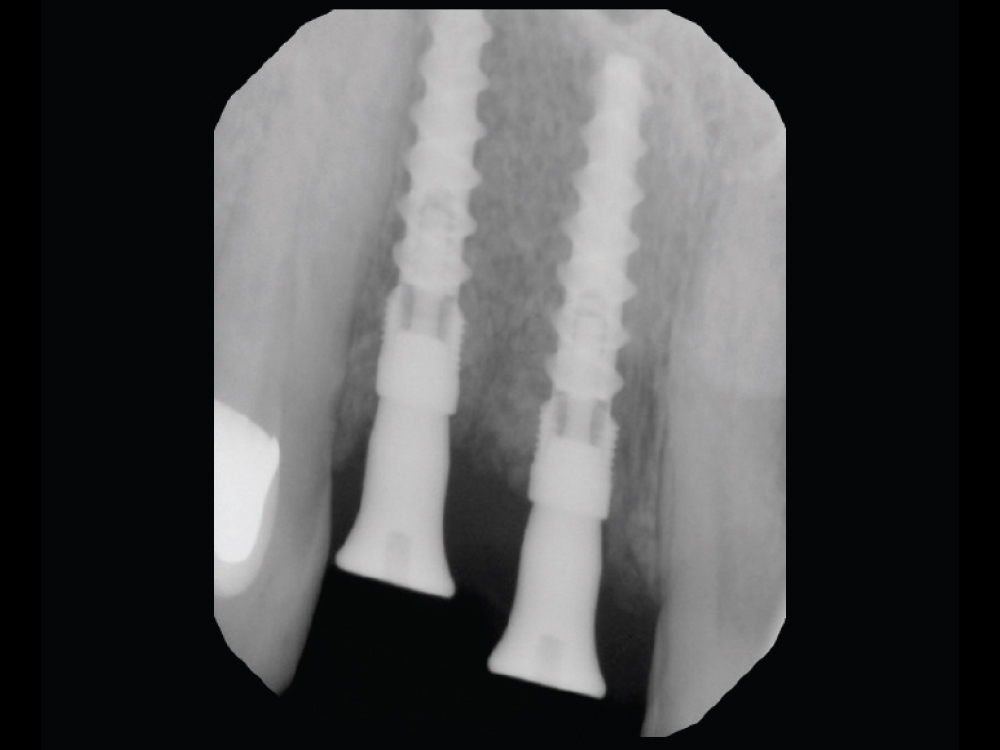
STEP 7: DELIVER THE IMPLANT RESTORATION
After allowing sufficient time for the implant and bone graft to heal, the implant is restored via conventional implant prosthetic protocols. In cases of poor bone density, a progressive bone-loading technique may be utilized.
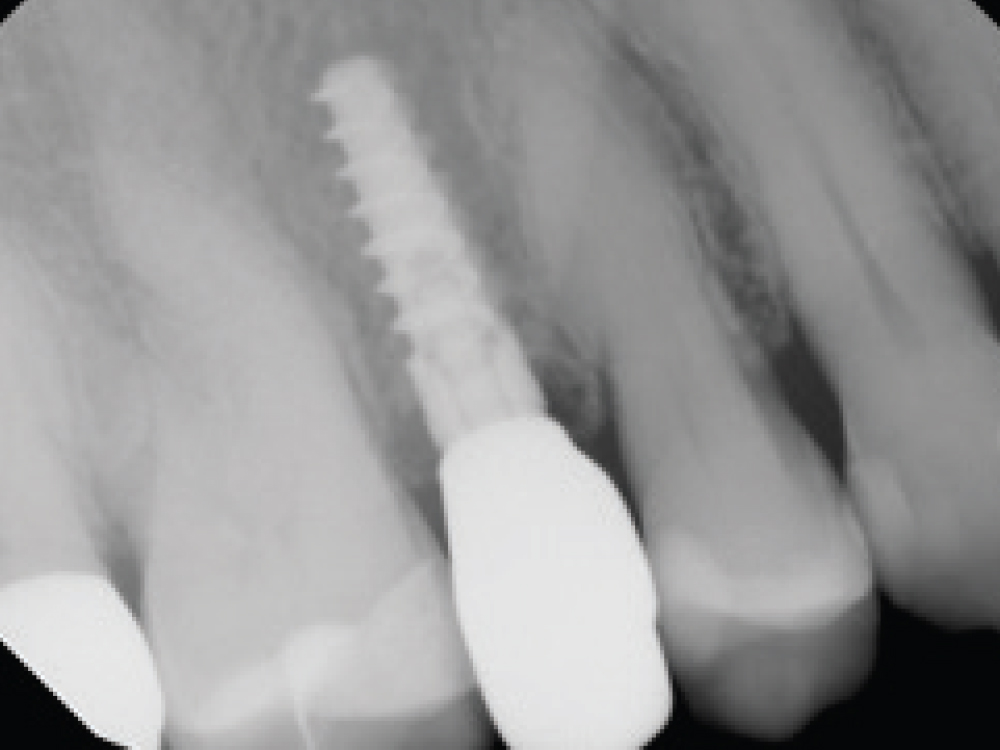
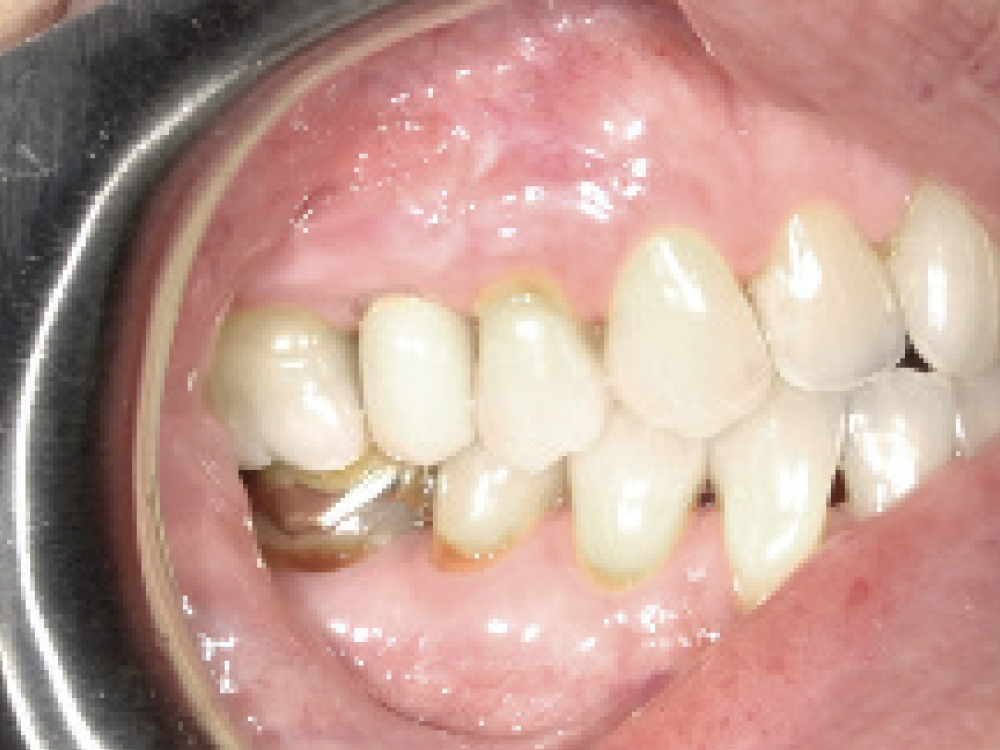
In this case example, an implant was immediately placed into an extraction site compromised by a fenestration. By utilizing the appropriate diagnostic, surgical and bone grafting techniques, a predictable restoration was delivered for the patient, and abundant bone volume was evident around the Hahn Tapered Implant.
CONCLUSION
While the presence of a fenestration poses unique challenges at an implant site, these defects can be confidently identified and addressed through proper evaluation, treatment planning, implant positioning and bone grafting techniques. The ability to successfully place an implant in a compromised site saves time, offers cost savings and expands the patient population able to receive care, making this a valuable skill for implant clinicians.
REDISORB is a registered trademark of Myco Medical Supplies, Inc.
The following Newport Surgical bone grafting instruments and materials are featured in this article. Visit glidewell.com/newportsurgical for more information or to purchase.
- Newport Surgical Implant Bone Grafting Instrument Kit
- Newport Biologics Mineralized Cortico/Cancellous Allograft Blend
- Newport Biologics Resorbable Collagen Membrane 4–6
- Newport Biologics Resorbable Collagen Plug
- REDISORB PRO PGA Sutures
References
- ^ Chrcanovic BR, Martins MD, Wennerberg A. Immediate placement of implants into infected sites: a systematic review. Clin Implant Dent Relat Res. 2015 Jan;17 Suppl 1:e1-e16.
- ^ Waasdorp JA, Evian CI, Mandracchia M. Immediate placement of implants into infected sites: a systematic review of the literature. J Periodontol. 2010 Jun;81(6):801-8.
- ^ Lang NP, Pun L, Lau KY, Li KY, Wong MC. A systematic review on survival and success rates of implants placed immediately into fresh extraction sockets after at least 1 year. Clin Oral Implants Res. 2012 Feb;23 Suppl 5:39-66.