In this issue:
Using a Diagnostic Wax-Up to Achieve Optimal Esthetics
Author

Some of my most memorable and rewarding cases are those done in the anterior for patients who are insecure about their smile. That special moment — when the patient looks in the mirror and sees their new smile — gives me the drive to keep improving my techniques and trying new materials. But how can we as dental professionals be confident that we are giving our patients exactly what they want before committing to a treatment plan, especially in such an esthetically critical area?
Using Glidewell’s Diagnostic Wax-Up service in the planning stages, we can create a smile makeover preview that shows how the final product will restore function, look natural, allow for the minimum amount of tooth reduction, and give the patient a smile that will last for many years. The diagnostic wax-up mitigates the patient’s concerns and allows them to try out their new smile before the permanent restoration begins. In this article, I will discuss the steps I take to show the patient what their definitive restoration will look like, the methods I use to plan the stages of treatment, and where I rely on the lab’s services and expertise.
CASE REPORT
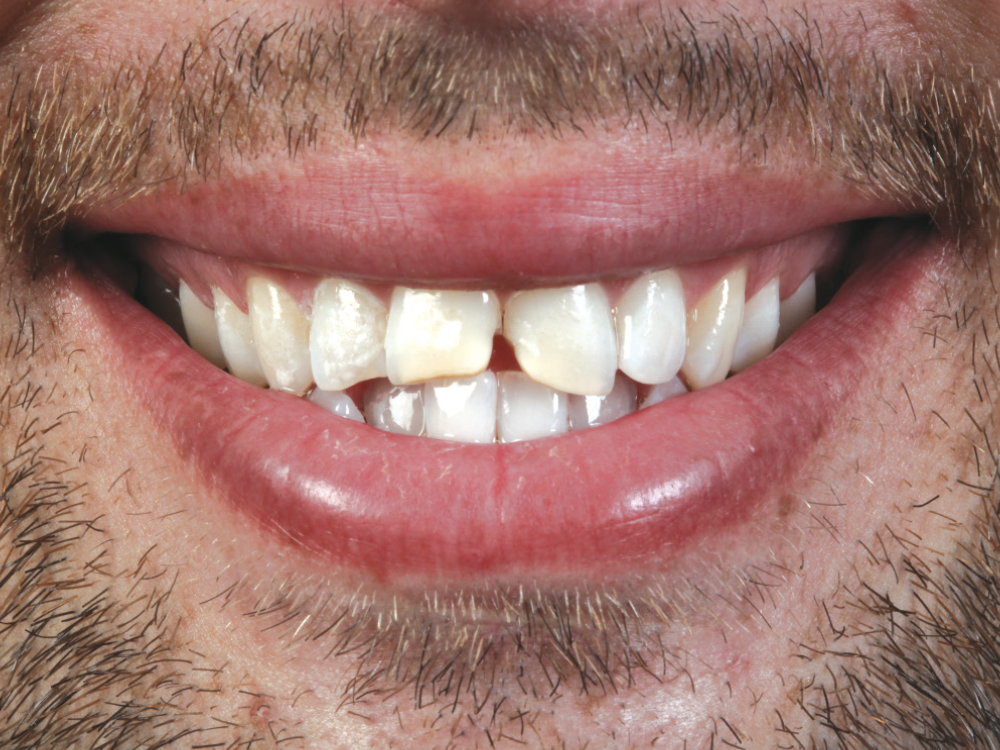
Figure 1: The patient presented several years after a traumatic injury to his upper anterior teeth. He had severe fractures through #8 and #9, as well as at the incisal edge of #7. He wanted to improve his oral esthetics, and I wanted to make sure I restored function and strength as well. The patient also needed to complete his treatment in a very short period of time, requiring some adjustments to my normal workflow.
Appointment No. 1: Initial Impressions and Treatment Planning
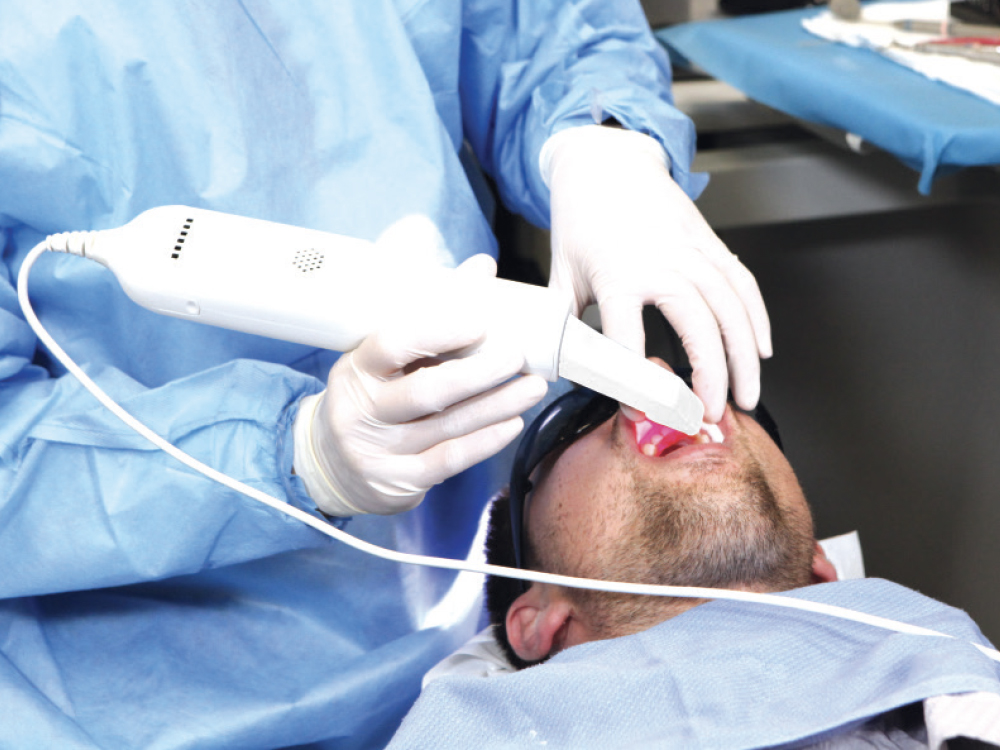
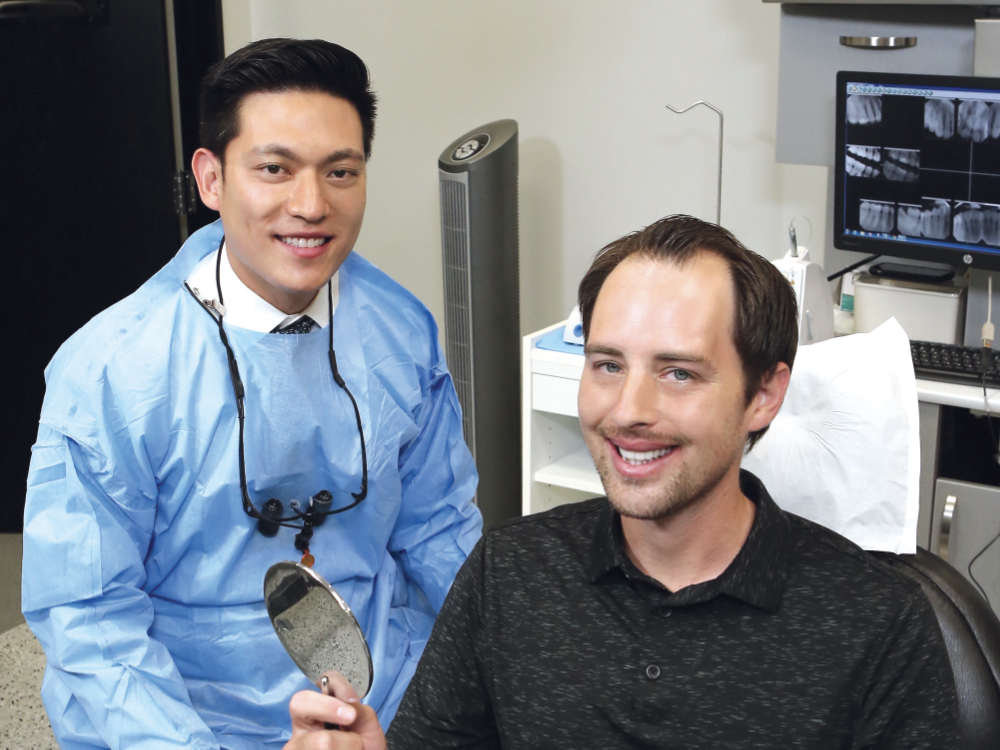
Figure 2: My plan was to restore teeth #7–10 with BruxZir® Esthetic veneers, so I took an intraoral scan of both the upper and lower arches along with a bite registration using an iTero® Element scanner (Align Technology; San Jose, Calif.). Note that, alternatively, VPS impressions can be taken, but scanning reduces the turnaround time by eliminating the need to ship physical models or impressions to the lab. I sent the scan along with specific directions to Glidewell for the production of a diagnostic wax-up.
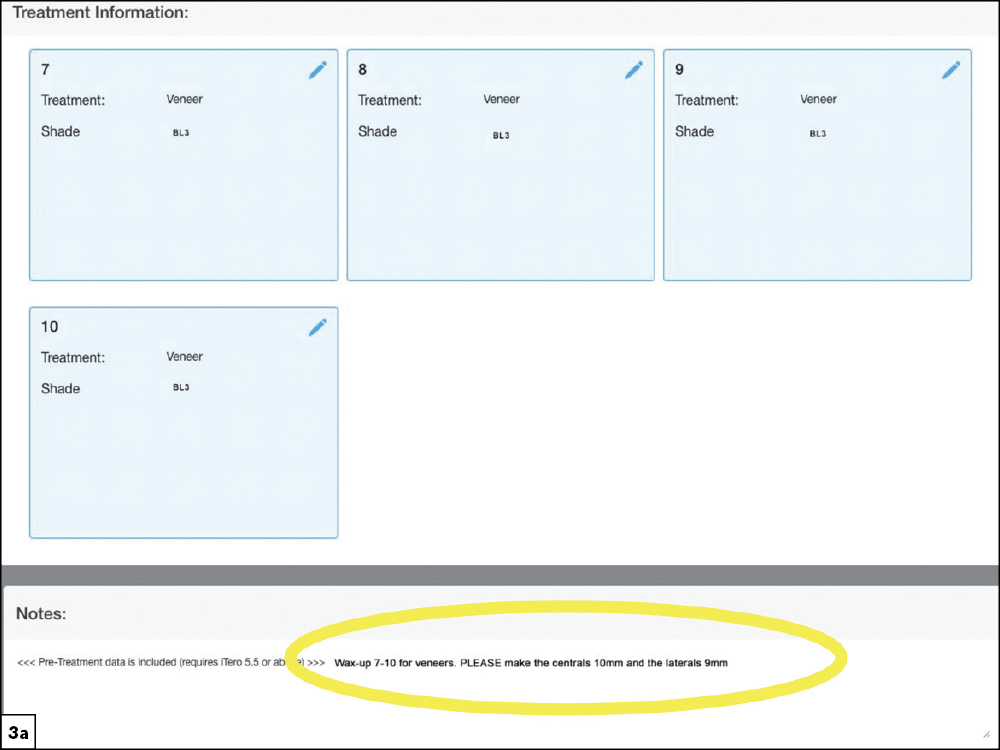
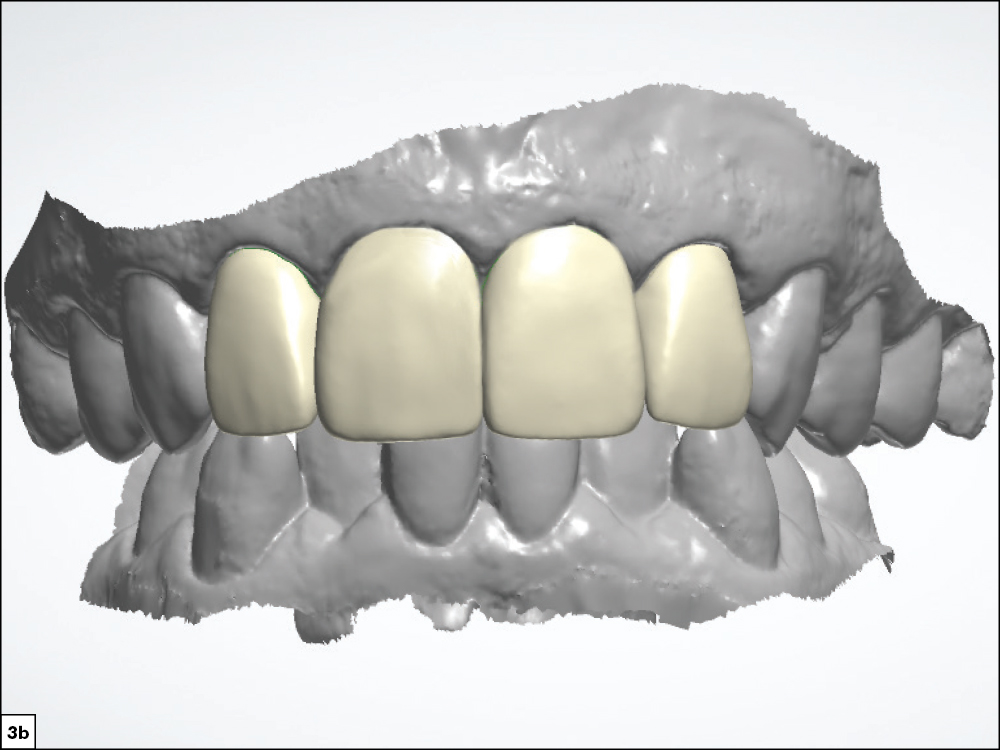
Figures 3a, 3b: When submitting the wax-up prescription, I included the specific lengths and contours of the desired veneers on the Rx to assist the lab technician in designing the diagnostic wax-up. Whether the case is submitted via intraoral scanner or traditional VPS impression, the case is digitized at Glidewell so a high-precision diagnostic wax-up can be created using advanced CAD software for consistent results. The technician assessed the surrounding dentition and created a harmonious digital design.
Appointment No. 2: Wax-Up Design Approval
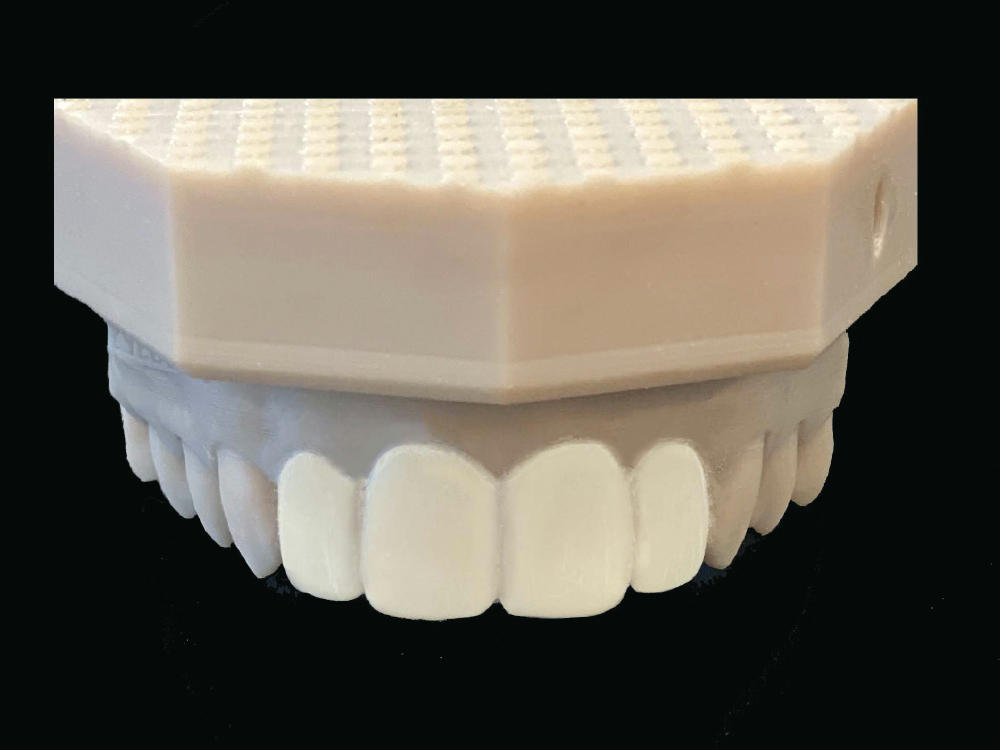
Figure 4: At the second appointment I showed the patient the new design for his teeth on the wax-up model fabricated by Glidewell, allowing him to examine the esthetic design of the proposed final restoration.
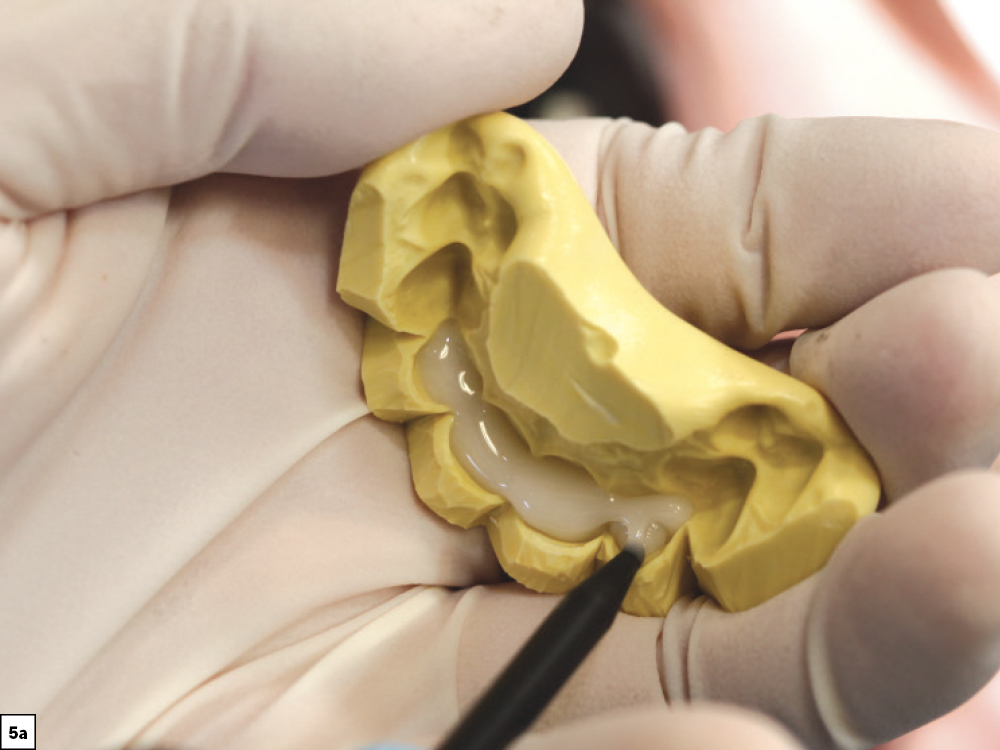
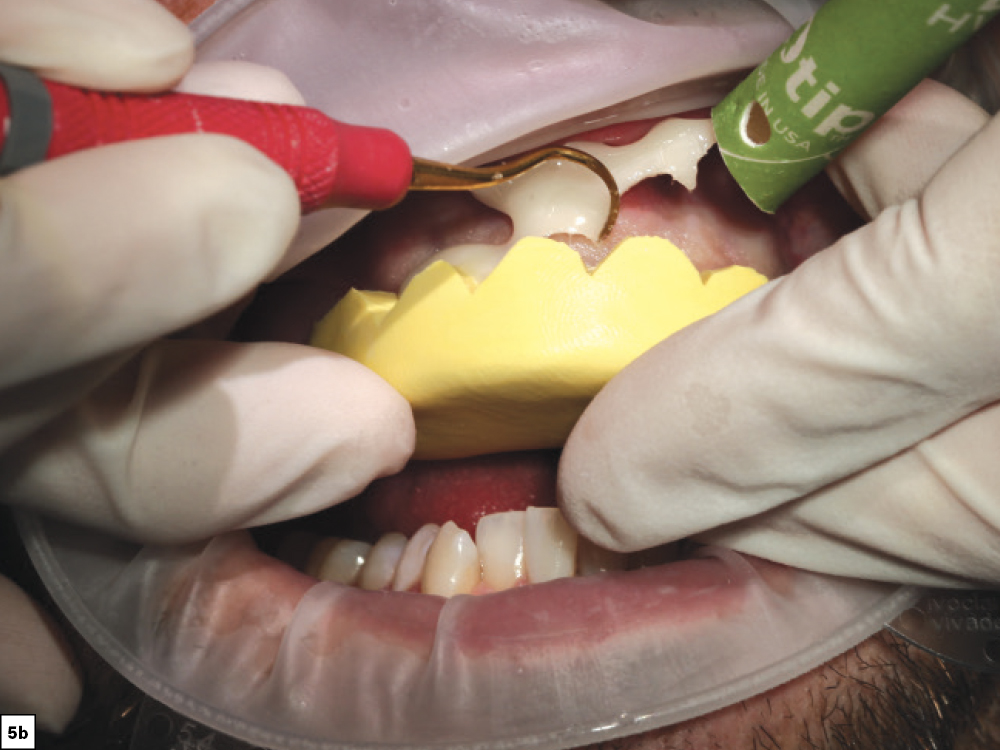
Figures 5a, 5b: After reviewing the wax-up with the patient, I used the lab-provided putty matrix to transfer the design to his teeth for a mockup, which allowed him to experience what the final restoration would look and feel like. Using a provisional material — I typically select Luxatemp Ultra (DMG America; Ridgfield Park, N.J.) or TuffTemp™ Plus (PULPDENT; Watertown, Mass.) — I back-filled the putty matrix and seated it over un-prepared teeth #7–10. I removed the excess acrylic while the material was setting in the mouth to reduce the time I would need to spend cleaning up hardened acrylic later.
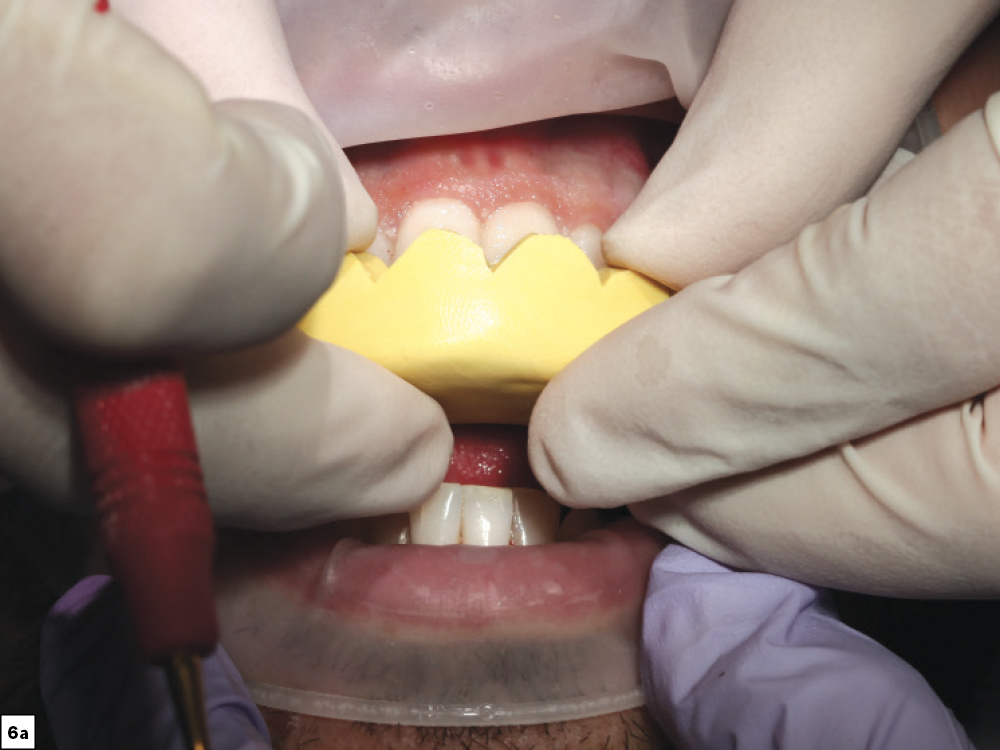
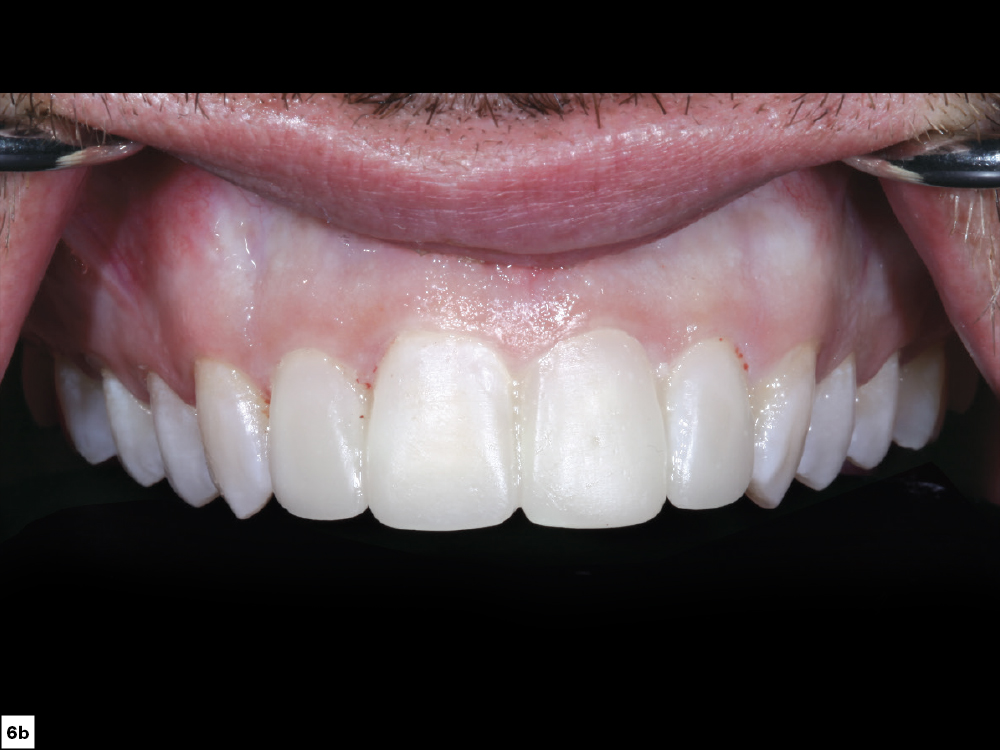
Figures 6a, 6b: The matrix was removed after the mockup material set. Small adjustments can still be made at this point if needed. The intraoral mockup gave the patient and me the opportunity to review the esthetics, speech patterns and overall functionality of the design.
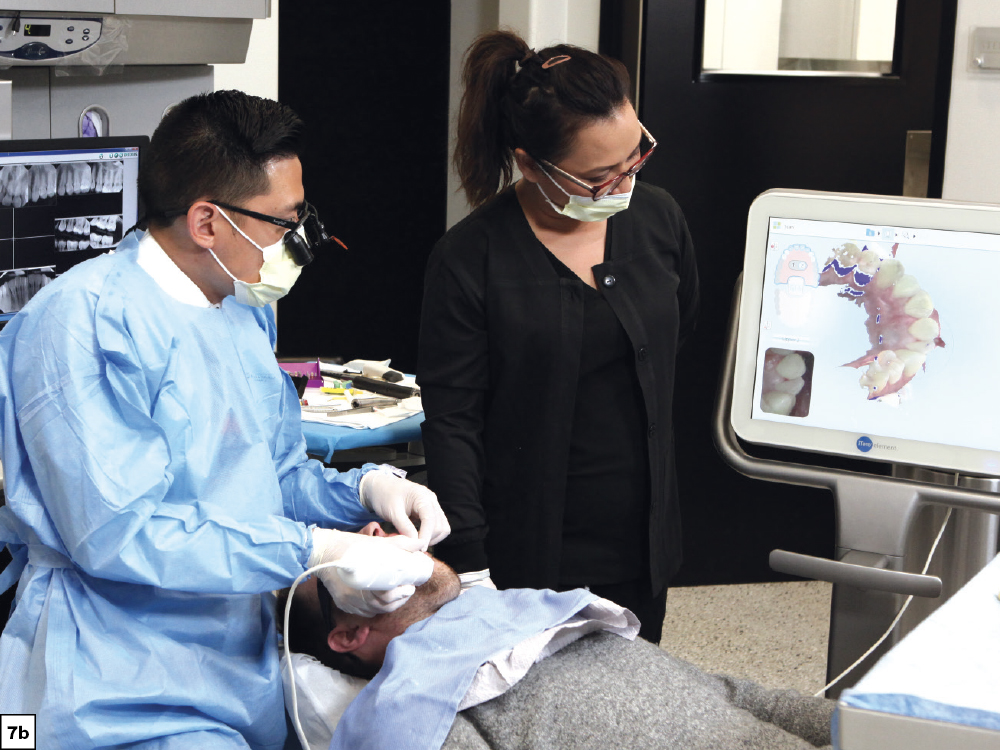
Figures 7a, 7b: After the patient approved his new smile, I took an intraoral scan of the mockup using iTero software. Called a “pre-scan,” this image was sent to the lab to guide the technicians in designing the final restorations.
Appointment No. 2: Continued
After the patient approved the new incisal-edge length, contours and midline, and I verified that his speech was unaffected, we were ready to prepare the teeth for the BruxZir Esthetic veneers for #7–10. The preparations can be done in the same appointment as the mockup unless the patient has some reservations about the esthetics or function and wants to wear the mockup home. Many patients prefer to get the opinion of a significant other, family member or friend, but in this case the patient was confident in his acceptance, and we were ready to start prepping his teeth.
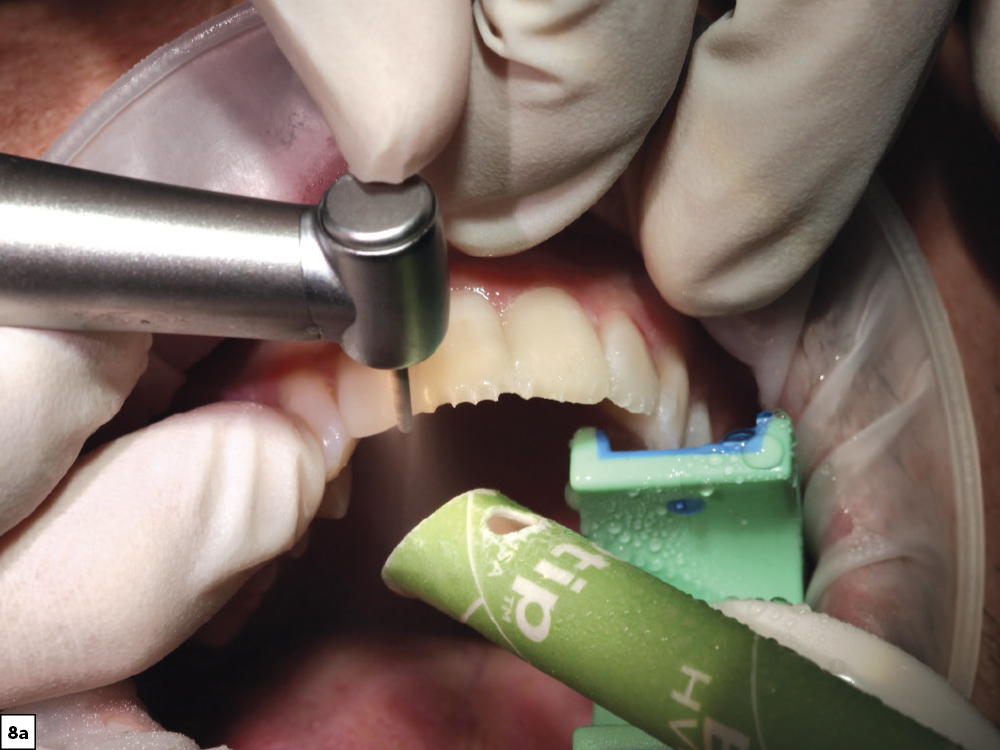
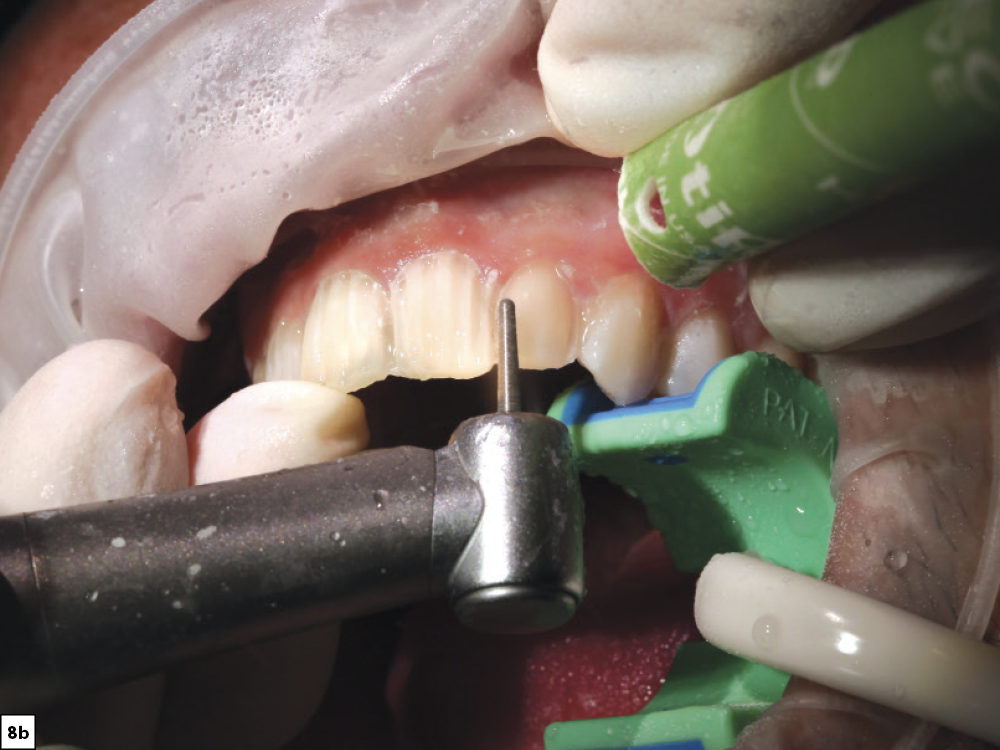
Figures 8a, 8b: With the provisional mockup still on the teeth, I used a diamond bur to make depth cuts through the acrylic, starting with the incisal edges. Because I needed a thickness of at least 0.7 mm on the facial to allow for the BruxZir Esthetic material, the mockup helped me visualize how much structure needed to be removed. With a 1 mm preparation on the incisal and facial surfaces, which exceeds the manufacturer’s requirements, the material is strong enough to withstand significant forces.
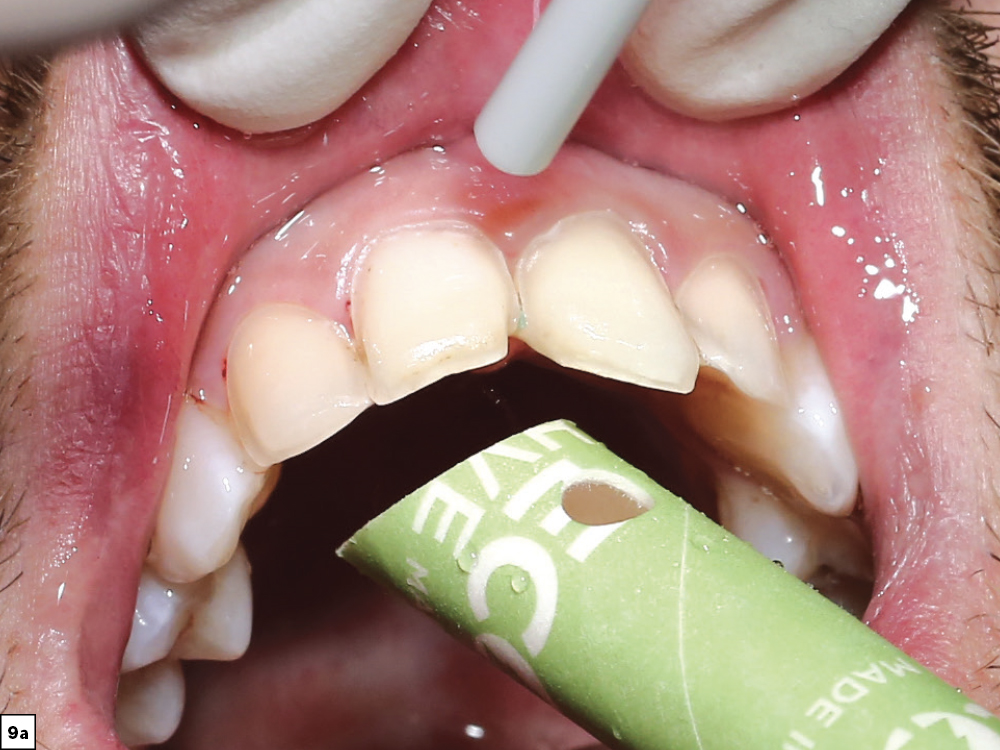
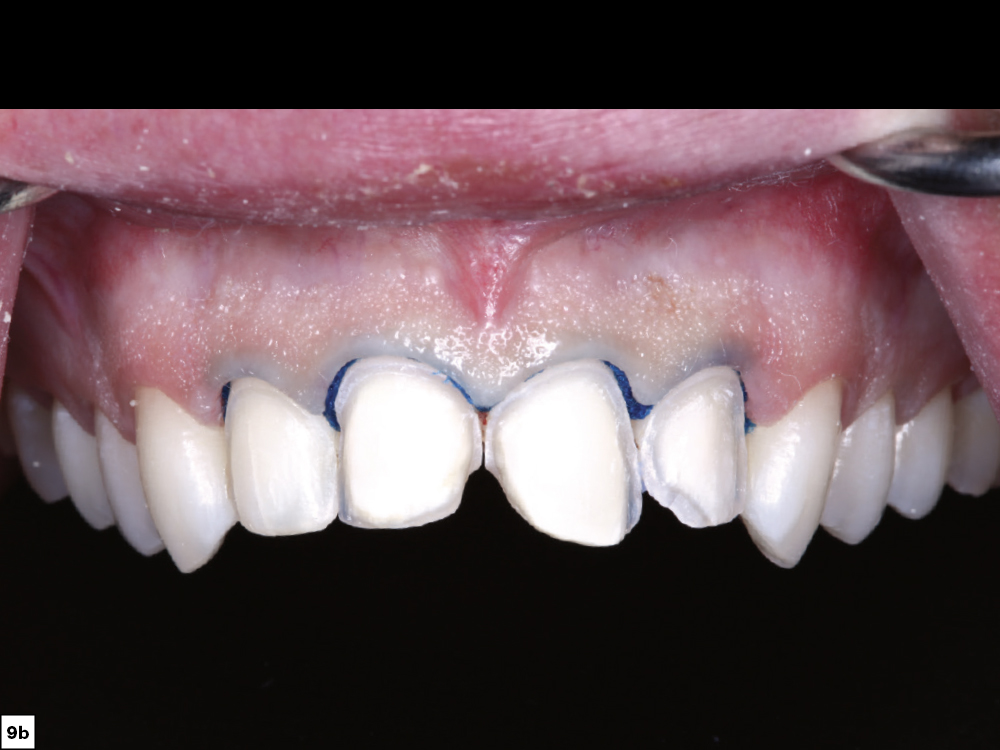
Figures 9a, 9b: After making the incisal and facial depth cuts, I blended the cuts together to create nicely prepared teeth to receive veneers. To ensure an accurate fit, it is important to pack cord to expose the gingival margins for the final impressions. I used Ultradent Ultrapak™ size #0 cord (Ultradent; South Jordan, Utah), and took my final impression using the iTero Element scanner.
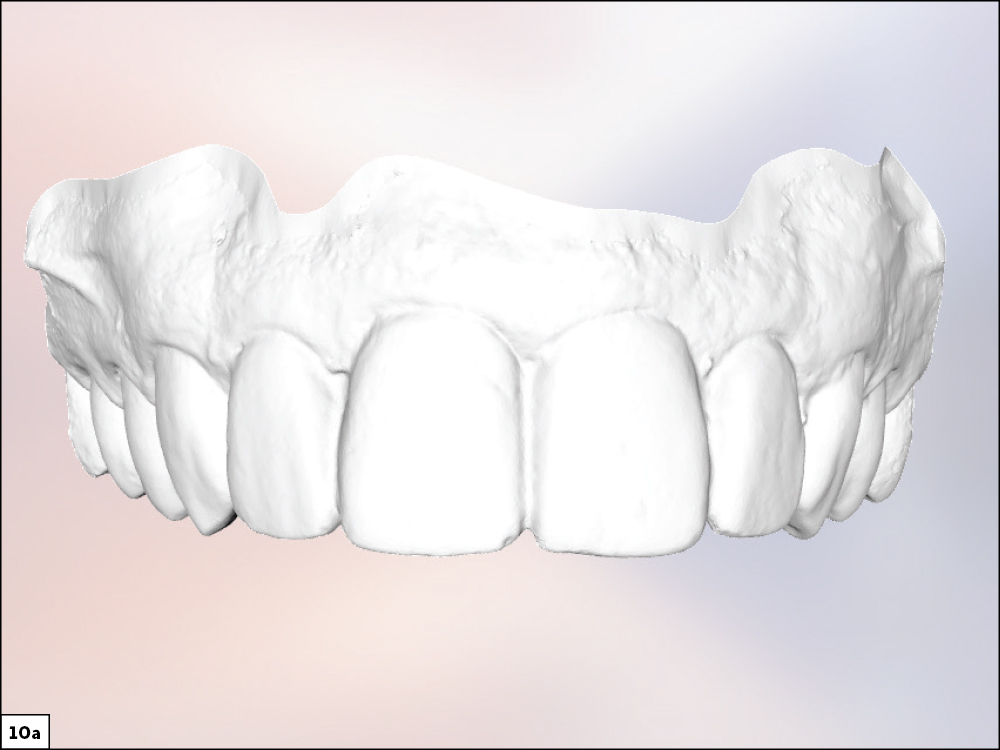
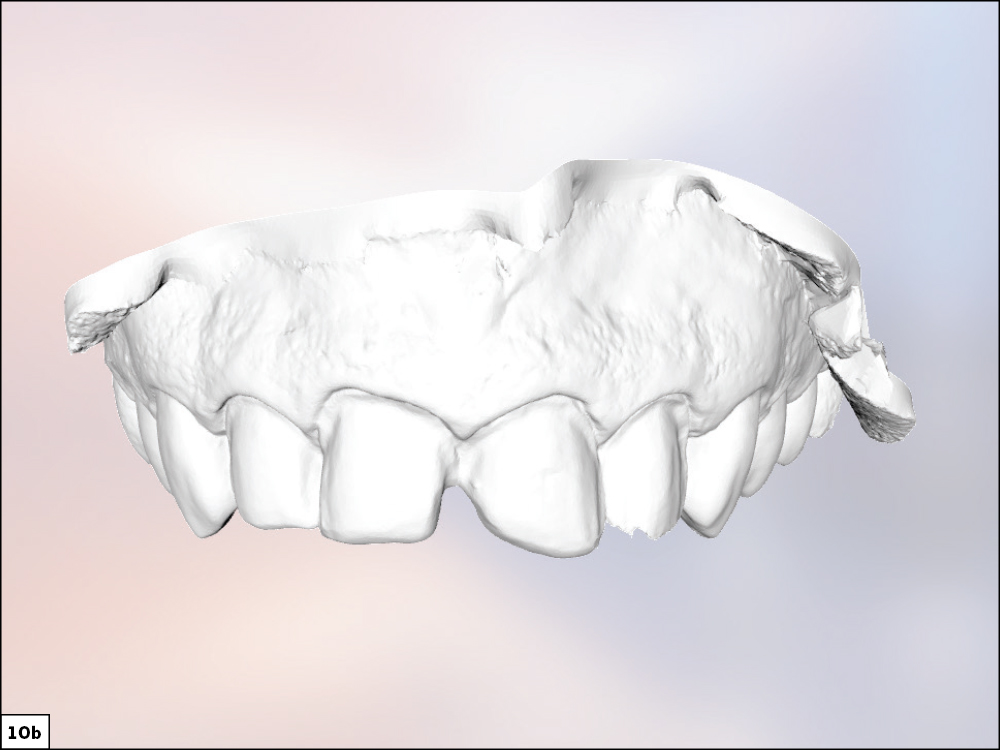
Figures 10a, 10b: The “pre-scan” function on the iTero Element scanner enabled me to obtain a “before” image of the mockup in place (10a), which is very helpful to the lab in designing the final restorations. If you are using traditional impression methods, take a VPS impression with the mockup in place. By packing cord, the well-defined gingival margins are clearly visible for the scanner to pick up when the preps are scanned (10b). When capturing an impression using VPS material, double-check to make sure all margins are visible in the impression.
Appointment No. 3: Final Restoration Delivery
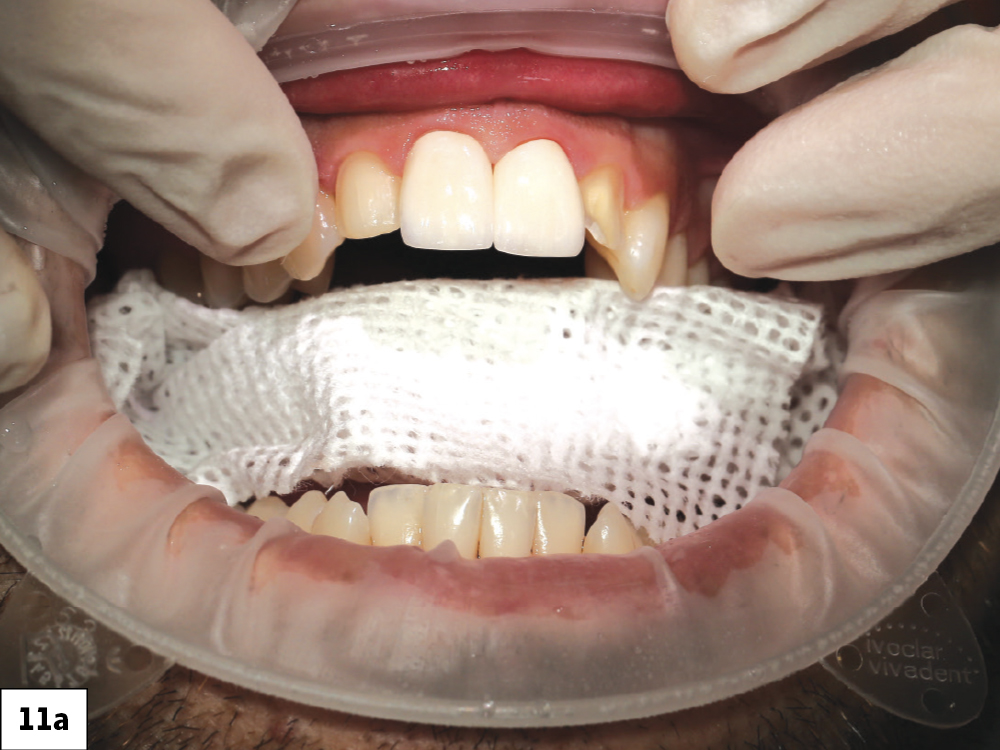
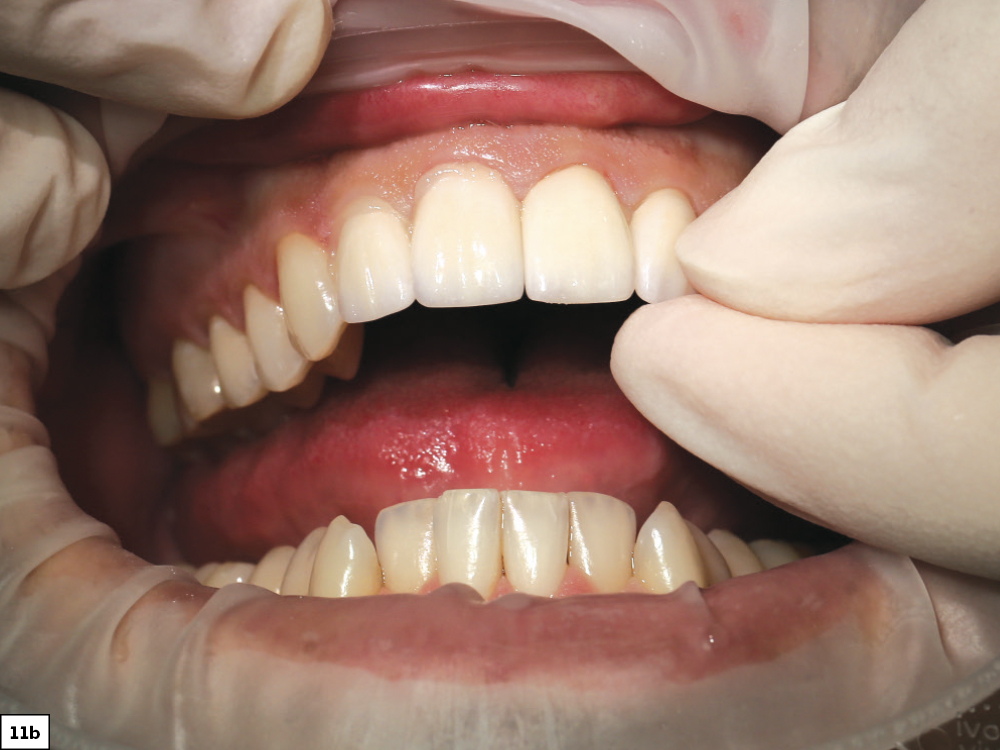
Figures 11a, 11b: I started the final delivery appointment by trying in the central veneers and then worked my way to the laterals. After confirming the accuracy of fit and offering the patient an opportunity to look in the mirror, I removed them and proceeded with cleaning the intaglio surface of the restorations.
Below is the protocol that I adhere to when bonding zirconia restorations.
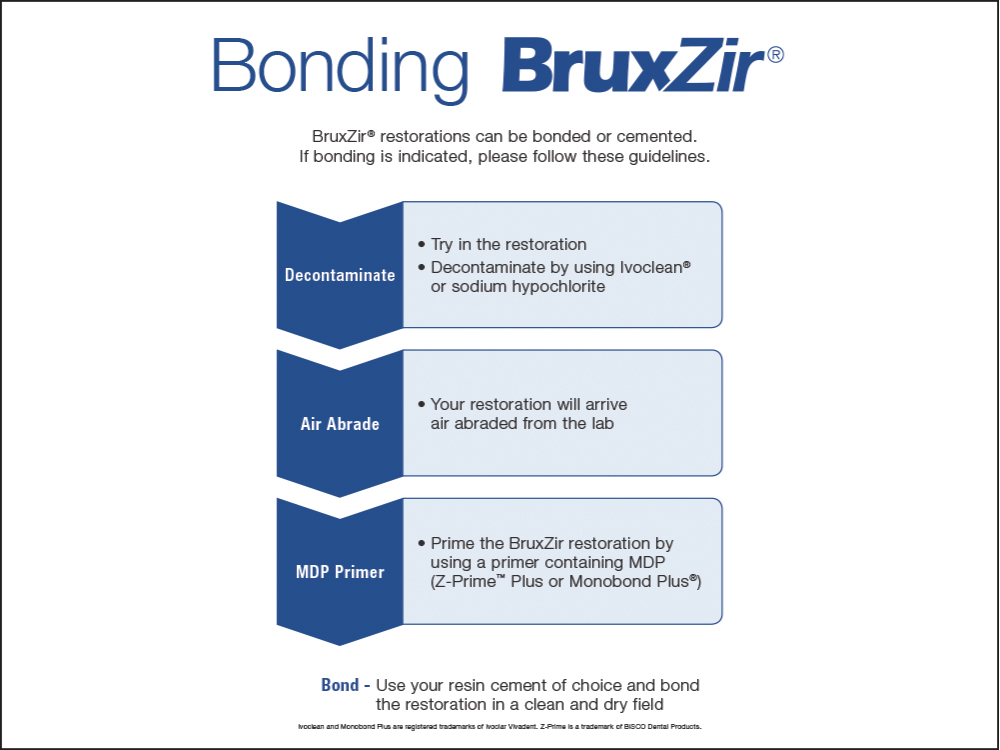
Note: It’s safe to lightly air-abrade with 50 µm aluminum oxide to decontaminate as well, although excessive air abrasion can weaken restorations.
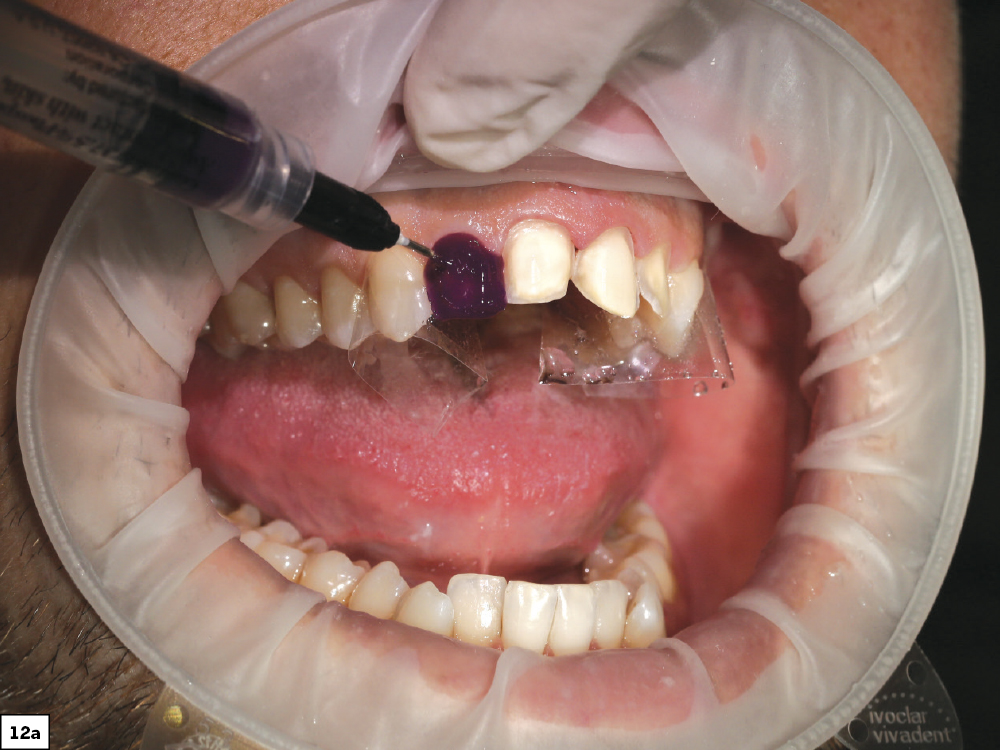

Figures 12a, 12b: After decontaminating and applying Monobond® Plus (Ivoclar Vivadent; Amherst, N.Y.) to the intaglio surfaces of the restorations, I began etching the enamel surfaces with 37.5% phosphoric acid etchant gel for 15 seconds. I then completely rinsed and dried the surfaces. On the dry enamel, I scrubbed on Kerr OptiBond™ Universal Adhesive (Kerr Corporation; Brea, Calif.), then air-thinned and light-cured the liquid.
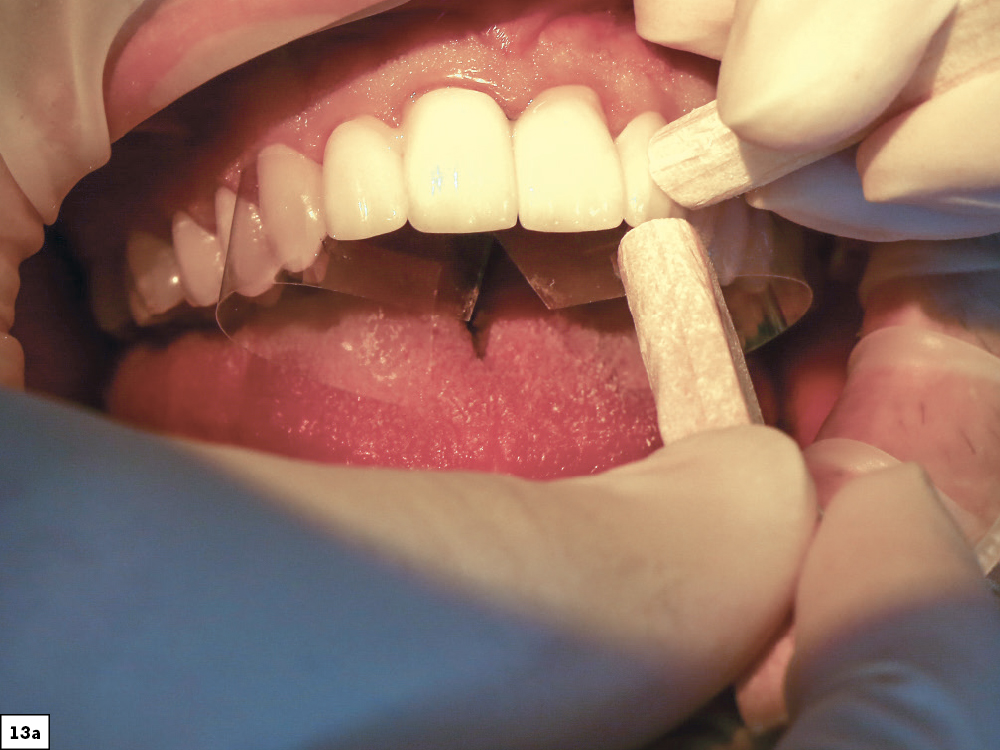
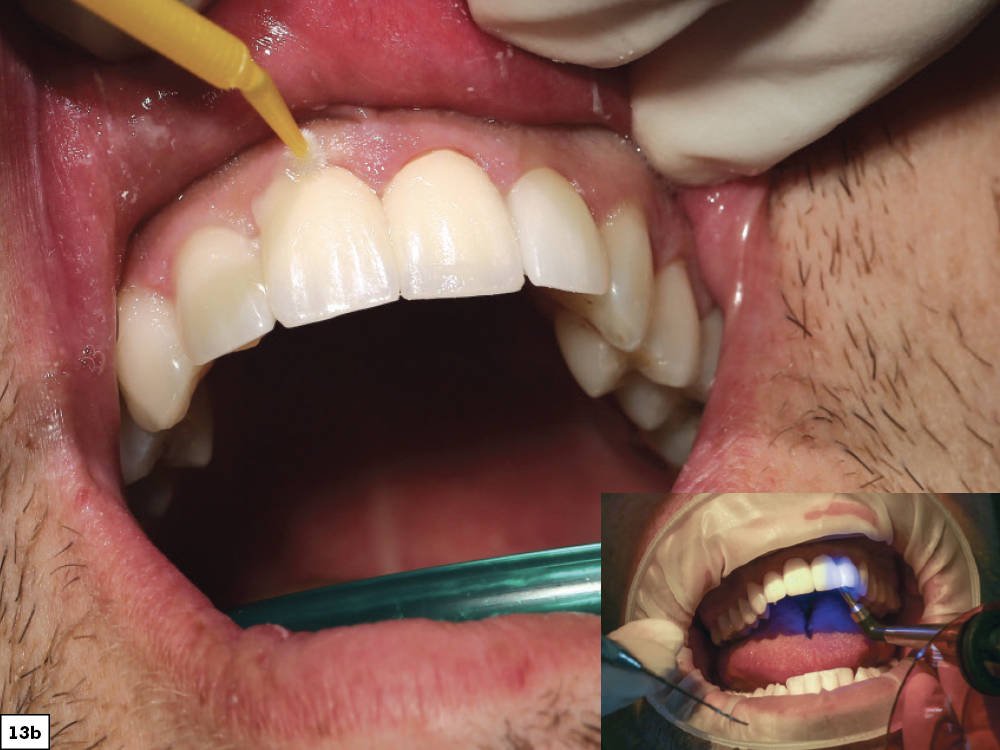
Figures 13a, 13b: Starting with the centrals followed by the laterals, I used NX3 Nexus™ Third Generation light-cure resin cement (Kerr Corporation) to bond the restorations onto the preparations, allowing me plenty of time to correctly position the restorations. I took a few minutes to clean up any excess cement before light-curing the veneers in place.
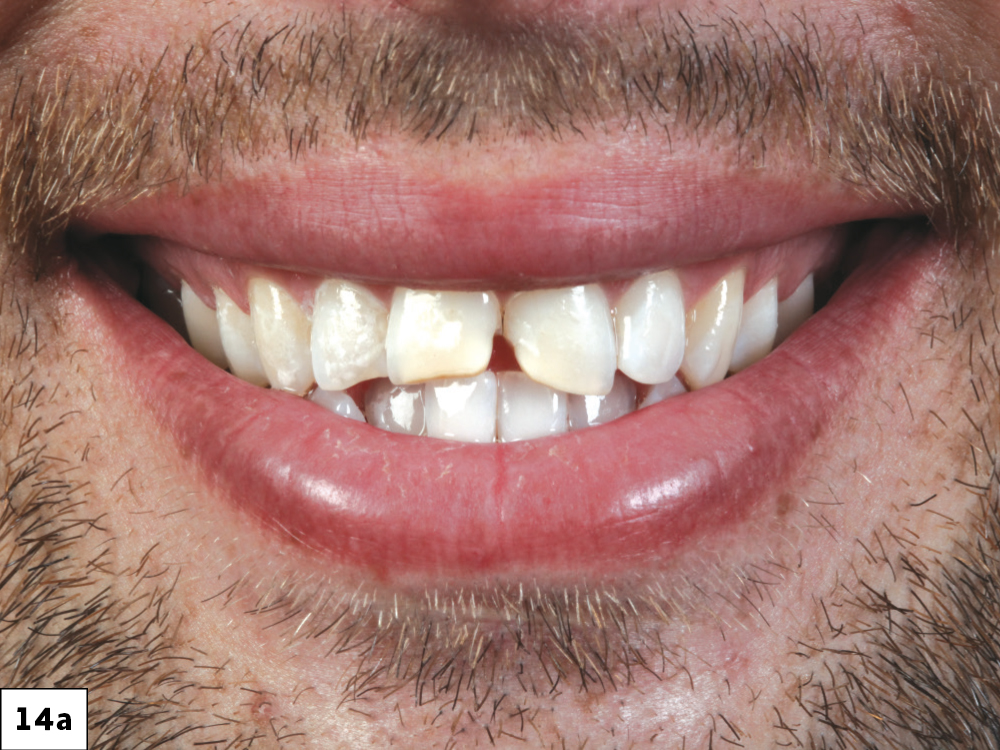
Figures 14a, 14b: By using a diagnostic wax-up to present the patient with an intraoral mockup of the proposed smile makeover, we were able to work together and agree on a final restoration design that looked and felt good for the patient.
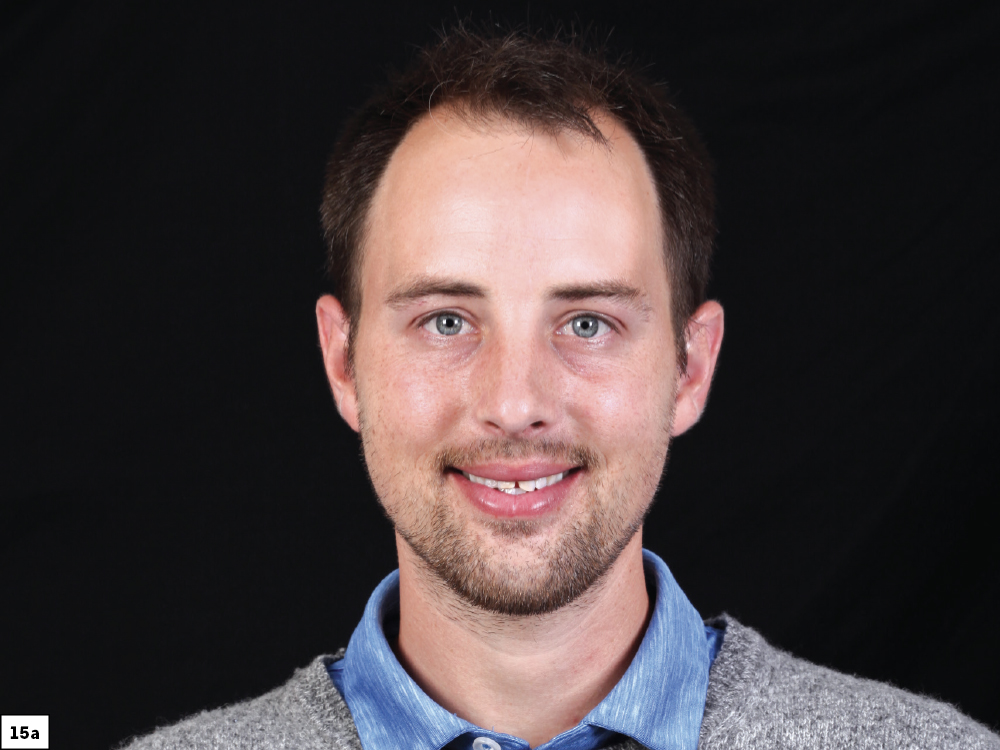

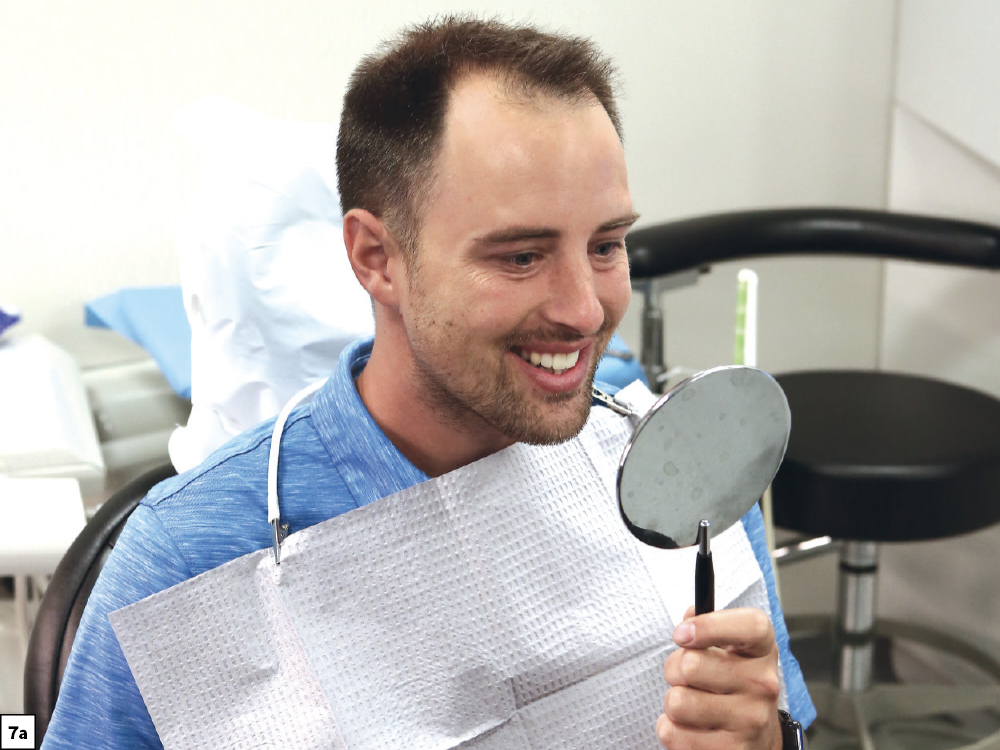
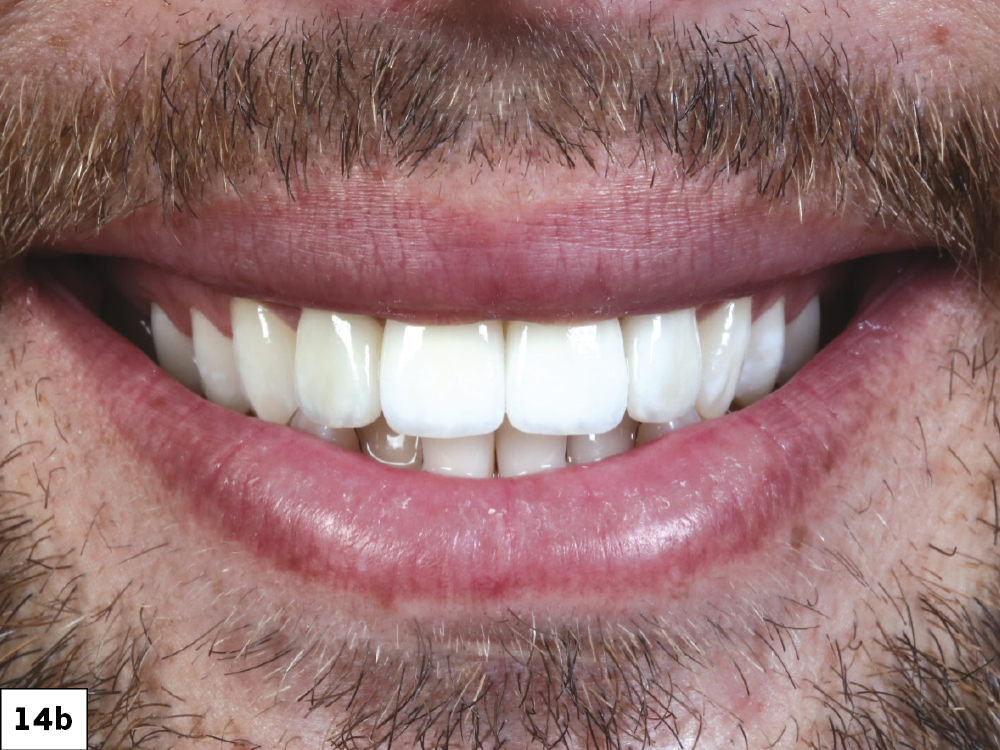
Figures 15a, 15b: The final BruxZir Esthetic veneers were just what the patient had hoped for and the excitement for his new smile is clearly visible.
CONCLUSION
By creating an intraoral mockup from a diagnostic wax-up, you are able to offer your patients a preview of how their restorations will look and feel. Establishing expectations is critical, and utilizing a diagnostic wax-up is useful in helping you gain acceptance for the proposed smile makeover. The workflow that I described in this article is one of two that I use with my anterior esthetic cases. Look out for the next issue of Chairside® magazine, where I will cover the other option: utilizing BioTemps® Provisionals.