In this issue:
Veneer Preparation and Temporization: Tips and Techniques
Author


The best way to approach any esthetic case is with the end in mind. By thinking ahead, you can map out the most effective path to achieving a predictable outcome and deliver esthetic veneers that will satisfy the needs of your patient.
In this article, I will cover some basic principles for choosing the right veneer preparation design, give you some tips and discuss the types of provisionals used for different cases. I’ll discuss why temporizing using predictable, versatile materials, such as BioTemps® Provisionals, will help you deliver esthetically pleasing results and increase patient satisfaction with the final restorations.
SHADE SELECTION AND CHOOSING THE RIGHT VENEER PREPARATION
Choosing a shade that works for you and your patient should be one of the first decisions you make together. In order to manage the patient’s expectations, clarify that the amount of tooth reduction is relative to the desired shade. In addition, use photographs of both the full face and the face from the side to help determine how many teeth will need to be restored to achieve the desired result.
PREPARATION SELECTION GUIDE
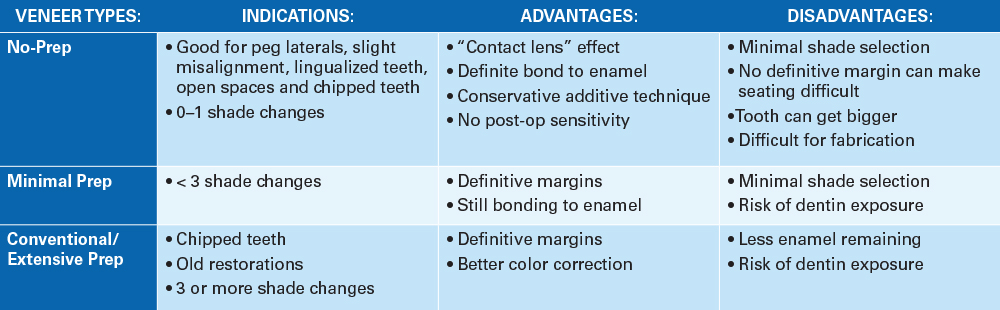
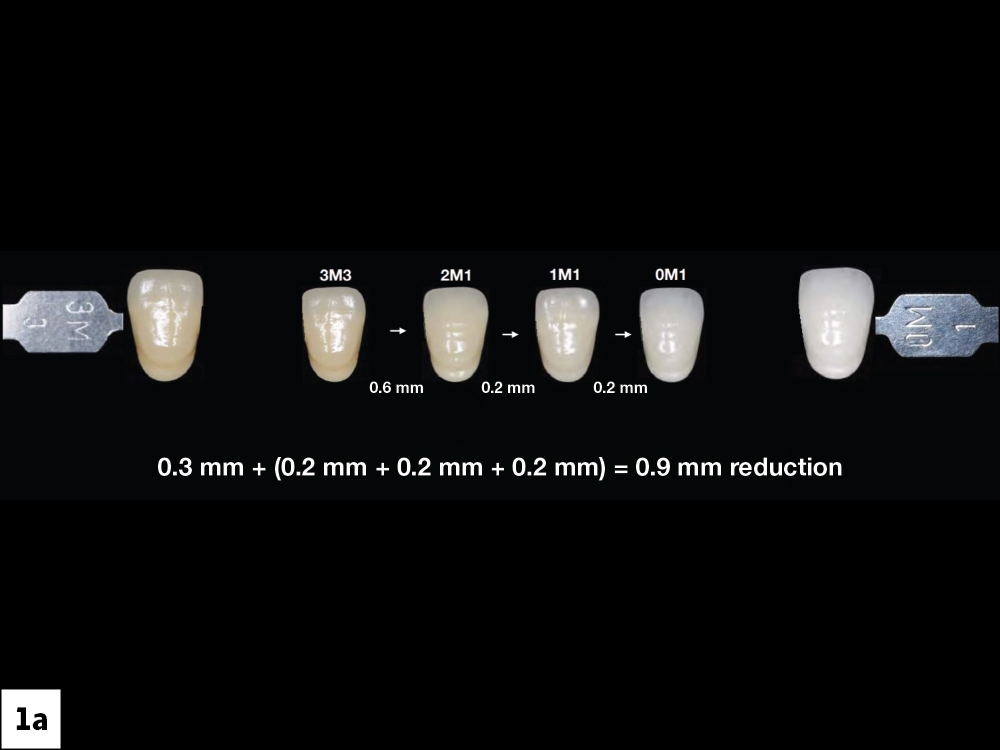
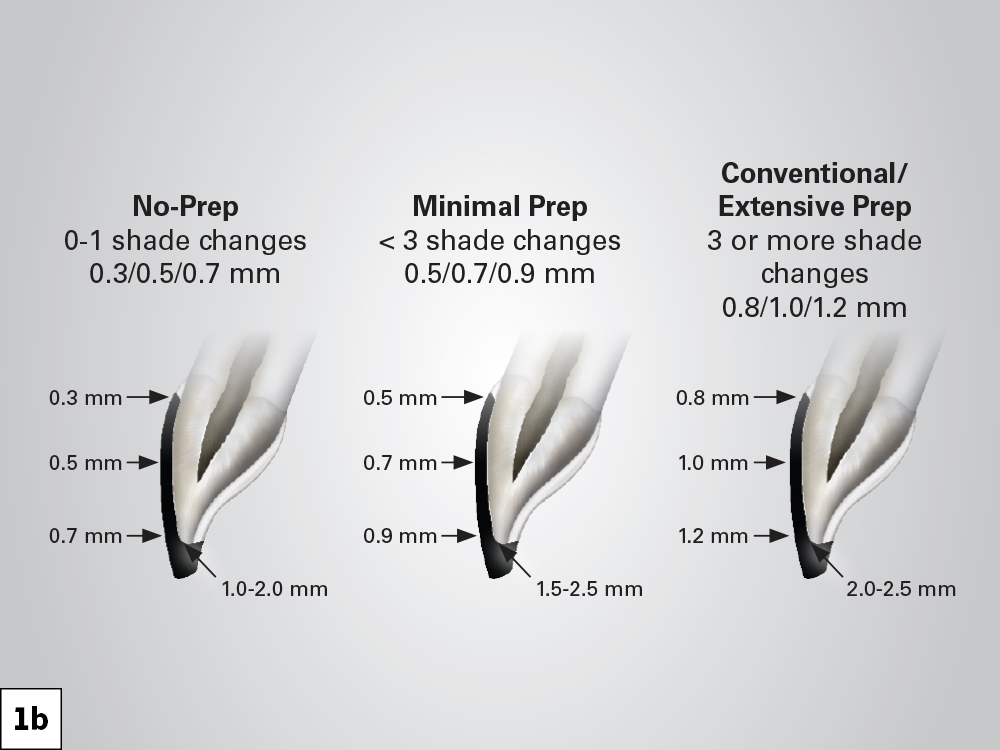
Figures 1a, 1b: It is important to note that the amount of reduction is determined by the shade you want to achieve. An additional 0.2 mm reduction is needed for each shade change, ascending from D4 to A1. Because lighter shades require a thicker veneer, you will need to increase the amount of tooth structure removed. It is essential that you start planning for the shade early on in order to avoid under-preparing the teeth. Manage the patient’s expectations by explaining to them that the goal is to save as much enamel as possible. However, note that some very white shades will require additional reduction.
SELECTING THE PROVISIONAL MATERIAL
Providing your patient with comfortable and esthetically pleasing provisionals is often the key factor in developing their confidence to continue treatment with you. Not only does it give them a chance to see what their final restorations will look like, but it also allows them to show their friends and family the improvements being made. Depending on the number of units you plan on restoring, there are a few options I like to choose from.
Cases of 1–2 Units
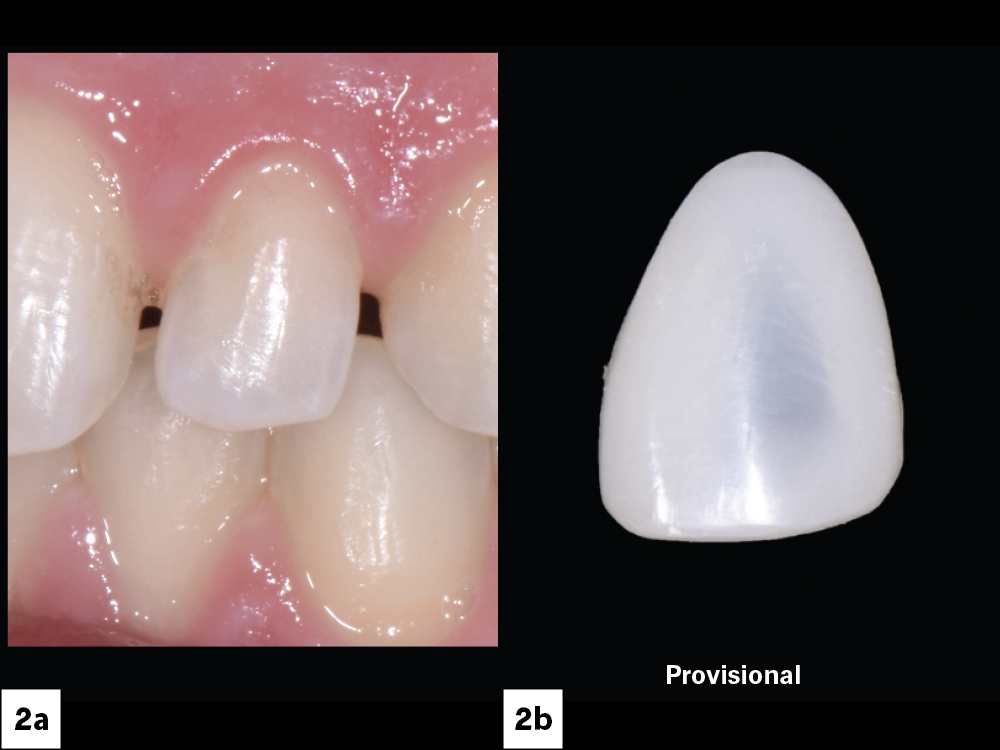
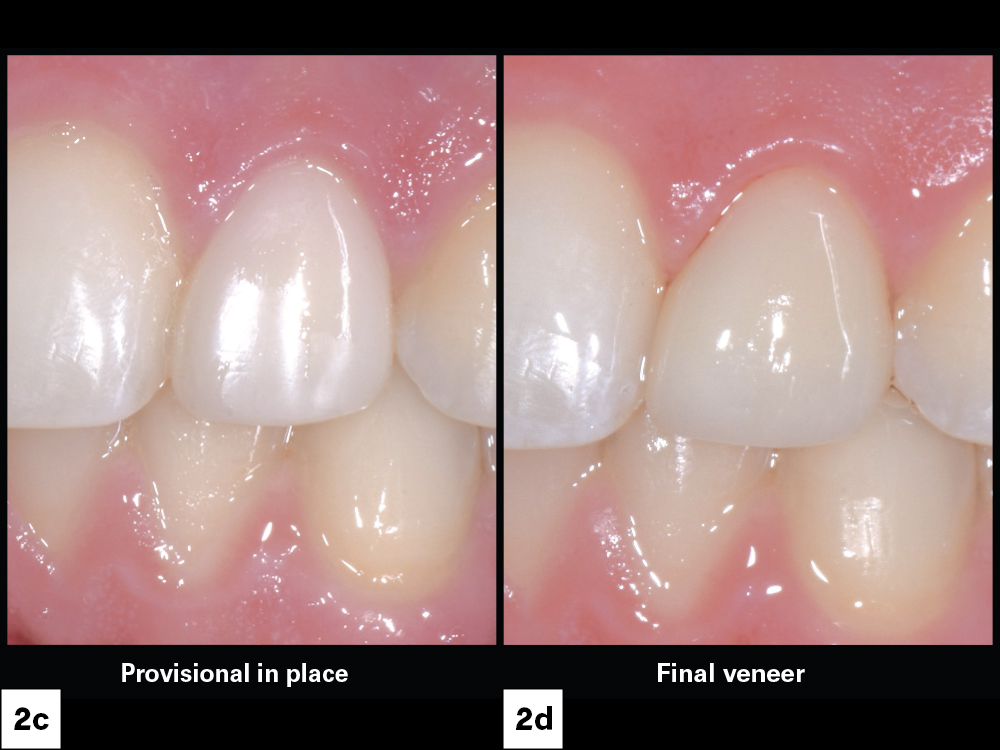
Figures 2a–2d: If restoring 1–2 units, I like to use a direct composite provisional. It is quick and easy to do while providing esthetically pleasing results. If you are restoring only 1 unit, you can trim and polish the provisional material in your hand before applying to the prepared tooth. To apply, spot-etch and spot-bond, using flowable composite to bond the provisional in place. I like to keep the bond near the incisal edge so that, when it is time to take the provisional off, adjustments can be made without interfering with the margins. If restoring 2 or more units, bond, trim and polish the provisionals while they are in the mouth.
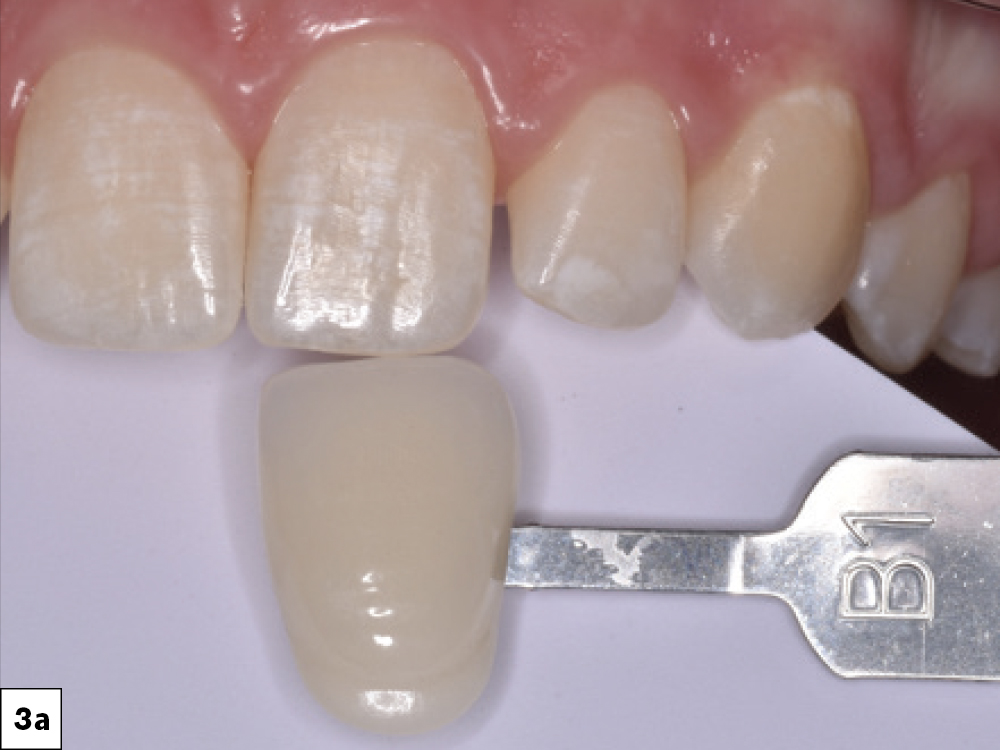
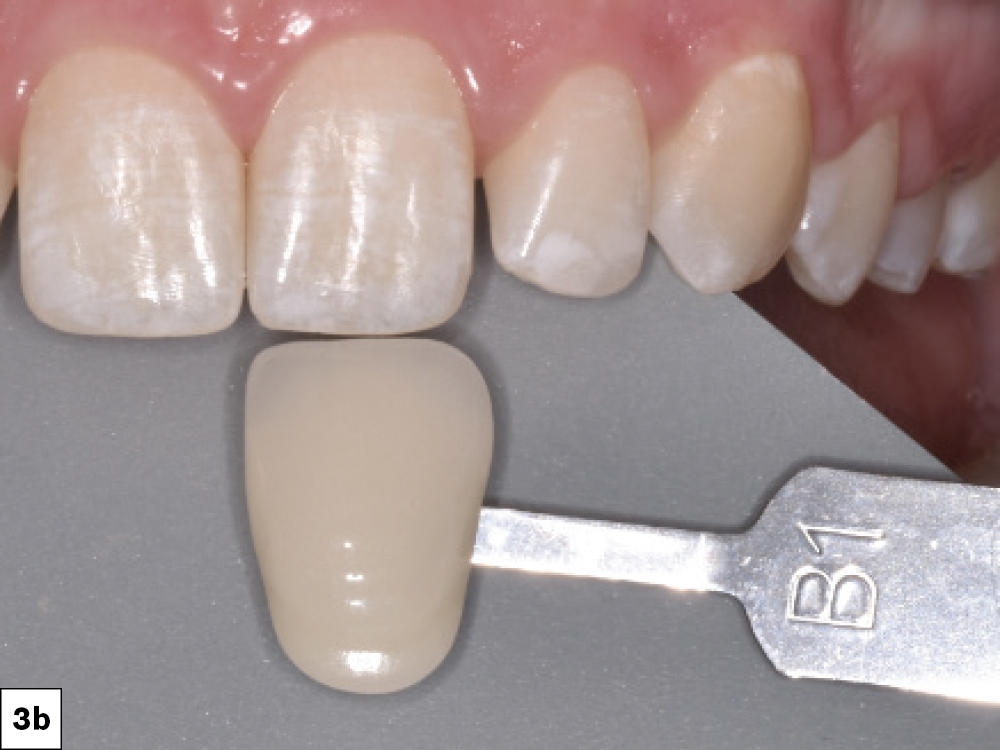
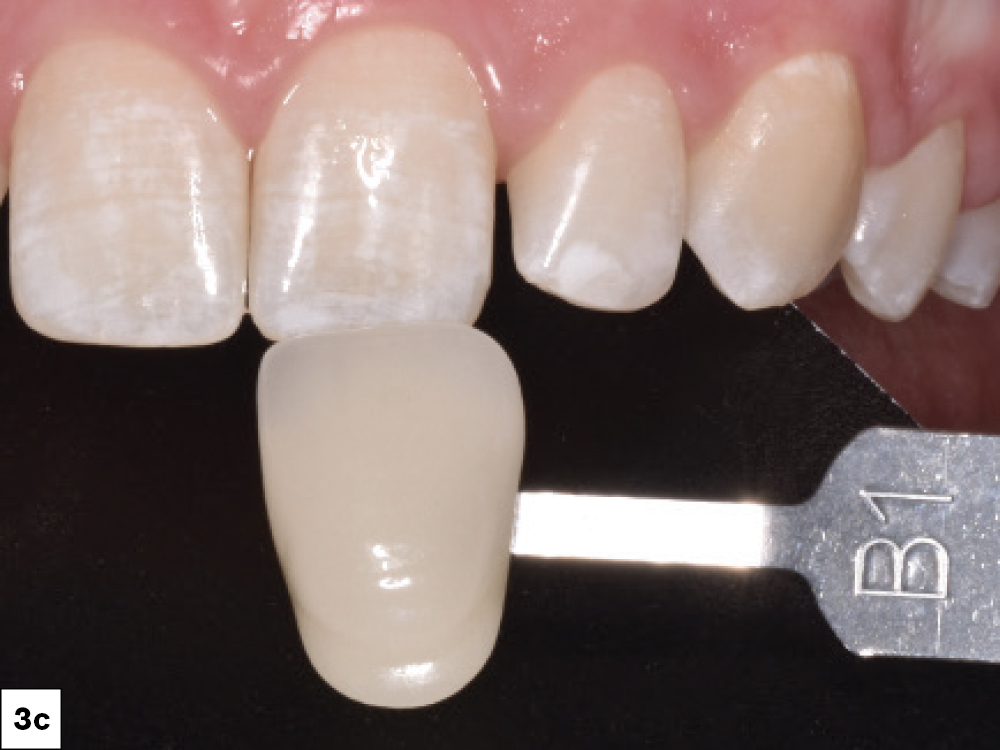
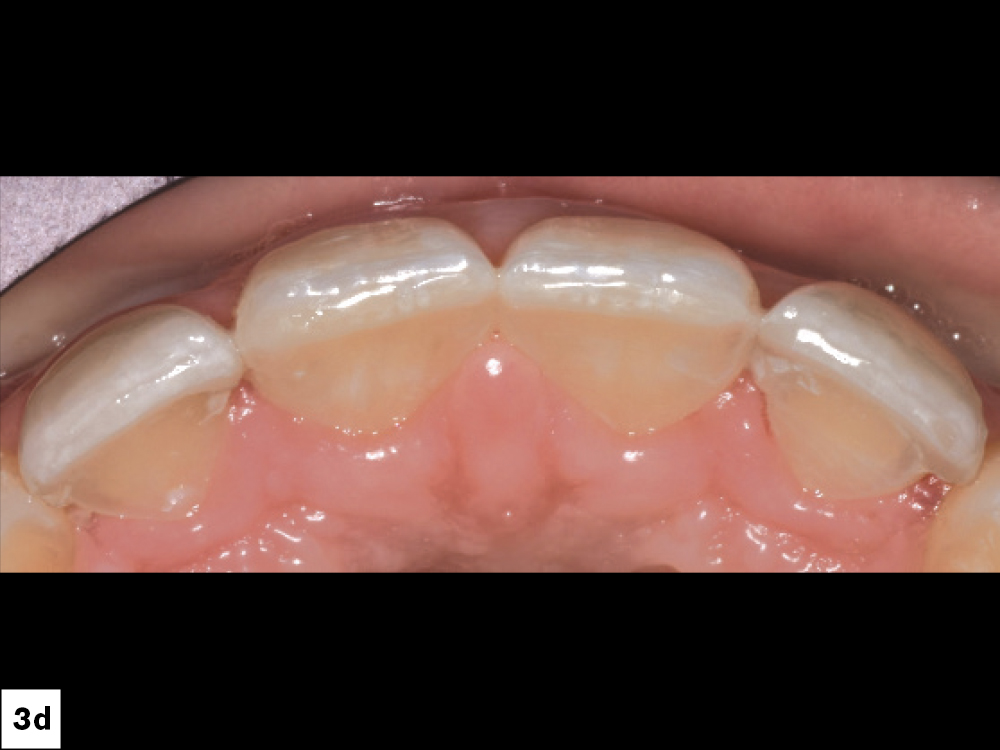
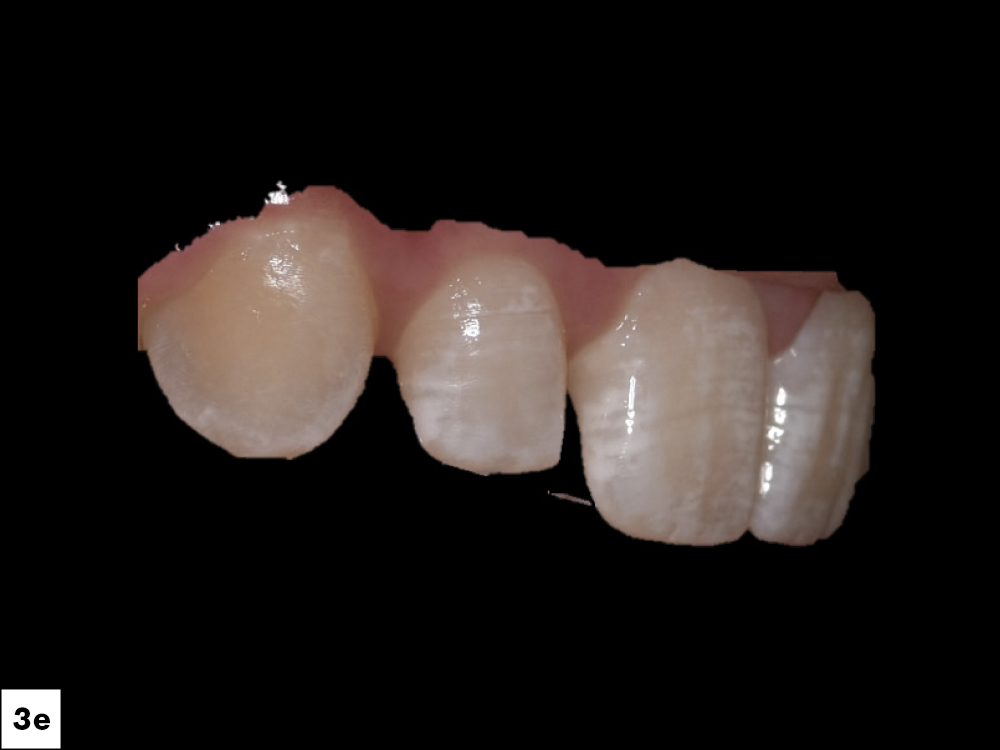

Figures 3a–3f: As you advance through the process, it is important to document everything. I like to take photographs of the teeth and provisionals so the lab can compare the colors and characterizations, and make the necessary adjustments. I use white, gray and black index cards as a reference to help the lab make a better color match and get a sense of the natural translucency.
Cases of 3–6 Units
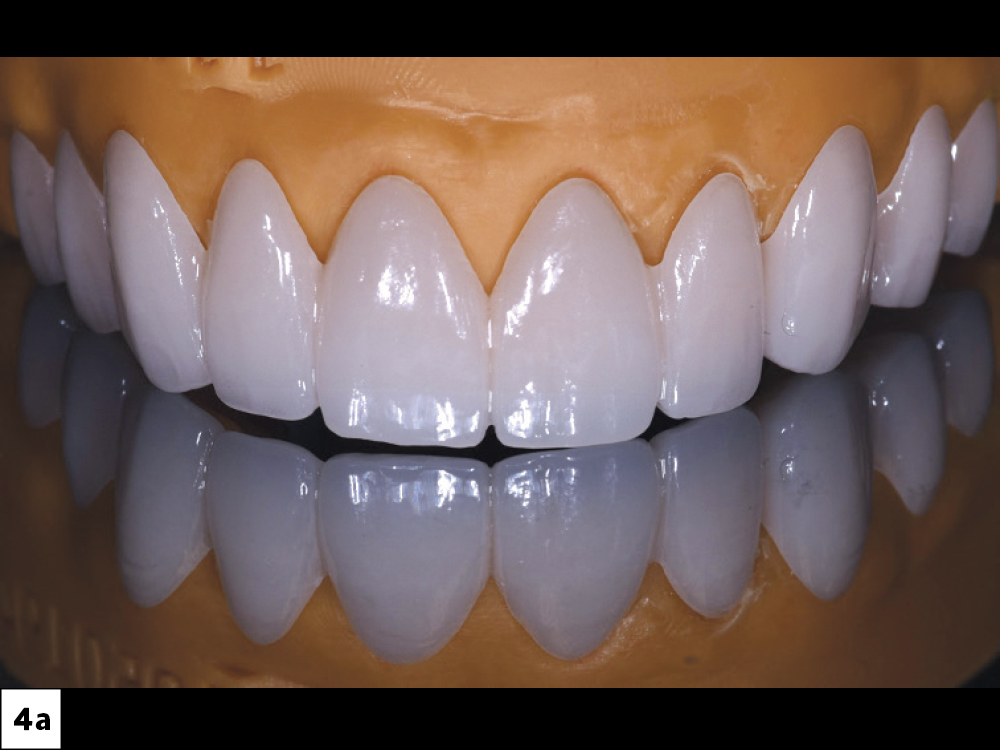
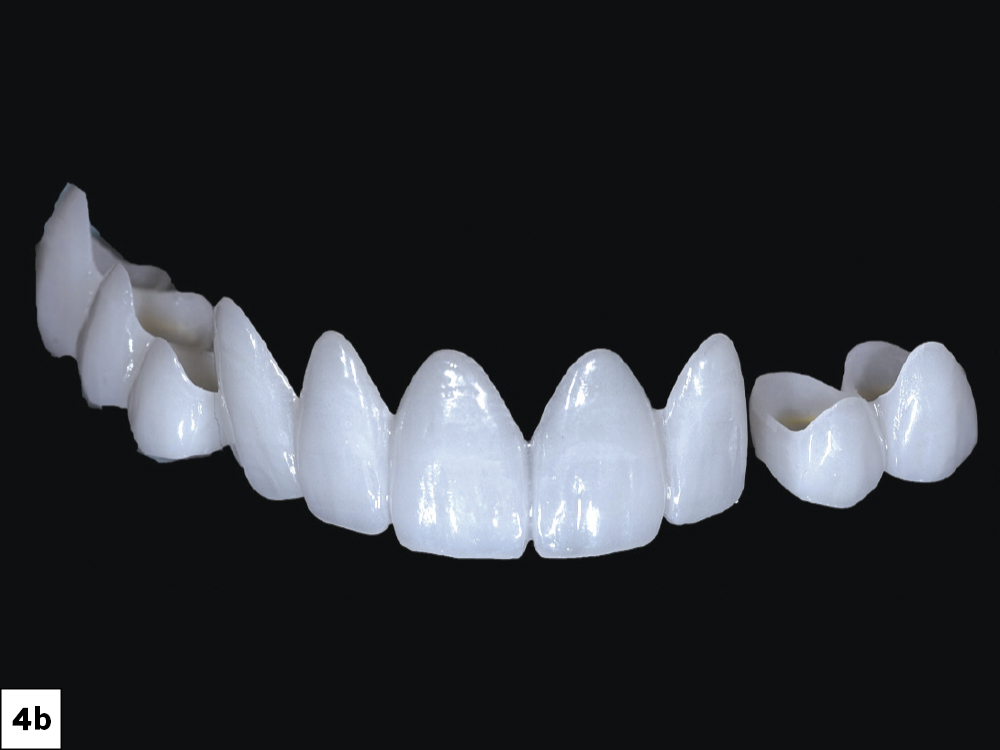
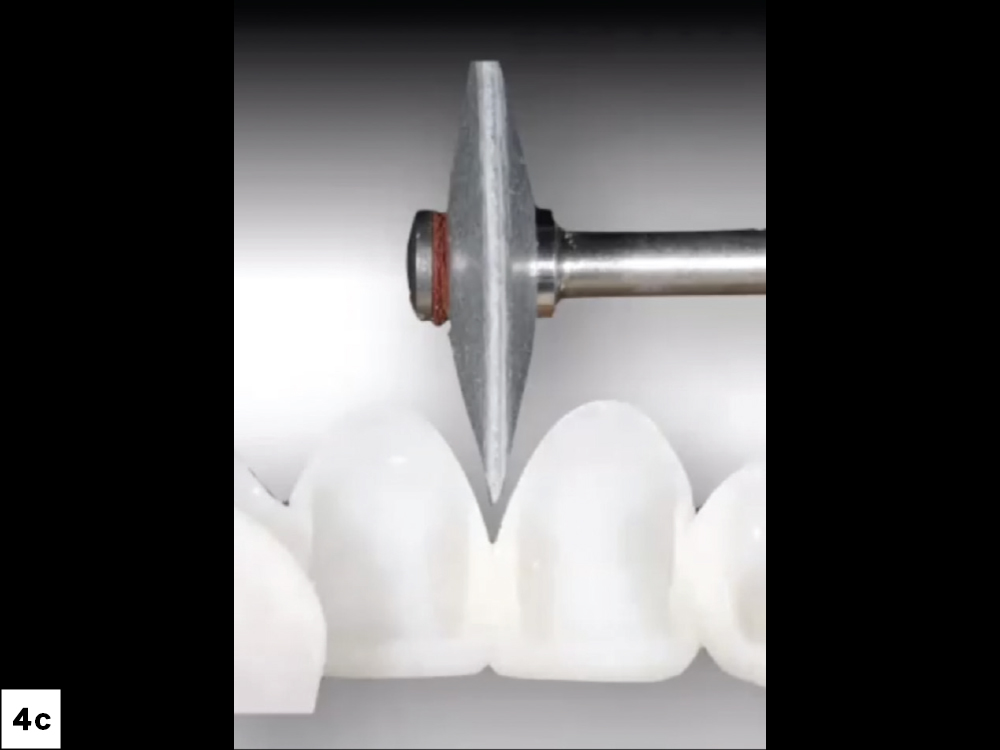
Figures 4a–4c: If restoring a case with 3–6 units, BioTemps Provisionals are an excellent option. I like to use them because I can control the gingival embrasures, which, if opened correctly, allow the gingiva to heal nicely around the provisional. I reline the BioTemps provisional with acrylic, which is inexpensive and polishes well. Then, I take the provisional out to trim and make any minor adjustments. Once ready, I spot-etch and bond the BioTemps provisional in place with a flowable composite.


Figures 5a, 5b: The esthetic value of temporizing with BioTemps Provisionals is significant. Because they retain the position of the gingiva, seating the final restorations on delivery day will be easy and predictable. In addition, BioTemps Provisionals allow patients to walk out of your practice feeling comfortable and confident while they wait for the permanent restorations, providing them — and yourself — with a rewarding experience.
Cases of 6+ Units
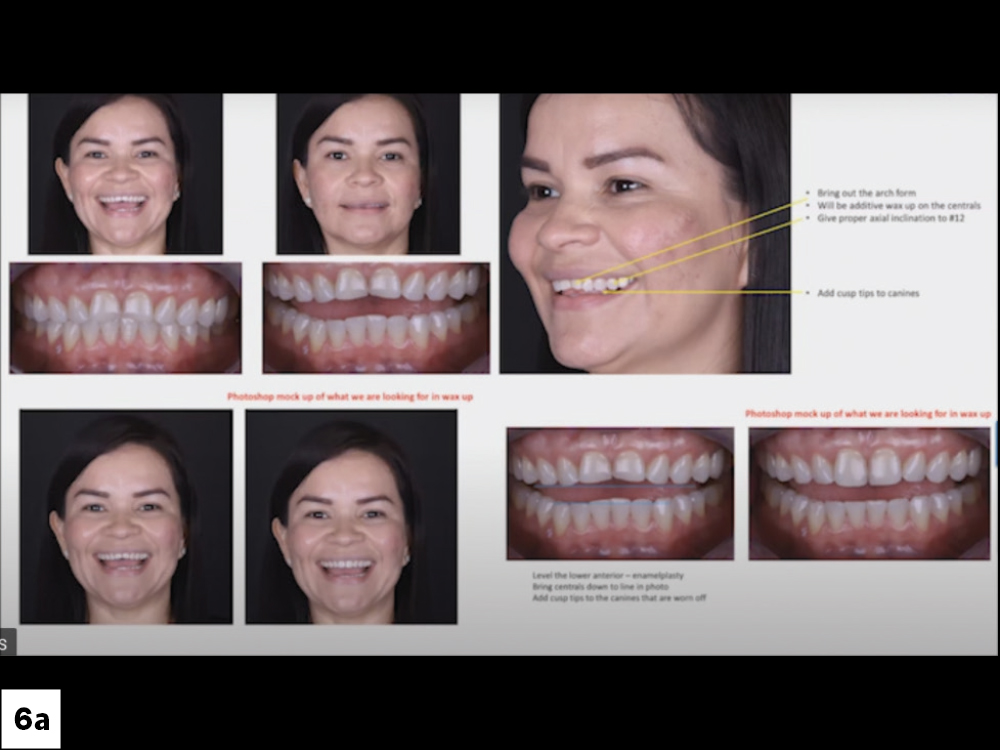
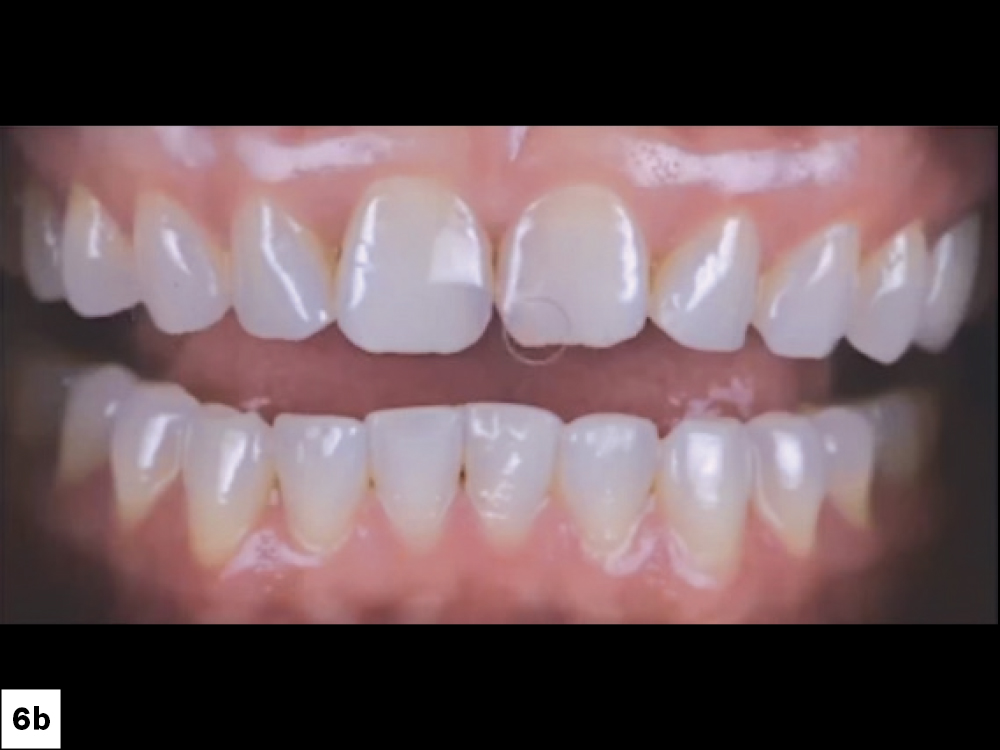
Figures 6a, 6b: If restoring cases with 6 or more units, using a wax-up is ideal. Throughout the process, make sure to clearly communicate what you want from the lab. I take plenty of pictures and use Adobe® Photoshop® (Adobe; San Jose, Calif.) to shape the teeth how I want them. Not only will this give the lab a good idea of what you want, but it also allows your patient to see the possibilities of the final restoration. I then create a document containing plenty of pictures of the patient’s mouth, leaving detailed instructions for the lab. I also use this process to order the wax-up and to communicate to the lab what needs to be done when fabricating the final veneers.

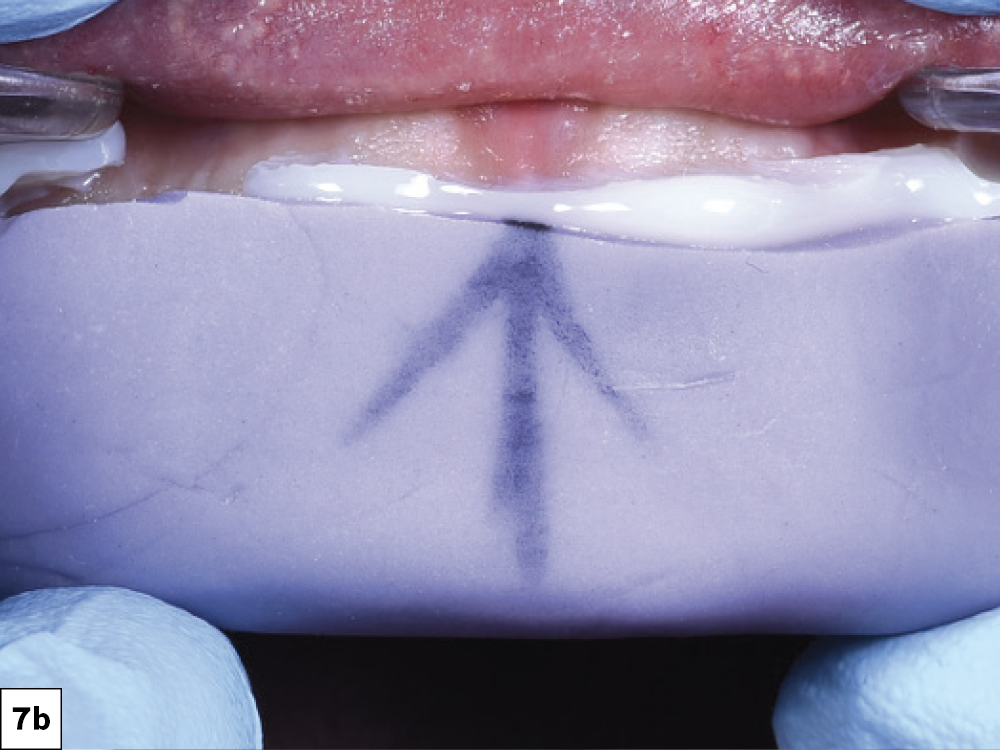
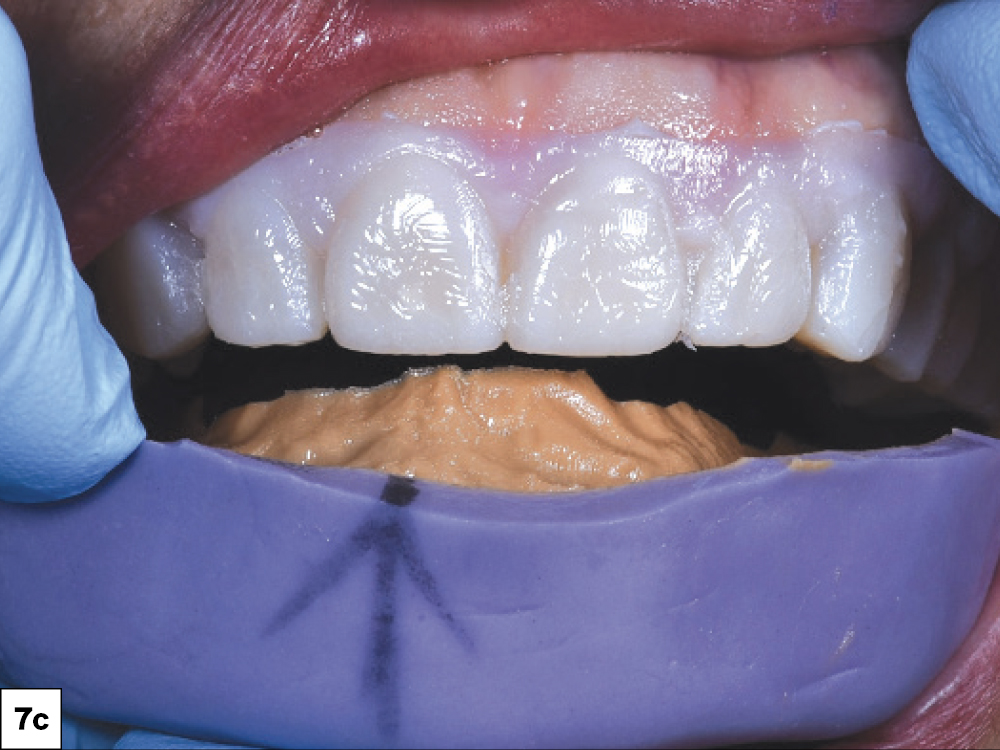
Figures 7a–7c: After receiving the wax-up and putty matrix from the lab, try in the matrix and mark the midline. This will make it easier to reseat the matrix once it’s filled with bisacryl material. To polish the material after seating, use a medium-grit diamond bur to release the material around the margin and peel off the rest — a finer grit will dig into the bis-acryl material. The provisional has mechanical retention, making the use of flowable composite unnecessary.
PREPARING THROUGH THE PROVISIONAL
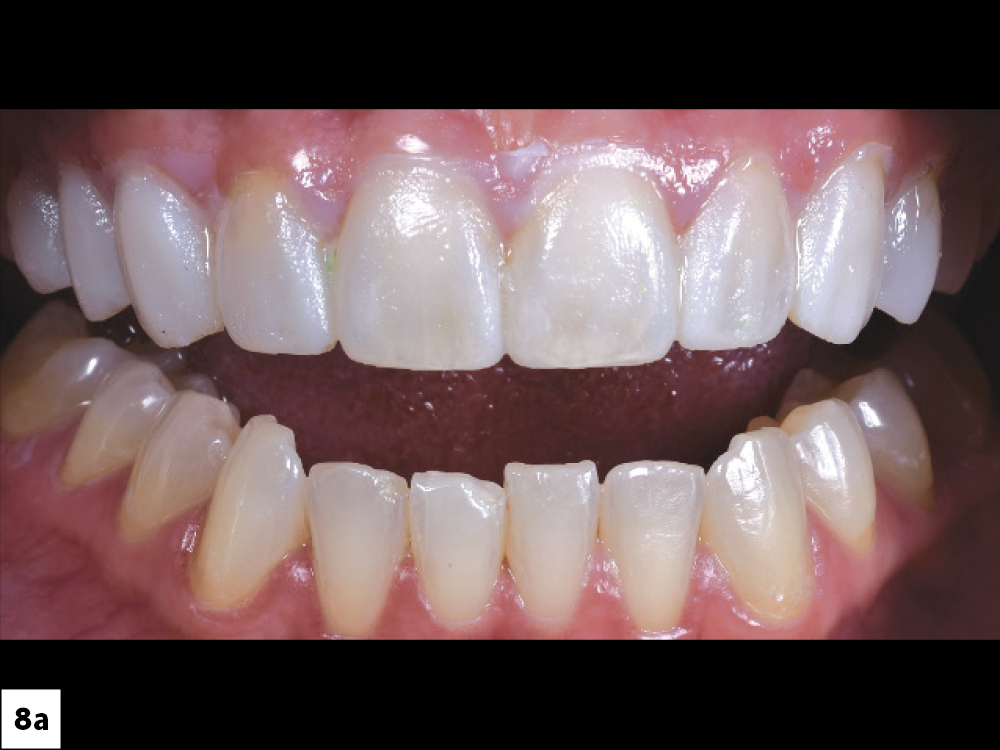
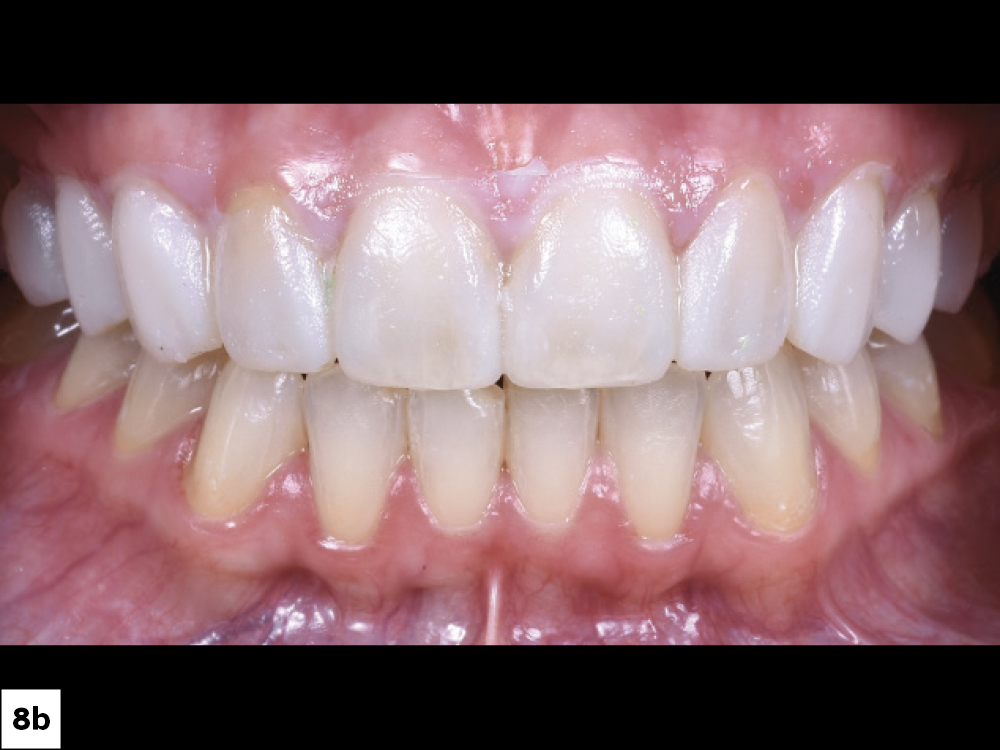
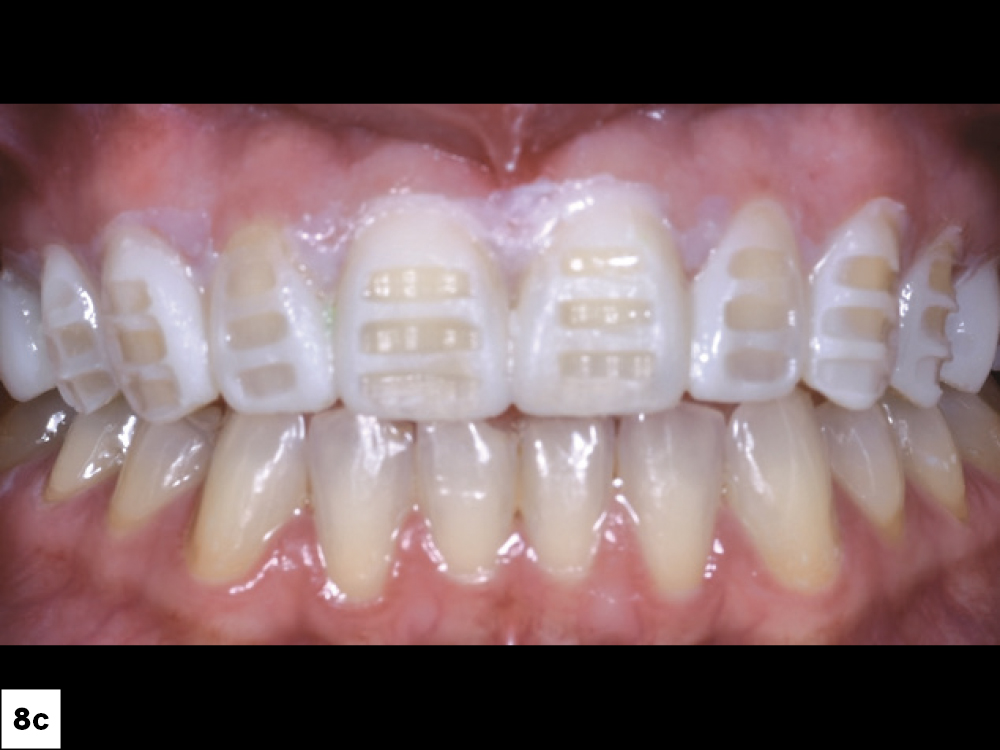
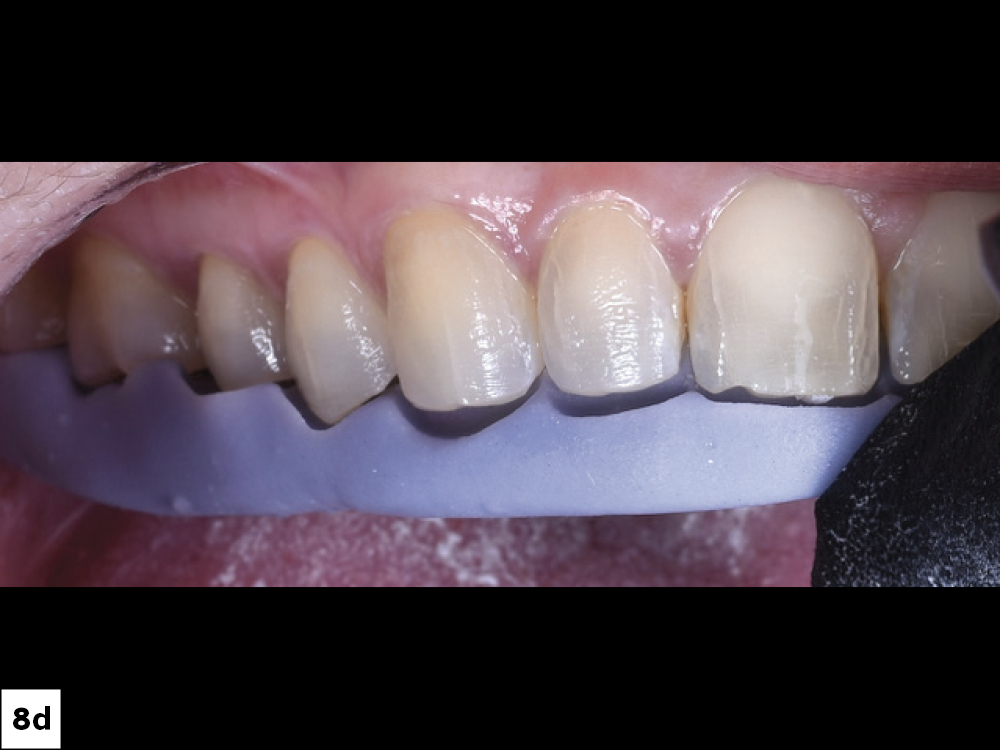
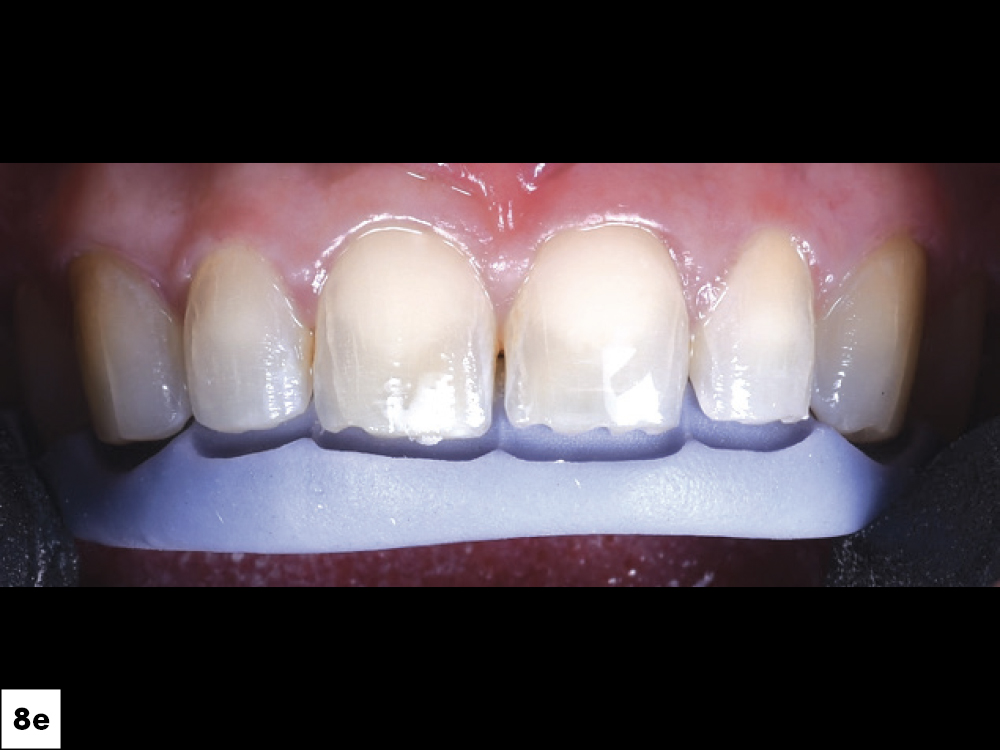
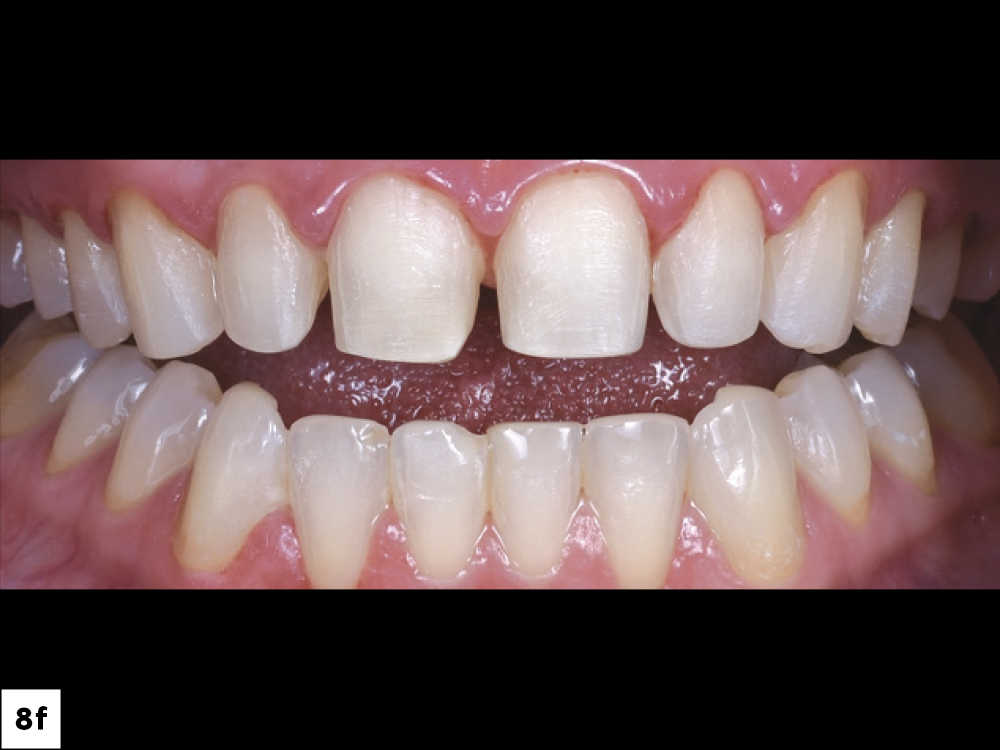
Figures 8a–8f: Before preparing the teeth, I place the bis-acryl mock-up over the non-prepared teeth. This is done before anesthetizing the patient. This way, we both get a chance to review the wax-up and see if we hit our desired esthetics. Any adjustments can be made at this time if needed. I like to prep through the mock-up. By doing this, I can plan how much structure needs to be removed without over-preparing and exposing dentin.
OTHER TIPS
Wrapping the Veneers
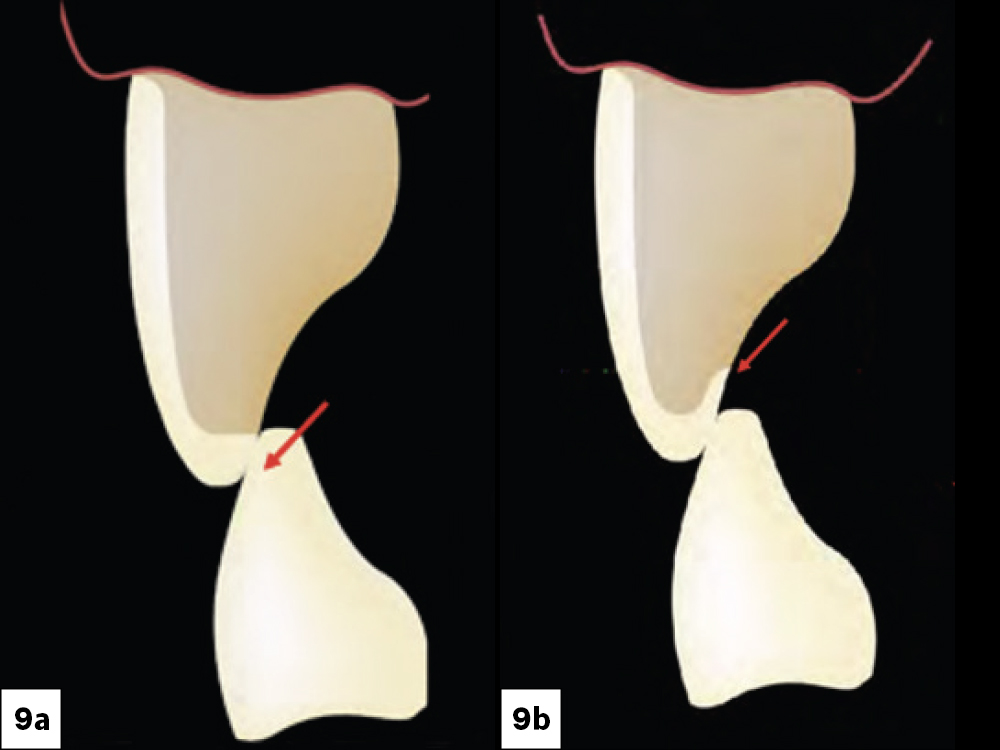
Figures 9a, 9b: When fitting the veneer, determine where the occlusion is. If the lower opposing tooth comes in contact with the veneer, drop the veneer marginal interface 1–2 mm, as long as it’s out of the way of the occlusion. Be sure to round your edges, especially if wrapping the veneers. I use sanding discs or rubber points, as burs may be too high-speed.
No “V” Shape

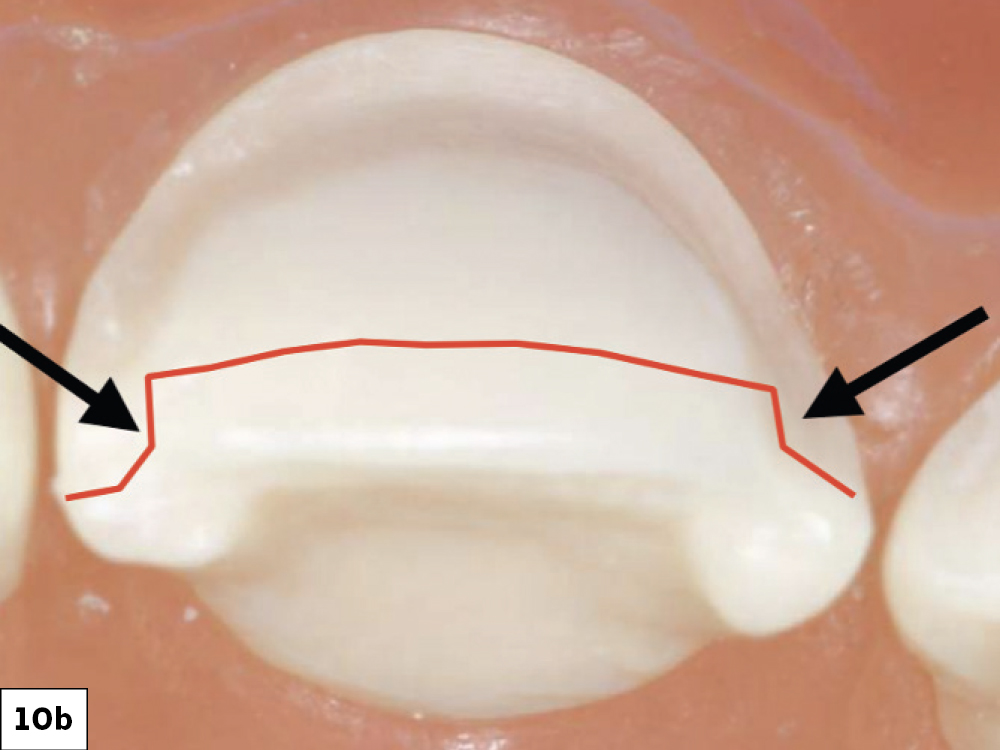
Figures 10a, 10b: Keeping the interproximals and transition lines rounded makes the milling process of the restorations much easier. Harsh edges and “V” shapes will make it difficult for the lab to fabricate tight-fitting veneers.
Follow the Planes for Facial Reduction
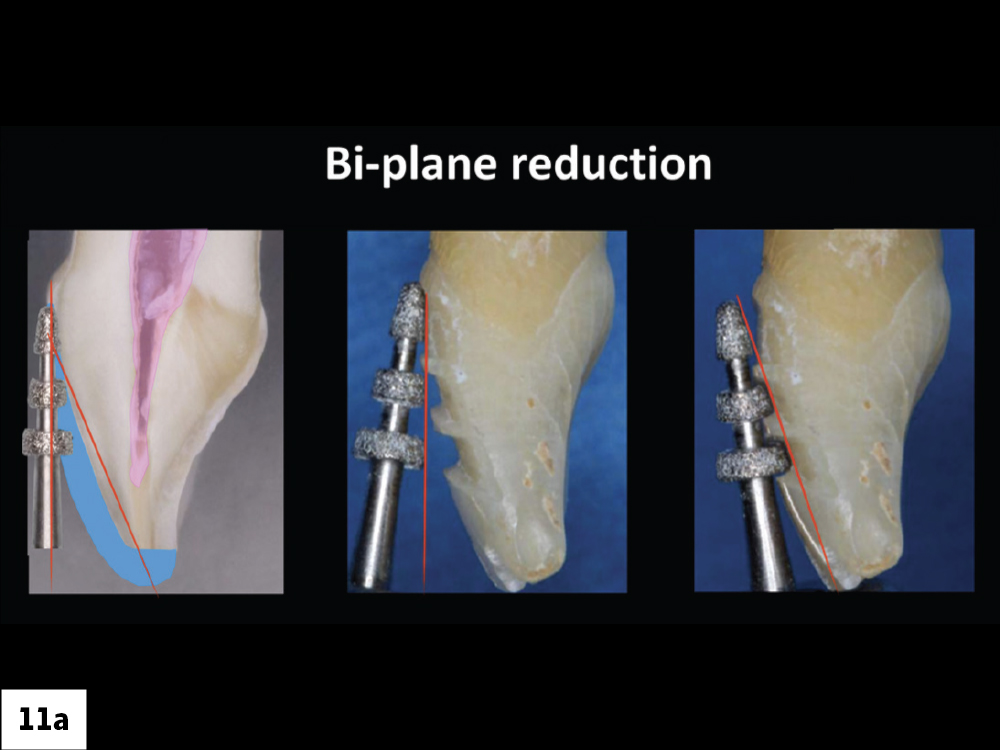
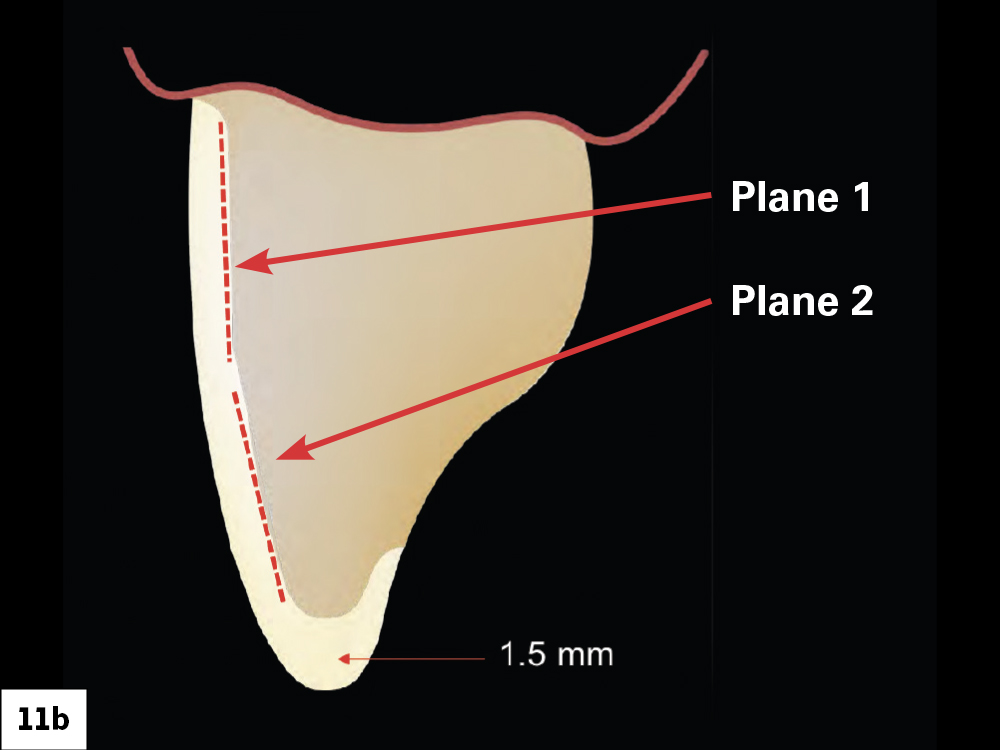
Figures 11a, 11b: Giving the technician enough room to work with is essential. So when preparing the facial, envision where the final incisal edge will be and use a depth-cutting bur along the two different planes of the tooth. I use the LS-7554 Laminate Veneer Set from Kerr Corporation.
Breaking Contacts
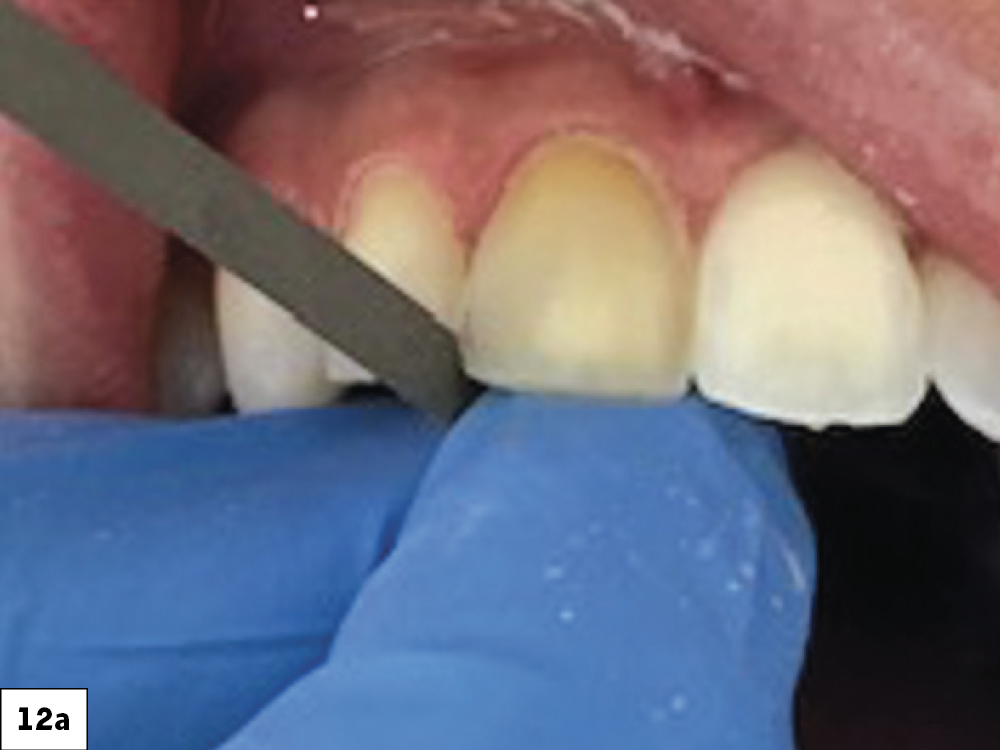
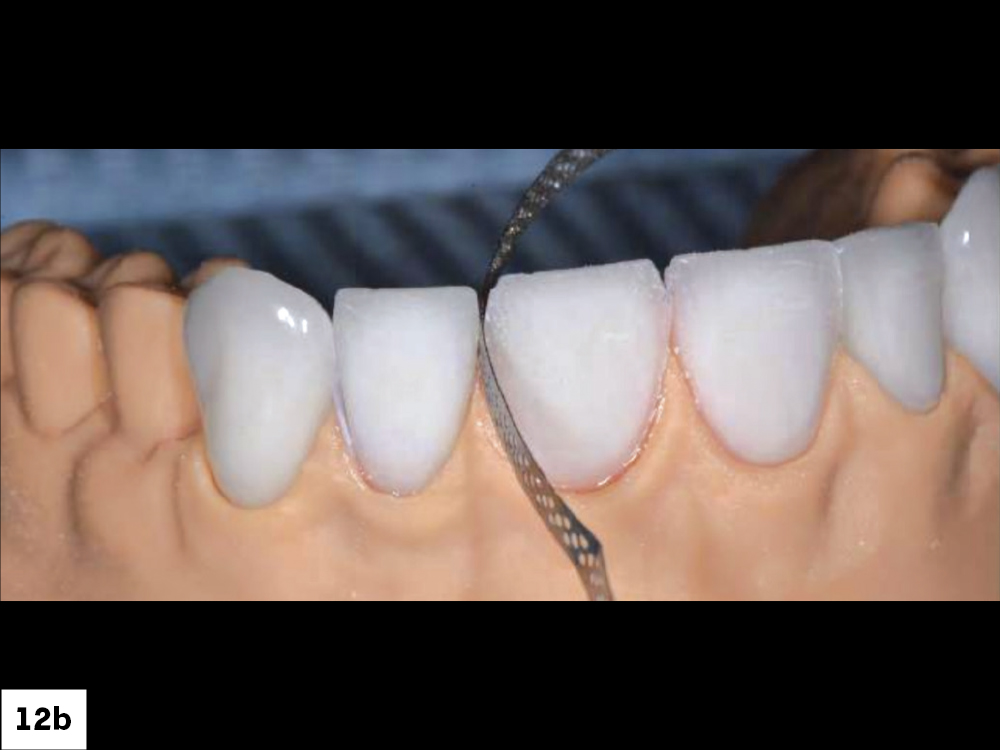
Figures 12a, 12b: In many cases, it may be necessary to open the contacts. You should open the contacts when you are changing the width of the tooth, making a midline correction, or changing the whole tooth morphology. I use a Brasseler WS25F Fine Red Single Sided Narrow Diamond Strip (Brasseler USA; Savannah, Ga.) to contour the contacts and create more space in between them. Creating more space will make it easier for the technician to fabricate accurate veneers. Shining a light between the teeth will confirm if they are open enough.
CONCLUSION
Starting your veneer case with the end result in mind will make the temporization and prep process much smoother. By knowing early on what you want to accomplish and utilizing different tools, such as BioTemps Provisionals, wax-ups and Adobe Photoshop, you can communicate more effectively to your patient and the lab. Ultimately, by following these tips and tricks, you can give your patients the restorations of their dreams.