Implant Impressions: The Digital Approach for the Single Unit (1 CEU)

December 27, 2023
 image
Taylor Manalili, DDS, DICOI
Implant Impressions: The Digital Approach for the Single Unit

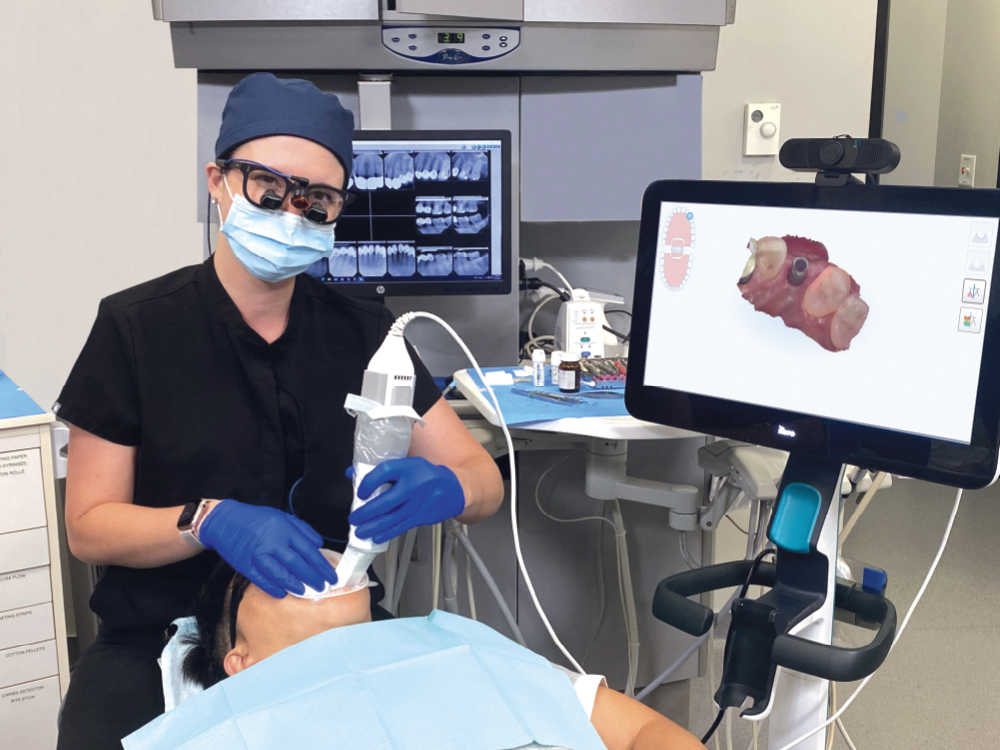
Capturing an accurate impression is an essential part of dentistry, particularly when restoring a rigid, osseointegrated implant. Inaccurate capture of the implant position can lead to an ill-fitting prosthesis, which could result in undesirable complications. In my experience, the accuracy and detail obtained with digital impressions provide a clear advantage over conventional impressions. Not only is intraoral scanning more comfortable for patients, it also allows doctors to instantly send digital impressions to the lab. Because scans can be uploaded and stored electronically, they enable doctors to easily check for distortions, analyze margins and confirm accuracy — all while the patient is still in the chair. This article details the best practices for taking digital impressions of single-unit implant cases.
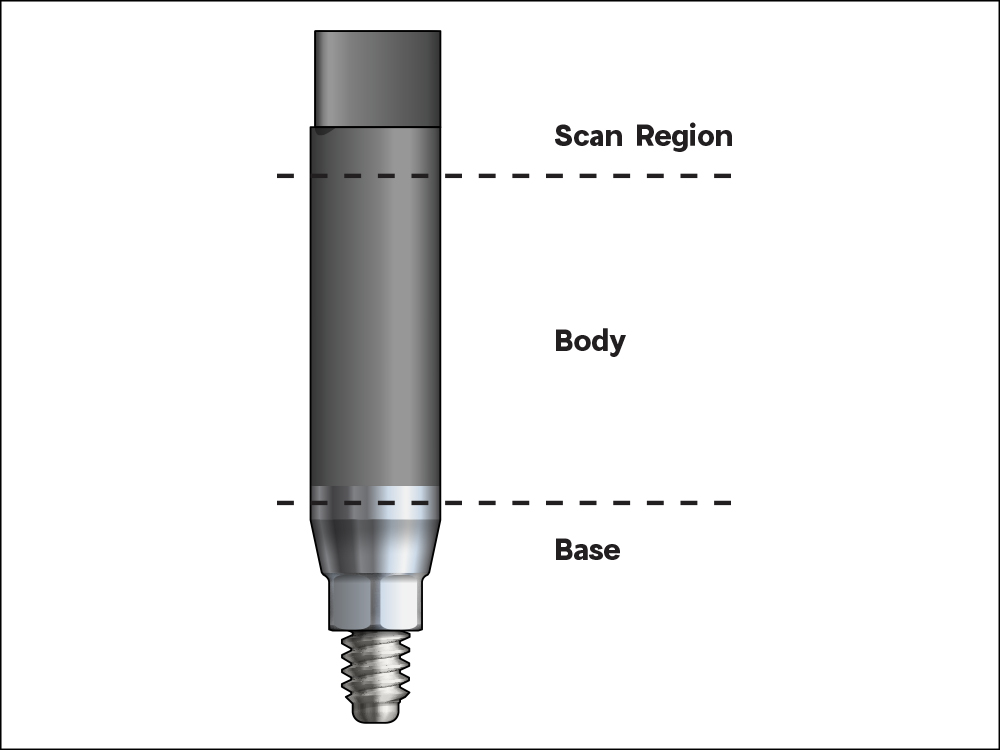
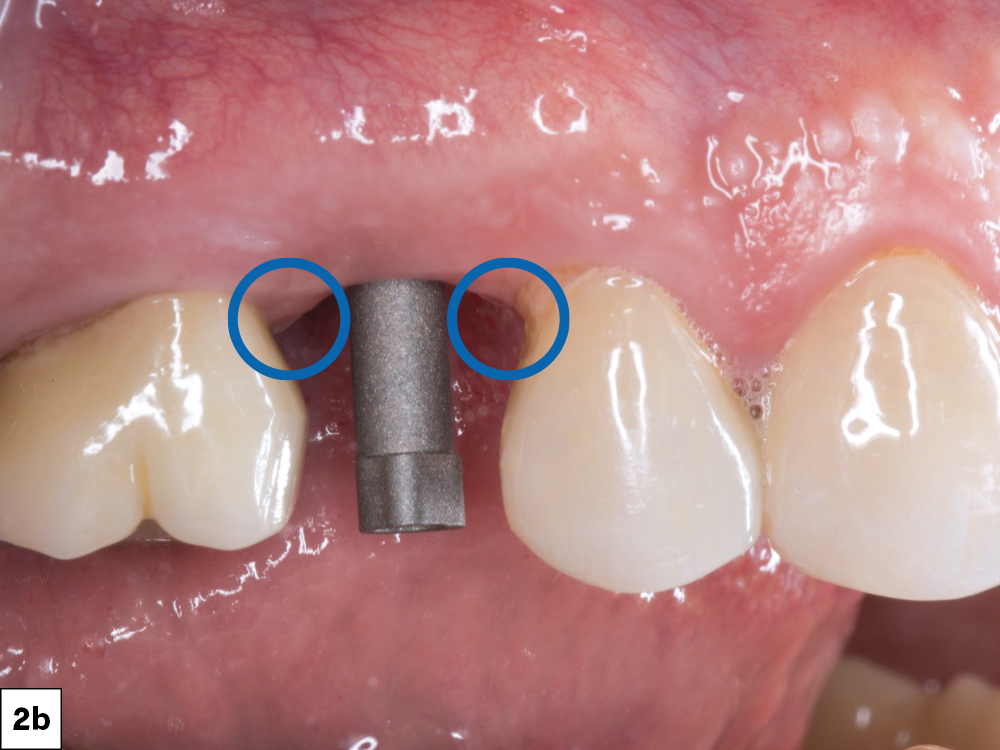
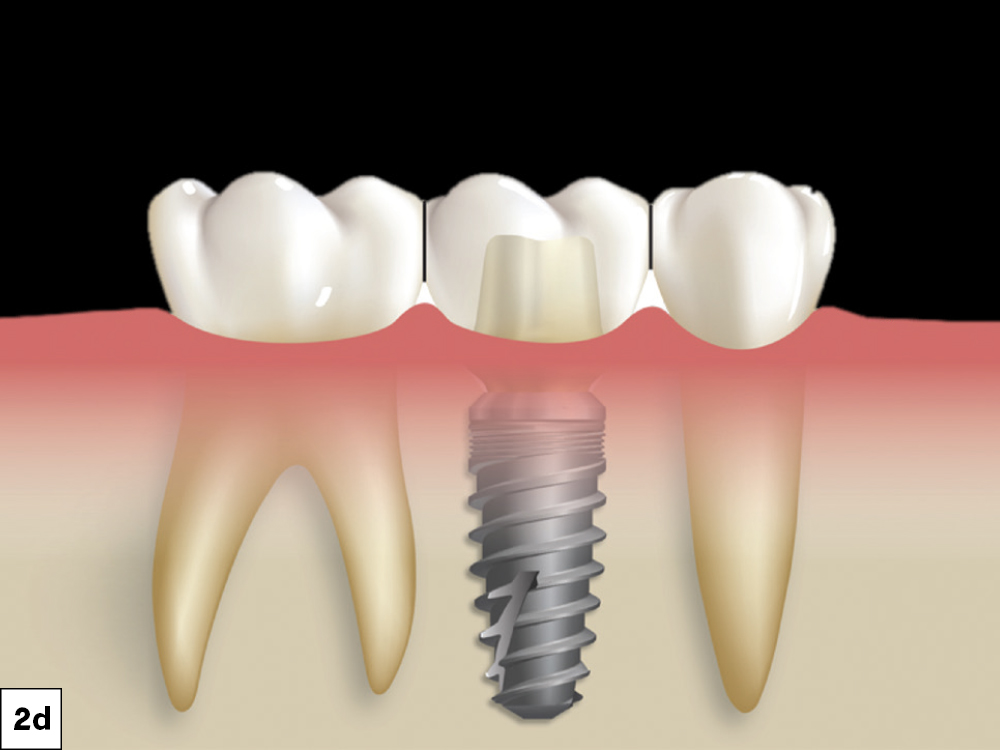
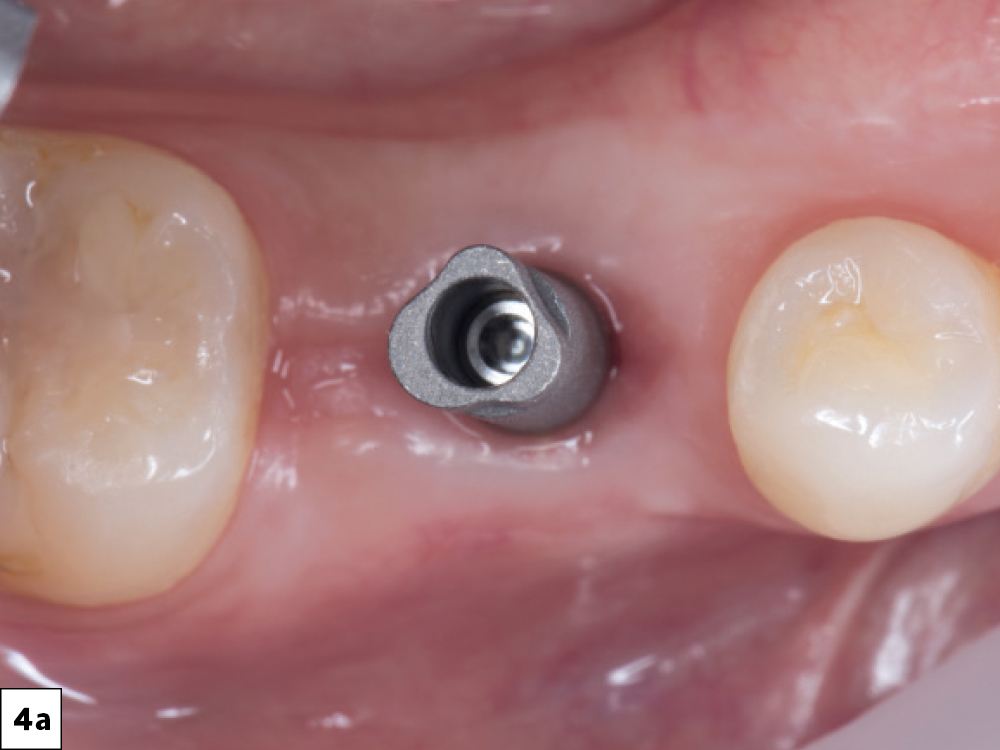
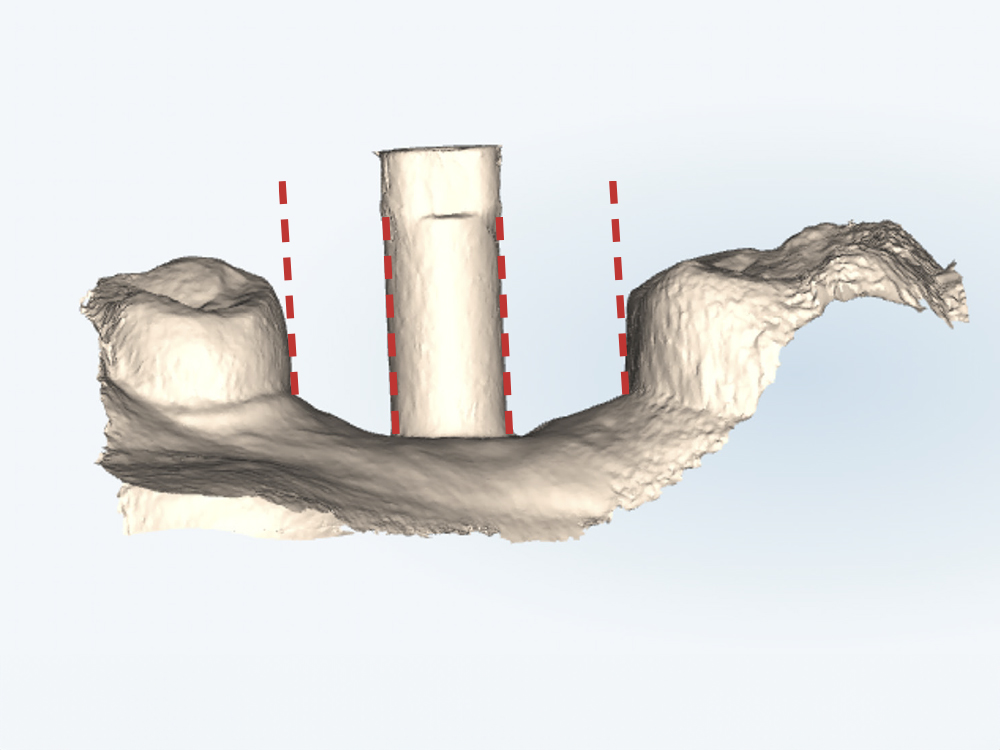
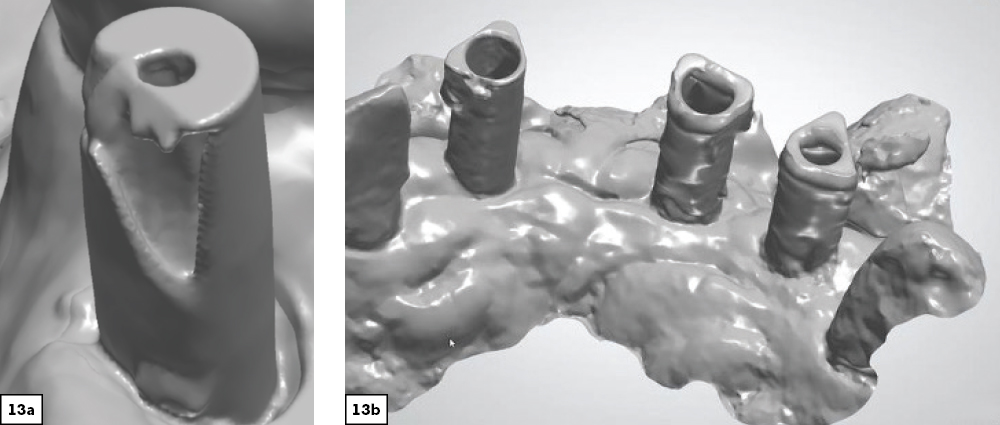
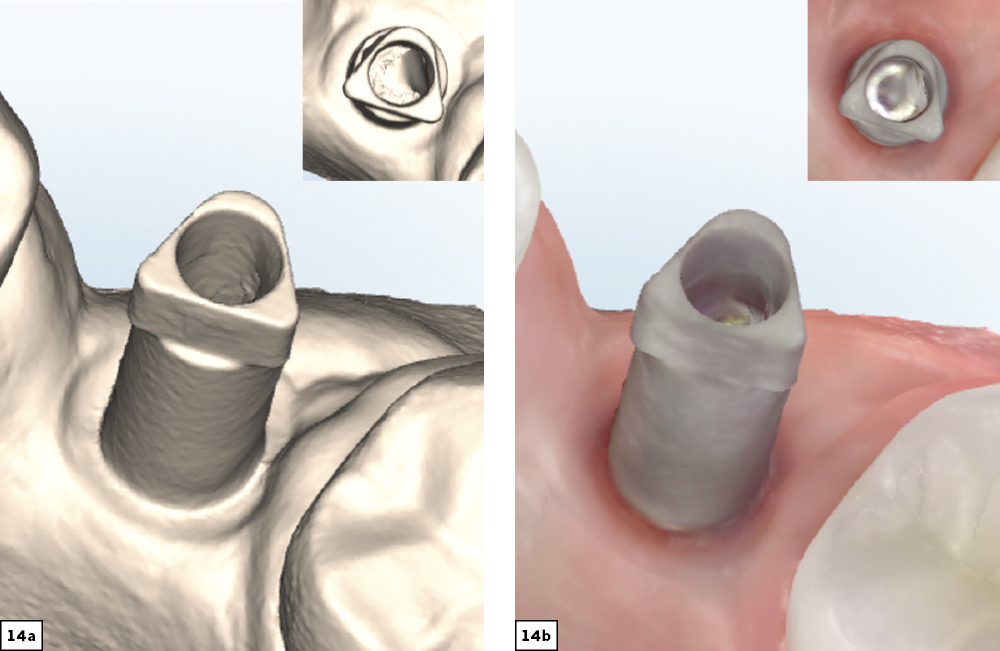
The Scan Body

Figure 1: The scan body is a critical element in obtaining an accurate digital impression, as it captures the position and orientation of the implant. The top of the scan allows the lab to determine the precise orientation and angulation of the implant. The asymmetrical shape, located in the scan region, helps index the scan body and improve surface recognition.1

Restorative Options

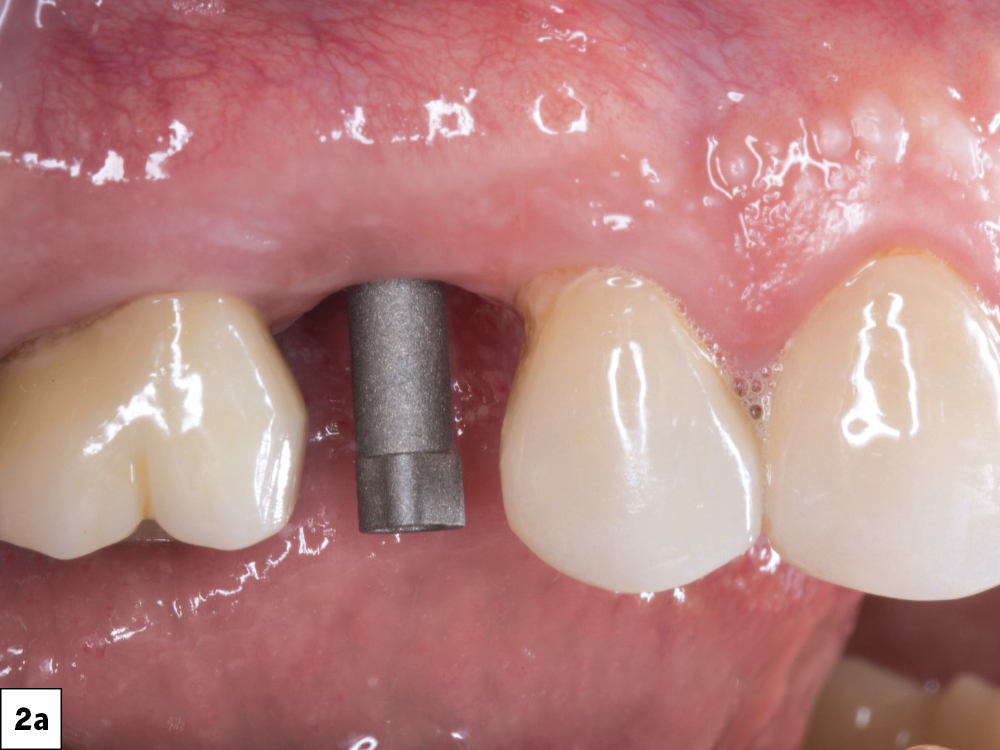
The restorative options available with digital impressions are similar to those from conventional impressions, including screw-retained crowns and custom abutments with cement-retained crowns. However, current intraoral scanning technology has certain limitations, including potential scan errors caused by implant angulation, the distance between multiple implants, and technical software and hardware difficulties that can lead to incomplete or distorted scans.2,3,4 Due to these limitations, an intraoral scan with scan bodies is recommended for single-unit or short-span implant restorations. As with all digital impressions, it is highly recommended to follow the specific scanning protocol for your intraoral scanner when acquiring a digital impression.5,6

Obtaining Accurate Digital Impressions

Figures 2a–2d: Before taking the impression, assess the adjacent teeth to ensure broad contacts can be achieved. This will increase the interproximal surface area and help distribute forces between the implant and adjacent teeth. Guide planes can be created to eliminate black triangles and achieve the desired broad contacts. “Point” contacts should be avoided to reduce the risk of caries and potential periodontal issues from food impaction. Point contacts can also make it difficult to create a predictable path of insertion, which can make the delivery procedure more difficult.

Figures 3a, 3b: To begin the digital impression procedure, remove the patient’s healing abutment or temporary restoration.

Figures 4a, 4b: In this case, a Hahn™ Tapered Implant Titanium Scan Body (Glidewell Direct; Irvine, Calif.) was connected to the implant and hand-tightened. Due to its radiopacity and durability, titanium is an ideal material for scan bodies. Their roughened surface provides excellent optical characteristics for the scanner. Once seated, a vertical bitewing radiograph is taken to confirm the complete seating of the scan body. Inclusive® Titanium Scan Bodies (Glidewell Direct; Irvine, Calif.) can also be used and are compatible with most major implant systems.

Figures 5a, 5b: Figure 5a is an example of an improperly seated scan body. The blue arrow shows impingement caused by bone or soft tissue. The yellow arrow indicates where the screw is not properly seated, as evidenced by the gap between the screw head and the channel of the scan body. In these circumstances, the scan body needs to be removed and the site inspected to determine whether more soft tissue or bone must be removed to allow for complete seating of the scan body and future restoration. Figure 5b shows what a properly seated scan body looks like. Note that the scan body is flush with the surface of the implant and the abutment screw is tight against the channel.

Figure 6: If the adjacent contacts are difficult to evaluate intraorally, take a quick scan of the adjacent teeth with the scan body in place for easier assessment. If adjustments are made to the adjacent teeth, do not alter the shape of the scan body. This can make it difficult for the surface recognition software in the laboratory to accept the scan. If the scan body is in the way of the bur, it is safer to remove the component and replace it after adjustments are made.

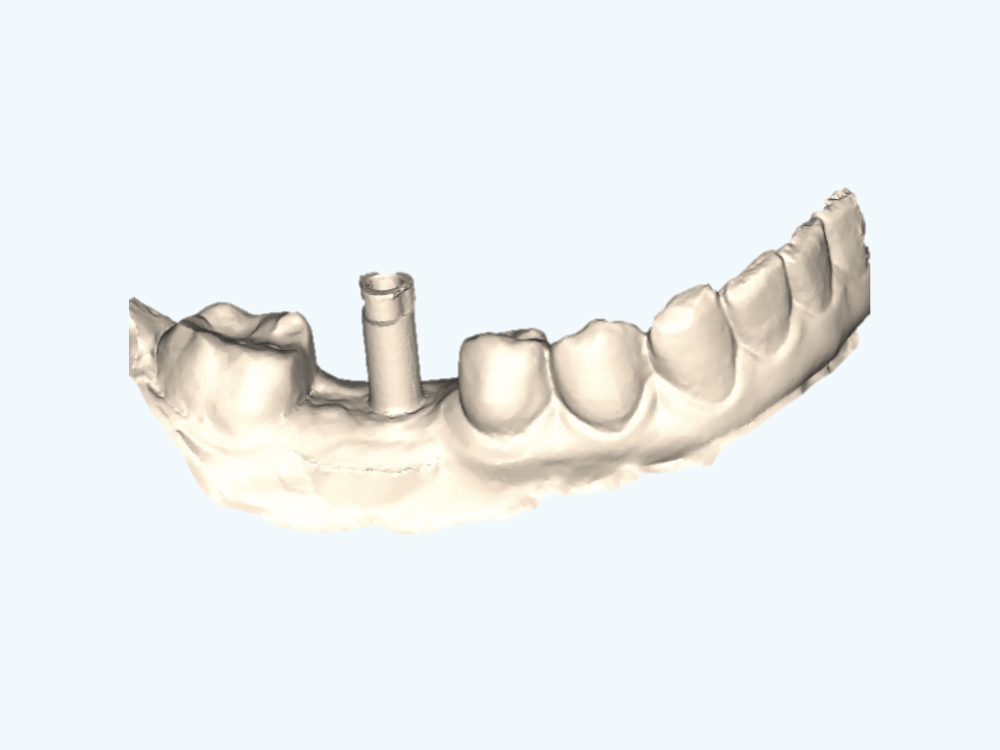
Take An Implant Scan

Figure 7: Scan the scan body, as well as the proximal and occlusal surfaces of the adjacent teeth. This enables the scanner to merge this segment with the full-arch scan. If the proximal surfaces are hard to capture with the scan body in place, they can be captured in the full-arch scan instead. It is vital to capture the geometrical pattern in the scan region of the scan body.

Scan The Implant Arch And The Opposing Arch
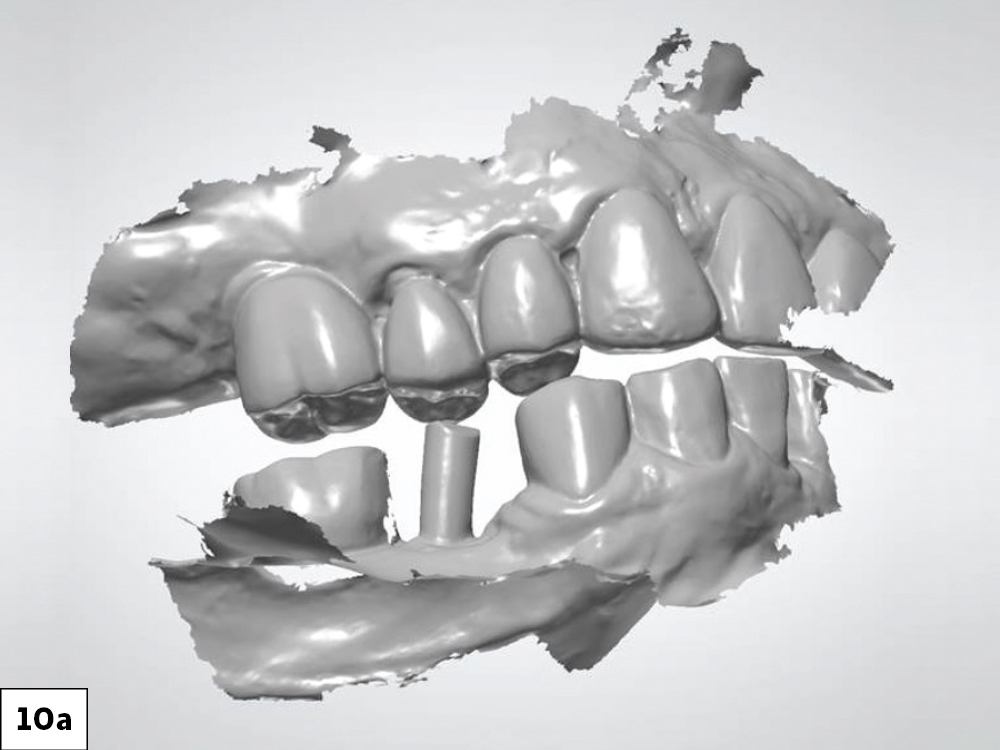
Figure 8: An arch scan can be taken in several ways. I find it easiest to perform the arch scan without the scan body in place. This allows the scanner to freely capture the adjacent contacts and soft-tissue contours. If soft-tissue collapse is a concern, a healing abutment can be placed during the scan.

Figure 9: Once the arch is scanned, it will merge with the implant or prep scan. I always take a moment to evaluate the acquired scan in the stone or model mode where I can easily see any missing or grainy data.

Scan The Bite

Figures 10a, 10b: I recommend removing the scan body prior to capturing a bite registration. The scan body may be taller than the adjacent teeth and can prevent the patient from fully occluding. Instead, remove the scan body to capture an accurate representation of the patient’s bite. If enough data was captured in the arch scans, the scan body is not needed to align the bite.

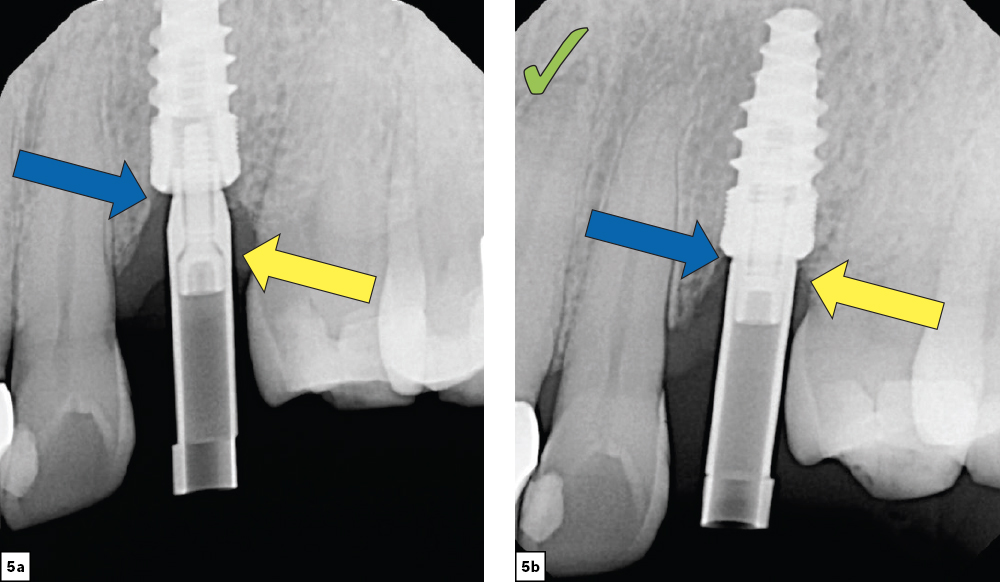
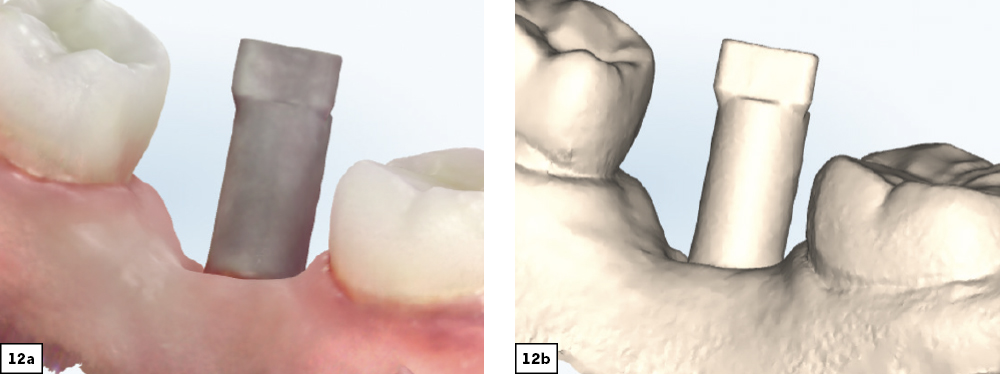
Evaluate Scan Quality

Figures 11a, 11b: Evaluating the scan quality is an integral step. In this example, the scanner’s autofill setting filled in an area that was not properly captured. Using the autofill feature of your scanner is not recommended because it may result in more adjustments to the restoration during delivery. To ensure a good scan, be sure the surface is smooth and dry. Biofilm and saliva can often prevent an area from being captured correctly. If this occurs, dry the area, delete the captured data from the grainy area, and rescan the grainy or missing portion.

Figures 12a, 12b: These images show a much clearer and more complete scan of the contact area, which will lead to a more accurate fitting restoration and shorter delivery appointment.

Figures 13a, 13b: Be sure to completely capture the geometry of the scan body. These examples show improperly captured scan bodies that are missing crucial details, which make it difficult for the laboratory to fabricate a prosthesis that will fit accurately.

Figures 14a, 14b: This scan shows clear, precise details of the scan body geometry, which will provide the required information needed by the laboratory to provide a well-designed restoration. While using the color mode of a scanner is helpful for patient education and acceptance, it does not provide the best view for evaluating scan quality. It is easier to see any missing or grainy data collected while in monochromatic mode. Remember, contacts and occlusion need to be extremely accurate in the scan. Do not use autofill near the prep scan, adjacent teeth, contacts or scan body. Toggling between color and monochromatic modes is helpful when evaluating the scans. Prior to the patient leaving the chair, be sure to verify that the clinical bite matches the bite captured in the scans.

CONCLUSION

The use of digital impressions with implant cases makes it easier for the lab to provide a precise, well-fitting restoration with little discomfort to the patient. Plus, when doctors restore their digital cases with Glidewell, they receive everyday discounts on model-free custom abutments and screw-retained crowns. Following a straightforward scanning workflow will lead to more efficient lab communication and better restorative outcomes.

References

  1. Mizumoto RM, Yilmaz B. Intraoral scan bodies in implant dentistry: a systematic review. The J Prosthet Dent. 2018. 120(3):343-352.

  2. Revilla-León M, Smith Z, Methani MM, Zandinejad A Özcan, M. Influence of scan body design on accuracy of the implant position as transferred to a virtual definitive implant cast. J Prosthet Dent. 2021.(6):918-923.

  3. Choi Y-D, Eun Lee K, Mai H-N Lee D-H. Effects of scan body exposure and operator on the accuracy of image matching of implant impressions with scan bodies. J Prosthet Dent. 2020. 124(3): 379.e1-379.e6.

  4. Revell G, Simon B, Mennito A,Evans ZP, Renne W, Ludlow M Vág J. Evaluation of complete-arch implant scanning with 5 different intraoral scanners in terms of trueness and operator experience. J Prosthet Dent. 2022. 128(4):632-638.

  5. Papaspyridakos P, Vazouras K, Chen Y-W, Kotina E, Natto N, Kang K, Chochlidakis K. Digital vs conventional implant impressions: a systematic review and meta analysis. J Prosthodont. 2020. 29(8):660-678.

  6. Schmidt A, Wöstmann B, Schlenz MA. Accuracy of digital implant impressions in clinical studies: a systematic review. Clin Oral Implants Res. 2022. 33(6):573-585.